Digital Spirit Level
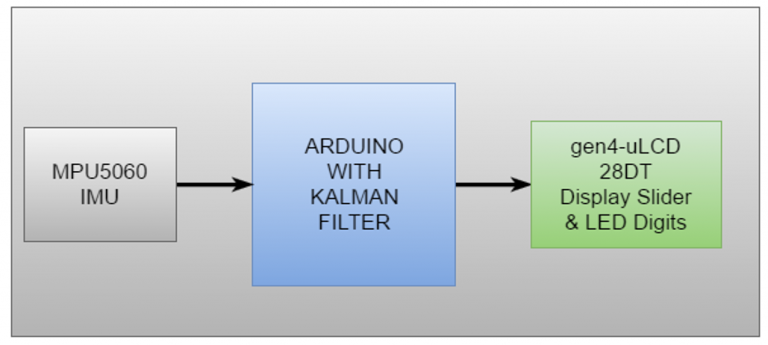
The project consists of an MPU6050 IMU reading values for pitch and roll, and an Arduino Uno communicating the modified values over serial to the µLCD-32PTUPicaso Display. The 4D Display updates the values using LED digits showing angles in each axis for degrees, and gauges to represent the magnitude of offset. The MPU6050 IMU communicates its reading to the Arduino using I2C.
How It Works
Build


Components
- Arduino UNO
- MPU6050 IMU
- gen4-uLCD-28DT
- uSD card
- gen4 Interface board
- small breadboard
- jumper wires
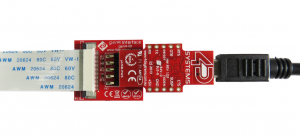
Clarification for the component
- If you are using gen4-IB and μUSB PA-5, connect the display to your computer as shown in the second image above
- If you are using gen4-PA board,connect the display to your computer as shown in the third image above.
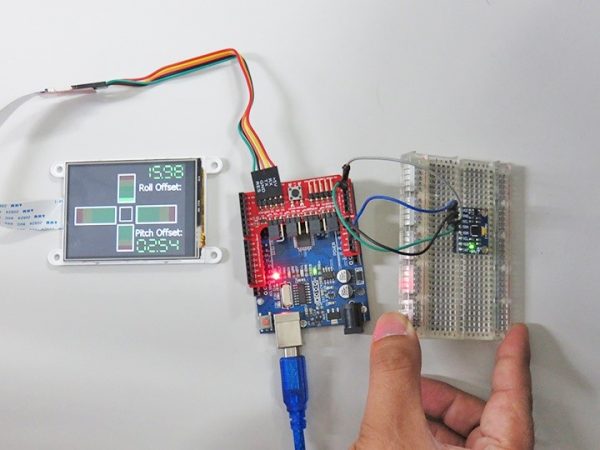
Connect the components as in the Fritzing Diagram. (first image)
Program
- Download the project code here.
- Open the code using 4D workshop.
- Click on the Compile button.
- Connect the display to the PC using μUSB-PA5 and a mini USB cable. Make sure that you are connected to the right port. Red Button indicates that the device is not connected, Blue Button indicates that the device is connected to the right port.
- Now click on the “Comp’nLoad” button.
- Workshop 4 will prompt you to select a drive to copy the image files to a μSD Card. After selecting the correct drive, click OK.
- The module will prompt you to insert the μSD card.
- Click the Verify button to compile the sketch and check if there are no errors.
- Then, click the Upload button to load the sketch into your Arduino board. Make sure that you selected the corresponding board and you are connected to the right port.
- After this, you can now test and use your Digital Spirit Level
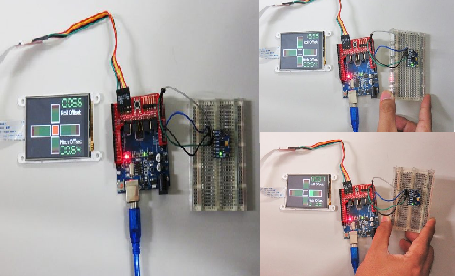
Demonstration


On a Flat Surface, image 1
Roll to the Right, image 2
Pitch Up, image 3
Pitch Down, image 4,