Digital Spool Holder (with Scale)
by InterlinkKnight in Circuits > Arduino
18509 Views, 90 Favorites, 0 Comments
Digital Spool Holder (with Scale)


)
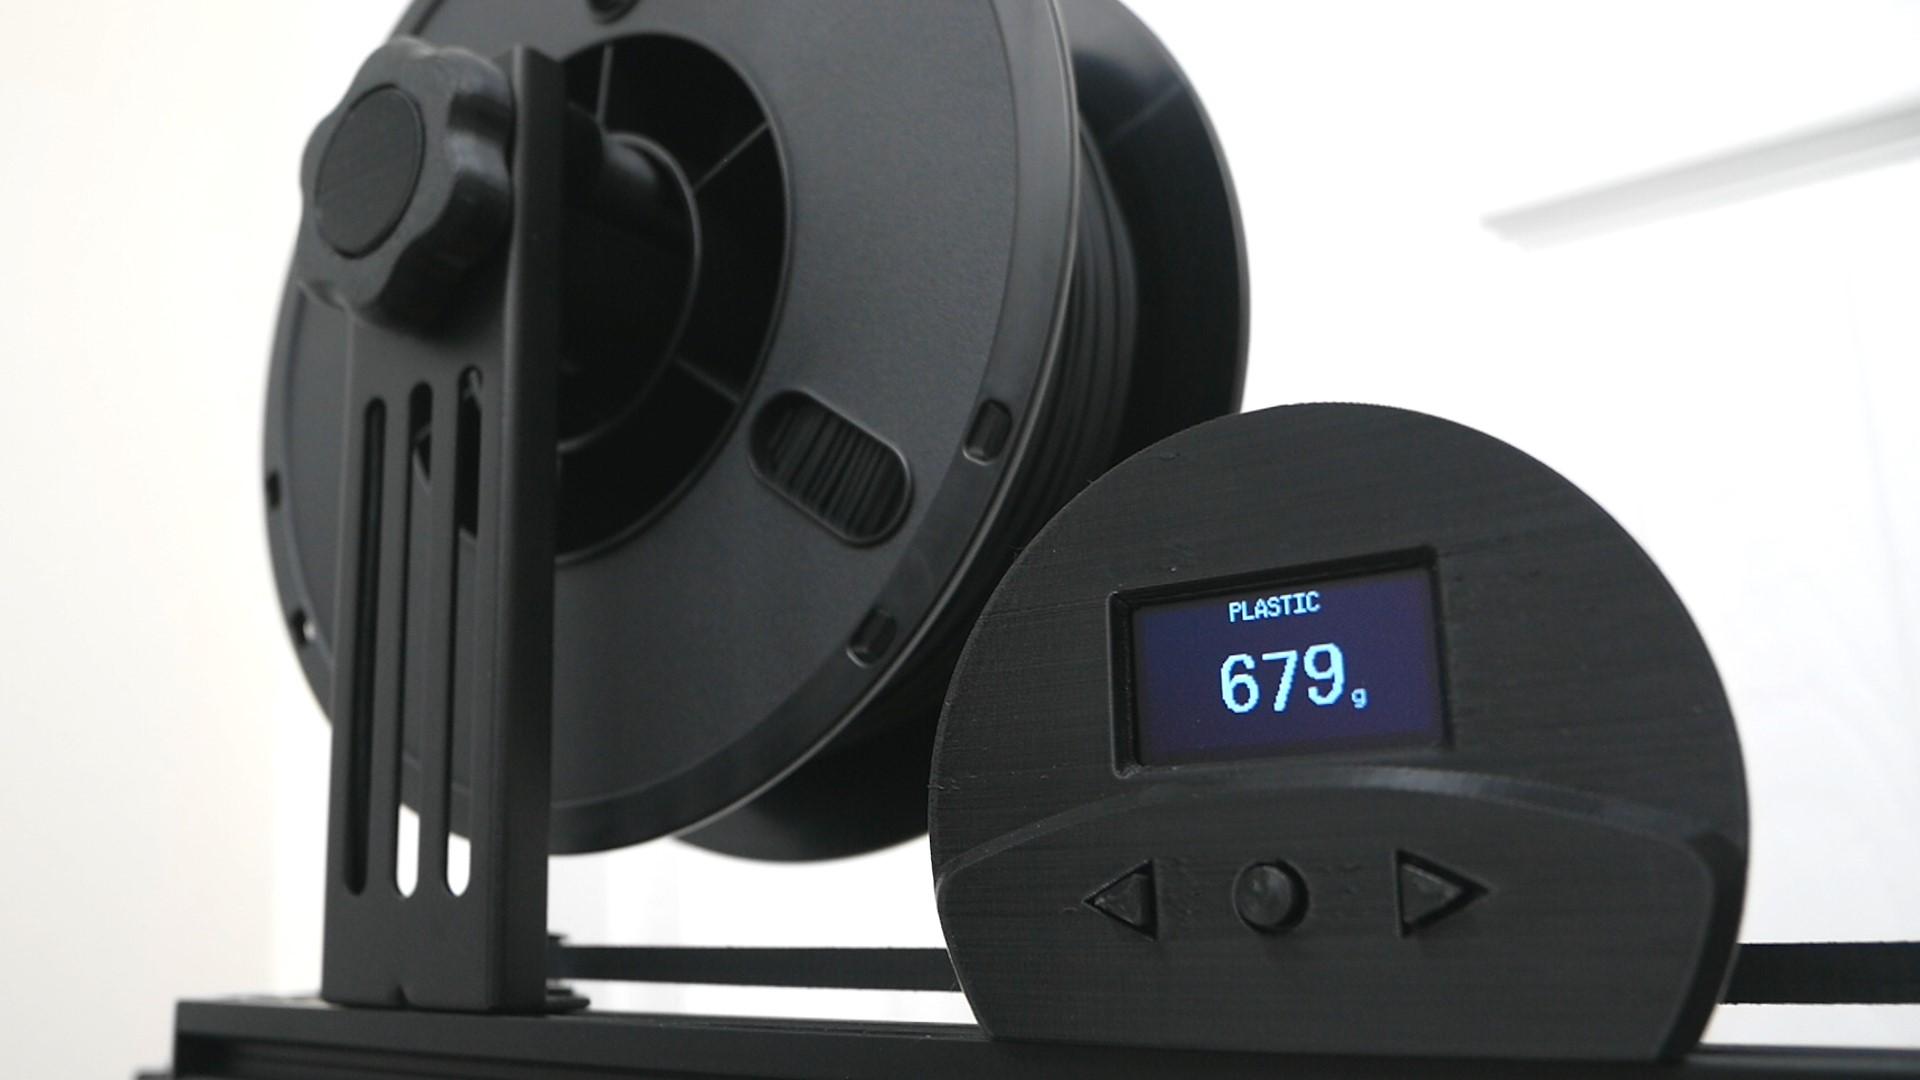
This is my DIY filament holder with an integrated scale for my 3D printer, using arduino, a load cell and an OLED display.
PCB sponsored by PCBWay - Full feature custom PCB prototype service: https://www.pcbway.com/
The main difference between this and a common scale is that this device has the possibility to add multiple profiles to store different Tare values so that way we can measure only the weight of the remaining filament excluding the weight of the empty spool, because each brand of filaments has a different weight and material for the spool itself.
Features:
- It can measure weights from 10g to 9999g.
- There are 3 buttons (LEFT, ENTER, RIGHT) that can be used for scrolling through different profiles and navigate through the menu system.
- You can add, edit and delete profiles using the menu system. It can store up to 20 profiles, with their own name and Tare value. Maximum 21 characters for the name of each profile.
- You can do a full calibration for the load cell using the menu system, so there's no need to edit the sketch in any way.
- Configurable deadzone with real-time reading on the display. The deadzone helps ignoring the fluctuations of the constant pulling/pushing of the filament in the 3D printer so we show the most realistic estimate of the actual weight left in the spool.
- All the settings are stored in the EEPROM so it's going to remember all the settings after powering the device off.
- There is an option in the menu to FACTORY RESET arduino for clearing the EEPROM (user data).
- Auto-center the tittle text in the main/normal screen ignoring spaces to the right.
- When adding a new profile, it's going to save the new profile after the current profile so the order can be arranged in a predictable way. To make this work it required a lot of effort so even though you might take this for granted, it's not a trivial feature.
- When powering ON, changing profiles or returning from the menu, it shows the weight starting at the lower edge of the deadzone so the device is ready to measure the decrease of weight of the filament immediately.
- No timeout for being on the menu. Yes, that's right, this is a feature. Why? I hate timeouts that will exit the menu if no operation is done after a few seconds, but I think that is a bad design that causes stress and frustration because you feel like you need to rush things with the threat of having to start all over from the beginning. You are not going to find anything like that in here.
Supplies

Parts:
- Arduino Nano: https://amzn.to/3iru0op
- OLED Display I2C 1.3 inch: https://amzn.to/3B5uIjH
- M3x6mm Self-Tapping Screws x6: https://amzn.to/3VGwX52
- M4x16mm and M4x12mm Screws: https://amzn.to/3FoUn9B
- M5x12 Screws (if you have a load cell with M5 threads): https://amzn.to/3Vzpbdg
- M6x100mm Screws x2: https://amzn.to/3isEINm
- M6 Lock Nuts x2: https://amzn.to/3uo2EnJ
- Load Cell (2kg, 3kg, 5kg, 10kg or 20kg) with HX711 module: https://amzn.to/3VOK8Rf
- Bearings 6x12x4mm MR126ZZ x4: https://amzn.to/3HbXUcO
- Resistors 3K and 10K (it doesn't have to be exact values): https://amzn.to/3XR4paN
- Push Buttons 6x6x4.3mm x3: https://amzn.to/3VpJGJr
- 28AWG 4-Conductor Wire: https://amzn.to/3EZNMB7
- 2.54mm Male and Female Pin Headers: https://amzn.to/4iHyTpW
- Buck Converter (optional): https://amzn.to/3Vxcpfq
Recommended Tools:
- Loctite Liquid Professional Super Glue https://amzn.to/2N7d1He
- Wera 1.5-10mm Hex-Plus Key https://amzn.to/2N4gXYW
- 4-inch Zip Ties: https://amzn.to/3BcuozL
- Breadboard (good quality): https://amzn.to/2QsyY3C
- SpeedEII Electric Screwdriver: https://amzn.to/3VzTkcD
- Multimeter (Fluke 17B+): https://amzn.to/2L3PNQk
- Rigol DS1054Z Digital Oscilloscope: https://amzn.to/2C5ZwD7
Note: As an Amazon Associate I earn from qualifying purchases.
Files:
- Download Arduino Sketch
- 3D printed parts (I recommend PETG material).
- Custom PCB - you can order from PCBWay.com using these gerber files.
Test in a Breadboard


Following the schematics to make all the connections in a breadboard to test everything.
Upload the Arduino Sketch to the Arduino Nano. You don't have to edit anything in the sketch, but you need to have a few libraries. The links for the libraries are in the top of the sketch.
PCB


I created a PCB design that you can order from PCBWay.com so you can solder all the components much easily than using a generic protoboard. Also, with my PCB you are going to be sure everything fits the 3D printed parts properly.
To make it very compact/small, some components are solder over other components so you need to solder the components in the order/sequence printed in the PCB:
- Buttons
- Resistors
- HX711
- Display supports (male pin header with a flush cut)
- Arduino
- Display
Test everything, of course.
Display Assembly


- Glue the 3D printed buttons to the display front case. The glue only goes to the part farthest to the actual button, to allow the plastic to flex. Try to center the button so it doesn't hit the walls of the case.
- Screw the PCB to the case. We use two screws directly from the display, but to avoid going too deep damaging the case, try to use the 3D printed washers to create some separation.
- The other 4 screws go directly to the PCB without washers. Try to align the display so it is completely horizontal. You can turn the display a little, forcing the pin headers to the direction you want, and then tight the screws.
- Everything works with 5V so if you want to add a buck converter to be able to power it with higher voltages, there's space on the back shell cover to put the buck converter.
Holder Assembly


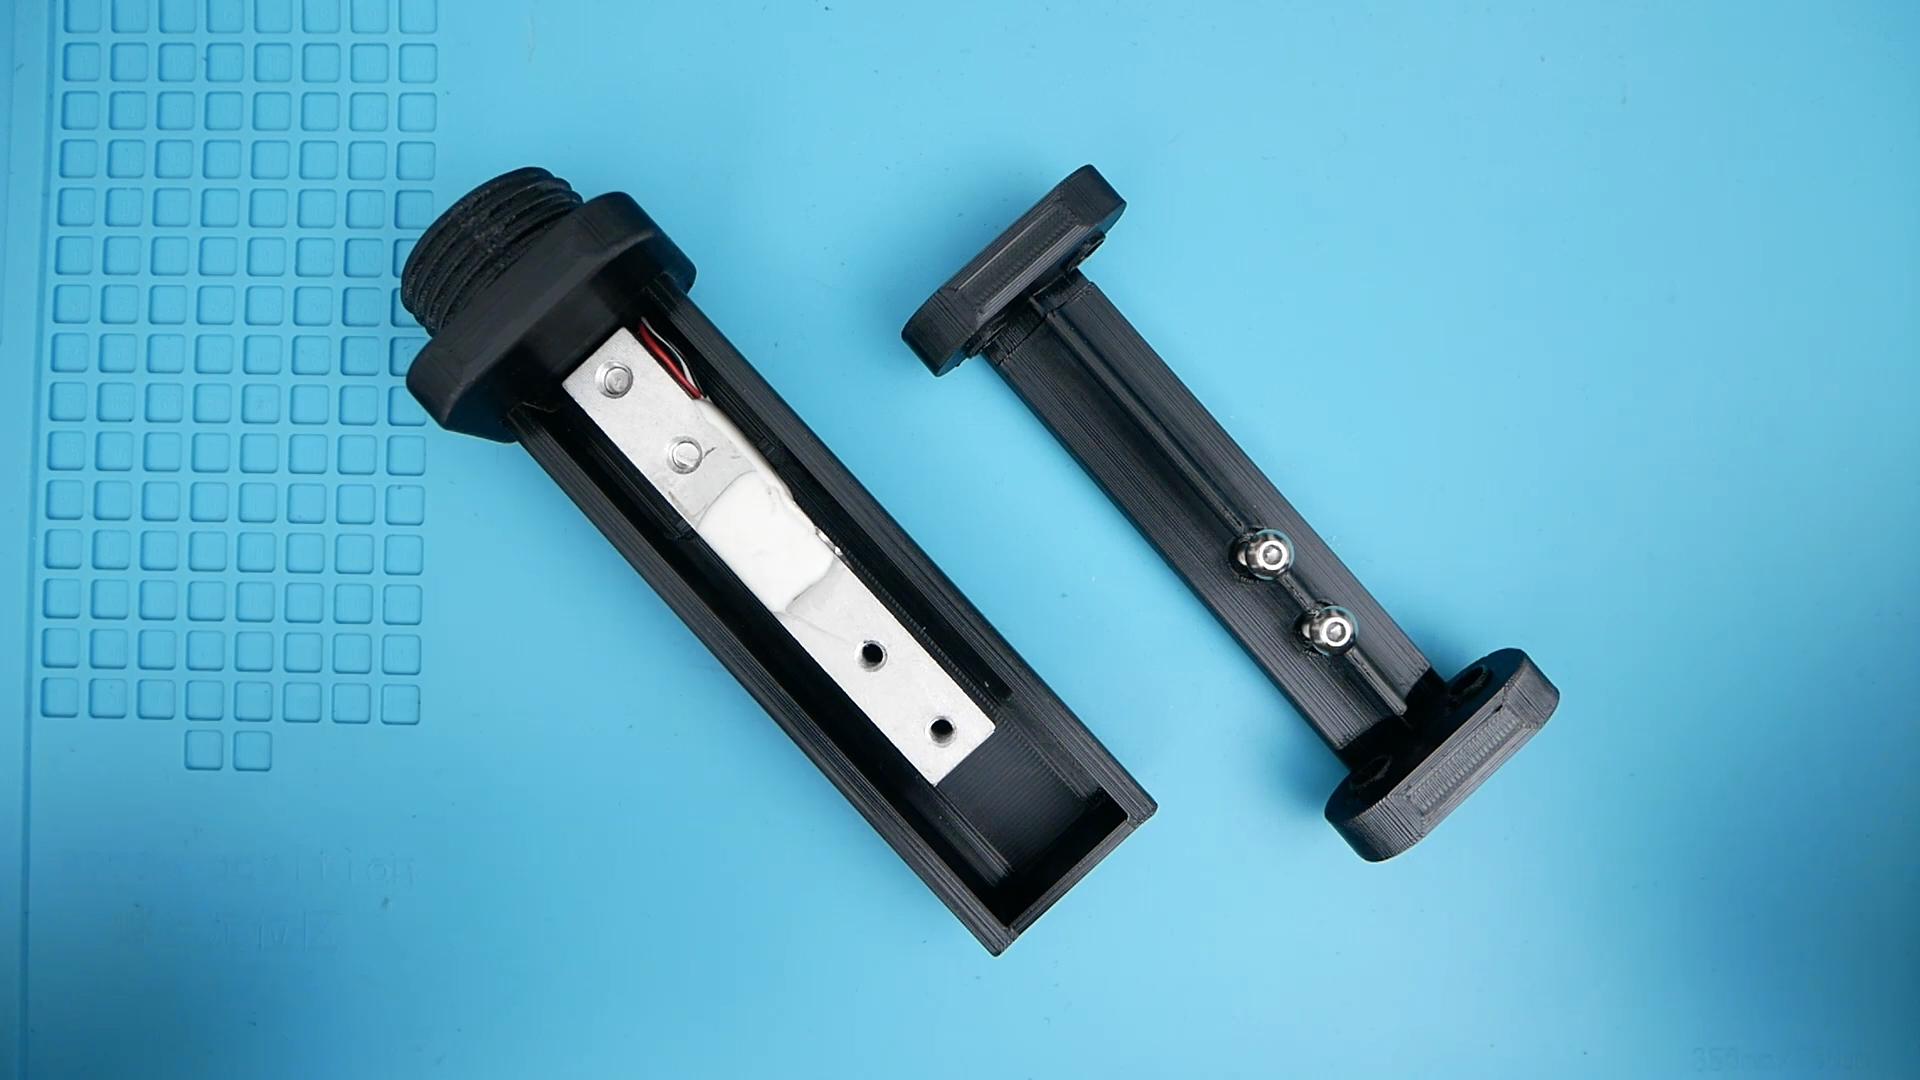
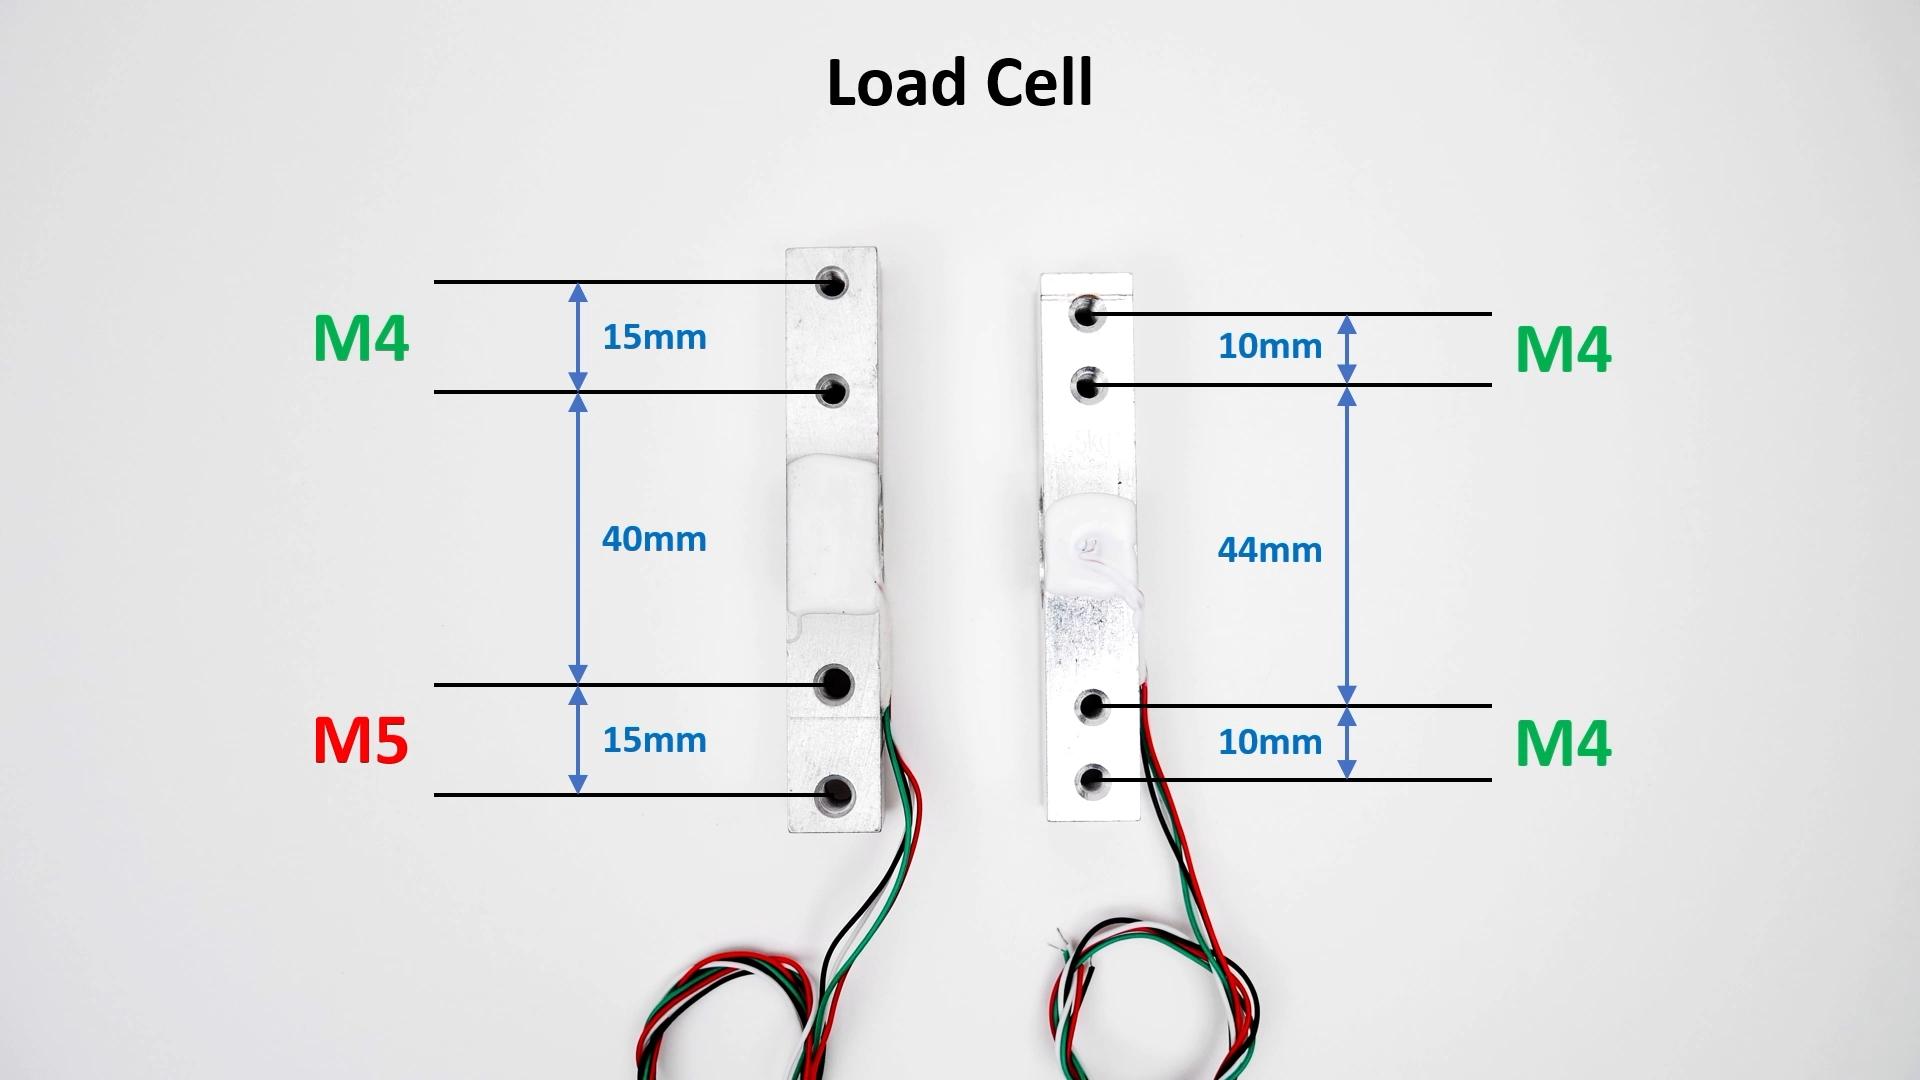
There are two types of load cells that look similar, but they have different spacing for the screws. We can call it "M5-M4" and "M4-M4". Depending on the load cell that you have, print the corresponding [Holder Top] and [Holder Base] so the load cell can fit correctly.
Solder a 4-wire cable to the load cell and pass it through the hole on the side of the base. It has to be thin enough, though. For example, I used an old USB 2.0 cable.
You need to place the lock nuts in the [Holder Top] before installing in the [Holder Base], because later we have to install the [Rollers] over it. The reason is that if the rollers are already installed, they block access to the screws that attach to the load cell.
You have some small freedom to center the load cell, so make sure it's centered. Also, you should center the [Holder Top] as much as possible, after making sure the load cell is already centered.
Final Installation

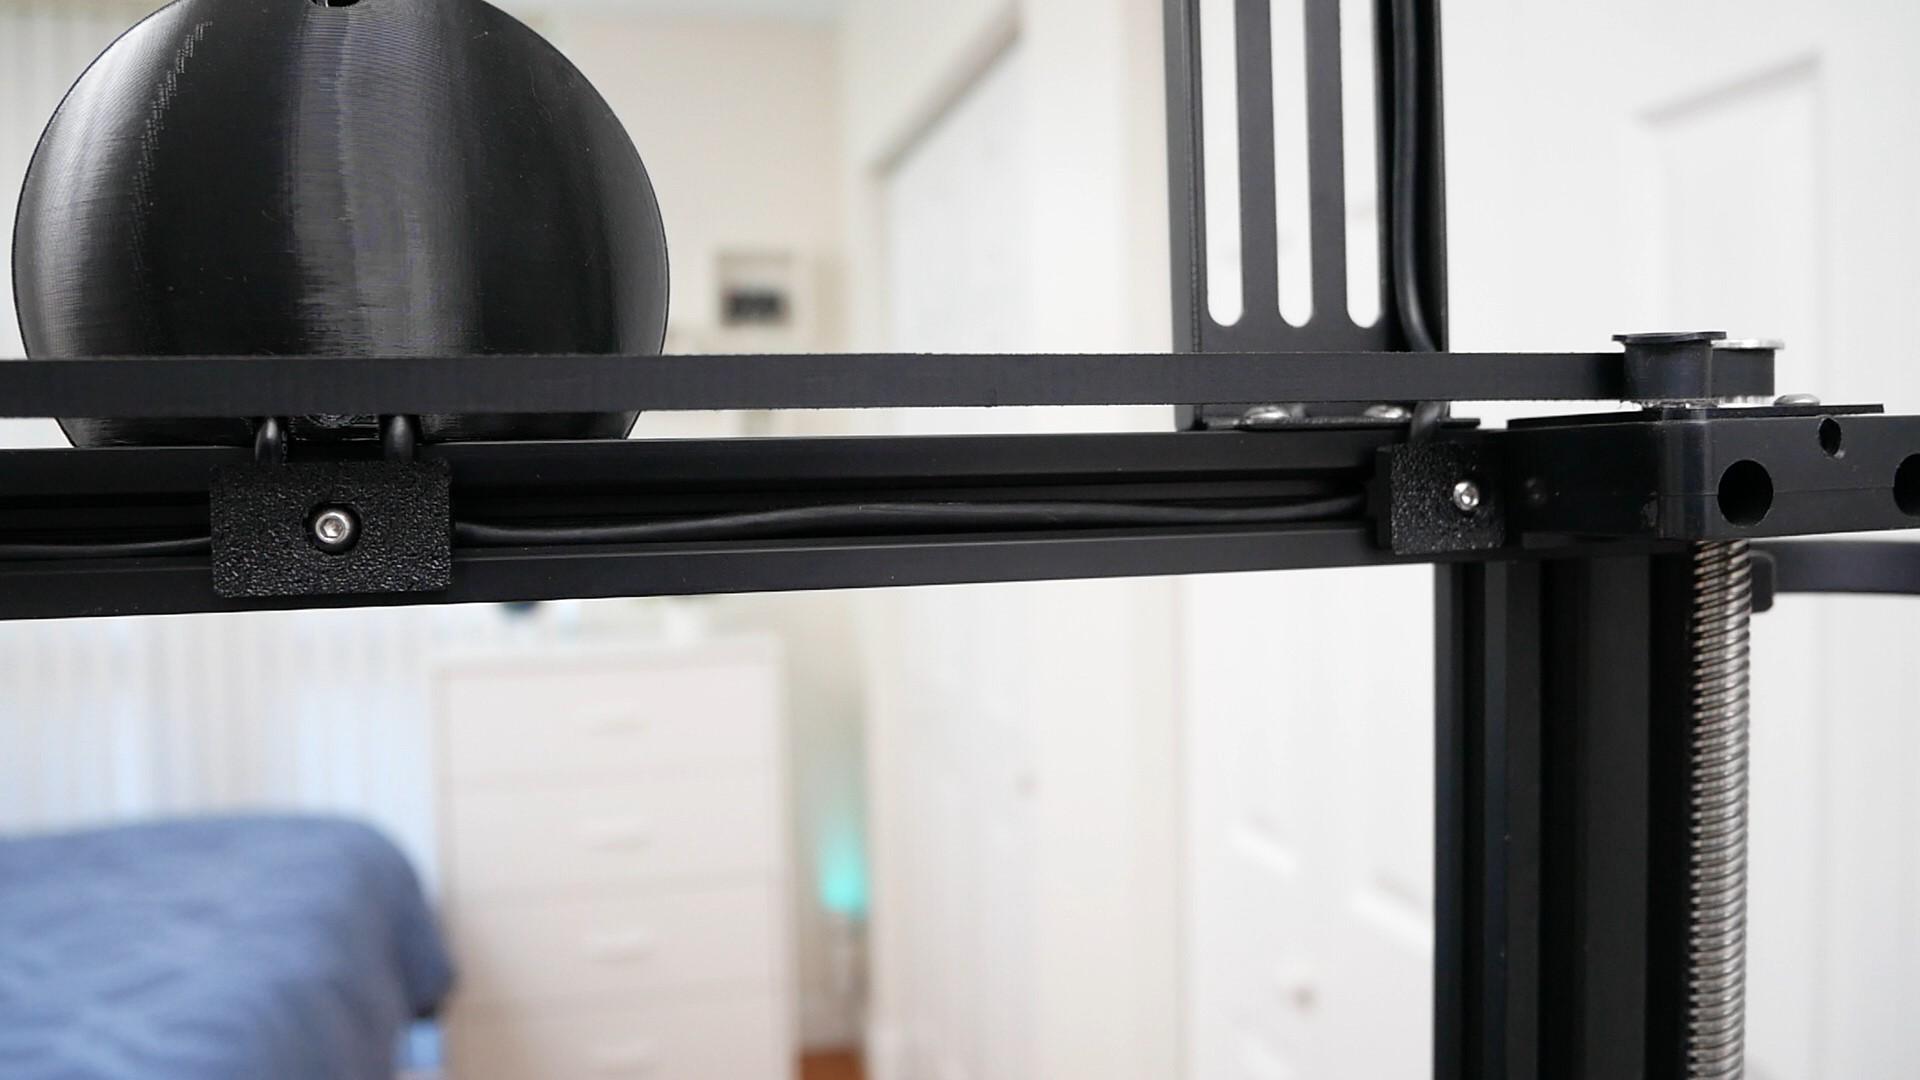
There are some 3D printed parts called [Cable Holder] that you can use to route the cable in your 3D printer. They only require T-nuts and the respective M3 screw.