Display Clock From Wooden Clips
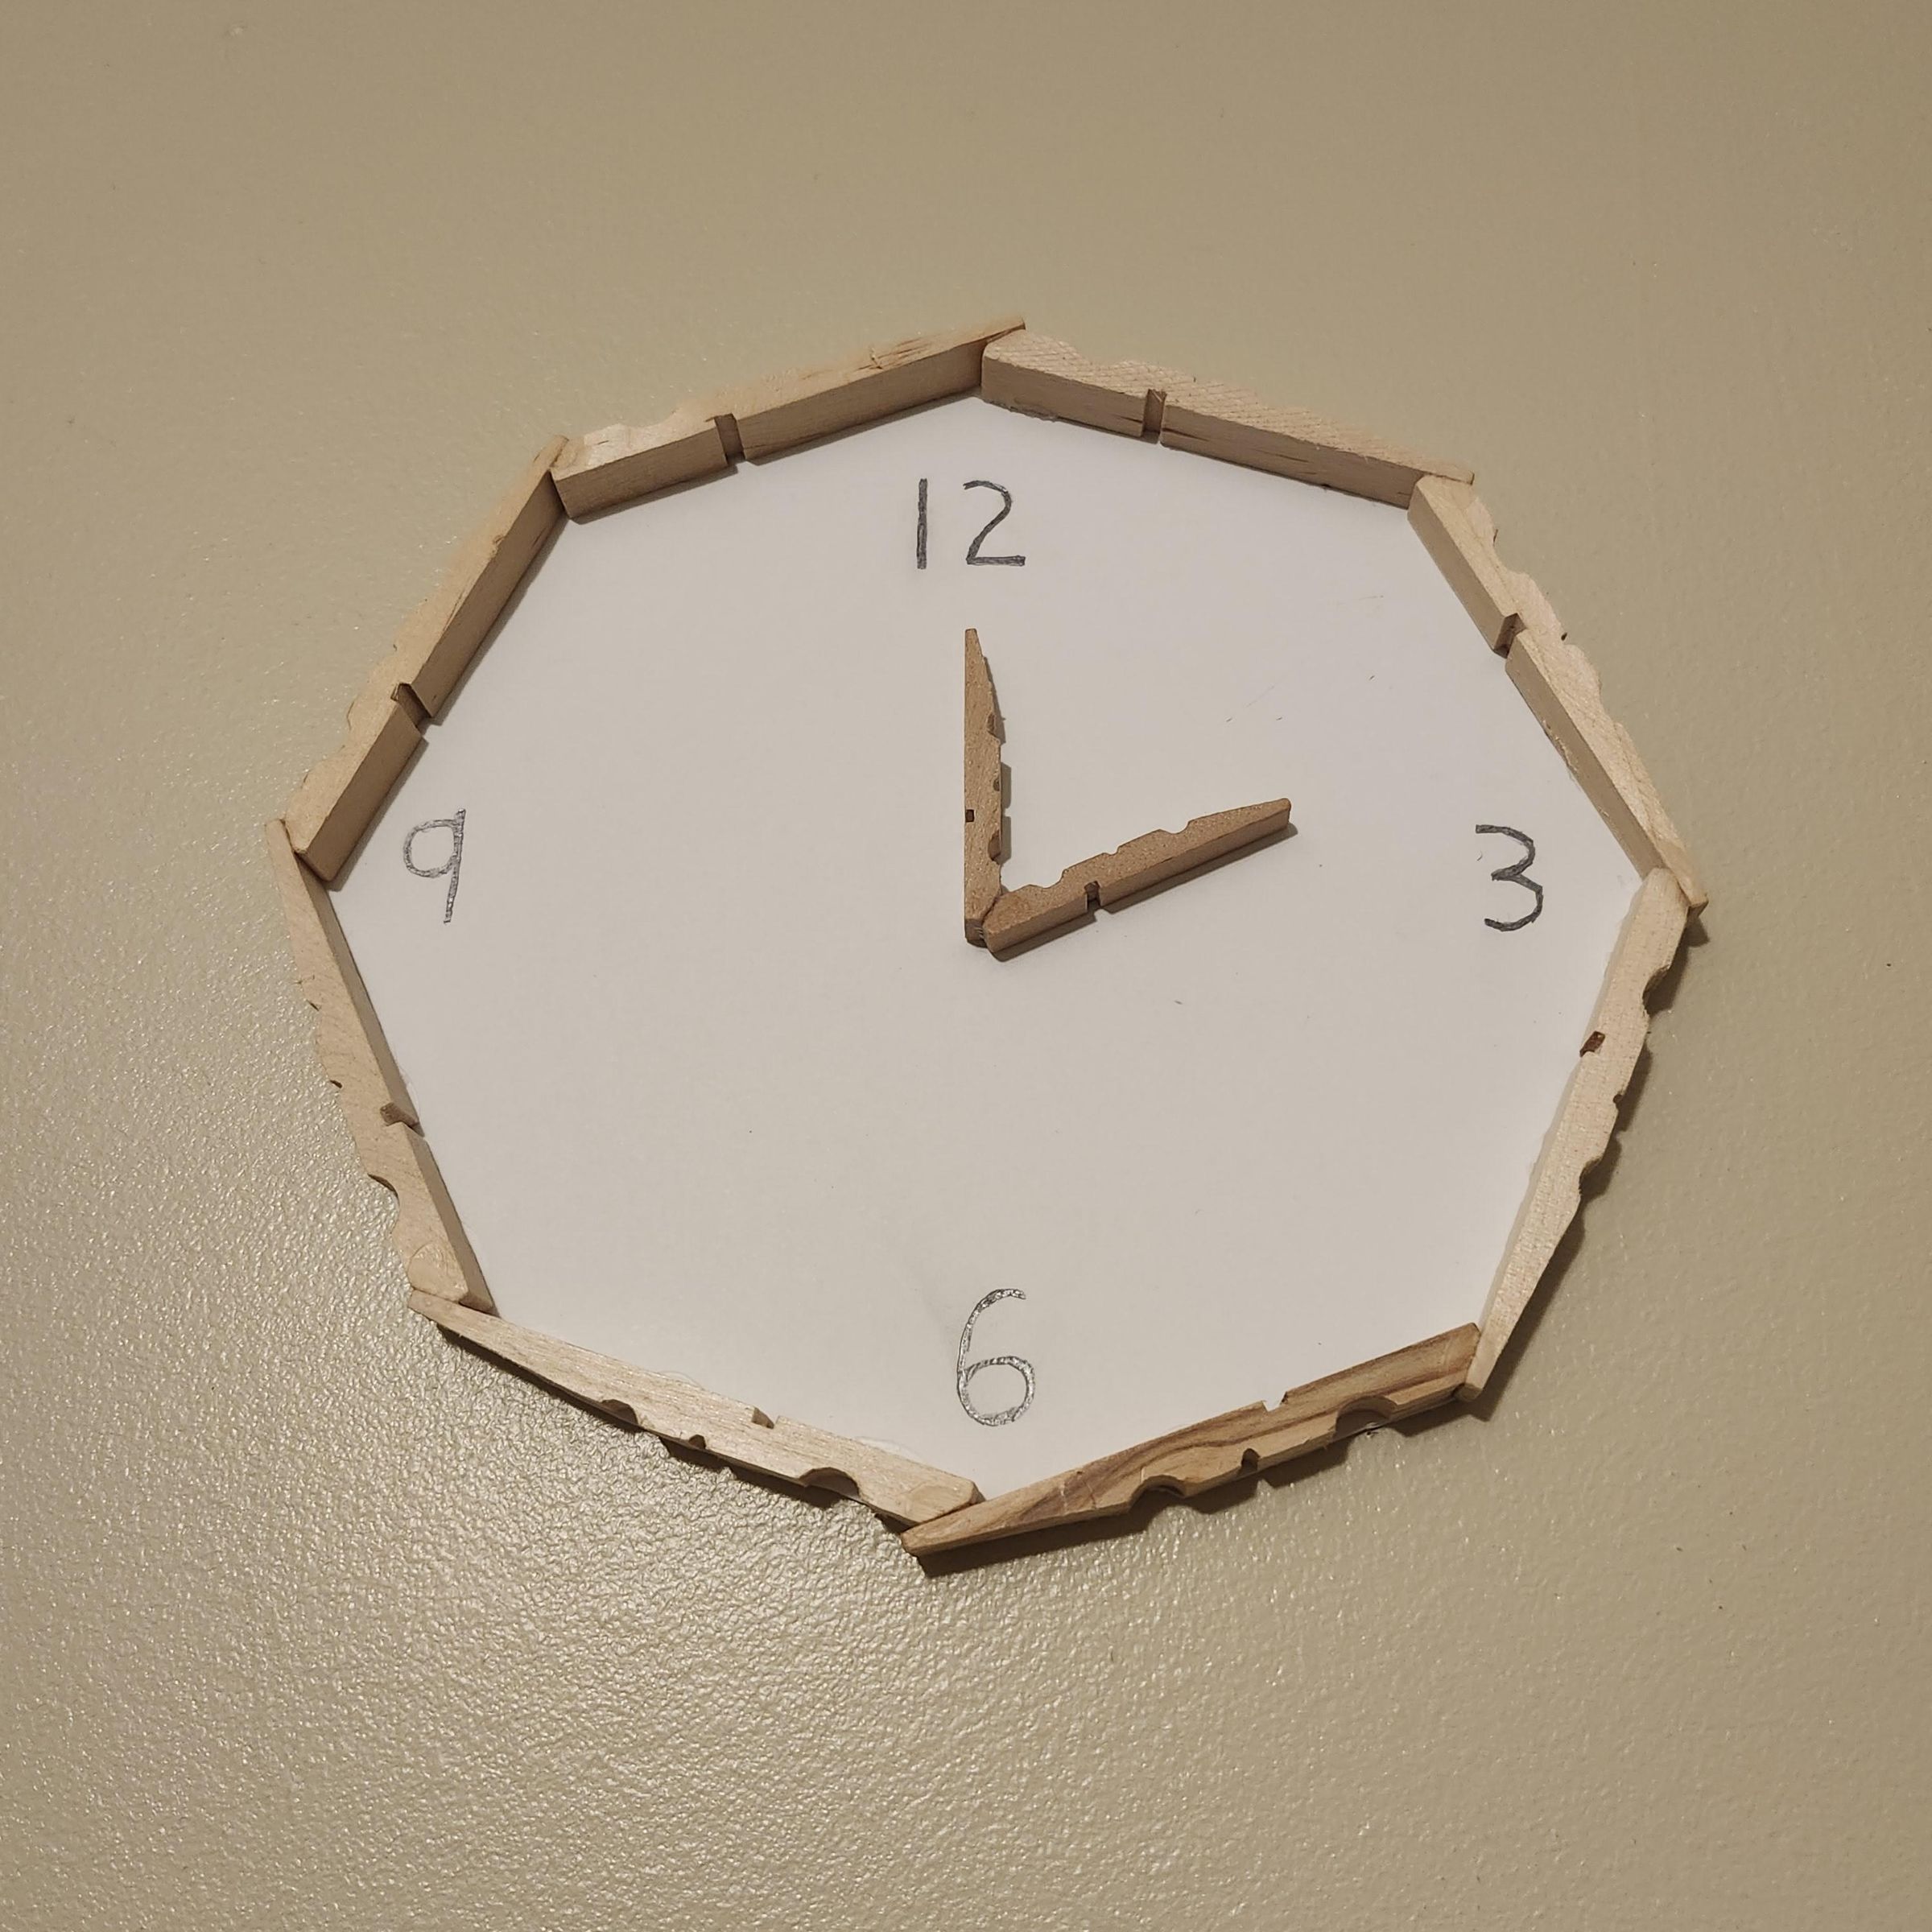
In this project, we'll build a clock using a few common household items. It's a fun STEM project for all ages, and you end up with a nice piece of handcrafted decor for display!
(Note: This is not an actual functioning clock)
Supplies
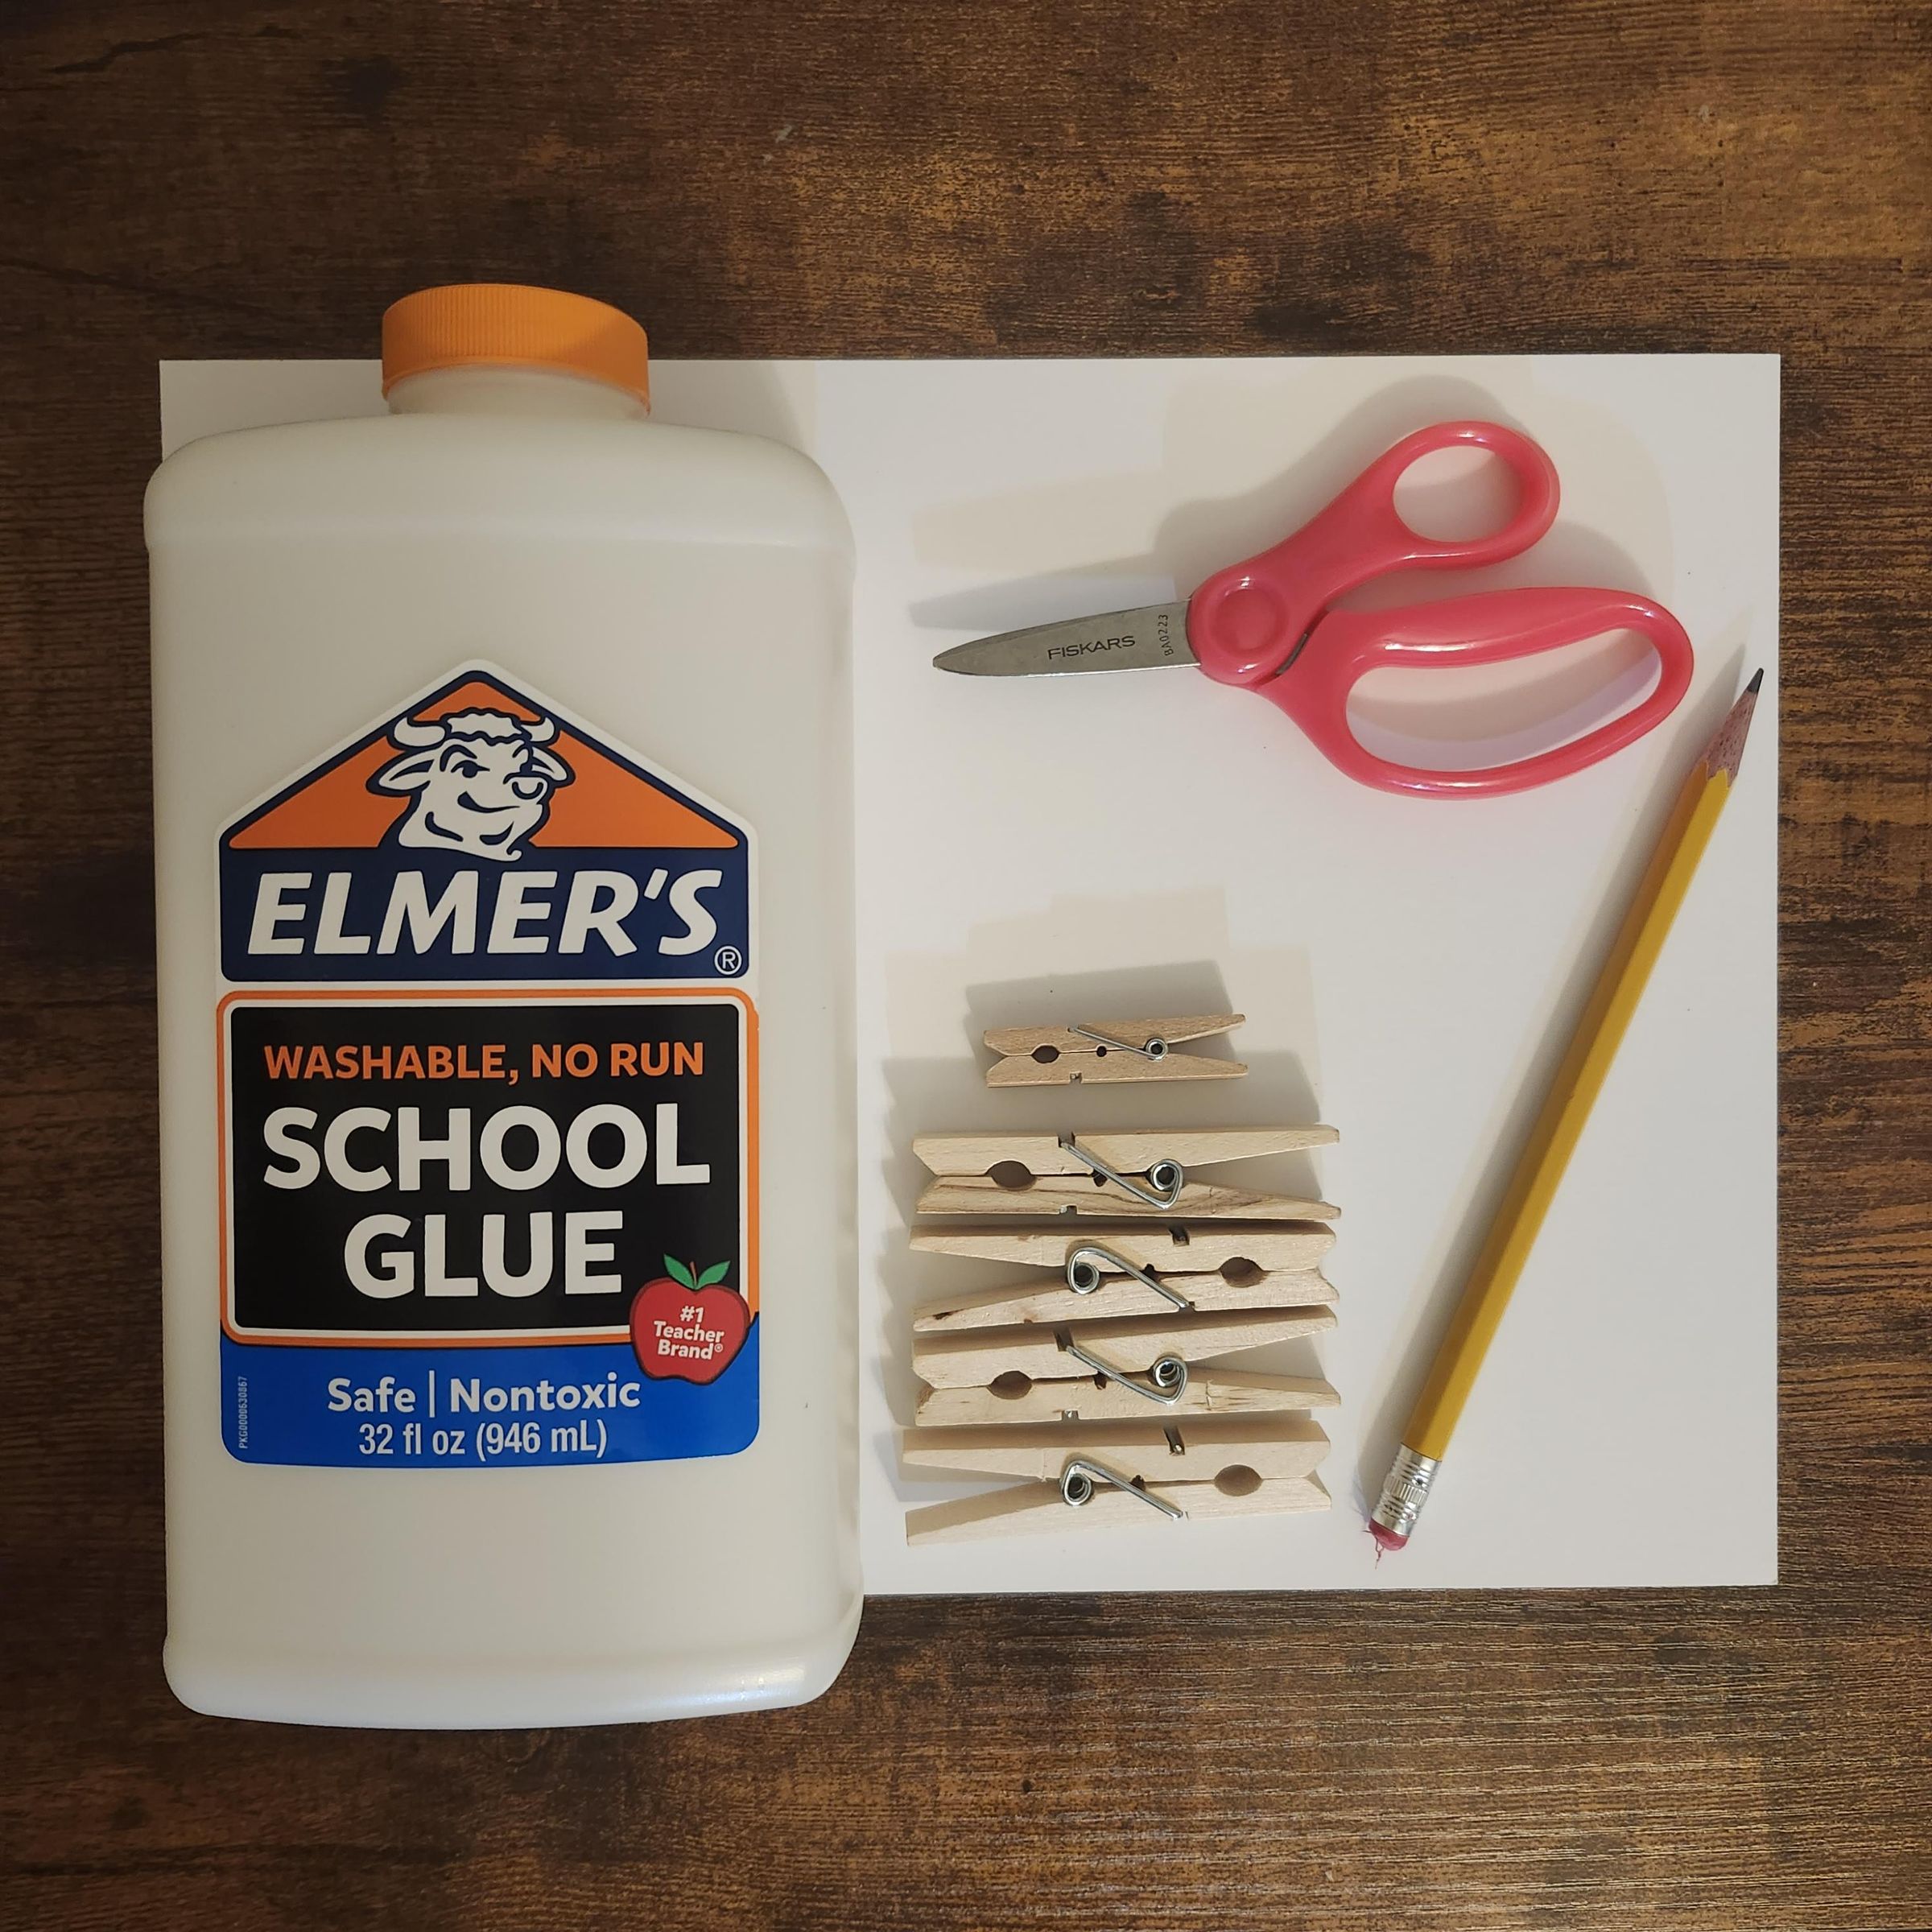
- Elmer's glue (or any white glue)
- Scissors
- Pencil (or a Sharpie)
- Cardstock
- 4 regular wooden clips
- 1 mini wooden clip
Take Apart and Glue Clips
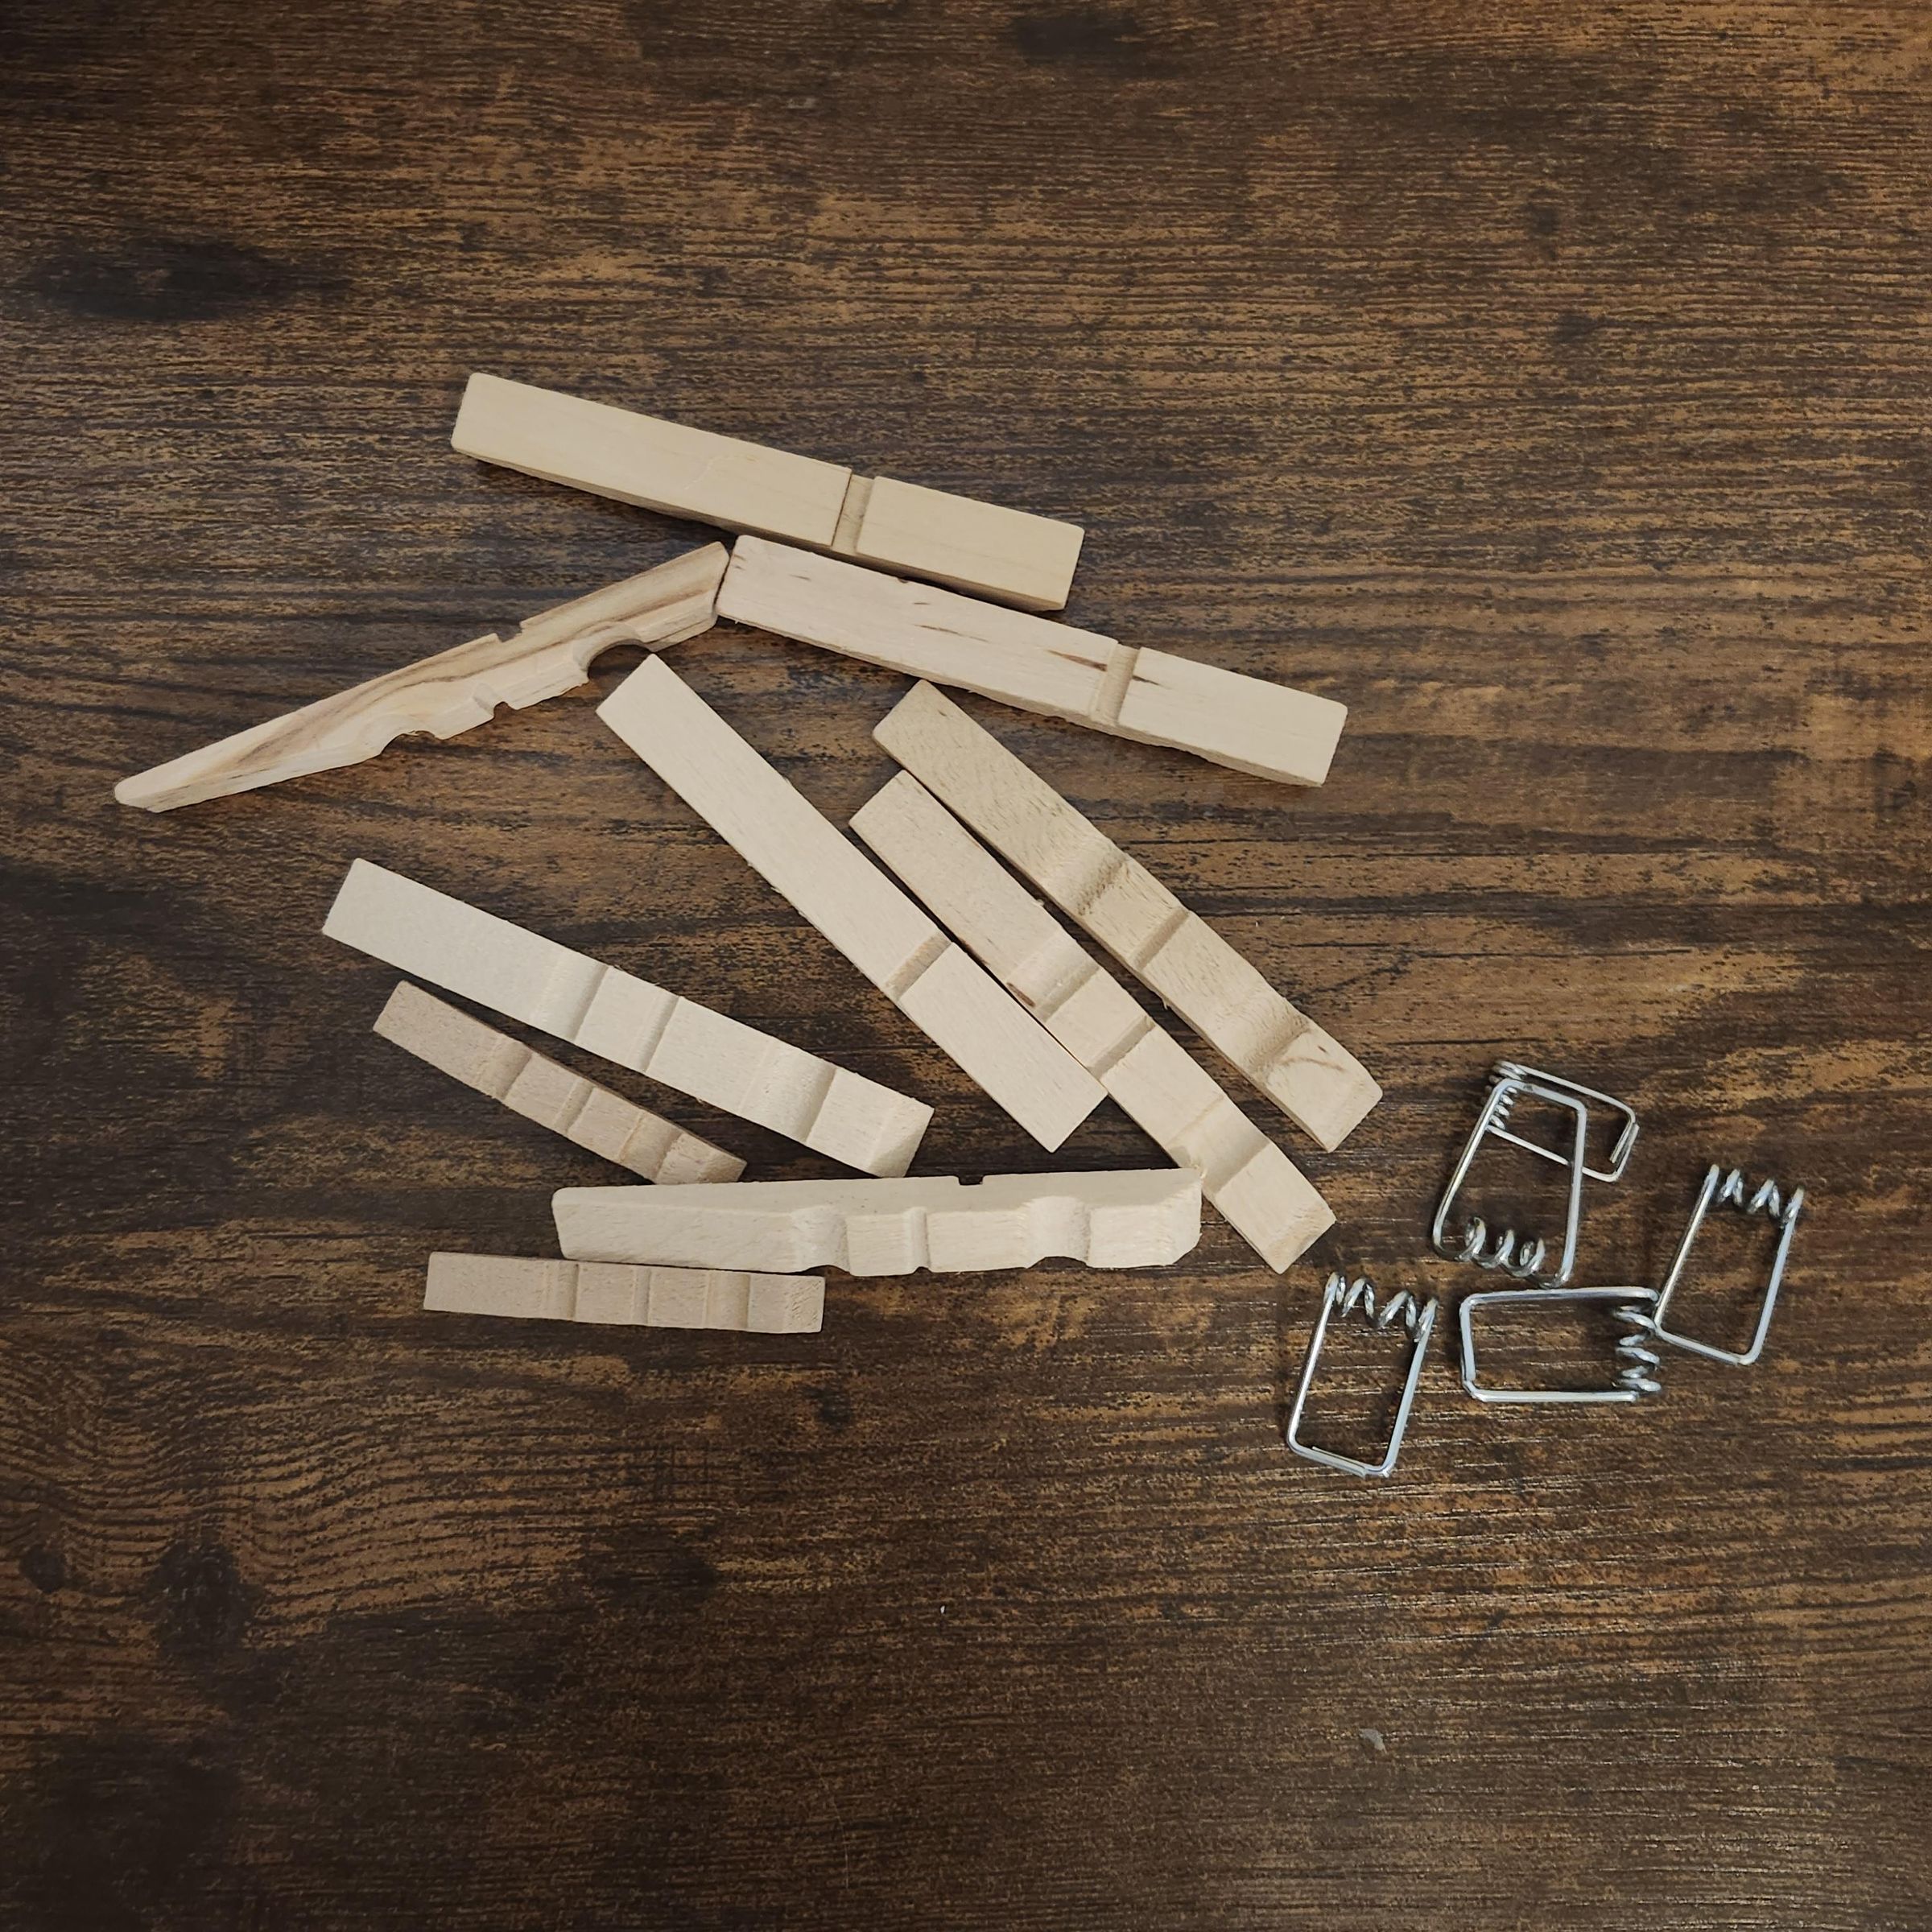
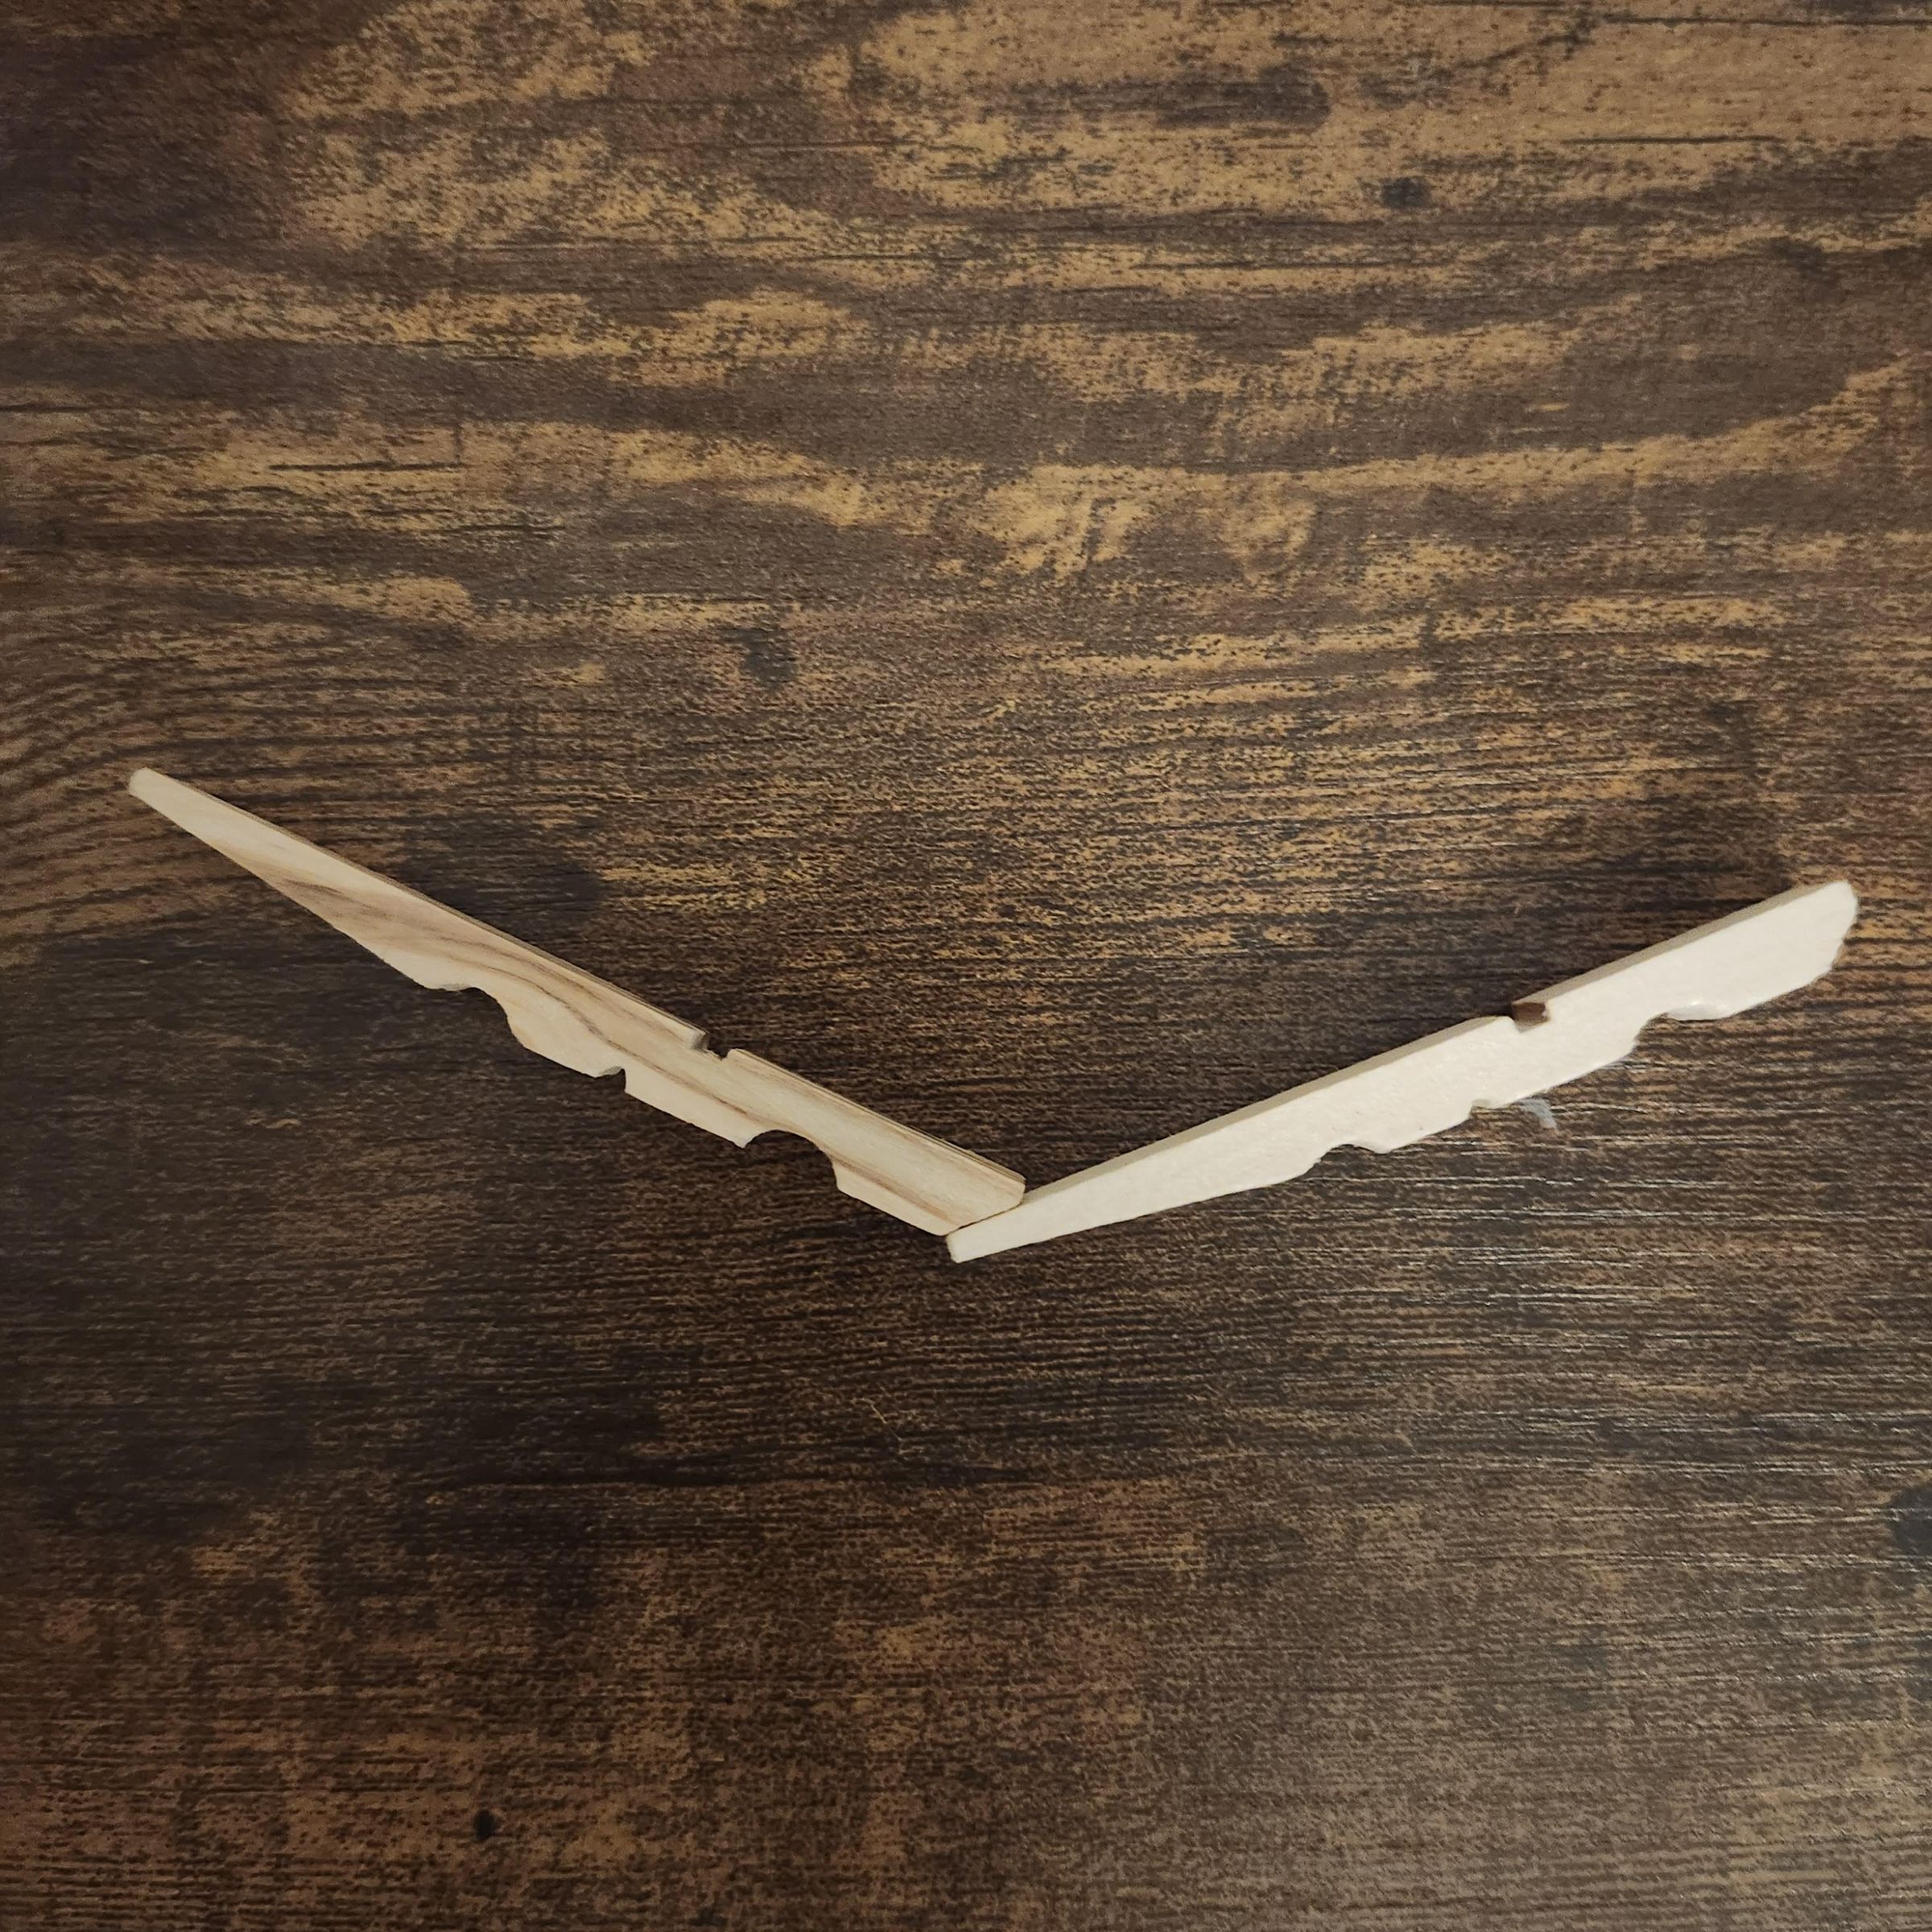
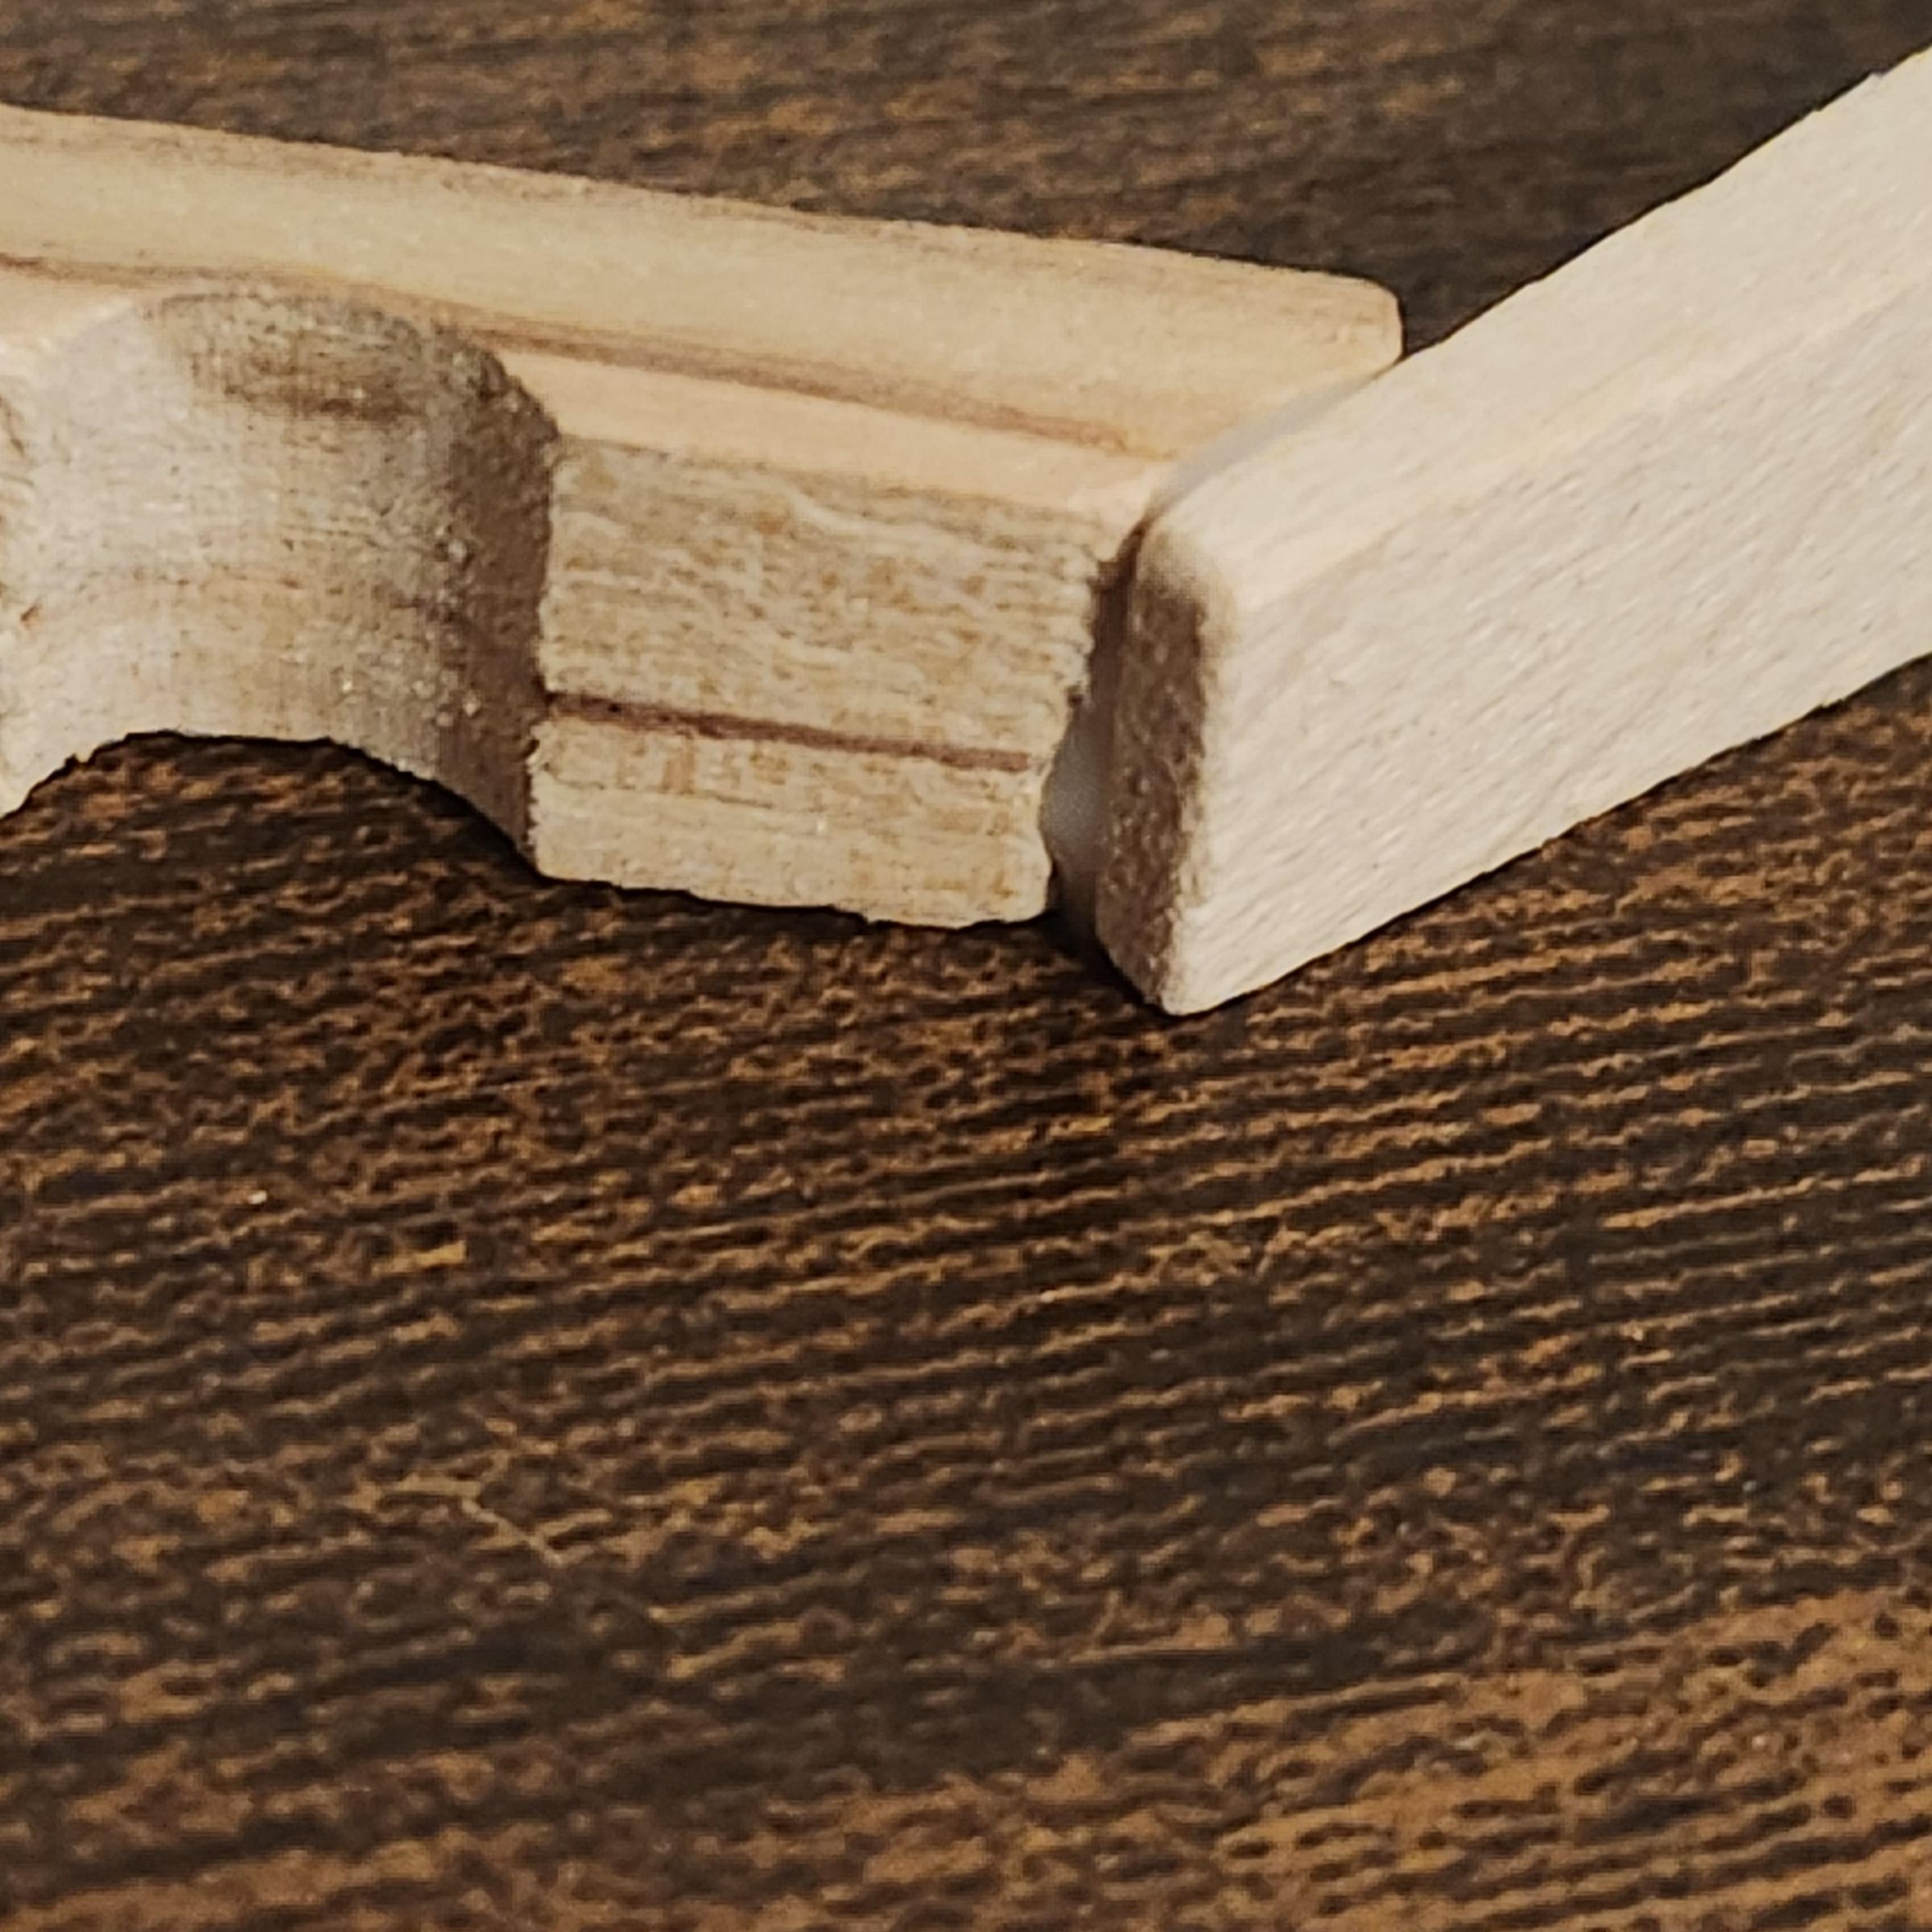
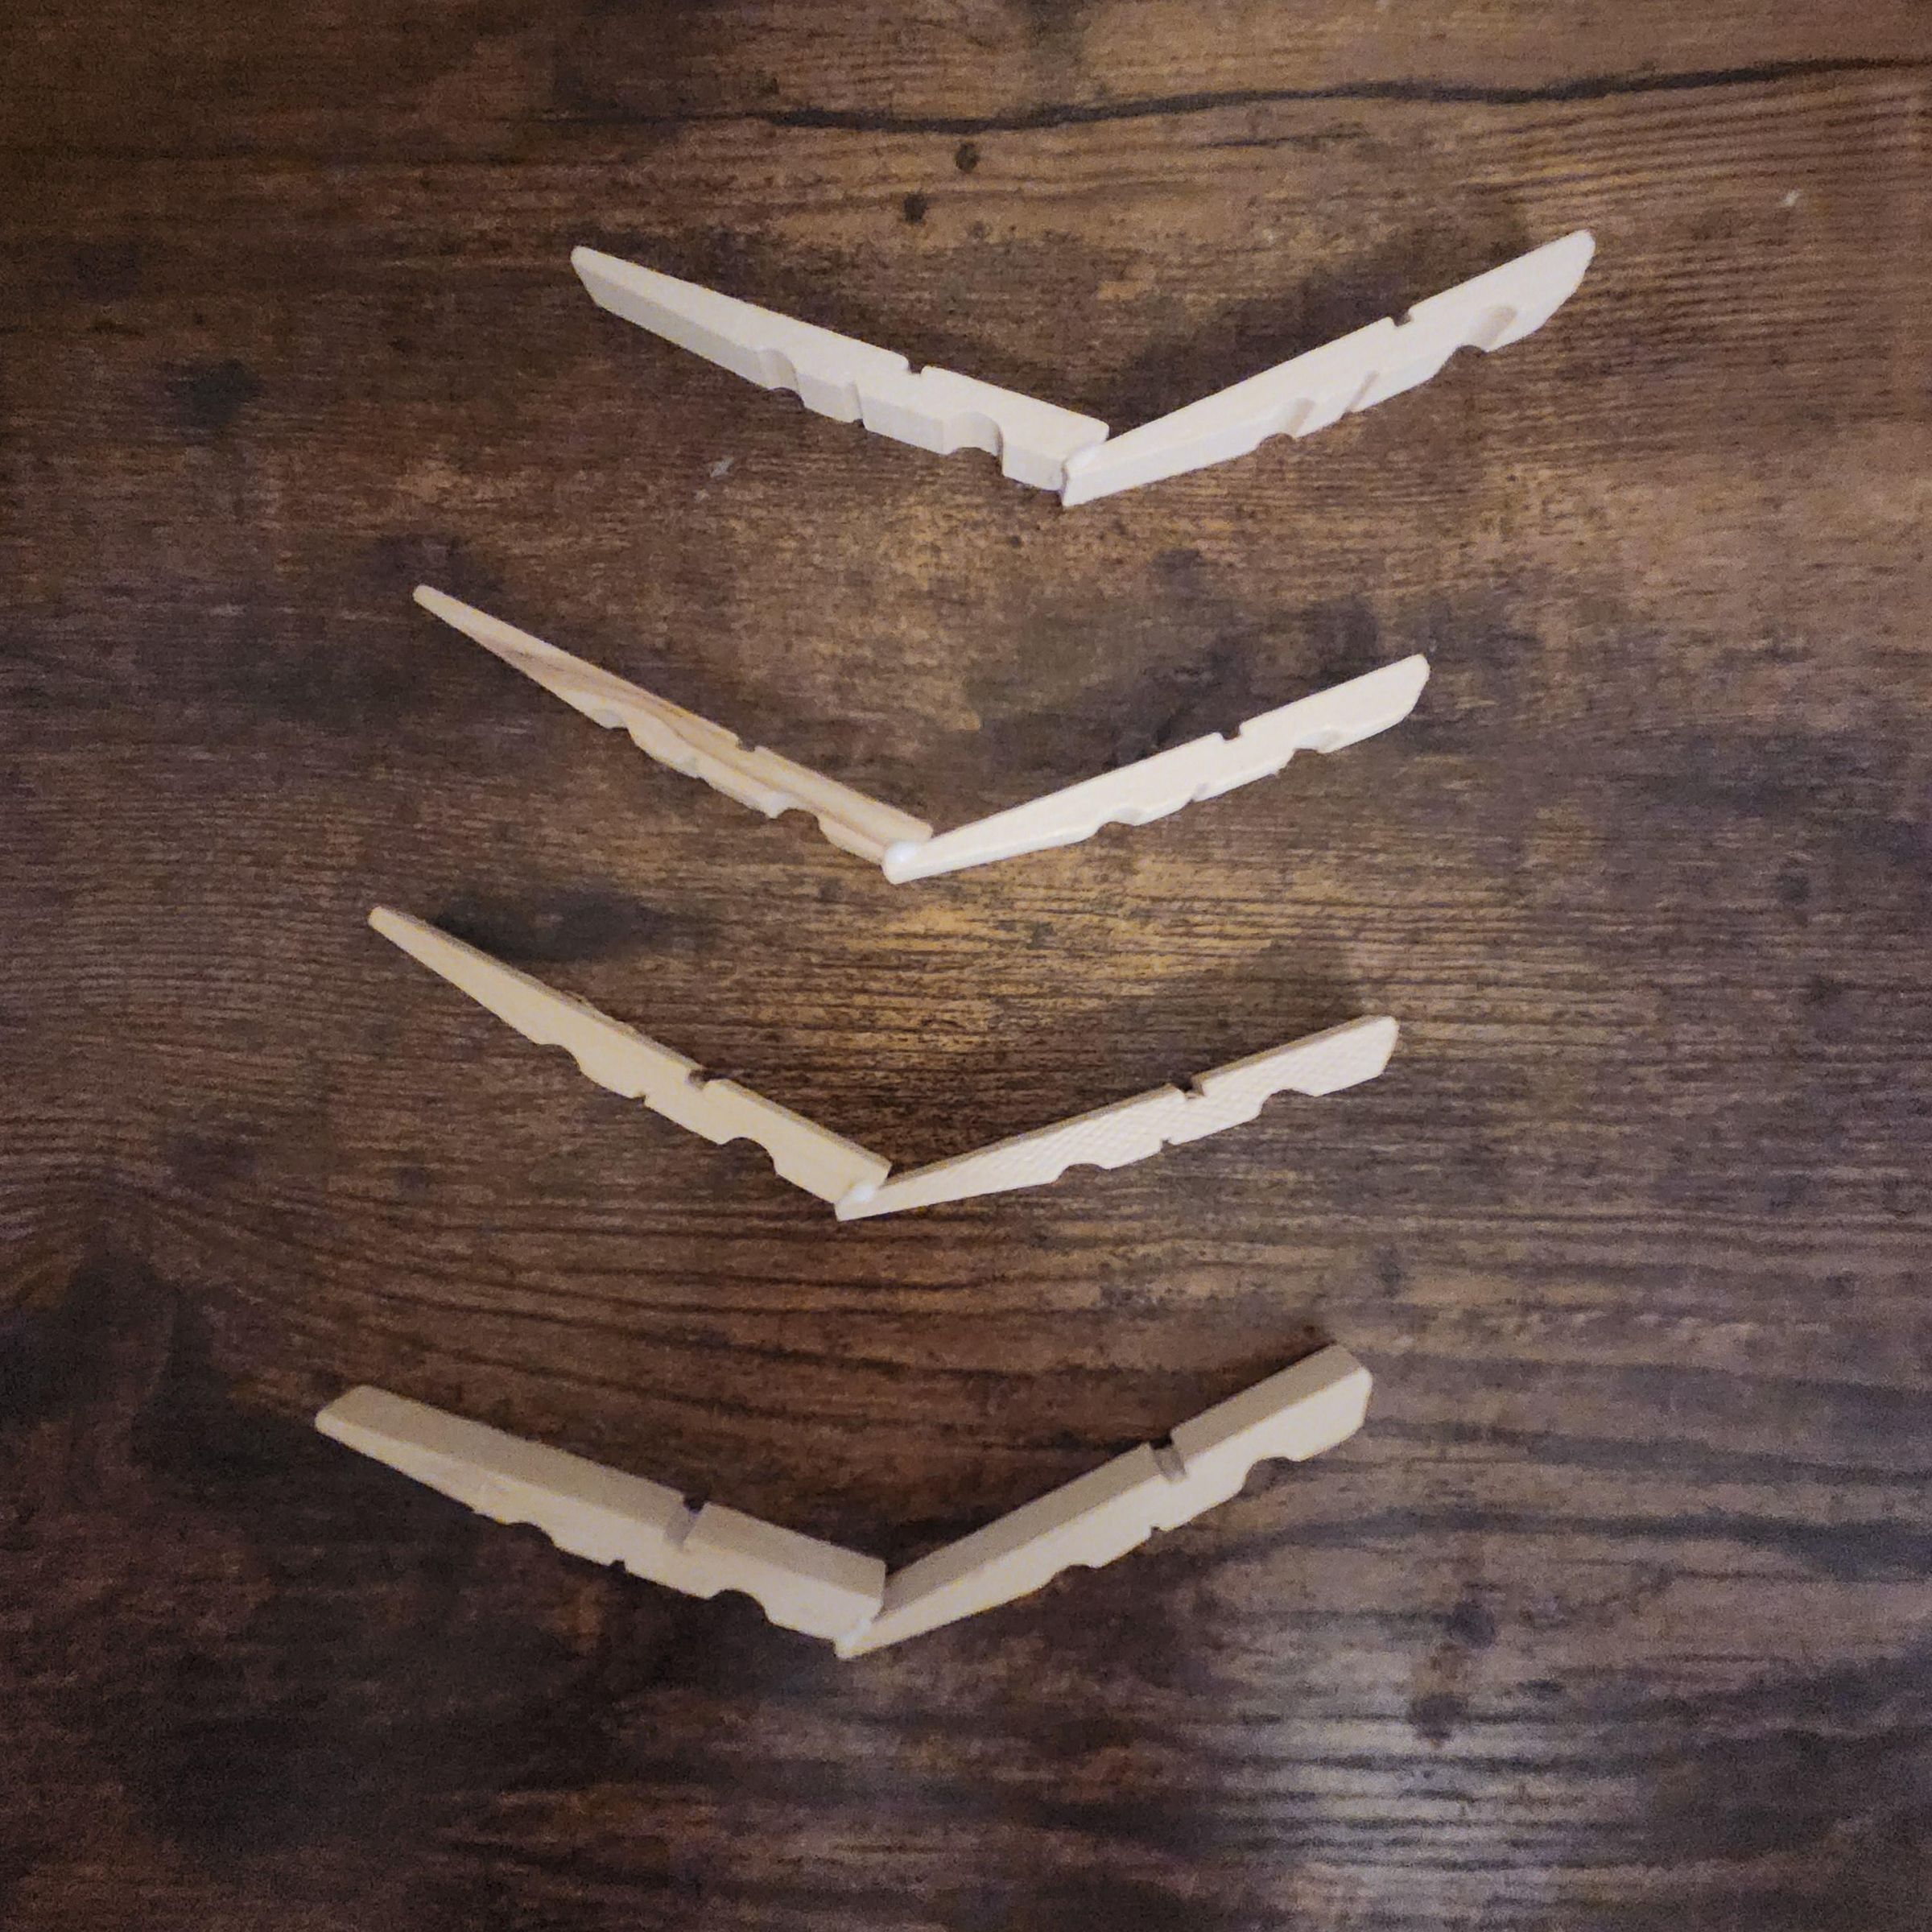
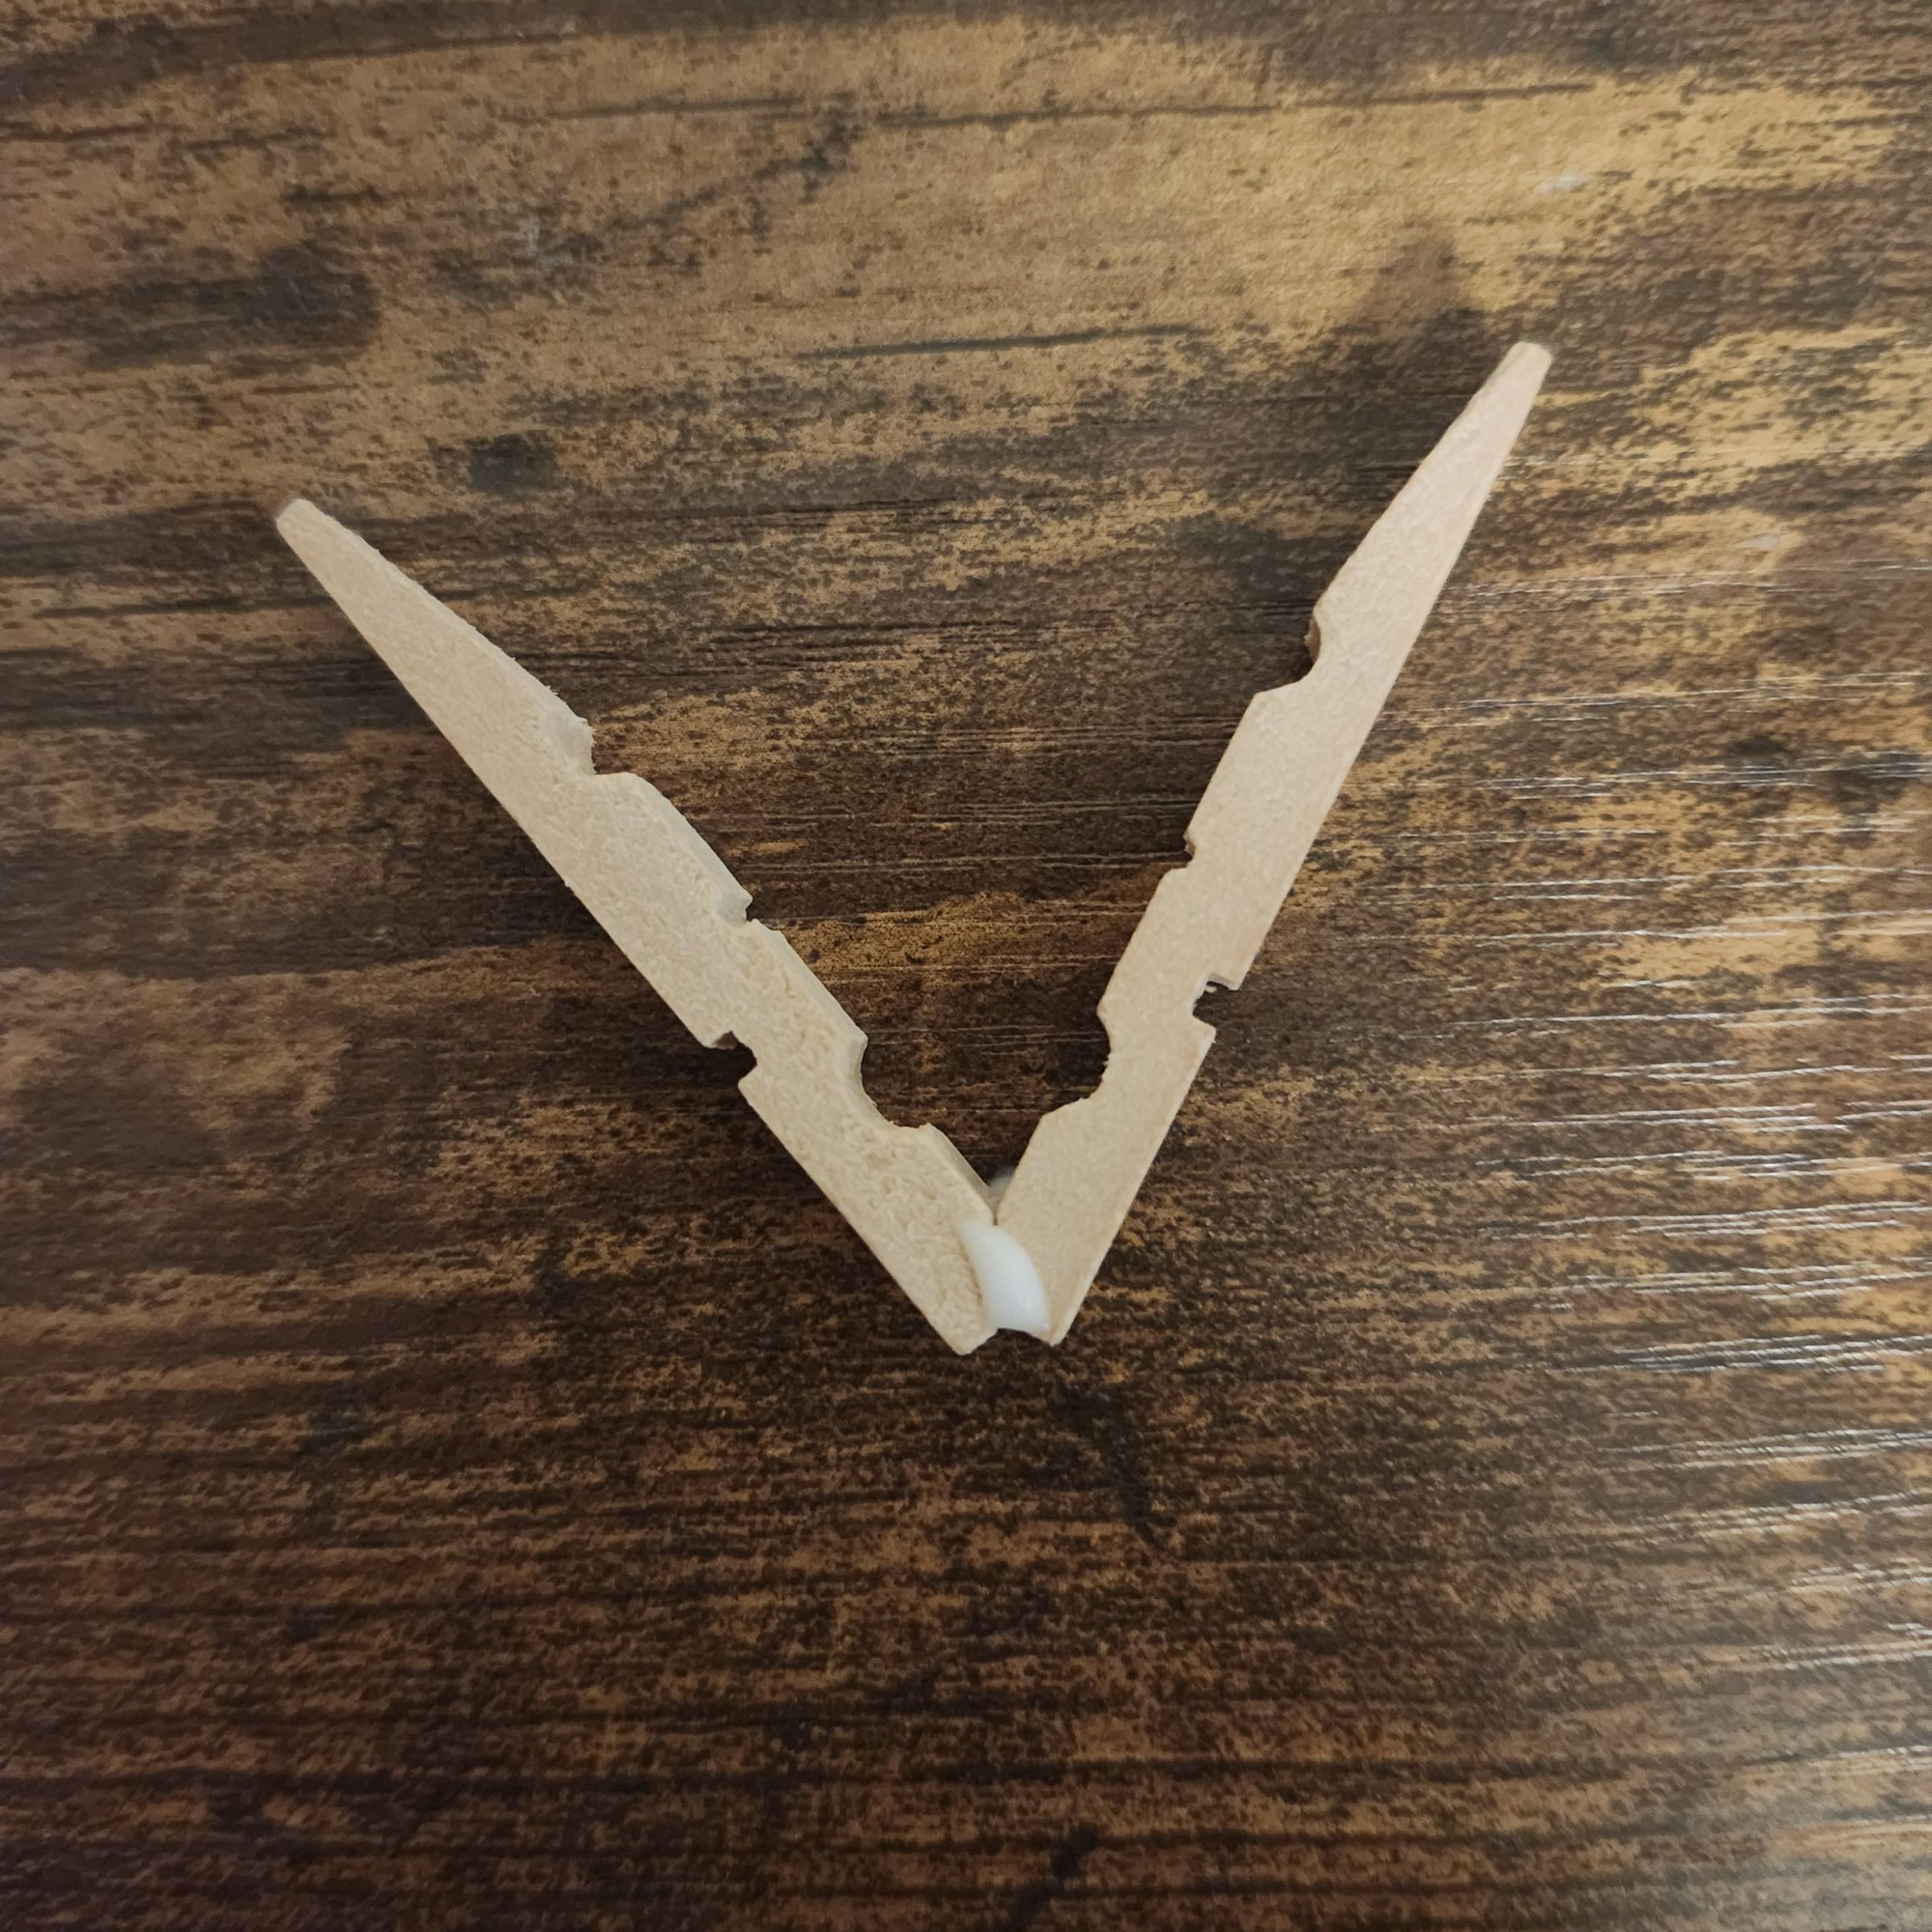
Take apart all the wooden clips (including the mini one) and divide into groups of 2. The metal wire springs are unneeded, so they can go into the trash or wherever you decide to put them. Following the pictures I attached, glue the wooden clips together. The inside of the clips should be facing outwards in the end. Repeat this 4 times and let them dry for about an hour or two.
For the mini clip, glue the two ends together to form the clock hands. The angle should be acute, as shown in the picture.
More Glue
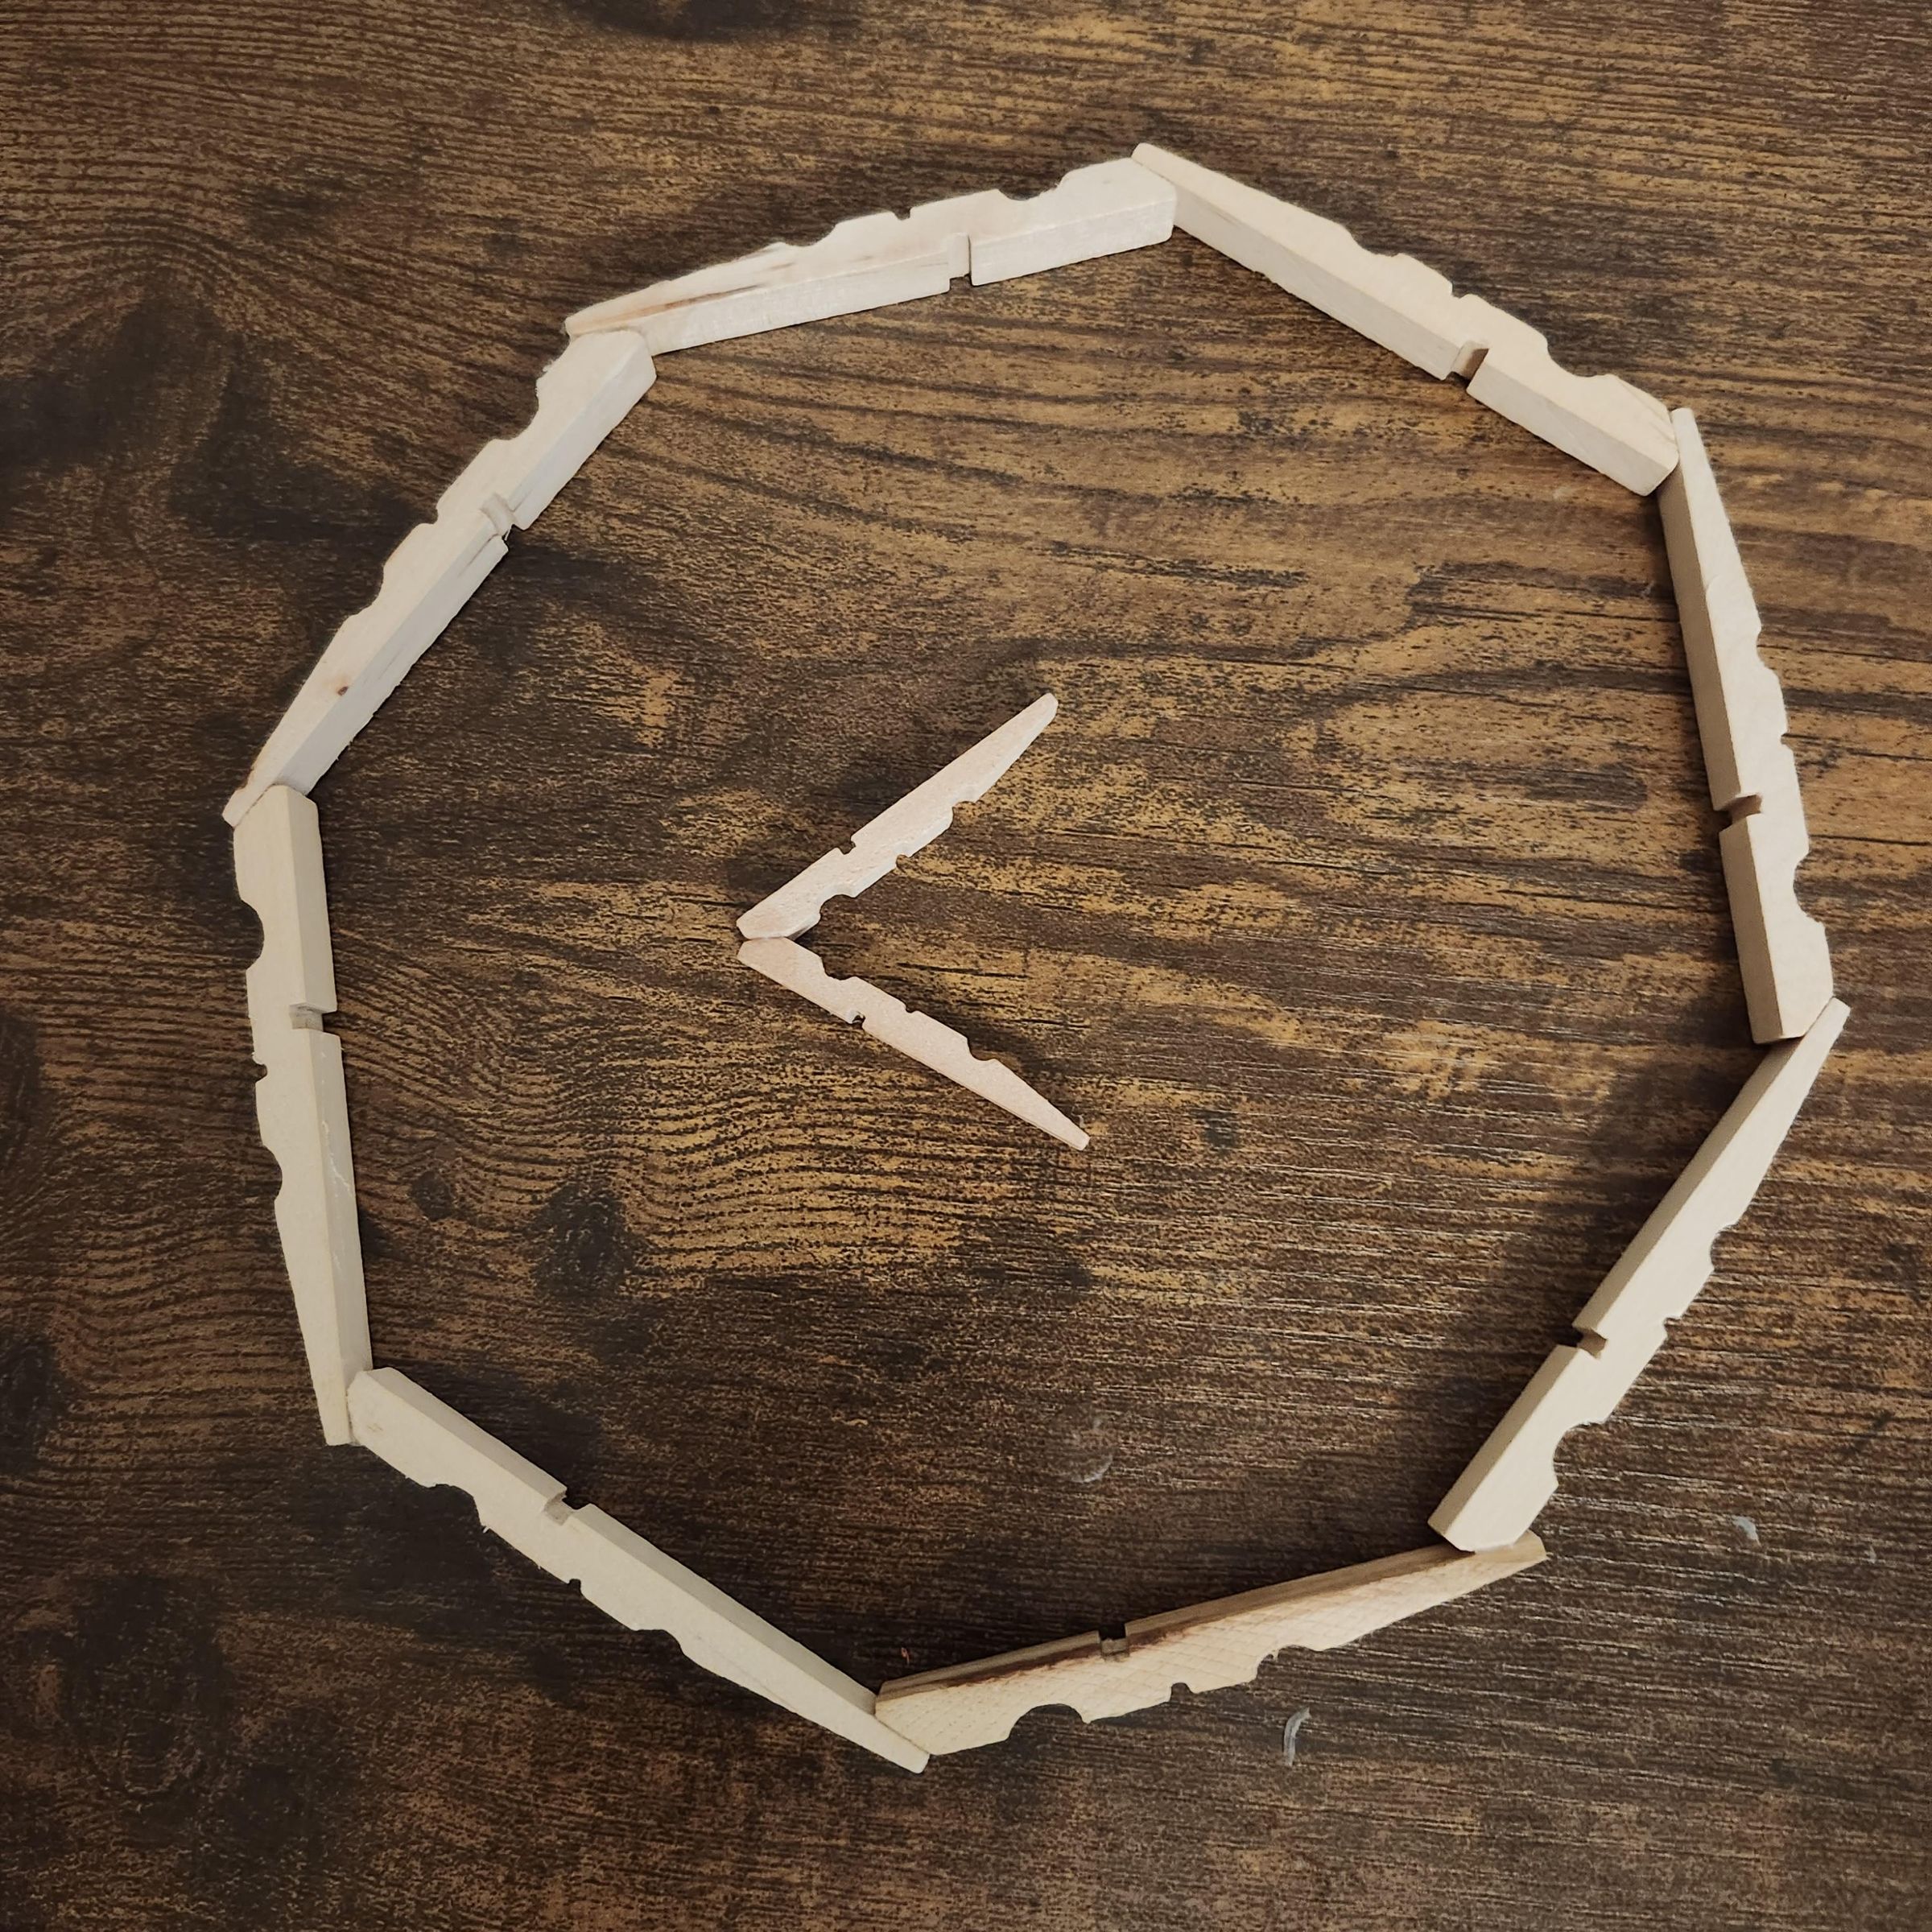
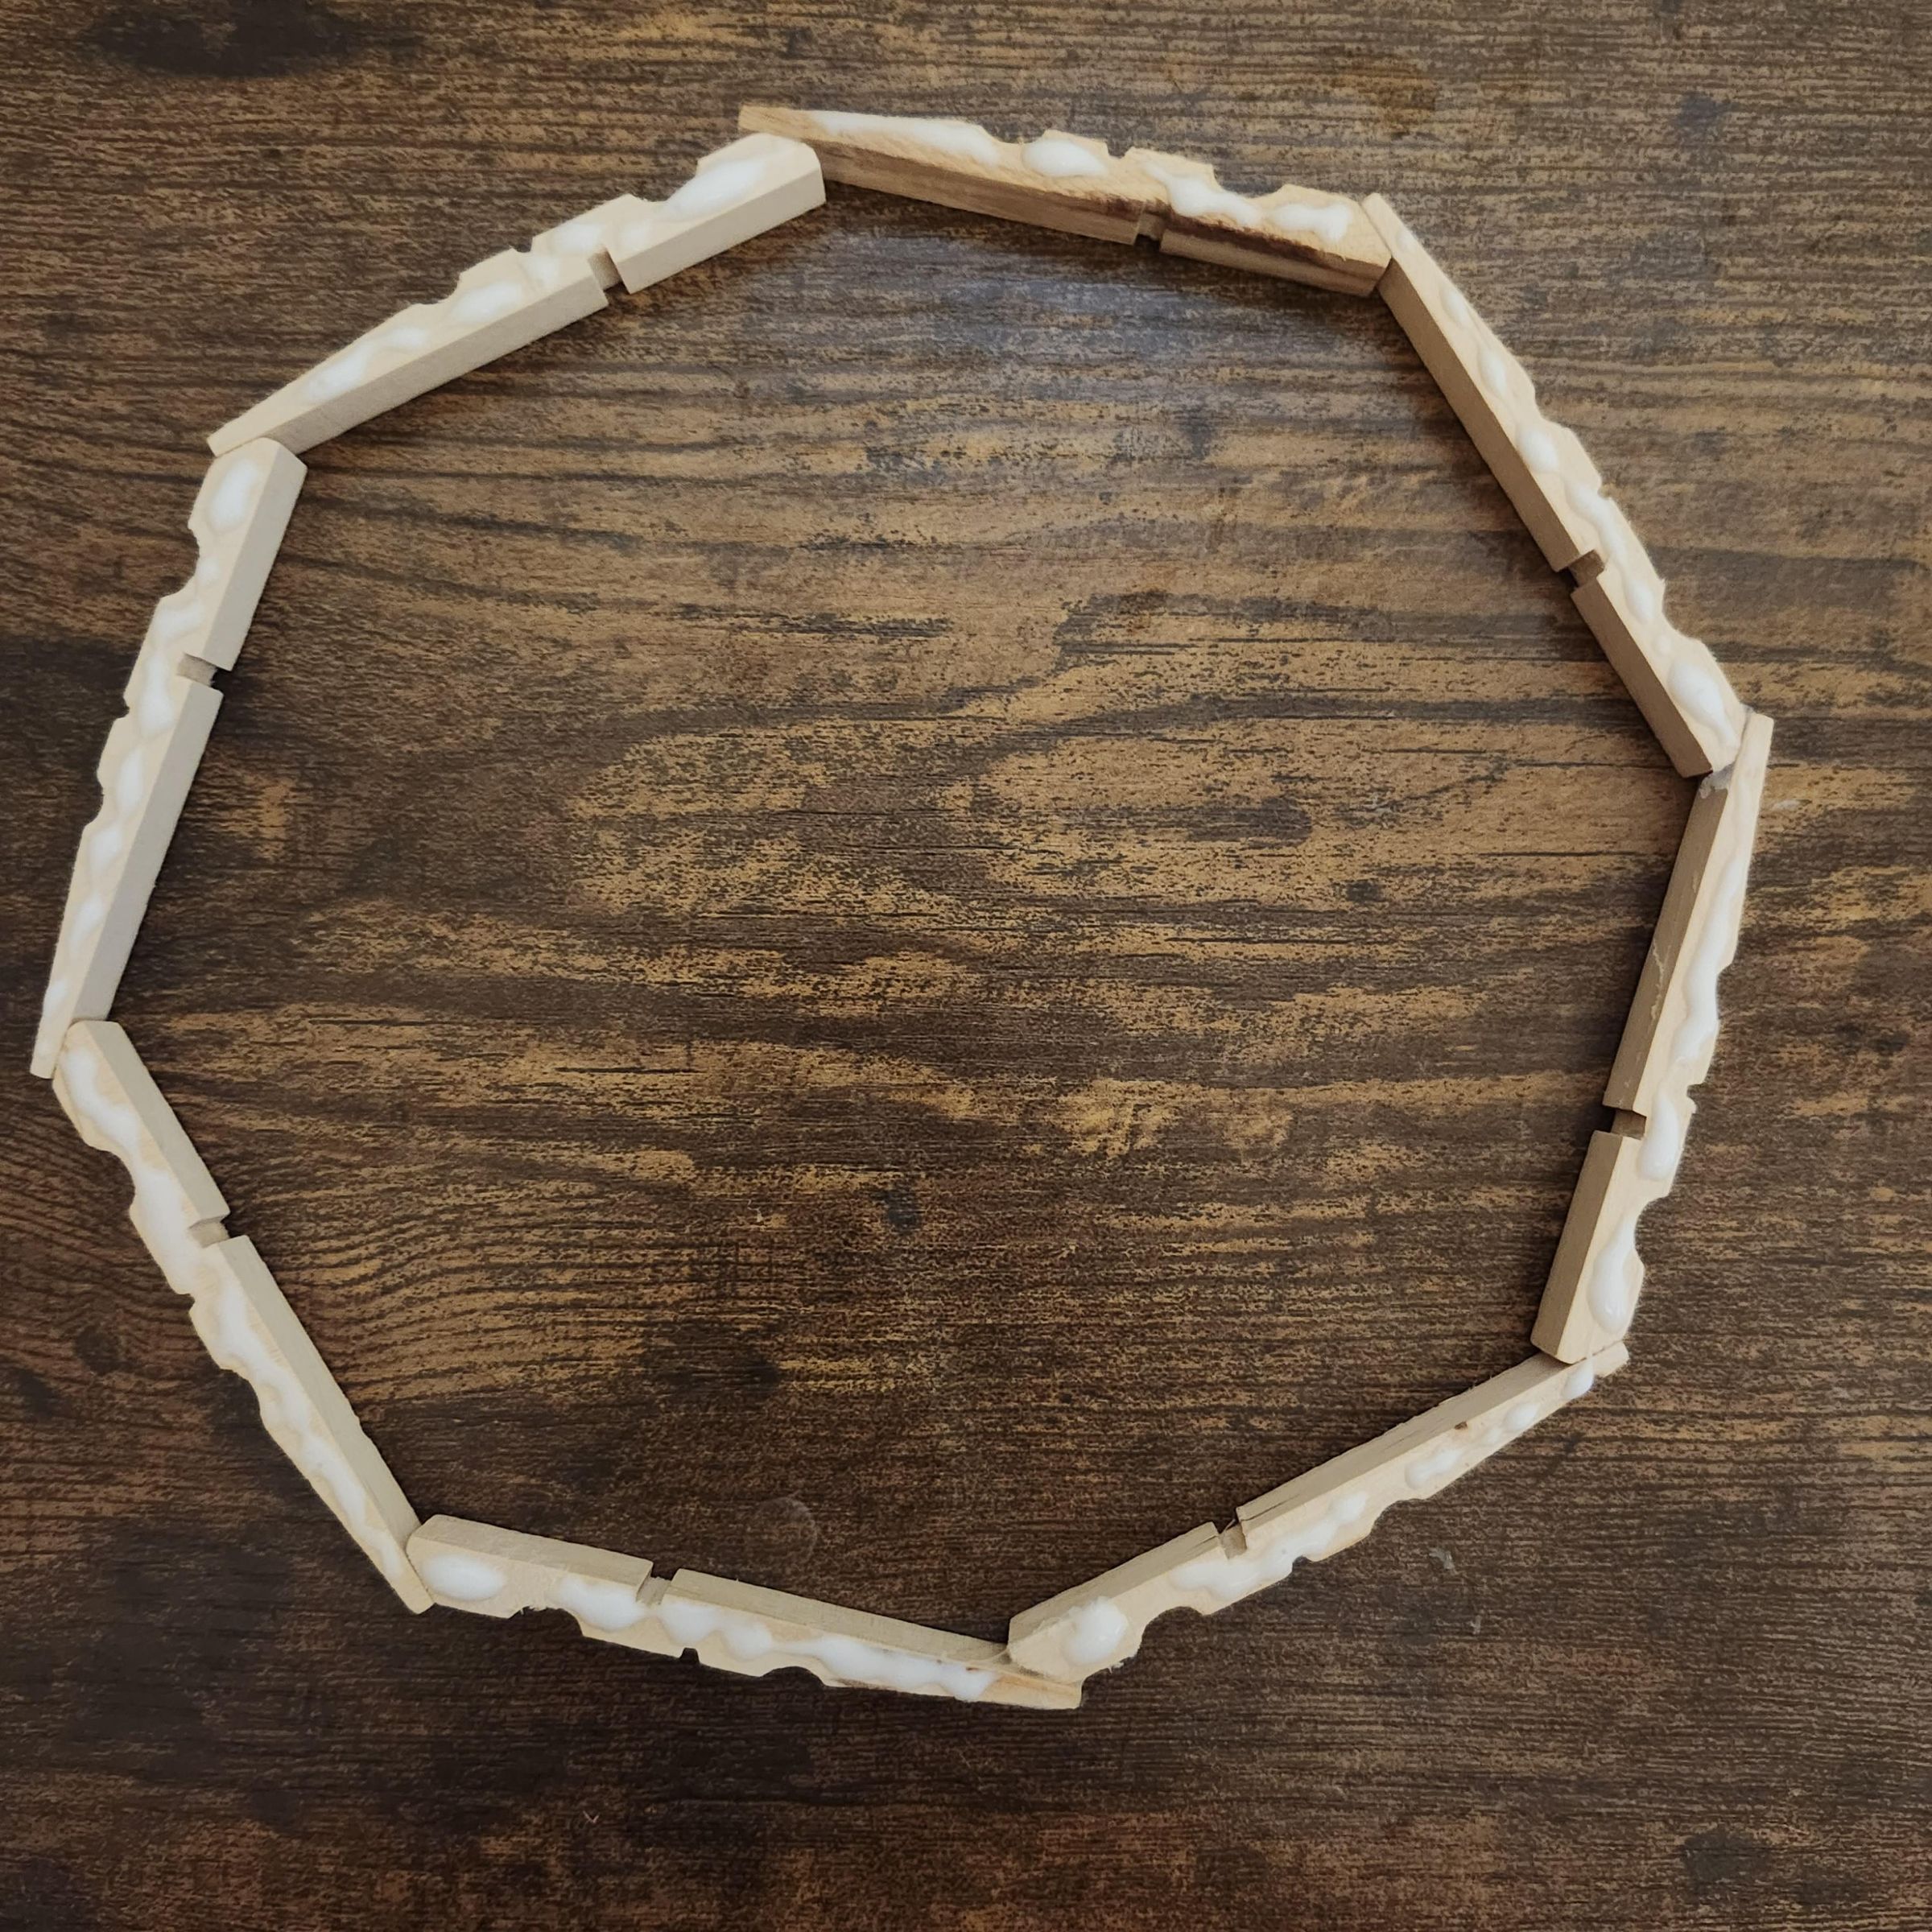
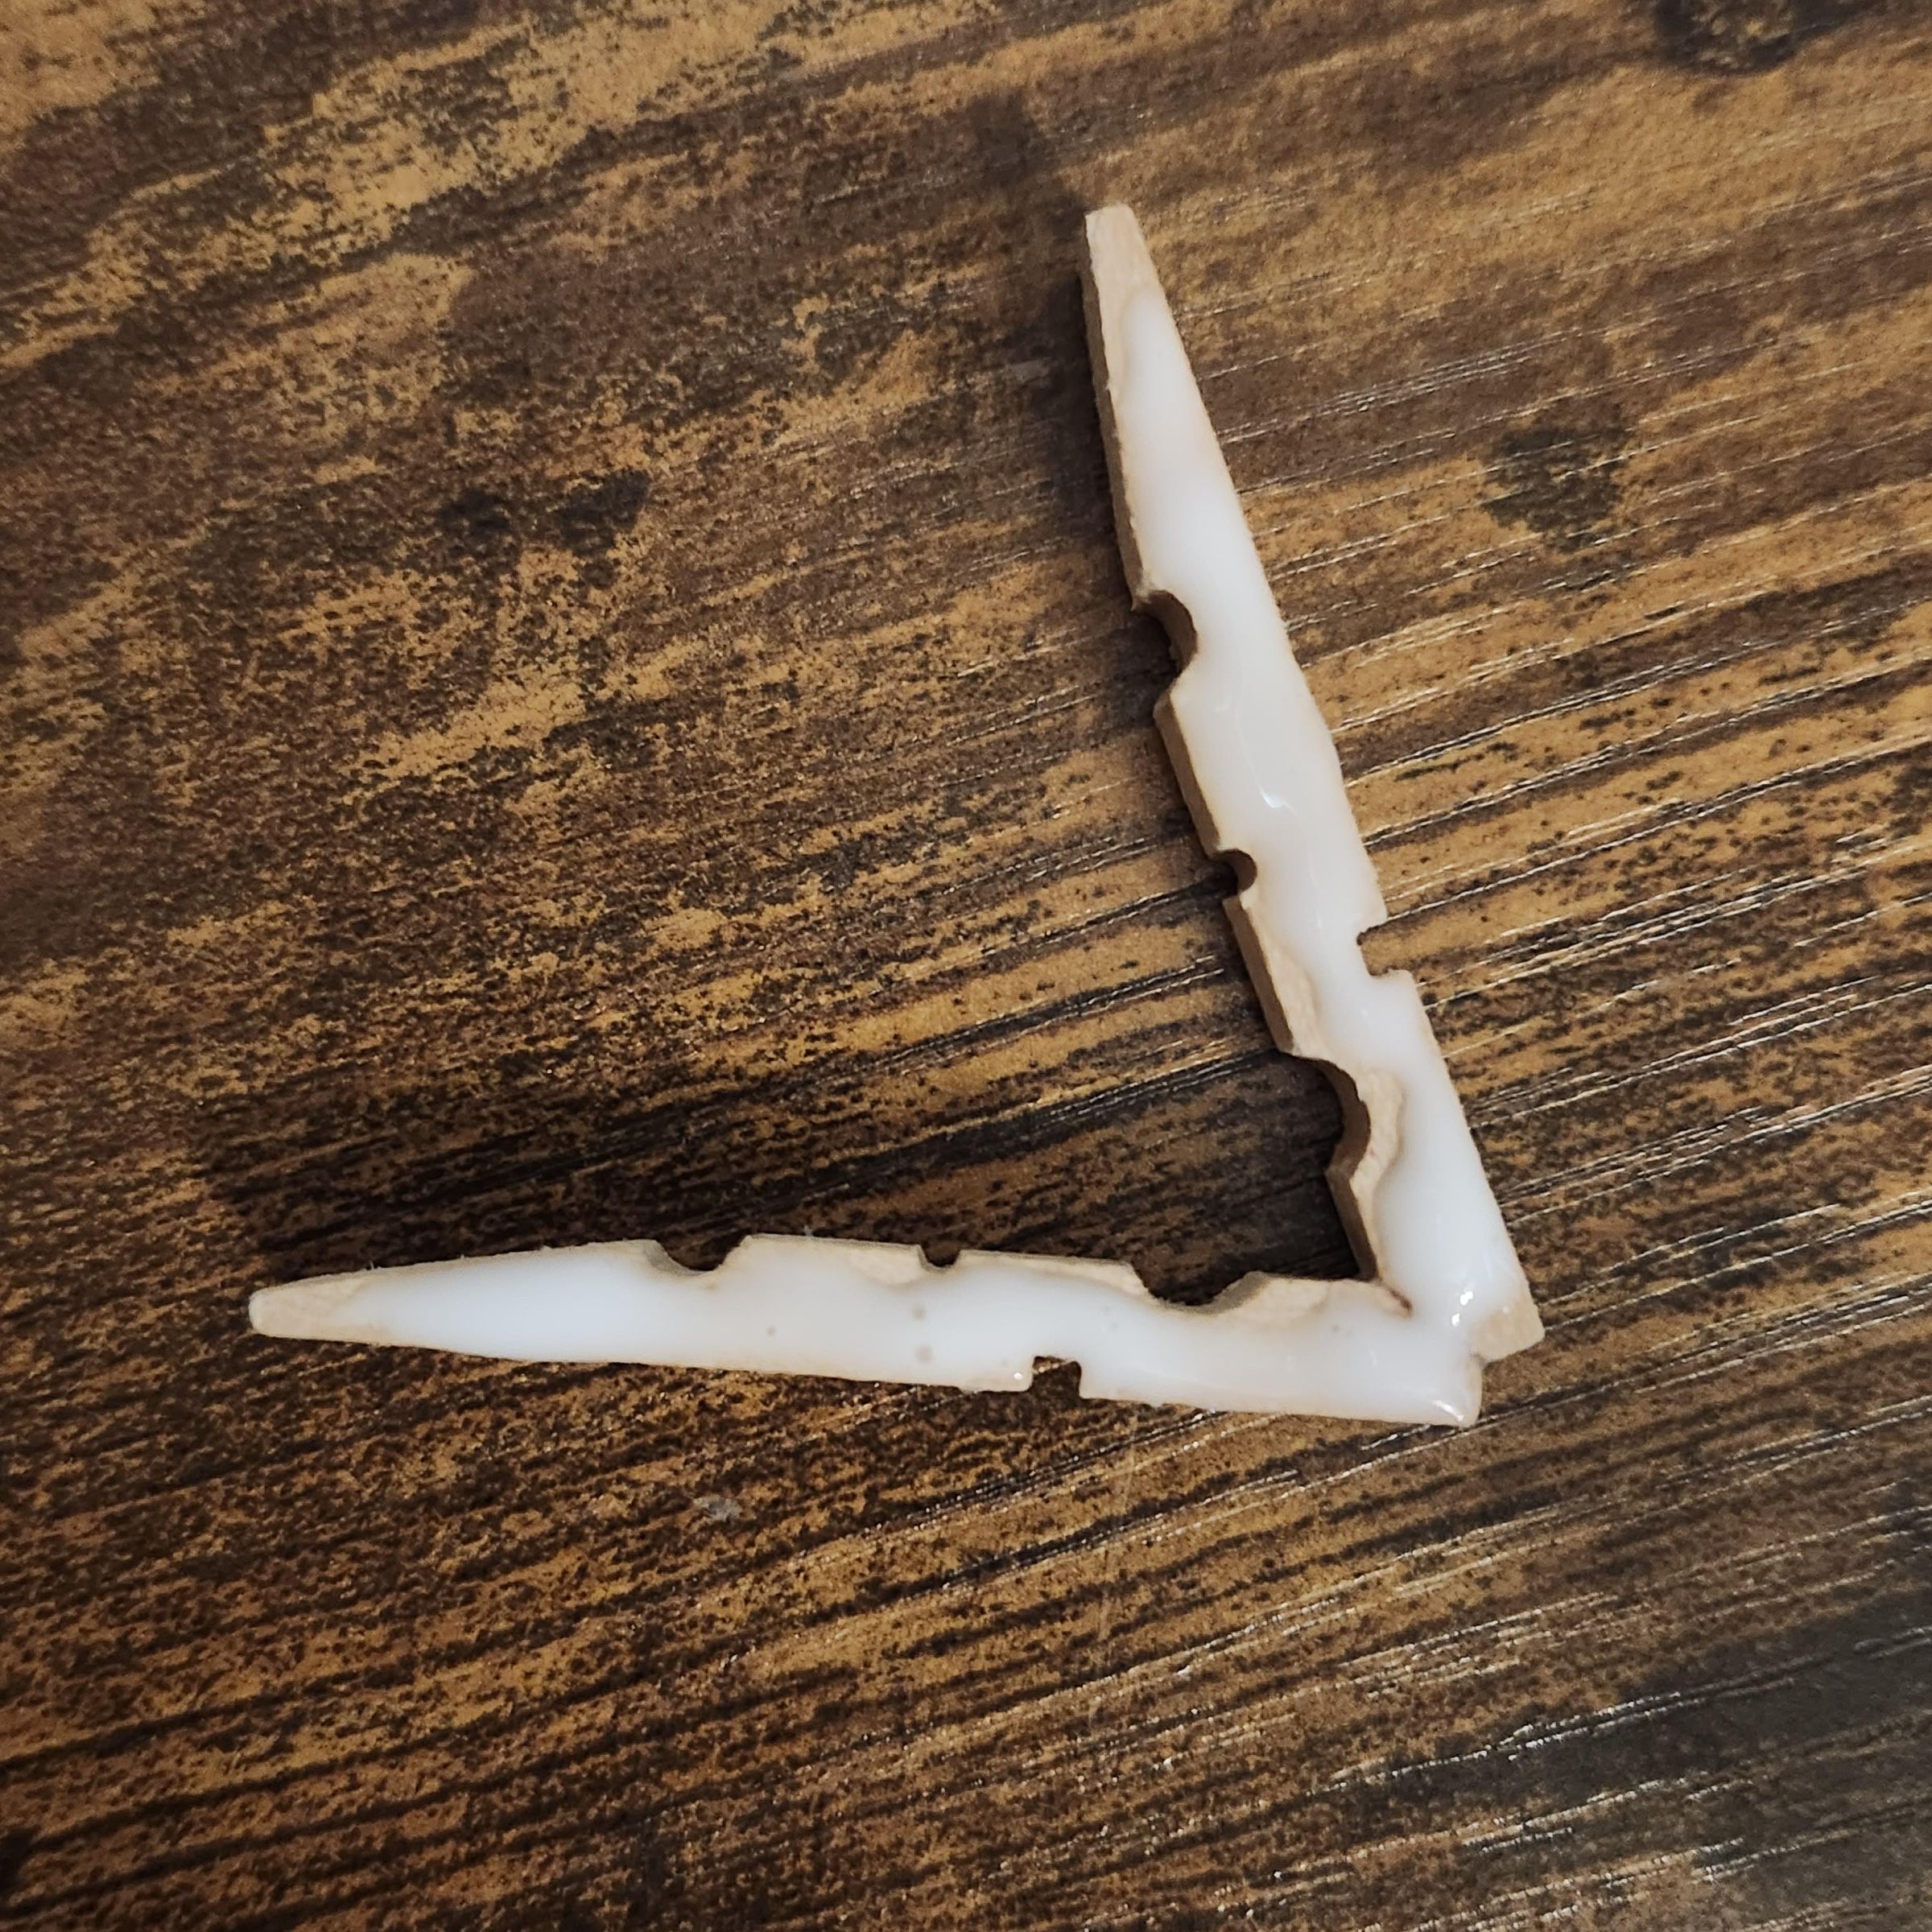
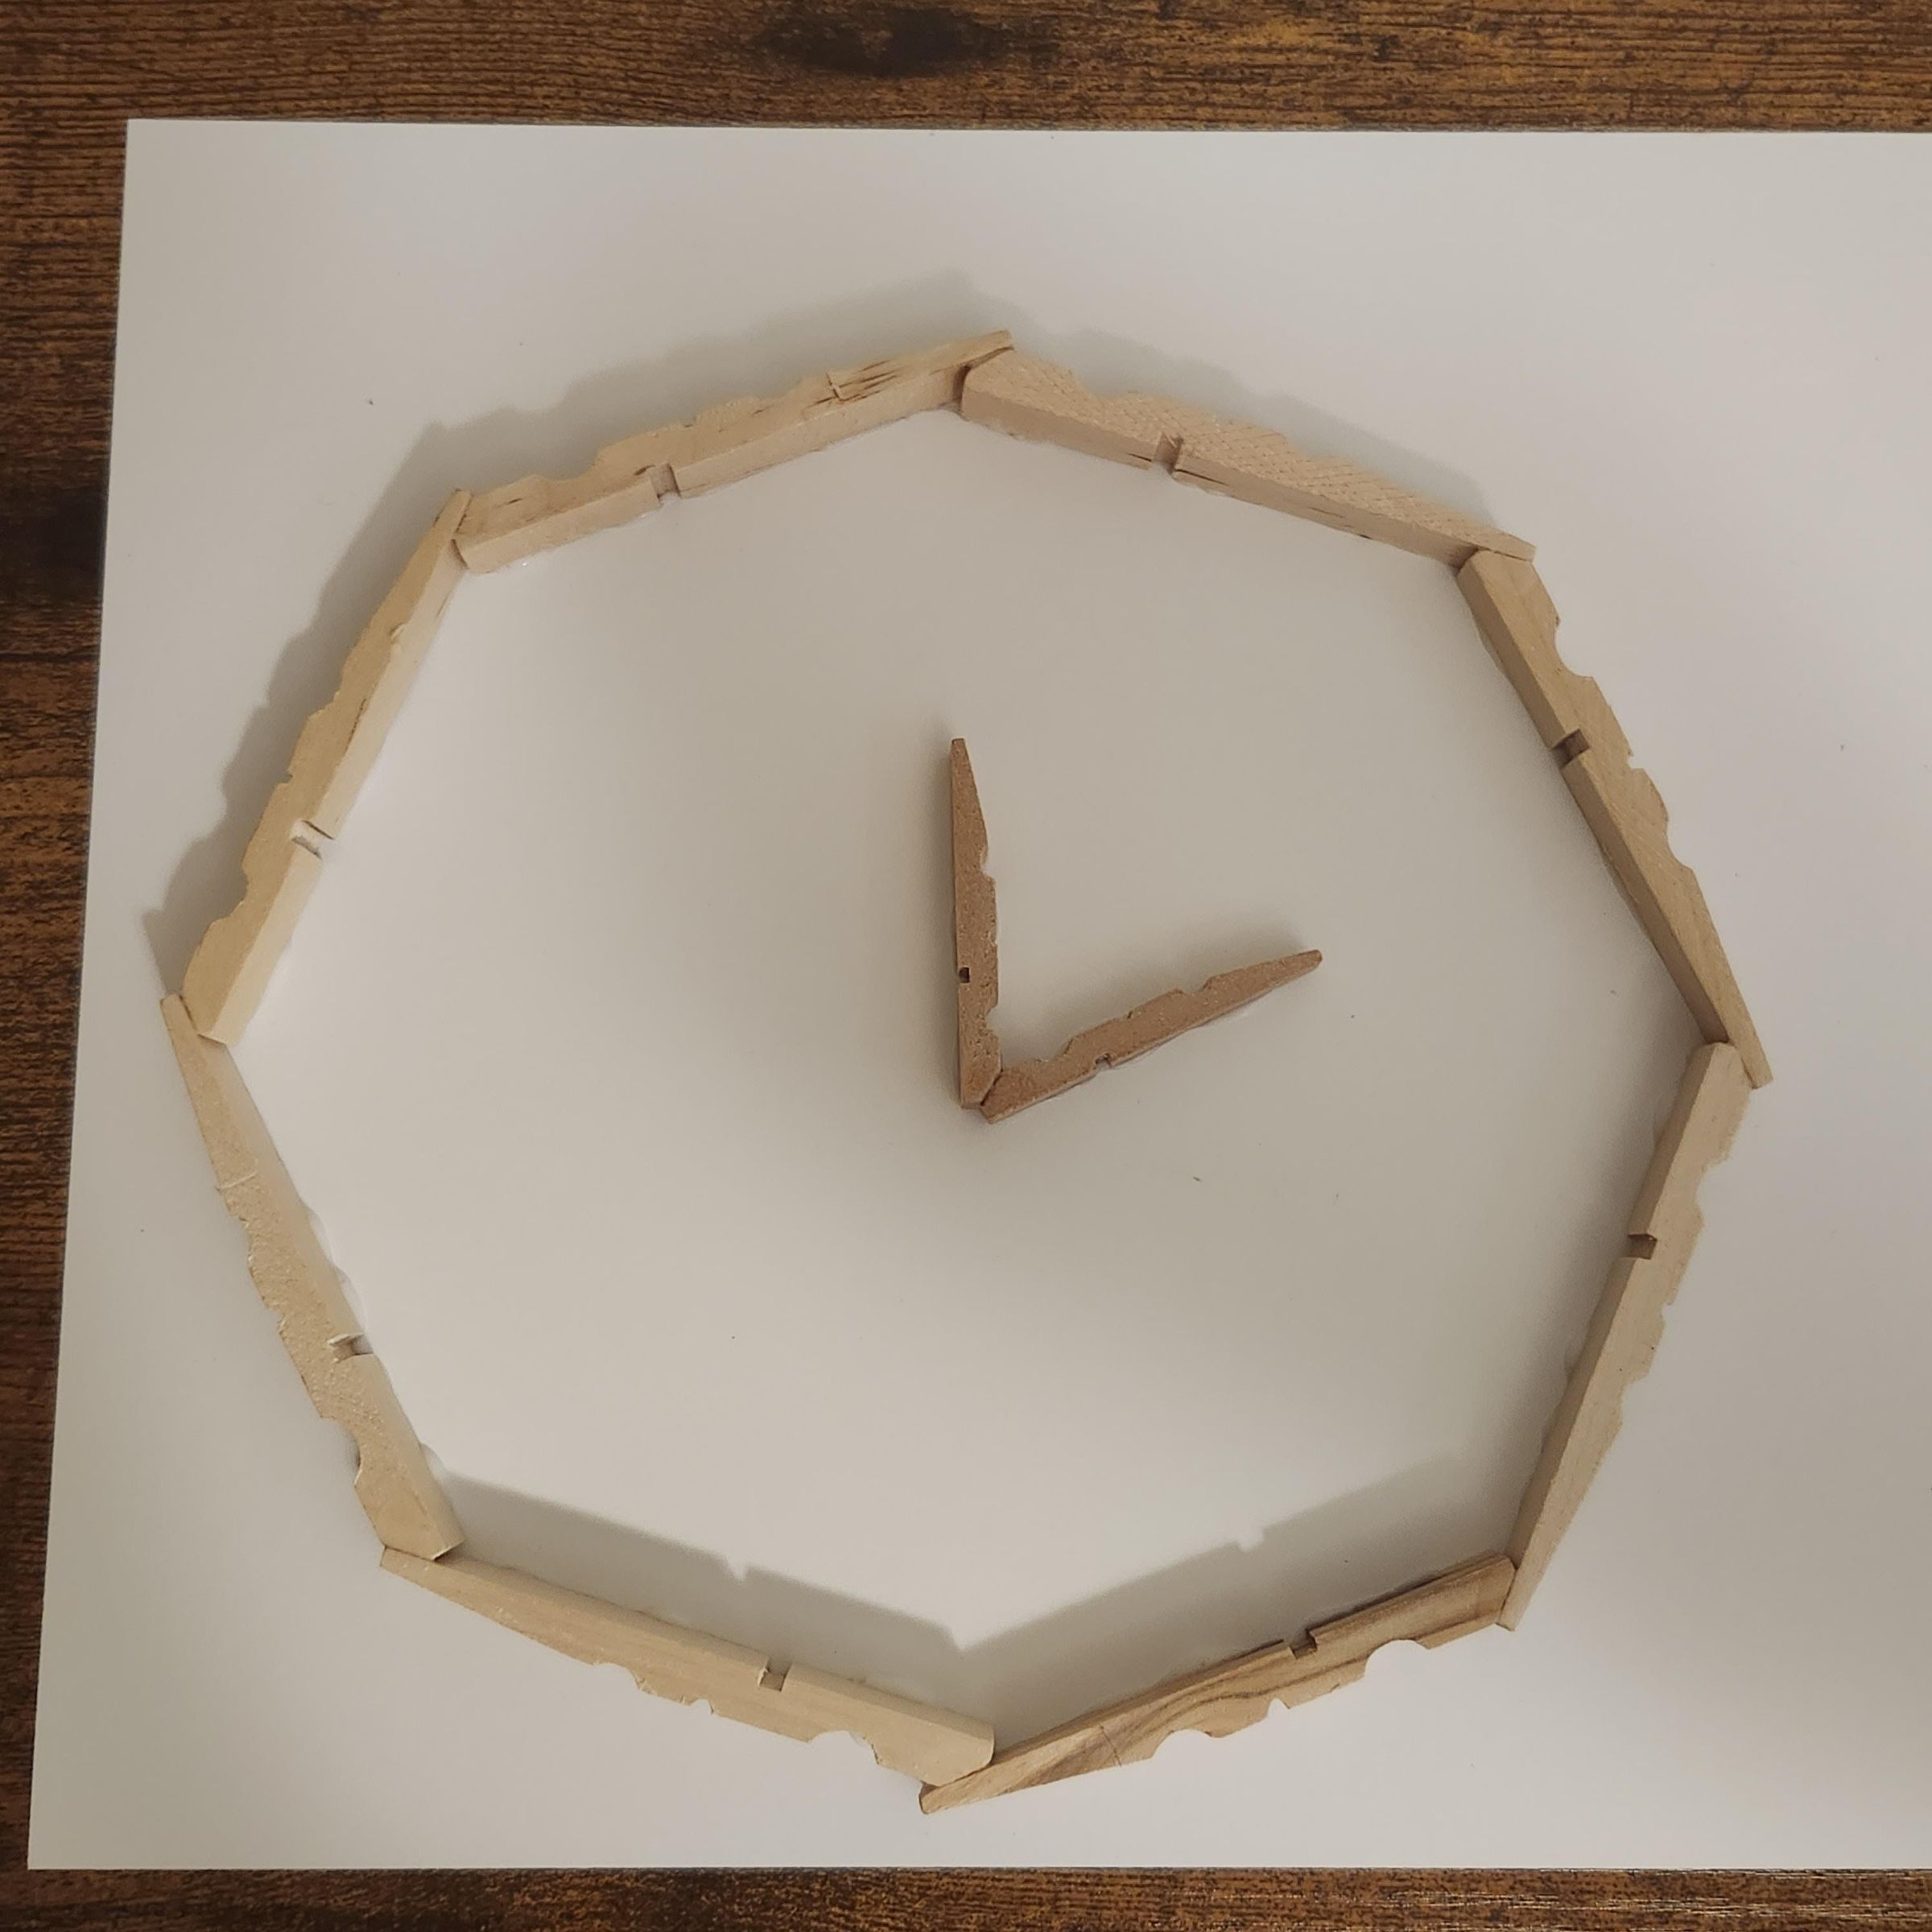
Once dry, connect the clips to the others, and let it dry. Then repeat once more. You should have a circle now that is hopefully stable enough- add more glue and let it dry if you think it might break easily.
Now we're ready to attach these to the cardstock! Glue the back of clock and the back of the clock hands. Turn it around and let it stick to the cardstock. Try to position the clock hands right in the center, with one hand pointing where two clips have been glued.
Let this dry for a few hours and we should be almost finished! Last step...
Numbers and Scissors
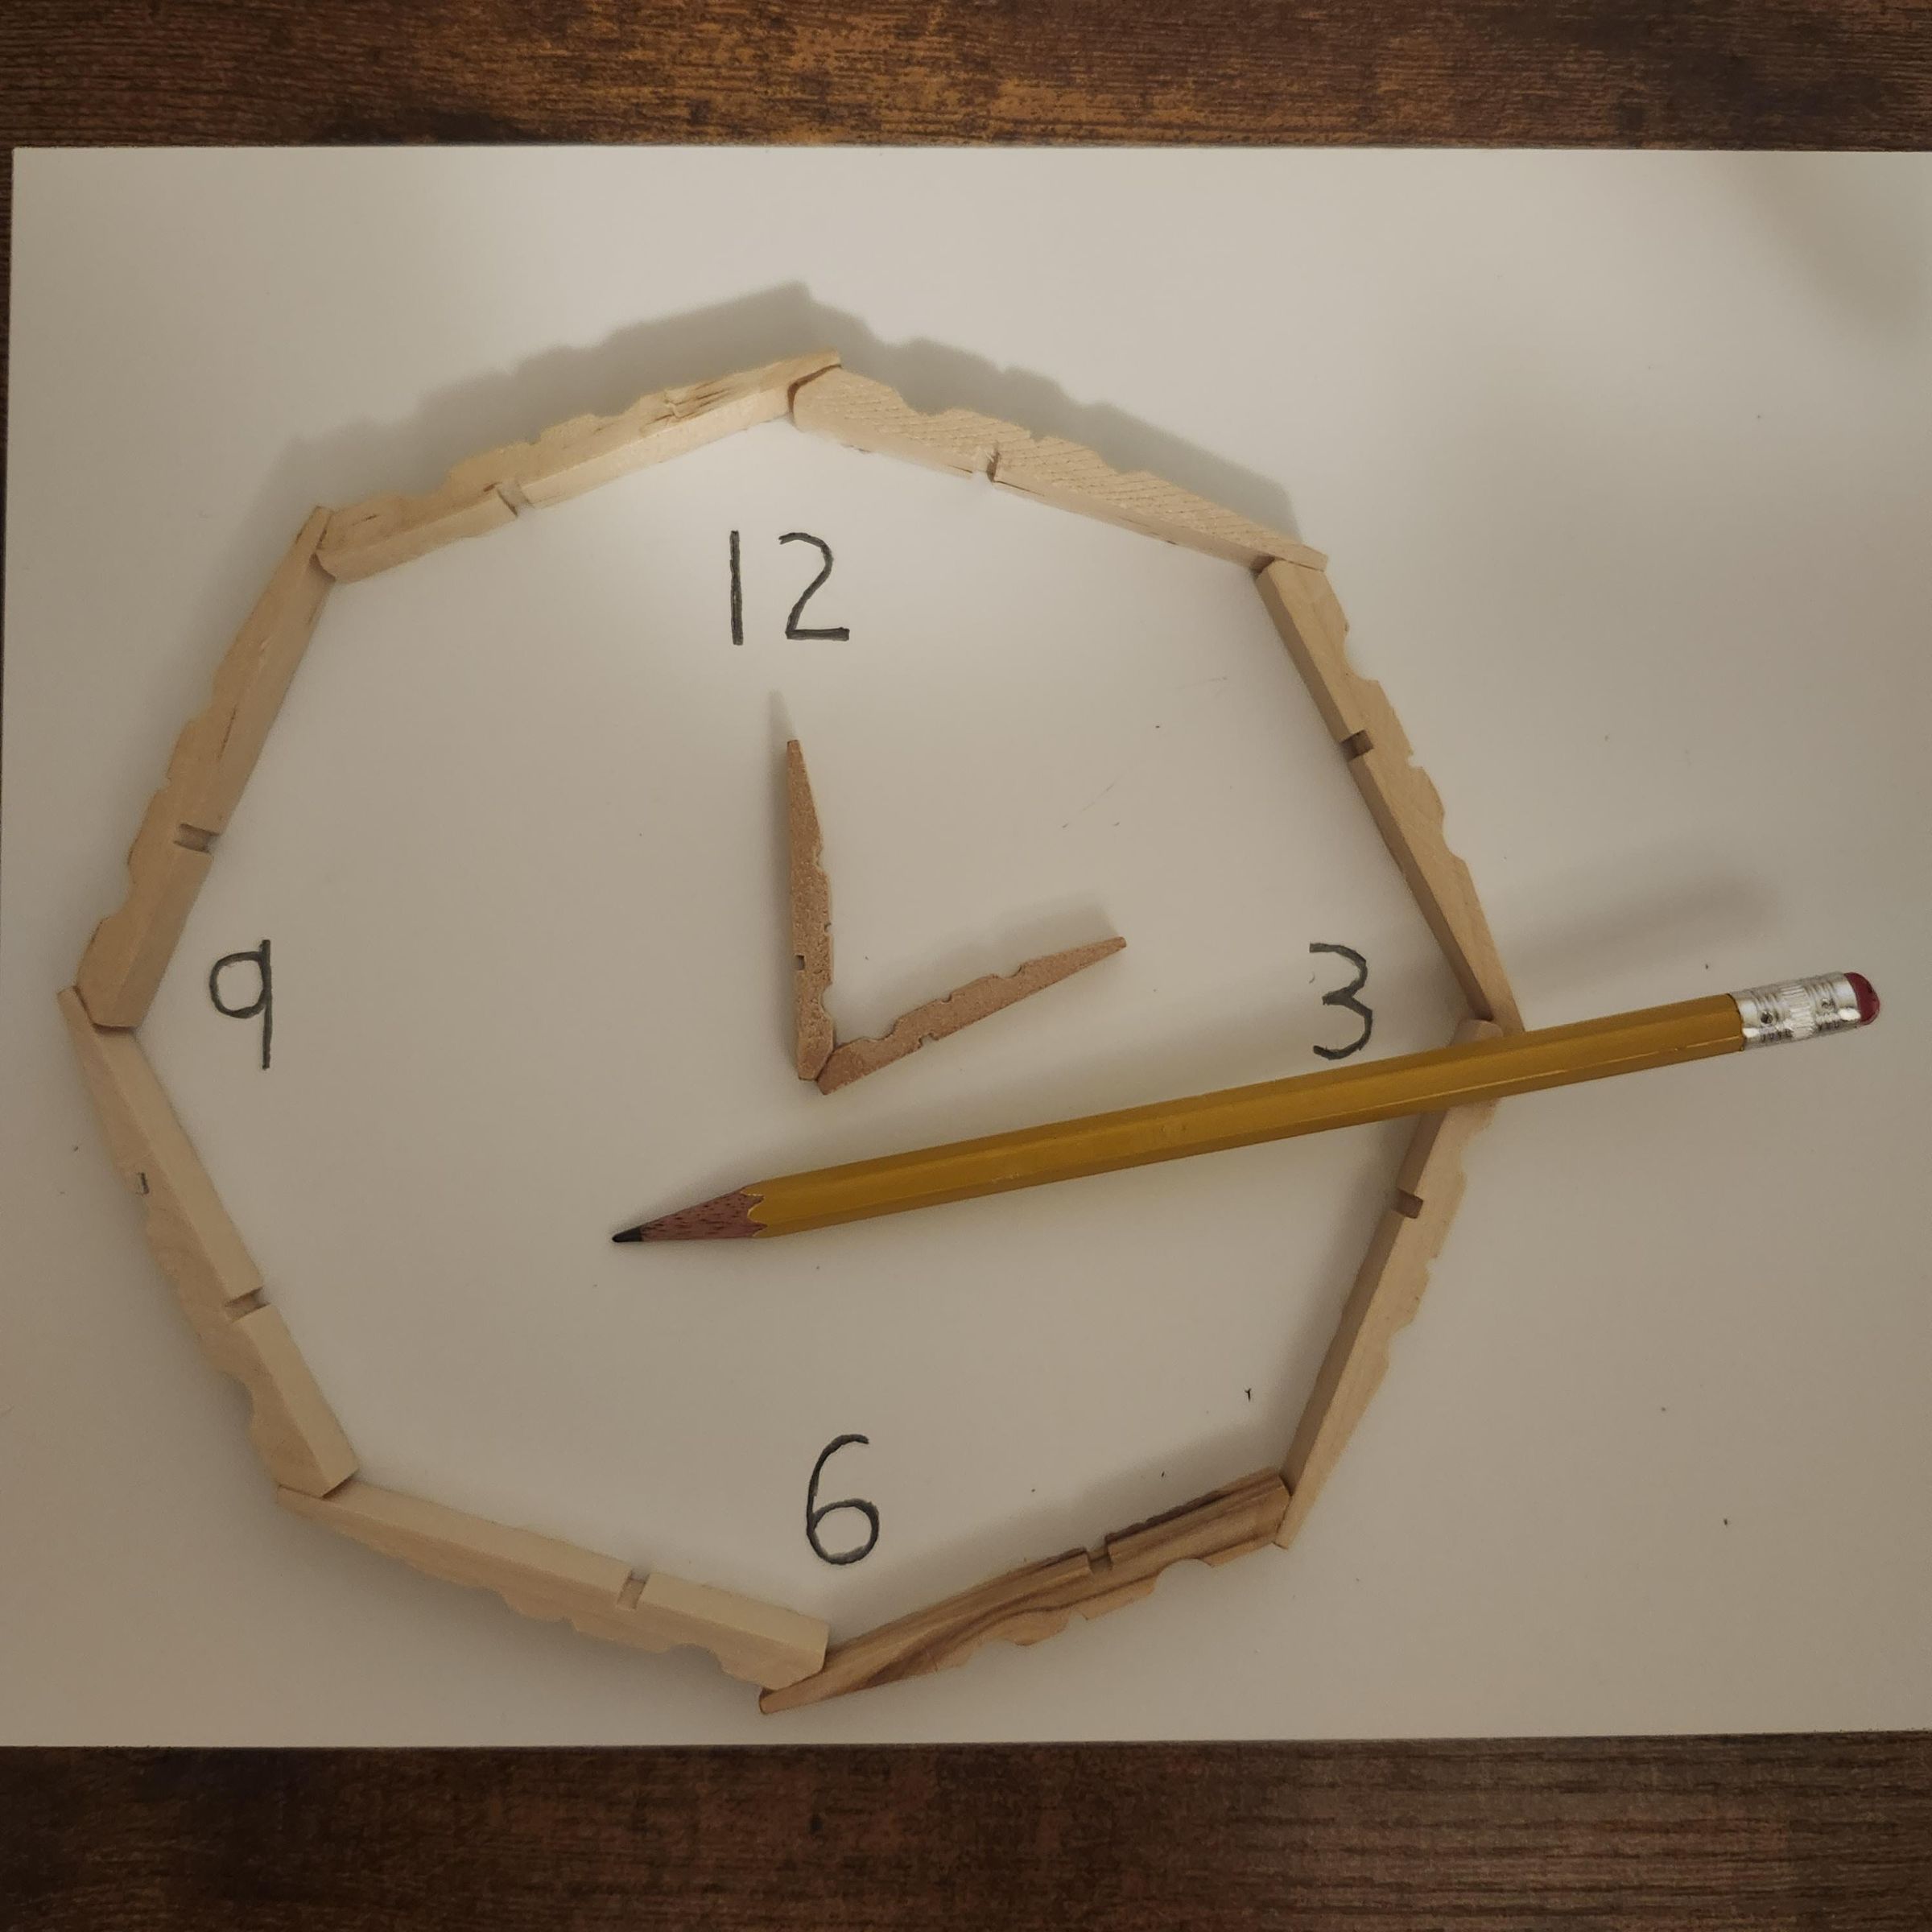
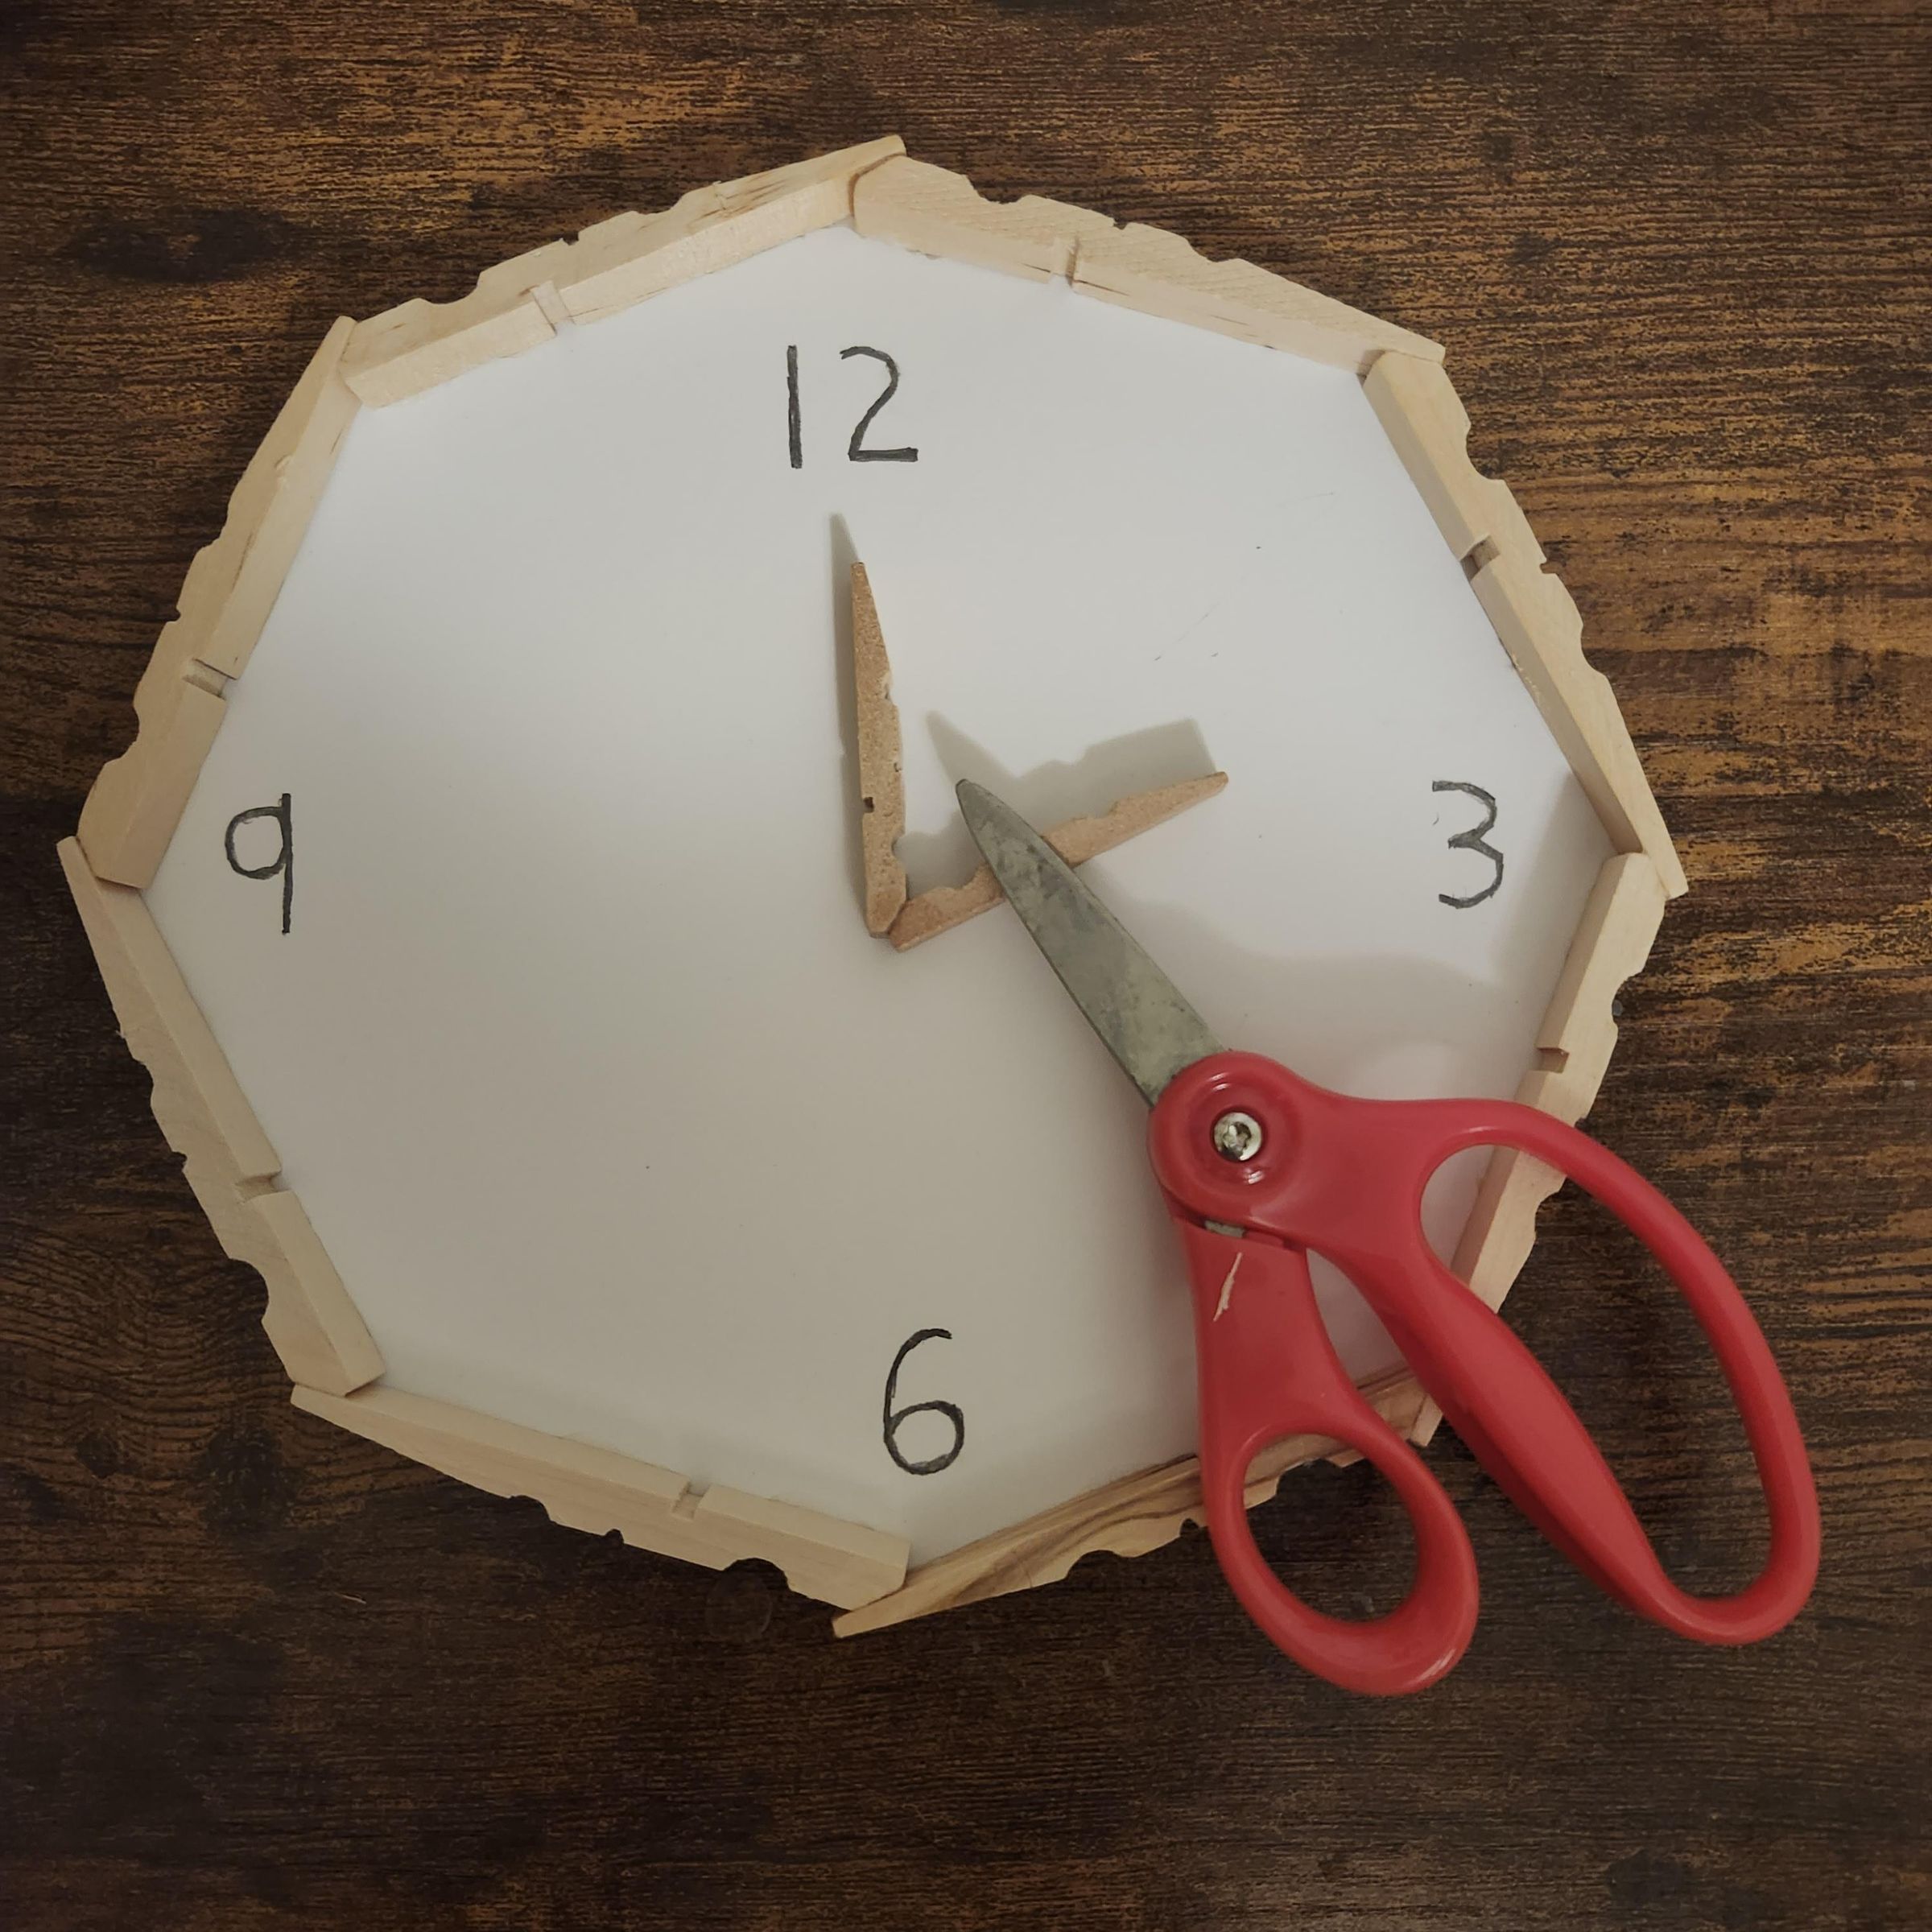
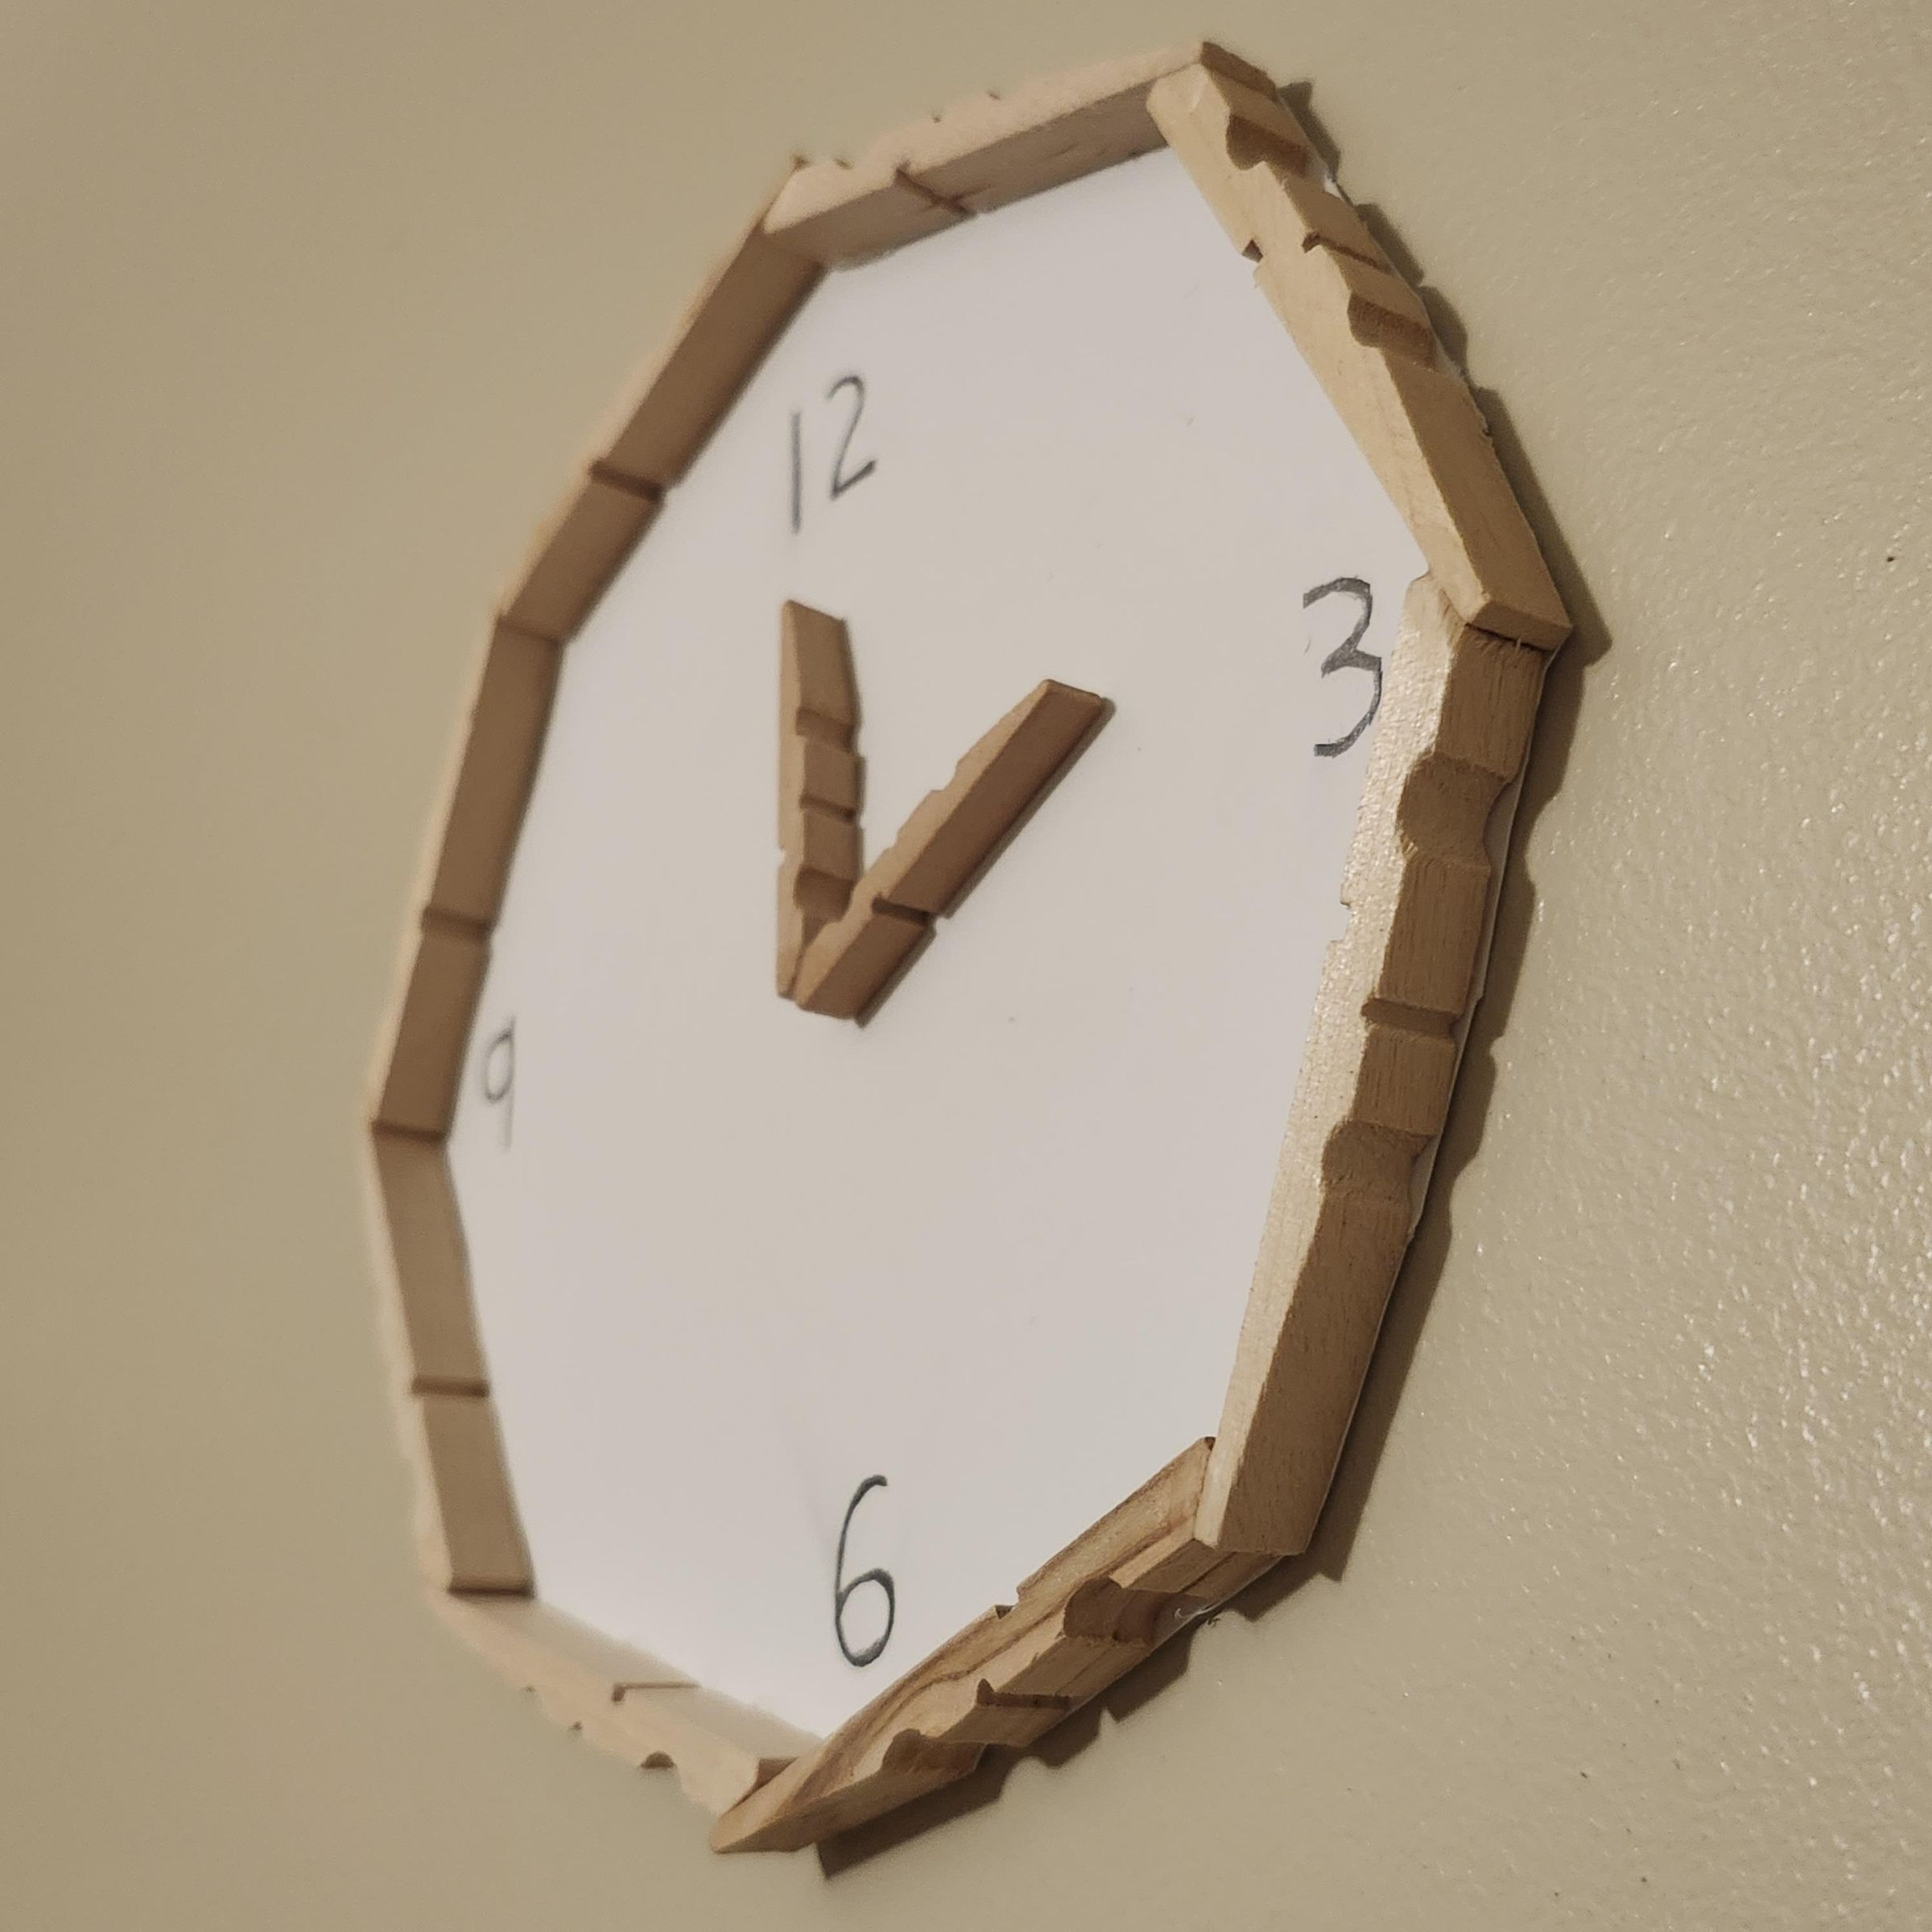
Using the pencil, (although a sharpie or marker would probably work better) write 12, 3, 6, and 9 evenly on the clock. Each number should be right below where two wooden clips were glued together.
Finally, cut out the clock along the edge of the wooden clips. And it's finished!
Thank you for reading! Check out my Instructables for more projects!