Dobro Guitar With Wooden Coverplate - Model Z11.1
134 Views, 0 Favorites, 0 Comments
Dobro Guitar With Wooden Coverplate - Model Z11.1

I recently repared the head of a brocken guitar wich had a metal reinforced neck, and I decided to transform this guitar into a dobro guitar. There are a lot of videos on the net showing this kind of transformation, but the guitar I did has two particularities:
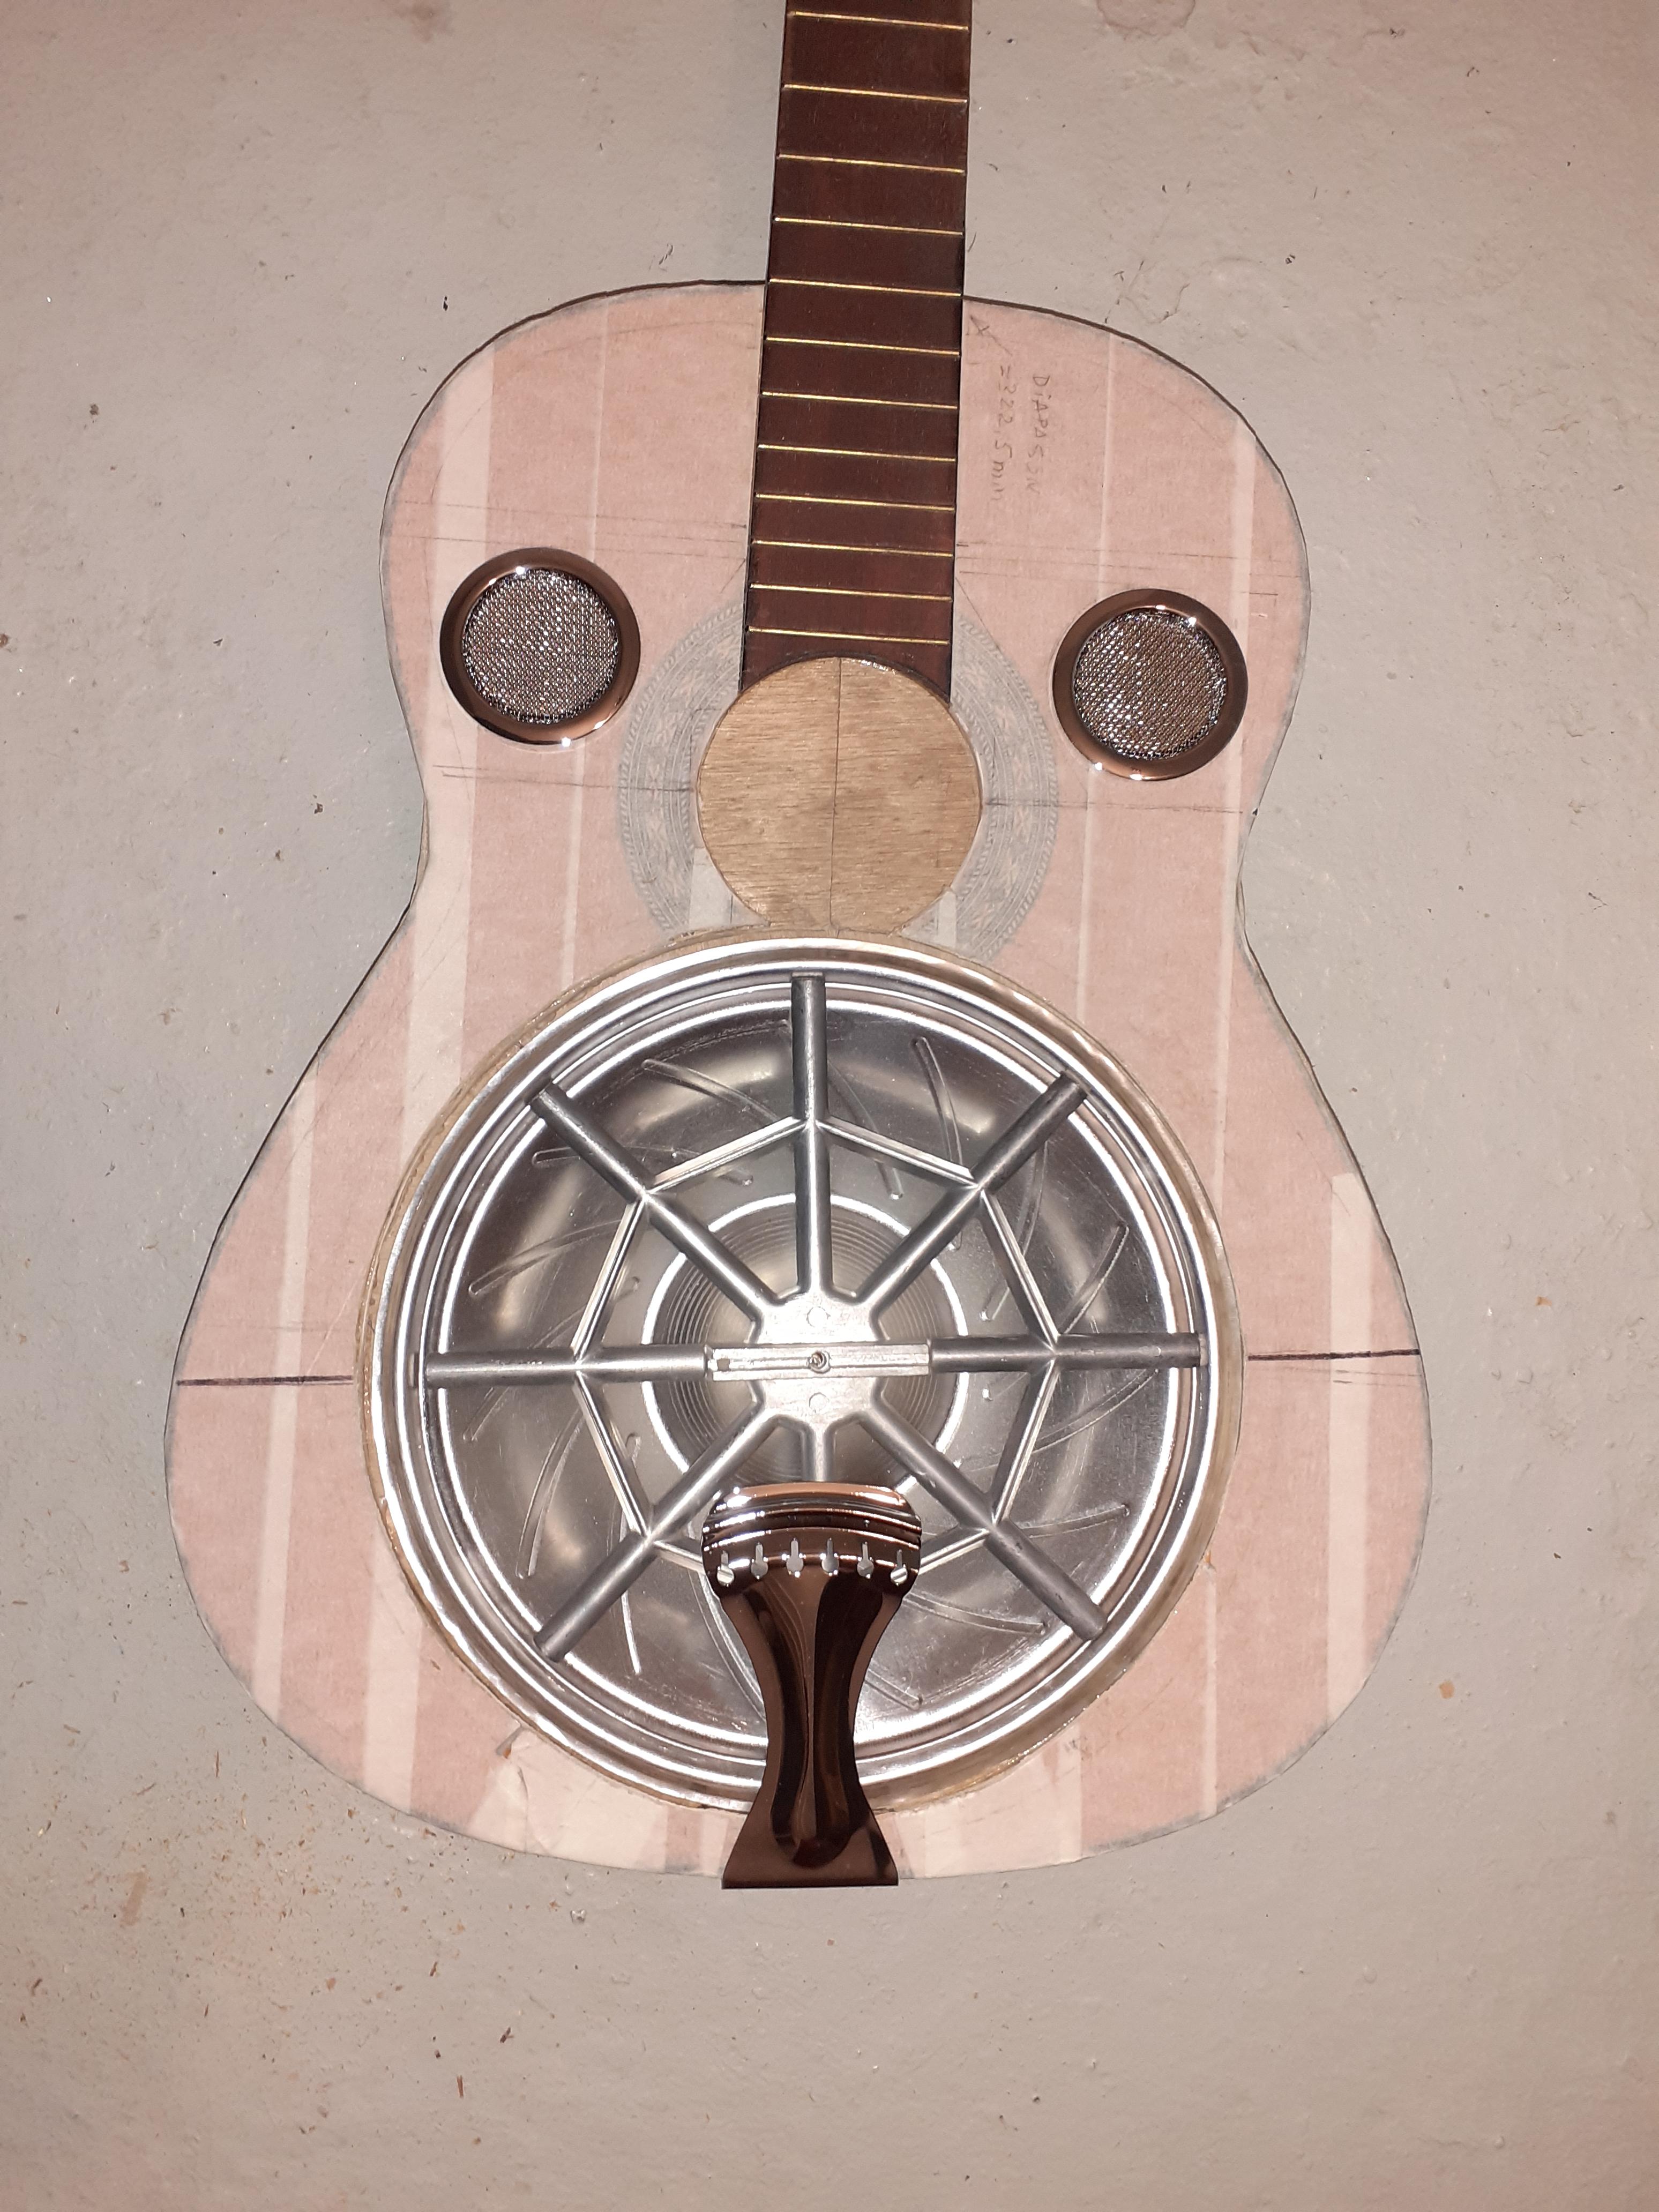
1- The metallic resonator ins not mounted into a pot, so that the resonnace of the soundbox is improved
2- The coverplate is made of wood (more original, lmore aesthetic, and less expensive.
Supplies
A guitar with a reinforced neck (reinforced neck is mandatory in order to stand the strength of the metal strings)
A dobro kit including 1 dobro cone, 1 dobro spider with bridge, 1 dobro tailpiece, 2 dobro sound inserts (Amazon,Aliexpress, etc....)
10mm plywood sheet
Vinyl and epoxy glue
saws, files, pliers, pliers, common wooden tools, drilling machine
Delivery time (approximately 2 working days without drying time)
Headstock Guitar Repair

Head repair. This step is easy to do. Since I had a good gluing surface, I didn't need to use any screws.
Draw the Hole of the Resonator

Here's where the serious stuff begins. You need to draw a hole larger than the resonator cone. What the videos on the internet don't say is that if you start with a classical guitar and draw a circle from the center of the bridge, well... with metal strings, ...it will sound out of tune! You need to add a 2-3mm compensation.
Indeed, with nylon strings (classical guitar), the distance between the 12th fret and the bridge nut is equal to the distance between the neck nut and the 12th fret. For a guitar with metal strings, you need to add a compensation of around 1mm for the high E string and 5mm for the low E string (=> average 2.5mm)
In my case, as the guitar was already mounted with metal strings, I did not need to add a compensation
Drilling the Resonator Hole


I made a handsaw with a saw blade clamped between two wooden planks
Cleaning the Bars Inside the Sound Box
Since you will need to glue a reinforcement under the acoustic table in the next step, you will then need to remove any reinforcement strips from the acoustic table that are in the way with a wood chisel.
Reinforcement Plate


It's absolutely necessary to reinforce the front plate (because it's now very fragile due to the huge hole we drilled, and if we don't reinforce it, the guitar will break from the string tension).
Place the guitar on a 10 mm thick sheet of plywood and copy the shape of the guitar.
Trace the main axis.
Trace the shape of the reinforcement to come 12 mm from the shape of the guitar you just traced so as not to bump into the side reinforcements later.
Trace the center of the cone (be careful with the offset), then the circle of the cone (266 mm in my case).
Cut out the general shape.
Cut the plywood sheet along its axis into two parts so that it can be inserted into the sound box.
Apply vinyl glue and clamp for a day.
This process is different from what you may see on the internet. With this assembly, we do not need any reinforcing pillars or a support bowl.
This allows the sound to circulate much more effectively within the sound box.
Creating the Cone Support


This is a plywood ring (in two parts to fit the sound box) glued under the reinforcement plate you cut in the previous step.
The resonator cone will sit on top of it.
The outer diameter corresponds to the resonator diameter + 30 mm.
The inner diameter corresponds to the resonator diameter minus 10 mm.
Cut the pieces necessary for the plywood pieces to fit into the sound box.
Apply vinyl glue, center it, and clamp it for a day.
Place the resonator cone in place. It should fit snugly on a flat surface.
Drilling and Mounting the Sound Inserts

Measure the diameter of the sound insert and drill (use a drill, wooden file) to the diameter of the insert -0.5mm. Then adjust with a file so that the insert fits. Normally, by doing this you do not need to glue.
Remove the protective strips
Mount the sound inserts
Hiding the Guitar Hole

Cut a circle (For me, Diameter =87mm) in the front plate you recovered when you cut the resonator hole.
Glue with vinylic glue and clamp during 1 hour
Making the Coverplate

I did not purchase a melal front cover, because I wanted a custom guitar. So I made the cover from a sheet of 5 mm thick plywood.
The diameter of the cover is + 20 mm greater than the cone of the resonator, and was made according to the joined drawing
Then I painted it black, let it dry and sanded, sanded, sanded, sanded, sanded, sanded, sanded, sanded, sanded until I saw the grain of the wood. Then I oiled it and I screwed it with brass screws (for aestetism).
Tailpiece
Mount the coverplate and then the tailpiece, and screw the tail piece on the back of the guitar.
See picture next step.
Final Assembly and Tuning

.
Put the cone in the hole, and screw the spider (lightly) with the screw in the center.
Usually, the strings used for dobro guitar are very hard. (16-56)
Since I wasn't sure if my guitar could handle it, I used normal tension strings (10-48)
I tuned the guitar in E, A, D, G, B, E. but you can tune it in open G (D , G, D, G, B, D ) , if you want!
File the nut so that you have 2mm between the top of the 12th fret and the bottom of the string
When this tuning is complete, loosen the strings, replace and screw the front cover and tune the strings again.
Screw the cover plate definitively . You are done!
Testing
Picking example: Improvisation_autour_de_Natalia (Georges Moustaki)
Sorry, I'm not a professional musician, and I don't know how to play with a bottleneck (I have to learn) . But I can garanty it works and it is possible to do wonderfull slides !!!!!
Conclusion
Really, I'm surprised!...
The sound is clear, precise and loud.
I hope you achieve the same success!
Greetings from France !