Doll House Smart TV & Multimedia System
by oliverb in Circuits > Electronics
1005 Views, 8 Favorites, 0 Comments
Doll House Smart TV & Multimedia System


This Instructable shows how to fit a working Smart TV, sound to light and wood burning stove into a 1/12th scale Doll House.
Designed to fit into my Instructables 1960s Doll House, details here - 1960s Doll House and Doll House Lighting.
Full details also on my site here https://www.brettoliver.org.uk/1960s_Dolls_House/1960s_Dolls_House.htm
The Doll House is scaled version of my actual house and although built in the 1960s the inside is contemporary.
The Doll House was build for my Granddaughter's 3rd birthday and I thought it would be nice for her to play in a replica of a house she spent so much time in growing up.
There are three parts to this Instructable.
Smart TV
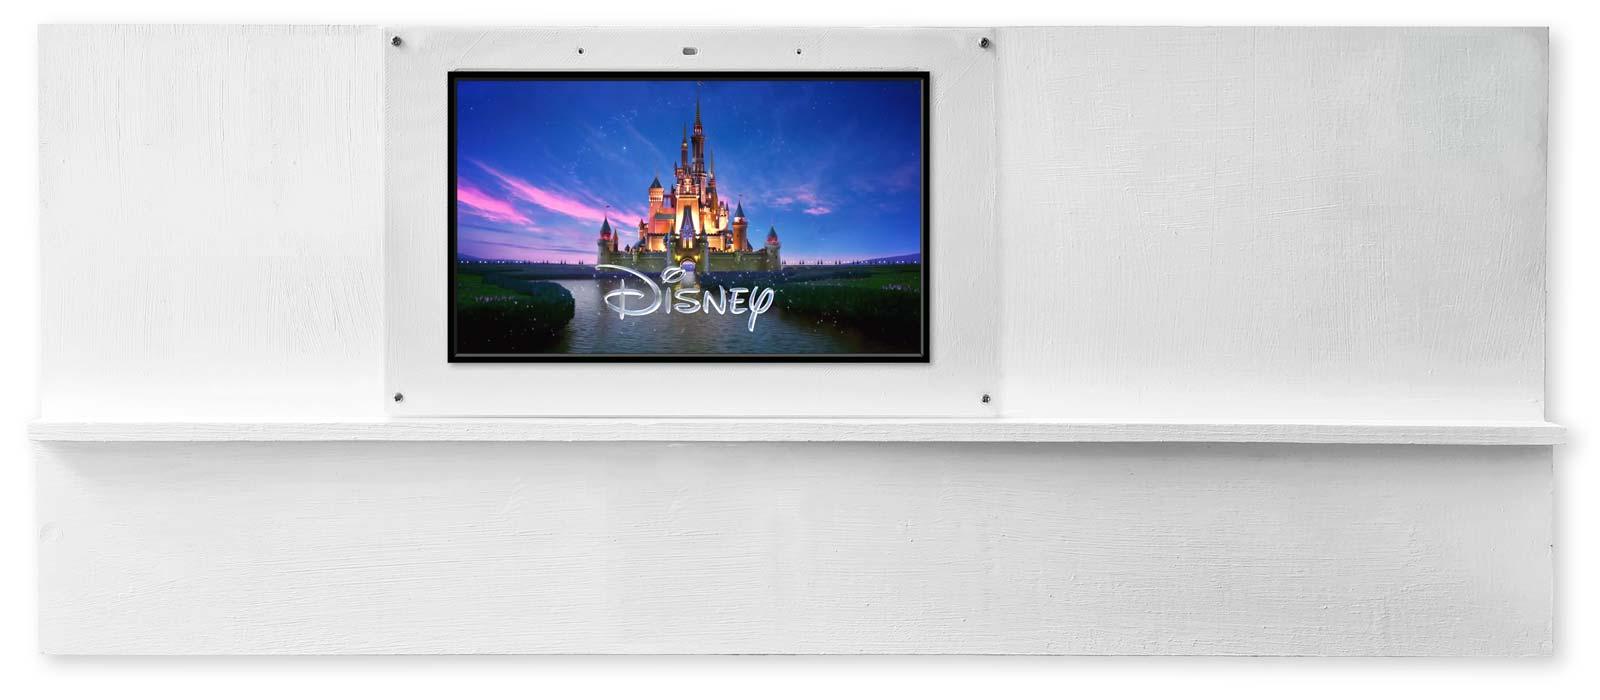
This is a fully functioning Smart TV scaled up it would be around 60". Based on a Google Nest Hub the TV is voice controlled and can play TV channels off the internet, videos, content cast from your mobile phone, play music or show pictures.
Note the Google Nest Hub uses it's own power supply and is seperate from the power to the house.
Sound to Light
The sound to light uses a £4.99 sound to light LED module from Amazon. It has standard flashing modes or will flash in time to music from the TV/Google Nest Hub.
Wood Burning Stove
In my house I have a wood burning stove below my TV. I have designed a 1/12th scaled version to fit in the Doll House and fitted a fire effect LED to light it up.
Supplies


Pic 1. Google Nest Hub 2nd Generation 1 off
Pic 2. Sound to Light Module 1 off
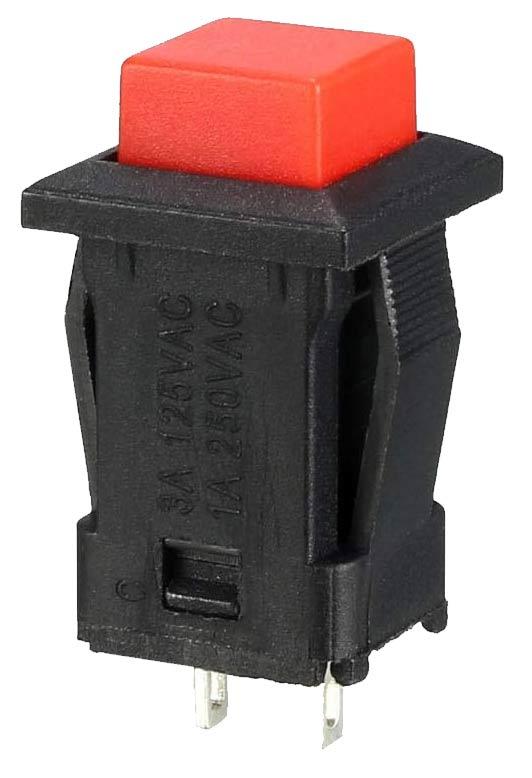
Pic 3. 12mm Mounting Hole Red Square Latching Push Switch https://amzn.eu/d/hYh0g3B 2 off
Pic 4. Pic 3. 12mm Mounting Hole Red Square Non Latching Push Switch https://amzn.eu/d/aX0Imk1 1 off
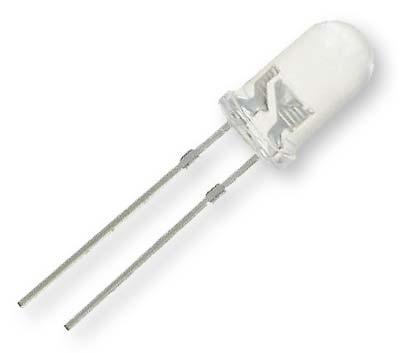
Pic 5. Flickering LED 1 off
Small peice of 1mm Perspex for wood burning stove glass
3D printer filament white & Black
12mm hardwood plywood off cuts
6mm hardwood plywood off cuts
Stainless steel rod for the woodburning stove handle https://amzn.eu/d/01k54m5
Constructing the Supporting Wall
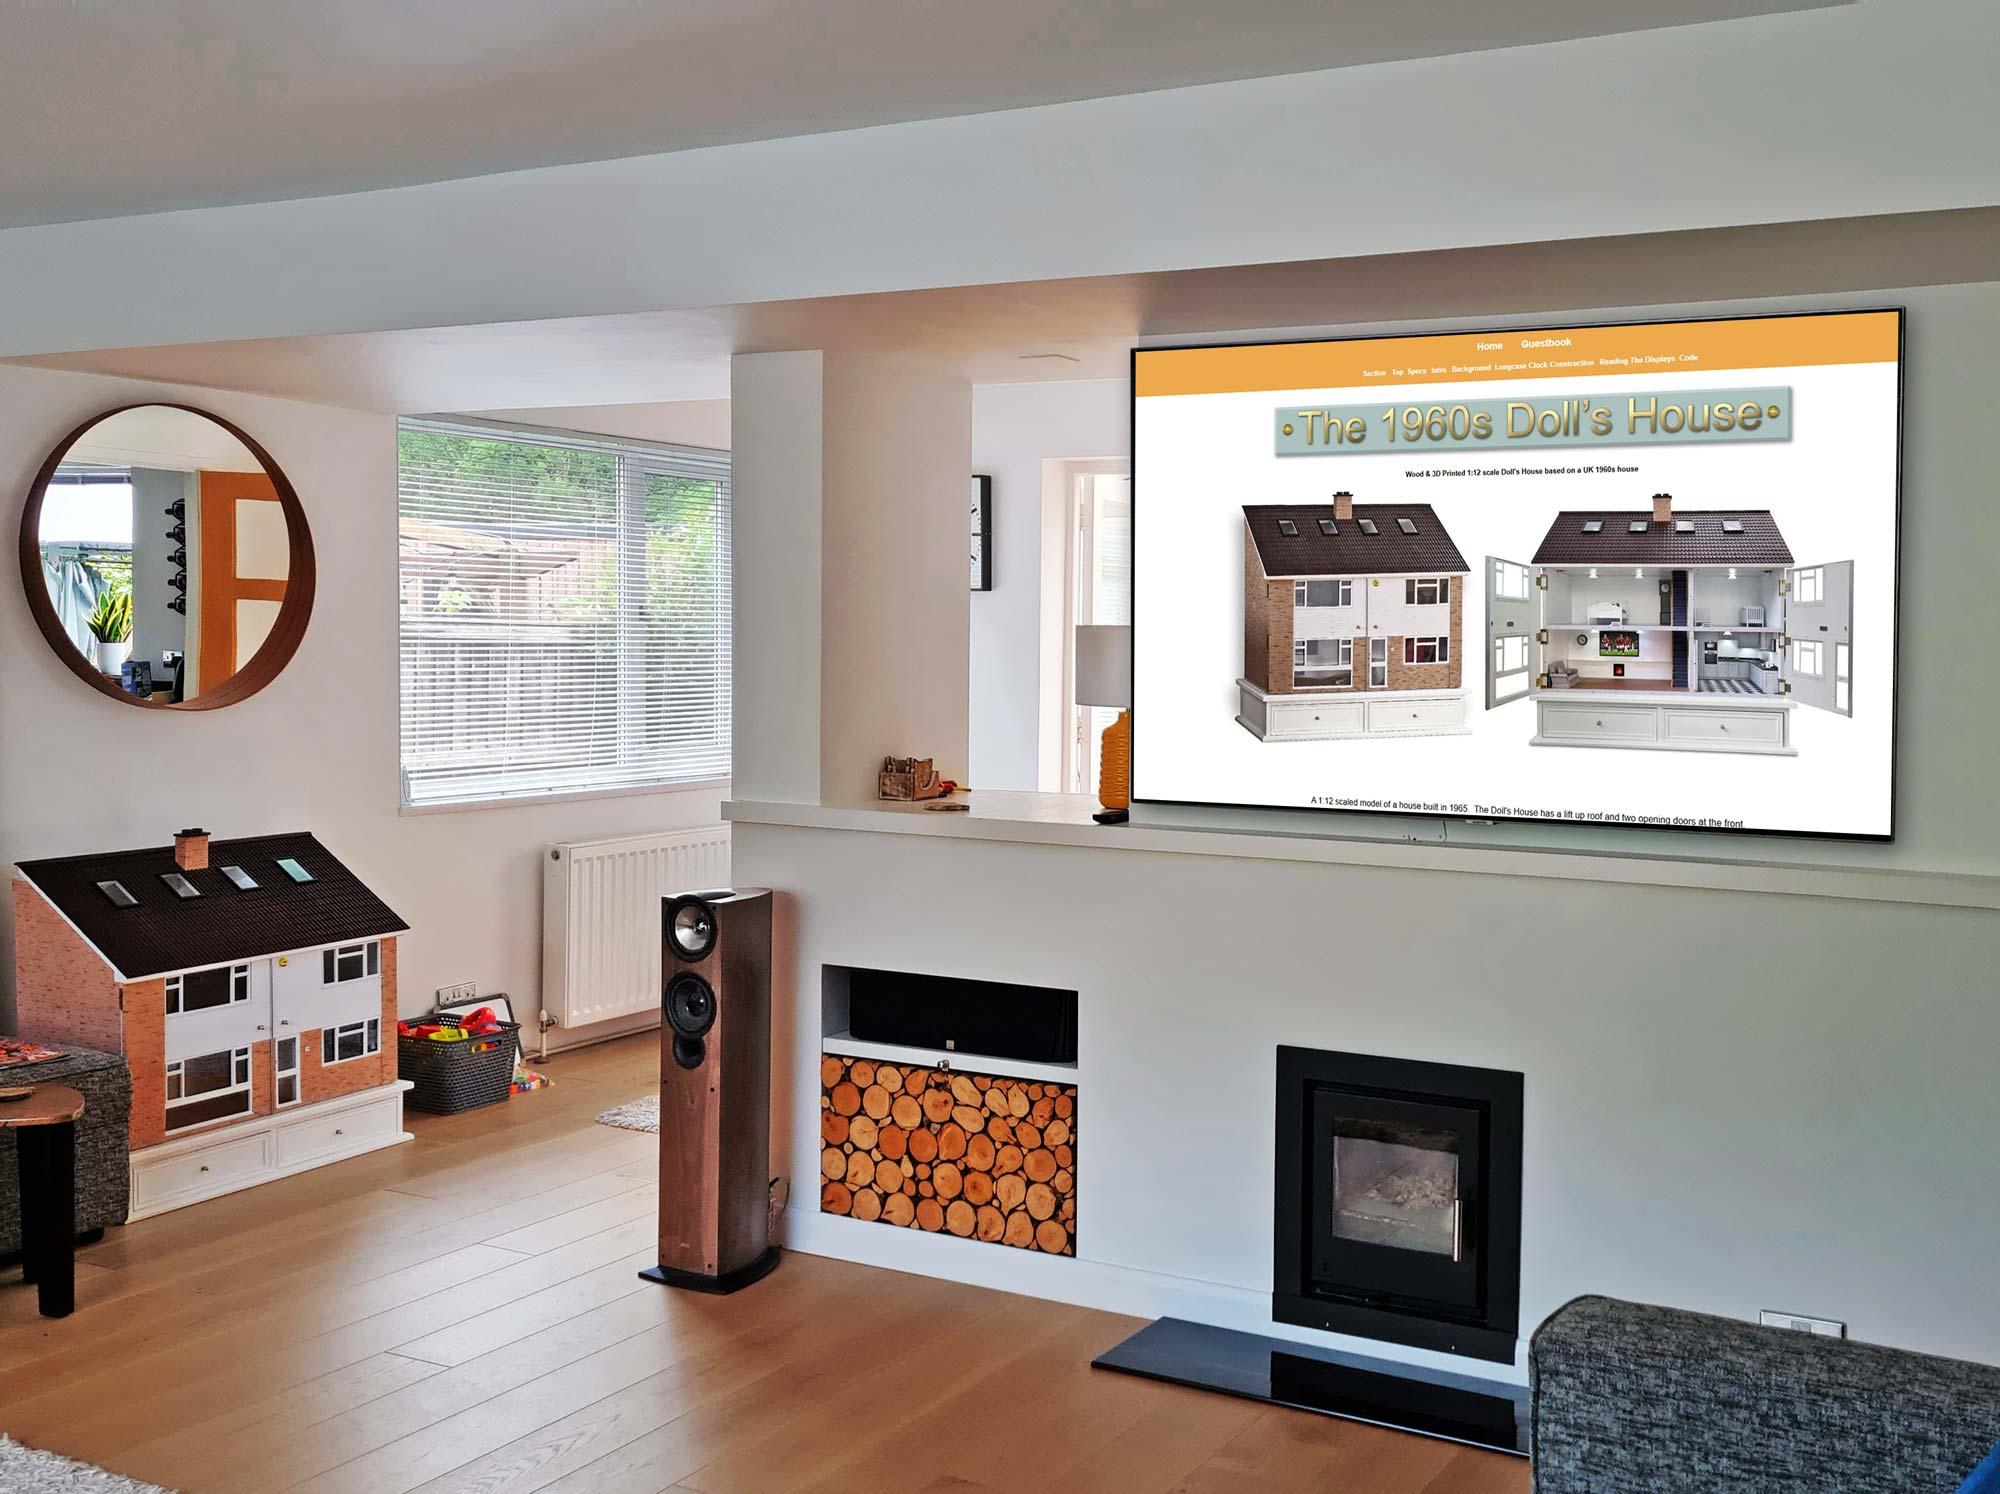
Pic 1. This image shows the lounge of my 1960s house. The TV is mounted on the wall with a mantel shelf below it. The wood burning stove is fitted in a brick recess under the mantel shelf. I don't have a sound to light in my lounge :), but thought it would be a nice addition to the Doll House.
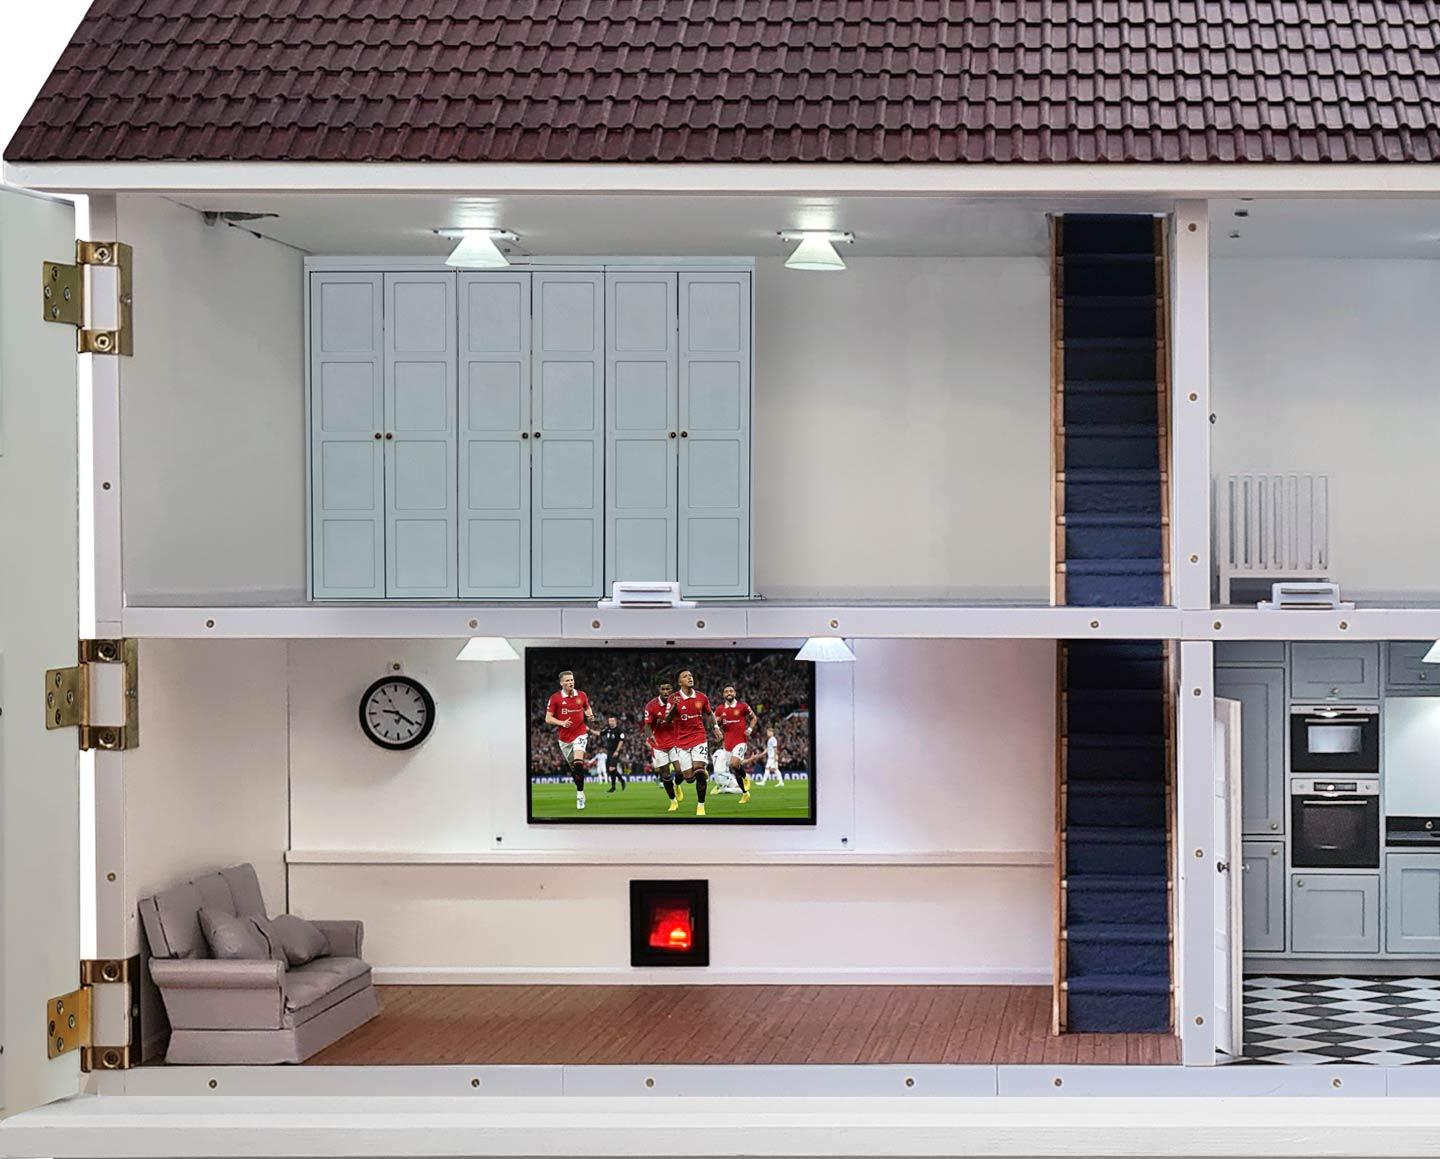
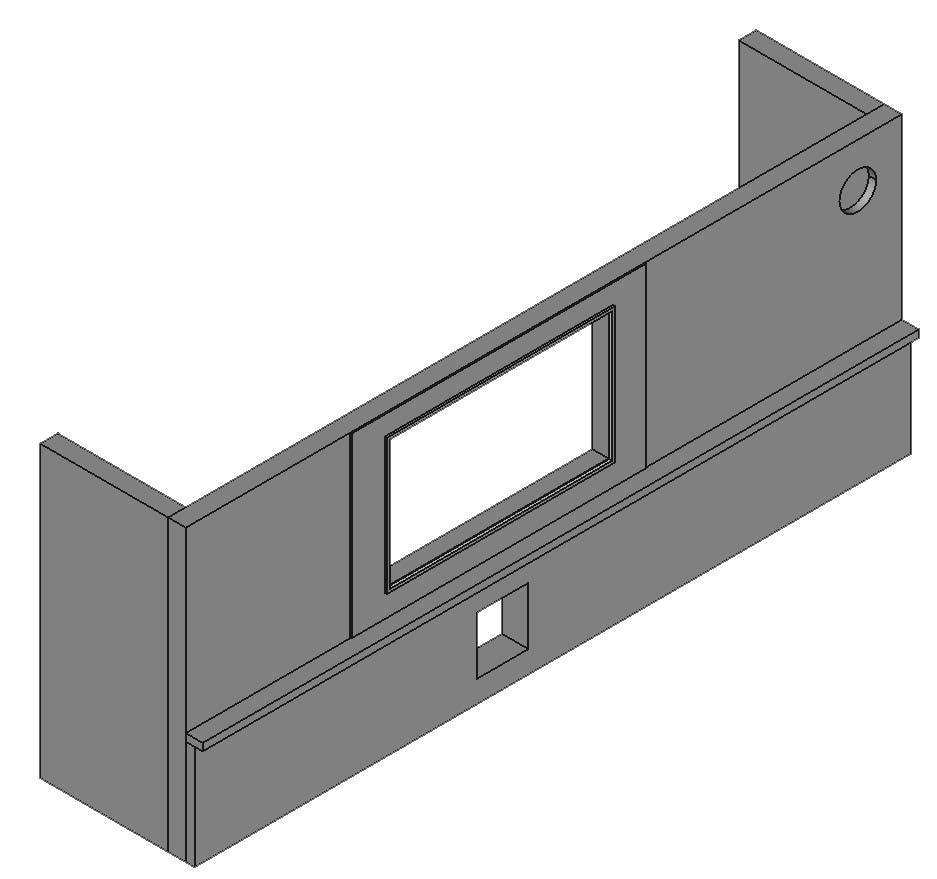
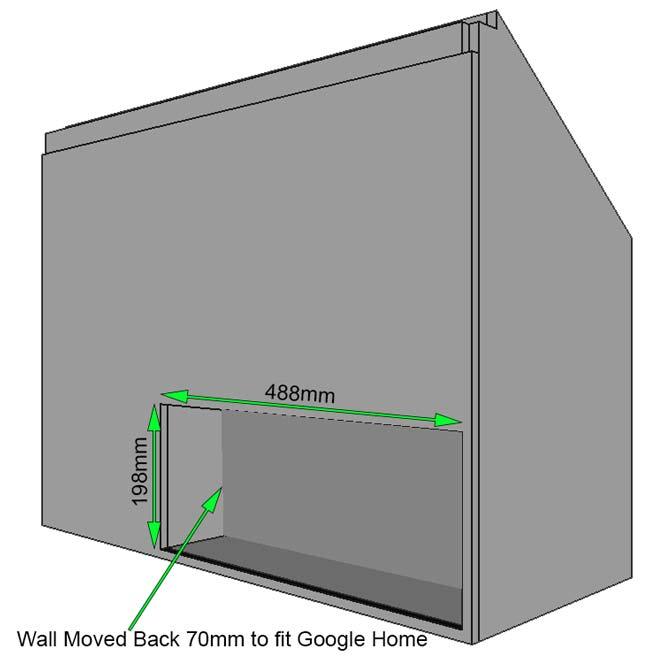
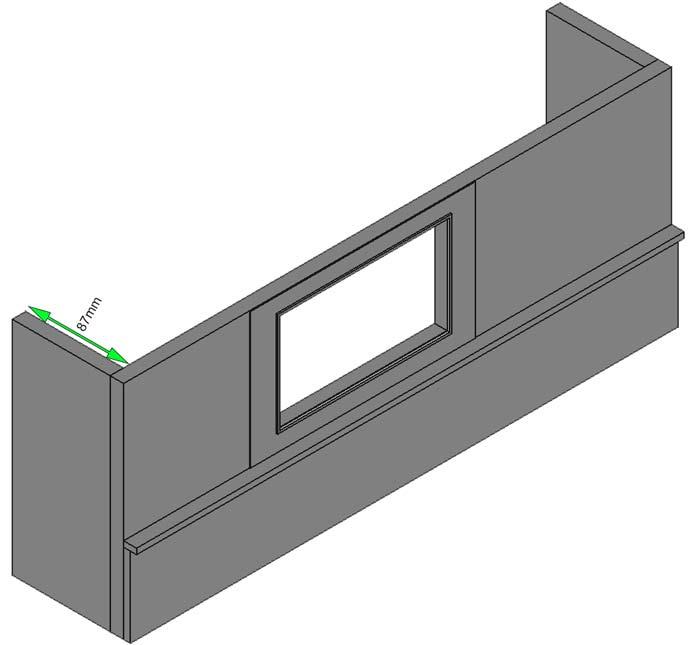
Pic 2. On the Doll House a 12mm plywood supporting wall is contructed with cut outs to house the TV, wood burner and sound to light module. The completed structure is inserted into the rear of the Doll House by 87mm. This will give the space required to fit the Google nest Hub.
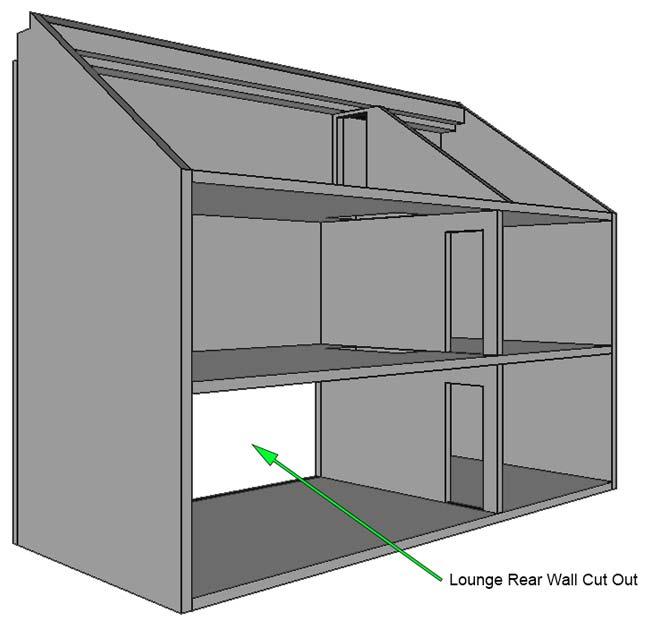
Pic 3. The rear wall of the lounge has been cut out.
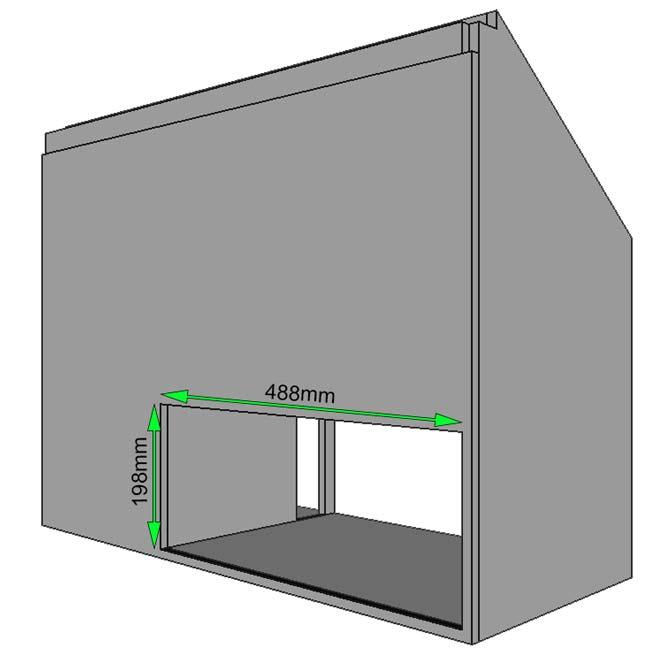
Pic 4. The rear cutout with demensions.
Pic 5. The completed rear wall structure is inserted from the rear of the doll house and measures 487mm to 197mm and it can be removed if required for maintenance.
The Supporting Wall Nest Hub Cutout


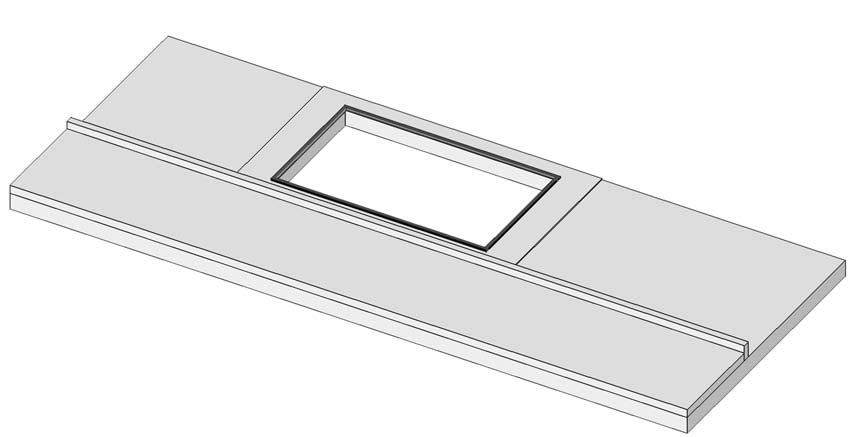

Pic 1. The main wall is cut from the 12mm thick plywood lounge wall of the house and cut down to 487x197.
Fix a 71mm length of 6mm ply to the bottom and then a 11.5x5mm baton on top of that to make the mantel shelf.
Pic 2. The panel needs a cutout to take the Google Home screen. Cut a hole 153mm x 90mm in the panel. The hole is 135.5mm from the left edge.
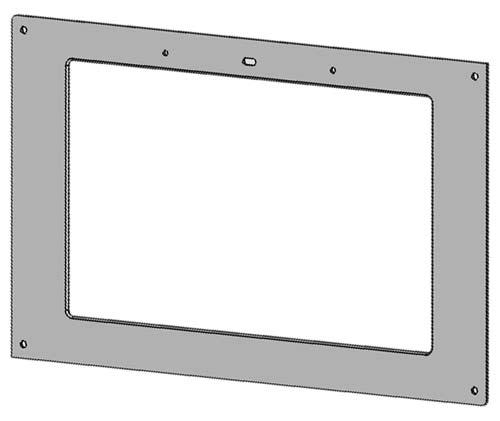
Pic 3. Over the cutout fit the 3D printed part "GoogleNestScreen" to cover the edge of the hole and screen.
This is printed/painted white to match the wall.
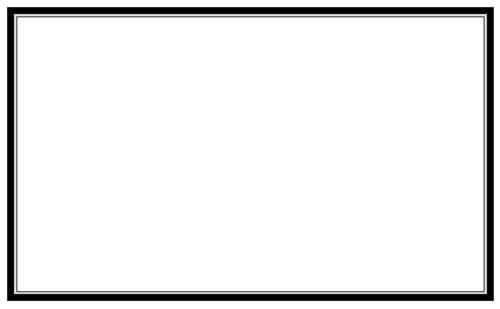
Pic 4. The 3D part GoogleNestBezel is then super glued over the top to form the "edge of the TV screen".
This part is printed/painted in black and makes it look more like a LCD TV.
Pic 5. This image shows the 3D part GoogleNestBezel in place
Pic 6. Google Nest Hub in place behind the bezel.
Pic 7. 12mm ply extensions are fixed to the rear of the wall.
These enable the wall to be fixed at the correct depth and also cover the rear of the Google Nest that sticks out the rear of the Doll's house.
Fixing the Nest Hub in Place
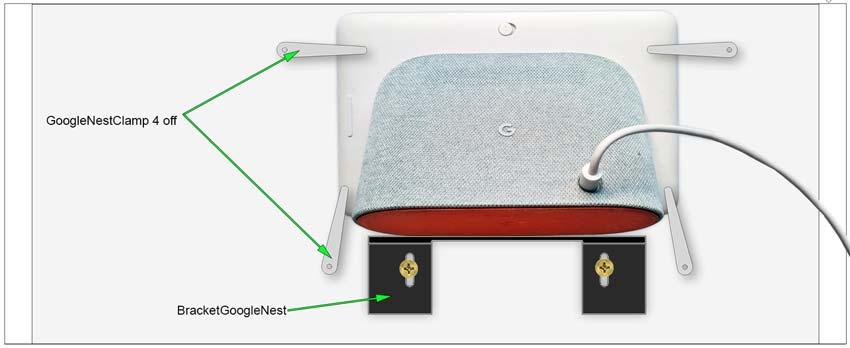

Pic 1. The Nest Hub sits behind the cutout and bezal and sits on a small 3D printed shelf and is locked in place by 3D printed clamps.
Pic 3. Screw the 3D printed part BracketGoogleNest on the rear of the cutout so the Nest screen lines up with the bezal.
The bracket is slotted to allow some adjustment.
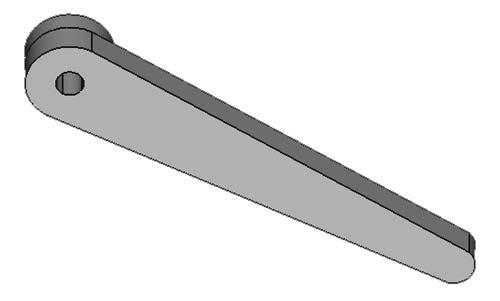
Pic 4. Screw the four 3D printed GoogleNestClamps in place using Pic 2 as a guide. The clamps twist and lock the Nest Hun in place.
Wood Burning Stove


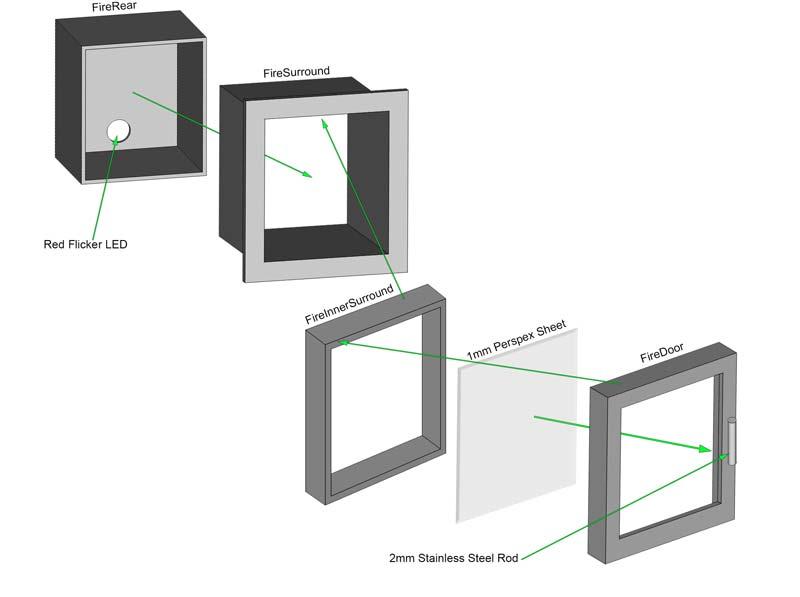
Pic 1. The woodburner sits below the Google Nest Home.
Pic 2. The wood burning stove has a flicker effect LED set into 3D printed logs.
Pic 3. Cut a hole through the 6mm & 12mm plywood of 39mm x 35mm.
Cut the hole 192mm in from the left edge of the wall and 15mm up from the floor.
Pic 4. Print out some logs in clear 3D filament. Glue them together around the LED inside the fire.
Paint some black shading onto the logs to represent non burning parts.
The Red LED flickers at random to give a fire effect.
Pic 5. Assemble the Wood Burning Stove with the logs inside using super glue.
Pic 6. The LED is wired via a switch and fuse. See shematic.
Sound to Light Module

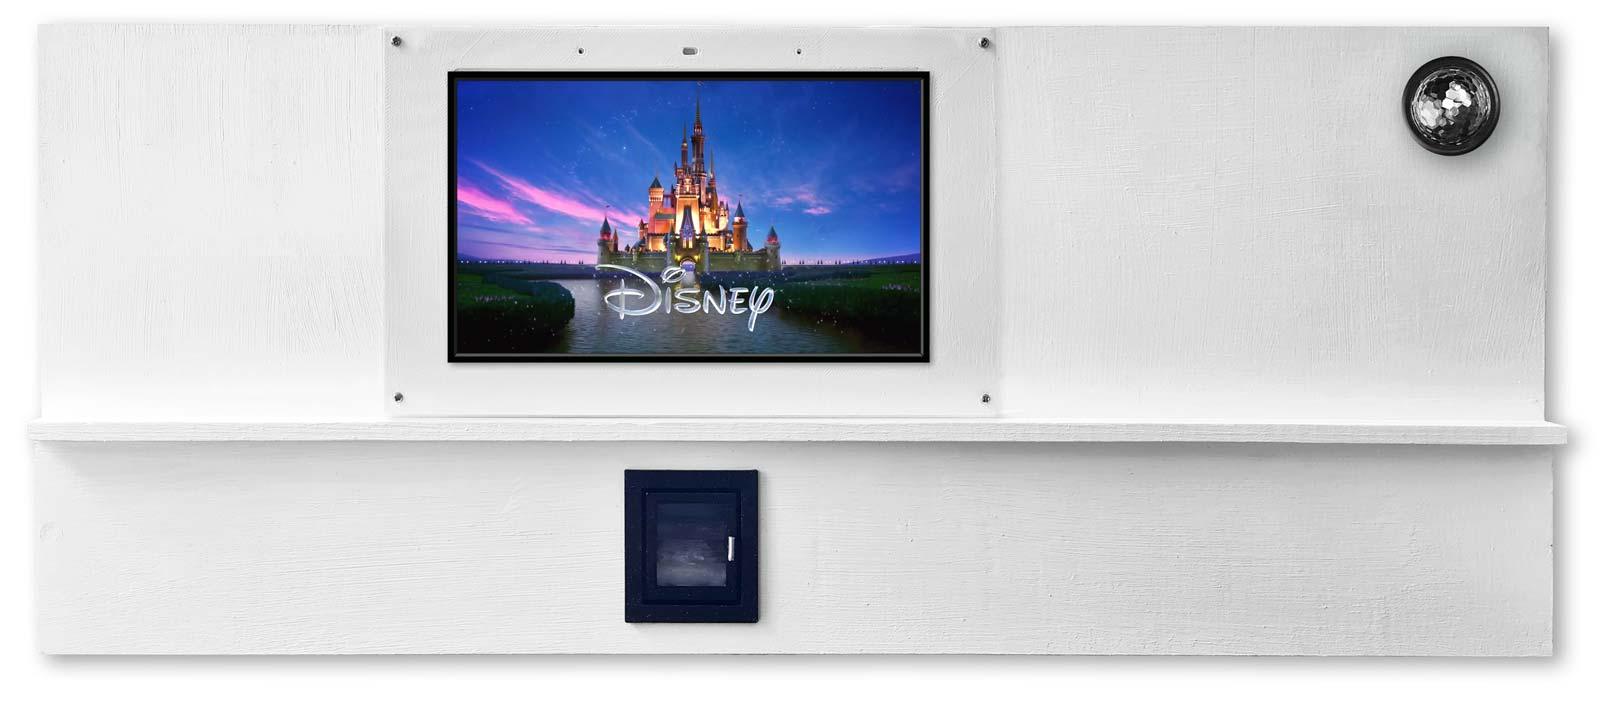
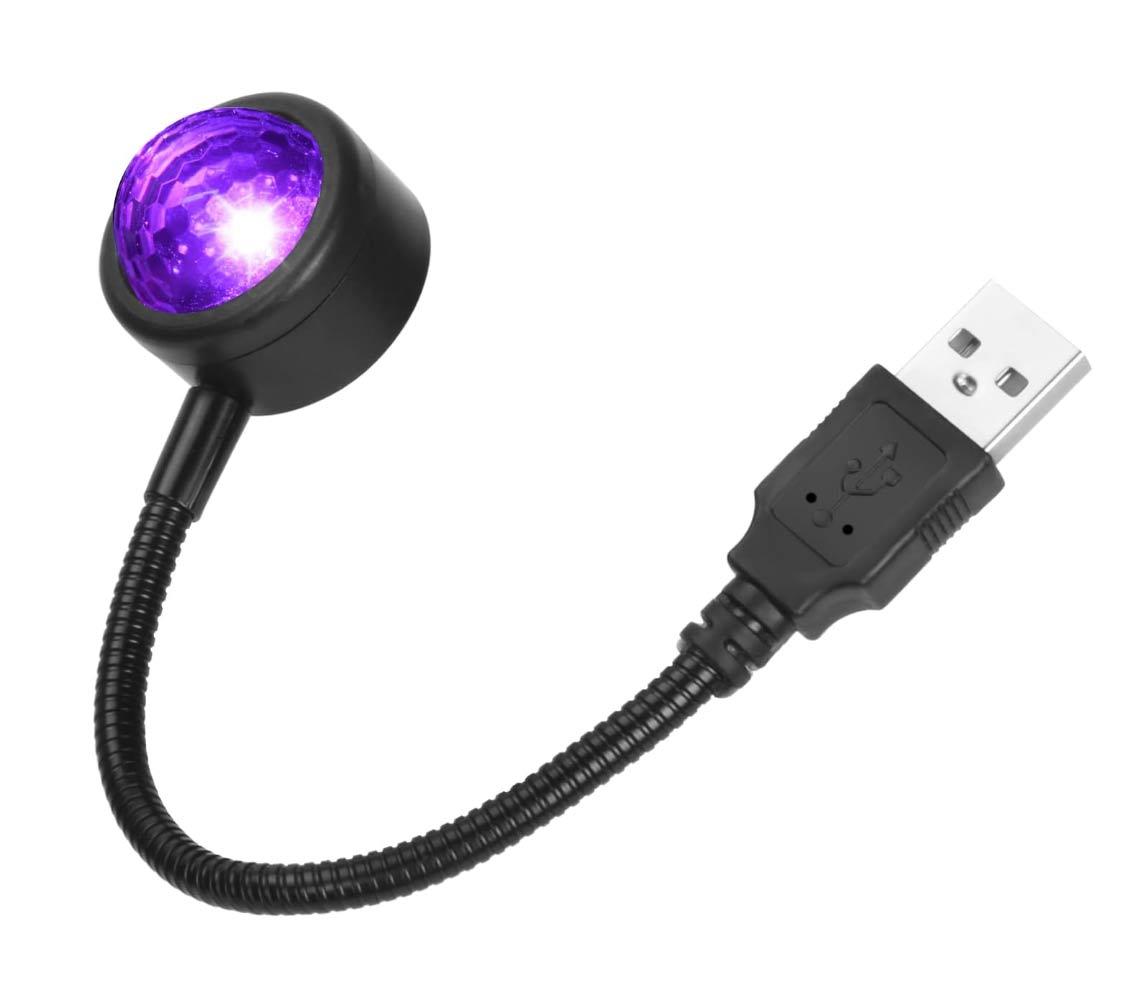

Pic 1. Sound to light module in use.
Pic 3. The sound to light module is very cheap at £4.99 and is available from Amazon https://amzn.eu/d/i8nNigB. The module has different modes controlled by a push switch mounted on top of the Doll House with all the other switches. There is also a power switch to turn the light on and off.
The module is USB powered so runs off 5v from the Dolls House. I disassembled the module leaving the front in place and this was mounted in a hole drilled in the wall. Pic 2. I placed it on the far right behind the stair case.
Pic 4. Schematic diagram. I soldered new wires for the mode switch and also wires to a switch for the power.
Download 3D Files
You can download all my 1960's Doll House 3D files here. Files are available in FreeCAD and Cura formats.