EMG Muscle Controlled Car Game
by Upside Down Labs in Circuits > Sensors
196 Views, 0 Favorites, 0 Comments
EMG Muscle Controlled Car Game
.gif)
In this tutorial, you will learn how to control a car racing game in your laptop using EMG signals. The code maps 3 gestures into different keystrokes to control the game. Flexing your right forearm turns the car right, flexing your left forearm turns the car left, Flexing both forearms simultaneously switches the driving mode. The first simultaneous flex activates Forward Mode, and each additional simultaneous flex toggles between Forward and Reverse modes. These gestures provide intuitive control for engaging gameplay.
NOTE: This project is made by Ankit Dhillon.
What is Electromyography(EMG)?
Electromyography is a technique that measures muscle response or electrical activity in response to a nerve’s stimulation of the muscle. We can use this electrical activity to detect neuromuscular abnormalities or create solutions for some crazy real-world problems like making artificial limb for amputees.
Watch the complete tutorial for this project on YouTube.
Supplies
 photos (2).png)
DIY Neuroscience Kit Pro (Upside Down Labs Store | Amazon India | Robu India | Tindie | DigiKey)
The kit includes:
- BioAmp EXG Pill (Assembled)
- Arduino Uno with USB Cable
- BioAmp Cable (100cm)
- 3 x Jumper Cables
- NuPrep Skin Preparation Gel (25g)
- Wet Wipes x 10
- Repositionable Gel Electrodes x 3
- Boxy Gel Electrodes x 100
- Gel Electrodes (4 variants, 6pcs each)
- Muscle BioAmp Band (EMG Band)
- Brain BioAmp Band (EEG Band)
- Heart BioAmp Band (ECG)
- Electrode Gel (100ml)
- Servo Claw
- Muscle BioAmp Shield Kit
- Muscle BioAmp Shield v0.3 (Assembled)
- BioAmp Cable (100cm)
- Muscle BioAmp Band (EMG Band)
- BioAmp AUX Cable
- Gel Electrodes (4 variants, 6pcs each)
- STEMMA Cables x 6
- 9V Snap Cable
Software:
Stack the Muscle BioAmp Shield on Arduino

Stack the Muscle BioAmp Shield on top of Arduino Uno properly.
Connecting BioAmp EXG Pill
.gif)

Connect the BioAmp EXG pill to the A2 port of Muscle BioAmp Sheild using STEMMA cable which has JST PH 2.0mm connector on one end and 3 female jumpers on the other end.
Connecting Electrode Cables
.gif)
.gif)

Connect one BioAmp cable V3 to BioAmp EXG Pill and another BioAmp cable to Muscle BioAmp Shield by inserting the cable ends into the respective JST PH connectors as shown above.
Skin Preparation
.gif)
We’ll create a 2-channel EMG acquisition system and to do so, we’ll be using both the sensors to record EMG signals from your arms in a way that Channel 1 is recorded from right hand forearm muscle and Channel 2 from left hand forearm muscle . Thus, prepare the skin accordingly.
Apply Nuprep Skin Preparation Gel on the skin surface where electrodes would be placed to remove dead skin cells and clean the dirt from skin. After rubbing the skin surface thoroughly, clean it with an alcohol wipe or a wet wipe.
Electrode Placement
.gif)
.png)
Place the electrodes as mentioned:
| Channel | Positive (+) Electrode | Negative (-) Electrode | Reference Electrode |
|---|---|---|---|
| CH1 | Right Forearm | Right Forearm | Behind the Right Palm |
| CH2 | Left Forearm | Left Forearm | Behind the Left Palm |
Upload the Code
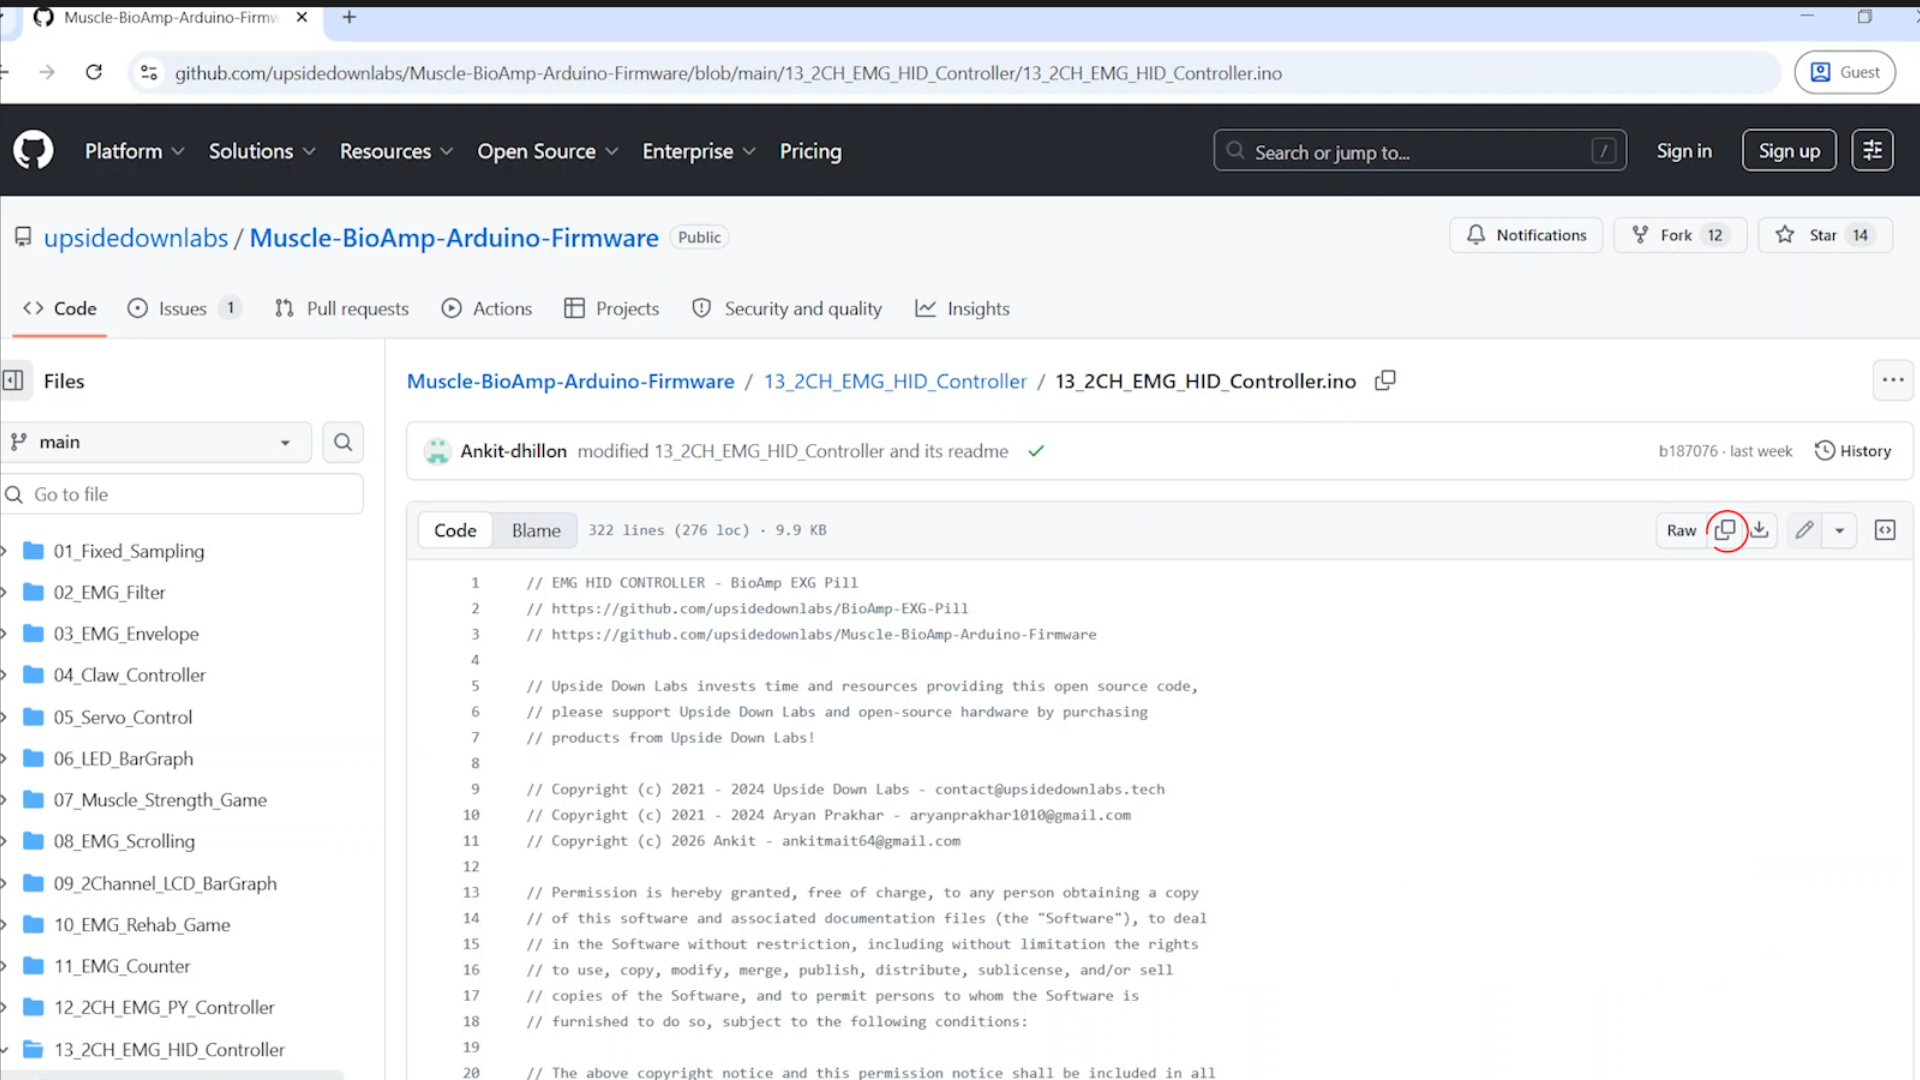
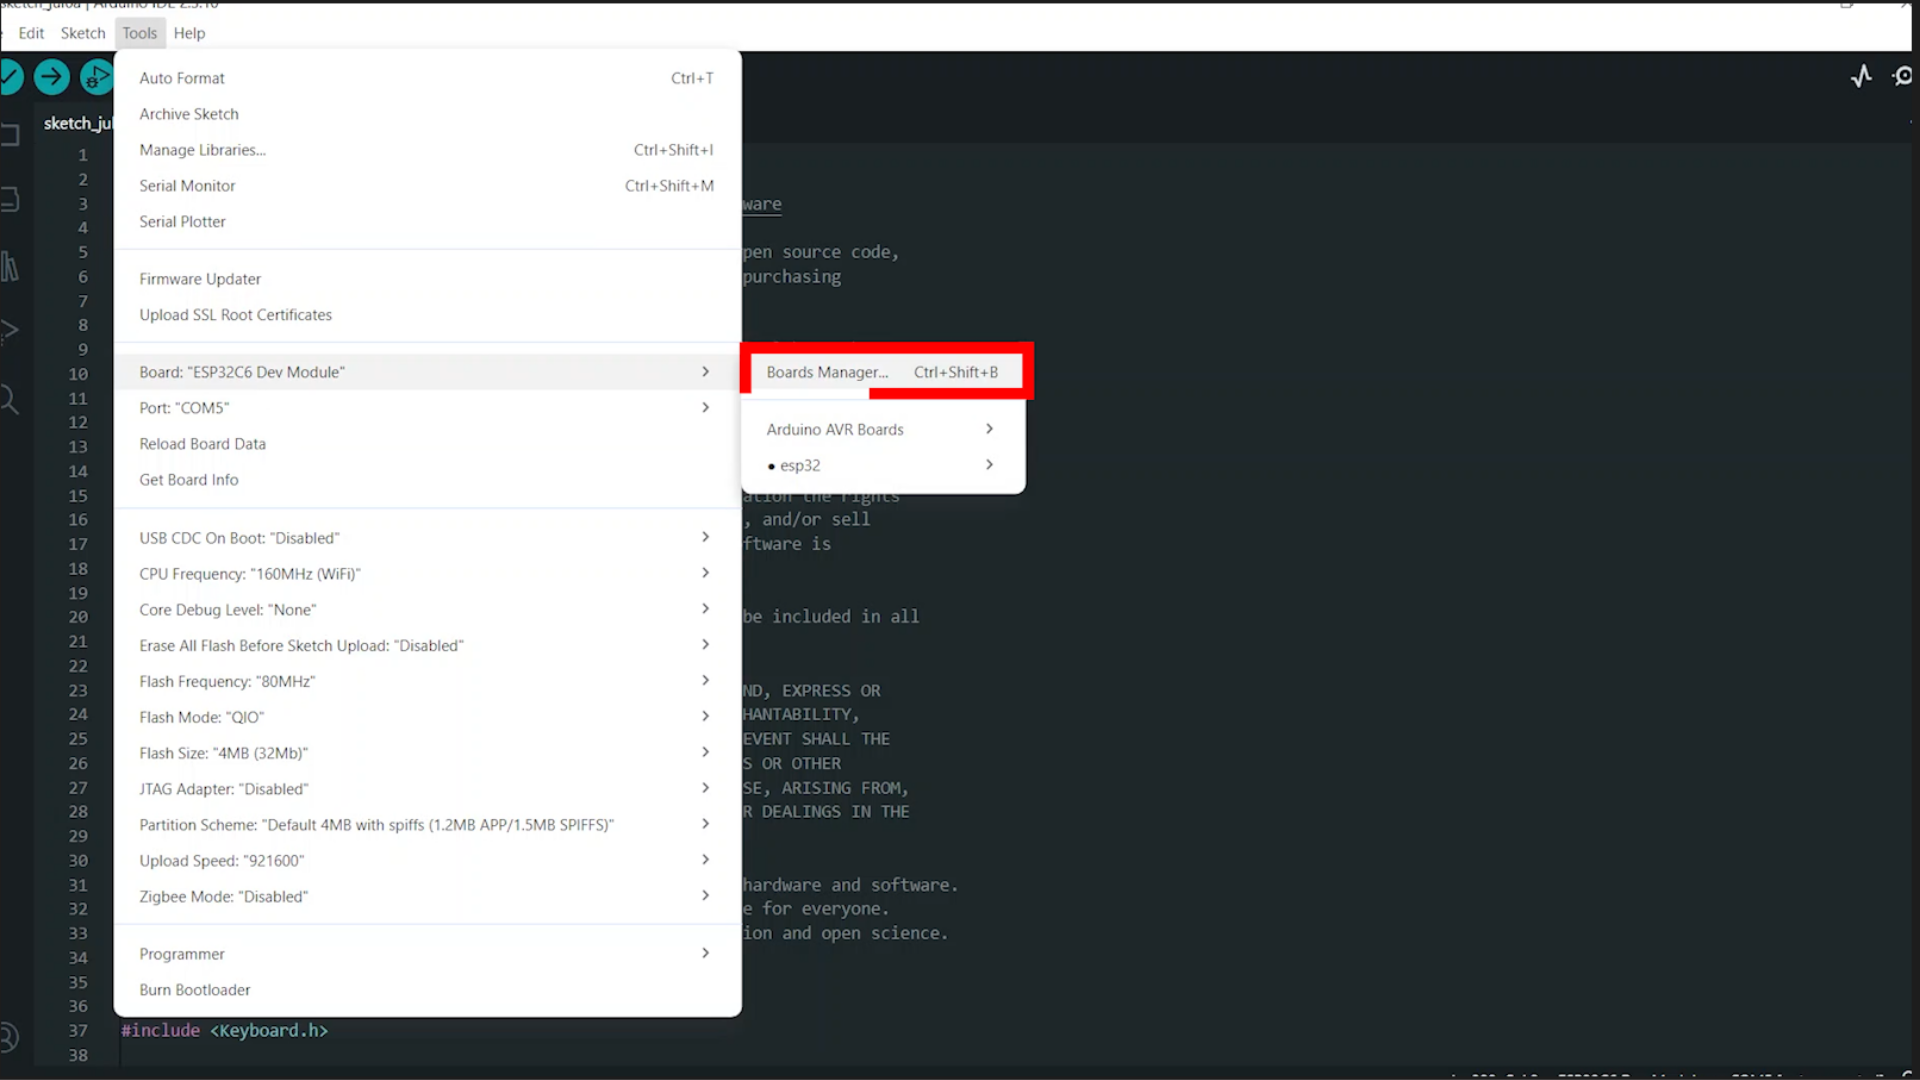
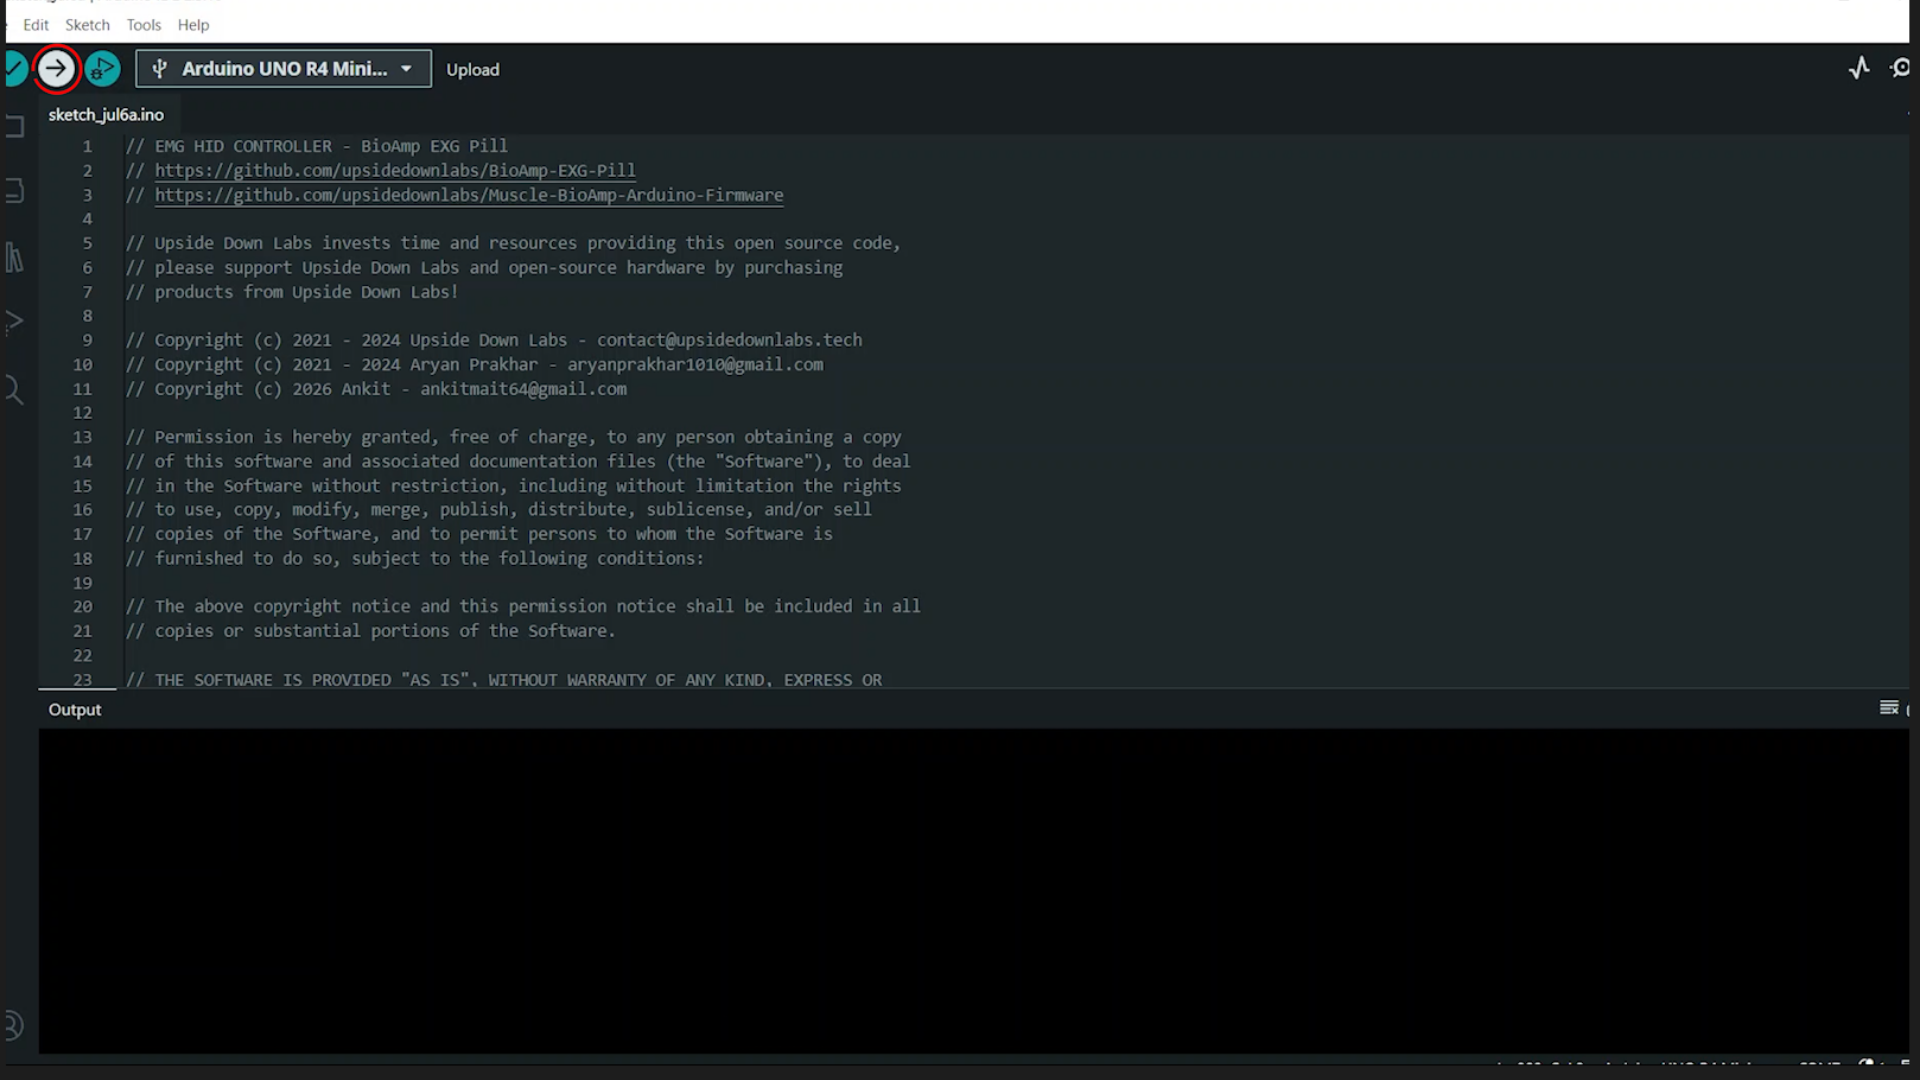
Copy the code from the GitHub repository.
Open the Arduino IDE.
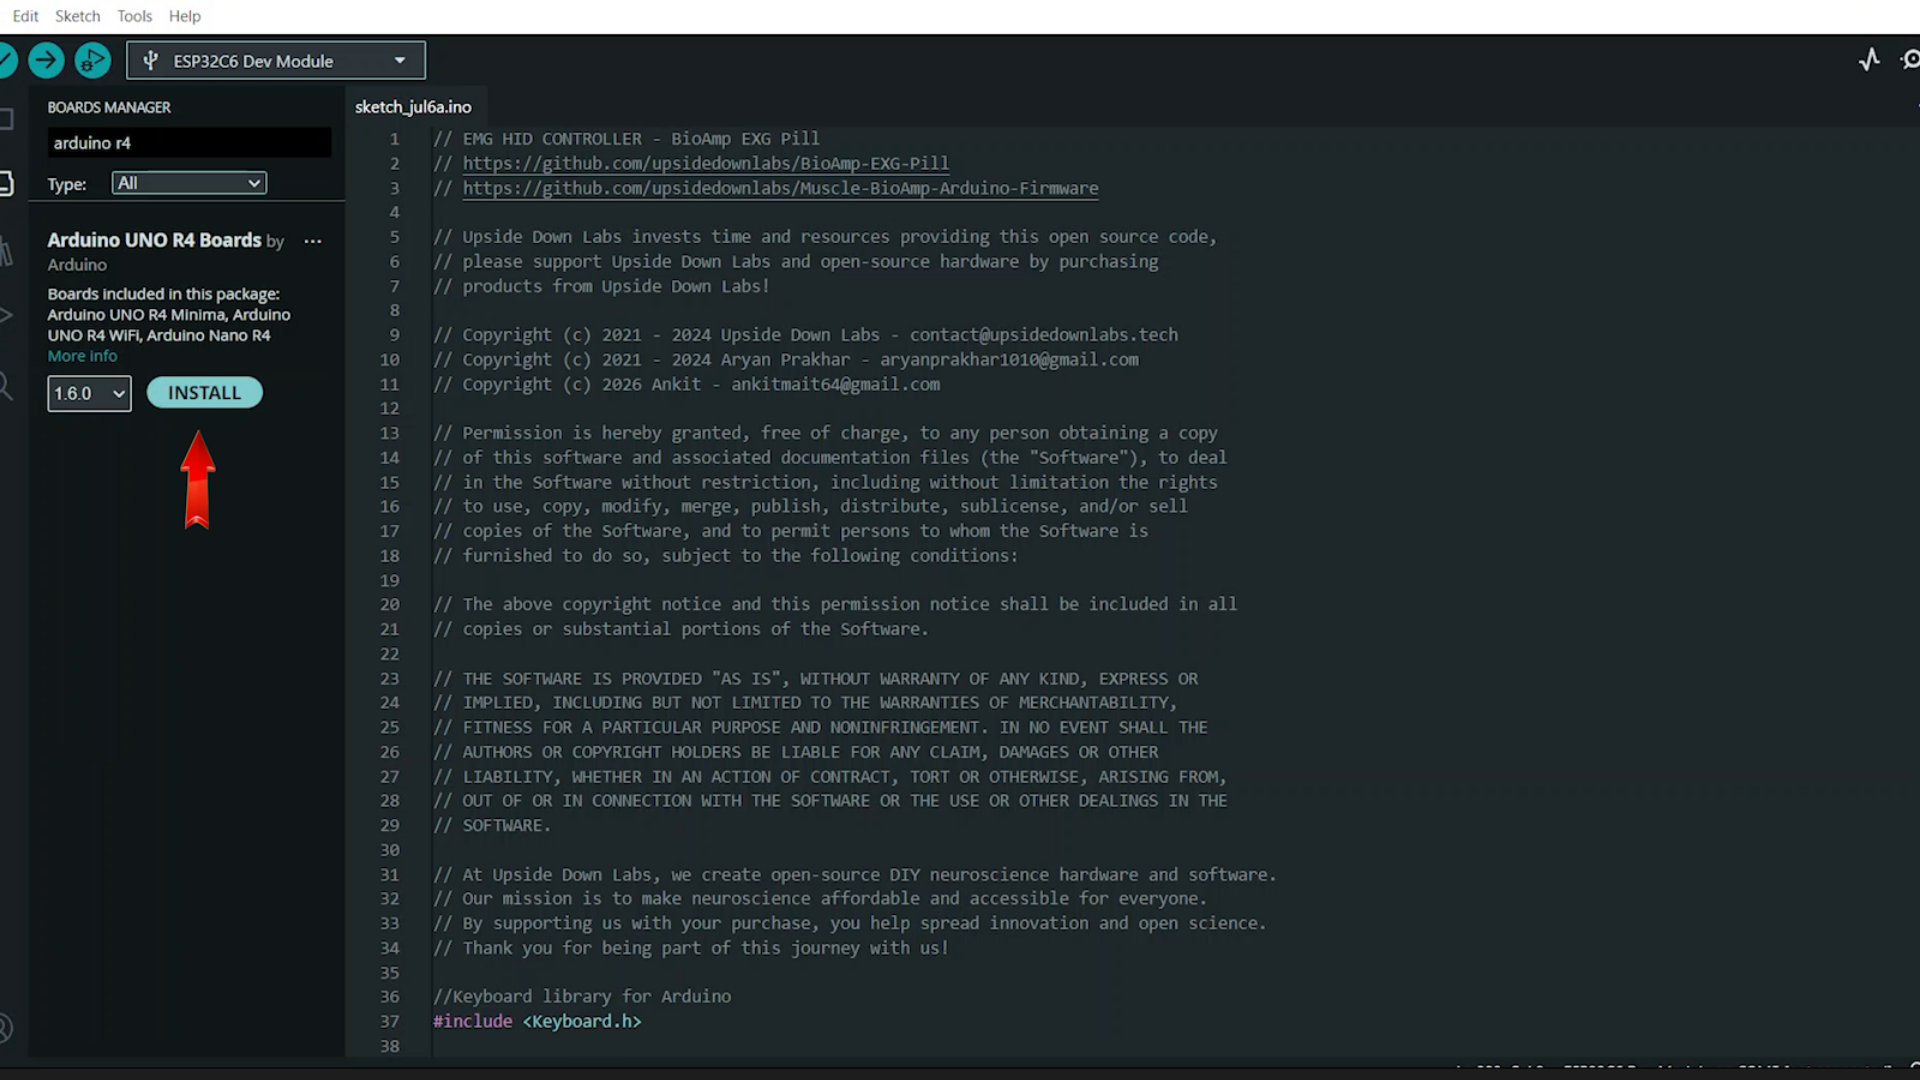
Install the Arduino UNO R4 board package:
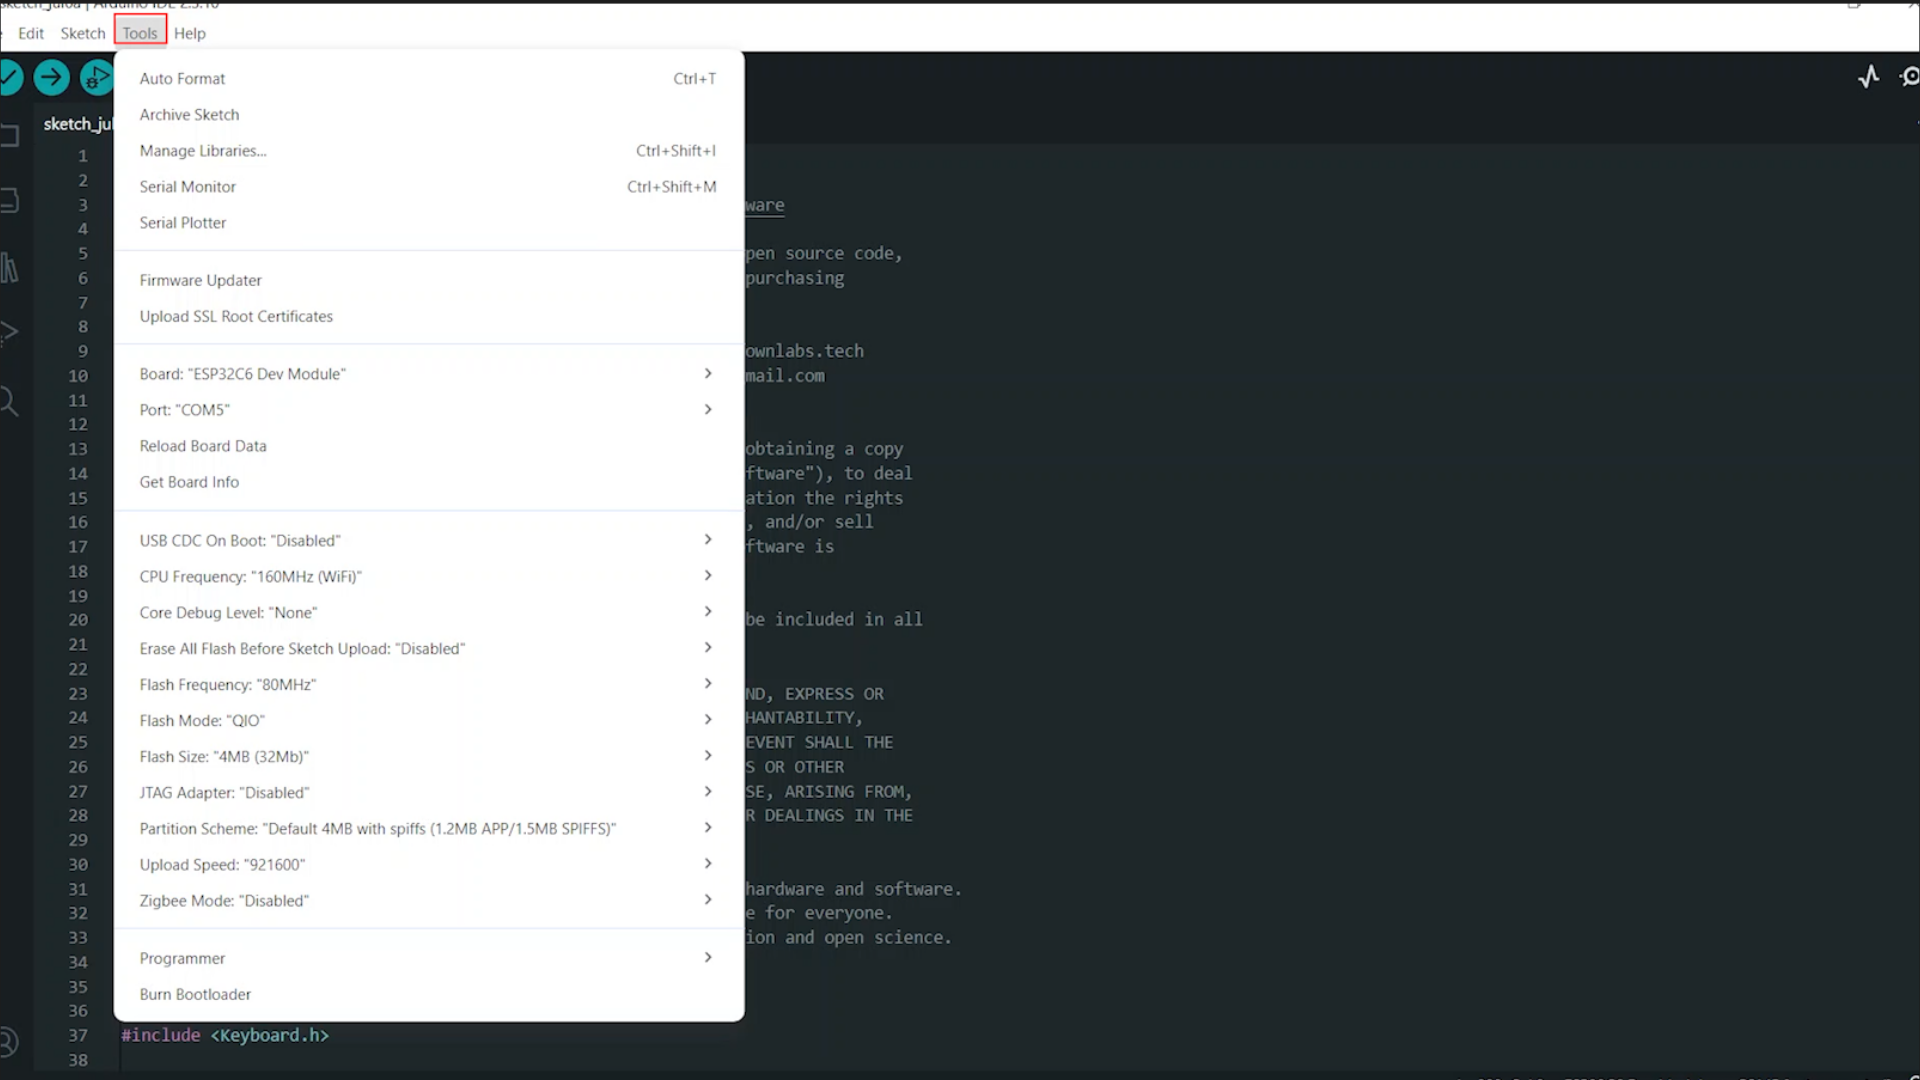
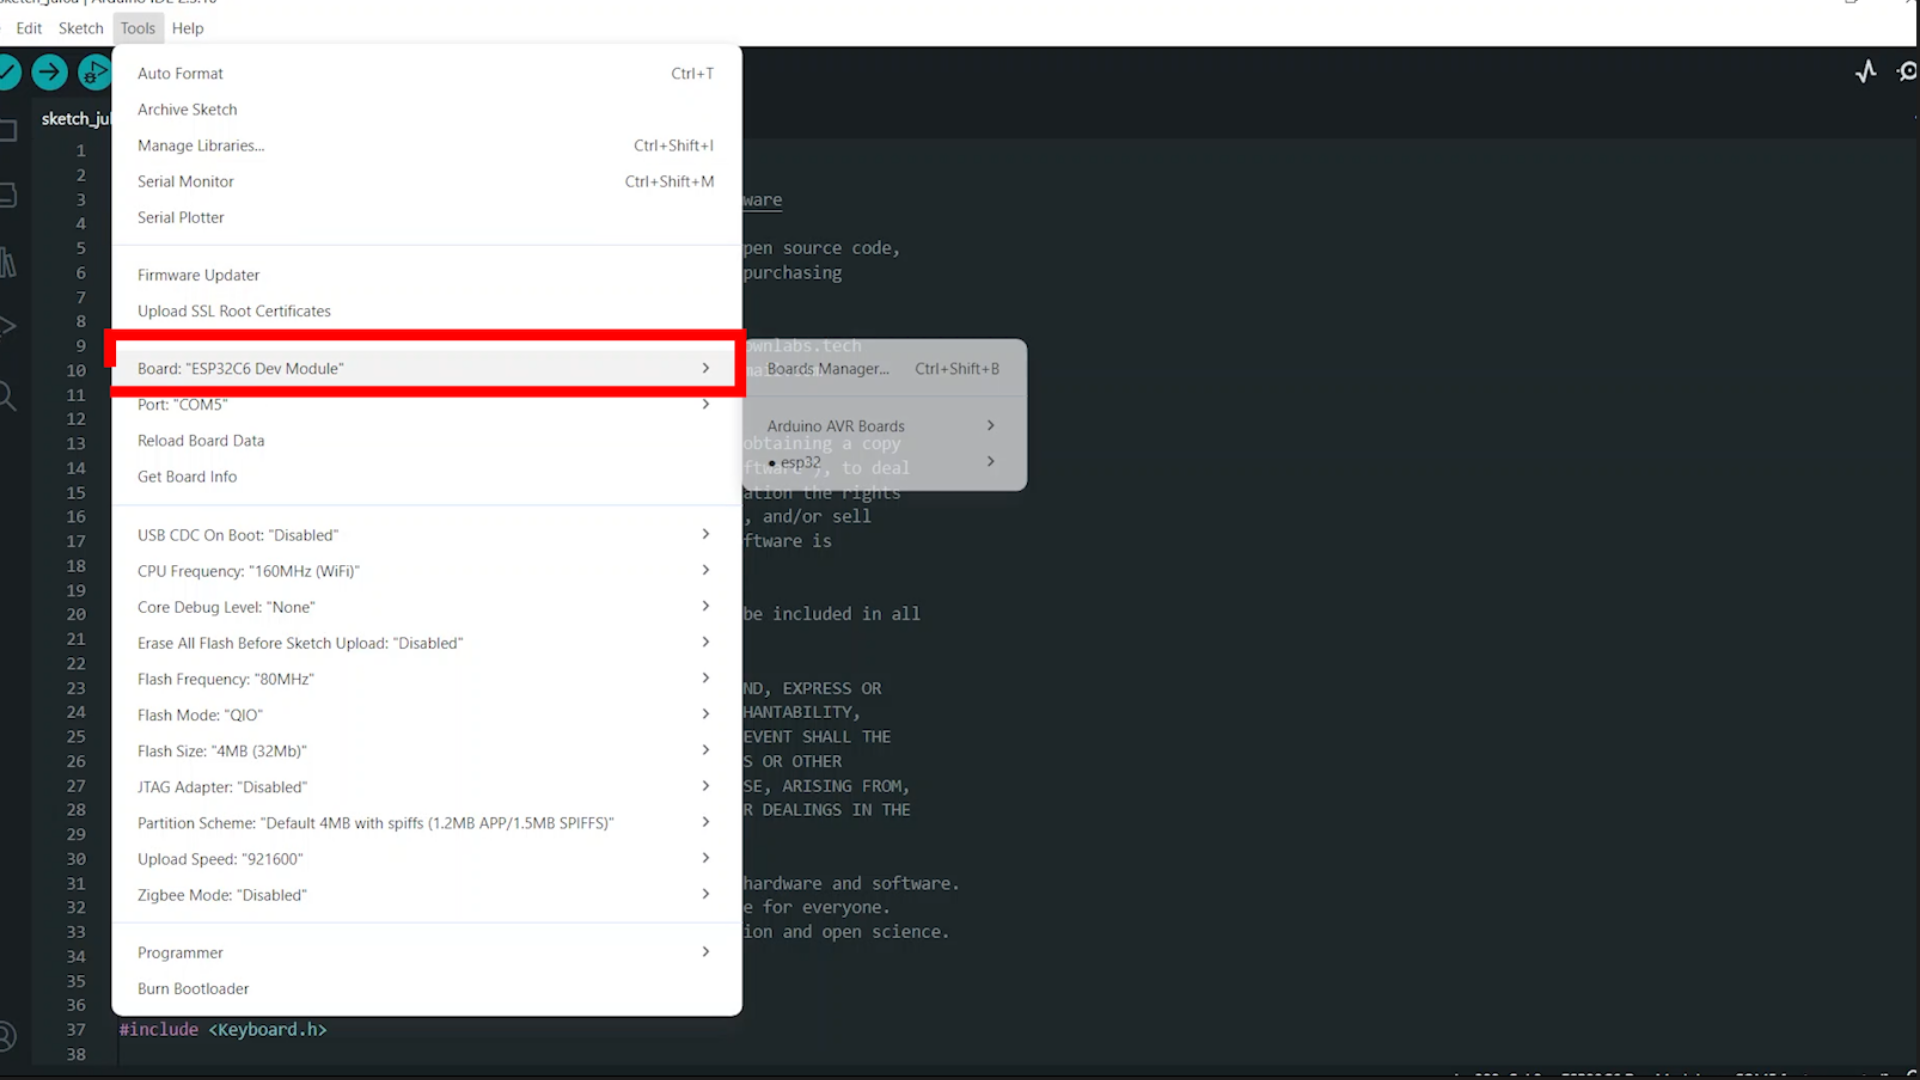
- Tools → Board → Boards Manager → Search "Arduino UNO R4 Boards" → Install the latest version.
Note: If any installation or permission pop-up appears during the process, click OK, Install, or Allow to continue the installation.
Create a new sketch:
- Go to File → New Sketch.
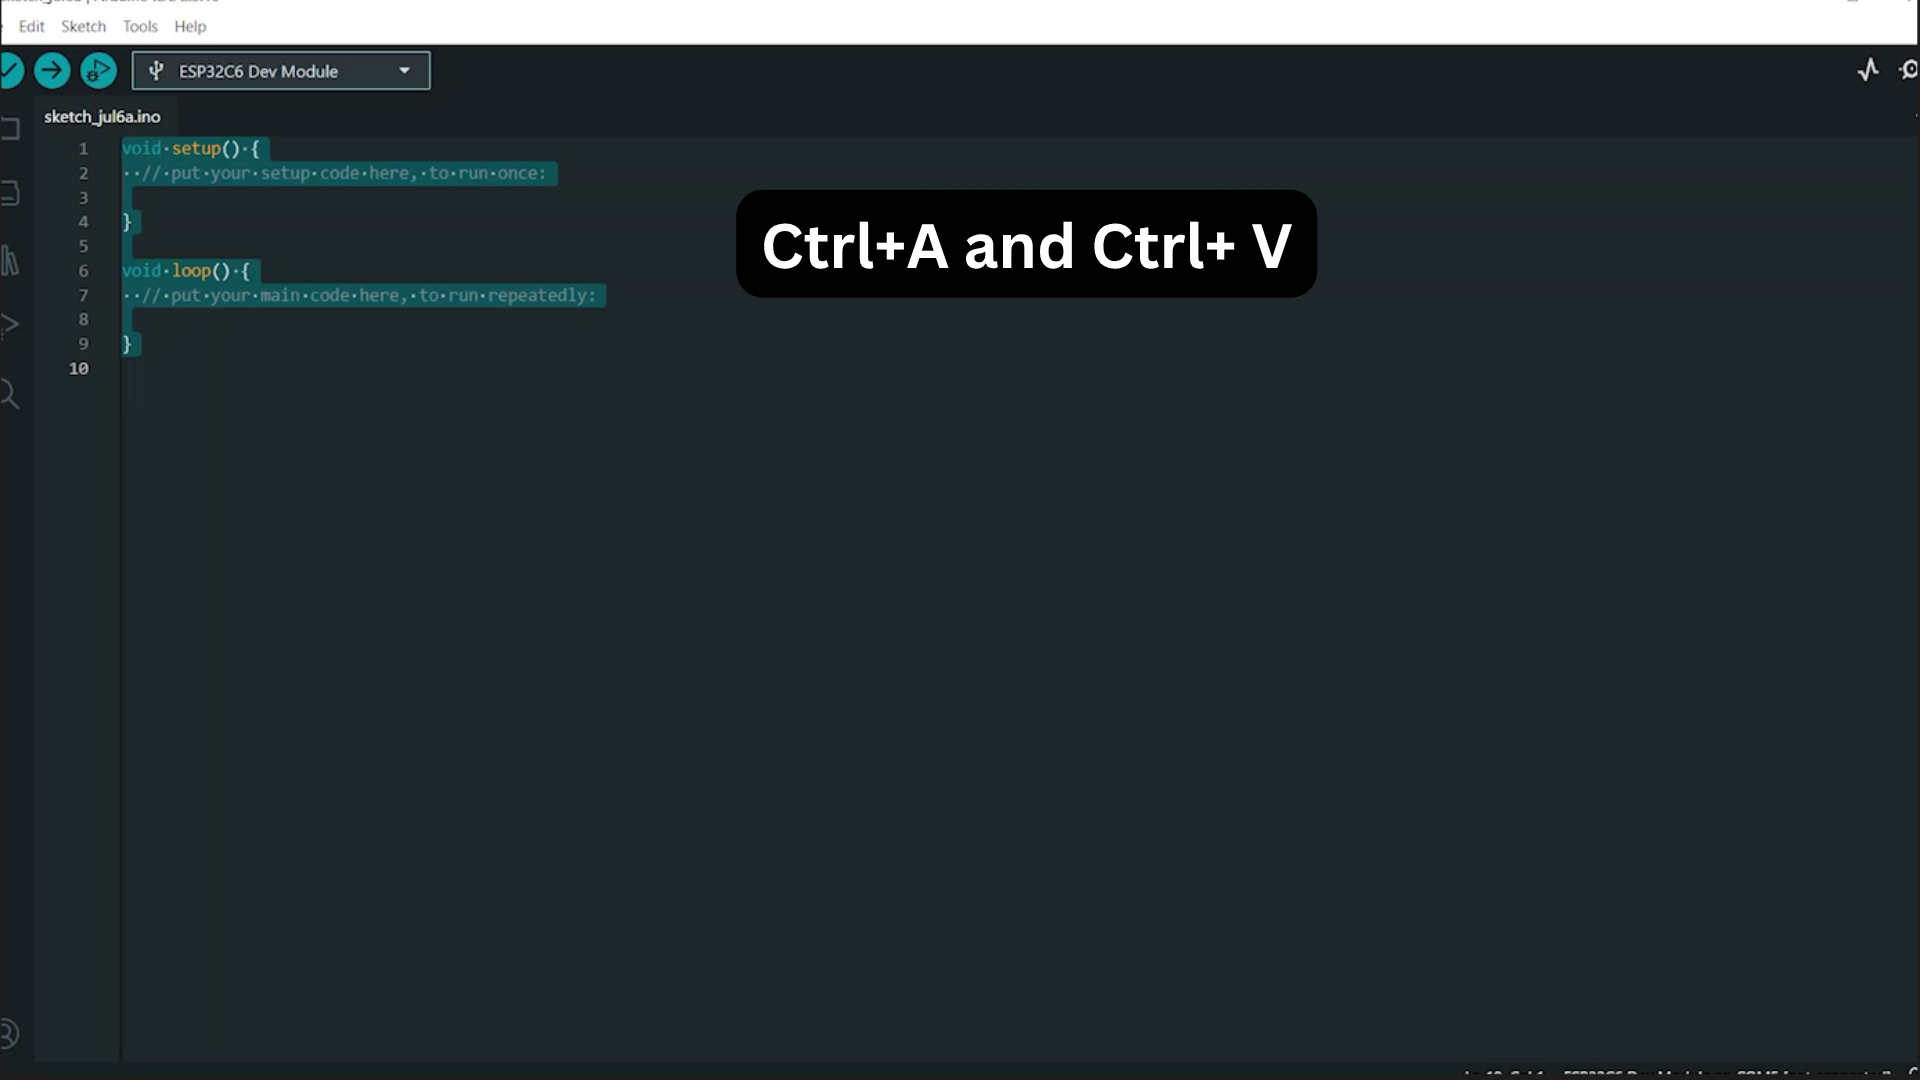
Remove the default code:
- Press Ctrl + A to select all the existing code and press Ctrl + V to paste the copied code.
Connect the Arduino board to your laptop using a USB cable.
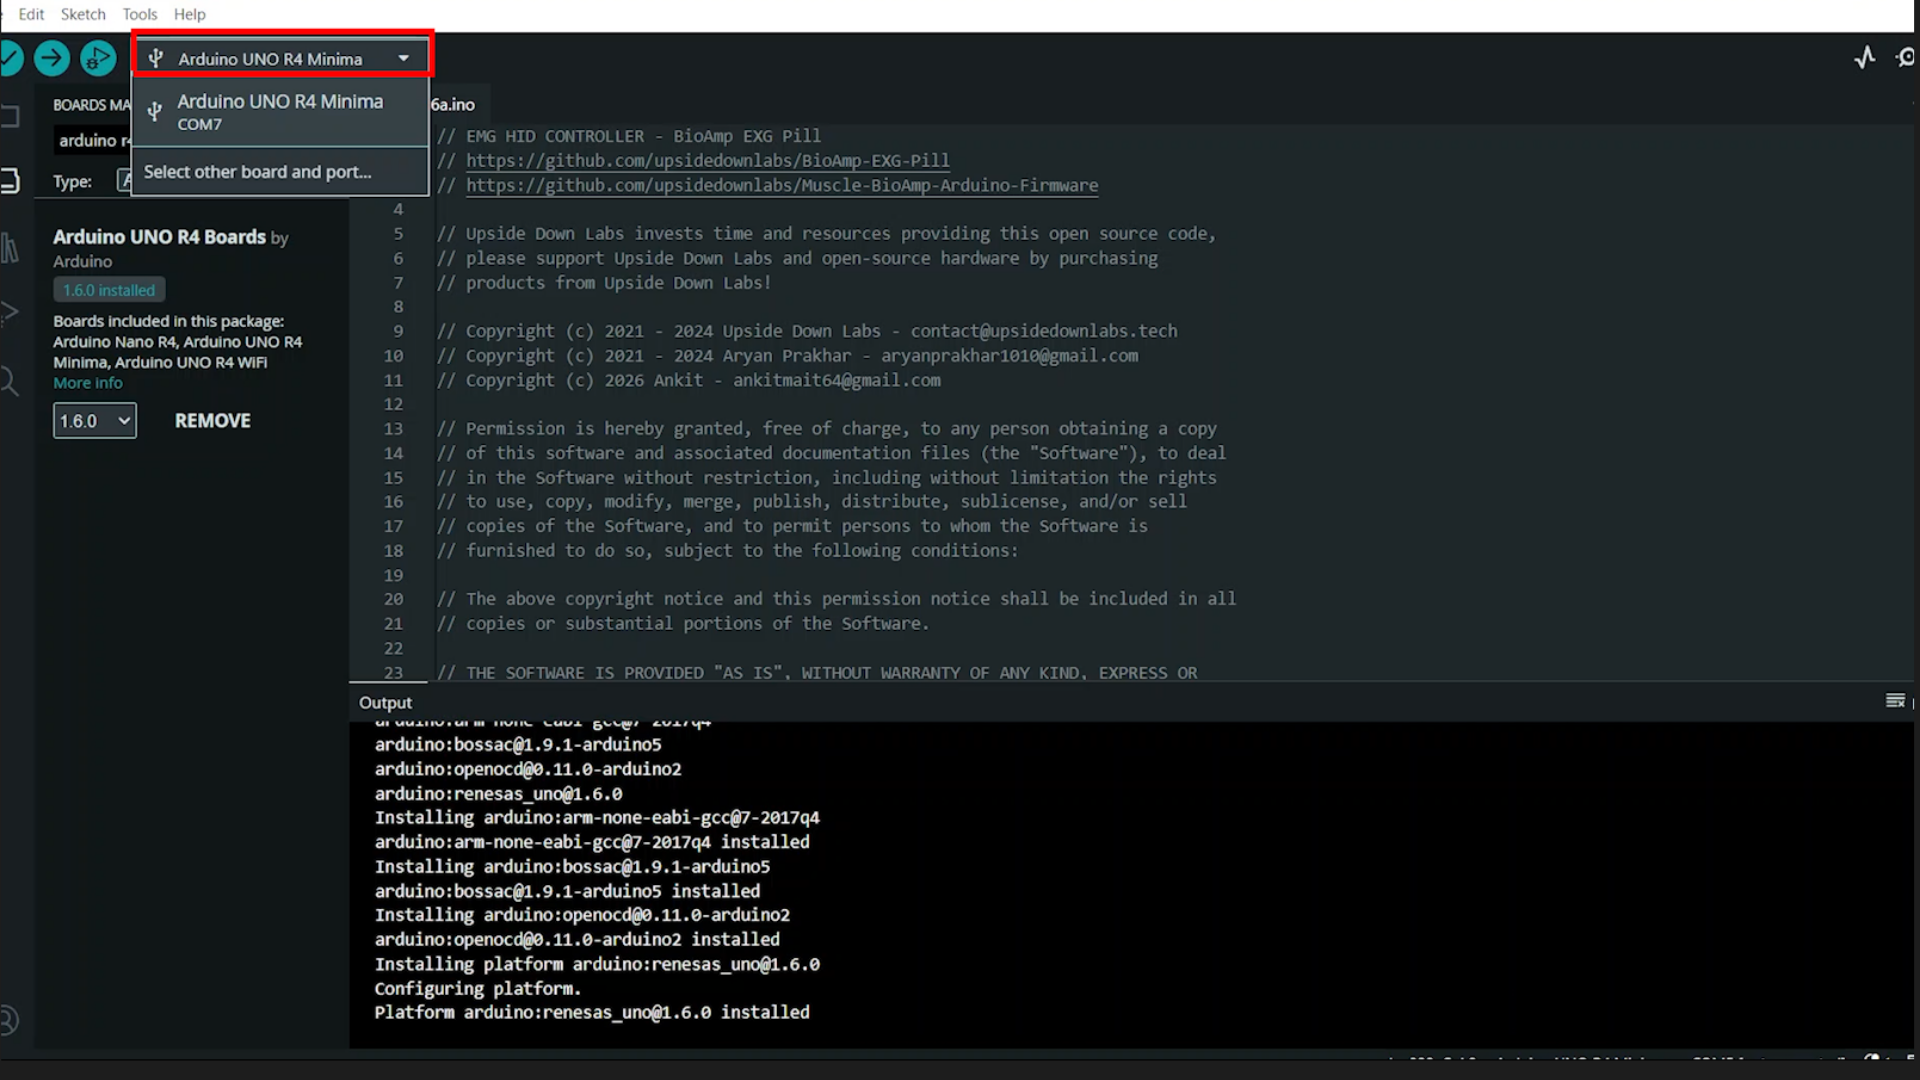
Select the board:
- Go to Tools → Board.
- Choose Arduino UNO R4 Minima.
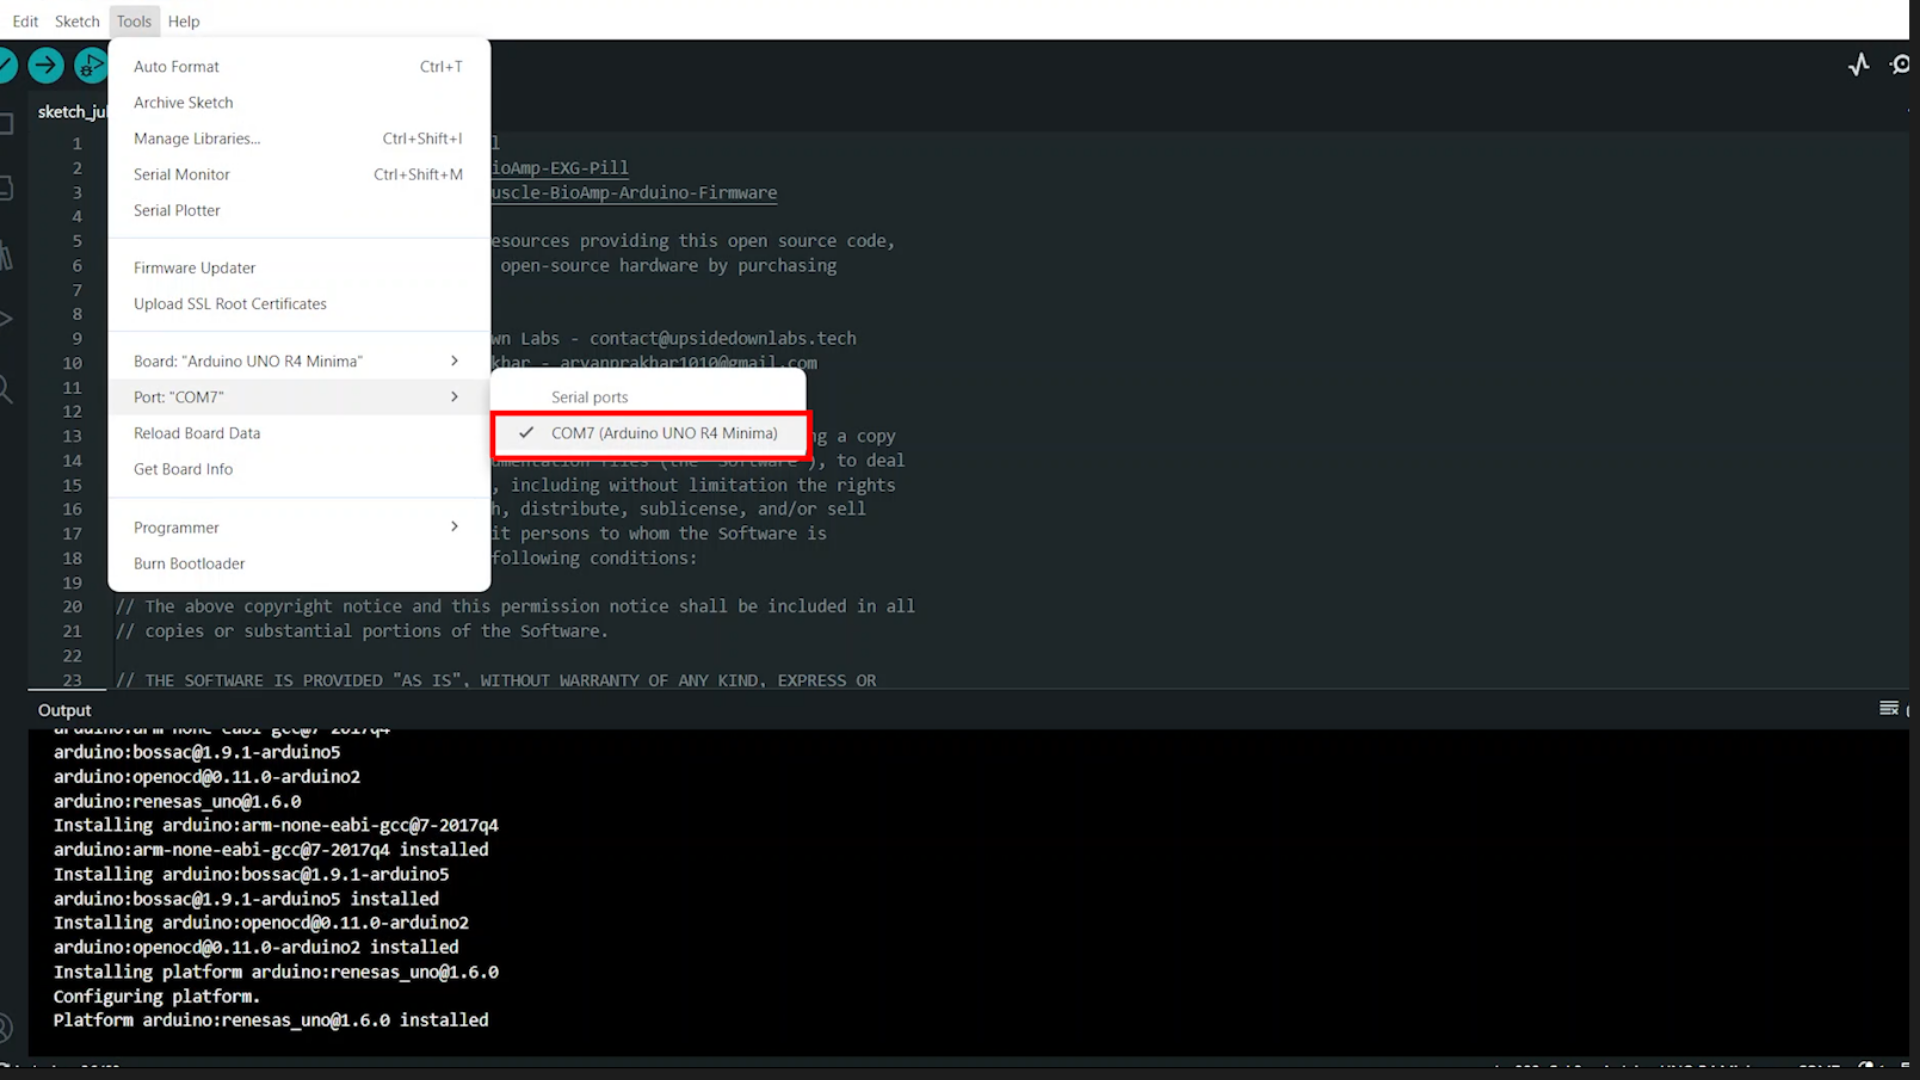
Select the correct port:
- Go to Tools → Port.
- Select the port corresponding to your Arduino board.
(if you can't find your port disconnect the Arduino and reconnect again)
Upload the code:
- Click the Upload button (→) in the Arduino IDE.
- Wait for the upload process to complete successfully.
Once the upload is complete, the Arduino is ready to run the program.
IMPORTANT: For the best signal acquisition, make sure your laptop is not connected to a charger and sit at least 5m away from any AC appliances.
Test the Code
Now test the code:
open any text editor like Notepad.
flex your right forearm ->The key 'd' should be typed once.
flex your left forearm -> The key 'a' should be typed once.
flex both arms together(first time) -> The key 'w' should be typed continuously.
flex both arms together(second time) -> The key 's' should be typed continuously.
If the detection is not accurate, you may need to calibrate the threshold values according to your muscle strength.
Calibration
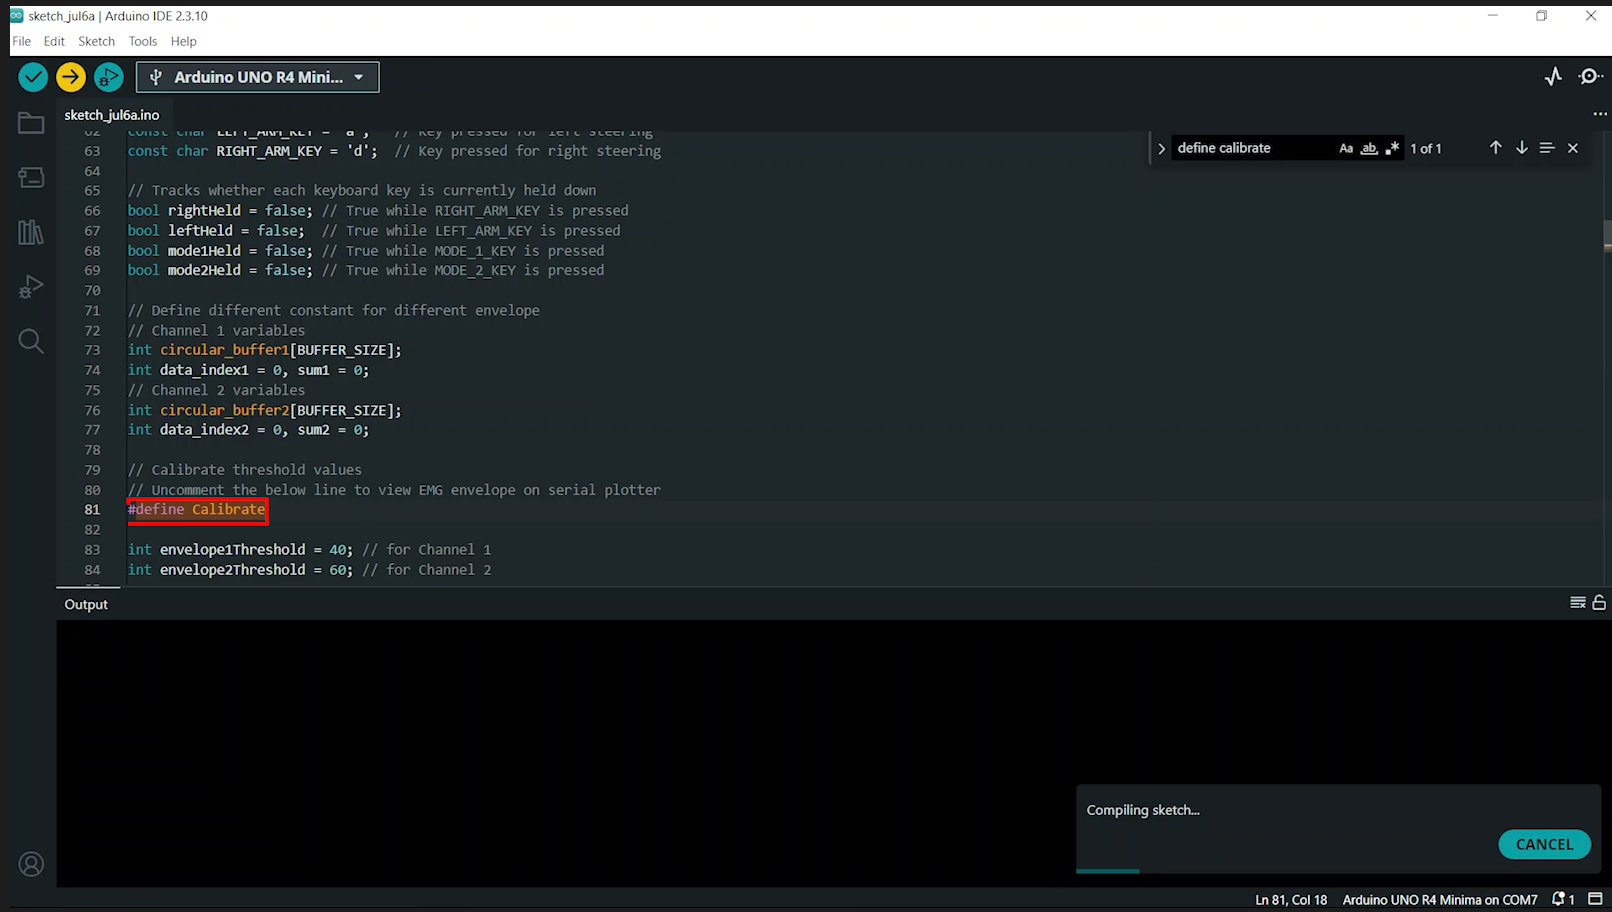
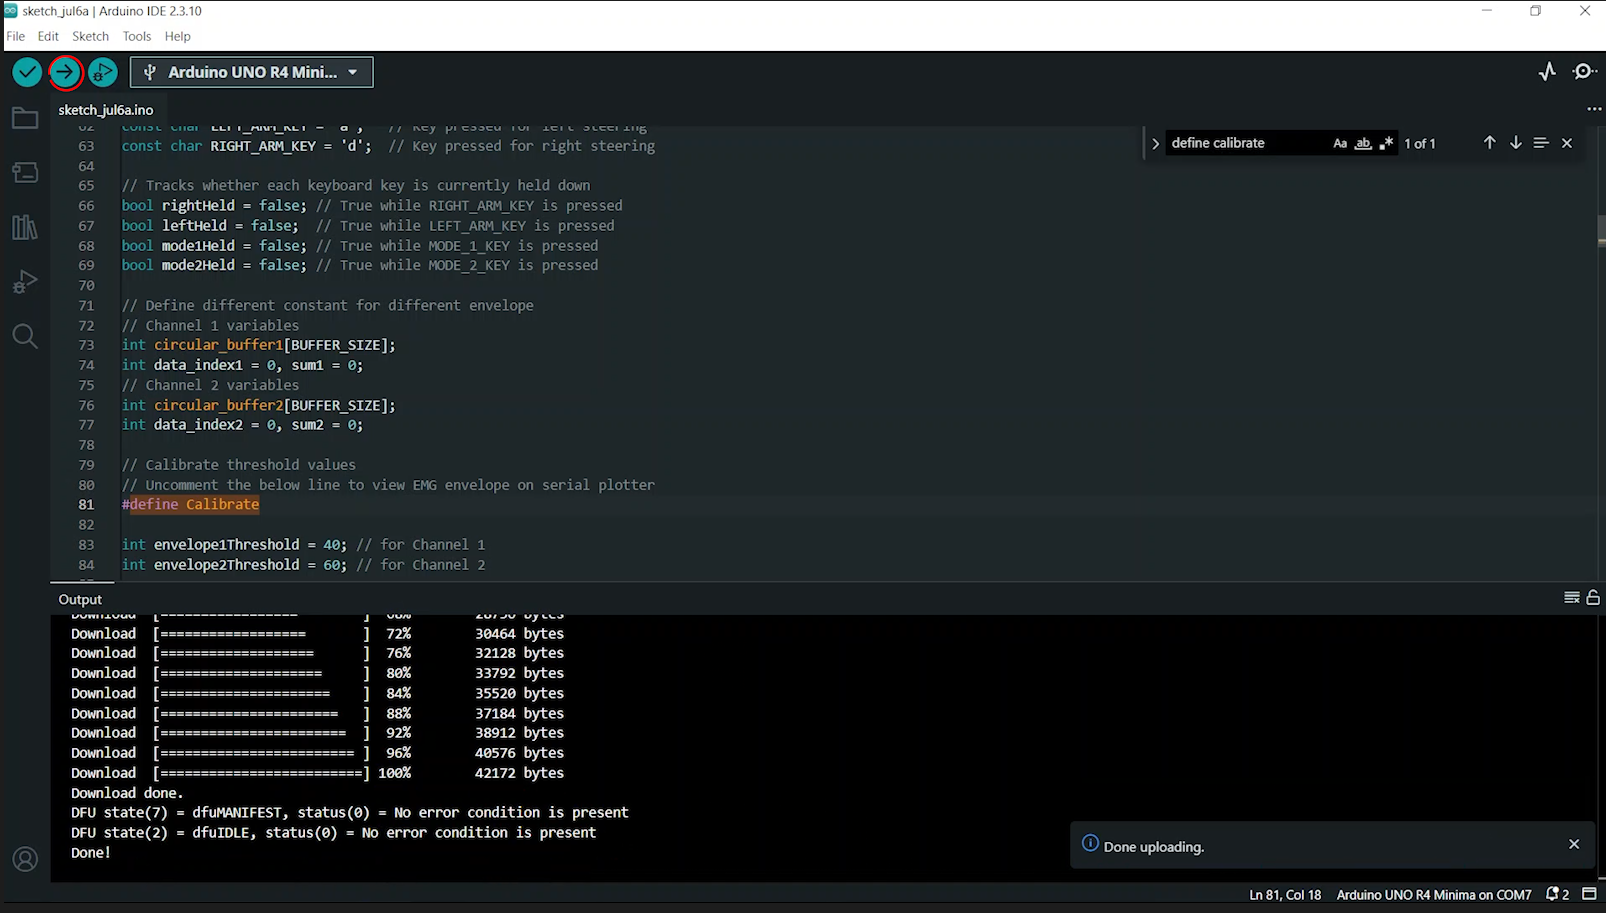
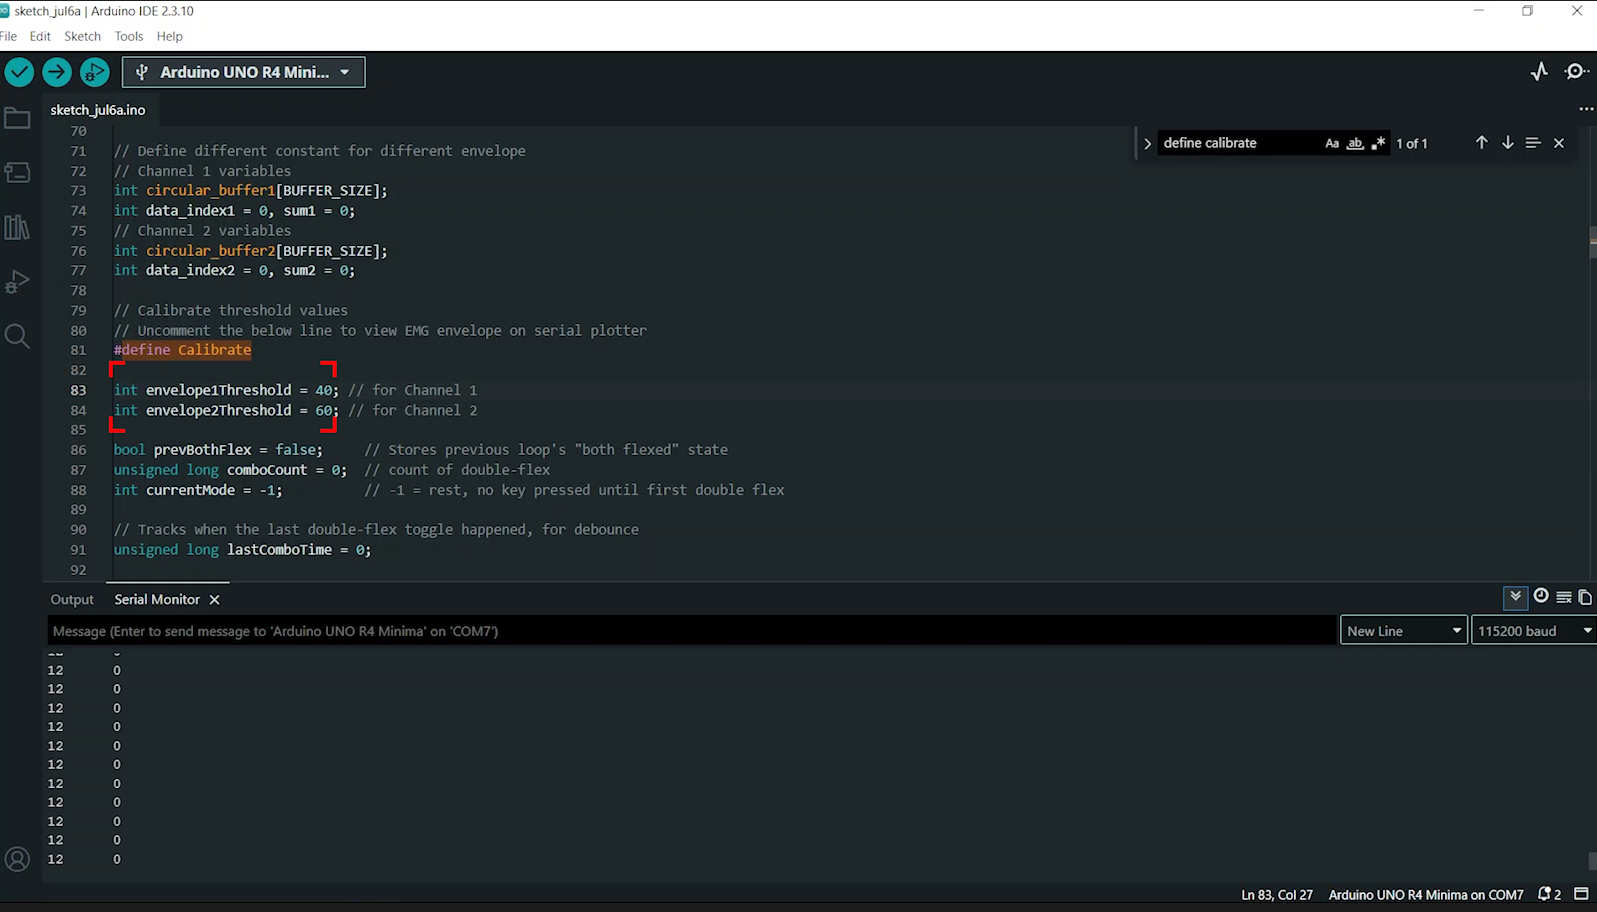
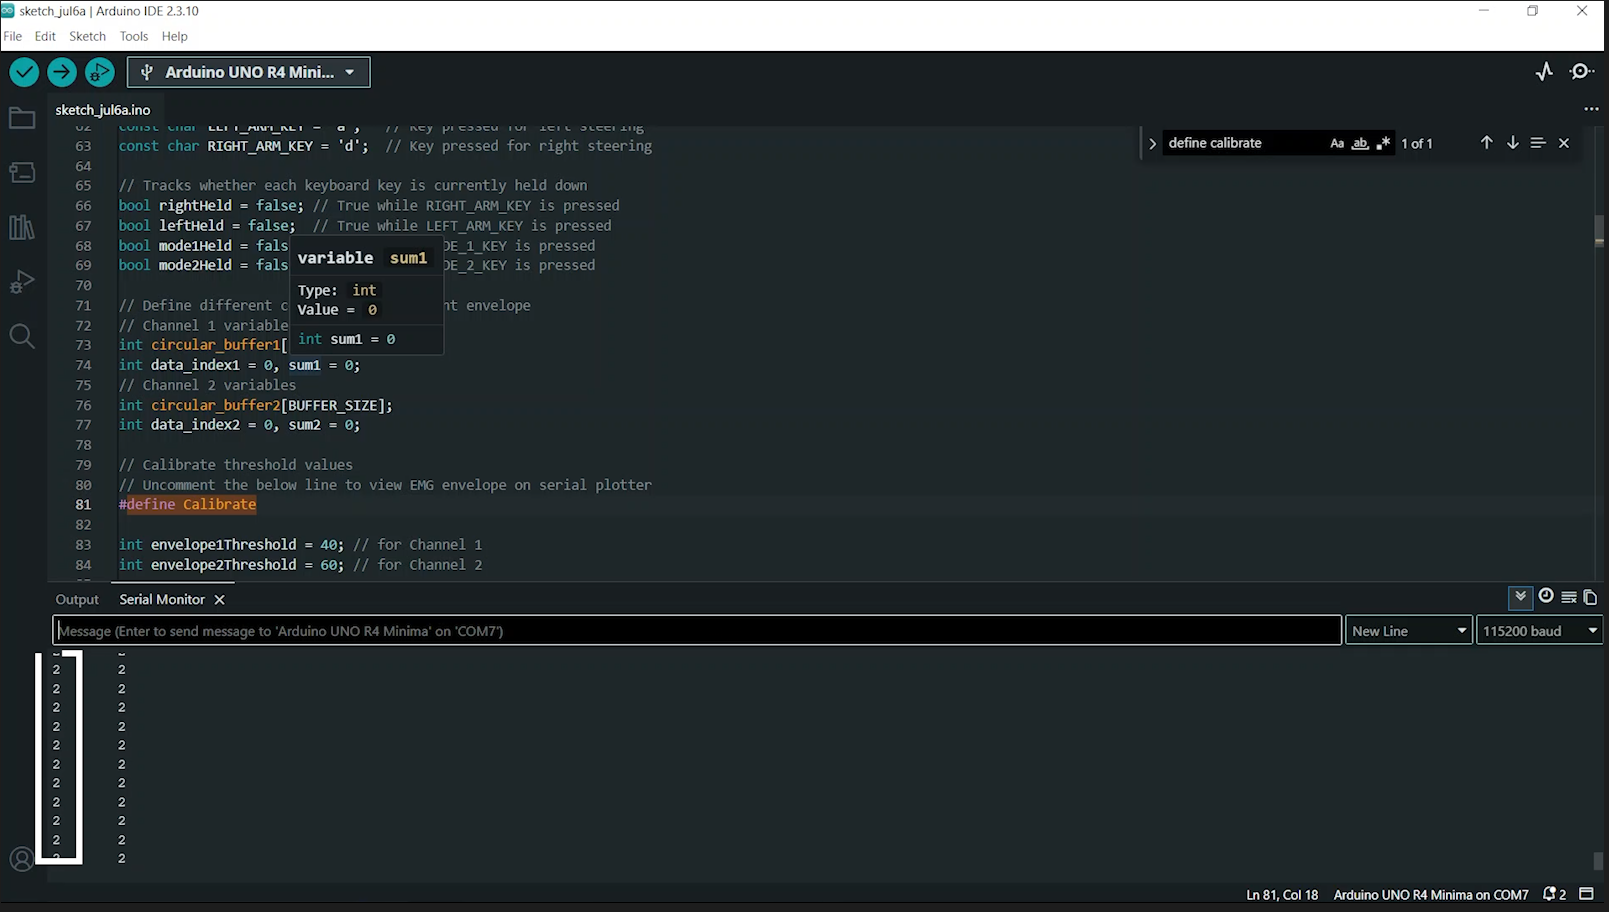
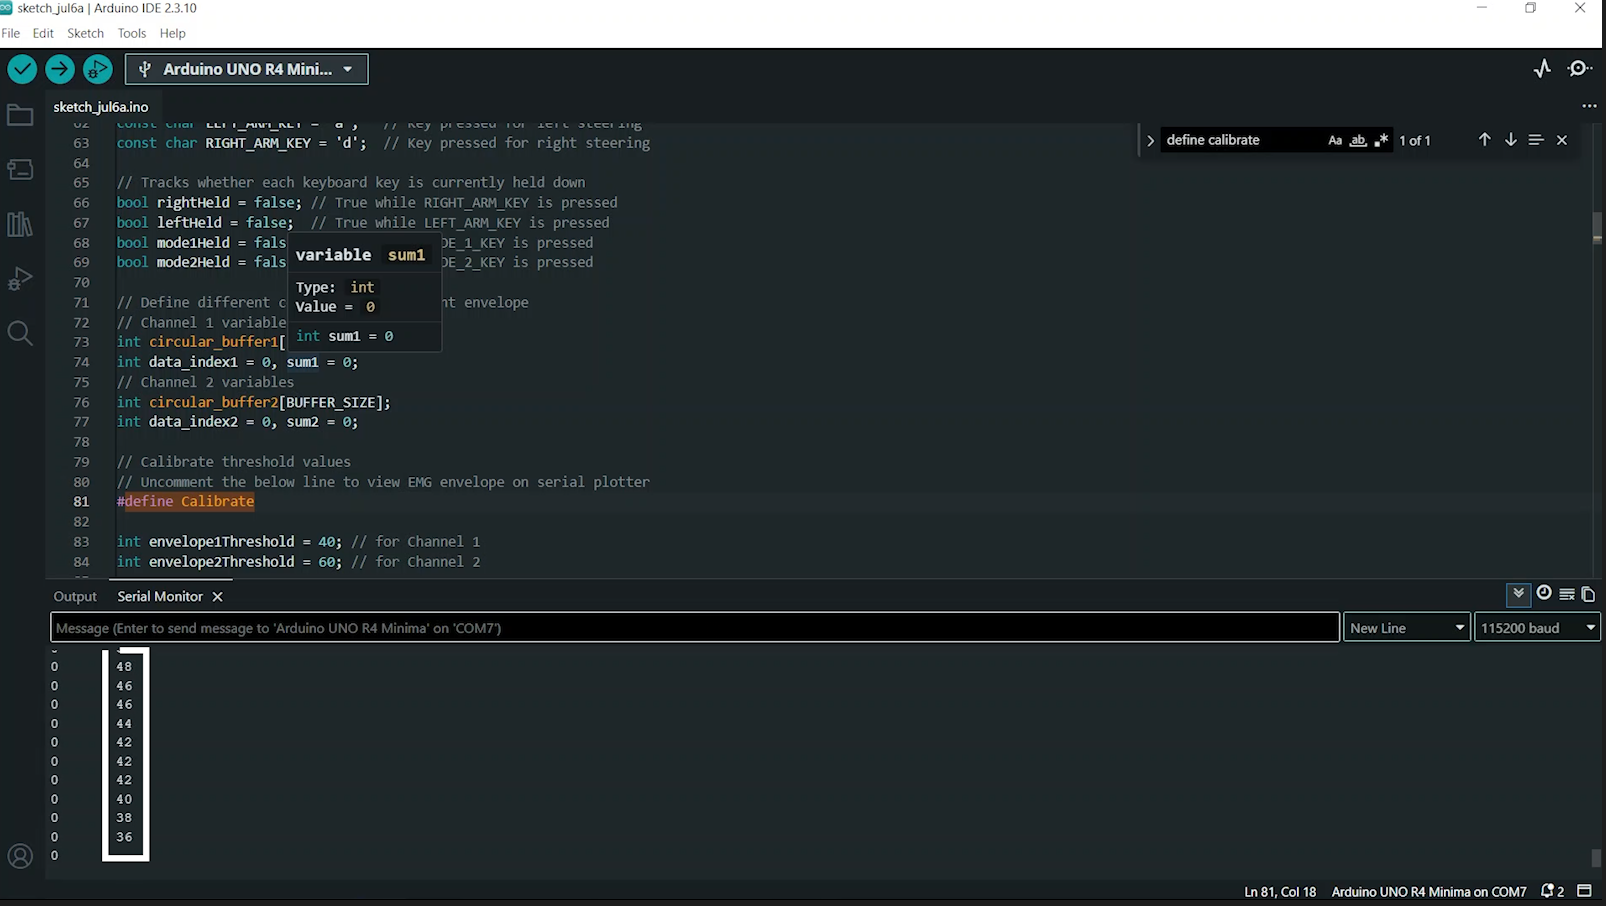
Follow these steps for calibration:
- Open the Arduino code and locate the following line:
- Uncomment the line so that it becomes:
- Upload the modified code to the Arduino.
- Open the Serial Monitor from the Arduino IDE.
- Flex your left forearm muscle several times while observing the values displayed in the Serial Monitor. Record the maximum peak value reached during a strong muscle contraction.
- Next, flex your right forearm muscle several times and record the maximum peak value for that channel.
- Calculate the threshold values by taking approximately 60–70% of the peak value measured for each channel.
- Update the threshold values in the code with the newly calculated values.
- int envelop1threshold = 40;int envelop1threshold = 40;
- Comment out the calibration line again:
- Upload the updated code to the Arduino.
- Test the controls in the game. If necessary, repeat the calibration process and fine-tune the threshold values until reliable muscle detection is achieved.
Playing the Game
.gif)
Once the hardware is connected, the code is uploaded, and the threshold values have been calibrated, you are ready to control the game using your muscle signals.
Controls
The system uses EMG signals from both forearms to control the vehicle:
- Flex the right forearm muscle to steer the car right (Keyboard key: D).
- Flex the left forearm muscle to steer the car left (Keyboard key: A).
Changing Driving Modes
The controller supports both Forward and Reverse driving modes.
- To change the driving mode, flex both forearm muscles simultaneously. This action is referred to as a double flex.
- The first double flex activates Forward Mode.
- In Forward Mode, the controller continuously presses the W key, causing the vehicle to move forward.
- Flexing both forearms simultaneously again toggles the controller to Reverse Mode.
- In Reverse Mode, the controller continuously presses the S key, causing the vehicle to move backward.
- Each subsequent double flex toggles between Forward Mode and Reverse Mode.
Keyboard Mappings
| Muscle Action | Keyboard Key | Function |
|---|---|---|
| Left Forearm Flex | A | Steer Left |
| Right Forearm Flex | D | Steer Right |
| Both Forearms Flexed (Forward Mode) | W | Move Forward |
| Both Forearms Flexed (Reverse Mode) | S | Move Reverse |
update your key mapping according to your need by changing the keys.
const char MODE_2_KEY = 's';
const char LEFT_ARM_KEY = 'a';
const char RIGHT_ARM_KEY = 'd';
Conclusion
.gif)
This was just a demonstration to show you how both the sensors (BioAmp EXG Pill & Muscle BioAmp Shield) can be used together to create a 2-channel EXG acquisition system and play games. In this project, we used BioAmp EXG Pill to record EMG signals, but it can also be used to record other biopotential signals as well like ECG, EOG, or EEG.
Video Tutorial
 - BioAmp EXG Pill and Muscle BioAmp Shield)
The full step-by-step tutorial for this project is available on our YouTube channel, where we explain every step in detail—from hardware setup and wiring to programming and testing.