ESP32-S3 YOUTH #1 - Getting Started
by KusTech in Circuits > Arduino
622 Views, 0 Favorites, 0 Comments
ESP32-S3 YOUTH #1 - Getting Started

Hello fellas!
In this article, I’ll explain everything you need to know to upload your first code to the ESP32-S3 Youth board using the Arduino IDE. Don’t worry—it’s easier than it sounds!
What is this board?
The ESP32-S3 Youth is a microcontroller board based on the ESP32-S3 chip from Espressif. It includes WiFi, Bluetooth, and plenty of useful features that hobbyists and microcontroller fans will appreciate.
The board’s design is inspired by the Arduino Uno form factor, with a few ideas borrowed from the Adafruit Metro series, plus my own additions—features I’ve always wanted when programming these boards.
What makes it special?
- A unique and eye-catching Anime design.
- Arduino Uno form factor for compatibility with many shields.
- LED indicators for pins 2–13 (because who doesn’t like blinking lights?).
- A physical power switch to turn the board on or off.
- Supports input voltage up to 28V.
- LEDs and NeoPixel for colorful fun.
- A buzzer for sound effects.
- A Stemma QT connector for add-ons.
- Reset and Boot buttons for easy programming.
- Works with Arduino IDE or CircuitPython.
And the best part? It’s the first colorful anime-themed board with ESP32! Some people say redheads don’t have souls, but I definitely put mine into this project.
Supplies


You can find any of these boards on my Tindie store:
Arduino IDE Configuration


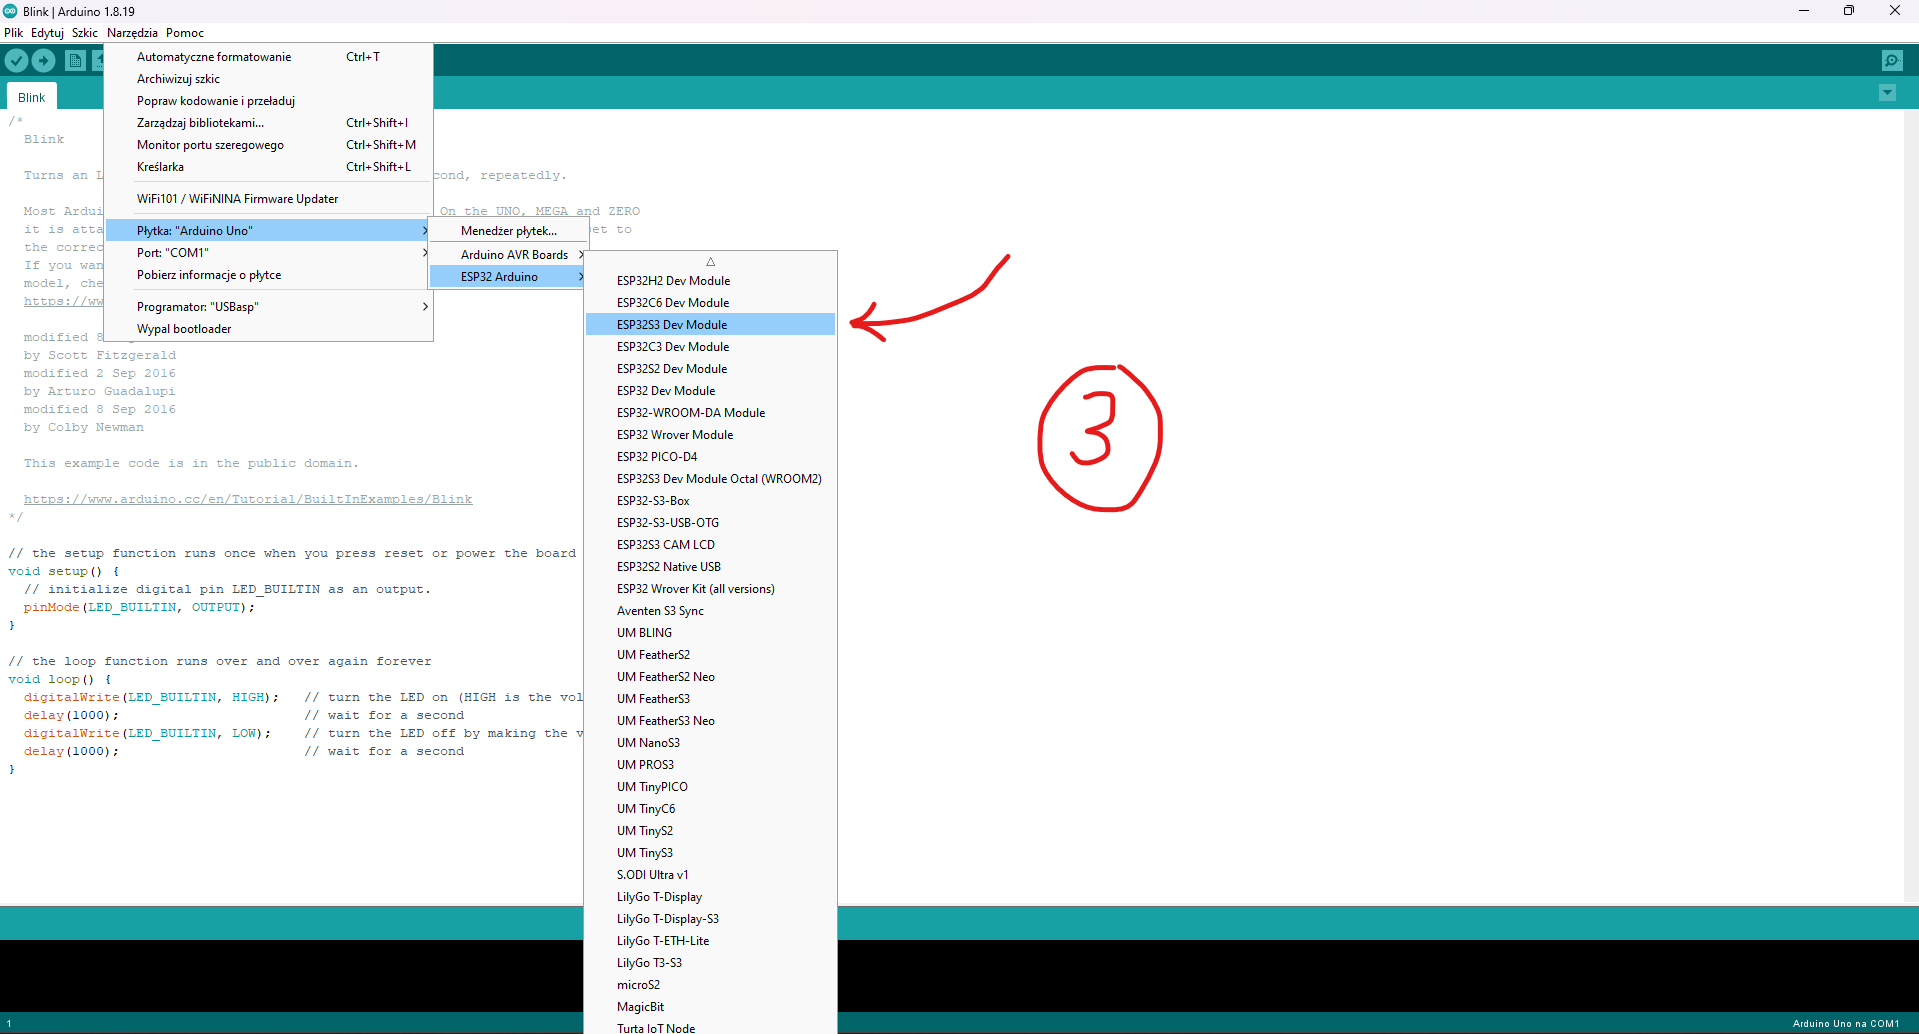
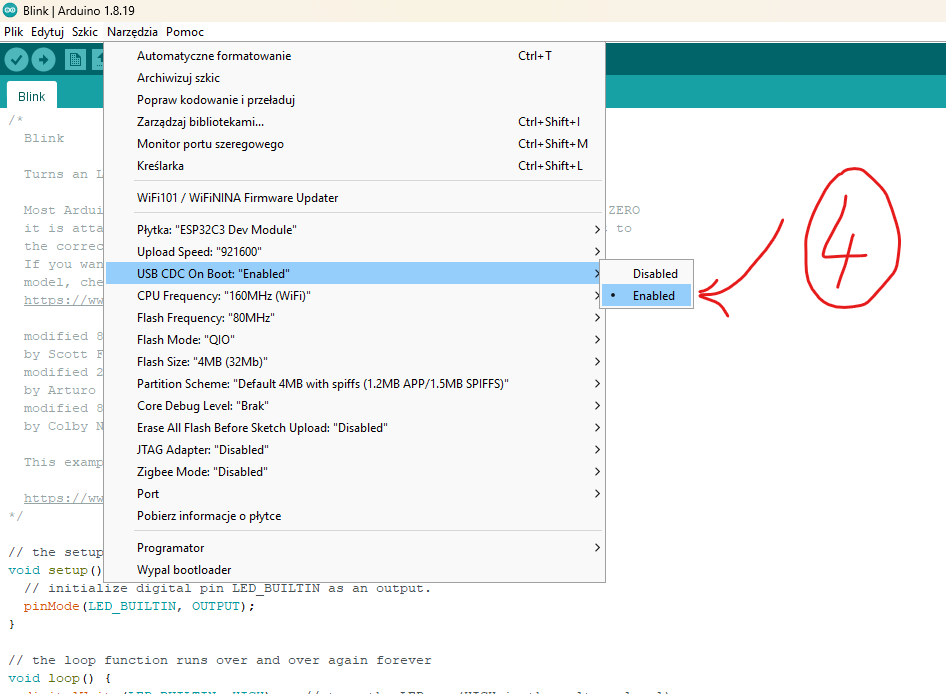
To do proper programming, first of all, we need to set up the ESP32S3 board in the Arduino IDE. There are some cool guides on how to do it (like this one), but basically, all you need to do is:
- Install Arduino IDE (I prefer version 1.8.19)
- Go to File > Preferences > Additional Boards Manager URLs and paste the following URL: "https://raw.githubusercontent.com/espressif/arduino-esp32/gh-pages/package_esp32_index.json" (1st screen).
- Then, go to the Boards Manager and install ESP32 by Espressif Systems (2nd screen).
After installation is complete, choose the ESP32S3 Dev Module (3rd screen) and set USB CDC On Boot to Enable (4th screen). Once everything is set up, you can start programming!
ESP32-S3 Youth Connection

Don't forget to check is the Swith is "ON" position!
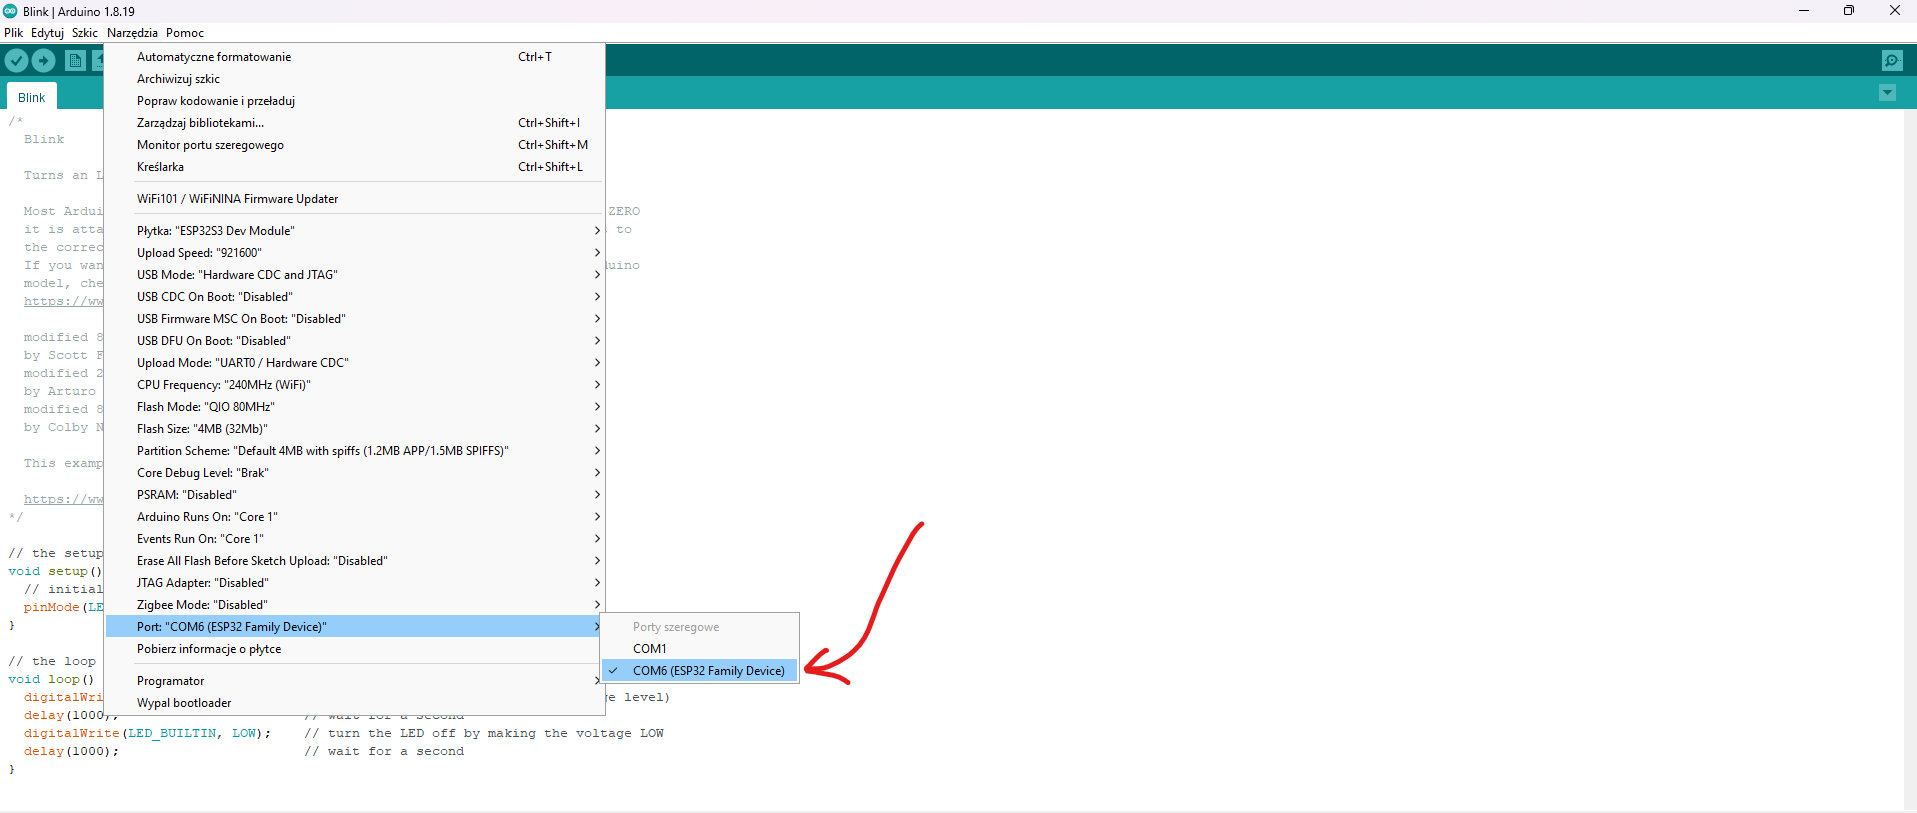
To connect the board, hold down the Boot button while plugging in the USB cable. You only need to do this once before uploading the first code. In the future, you can do it again if needed, but it’s usually not necessary. After connecting, in Arduino IDE, choose the COM port with the phrase "ESP Family device" in parentheses. Now it is ready to upload your code.
Let's Check How It Works
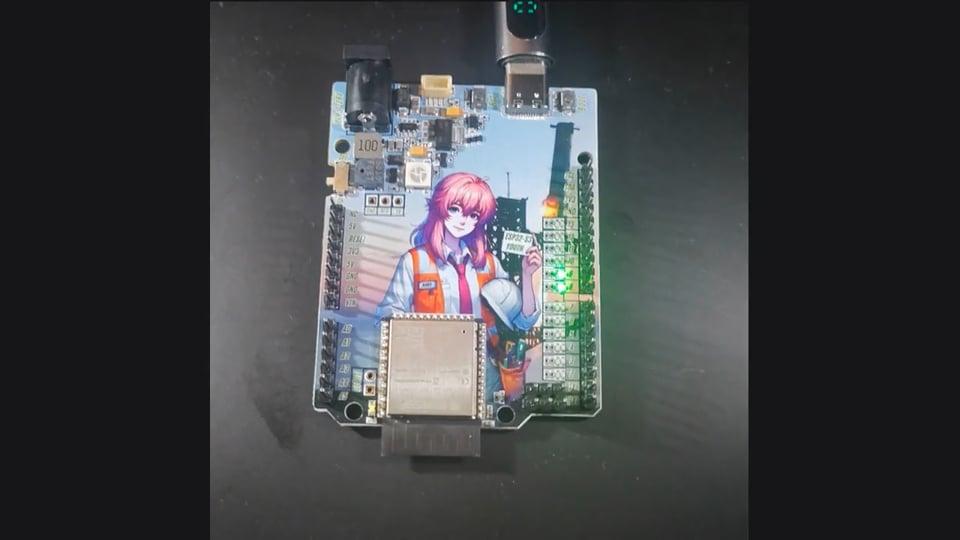)
Now, let’s see what this little gem can do in practice:
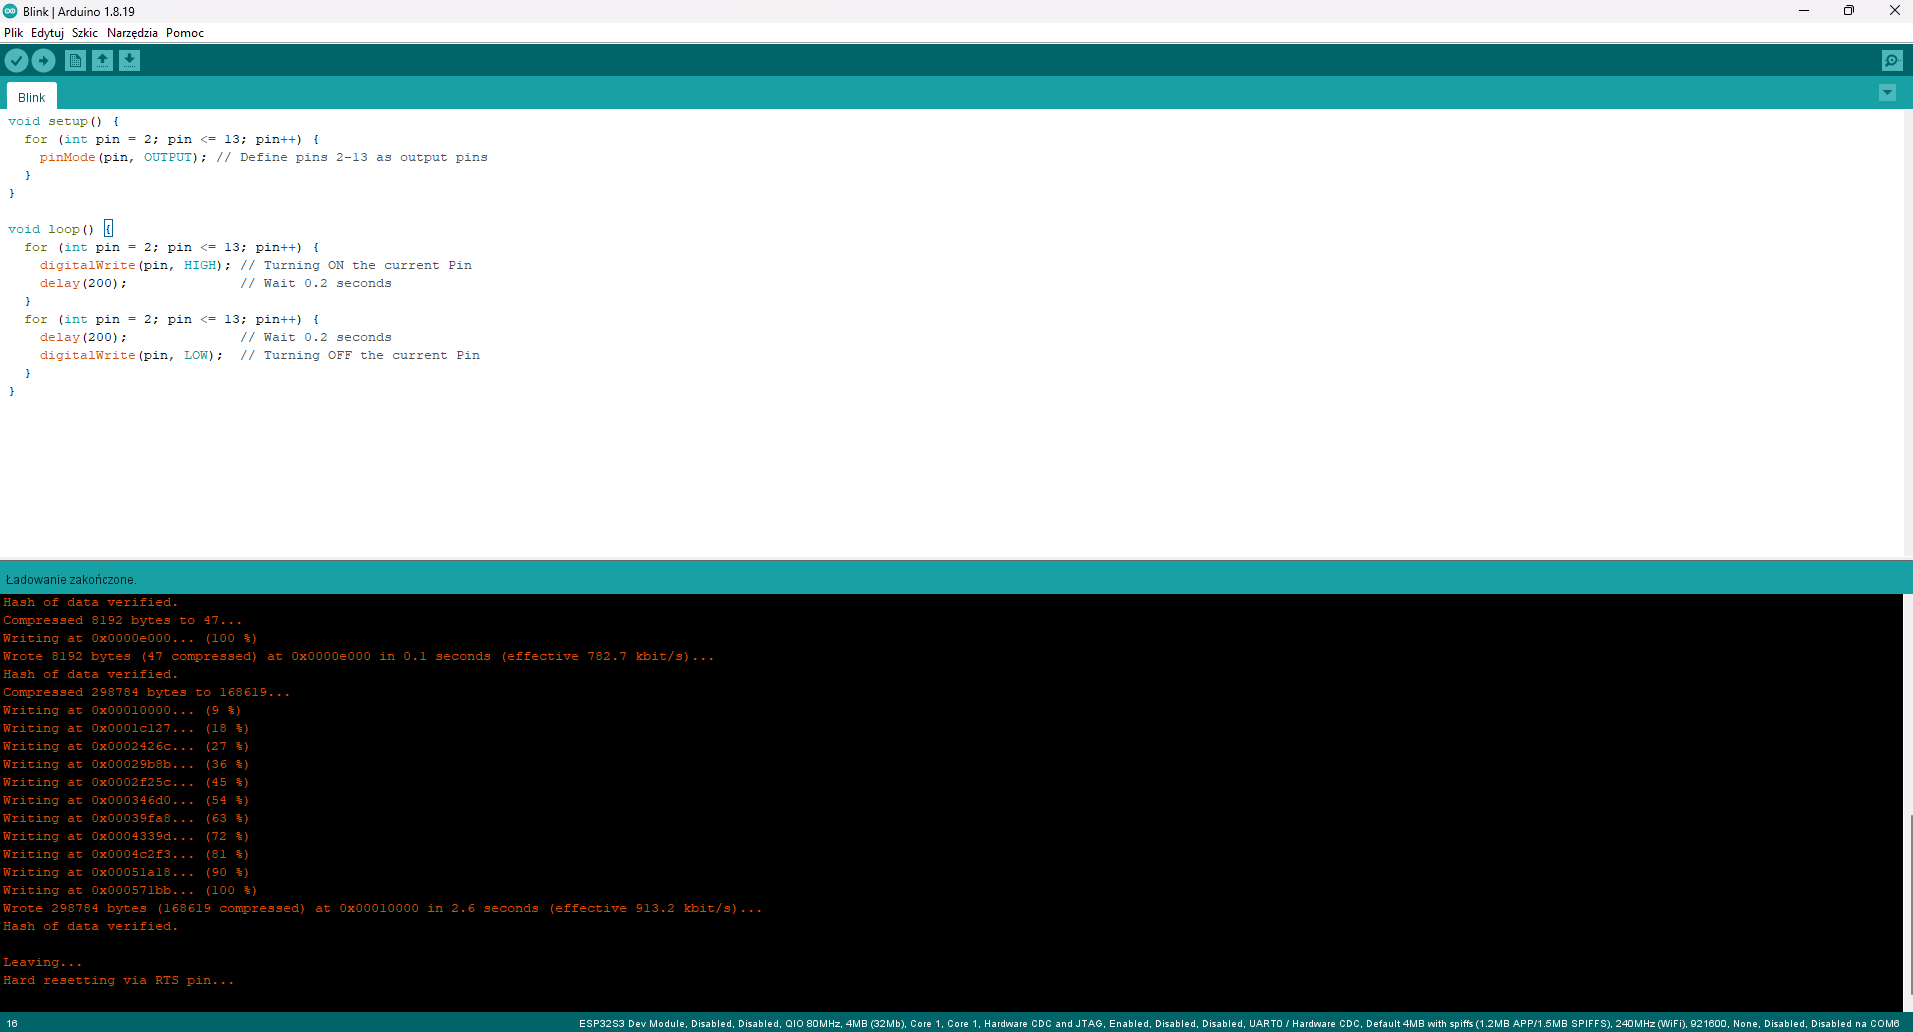
Open a new file in Arduino IDE and copy the following code:
Then, select the COM port your board is connected to and upload the code.
Once the code is uploaded, press the "Rst" button and watch the magic happen! 😊
The code will turn LEDs on and off one by one for pins 2–13 connected to the board. When the signal is positive, the green LED will light up; when it’s negative, the blue LED will take over.
P.S.
Your LEDs might not shine as brightly as in the demo video. My prototype uses 580 Ohm resistors, while the public version of the ESP32-S3 Youth boards comes with 10 KOhm resistors. These are more user-friendly and designed to indicate signals without being overly bright.
Downloads
In Conclusion

Thank you for reading this article! If you have any questions or if something doesn’t work, feel free to ask in the comments section.
By the way - don't forget to check all Collection in my Tindie shop :)