Easy Arduino Mini Piano for Beginners
by Aynur nouri in Circuits > Arduino
59 Views, 0 Favorites, 0 Comments
Easy Arduino Mini Piano for Beginners
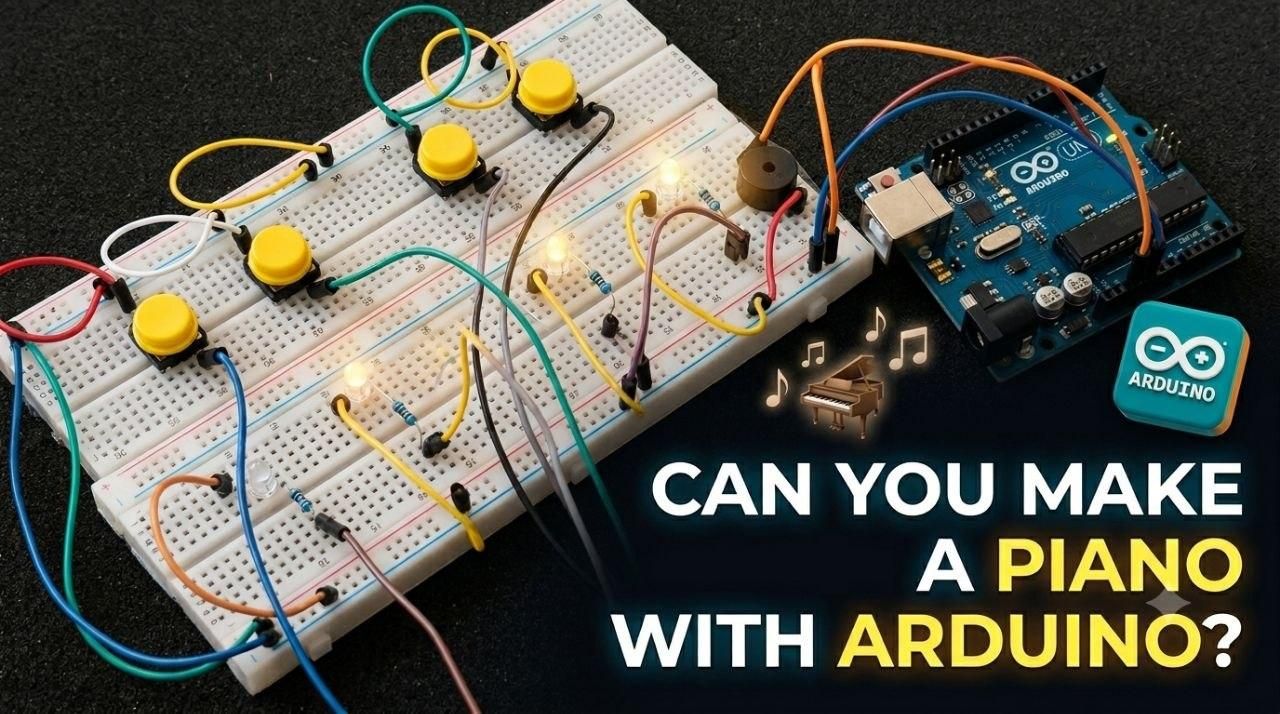
Have you ever wanted to play music with your own DIY project? In this tutorial, I’ll show you how to build a simple Mini Piano using an Arduino Uno, a breadboard, a few push buttons, and a buzzer. This is a perfect project for beginners to learn about digital inputs and sound frequency control.
Supplies
Components:
- Arduino Uno (or any Arduino board)
- Breadboard
- Push Buttons (4 units)
- Passive Buzzer
- LEDs (4 units)
- Resistors (220 ohm)
- Jumper Wires
Tools:
- USB Cable for Arduino
- Computer with Arduino IDE installed
Wiring and Connections
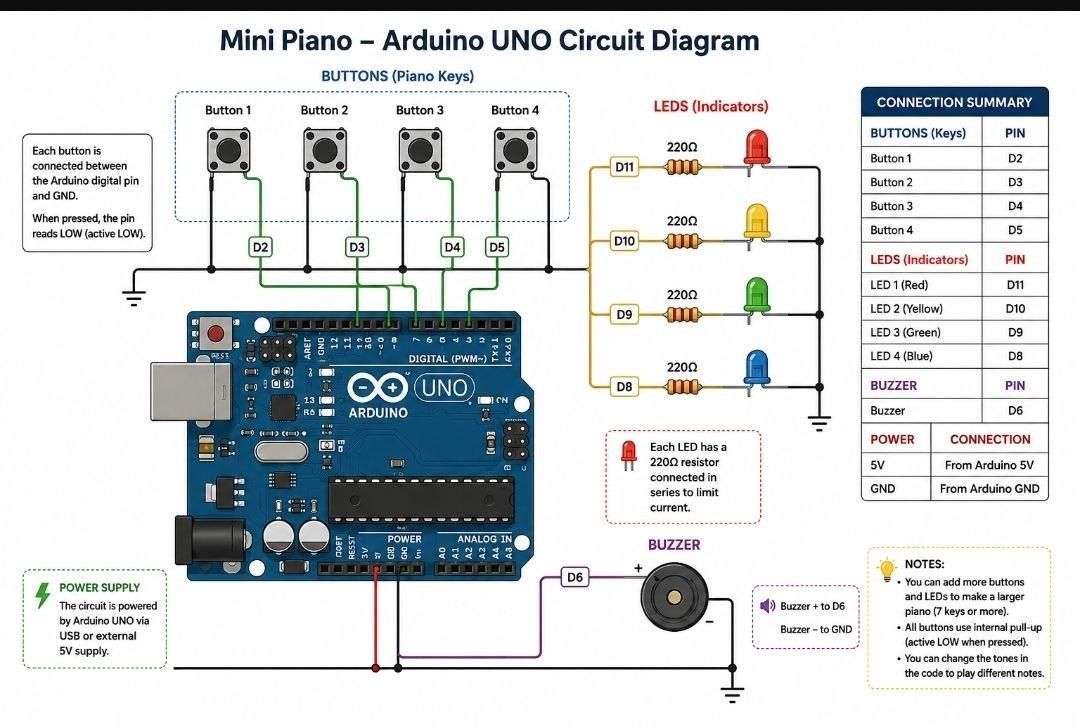
To build this mini piano, connect your components to the Arduino Uno as shown in the circuit diagram below. Use the following guide for the pins:
- Buttons (Piano Keys): Connect the four buttons to digital pins D2, D3, D4, and D5. Connect the other side of each button to GND.
- LEDs (Indicators): Connect the four LEDs (with 220Ω resistors) to digital pins D11, D10, D9, and D8.
- Buzzer: Connect the positive terminal of the buzzer to digital pin D6 and the negative terminal to GND.
- Power: Ensure your Arduino is powered via USB or a 5V source.
Make sure your wiring matches the circuit diagram. Double-check all connections before plugging in the USB cable!
The Code
Now, let's program the Arduino to make it work as a piano.
- Connect your Arduino Uno to your computer using the USB cable.
- Open the Arduino IDE.
- Copy the code below and paste it into a new sketch.
- Click the Upload button to send the code to your board.
Downloads
Testing and Playing
Congratulations! Now that your wiring is complete and the code is uploaded, it’s time to play. Power up your Arduino and press the buttons to hear the different tones. The LEDs will light up, providing a visual feedback for each note you play.
See it in action: Check out the video below to see how the Mini Piano works and how to play your first melody!
Final Touches &Resources
You have now successfully built your own Arduino Mini Piano! This is a great starting point for your journey into electronics and programming. You can experiment by adding more buttons to create more octaves or by changing the notes in the code to play your favorite songs.
GitHub Repository: You can find the full source code and any future updates for this project in my GitHub repository: View Arduino Mini Piano on GitHub
Thank you for following this tutorial!
If you liked this project, please share it and let me know how it turned out for you in the comments. Happy making!