Electricity Tariff Monitor
by unokaycomics in Circuits > Microcontrollers
74 Views, 1 Favorites, 0 Comments
Electricity Tariff Monitor
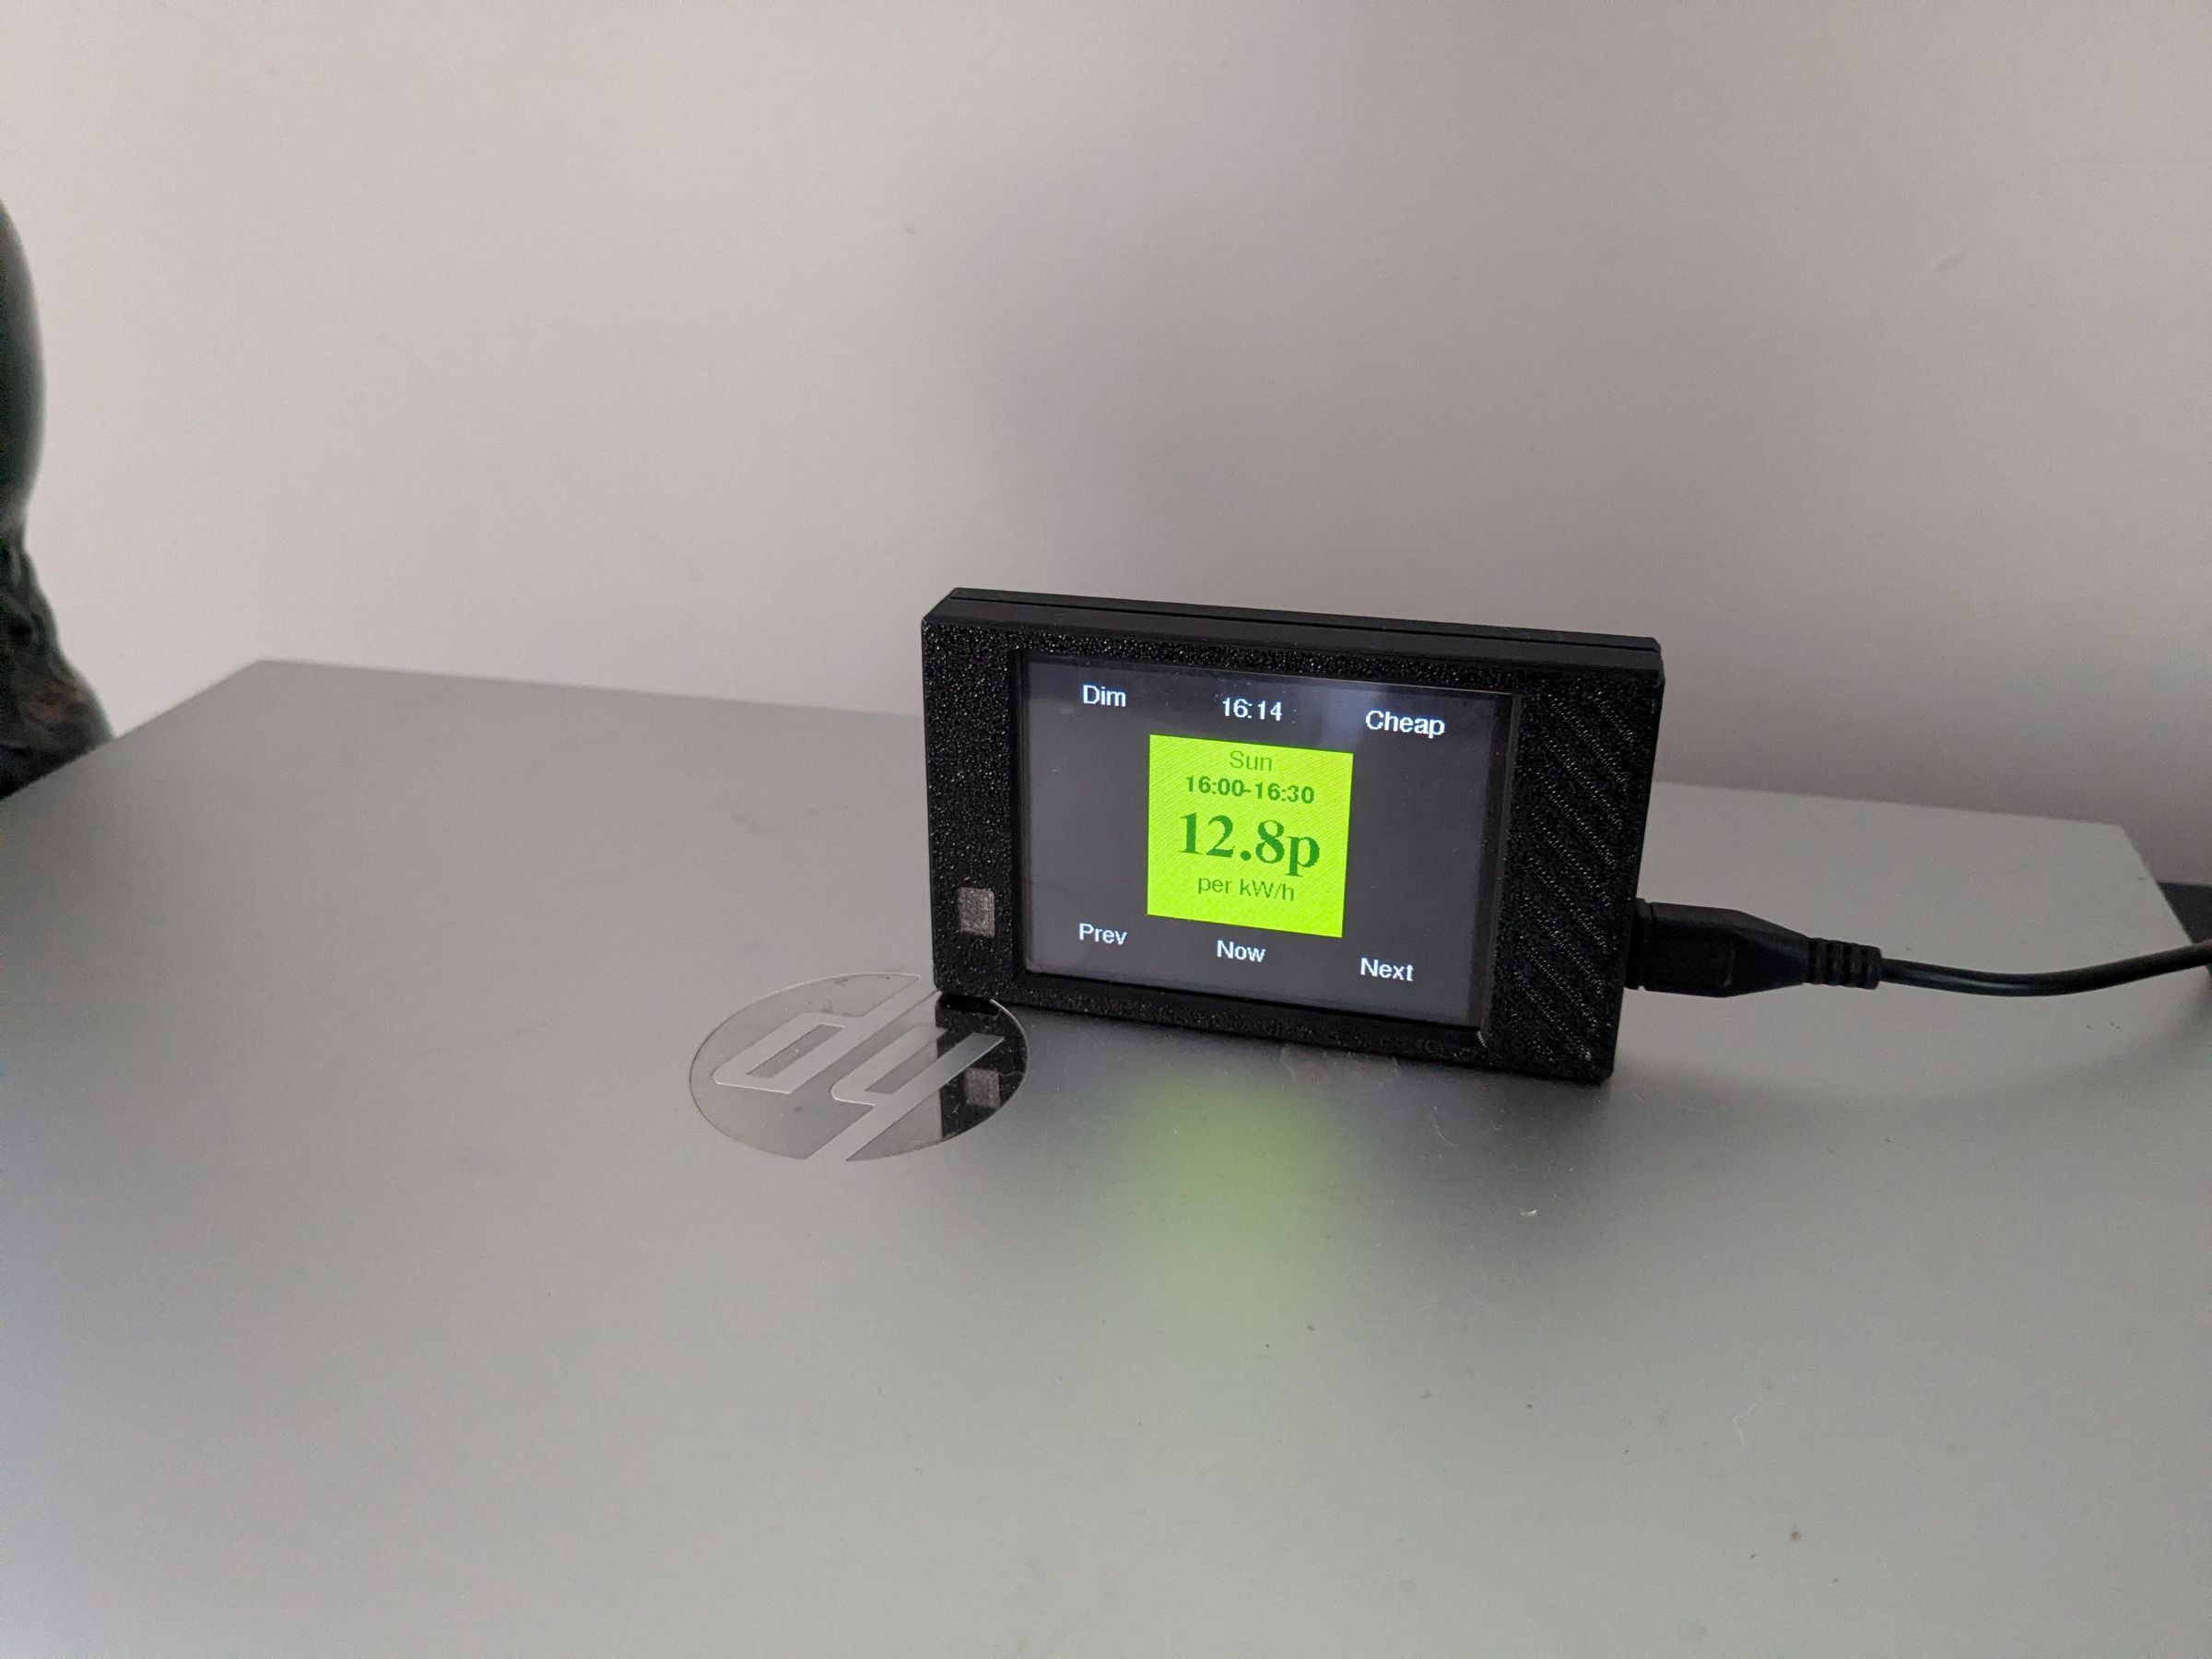
I'm on an energy tariff where I get a price for each half-hour slot one day in advance. So I built a standalone monitor to show me the current price and the next cheapest slot.
Supplies
I used an ESP32 with a built in 320 x 240 2.8" LCD display with a touch screen called the "ESP32-2432S028R" - otherwise known as the "Cheap Yellow Display" or CYD. I bought mine on eBay from a hobby supplier and it came with a 3D-printed case, all for just over £15.
Backend App
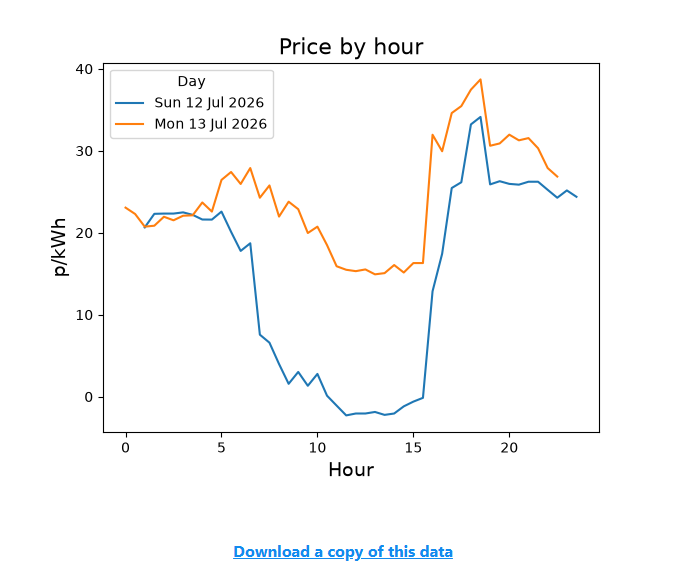
As a first step I built a Flask app in Python to do the heavy lifting of getting the energy price data from my supplier - Octopus Energy. Octopus provides an API which you can use to request the tariff data. It responds with a JSON array of the pricing data for each half hour.
I used pandas to manipulate the pricing data in the app, and matplotlib to produce a graph of today's and tomorrow's prices.
My app also has an API which can be access with a query string. This returns a simplified version of the pricing data which is designed to support access by the CYD. Here's an example of the response:
I developed my app in the Linux subsystem on an old Chromebook I had, using VSCodium as the IDE installed on Linux.
I used Gunicorn as the web-application server for my Flask app and Nginx as the web server, and I deployed the app to a Raspberry Pi 5 computer in my house, so it's just accessible on my home network.
The code is available on my Codeberg repository.
Develop CYD Software
For this, I used the Arduino IDE to connect to the CYD, and built the software using the Arduino sketch language (essentially a version of C++).
The CYD has built-in WiFi, and I used the standard Arduino WiFi library to connect to my local network. Then I used the HTTPClient library to make a request to my app for the pricing data. It then uses the ArduinoJson library to deserialise this data and then access it as an array.
Once in an array, it was easy to navigate through the time slots and present the price data.
The best starting point for information on developing for the CYD is the Brian Lough GitHub page.
The additional libraries I needed were:
- TFT_eSPI - this is a general purpose library for displaying information on the LCD. It also includes libraries for creating buttons, which I used to create the six buttons on the screen.
- XPT2046_Touchscreen - this is a library for the touchscreen. It enables you to query the coordinates and pressure when you touch the screen. You also need to map these coordinates to the dimensions of the screen.
- NTPClient and WiFiUdp - these are used to access the current time, as there are some time-based events I needed to develop.
You can find the code in my Codeberg repository.
Monitor Functionality
These are the functions I developed.
Buttons:
- Dim the display. Pressing this button cycles the backlight through 3 levels - low, medium, and full.
- Set time offset. The monitor displays the current time in a button. To avoid having to build in automatic check for daylight saving time, pressing on this button toggles daylight saving time on and off.
- Next cheapest. This reads through the array of time slots and finds the next "cheapest". The price category - high, medium, low - is determined by the backend Flask app when it has the data in a pandas dataframe. I experimented with a few options, but in the end I categorised the data using a lambda with upper and lower boundaries calculated using the upper 20% and lower 20% of values:
- Now button. This gets the price data for the current time slot based on the current time.
- Next button. This advances through the time slots.
- Previous button. This goes back through the time slots.
Time-based events:
- The time button is updated every minute with the current time.
- Each half-hour, the display advances to show the price for the current time slot.
- Each day at 18:00, the monitor retrieves the latest prices by making an HTTP call to the backend app. This does the call to Octopus Energy, who publish their prices each day around 16:00-17:00.
- After 15 seconds of inactivity, the monitor switches off the backlight to save power. The CYD doesn't really have a low-power mode as such, as the display processor will still be running, but this is the best that can be achieved. Touching anywhere on the screen sets the backlight back on at the previous setting.
Over to You
I haven't gone into great detail about how to replicate this particular device, as your mileage may vary in what you want to produce, but I wanted to show what's possible if you pick the right hardware and software to produce your solution.
The CYD is a great platform for prototyping or for creating a finished solution, as it's cheap, has everything you need bundled together, and is relatively easy to program.
Also, I can recommend Flask as a platform for creating quick web-based apps - both for UI-based apps and for creating APIs.