Esp32 S3 Sense Video Streaming in Micro Python
by ManojR6 in Circuits > Microcontrollers
1215 Views, 4 Favorites, 0 Comments
Esp32 S3 Sense Video Streaming in Micro Python
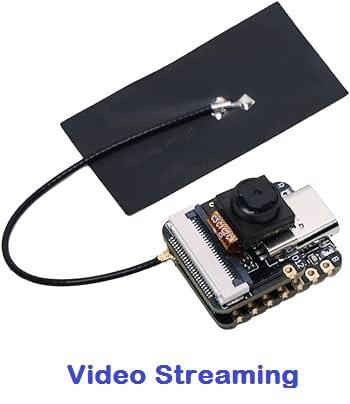
We need video streaming for various applications and for Ai Application. Here we are going to build a Video Streaming application using Esp32 S3 Sense and micropython.
Supplies
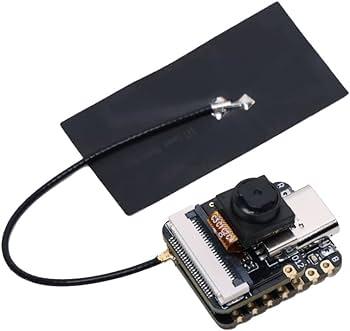
- Esp32 s3 sense with wifi antenna and camera attached to it
- Thonny IDE
Story
what is it ?
Video streaming is a continuous transmission of video files from a server to a client. Video streaming enables users to view videos online without having to download them. Streamed video content can include movies, TV shows, YouTube videos and livestreamed content.
What is streaming ?
The term streaming refers to the continual transmission of audio and video files from a server to a client. In video streams, content is sent in a compressed form over the internet and is displayed by the viewer in real time. The media is sent in a continuous stream of data and is played as it arrives. The user needs a player, which is a special program that uncompresses and sends video data to the display and audio data to speakers. Examples of media players include Windows Media Player 12 for Windows 10 or QuickTime Player for MacOS.
How does streaming works ?
Video streams normally begin with a prerecorded media file hosted on a remote server. Once the server receives a client request, the data in the video file is compressed and sent to the requesting device in pieces. Audio and video files are broken into data packets, where each packet contains a small piece of data. A transmission protocol, much of the time either Transmission Control Protocol (TCP) or User Datagram Protocol (UDP), is used to exchange data over a network. Once the requesting client receives the data packets, a video player on the user end will decompress the data and interpret video and audio. The video files are automatically deleted once played.
Hardware Setup of Esp32 S3 Sense:-

For setting up a video streaming server on esp32 S3 sense. you need to connect the wifi antenna to the esp32 board and the camera module to the board as well as shown in figure above.
The esp32 s3 sense module needs to connect to your network router. For which you need the SSID of the router and the password of the router. Over here esp32 s3 sense module is setup as a video streaming Webserver.
Finding SSID and Password of the Router :-


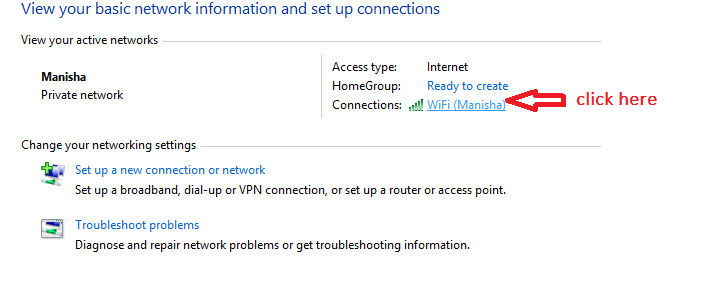
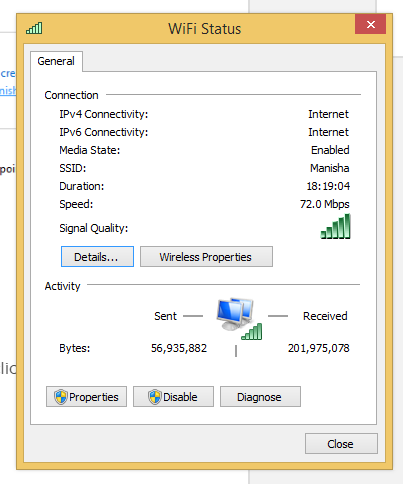
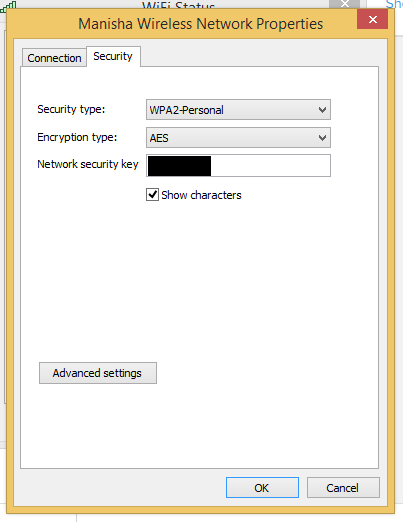
Steps for finding the SSID and password of router
Step 1:-
Right click on windows icon and click on control panel.
A control panel window will open.
Step 2:-
On control panel window click on network and internet.
Step 3:-
click on network and sharing.
Step 4:-
Click on wifi link to get wifi status window.
Step 5:-
A wifi status window will appear on it click on wireless properties.
Copy the SSID on a notepad.
Step 6:-
click on security tab of wireless properties window and check on show character to look for password.
copy the password on a notepad as it is required for letting your webserver connect to your router.
Downloading Micro Python Firmware With Camera Driver.:-
Step 1:-
click on the link bellow to download the firmware with camera driver and some source code.
https://files.seeedstudio.com/wiki/wiki-ranger/Contributions/S3-MicroPy/XIAO_ESP32S3_Micropython.zip
Installing the Firmware With Camera Driver on Esp32 S3 Sense:-

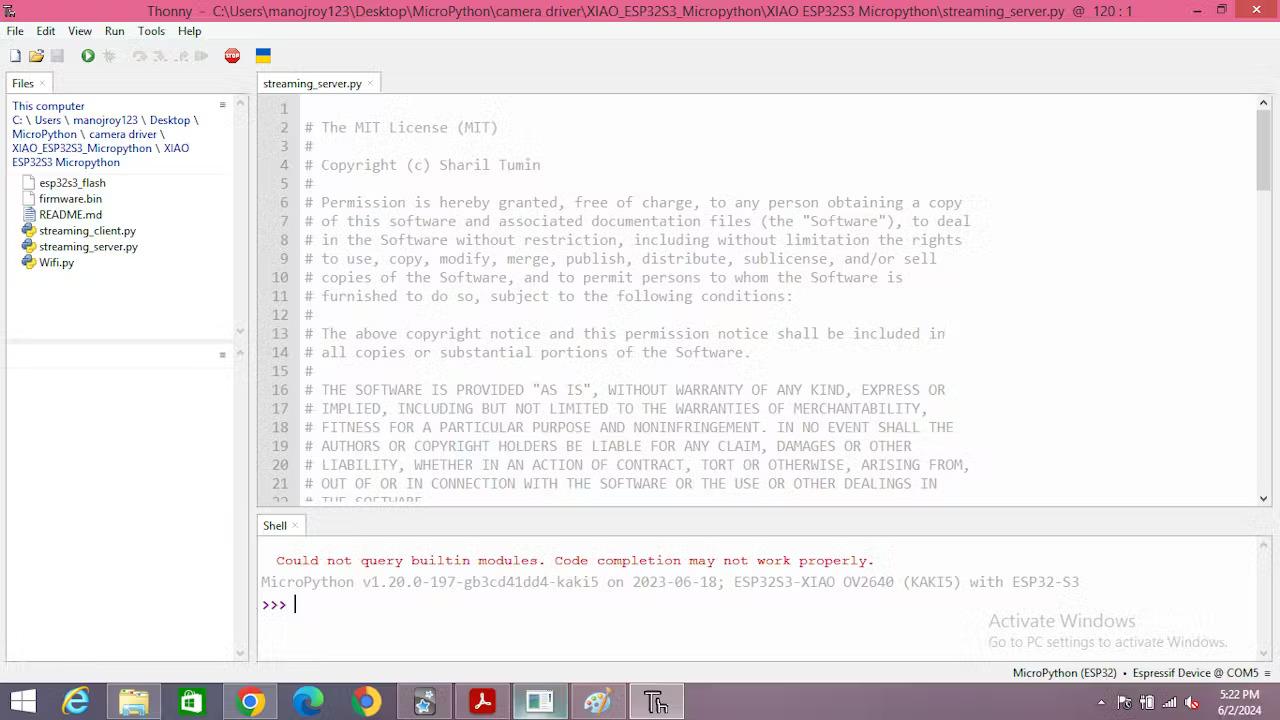

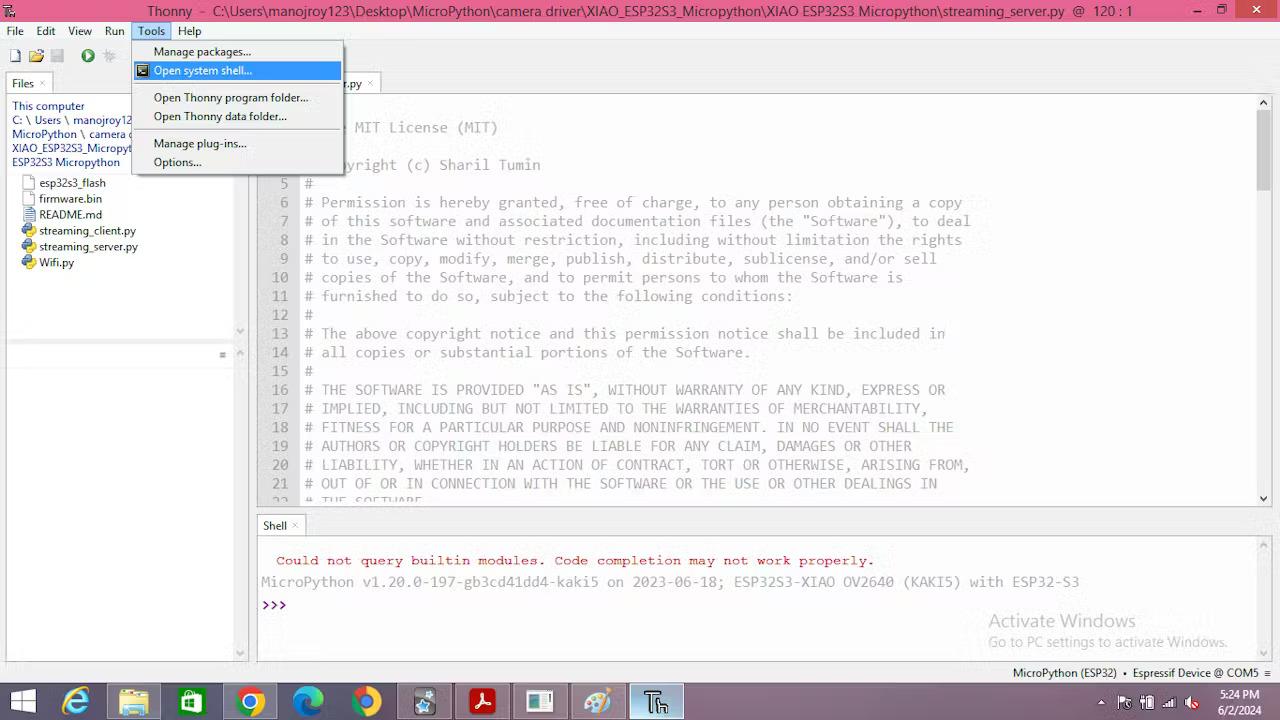


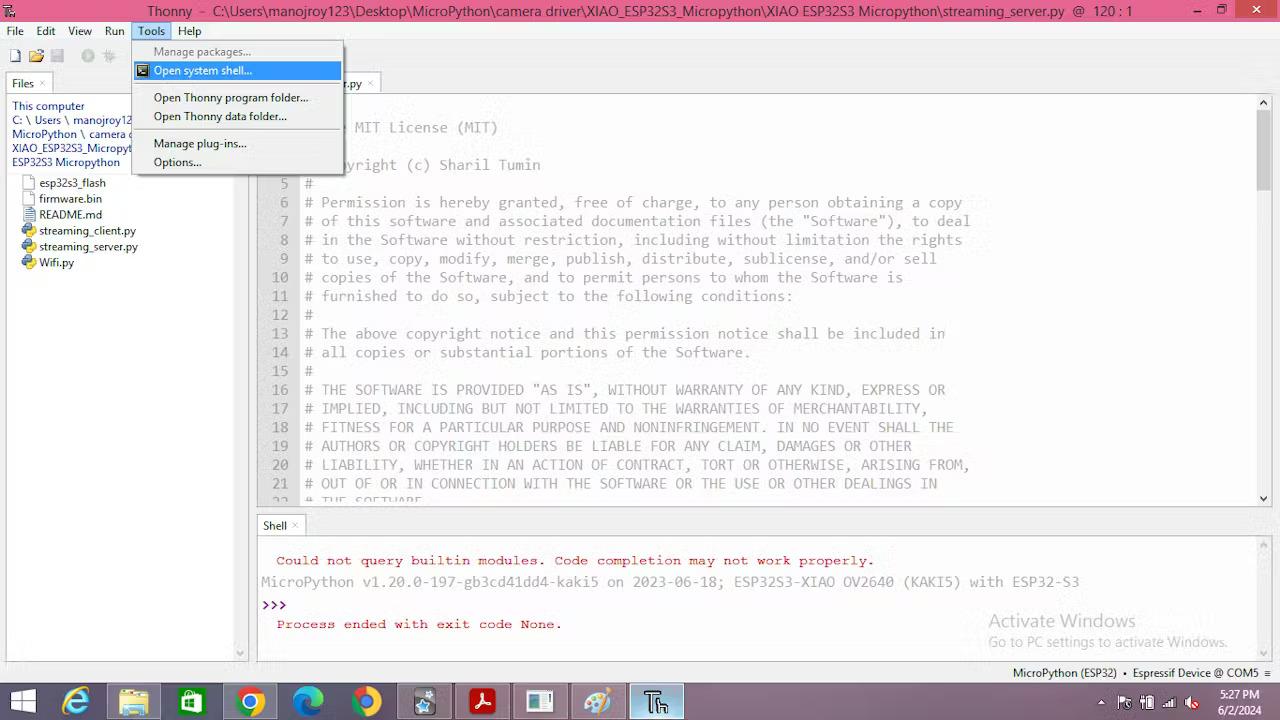
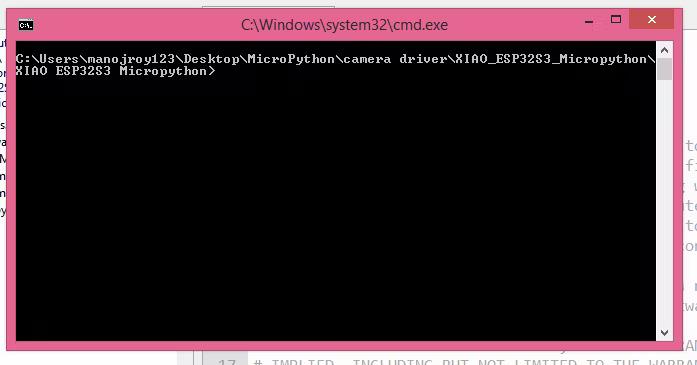


Step 1:-
create a micro python folder on desktop.
Step 2:-
Copy XIAO_ESP32S3_Micropython.zip from download folder to Micro Python folder
Step 3:-
Extract the XIAO_ESP32S3_Micropython.zip in Micro Python folder.
Step 4:-
Open Thonny.
Step 5:-
Click on tools tab in thonny Application.
Step 6:-
Click on open system shell.
Step 7:-
A command window will open.
Step 8:-
click CTRL+B to open python shell.
step 9:-
click CTRL+T to close the command window.
Step 10:-
click on tools tab again.
Step 11:-
click on open system shell.
step 12:-
A command window will open.
Step 13:-
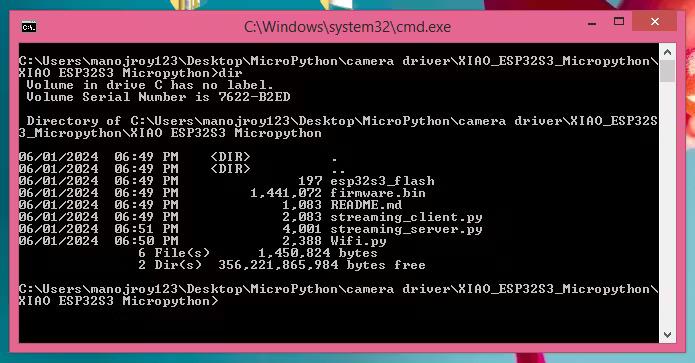
Go to the location when "esp32s3_flash", "firmware.bin", "README.md", "streaming_client.py", "streaming_server.py", "Wifi.py" is located and type dir.
Step 14:-
Set the esp32 s3 sense in boot mode by pressing the boot button and connecting it to the usb. and then type the following command "python -m esptool erase_flash". as shown bellow, if successful you will get output.
Copy the serial port no in text file over here it is "COM4". Since we need this comport no to flash the firmware file in it.
Step 15:-
Know to upload the micro python firmware with camera driver type the following command in the command prompt "python -m esptool --port COM4 --baud 460800 --before default-reset --after hard_reset --chip esp32s3 write_flash --flash_mode dio --flash_size detect --flash_freq 80m 0x0 firmware.bin". Output will be shown.
Step 16:-
close the command prompt by typing exit. And than close thonny. After that open the esp32 s3 from the usb port.
Step 17:-
Open thonny and than click on tools.
Step 18:-
On it click on Options.
Step 19:-
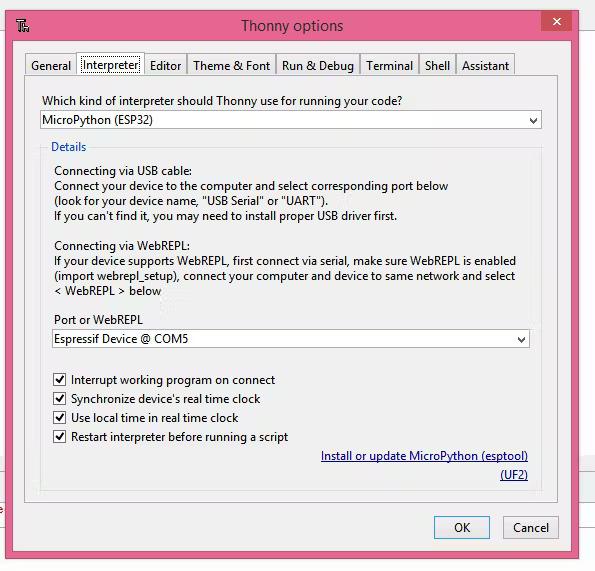
A window will appear. On it click on interpreter select interpreter as "MicroPython (esp32) " and port as "Espressif Device @ COM5".
click ok and you will see python prompt in main thonny window.
Step 20:-
test the micropython by running a simple python command like print("Hello") on main window and press F5. you will see the output of it in the python prompt.
Starting the Camera Streaming:-
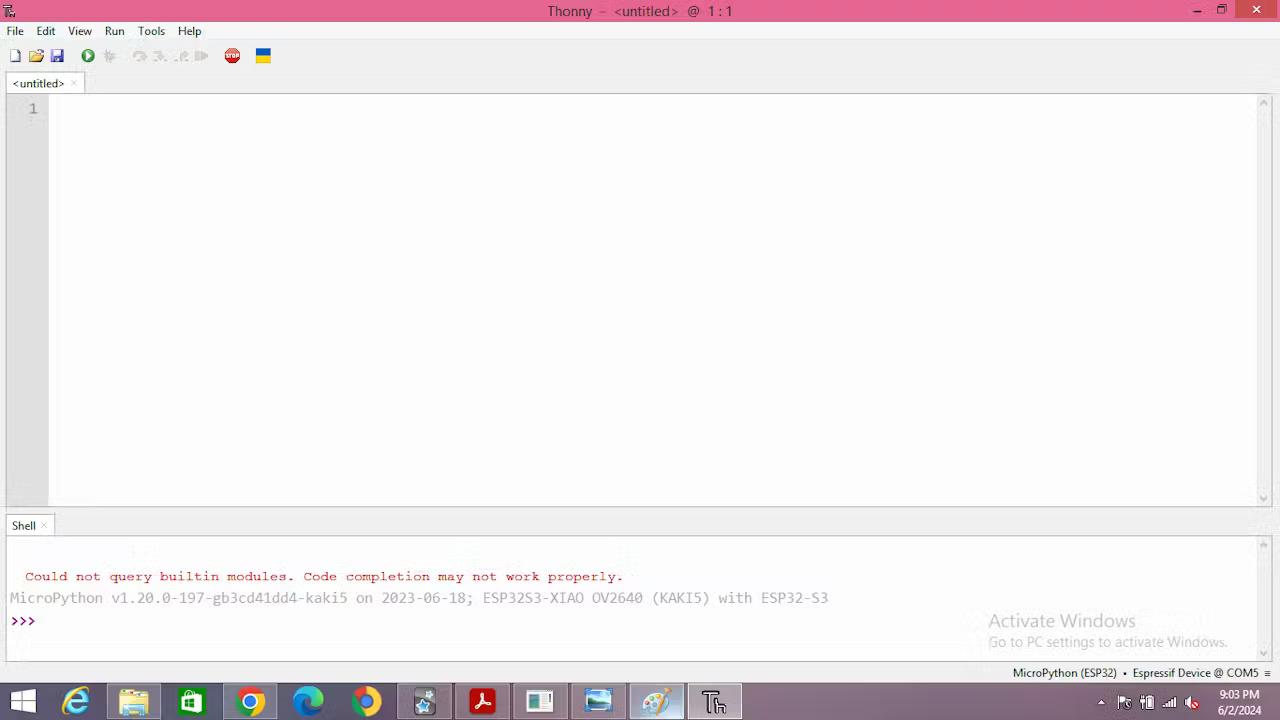





Step 1:-
Open Thonny IDE.
you will see a python shell if thonny IDE is connected to esp32 s3 sense.
Step 2:-
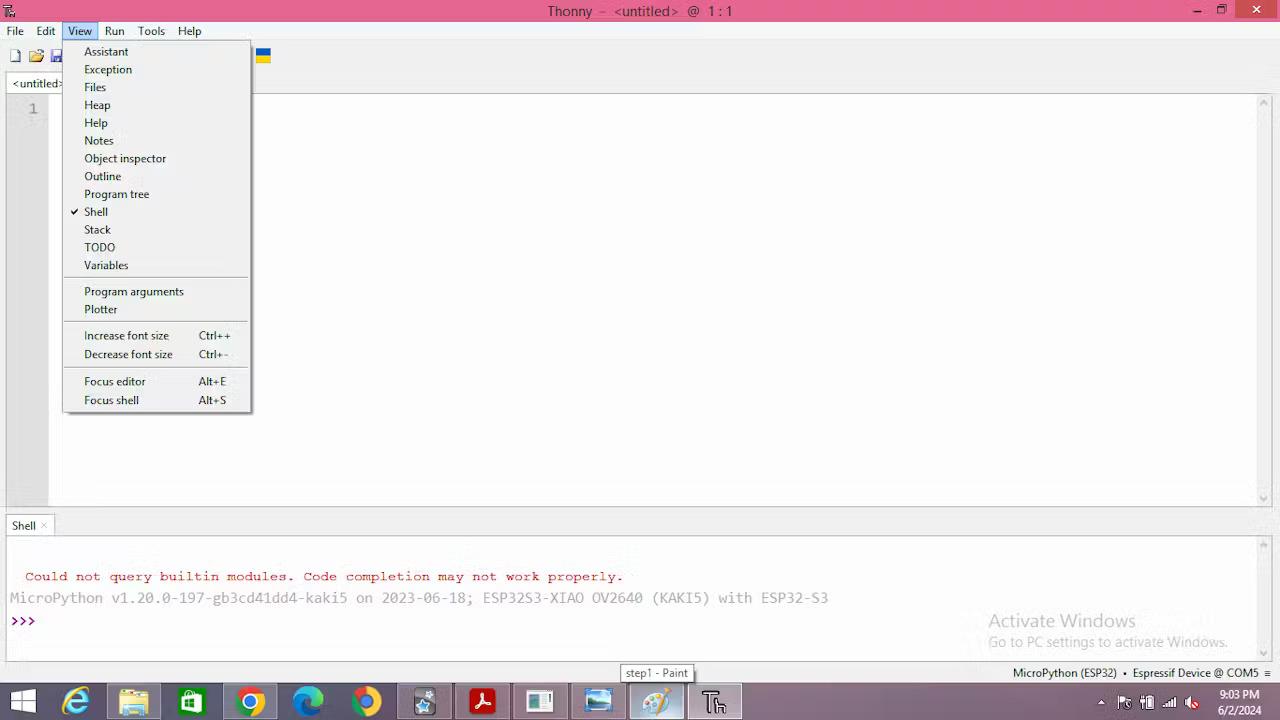
Click on view tab.
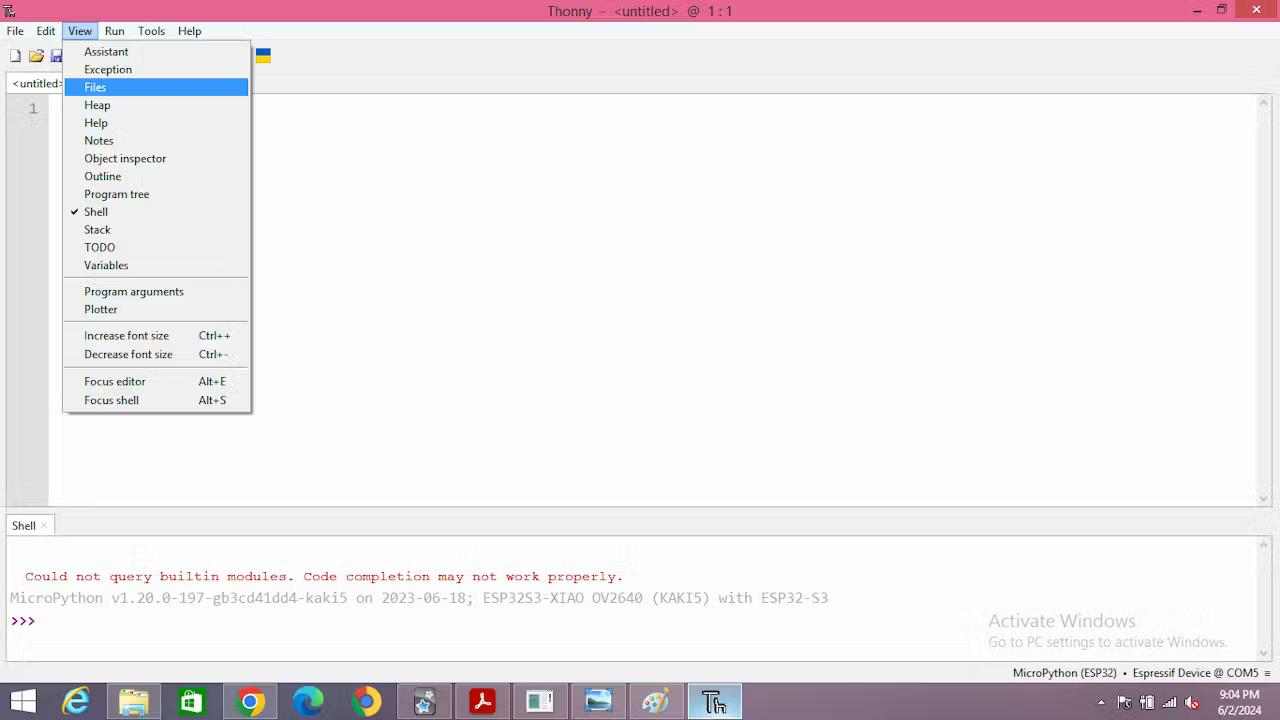
Step 3:-
click files.
Step 4:-
Files window will appear.
On file window open location where "esp32s3_flash", "firmware.bin", "README.MD", "streaming_client.py", "streaming_server.py", "Wifi.py" is located.
Step 5:-
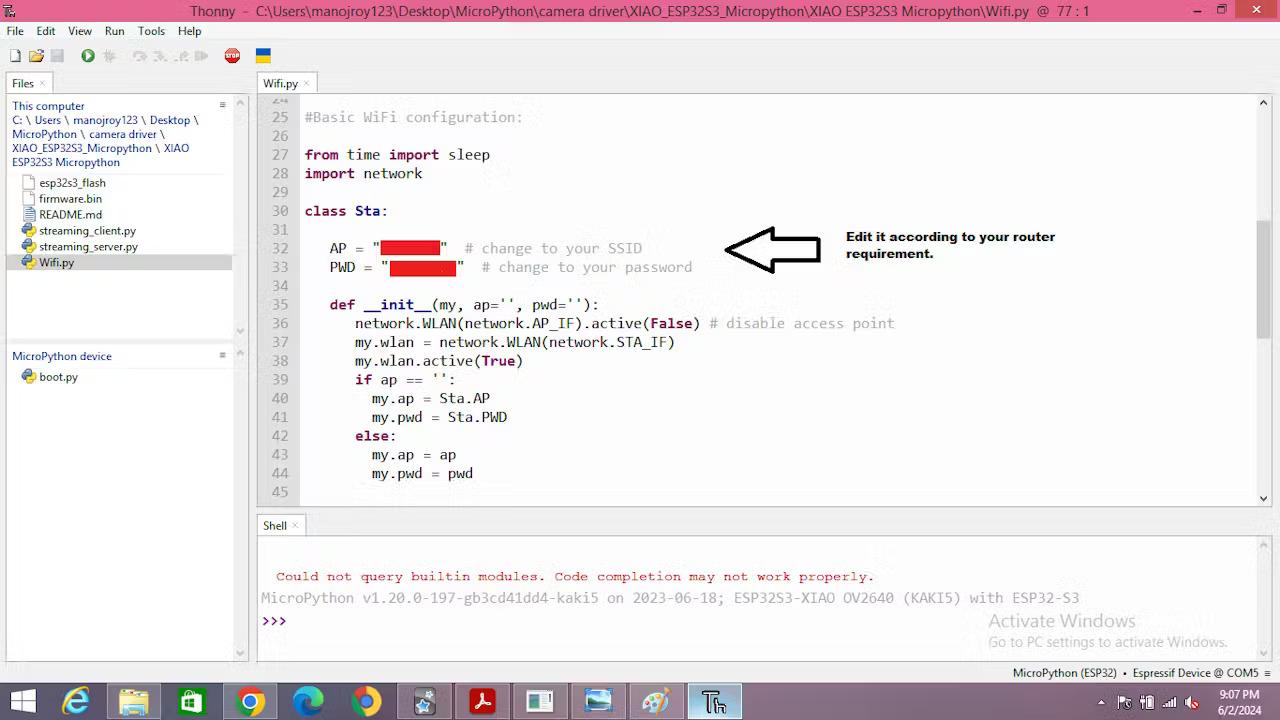
Click on "Wifi.py" to display content of Wifi.py.
Step 6:-
Edit the content of "Wifi.py" with your SSID and password of router.
press CTRL+s to save the content of file after editing the SSID and password of the file.
Step7:-
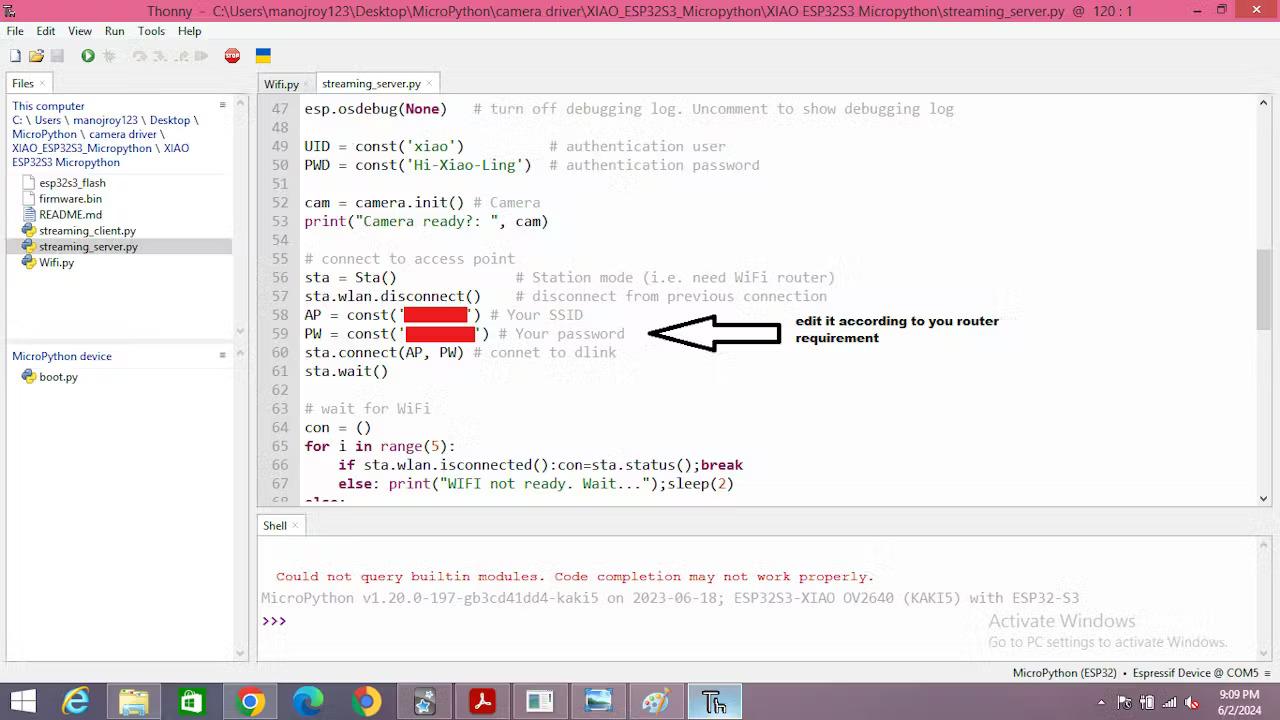
Open the content of "streaming_server.py" and edit the content of SSID and password with your router SSID and password that was copied in notepad.
press CTRL+s to save the content of file after editing the SSID and password of the file.
Step 8:-
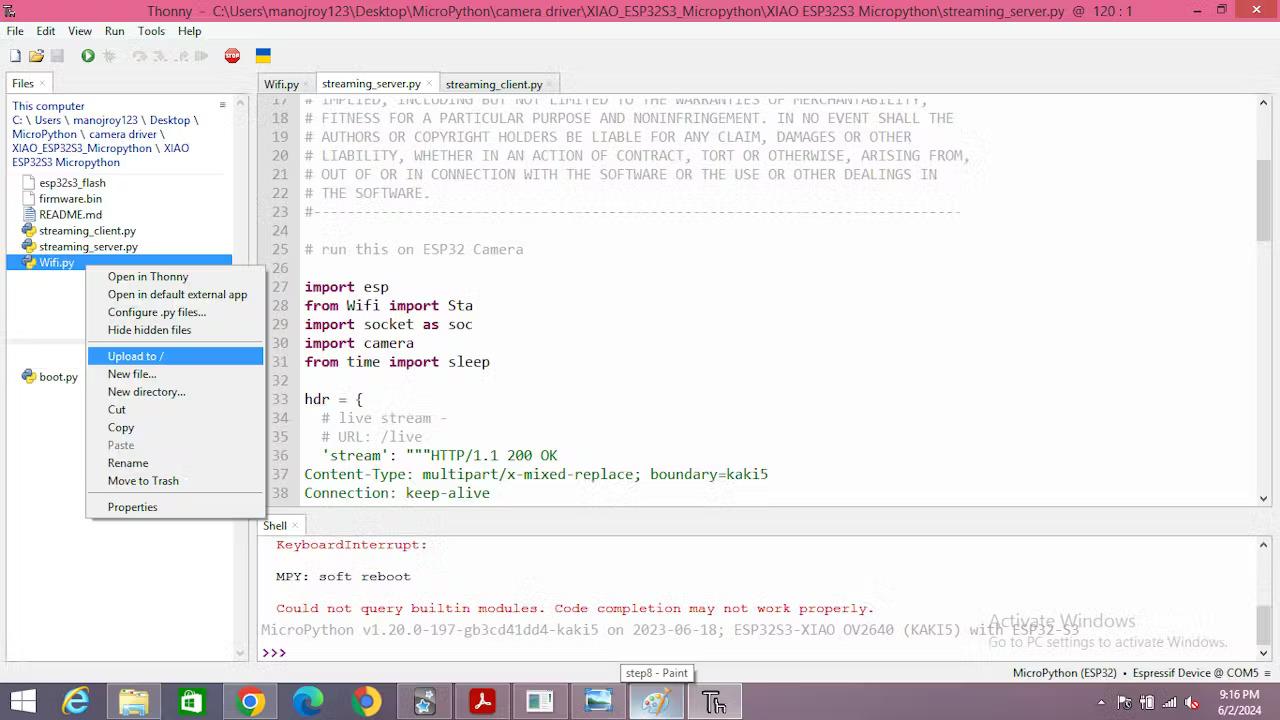
Right click on "Wifi.py" on files window.
Step 9:-
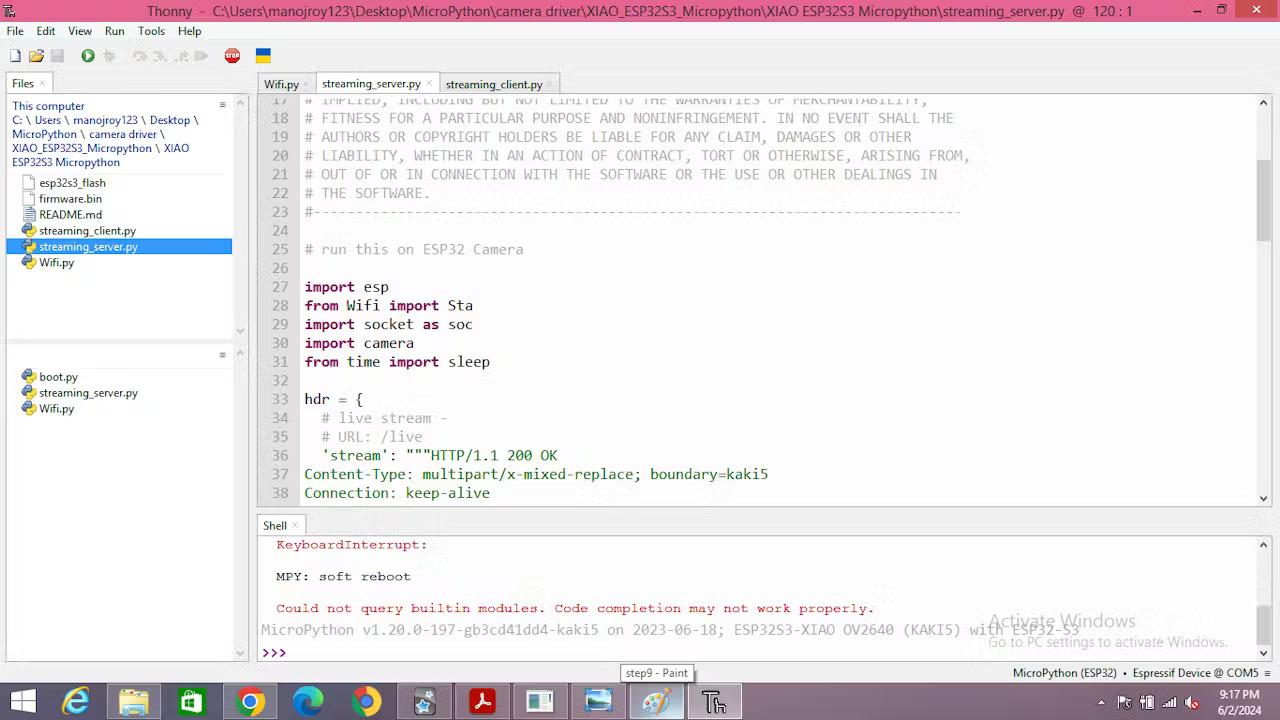
Click on upload to, to upload the file on esp32 S3 sense development board.
Step 10:-
Upload even "streaming_server.py" on the esp32 s3 sense development board.
Step 11:-
Open "streaming_serve.py" code window.
Step 12:-
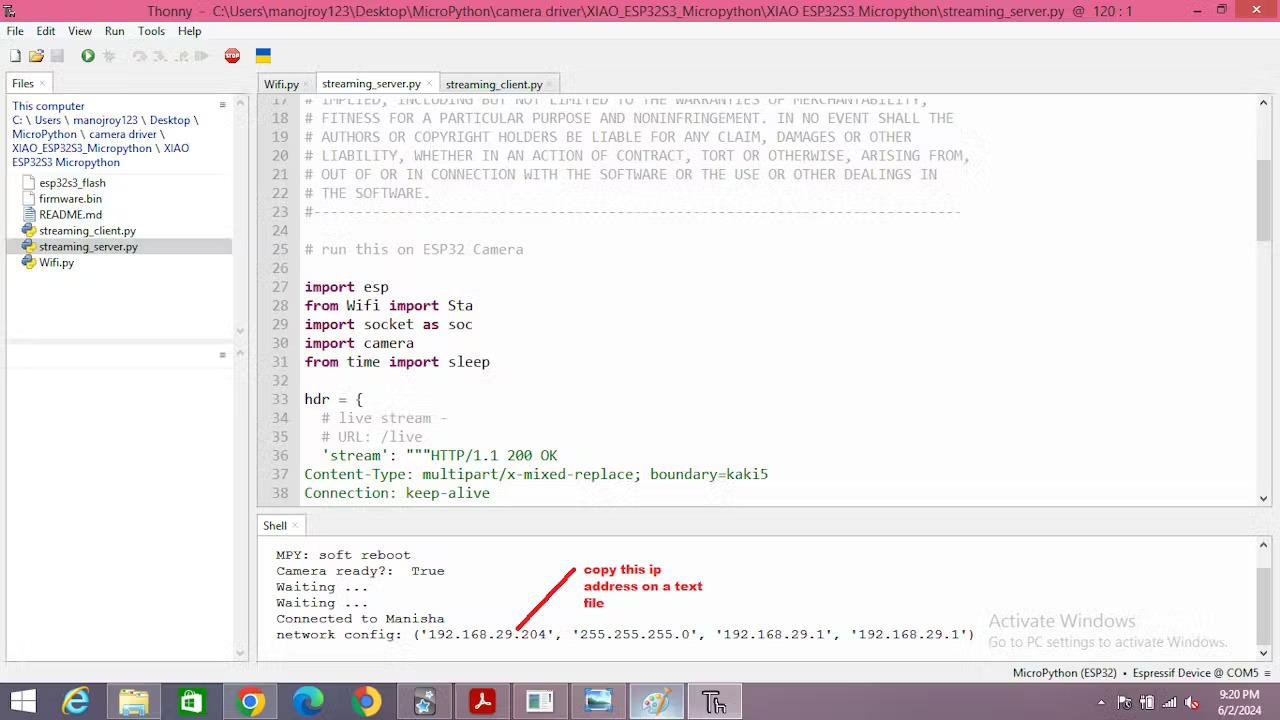
Press F5 to run the python code. you will get the output on python shell.
Copy the ip address in a notepad.
Step 13:-
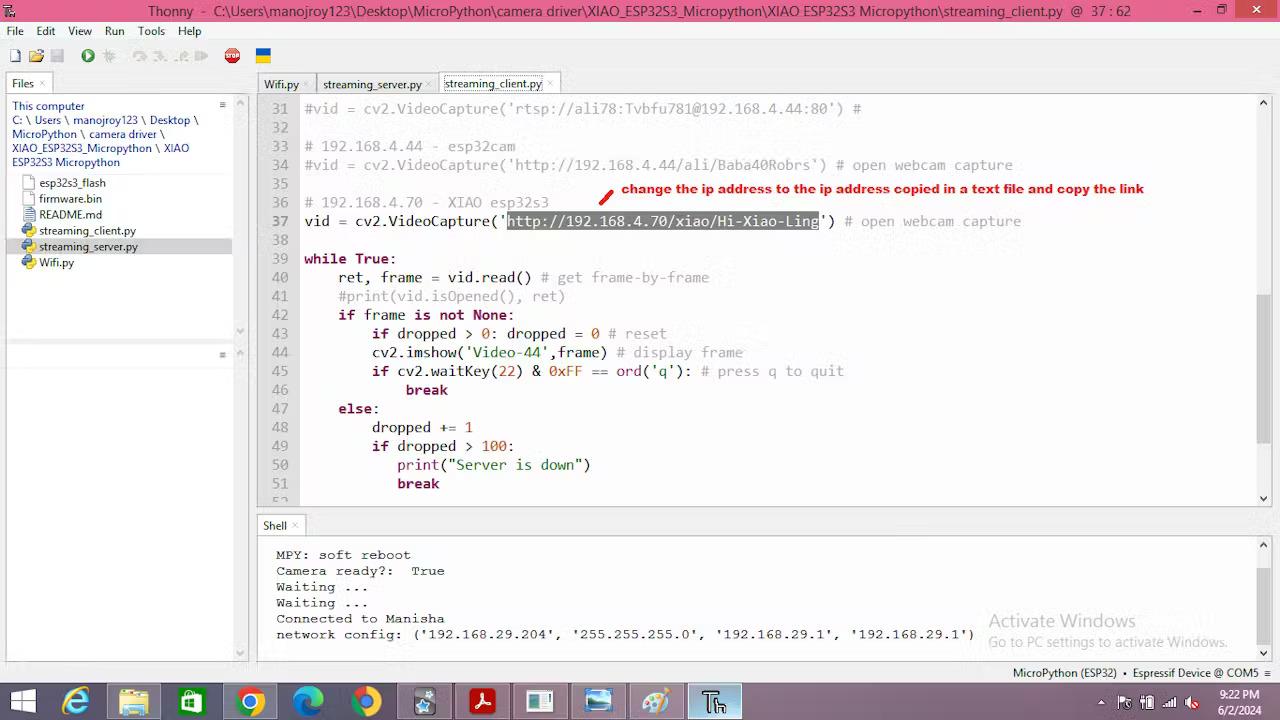
Change the ip address of "streaming_client.py" with the copied ip address.
Step 14:-
Copy the ip address and past it on web browser.
you will start getting live streaming of video on web browser from your esp32 S3 sense.