Fake Fireplace


A friend of mine recently moved home, to a house with a big, draughty gap in the sitting room where a fireplace ought to be. She can’t decide whether to have an open fire, a woodburning stove or a gas or electric heater of some sort, and wants to see how cold the room feels in winter before making up her mind. Perhaps a fire will be unnecessary and the chimney can be blocked off. But in the meantime there was this huge, unsightly hole in the chimney breast that the wind whistled down. She considered filling it with a bookcase or wine rack, but liked my suggestion of making a removable dummy stove on top of a fake log box. Before I knew what was happening, I’d agreed to make it.
Perhaps you too have a chimney where a fireplace has been removed, but you don’t want to block it off permanently and cap the chimney. Making a fake fireplace keeps the options open while preserving the look of the room by giving it a focal point. I made this one largely from scrap materials at very little cost – have a look in skips for plywood and MDF. It hardly protrudes into the room so it doesn’t take up much space, and chimney ventilation is incorporated by means of hidden holes in the log box section.
Supplies
A sheet of 12mm (1/2”) plywood big enough to fill the hole
Offcuts of 6mm (1/4”) ply or MDF for the fake stove
Offcuts of thicker MDF (say 18mm / ¾”) for the stove door
A piece of clear 2-3mm (1/8”) glass, acrylic sheet or polycarbonate sheet for the window
A suitable cabinet handle, or steel/brass tube or rod for the door handle
Enough wooden moulding for the perimeter of the fake log box
Scrap wood for the stand
A few hardwood logs (borrow some and give them back after taking slices)
Matt black paint, eg acrylic artist’s paint
Stove polish (aka black lead polish) - optional
Wood glue and panel adhesive
A few screws and moulding pins
Double sided tape
Woodworking tools: saw, router, clamps, drill, plus sandpaper
Measure and Design

Start by tidying up the hole in the chimney breast if it doesn’t have straight edges. Plasterboard (aka drywall, gyprock) is easy to cut by first scoring it with a utility knife and then snapping it, or else use a vibrating multitool. Make good any damage that’s been caused in removing a fireplace by using filler and touching up the paint. Once you have a neat hole, measure it accurately, you’re going to be cutting a backboard for the fake fireplace that will just fit into it. Make a drawing showing these dimensions. Also measure the internal depth of the chimney breast and make a note of any obstructions in there near floor level - as you can see in the photo in the previous step, there was a gas pipe at the back of the one I was working on.
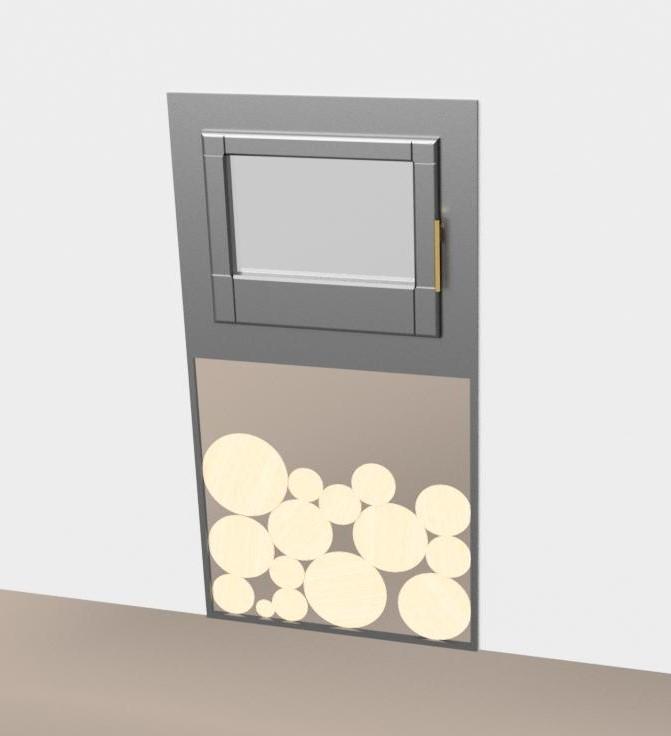
Now plan your design. The hole I was filling was 1,240mm tall and 640mm wide (49" x 25"). That’s too tall and thin to be just a stove, which is why I made a dummy log box to go beneath it. Work out what will look best in your room and sketch it up, with dimensions. I found it helpful to look at online images of woodburning stoves to see what proportions look right, both in terms of overall width and height and the dimensions and position of the door. Many stove manufacturers give the key measurements on their website, so you could just copy one that you like the look of. If you have a short, wide space instead of a tall thin one then a log box could go to one side of the stove, or on both sides.
To help me visualise the fake fireplace I was aiming to build and get my friend's approval, I modelled it in Fusion 360 and rendered the image above. I also created a dimensioned drawing and printed it off so I could scout for materials that would be useful while I was out and about - offcuts of plywood and MDF can often be found in skips (dumpsters) outside houses where building work is going on. The measurements changed a little as the project progressed and as I sourced various materials, but it was still useful to have a drawing to work from.
The dummy stove has 3 layers mounted on a backboard:
- a stove front made from 6mm (1/4”) sheet material
- a stove door made from (18mm / ¾”) MDF, shaped to mimic cast iron
- glazing behind the stove door
The log box is mounted on the same backboard and consists of a frame made from strips of wooden moulding with log slices arranged inside it.
Although the backboard needs to be a single piece of plywood, the stove front could be made from 4 strips joined to form a rectangular frame. That’s what I did because I didn’t have a piece of thin sheet material big enough for the whole stove front. Either way, keep the weight down by making the rectangular hole within the frame as large as it can be, but it does need to be smaller than the stove door so that the door completely hides it. As well as the weight issue, it’s best to have that hole in the stove front because it creates a gap behind the window and the added depth makes it look more realistic.
Bear in mind when choosing materials for the stove front that it must overlap the edges of the backboard on all sides. I made this overlap only 15mm (0.6"), just enough to be sure that the edges of the hole would be hidden. It will prevent the fake fire from falling back into the opening. Similarly, the wooden moulding you use to define the 4 sides of the log box needs to be wide enough to overlap the edges of the backboard by the same amount and be capable of being fixed securely to it. I used 20mm (just over 3/4”) half round moulding, I don’t recommend going any narrower than that.
The Backboard and Stand


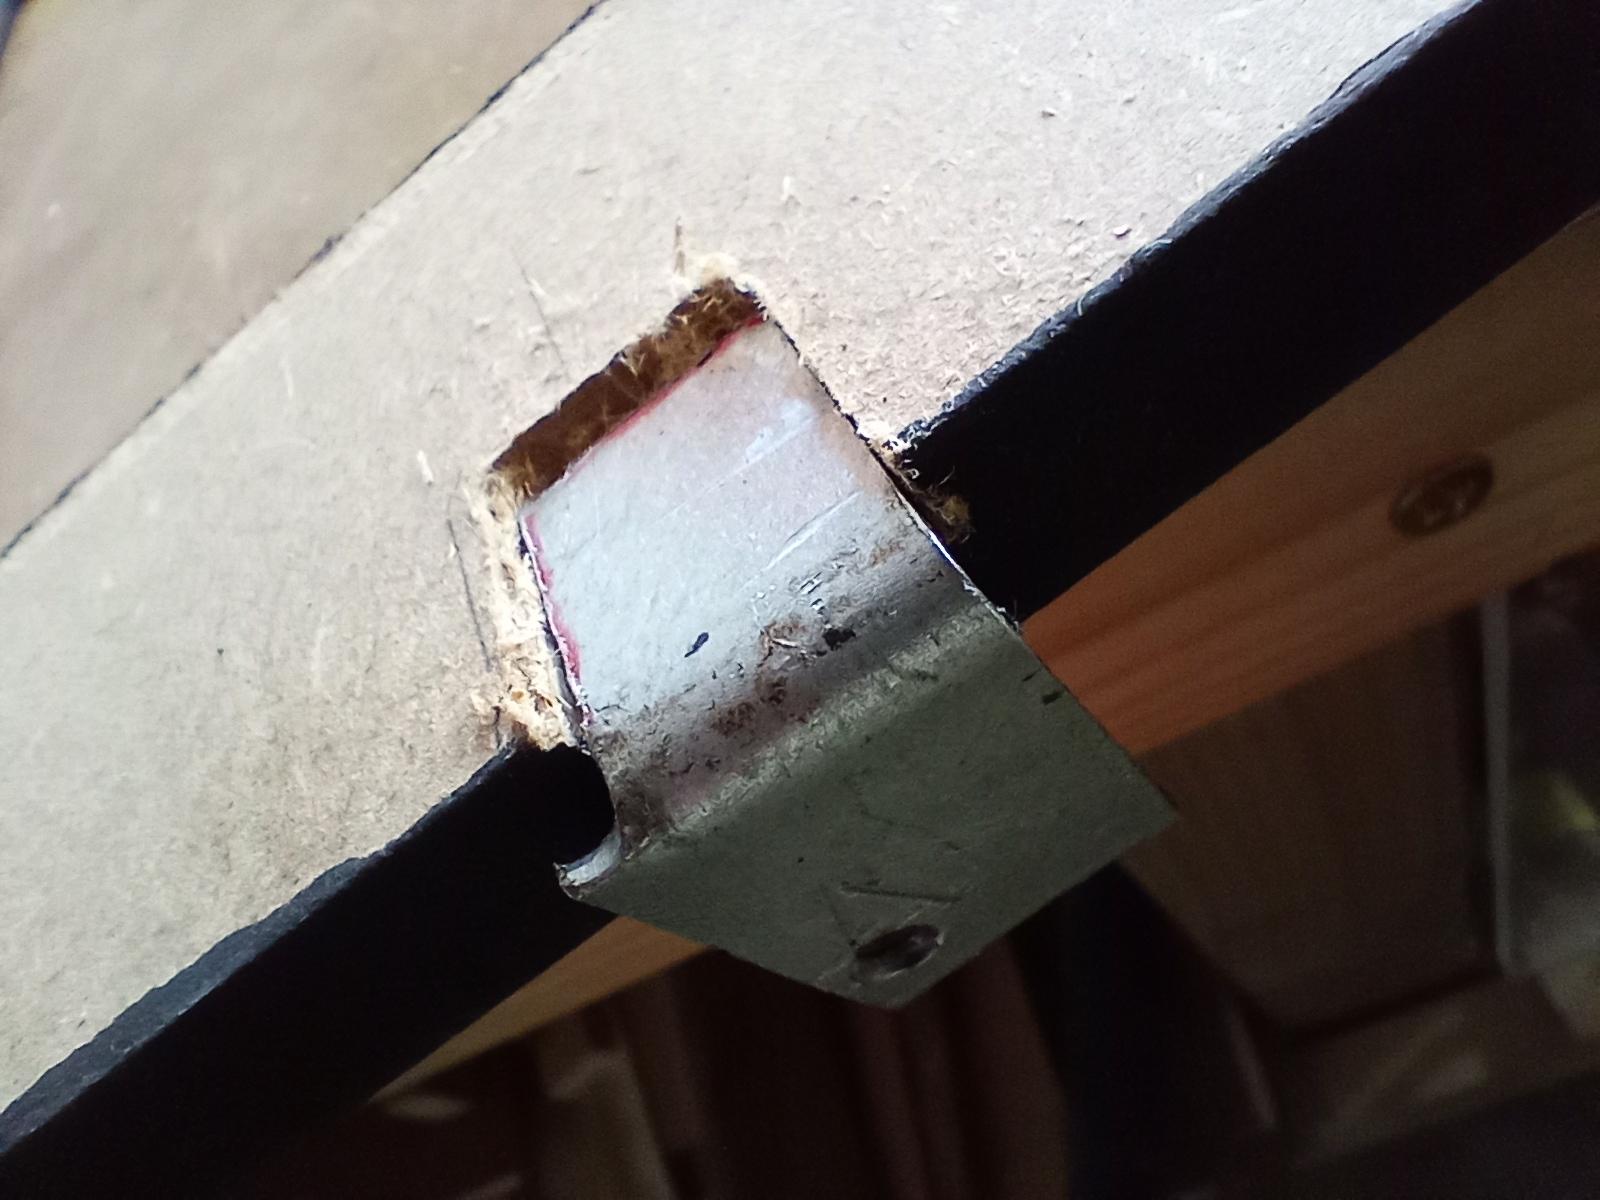
Cut a piece of 12mm thick plywood that will just fit in the chimney breast opening – it needs to be no more than about 3mm (1/8”) smaller horizontally and half that vertically if, like mine, the opening starts at floor level. Before you try it for size, screw one or two large woodscrews partially into it somewhere in the upper half so that you have something to hold onto to stop it falling into the opening – or to pull it out if it’s a bit tight and gets jammed. Consult your drawing to make sure you’re putting the screws where the holes will eventually be hidden by the stove front, keeping them well clear of the door’s glazing.
Test the fit by lining up the backboard with the hole horizontally and then resting its lower edge on the bottom of the opening, before rotating it back into the hole while keeping tight hold of the screws so it can’t fall back. If it sticks anywhere, with luck you’ll see white marks from the plasterboard on the edge of the plywood to give the clue where you need to remove a little material. Finesse the fit until the backboard goes into the hole without a struggle.
Once the board is the right size, draw and label an arrow on the back of it to indicate up (or down) so you don’t get it the wrong way up in future. Then give the front face and all 4 edges two coats of matt black paint.
Make a stand from scrap wood to keep the backboard upright. This is easier for a floor-mounted dummy fire like mine, because the weight is taken on the floor. As you can see from the photo, I screwed a length of scrap pine onto the rear of the board with a cut-out to hold a piece of ply that protrudes behind it into the chimney space. I made the base of the scrap wood extend slightly below the bottom edge of the backboard, to allow for the thickness of the carpet and its underlay. The screw holes through the board to hold the stand should be recessed and, again, positioned where they will be hidden later – in my case by log slices.
The piece of ply that protrudes at the rear should be slightly angled to give the backboard a tendency to tip backwards. This is to counter the additional weight on the front of the board when the stove and logs are added, preventing any danger of it falling forward into the room and ensuring that the fake fireplace presses tightly against the opening in the chimney breast.
For an inset-type stove you may need to build a more complicated structure to take the weight of the fake fire, although a small one should be OK supported by the plasterboard beneath it.
For now at least, avoid gluing the stand onto the backboard, just rely on a couple of screws. Building up the fake stove and log box is much easier if you can lay the board on its back without the stand attached.
The Stove Front


Decide how to make the stove front from 6mm ply or MDF, remembering that it will need to overlap all of the backboard’s edges that it adjoins – top and both sides in my case. Also, the rectangular hole in the middle of it needs to be smaller than the stove door while having enough of an overlap for the door to be fixed onto it with screws and/or glue. In my design the overlap was 15mm (0.6") all around.
Cut out the stove front, either from a single piece of material using a jigsaw, or cut 4 strips that you can join to make a frame shape. Then, with the backboard lying face up, position the stove front on the backboard, being careful to line it up so that the edges overlap the backboard’s edges evenly. Glue it in place and leave it clamped or under weights until the glue is dry. I opted not to screw it as well at this stage, instead I screwed through all three layers (backboard, stove front and stove door) later - see Step 5.
Fill and sand smooth any gaps between the strips forming the stove front, then give it two coats of black paint including the inside and outside edges. (In the photos in Step 6 you'll see I left a border unpainted to help the glue to stick on the stove front later, but that probably wasn't necessary.)
Door Handle

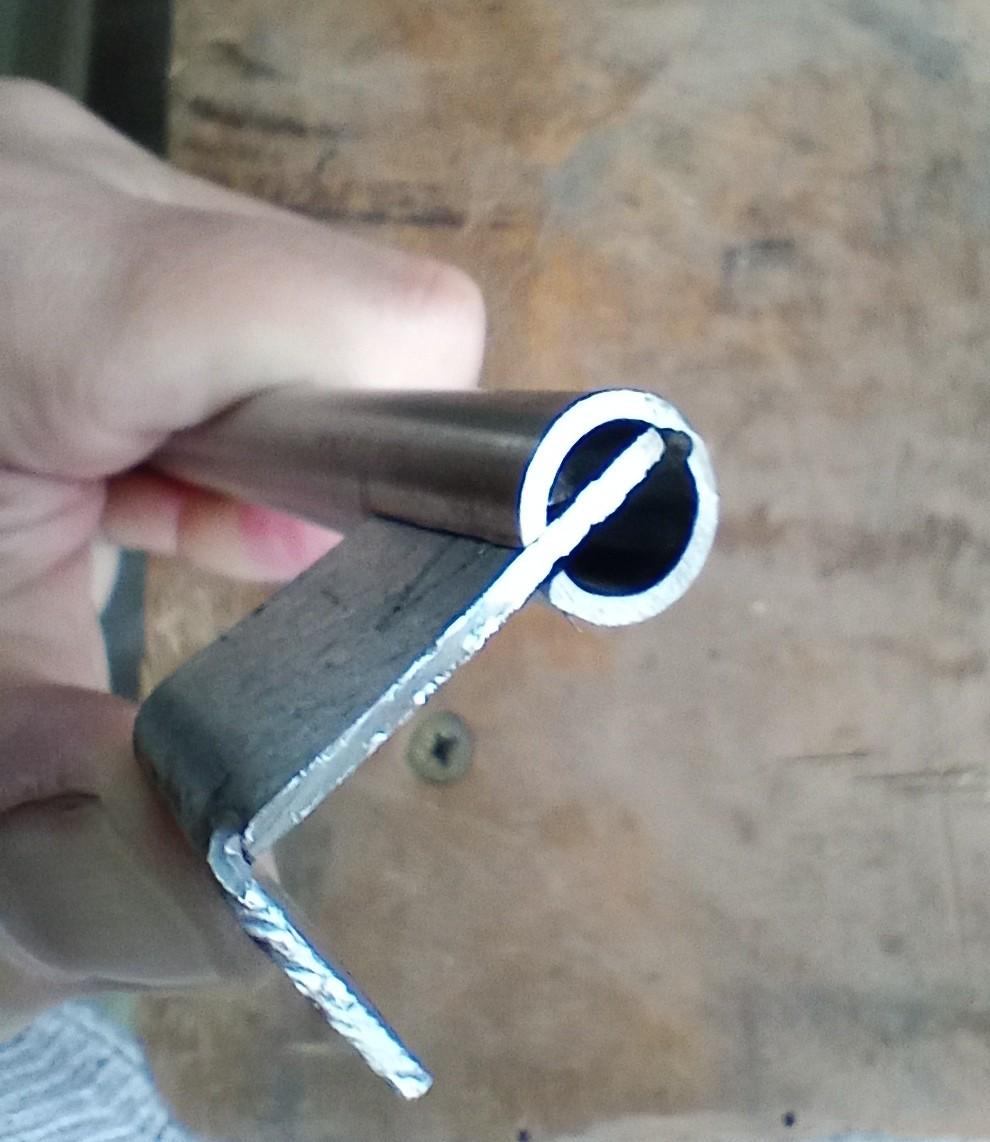

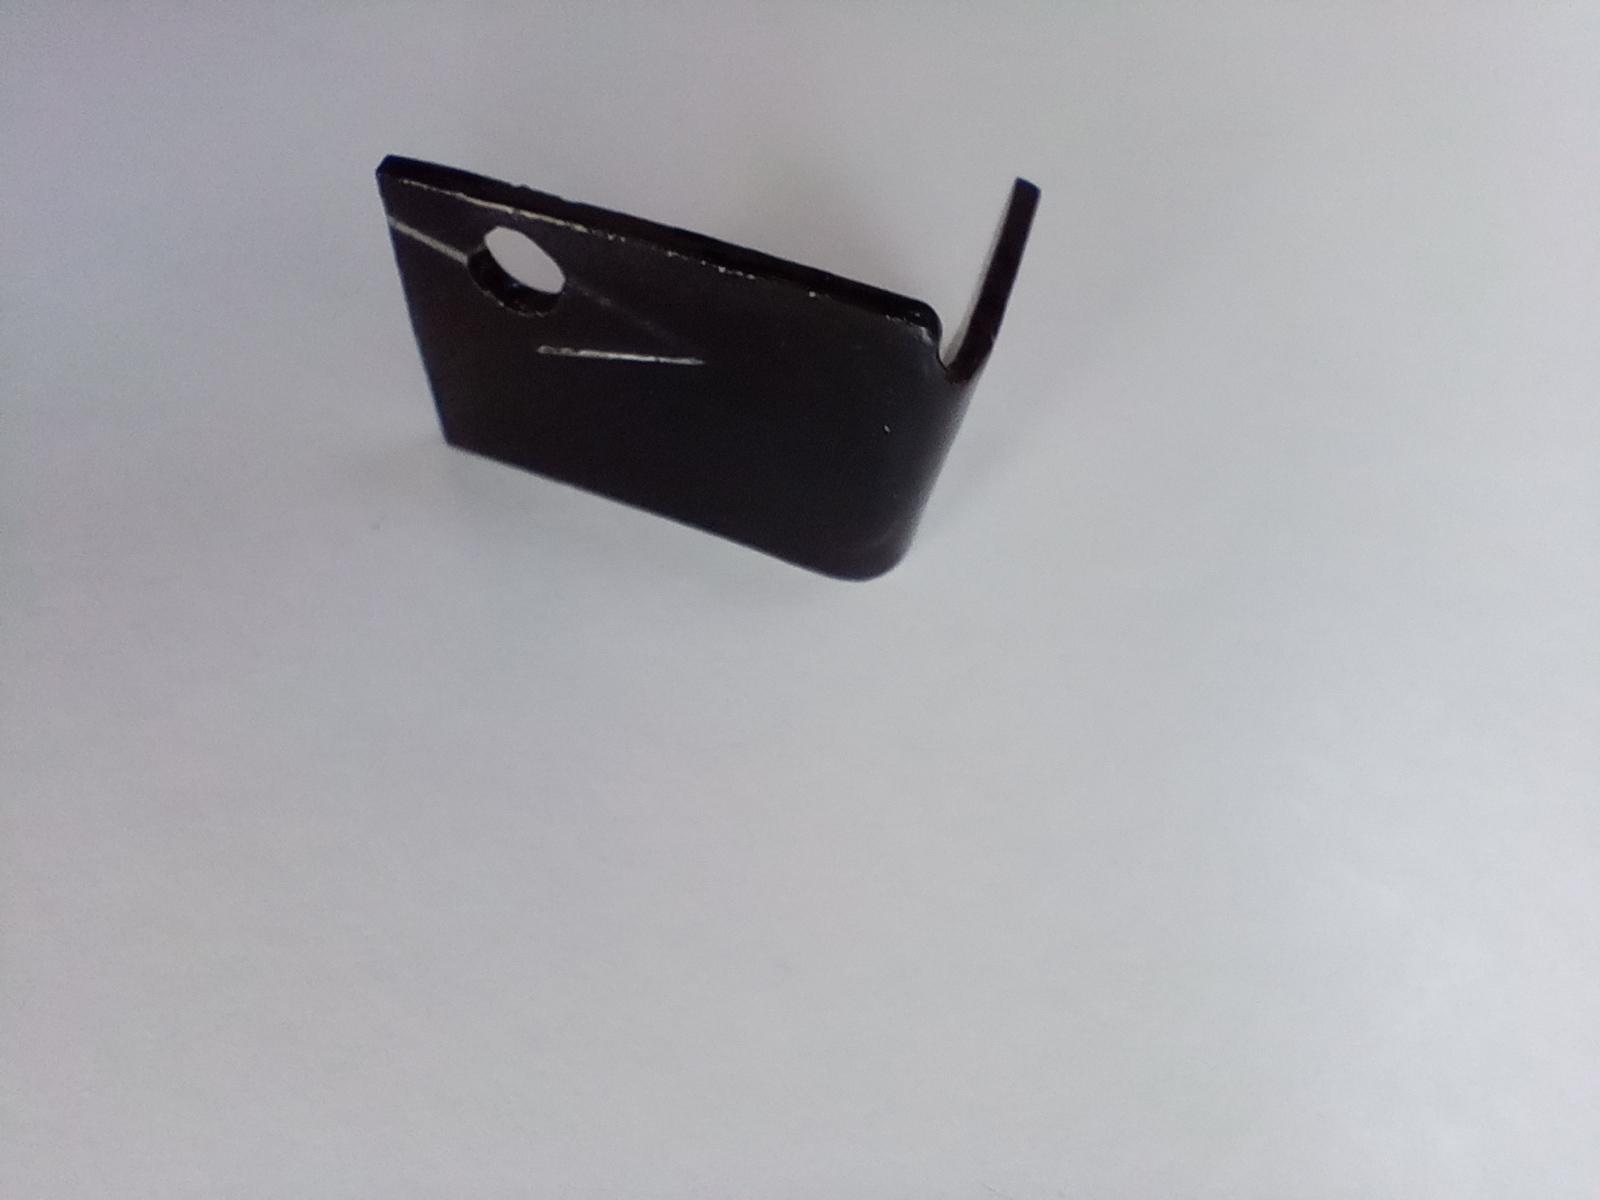
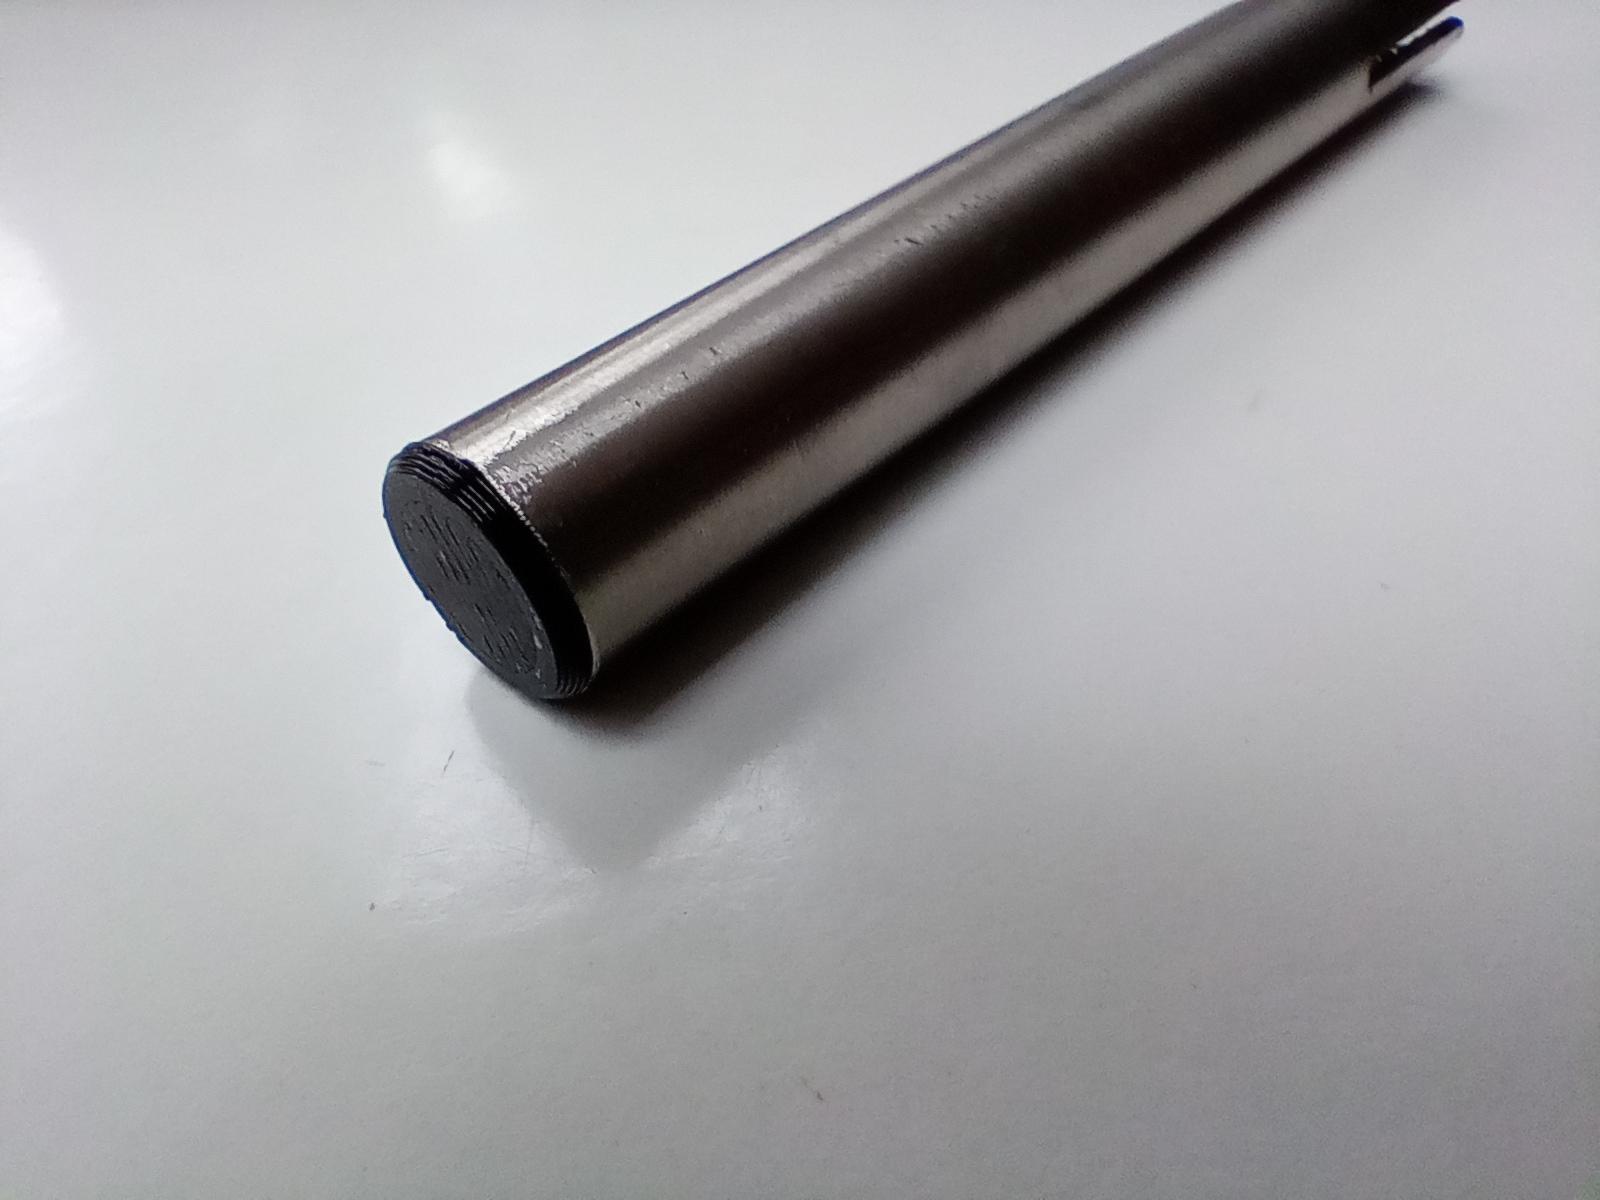
I made a handle for the stove door from a length of 12mm (1/2") diameter stainless steel tube and a steel angle bracket. I cut a slot with a hacksaw about 25mm (1”) long in one side of the tube at one of its ends, then enlarged it with a file to take the thickness of the steel bracket. I sawed a piece off the bracket to give me a right-angled mounting bracket for my handle, tidied it up with a file and then painted it black. I closed the ends of the tube with black 3D printed caps, but anything that can be painted black could have been used, such as a whittled piece of wood or cork.
Only after going to all this trouble did I notice that the finished dummy handle looked a lot like the T-bar handles on my kitchen cupboards, albeit they have two legs apiece rather than one. It would have been a lot easier to buy one and saw a leg off it.
The Stove Door


I wanted my stove door to look like cast iron, which is why I cut it in 4 pieces from a fairly thick piece of MDF, and why I opted for visible joints. I used a table router with a V-cutter to put a small chamfer on both ends of the top and bottom and on the adjoining sections of the two sides (see photos). Then, after gluing the 4 pieces together to make a frame I used a roundover bit to go around both the inside and the outside edges of the frame. But you may prefer to leave them square.
Before gluing the door frame though you need to make a recess on the back of what will be the inner edge of each piece to take the window. Make the recess at least as wide as your double sided tape and the same depth as the thickness of your glass or plastic sheet. Then cut the window material to fit – it will make life easier if it’s slightly smaller than the recess. But don’t fit the glazing yet.
Cut a recess in the back of the door at one side to take the handle bracket.
Paint the door black as for the other parts of the stove. MDF being quite absorbent, the routered edges will probably need light sanding after the first coat to smooth down the fibres which have been raised.
If you have any stove polish (“black lead” paste – although it’s not made from lead any more), apply it to the stove front and door following the manufacturer’s instructions.
Screw the handle bracket onto the back of the door before gluing the stainless tube for the handle in place using 2-part epoxy glue.
Finally, finish the stove part of the fake fireplace by using double sided sticky tape to secure the glazing material to the recess behind the stove door, then glue the door into position before drilling and screwing from the back through the backboard, stove front and half way through the door. Position the screws carefully to ensure they go through all the layers without being visible through the door’s glazing.
The Log Box


This is the easy part. Just cut lengths of moulding to frame the part of the backboard that isn’t already covered by the stove, remembering that its outer edge needs to line up with the outer edge of the stove front, overlapping and hiding the edge of the backboard in the same way. If the log box starts at floor level, the strip of moulding that forms the lower edge should be flush with the bottom of the backboard though.
Glue the moulding in place and knock in a few moulding pins from the back to give the joints more strength. Once the glue is dry, apply 2 coats of black paint as before. I didn’t use stove polish afterwards as I thought it was unlikely a log box would be made of cast iron, more likely steel with a black finish.
All that remains to finish the log box is sawing some log slices and sticking them on. Try to vary the thickness of the slices a little, from say 6-18mm (1/4-3/4”), so that some protrude from the backboard more than others for a realistically untidy look. With the fake fireplace lying flat, arrange the slices without glue, working from the bottom of the log box upwards so you can place them where gravity would put them. A good rule of thumb is that every slice should touch at least two other things beneath its centre point, whether other slices or the frame of the log box. Snap large, thin slices into halves or smaller pieces to help fill the gaps. Stop every now and again to look critically as the arrangement and check you aren’t making a logpile that looks gravity-defying.
When you’ve filled the log box or have run out of log slices, start gluing them in place using panel adhesive. Work from the bottom up again, removing one slice at a time, placing a squirt of adhesive on its back and then replacing it in the same orientation as before. The backs of the slices are unlikely to be very flat, so aim the adhesive onto the high spots and use plenty. Ideally, put a weight on each slice to hold it firm while the adhesive dries.
Finishing


To finish the job, re-attach the stand and check whether it needs any adjustment to hold the fake fireplace vertically. It may be that adding extra weight to the front of the backboard has changed its centre of gravity enough to make it lean slightly forward. Aim for the flange created by the overlapping stove front and log box moulding to be tight against the edges of the chimney breast opening without any noticeable gaps when the fireplace is viewed from the side. However, as long as the edges of the backboard and everything mounted on it are painted black, a tiny gap wont be obvious.
Re-fit the skirting board (baseboard) if it was removed, cutting it to fit right up to the edges of the fake fireplace.
The last task is to drill ventilation holes through the backboard at the bottom, between logs. This will prevent an uncapped chimney from becoming damp, as any rain falling into it will be evaporated by a small flow of air from the room. Position the holes just beneath log slices then they won't be visible. I thought I'd need to paint the edges of the holes black but I found it wasn't necessary, the only way you'd see them would be if you were lying on the floor and looking up at the log box.