Family Game Night Tmer

This is a family game night timer. This device is a re-design of an original family game night timer. This re-design was aimed at adding movement functionality to the original design. A flag was added (3D printed) to the timer and is connected to the Servo Motor. This product was made to be family-friendly, safe, fun, and engaging.
Supplies


- Flag: This flag was 3D printed as a part of Phase 2 of this assignment. The flag is to attach to the Servo Motor and move one space every second for 20 seconds.
- Base: This base was 3D printed in phase 1. This is what hold the CPX, Servo, and flag.
- Cables: Users need a USB cable that is compatible with their laptop, as well as the CPX.
- USB-A: https://www.adafruit.com/product/898
- USB-C: https://www.adafruit.com/product/3879
- Servo Motor/Aligator Clips: The Servo Motor connects to the CPX via the Aligator clips.
- CPX: The CPX is the main operating system for this device. It adds light, sound, and movement functions.
- CPX: https://www.adafruit.com/product/3333
- Hot Glue Gun: This will be used to attach the Instructables pieces together.
- Battery Pack: The battery gives power to the Servo Motor.
- Code: The code must be copied onto the user's computer and CPX.
3D Design Download


These are the 3D-printed materials that will be utilized for this design.
Adding the Code to the CPX

Description of step:
- Copy and paste the code from the document onto the app Mu editor.
- Download the code to the CPX device (make sure it is named “code.py”). Click "save" on the MU Editor Application.
- Then, click on "code.py" in your files/finder, and ensure the correct code is saved to this file. If not, copy and paste the correct code, and click "save." Then, run the code using buttons "A" and "B."
- Make sure the CPX is connected to your laptop via a USB cable.
- After the code is downloaded to the CPX, the battery pack will be utilized as the power source.
What this code can do:
- Button "A" on the CPX initiates a 10-second timer while button "B" on the CPX initiates a 20-second timer. The code will utilize the light and motion of the Servo Motor.
Downloads
Connecting the Flag to the Servo Motor

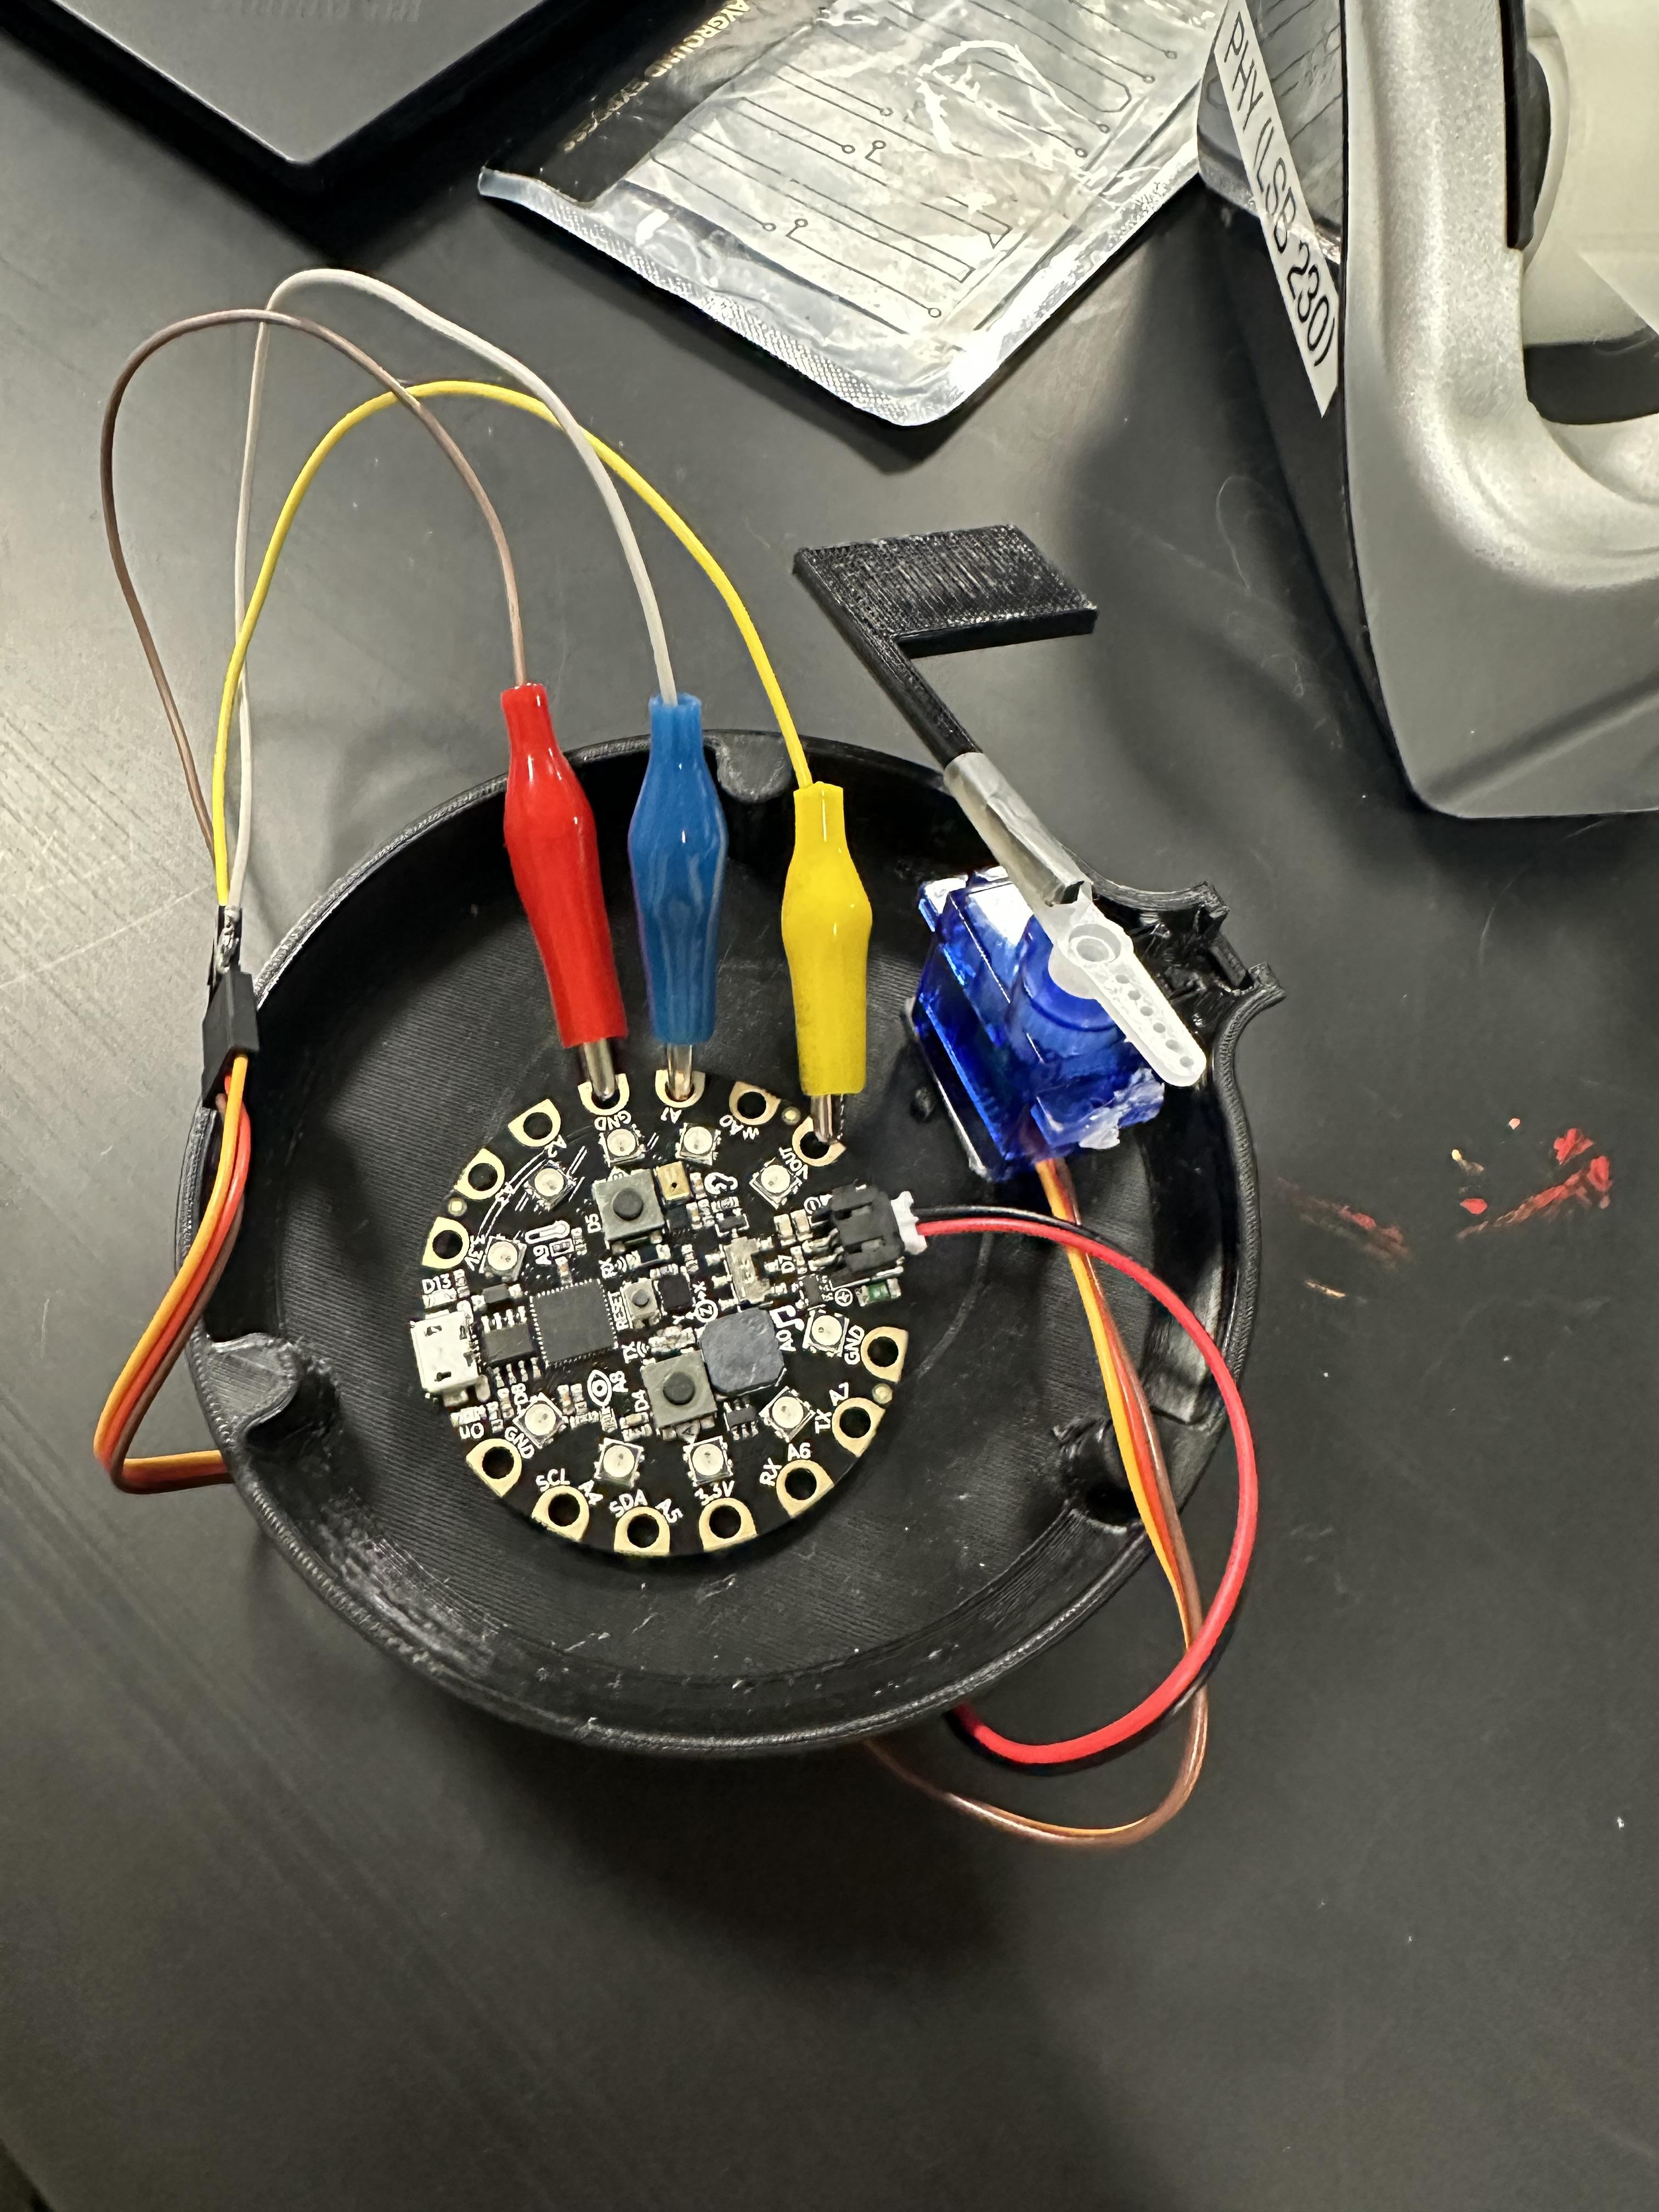
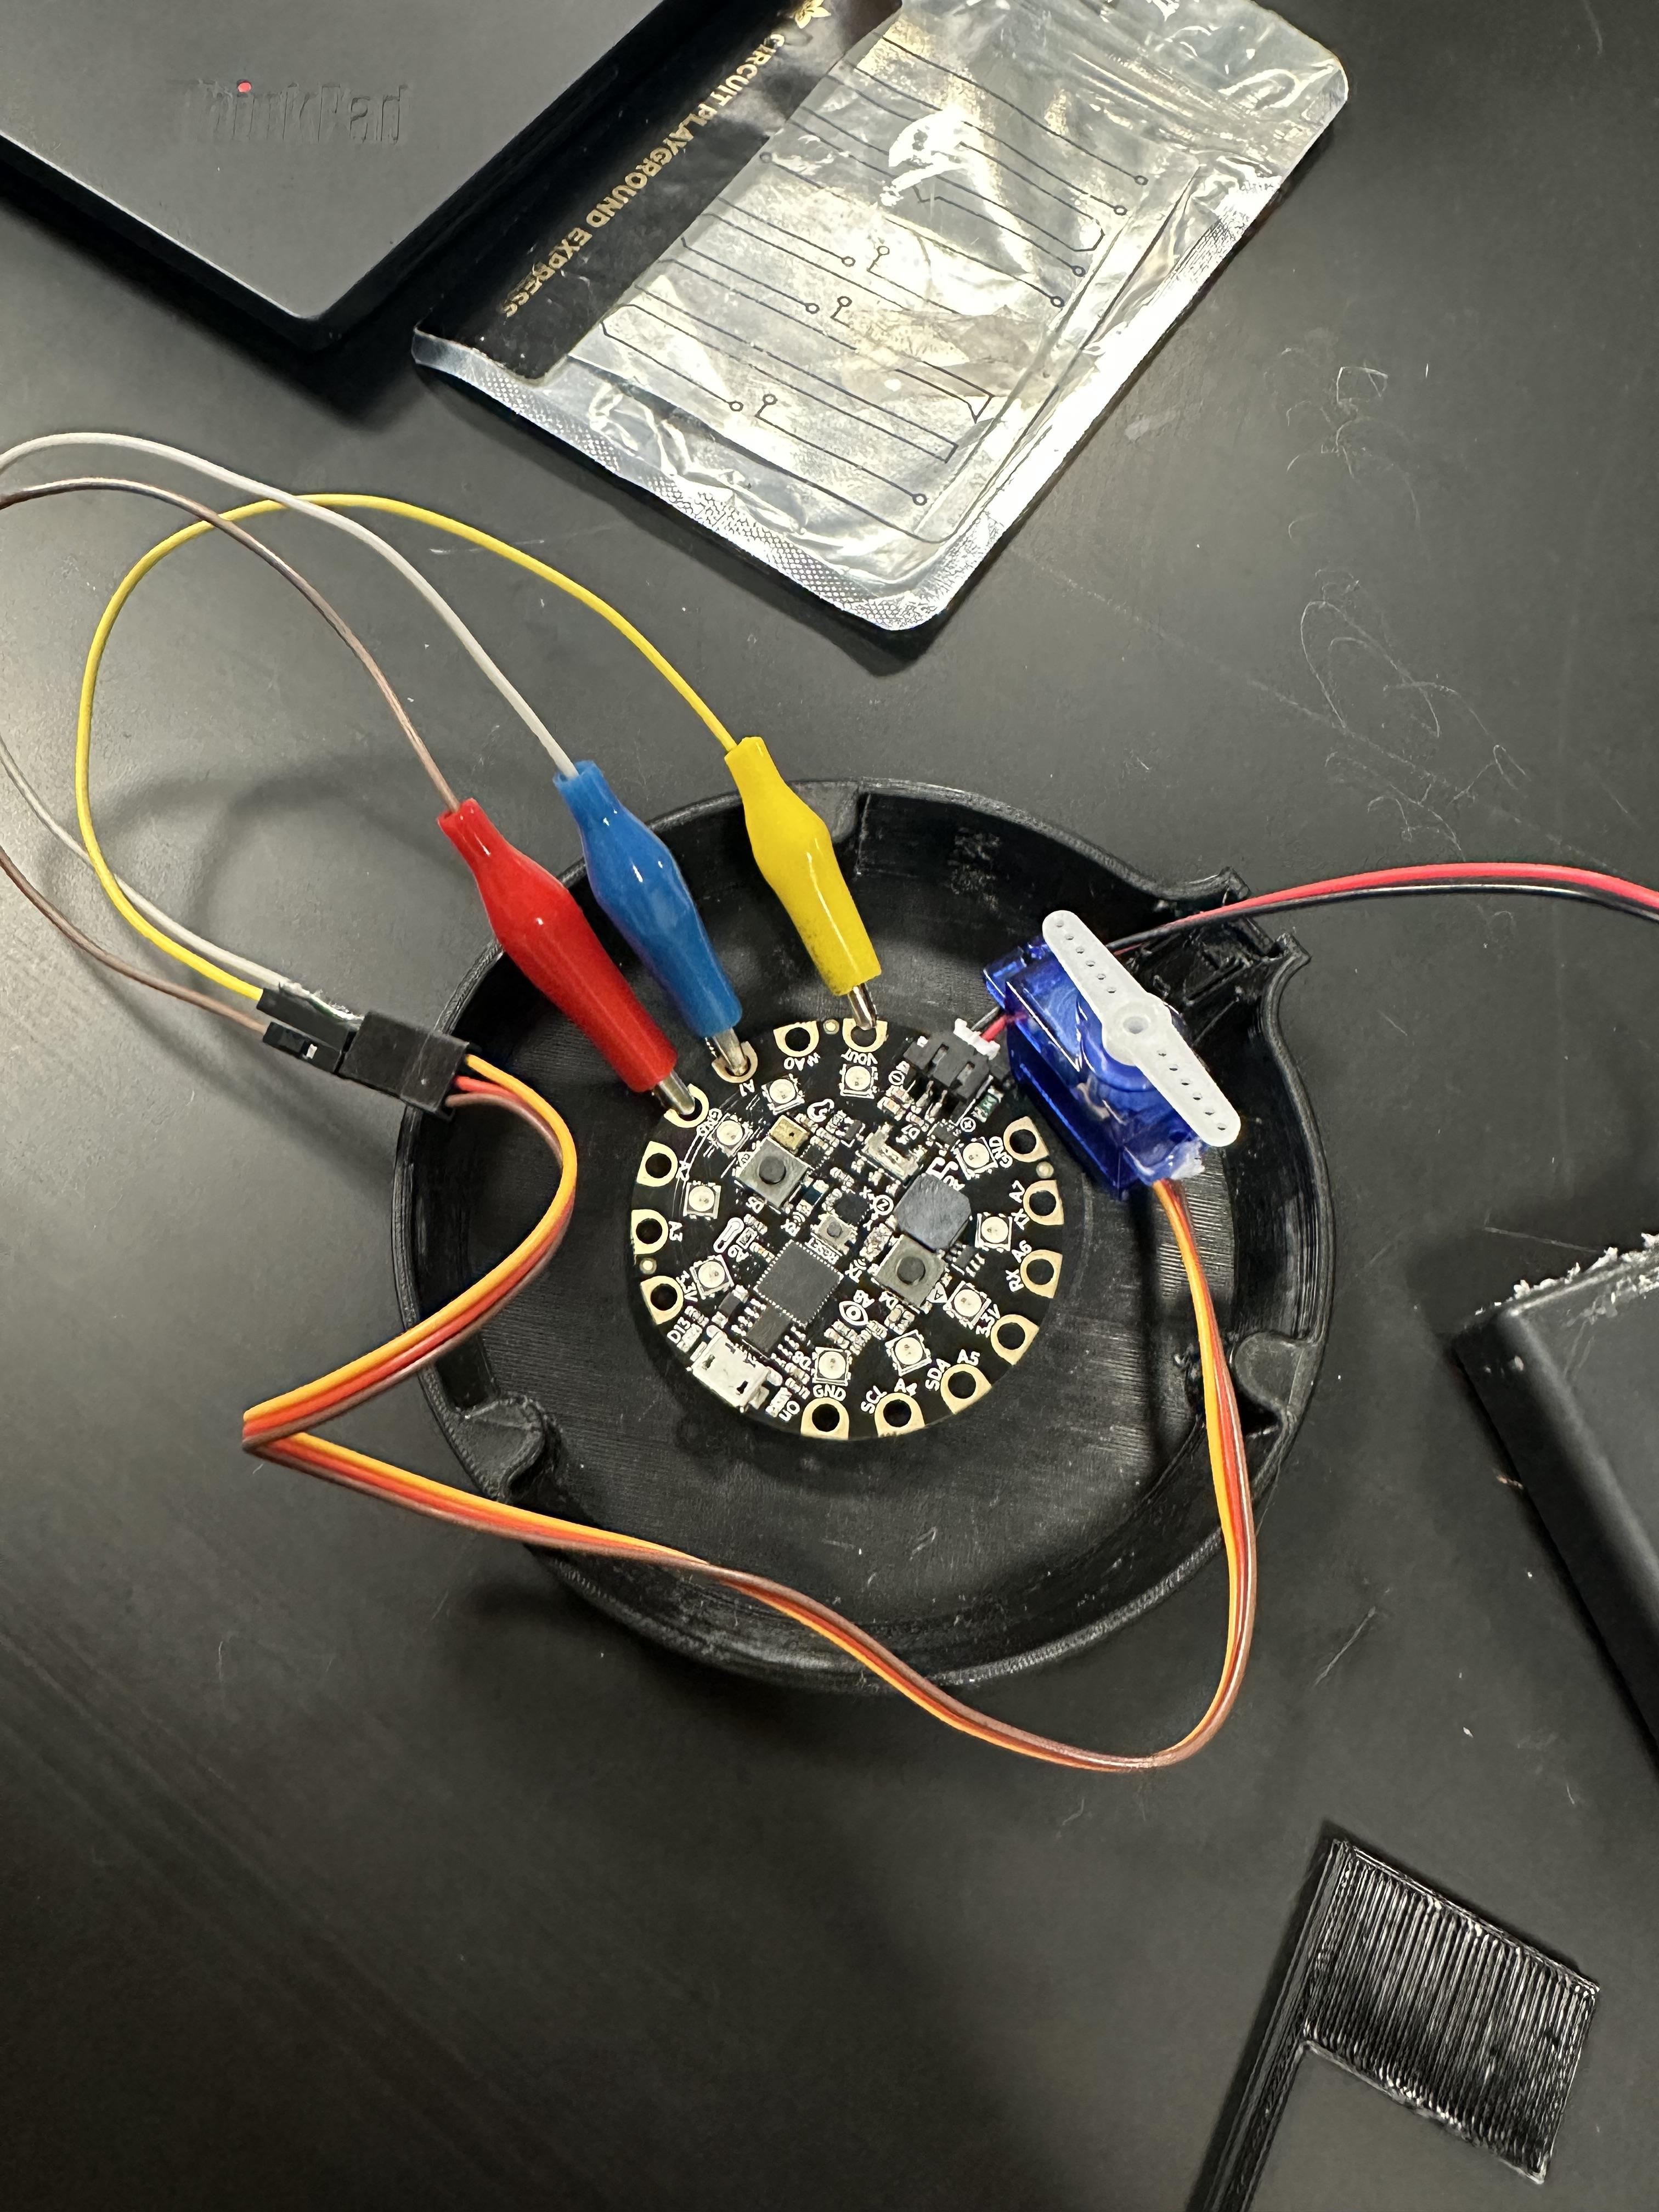
Description of step: Use a hot glue gun to glue the end of the flag to the top part of the servo (the white part that moves). The Servo motor is going to be connected to the CPX. Utilize the alligator clips and wires in your tool kit, which have been pictured above in the supplies section. Connect the alligator clips to the black part of the Servo Wires. Then, connect the corresponding wires to the “VOUT,” (red wire) “A1,” (orange/yellow wire), and “GND” (brown/black wire) sections on the CPX.
Wiring

Description of step: Plug the battery pack into the CPX device and use the wires with the alligator clips to connect the CPX to the servo (see the image for how to connect the clips to the CPX), or see the description above.
Connecting the CPX to the Base

Description of step: Use a hot glue gun to glue the bottom of the CPX to the center of the 3D-printed circular base.
Connecting the Servo Motor to the Base

Description of step: Use a hot glue gun to glue the bottom of the servo to the 3D-printed circular base above/next to the CPX device.
Connecting the Battery Pack to the Base

Description of step: Use a hot glue gun to glue the bottom of the battery pack to the bottom of the 3D printed circular base.
Put It All Together!
Run your code! Press "A" on the CPX for a 10-second timer and "B" on the CPX for a 20-second timer. Enjoy your family game night!