Far Flying Glider Paper Airplane: Cardinal
by CreaseAndRelease in Craft > Paper
175 Views, 1 Favorites, 0 Comments
Far Flying Glider Paper Airplane: Cardinal
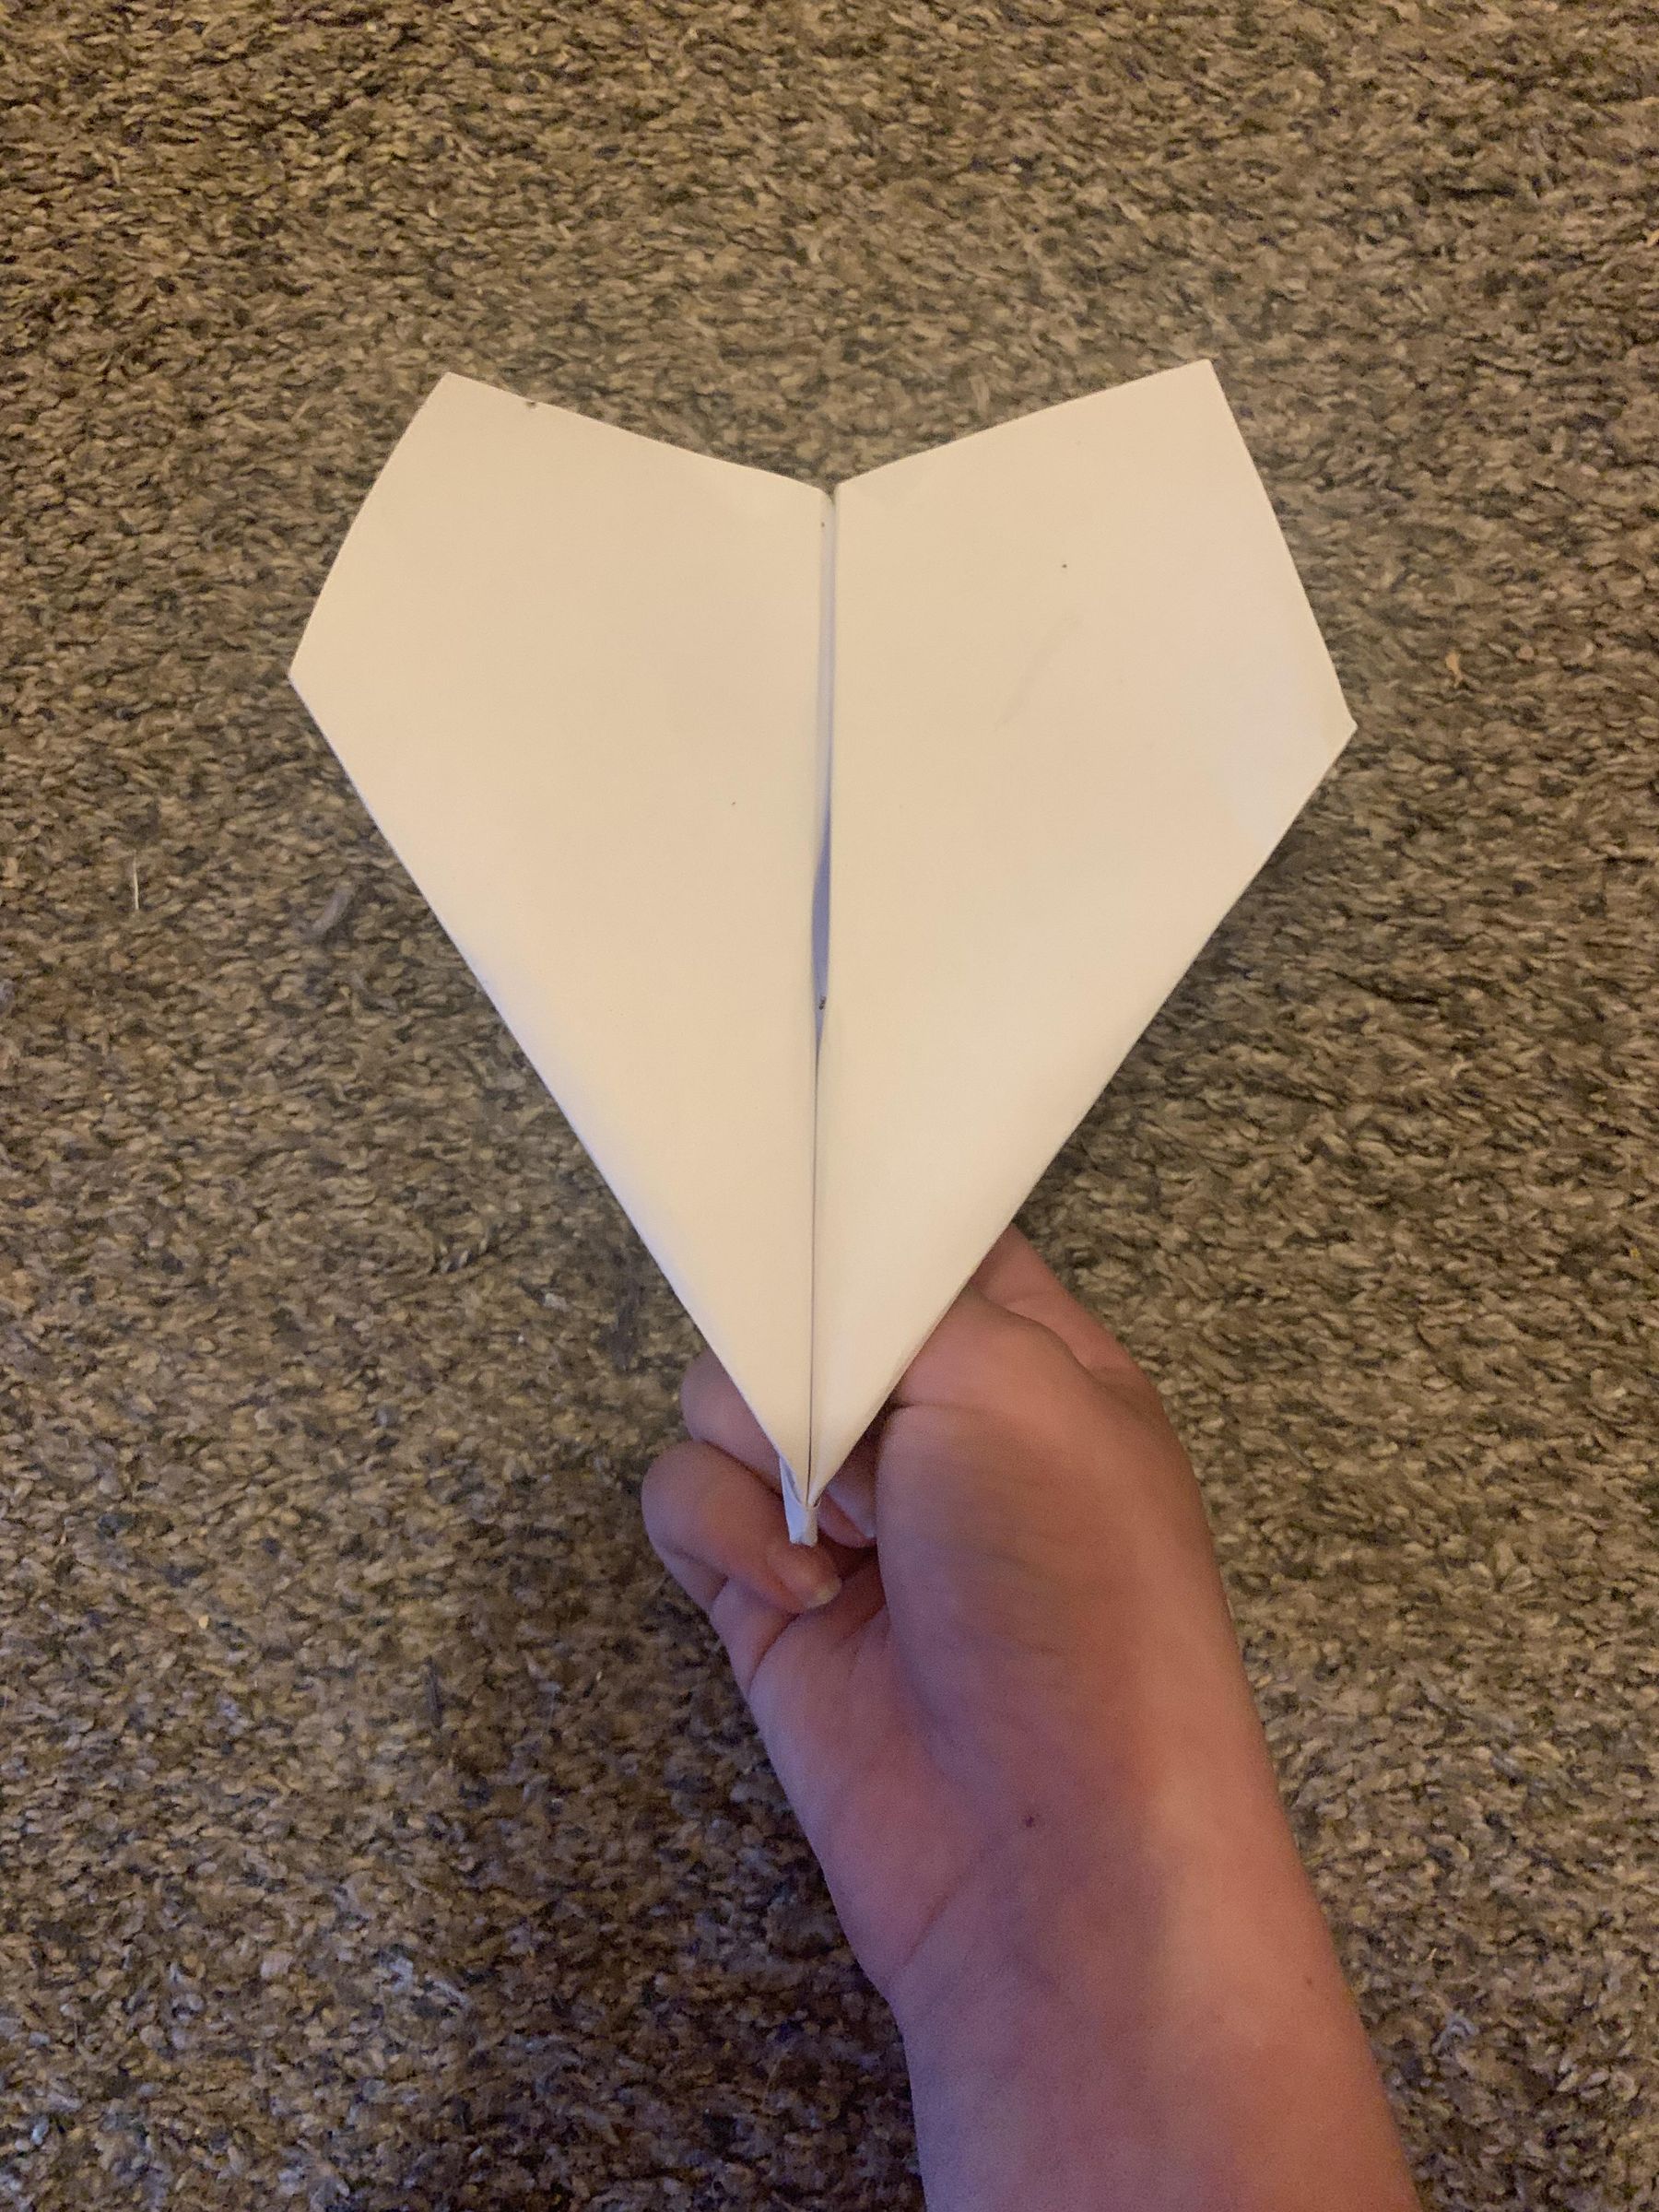
I have made my own design of a world record paper glider called Firefly 5 that I like to call Cardinal. It flies super far, really aerodynamic, and even has a nose lock in the front! And today I’m gonna be teaching you how to fold it!
Supplies
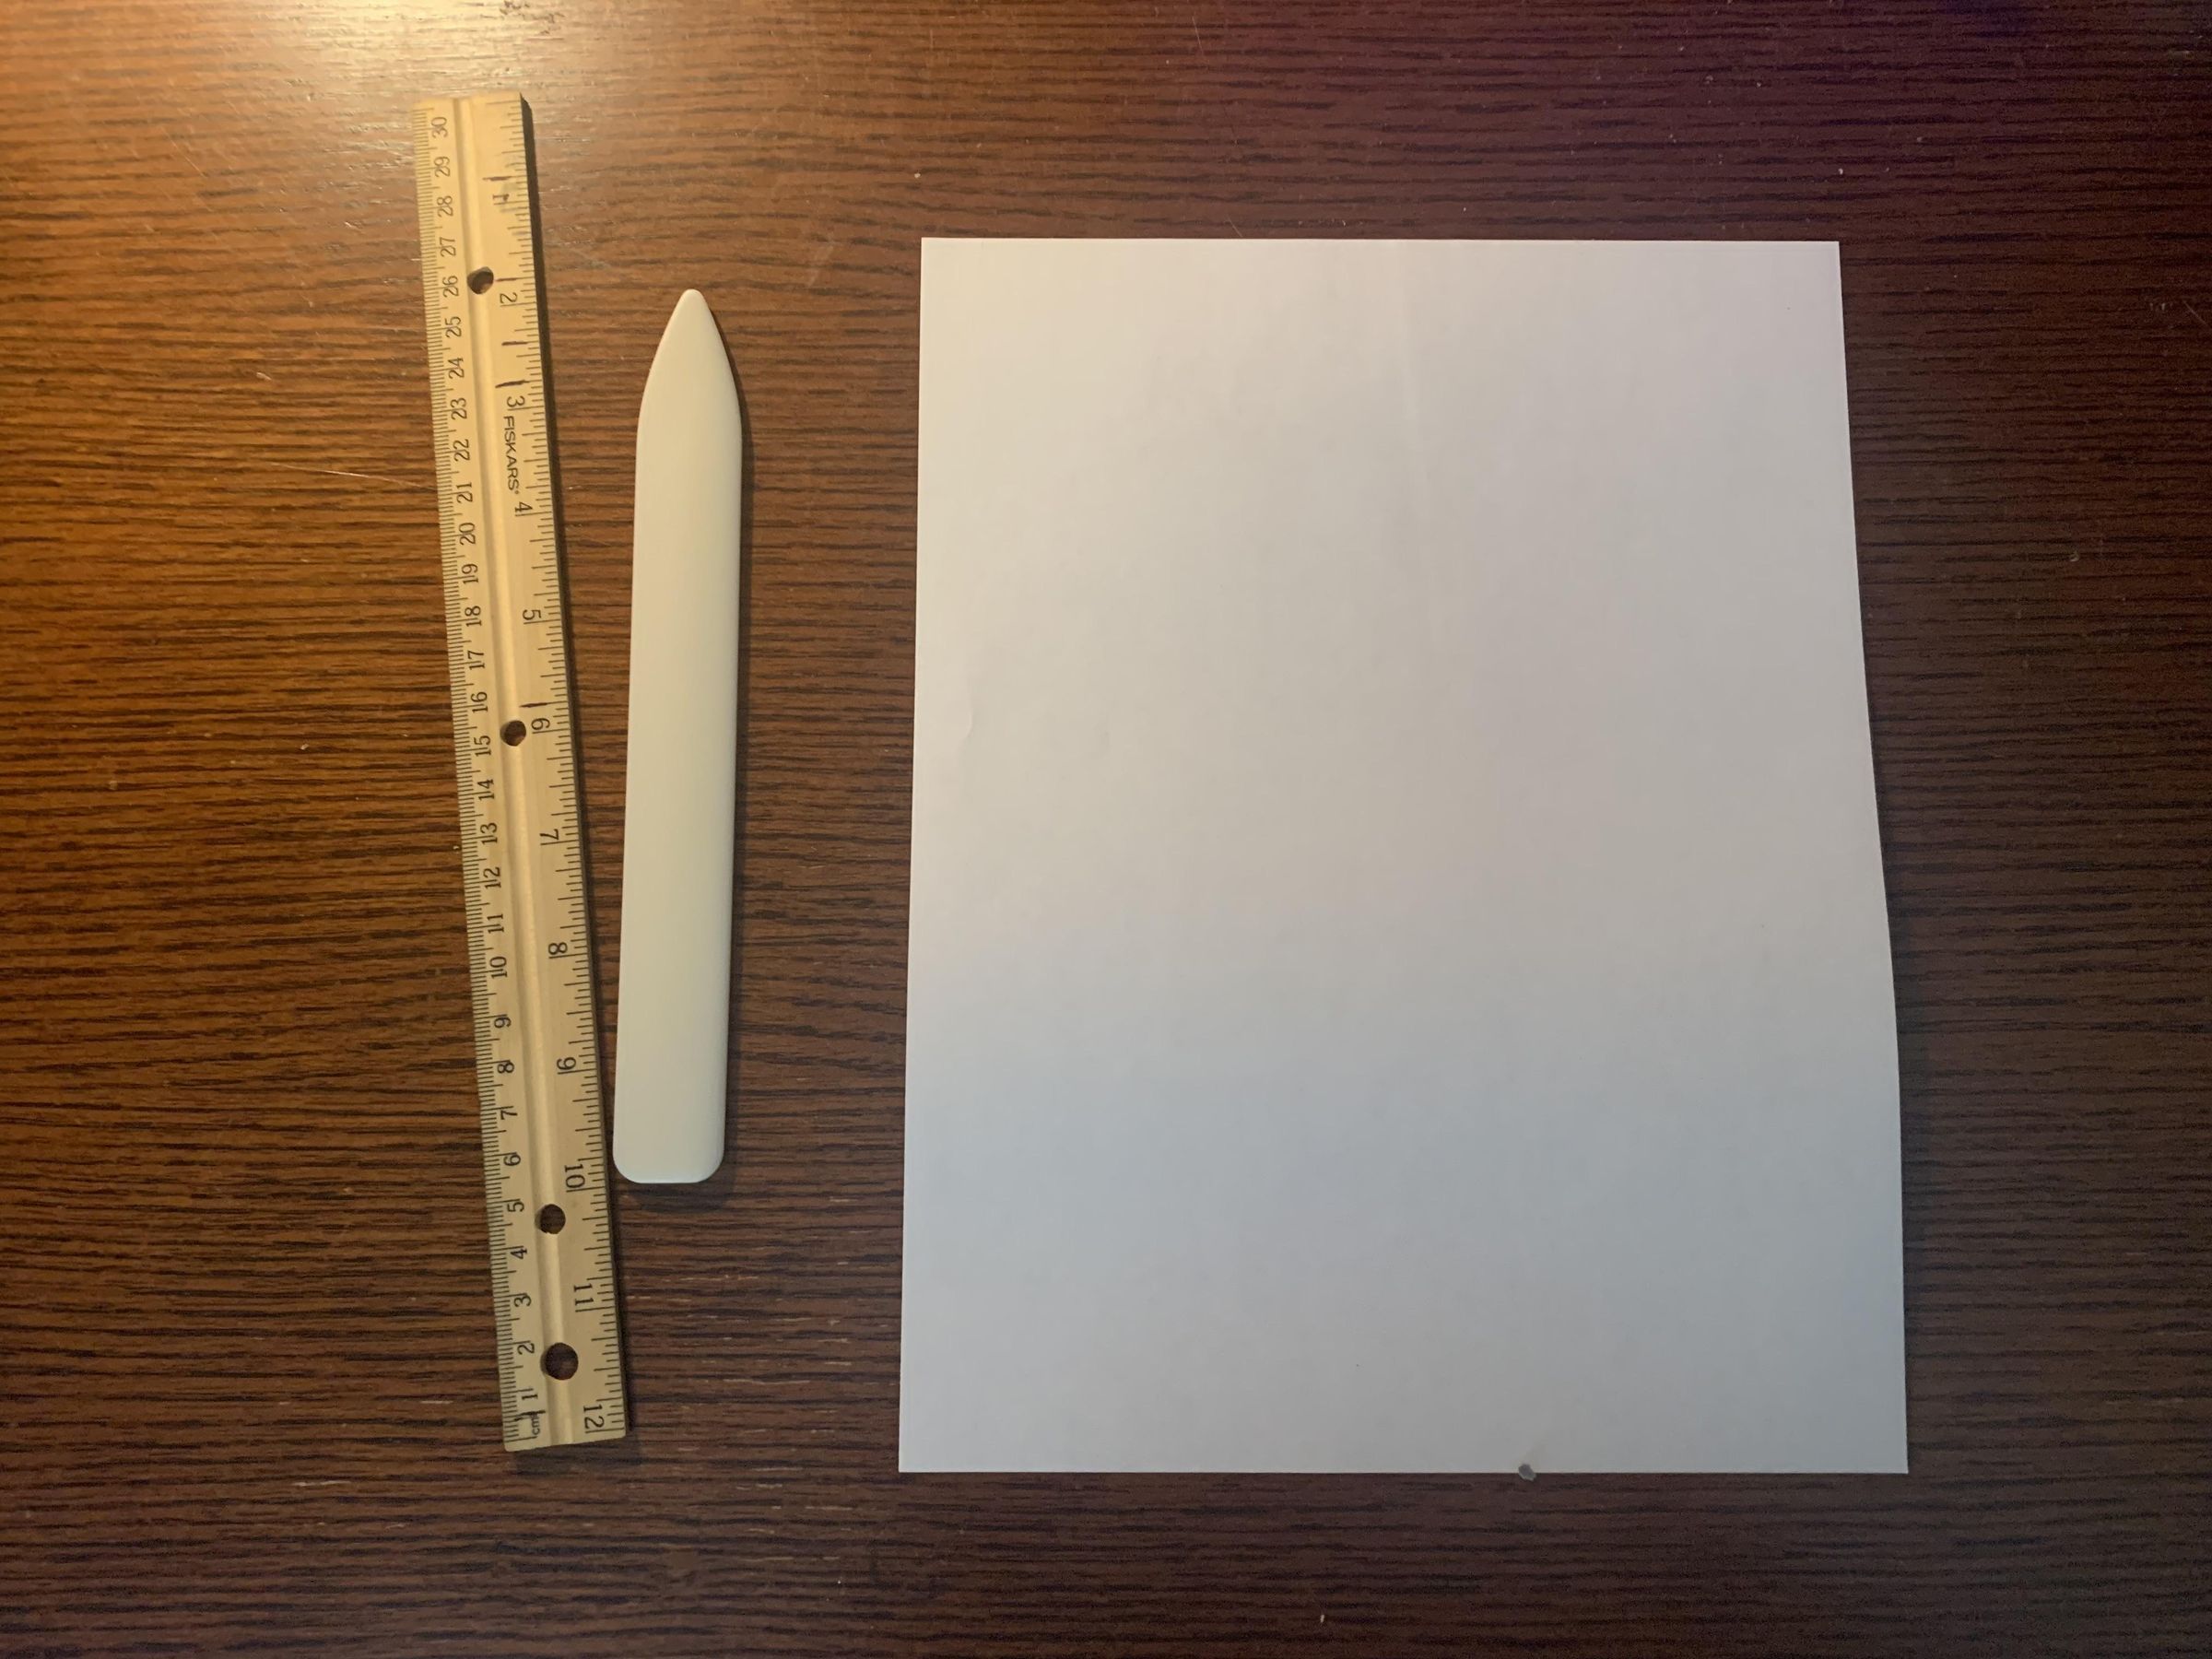
8.5”x11” paper/printer paper (same thing)
bone folder creasing tool (not needed but highly recommend)
ruler (not needed but highly recommended if you want to make your own measurements)
two hands
Fold in Half Lengthwise
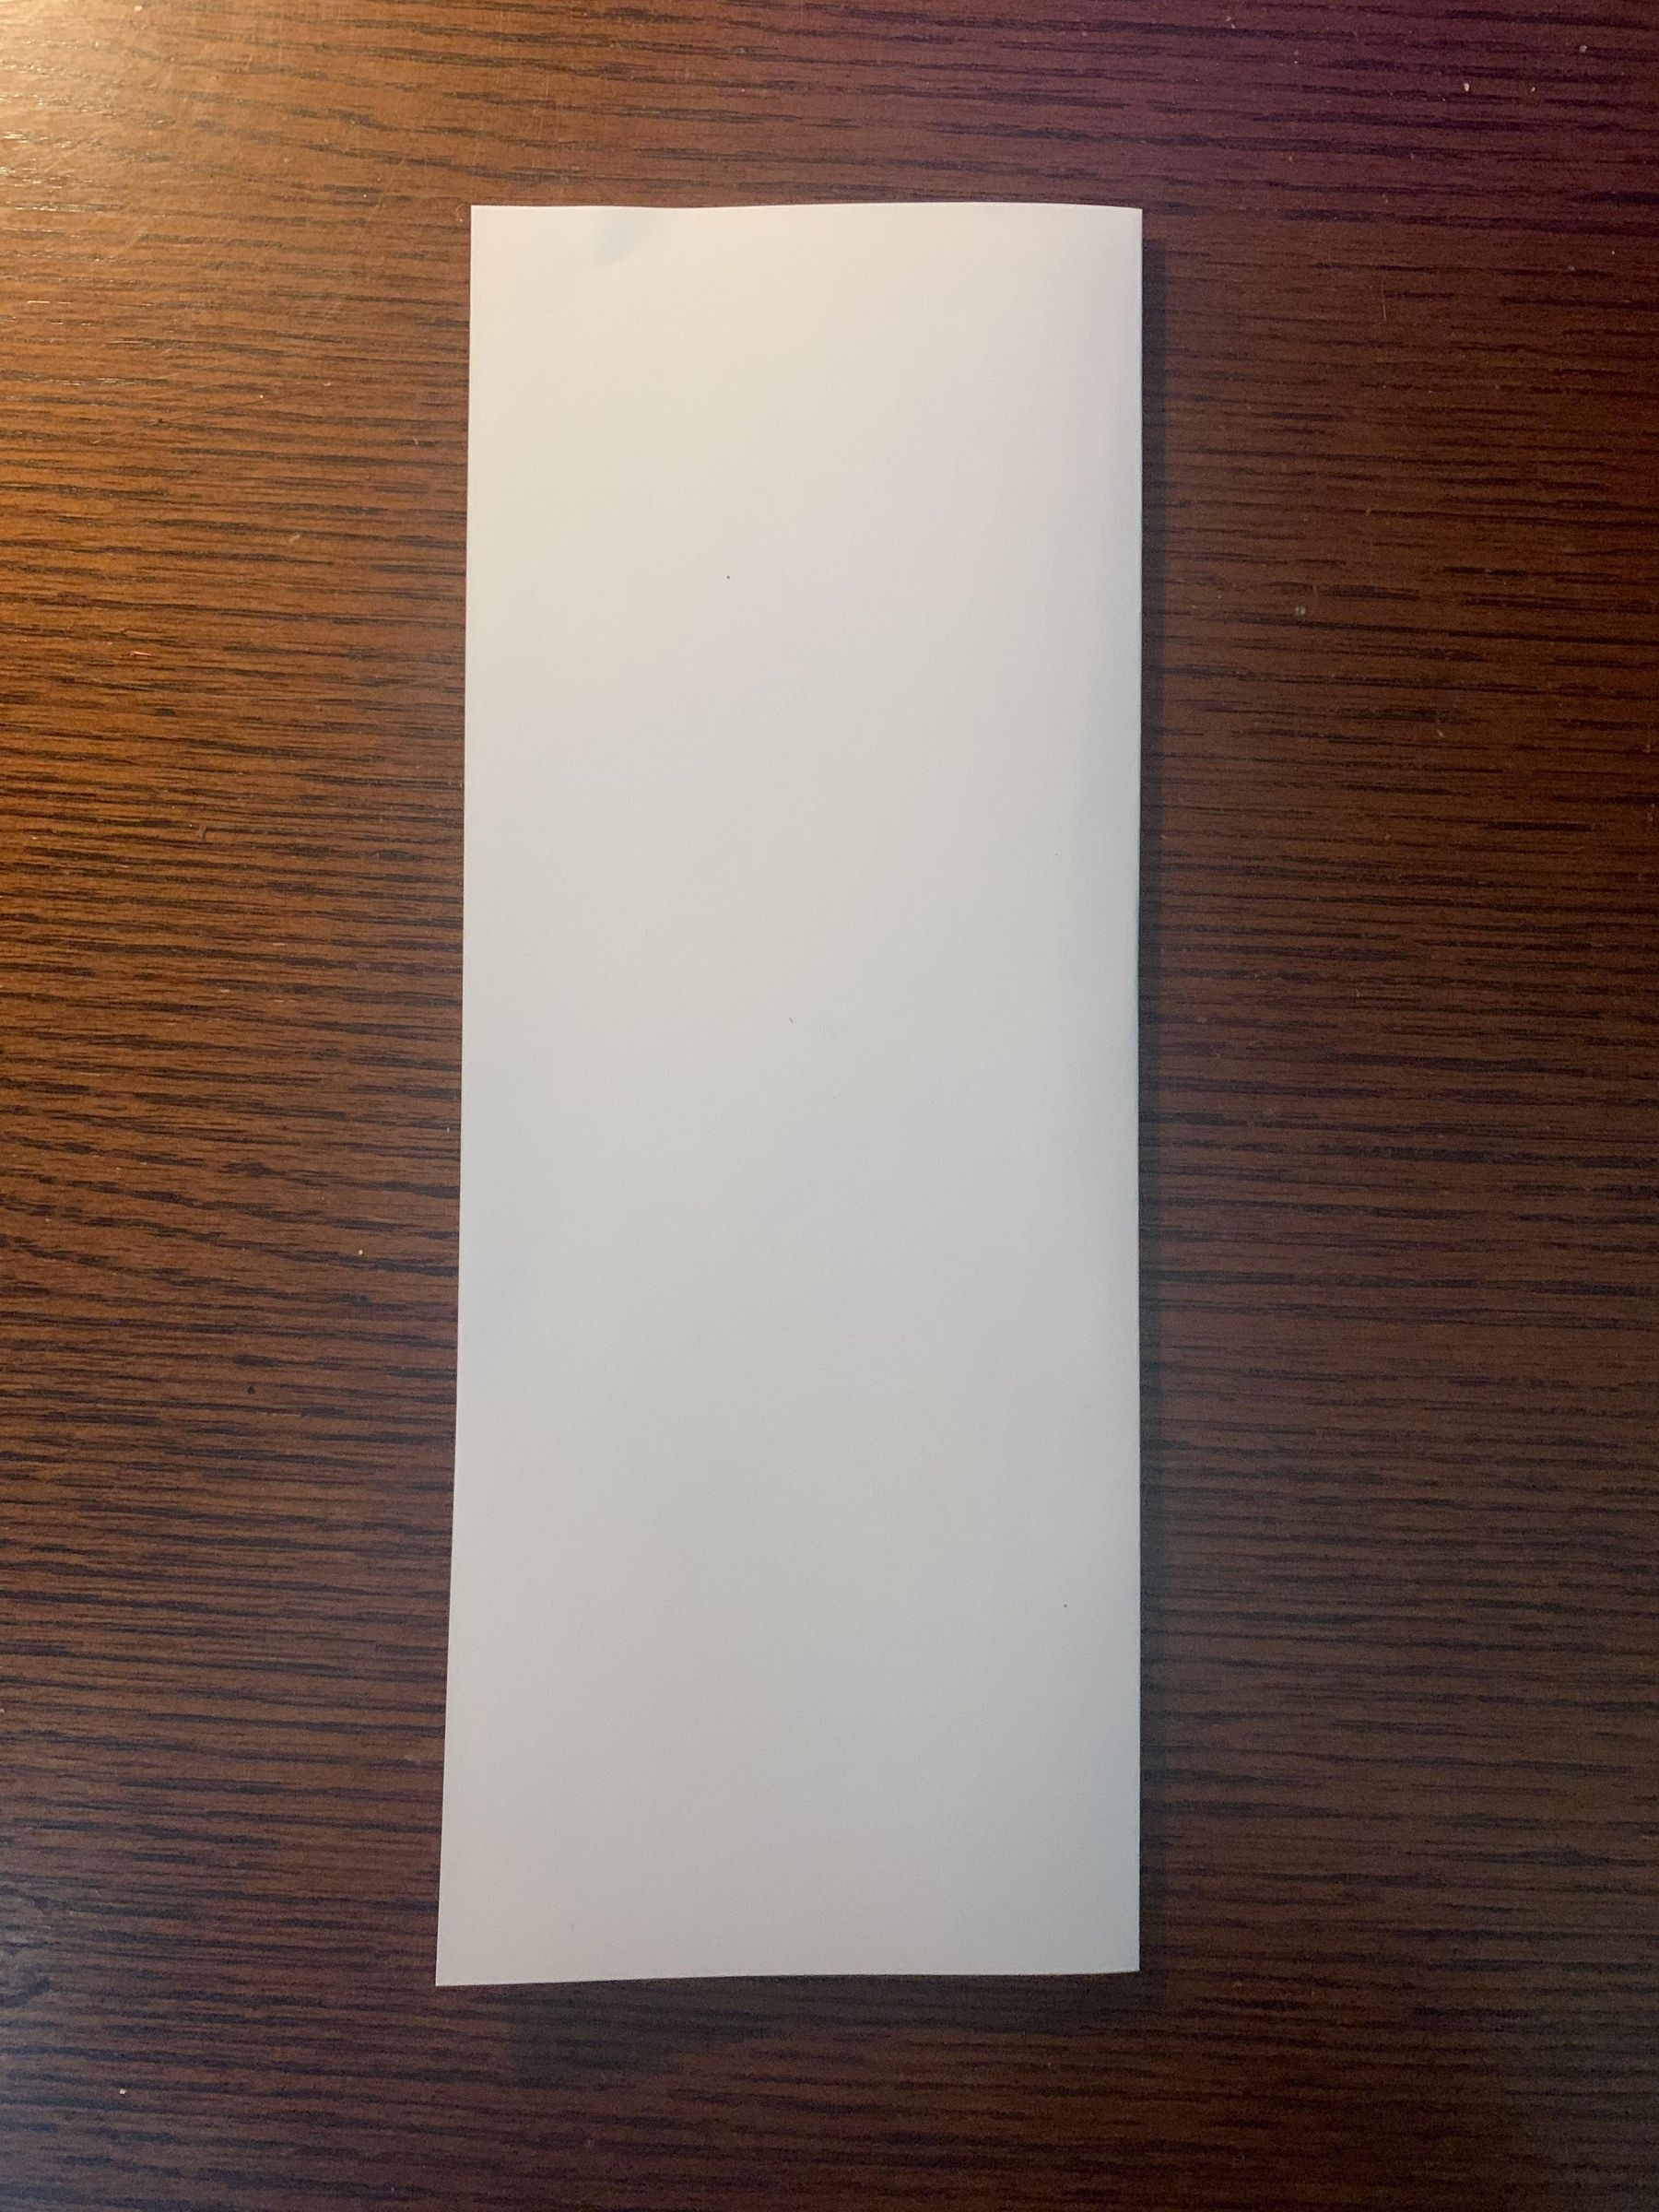
You are first going to fold in half lengthwise almost like a hotdog and then crease it sharply.
Fold Down the Corners
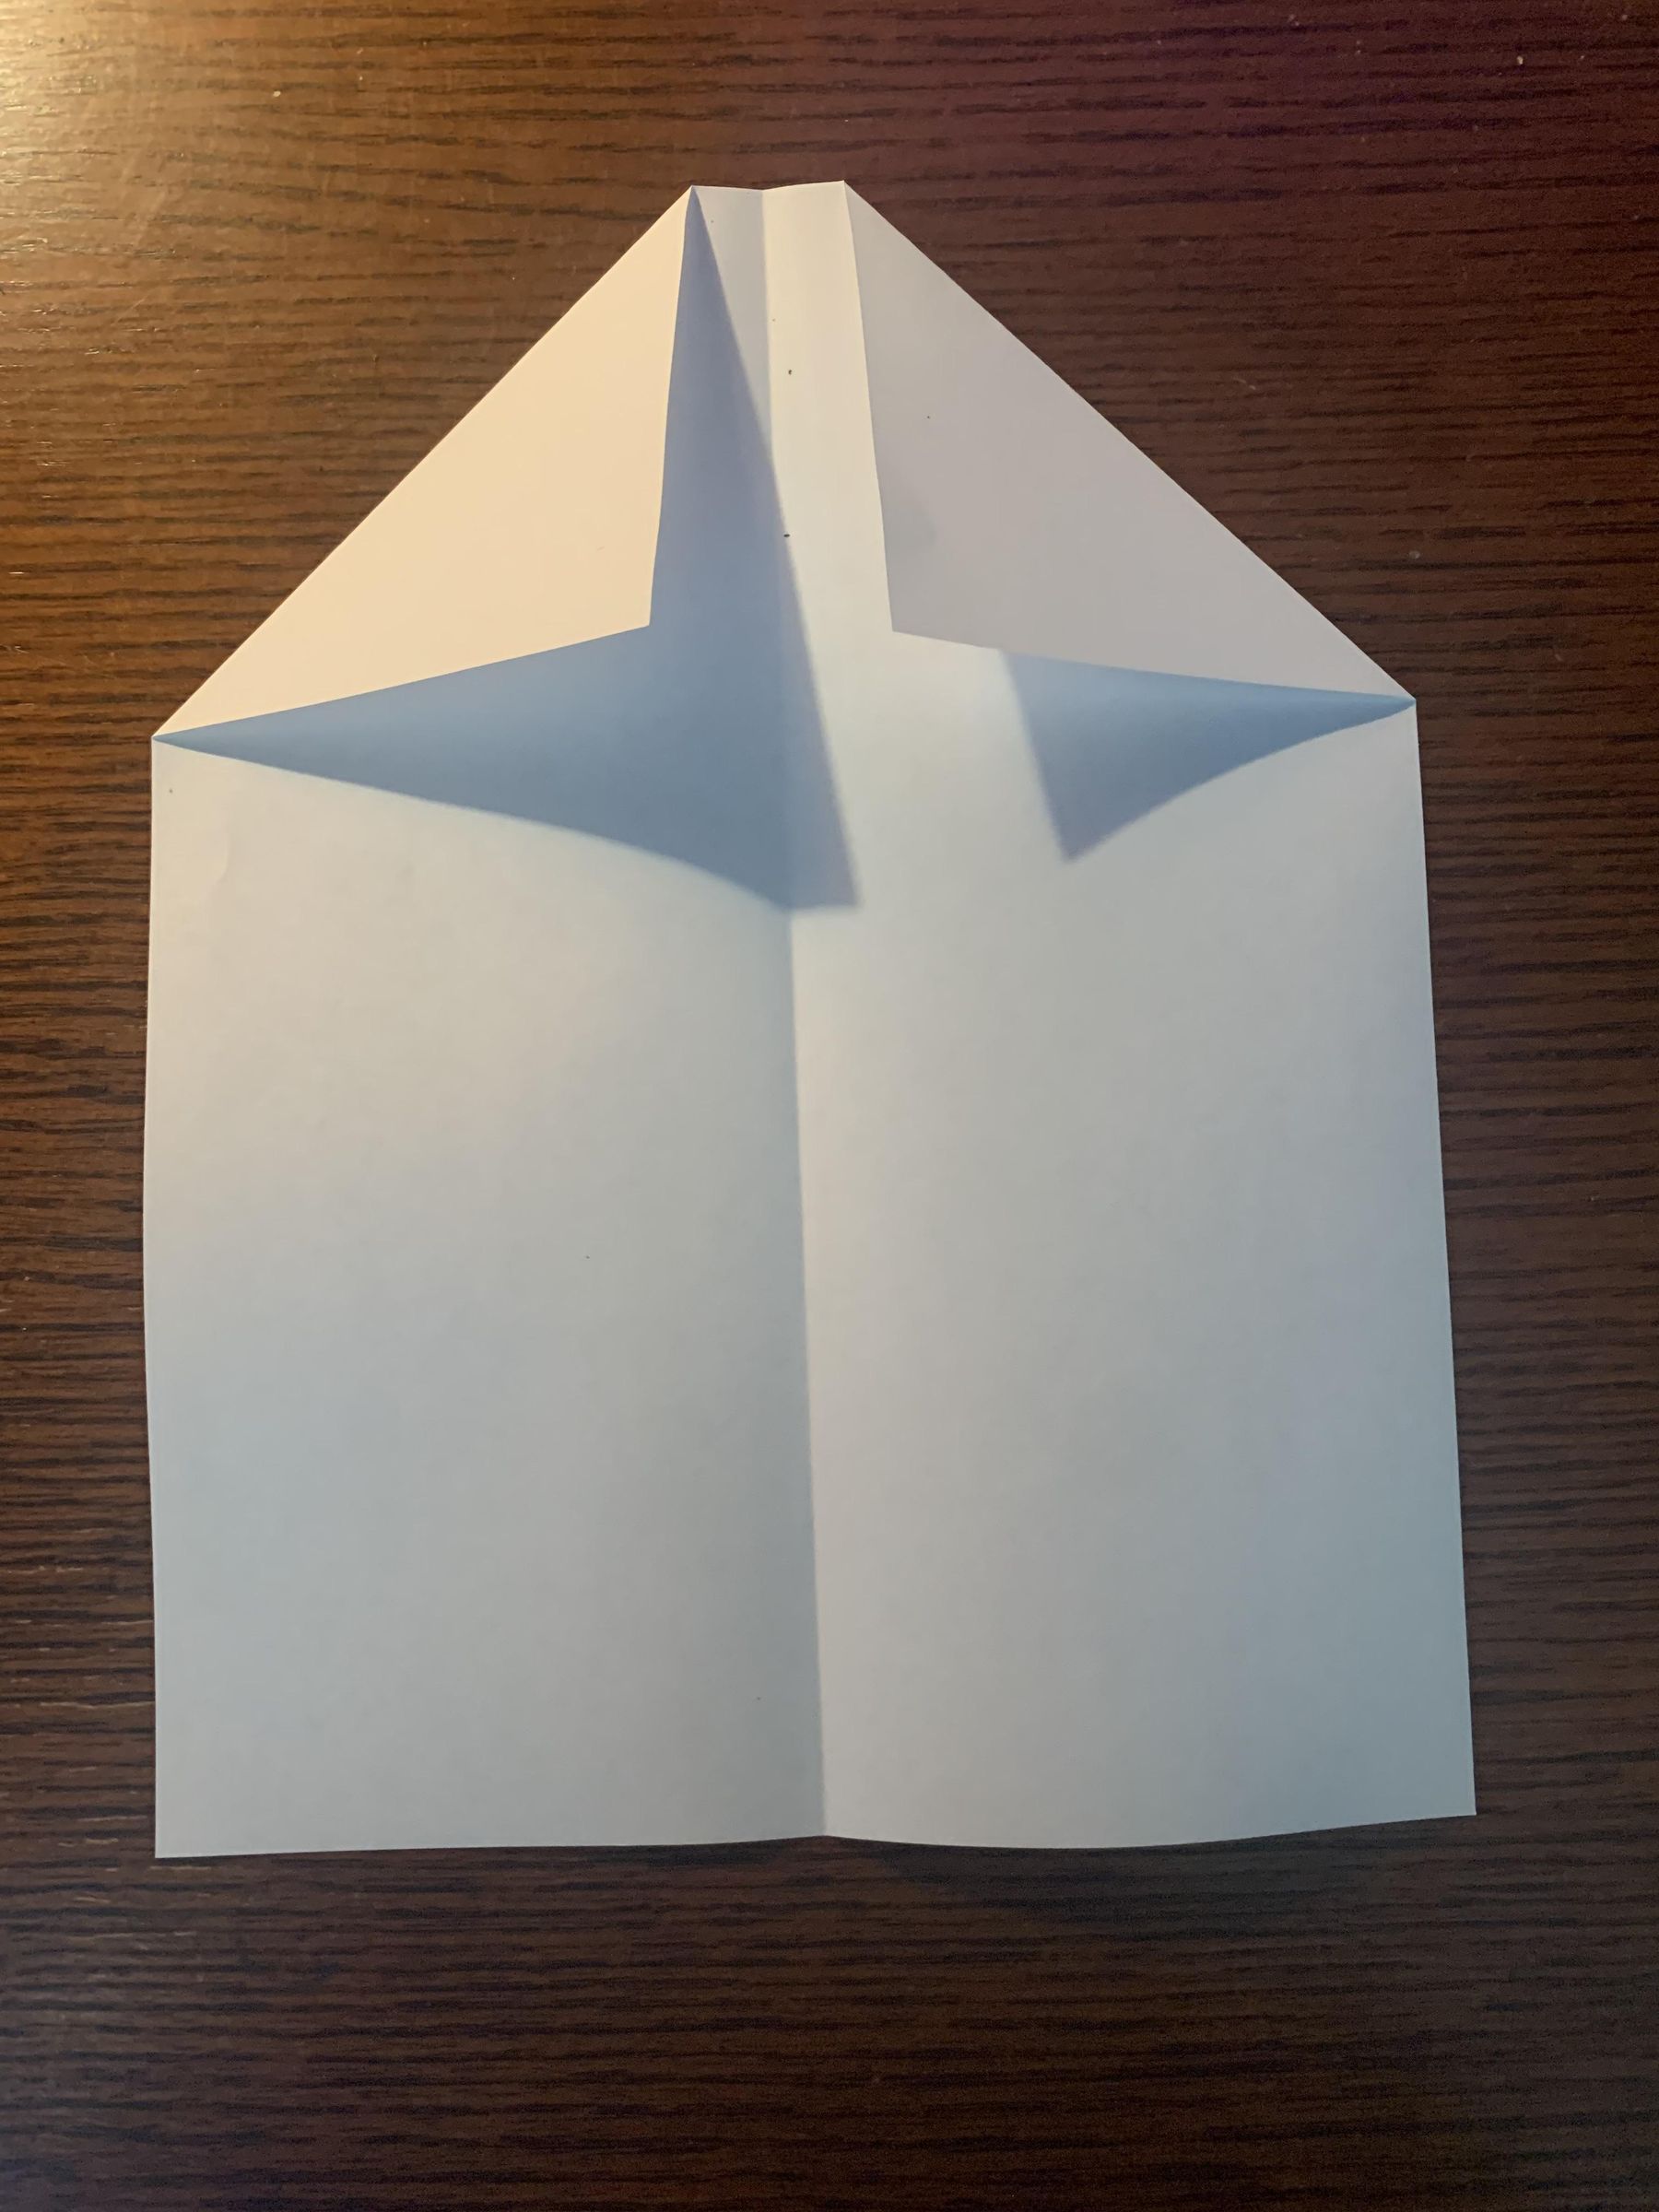
Now unfold the half and fold down the top two corners to where you have a gap about the width of your index finger towards the center of the plane.
Fold Everything Down
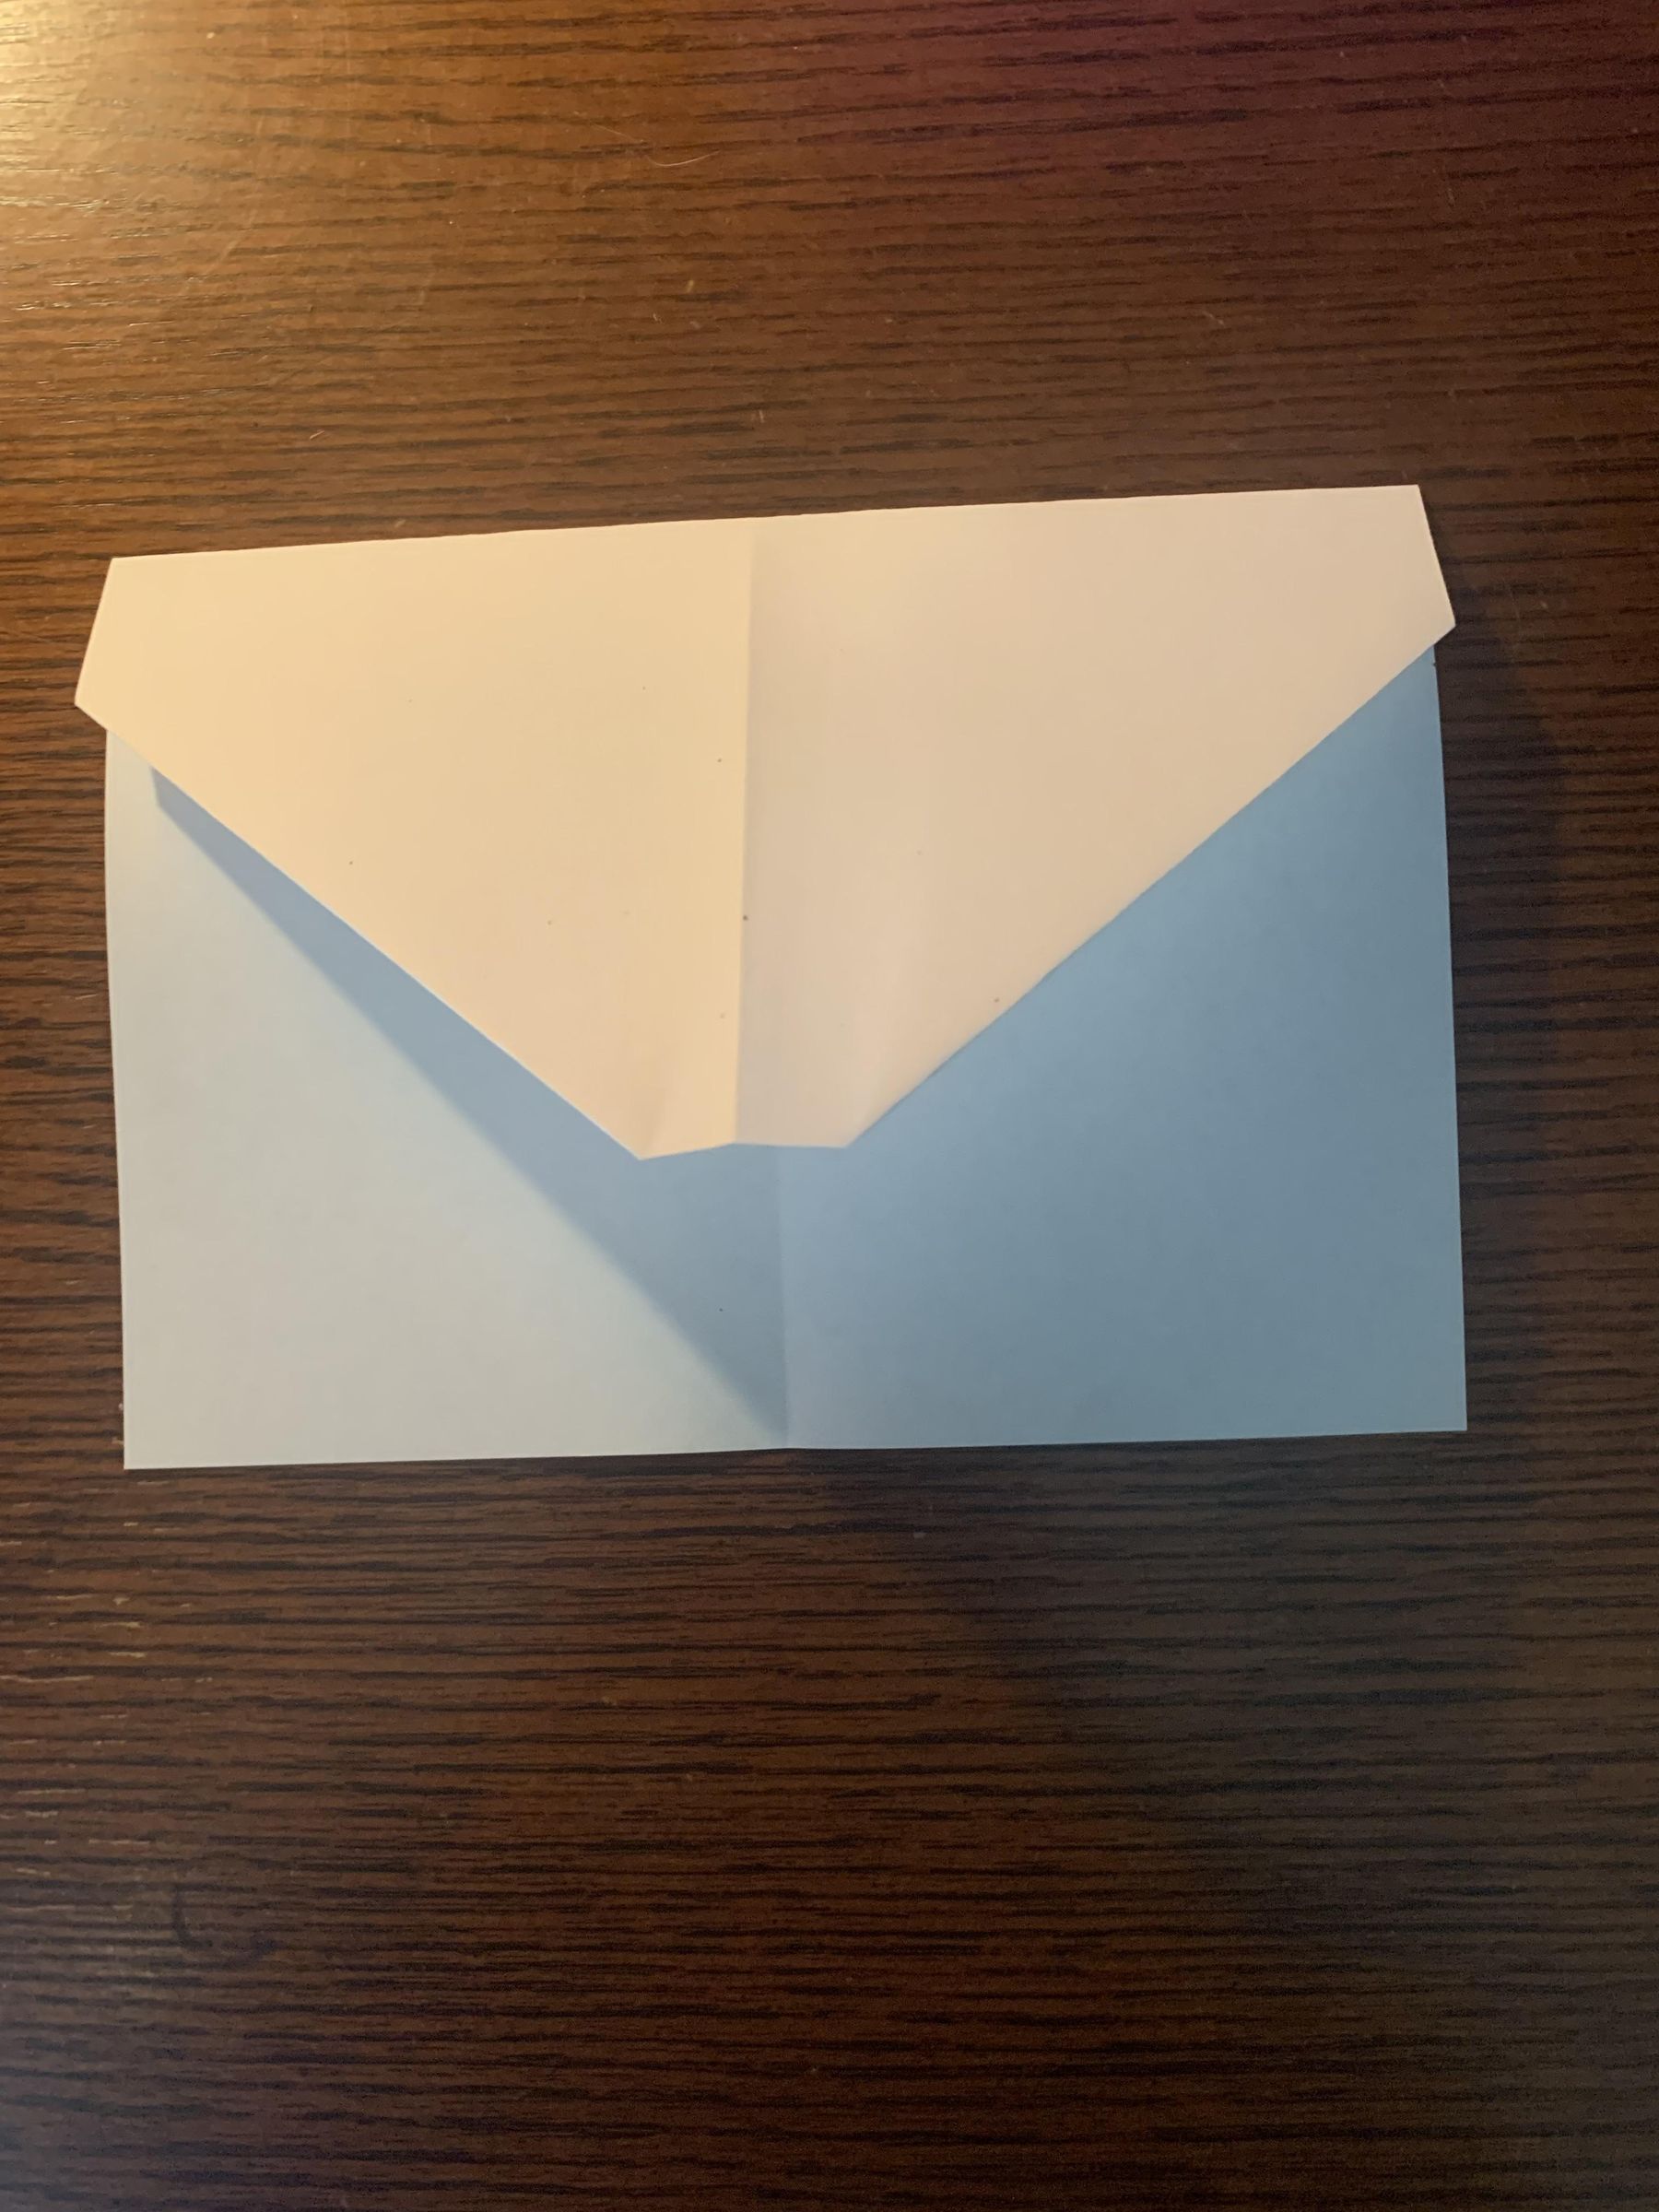
Next fold the two corners down towards the bottom to where you have about an inch left of space on the bottom of the plane. Also be sure to line up the center crease.
Make a Pinch Crease
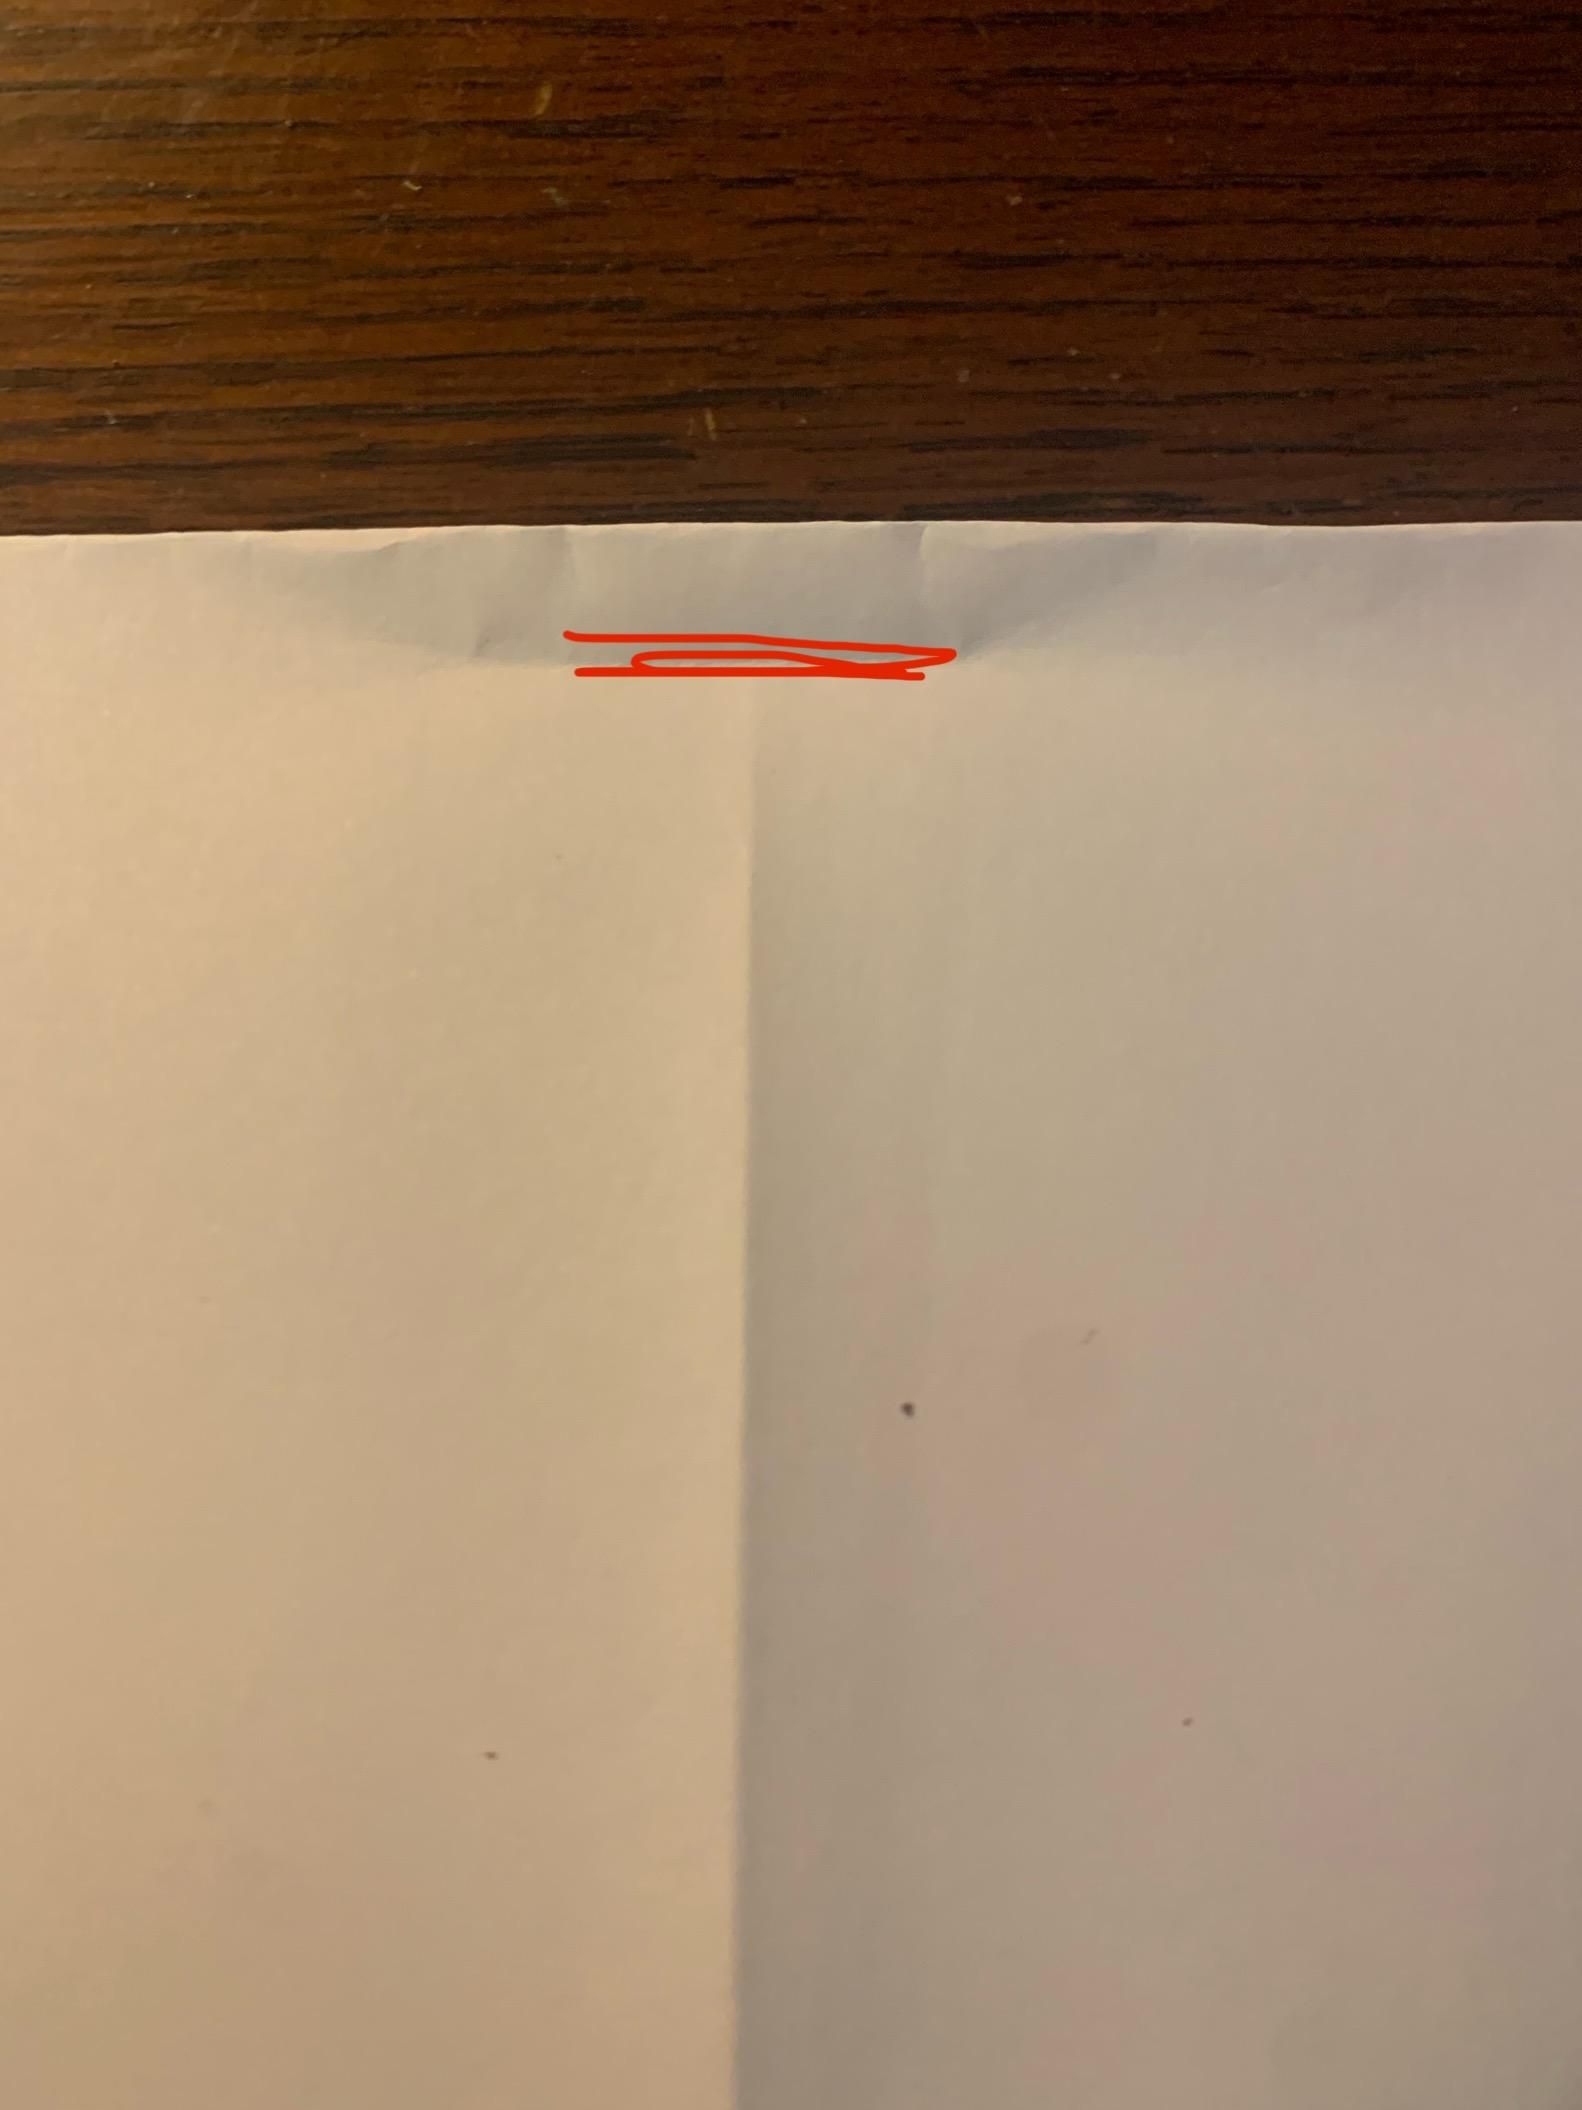
Now make about a centimeter pinch crease at the top of the plane making sure to not fold all the way across.
Fold Down One Corner Again
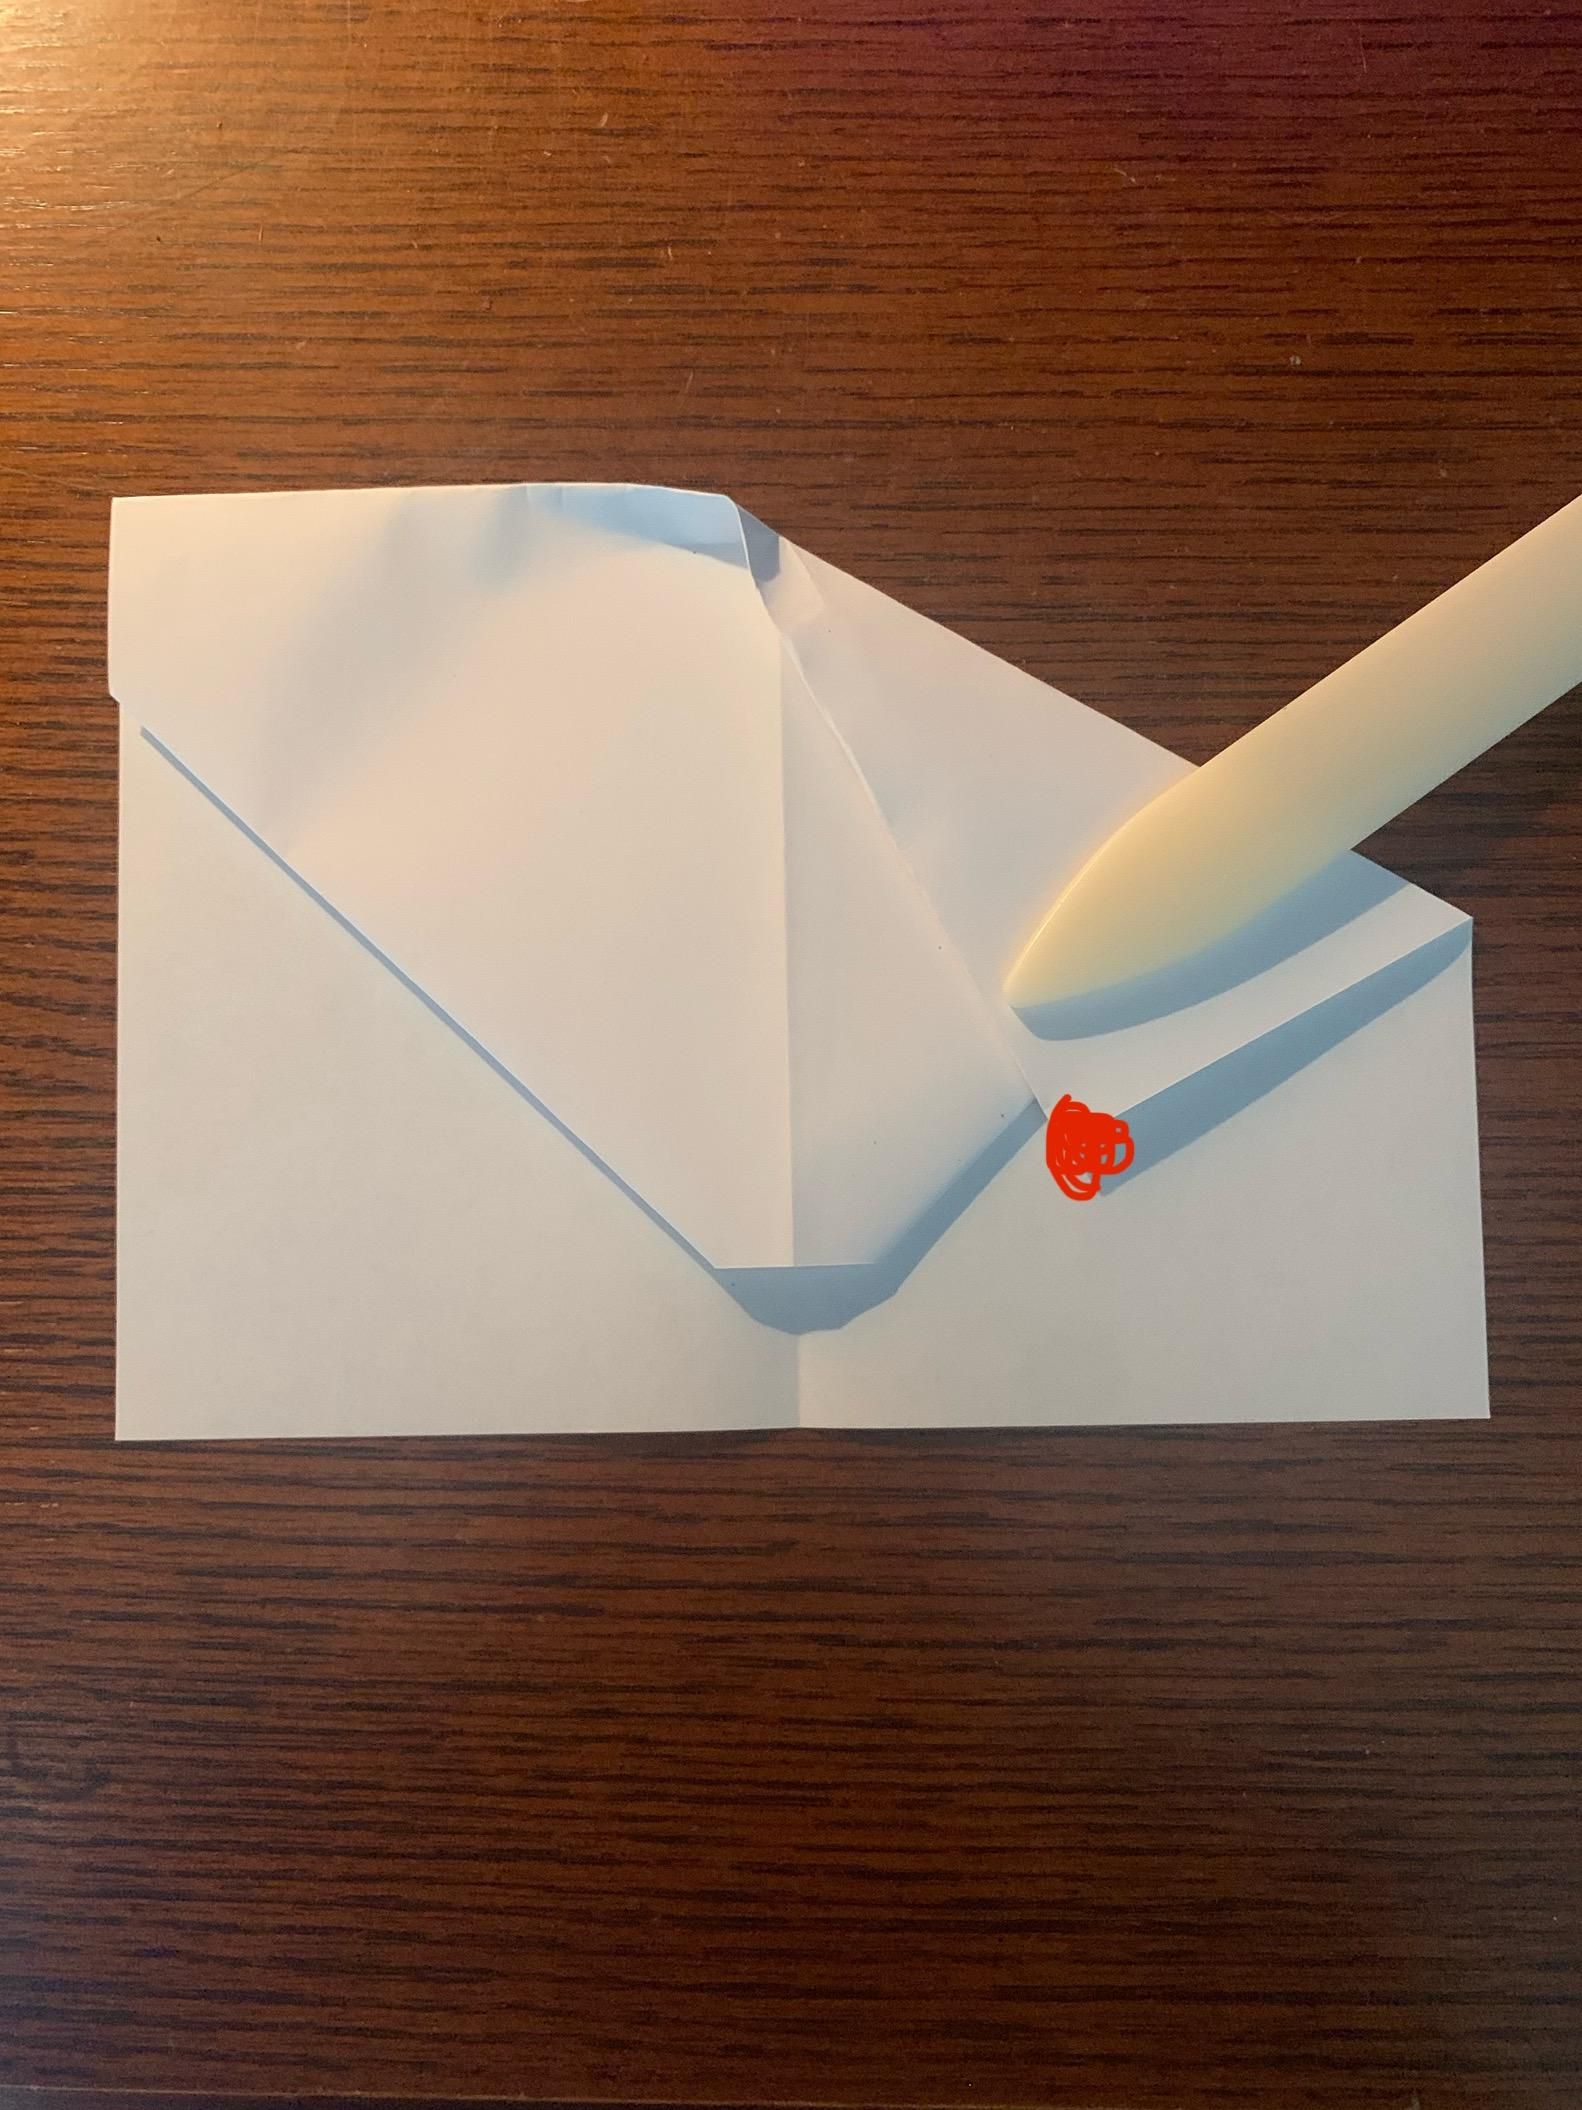
Now fold one corner down from that pinch crease and make sure the point I marked doesn’t get surrounded by the layer next to it. Leave a little space from that point to the edge next to it (that’s probably an easier and shorter way to say it, lol).
Fold in Half and Book Match
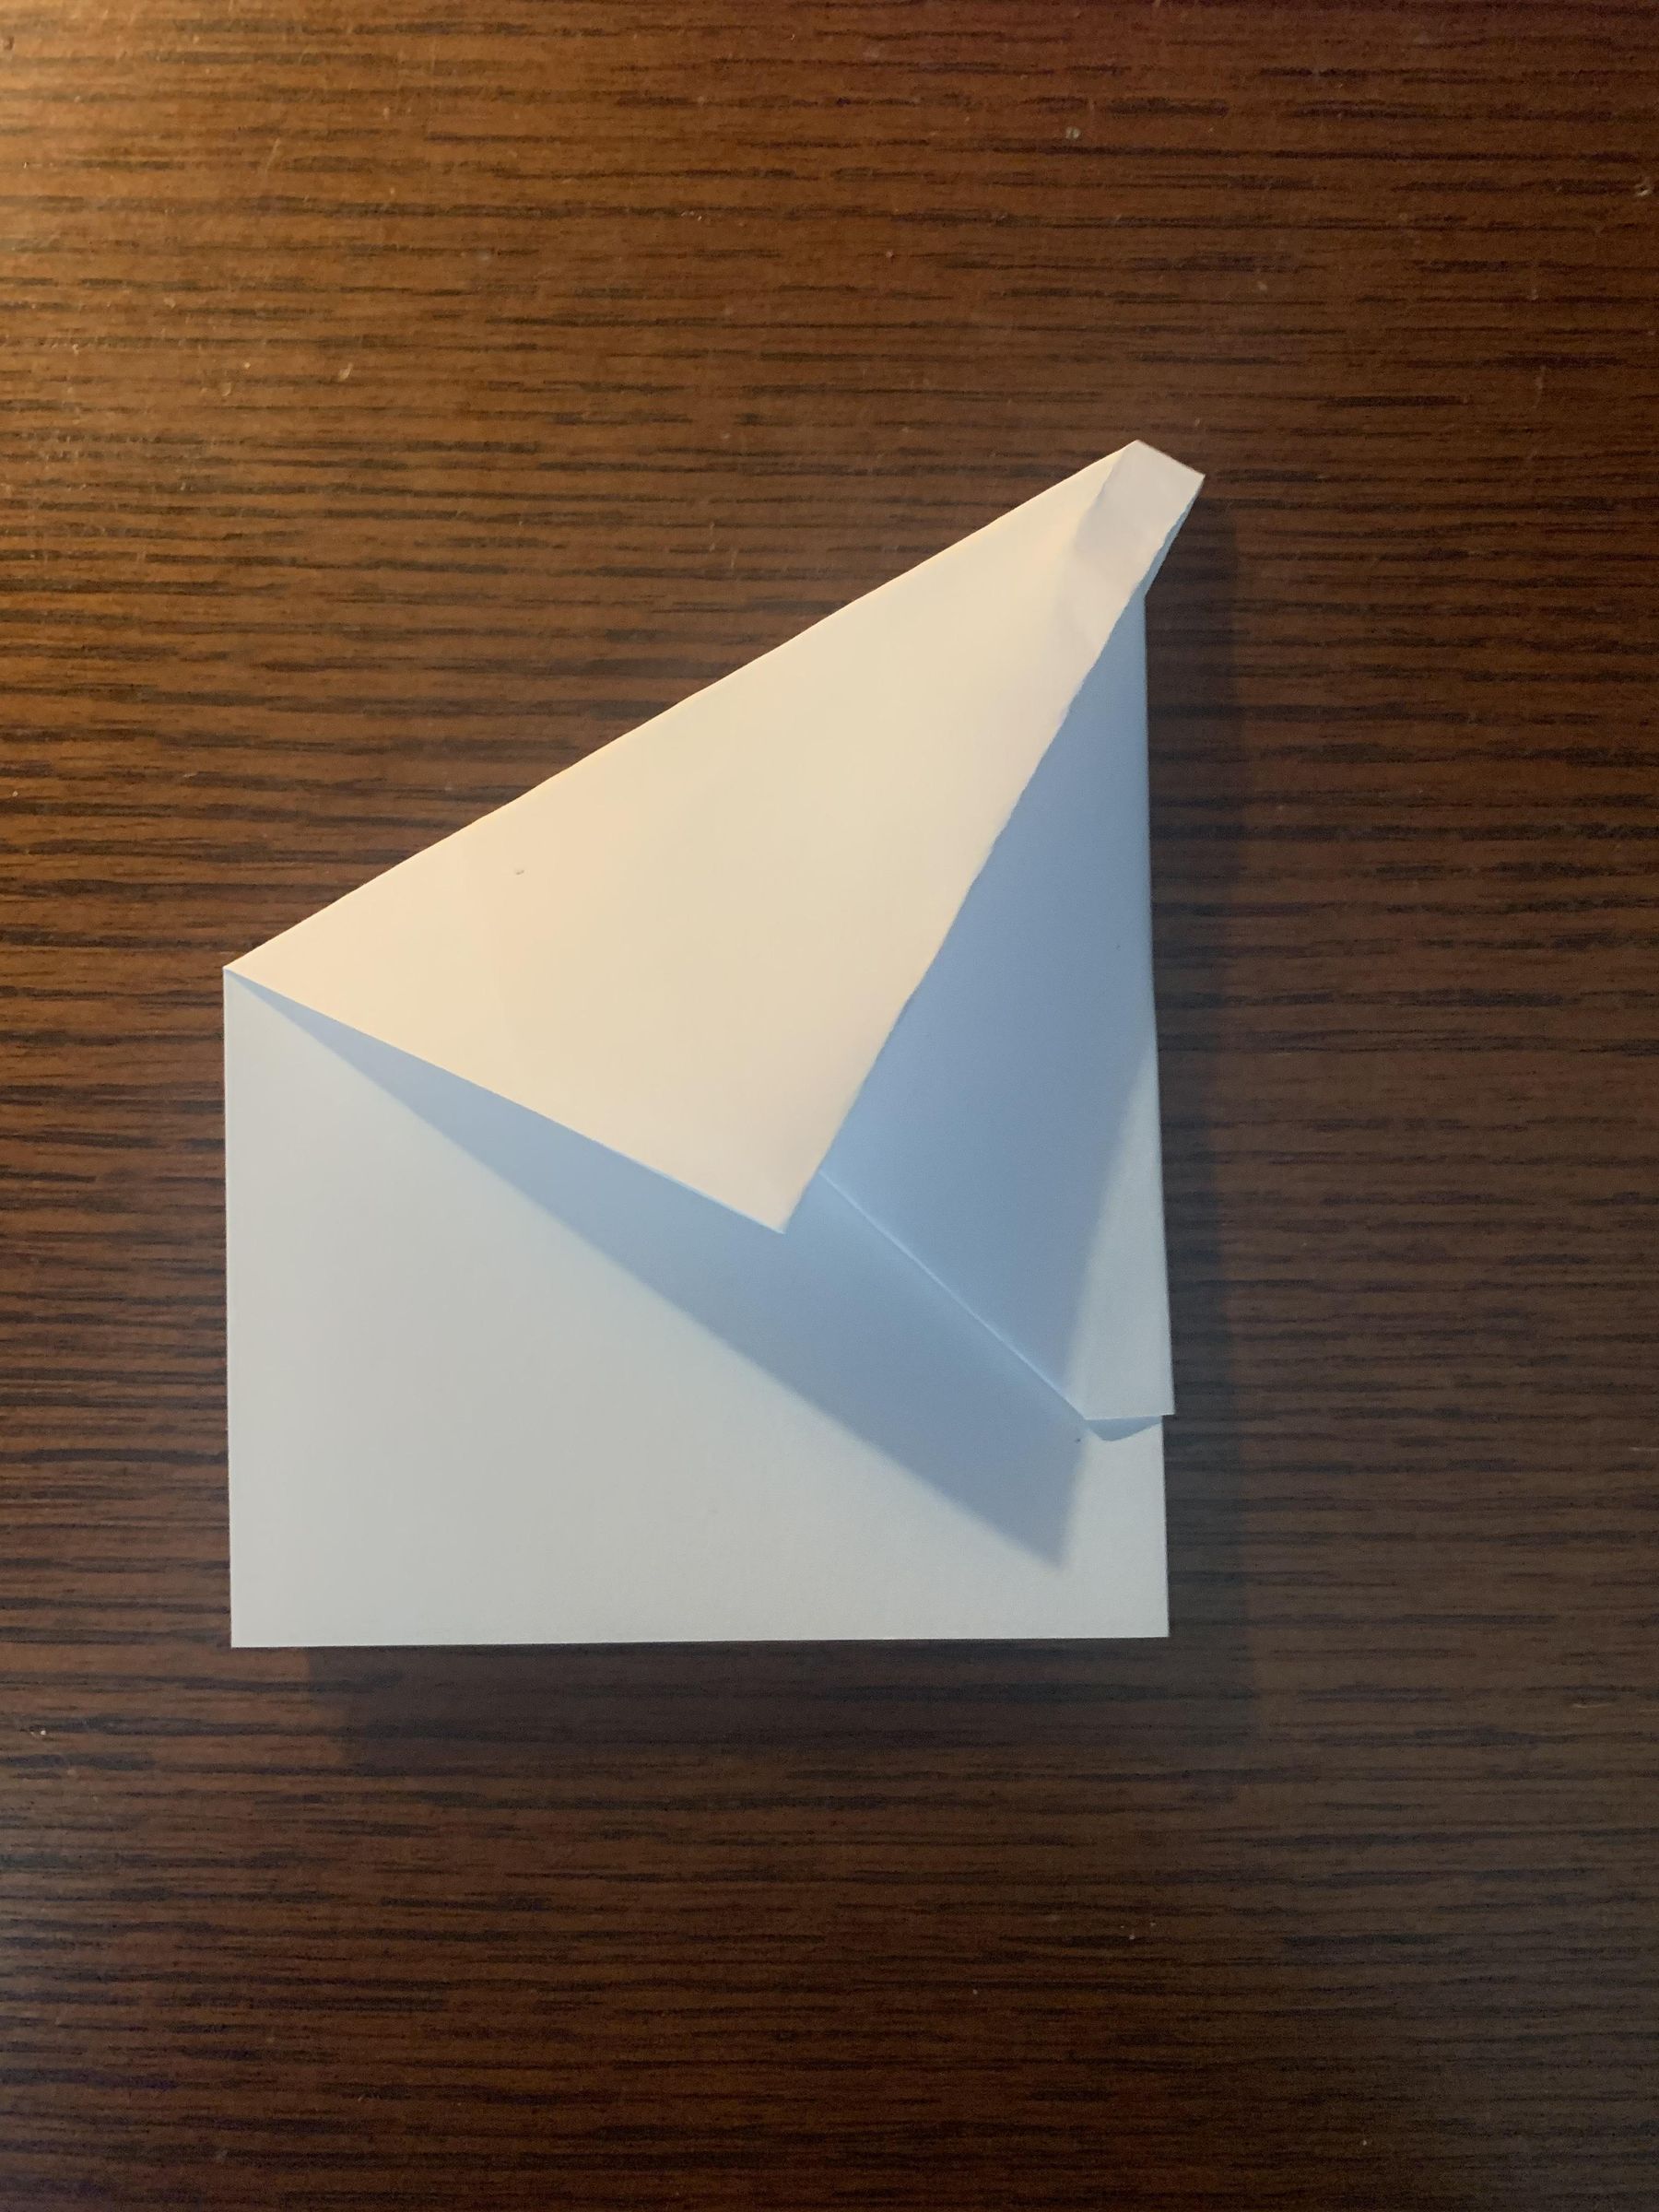
Now fold in half again along the center crease and book match the wing behind it because you will have a pocket at the tip of the nose that keeps it from lying flat. (That’s why you book match the wing)
Unfold and Fold to the Crease
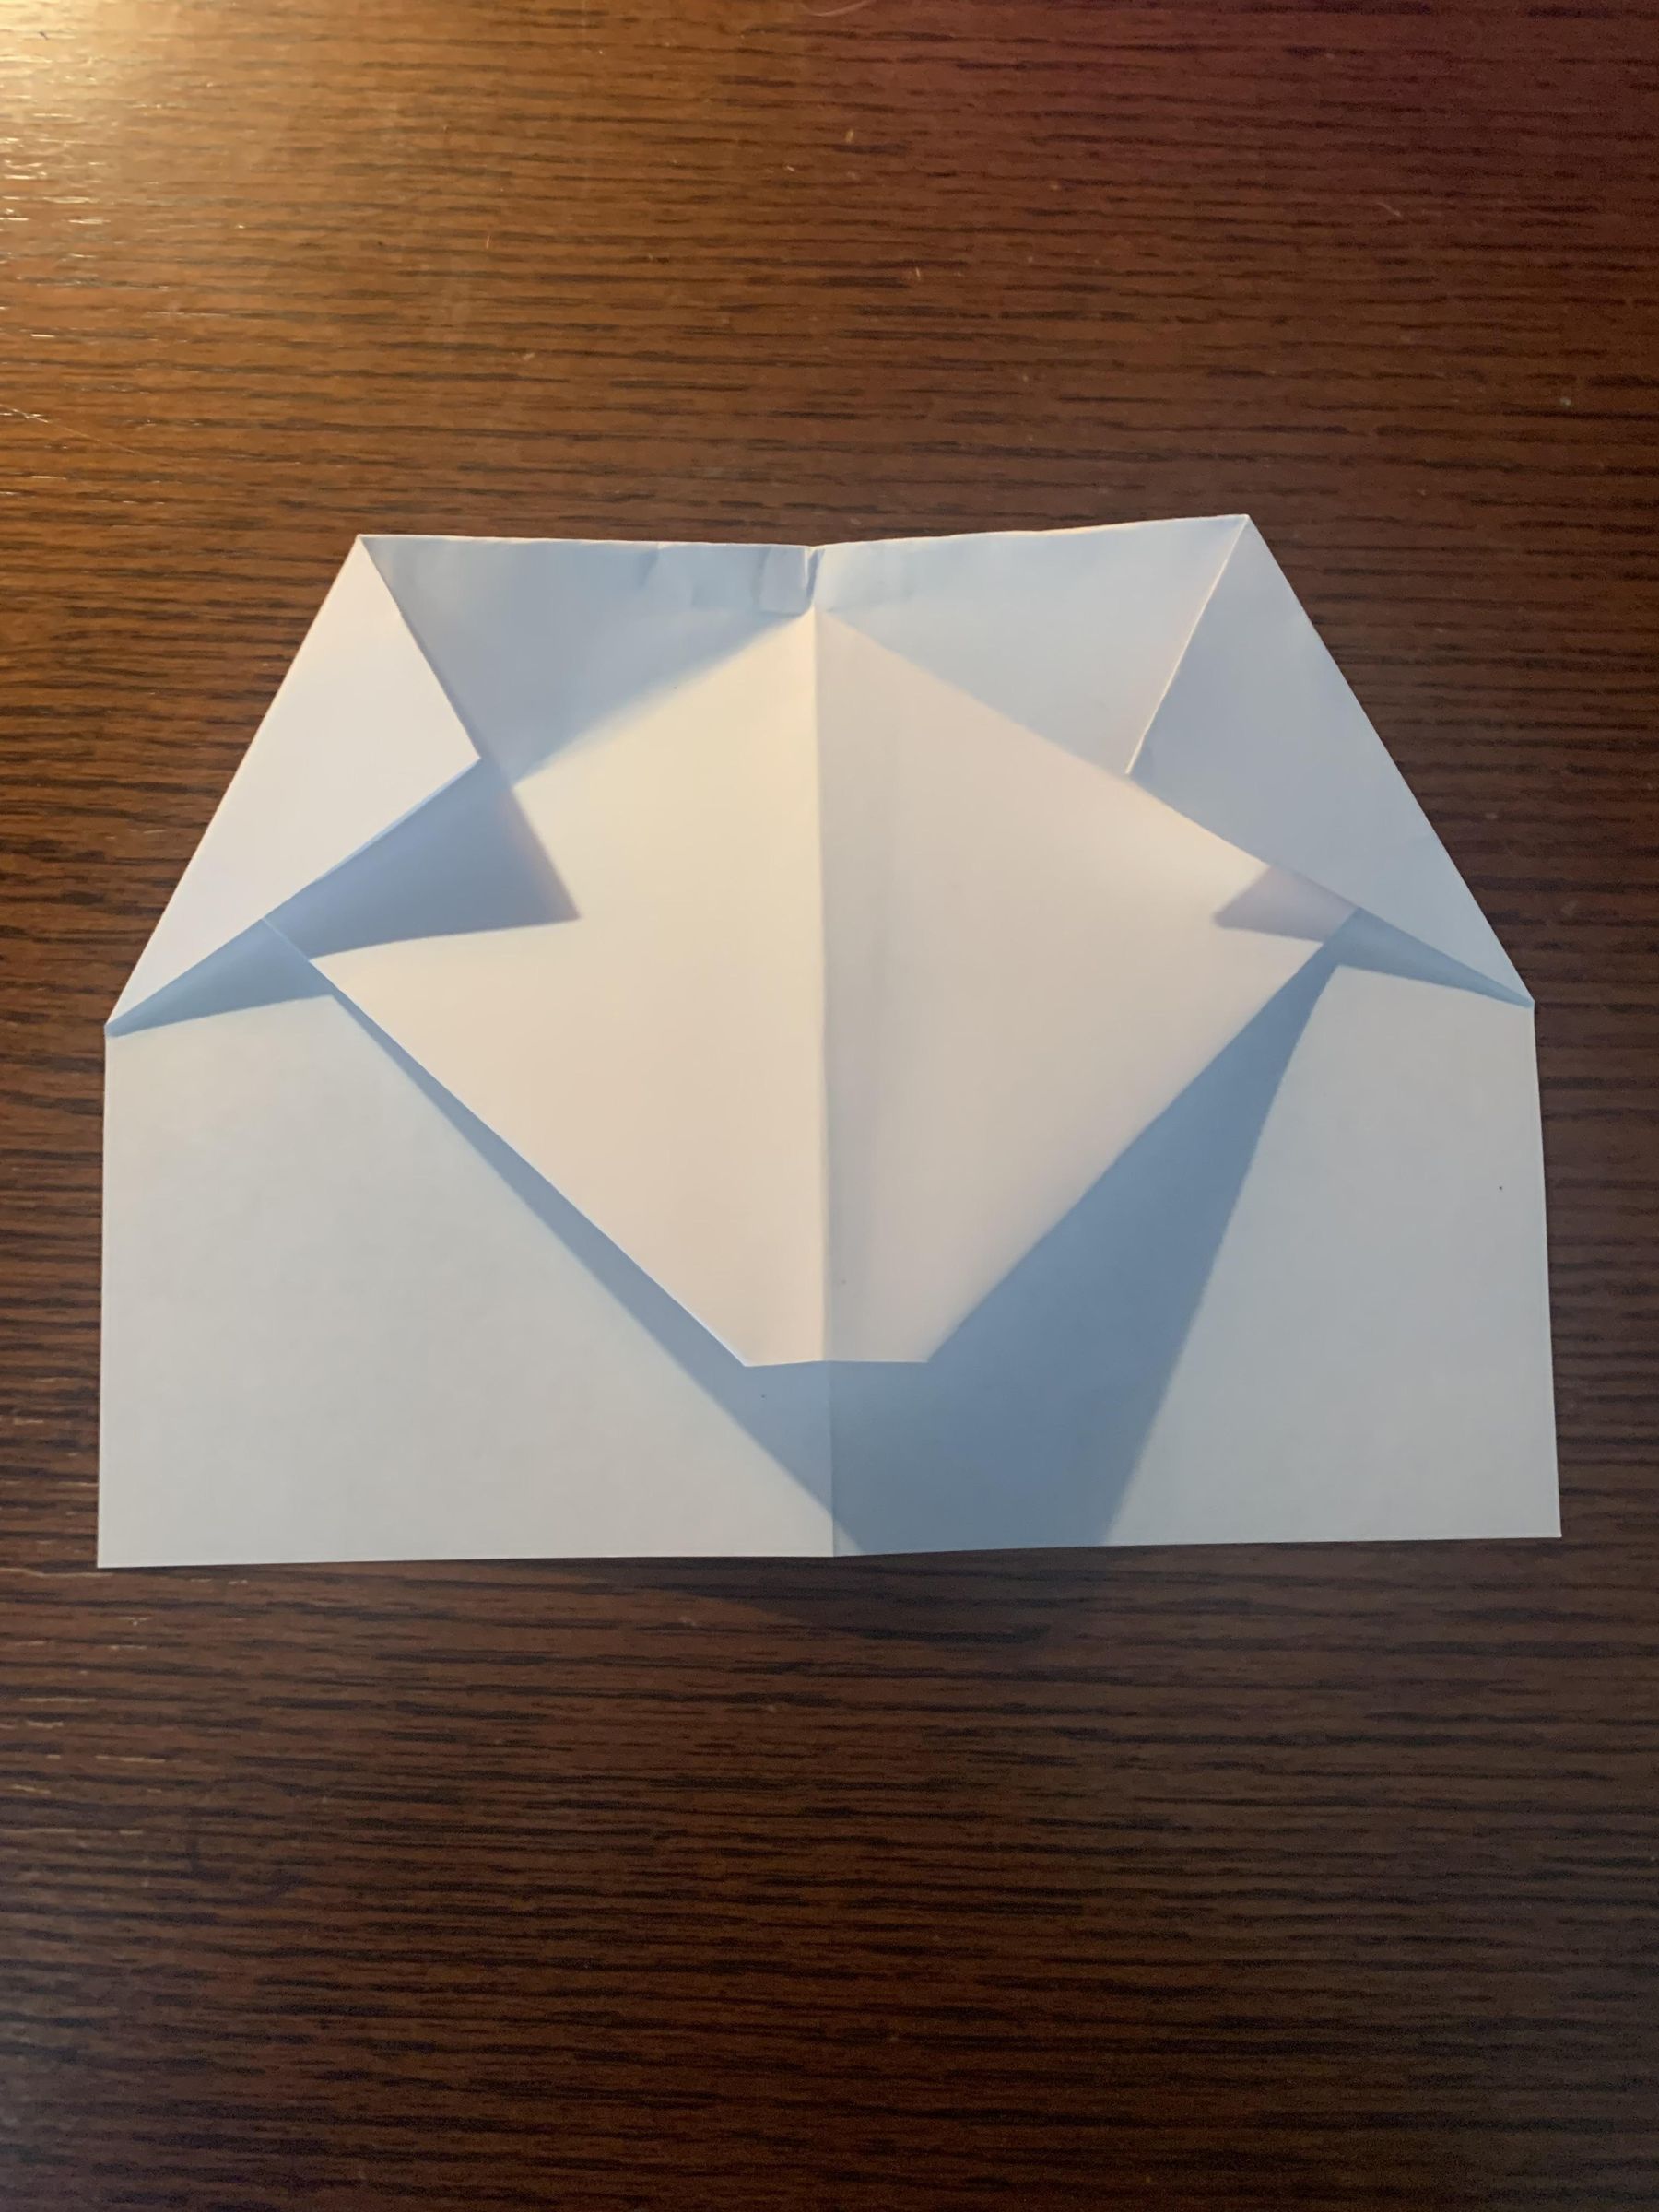
Now unfold the two wing flaps by unfolding the center crease too and now fold the two corners to the two creases you just made before.
Unfold As Shown and Said
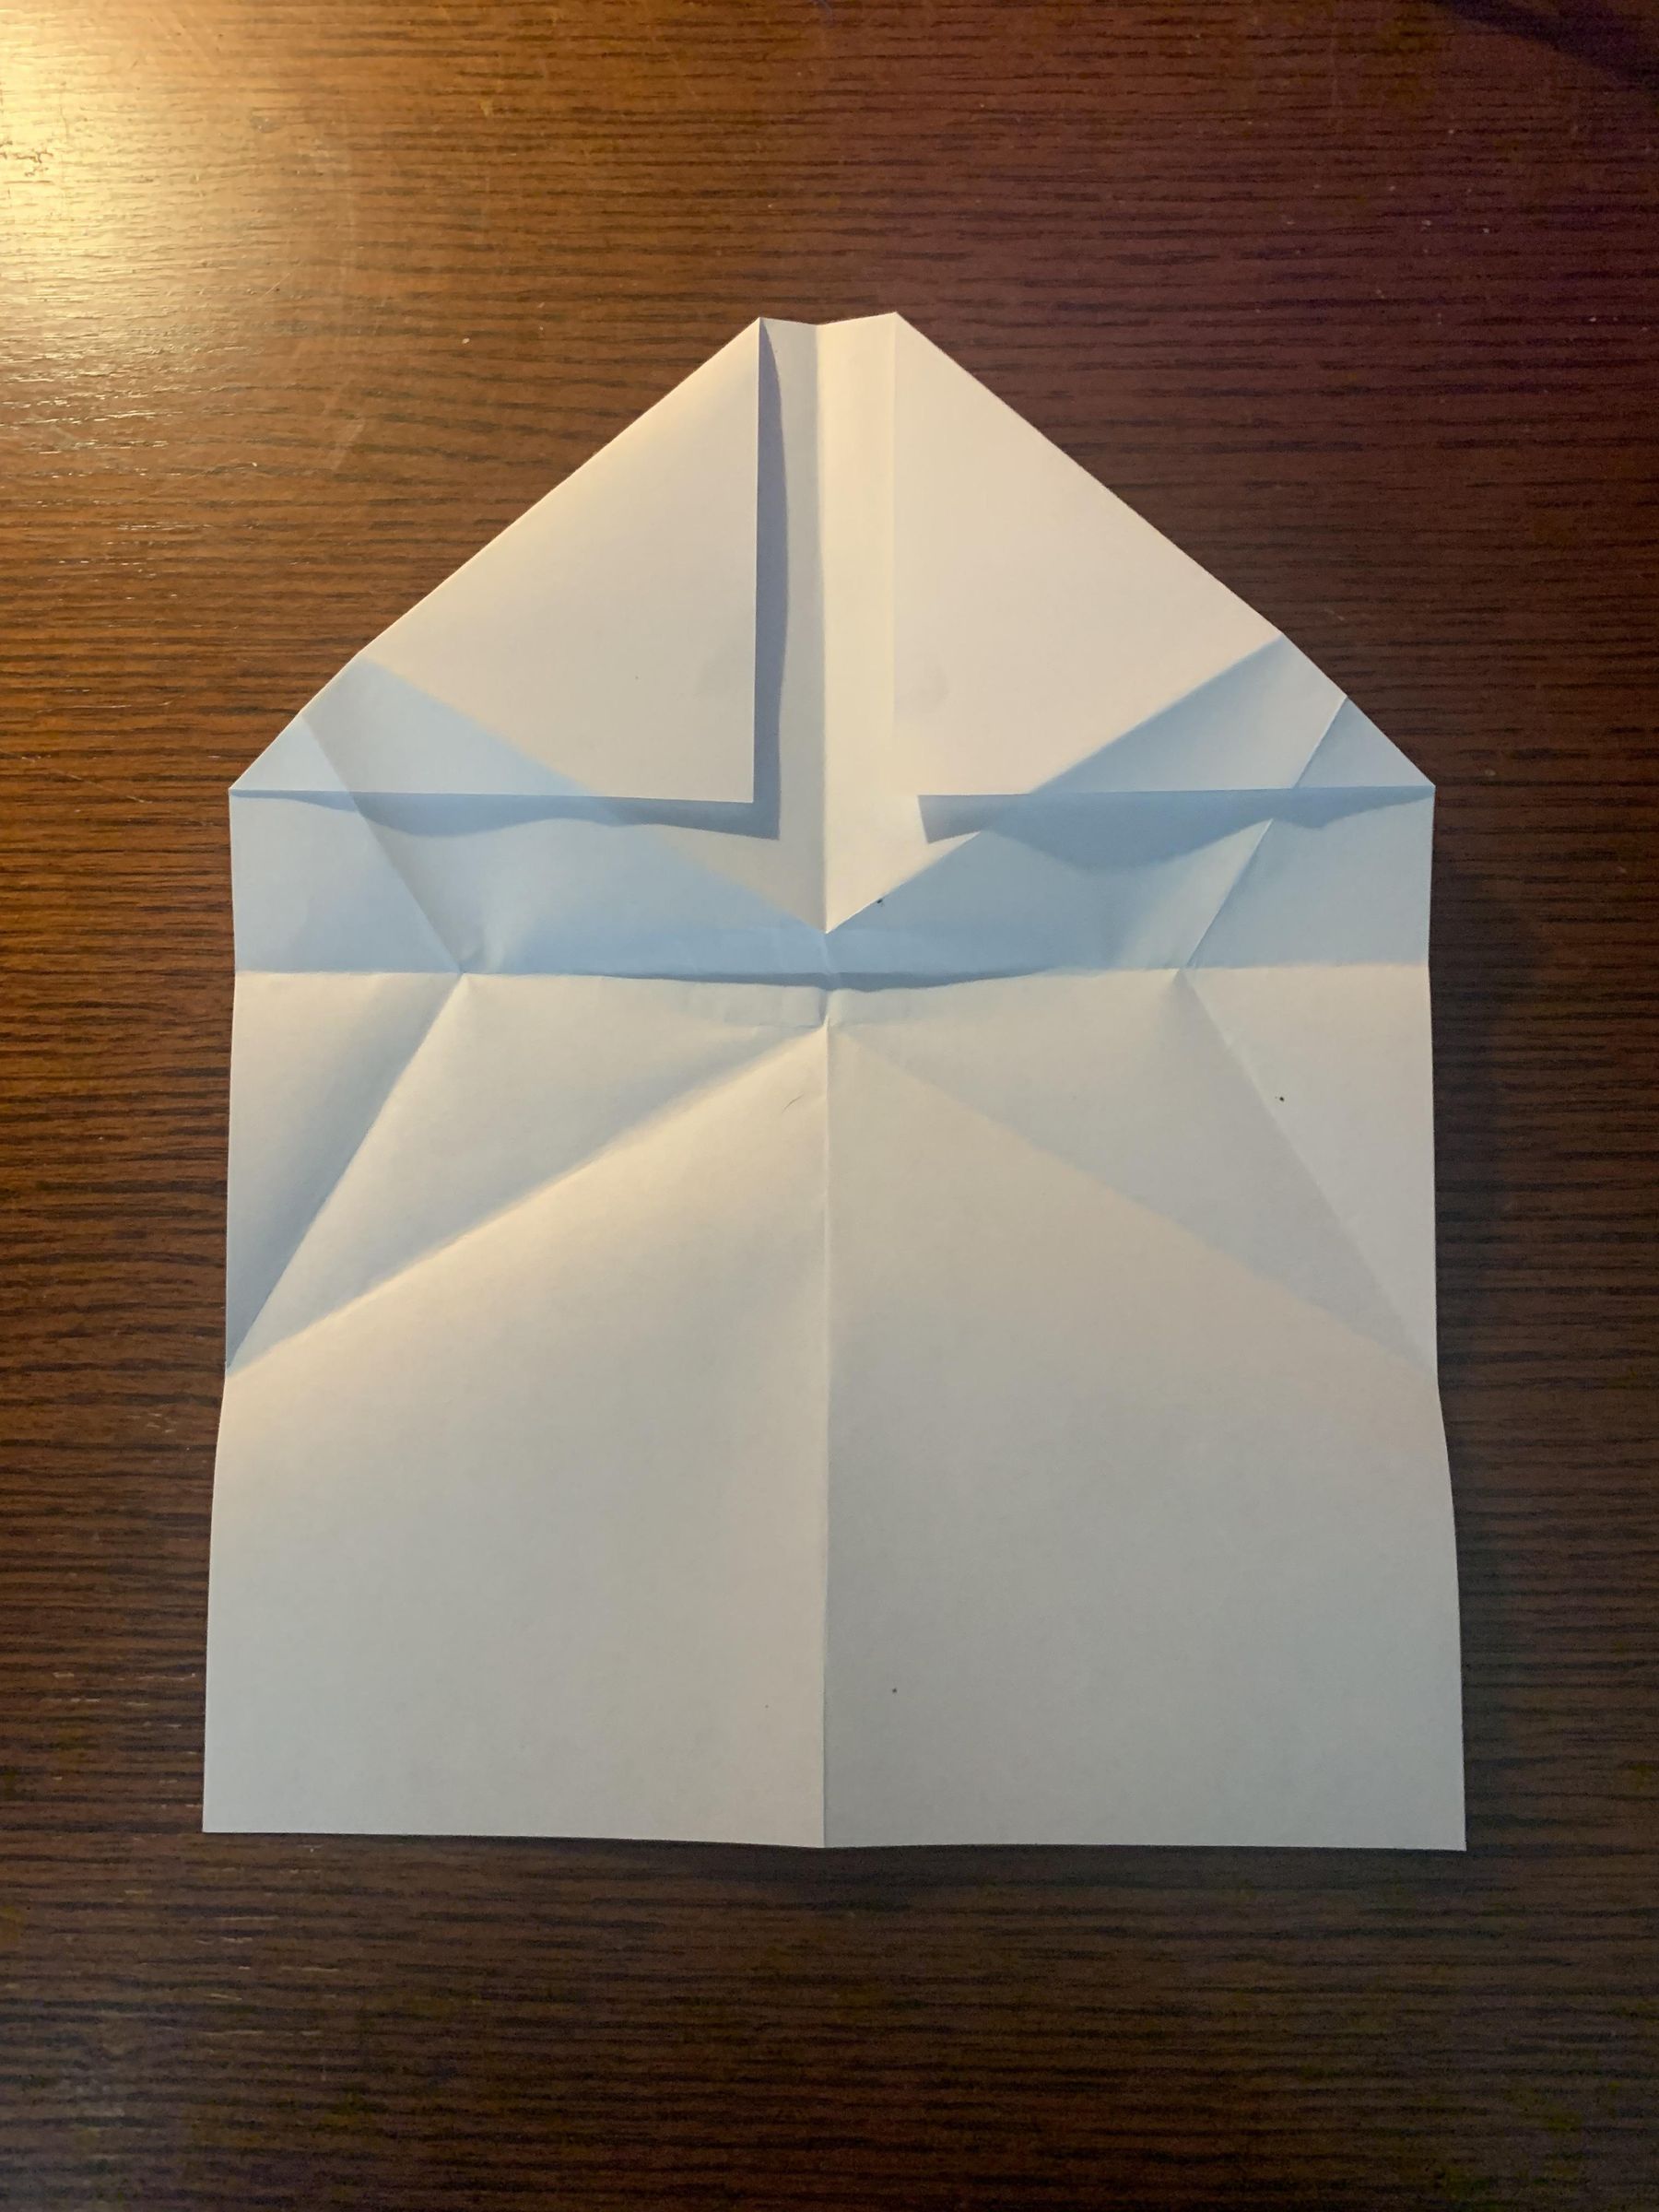
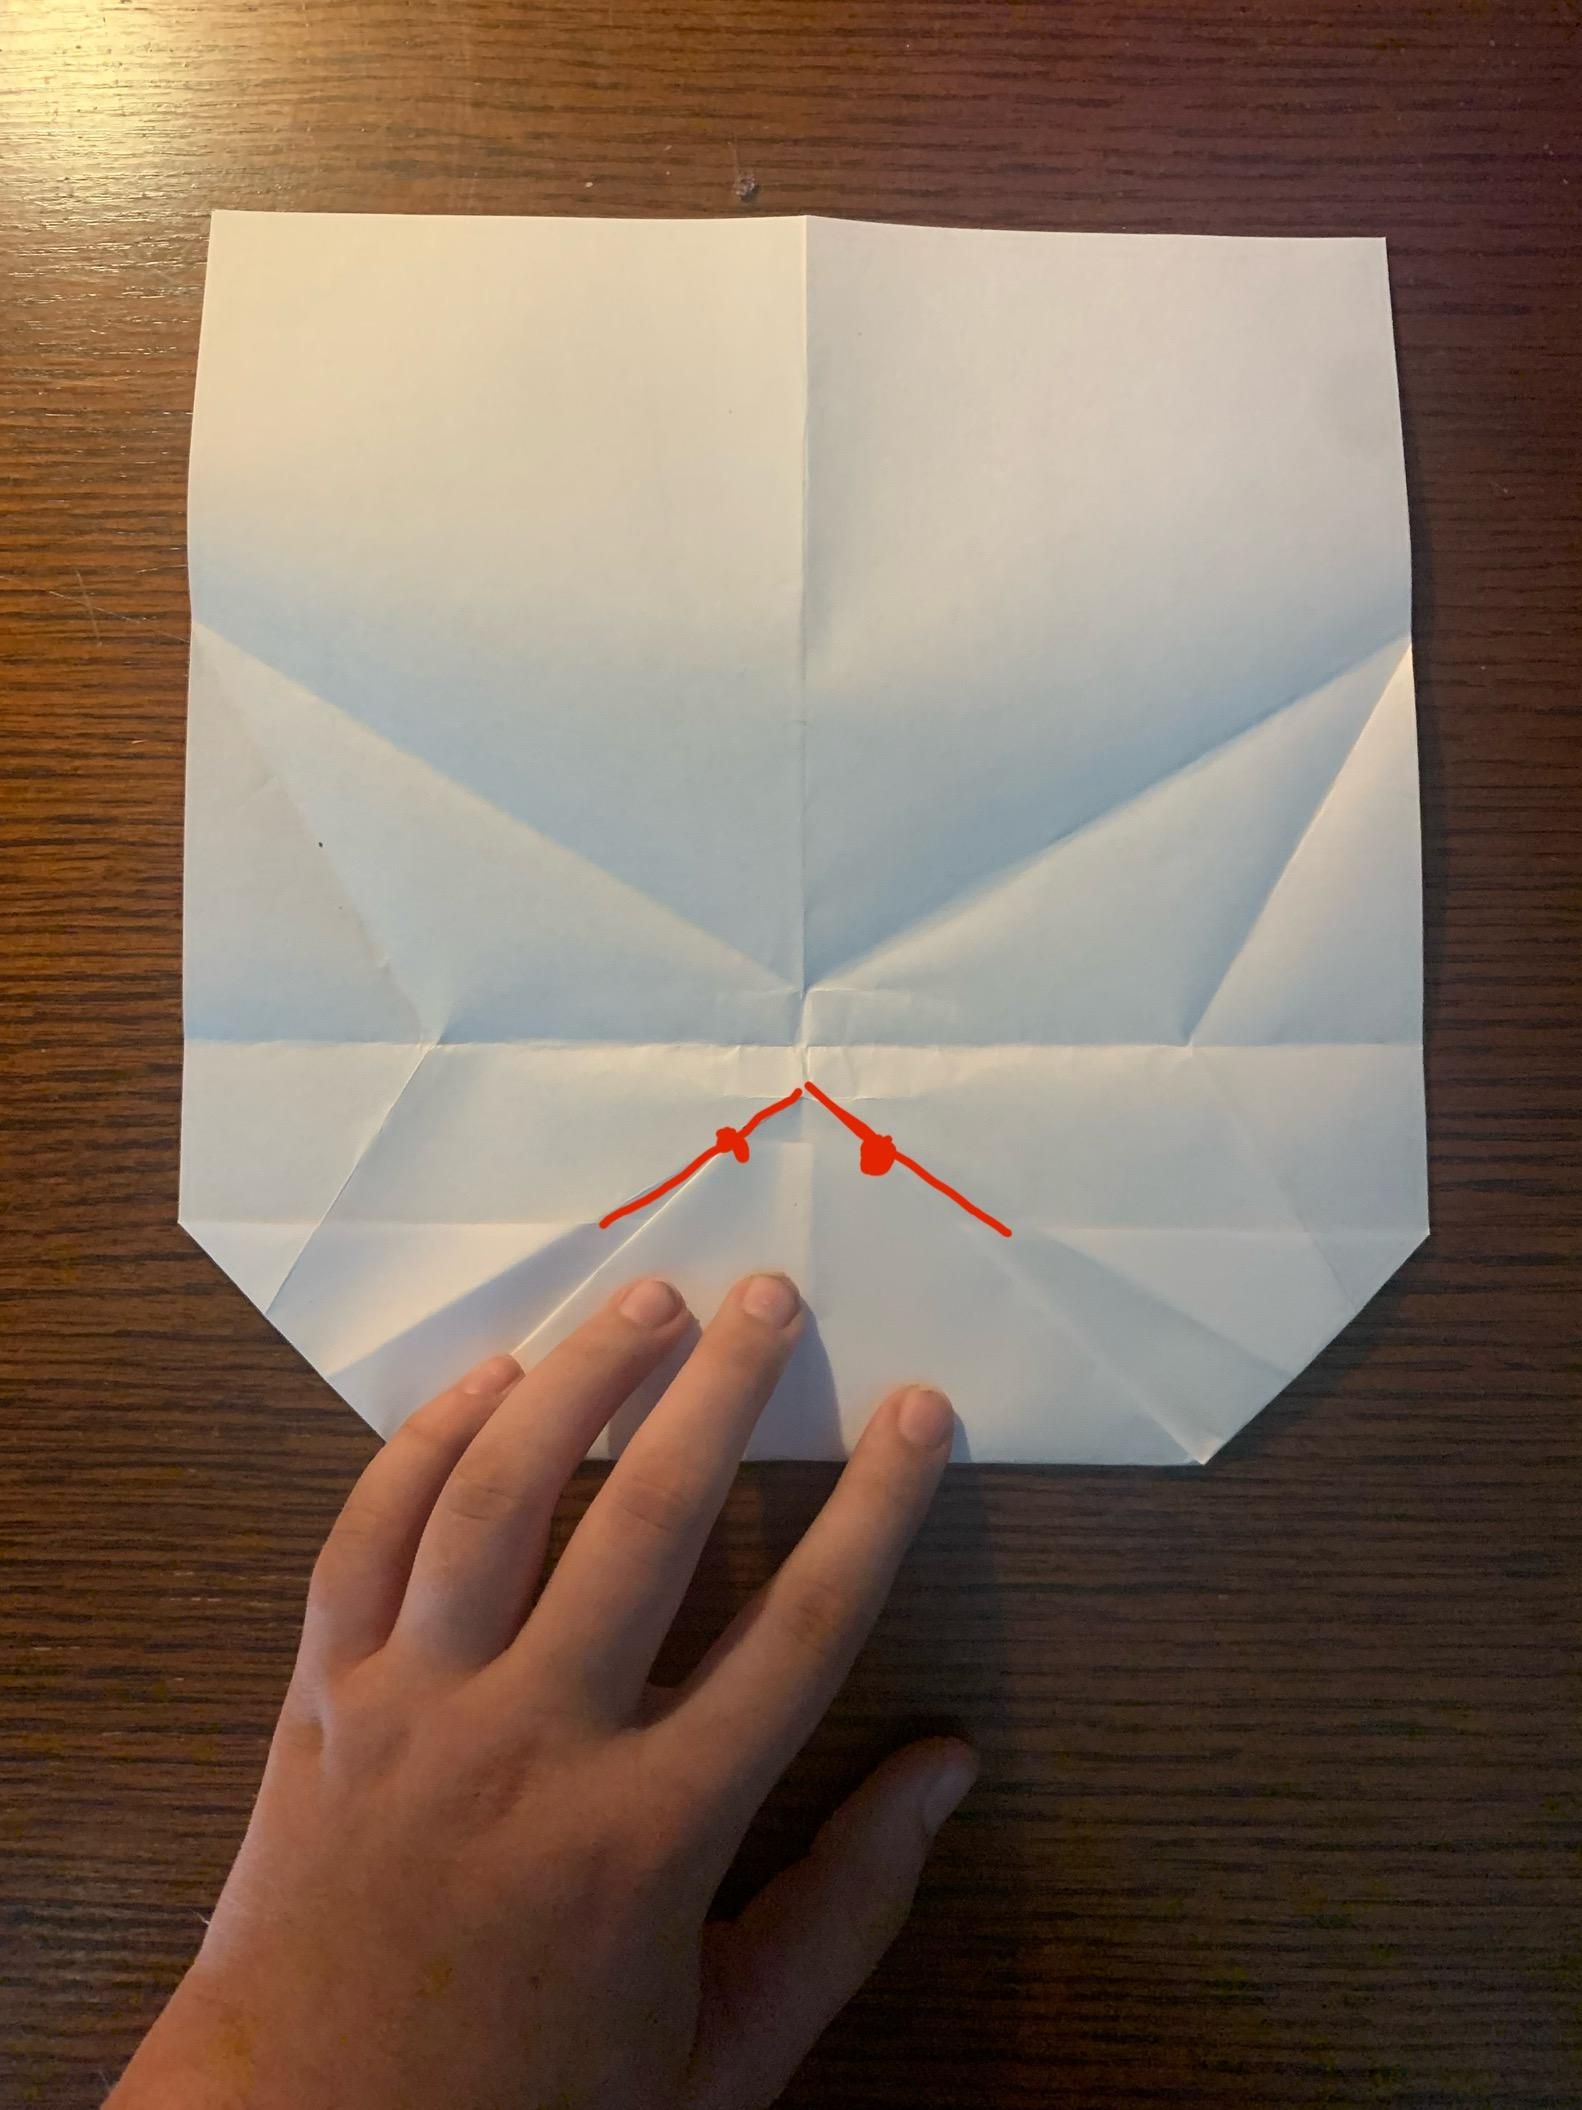
Unfold everything except the top two corners and then fold the top down to where I marked.
Swivel Some Pockets
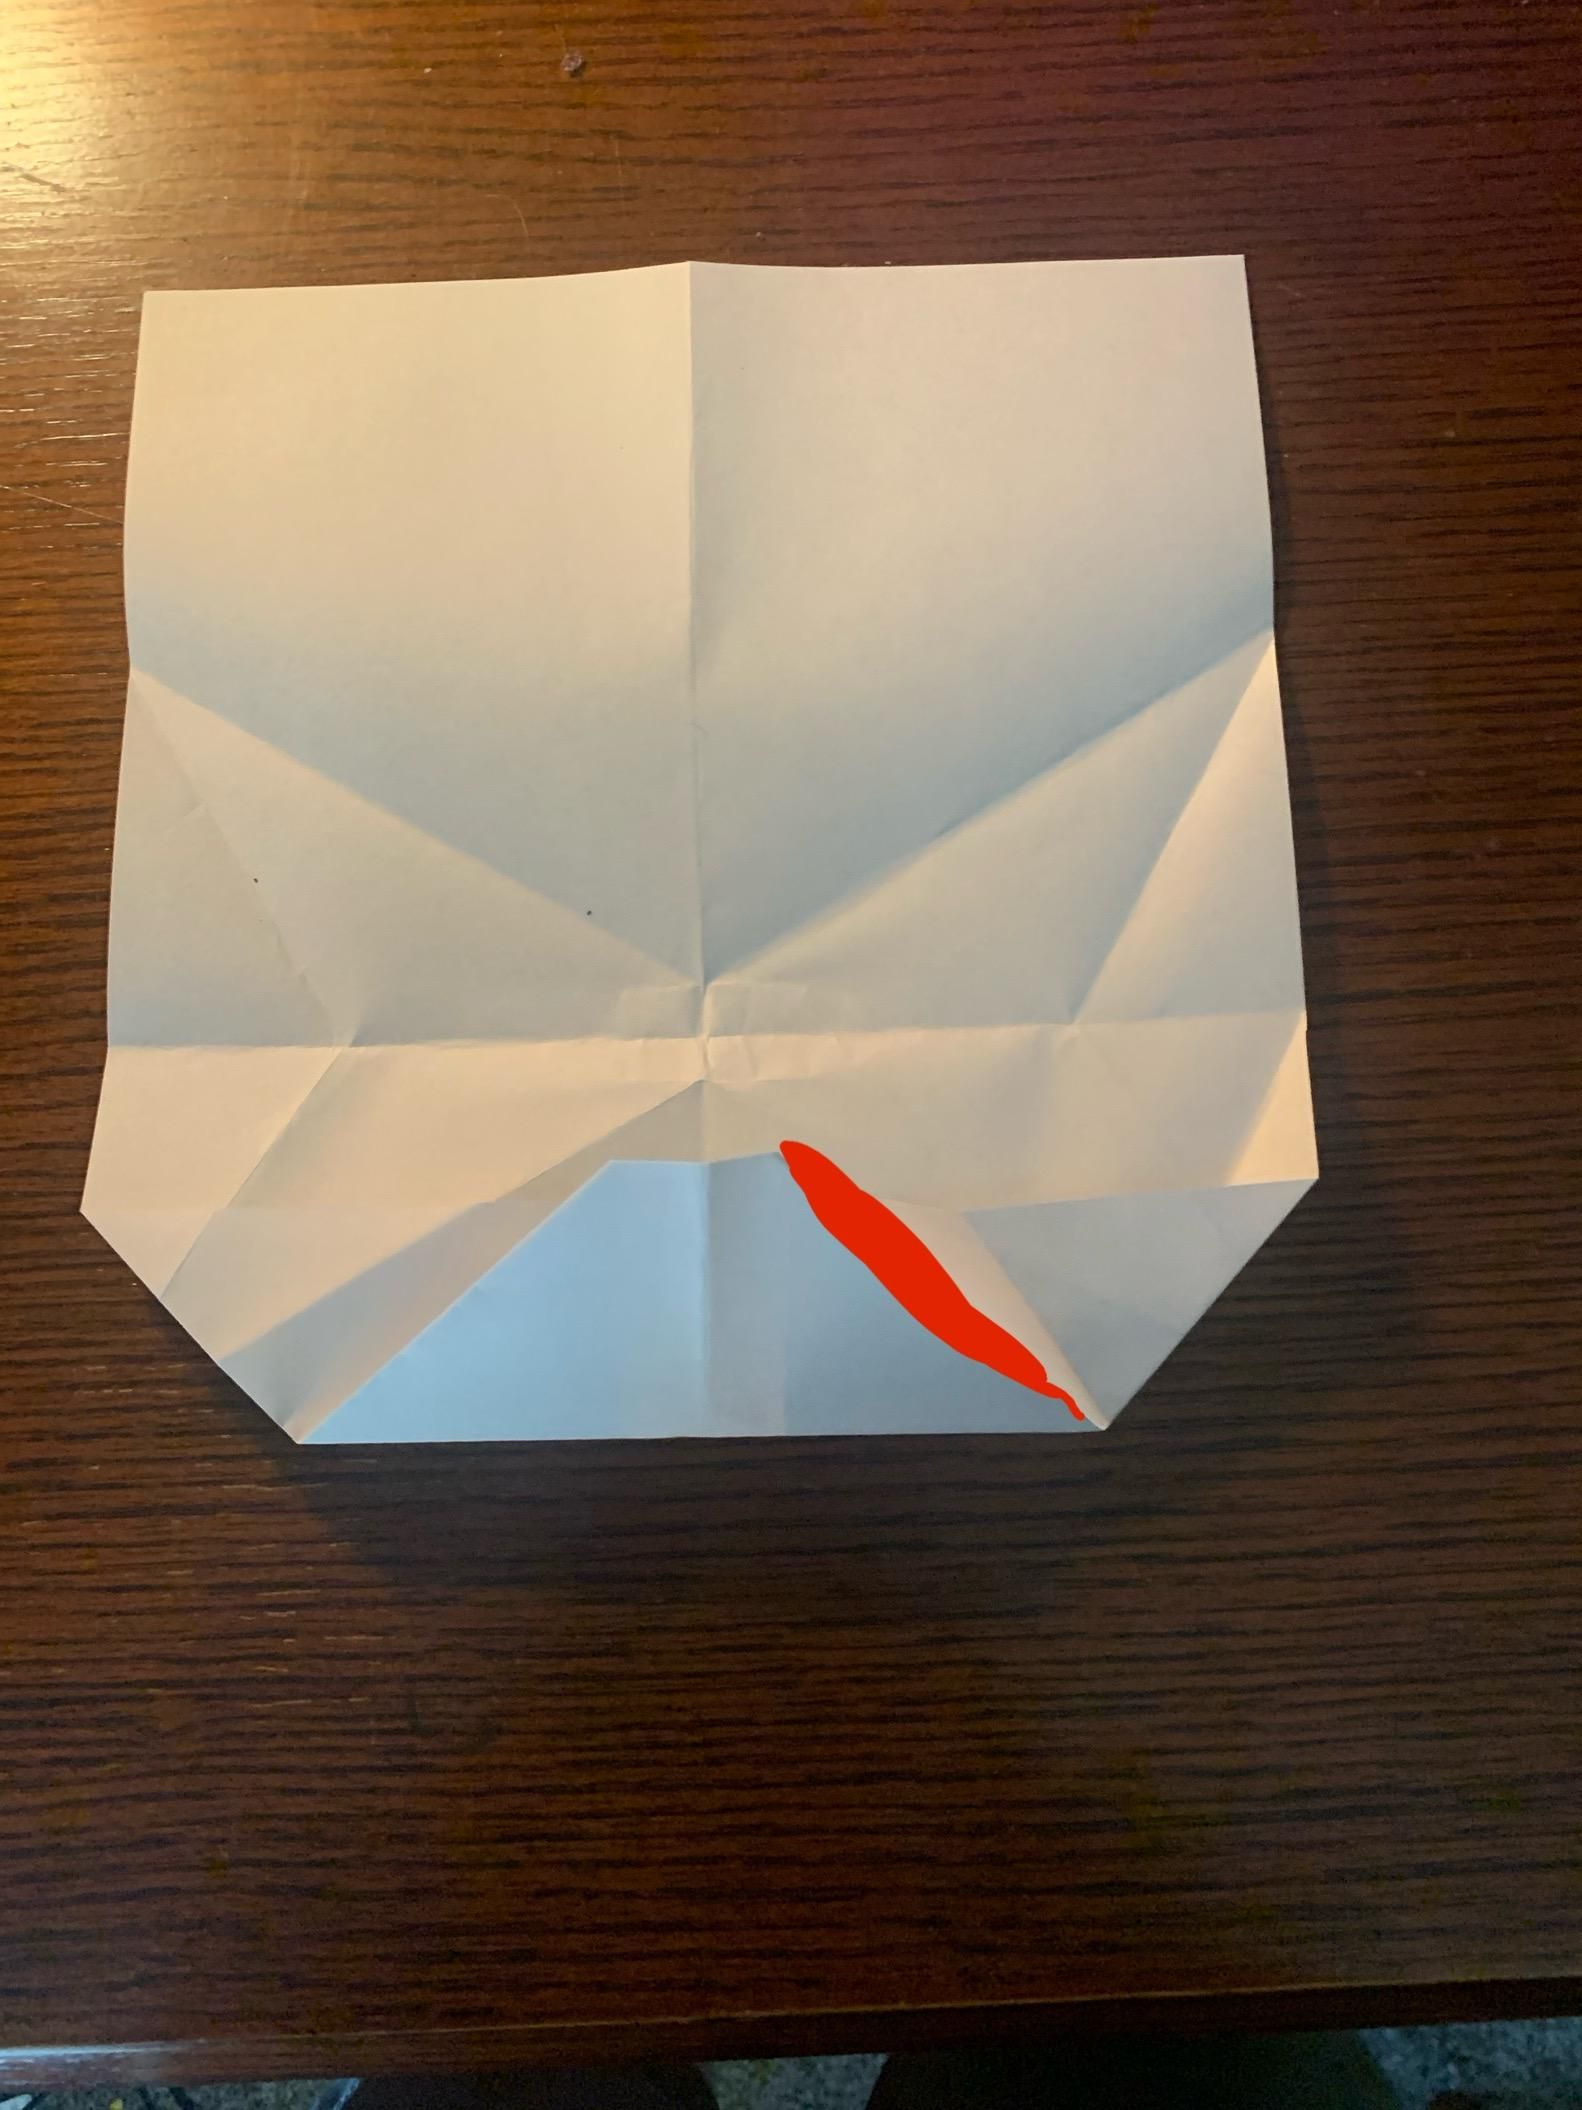
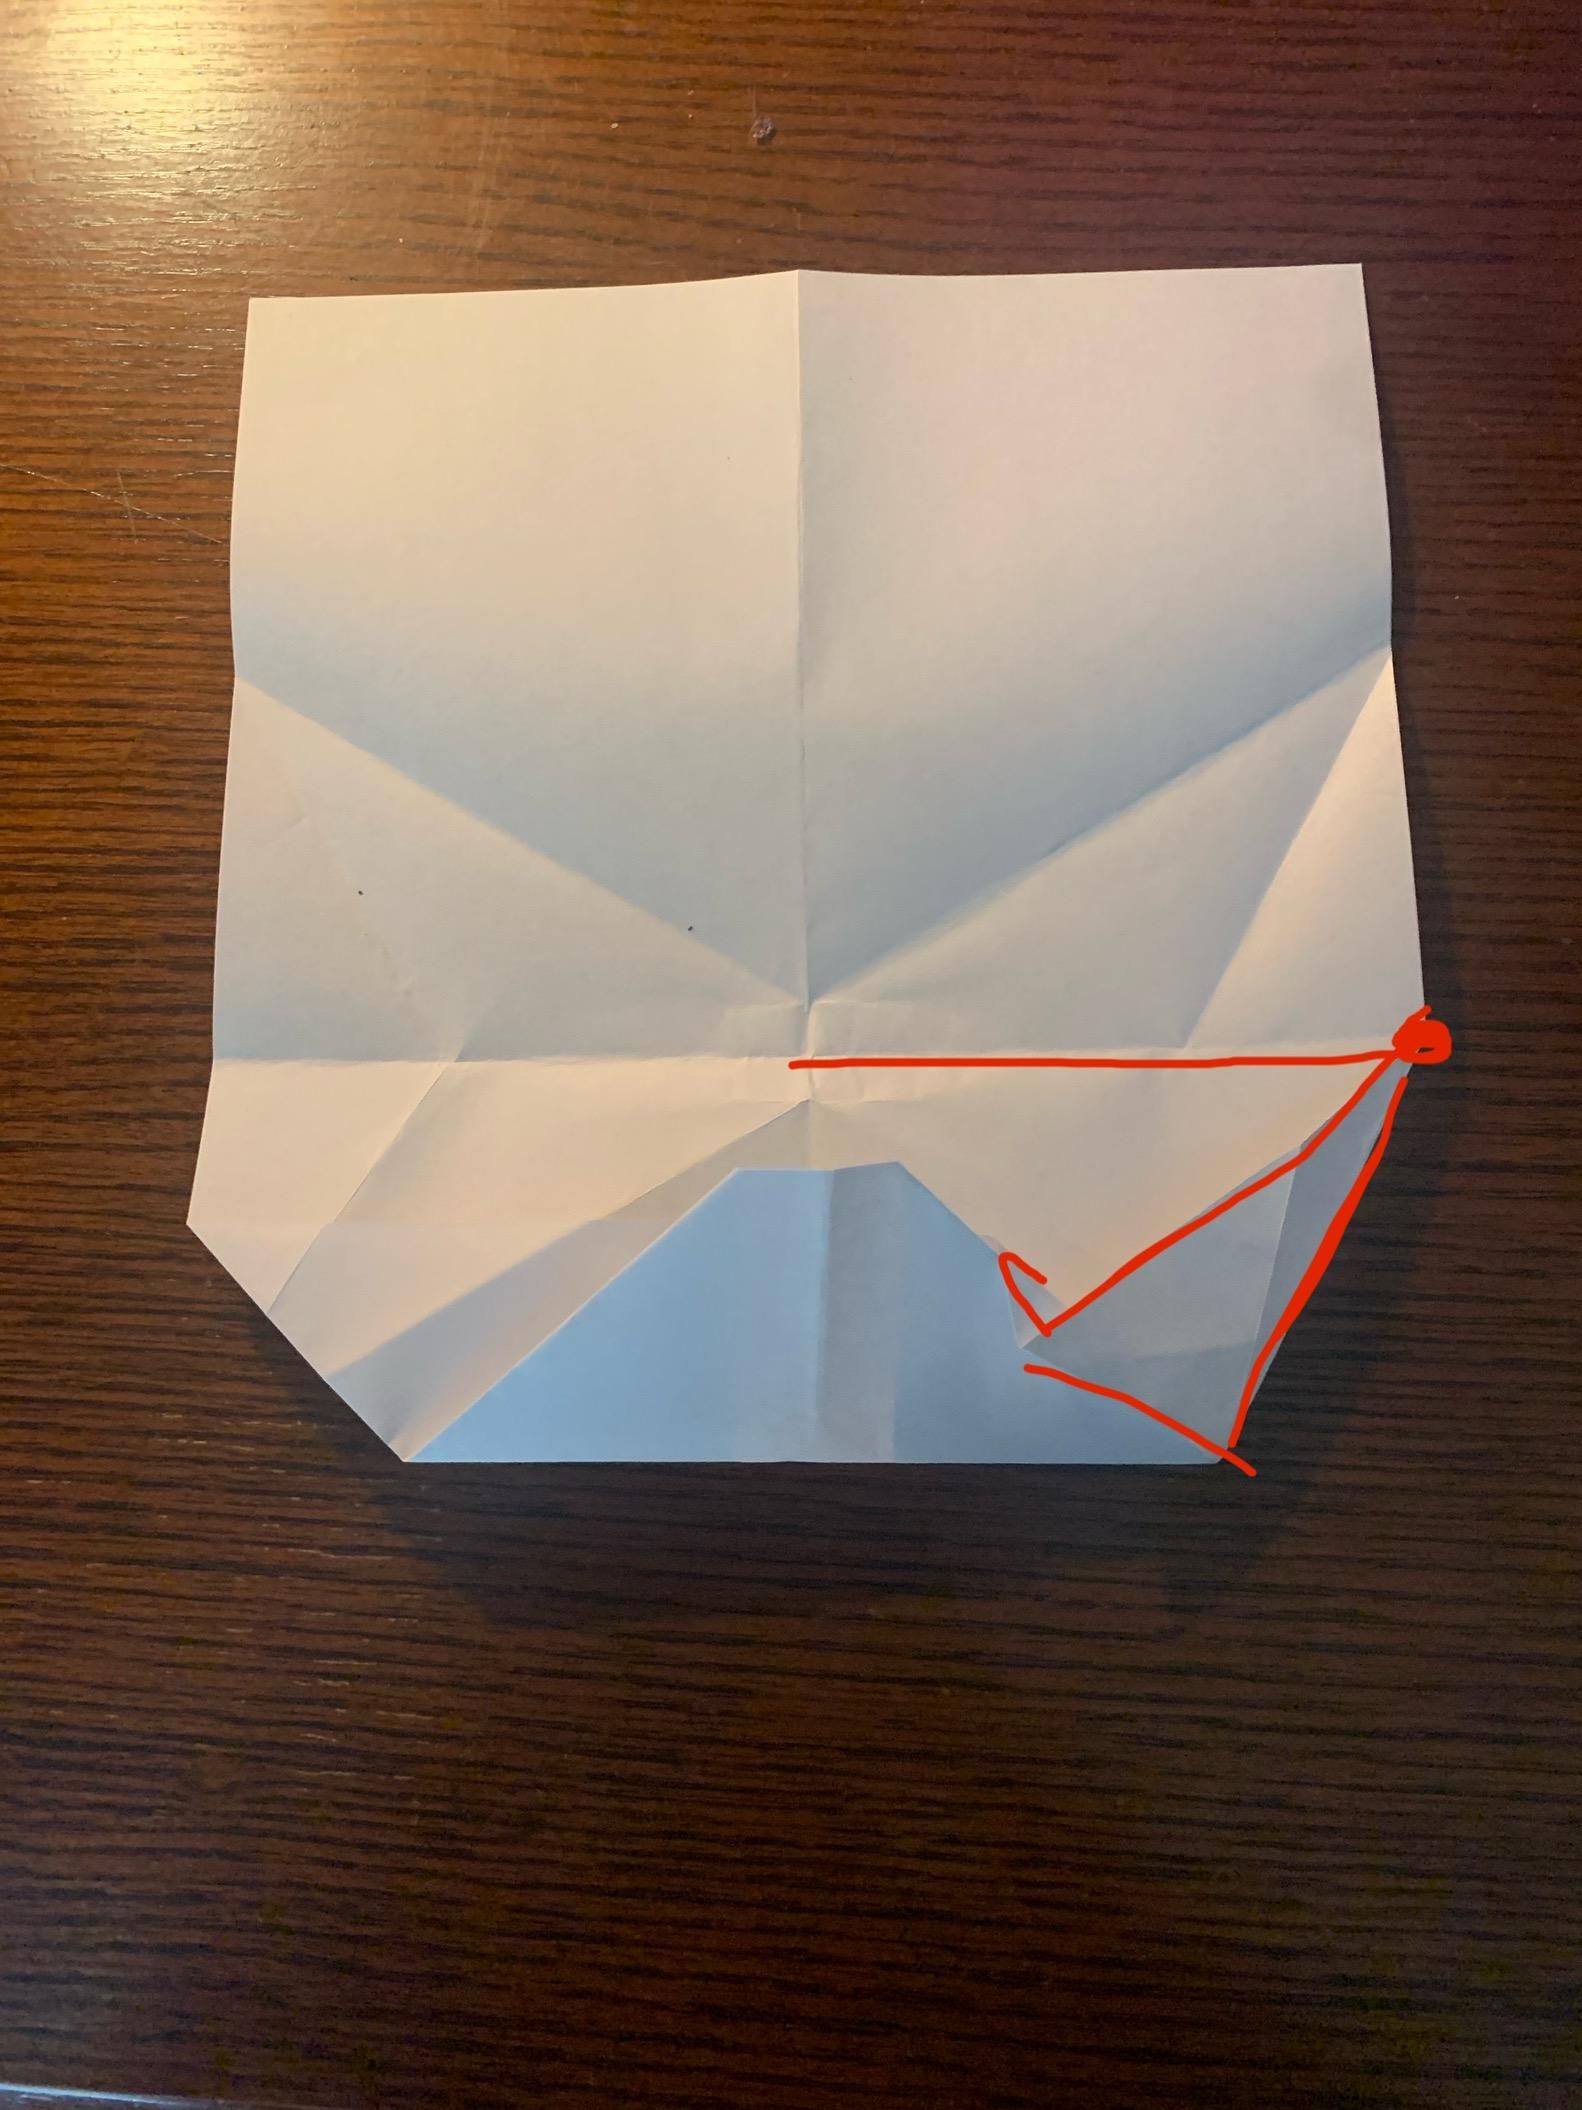
Now swivel the flap next to the folded-down top over on the edge I marked and end the swivel fold to the point I marked.
Repeat
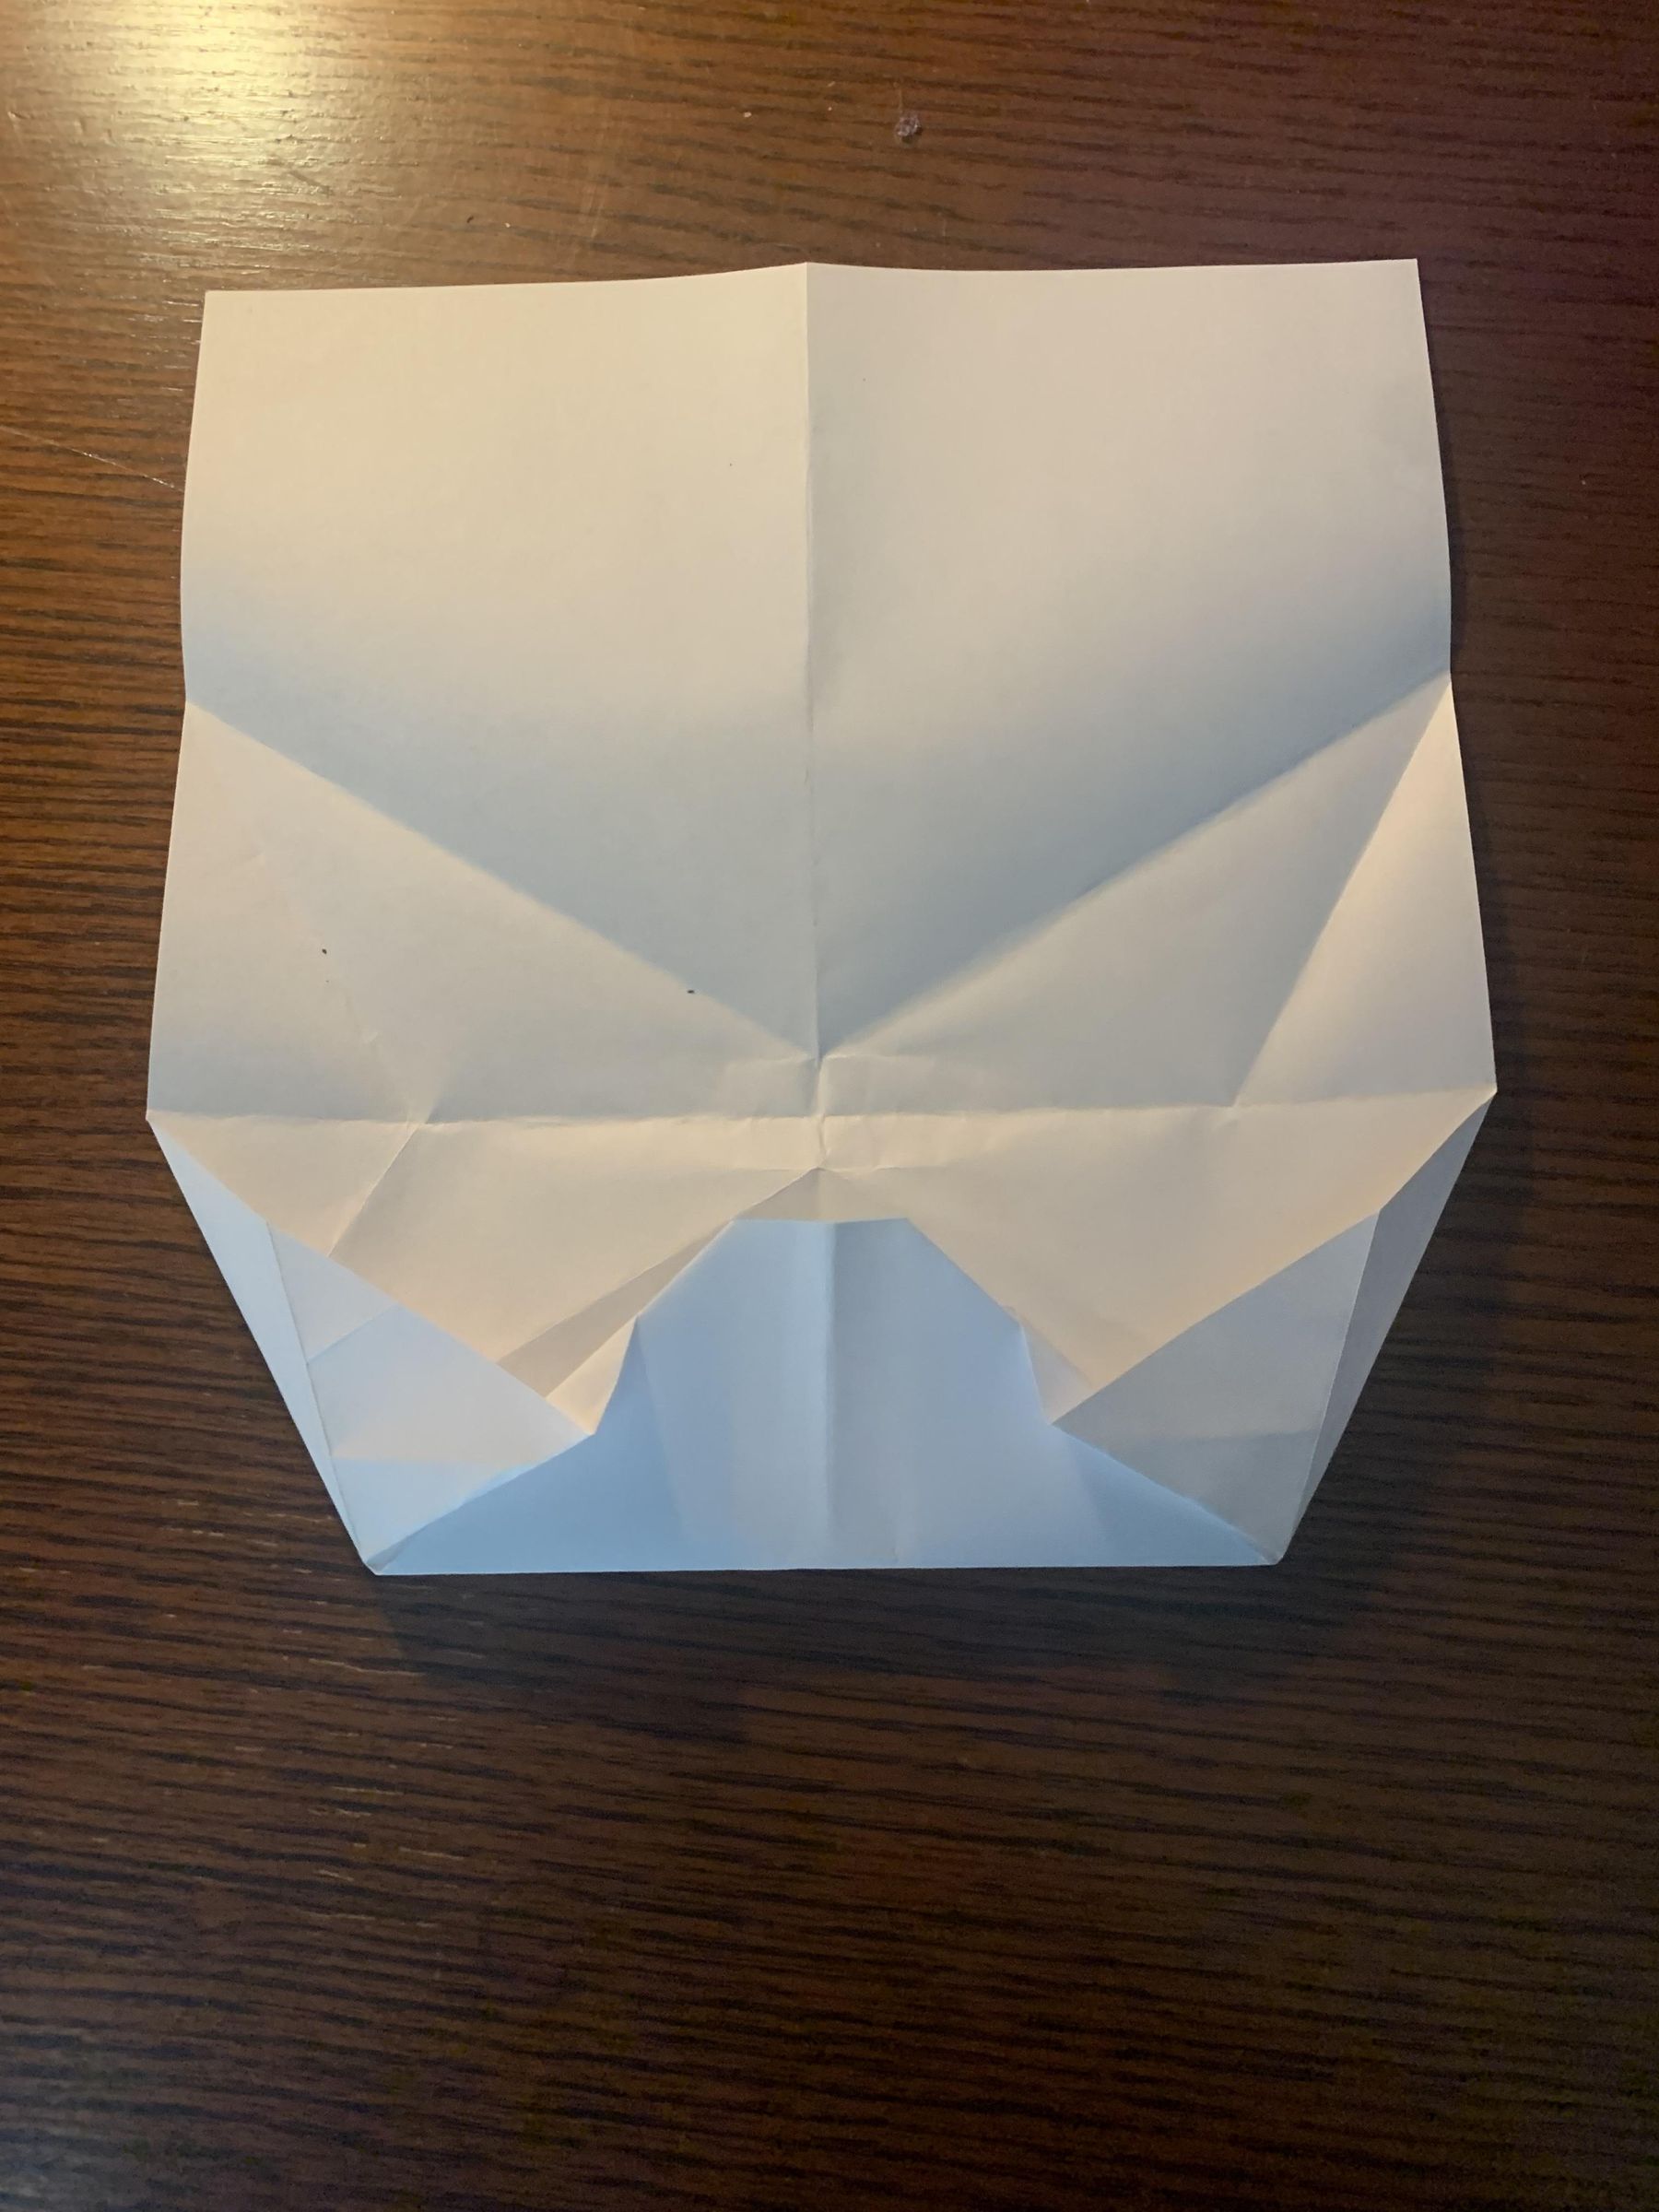
Do that on both sides.
Fold Down and in Half
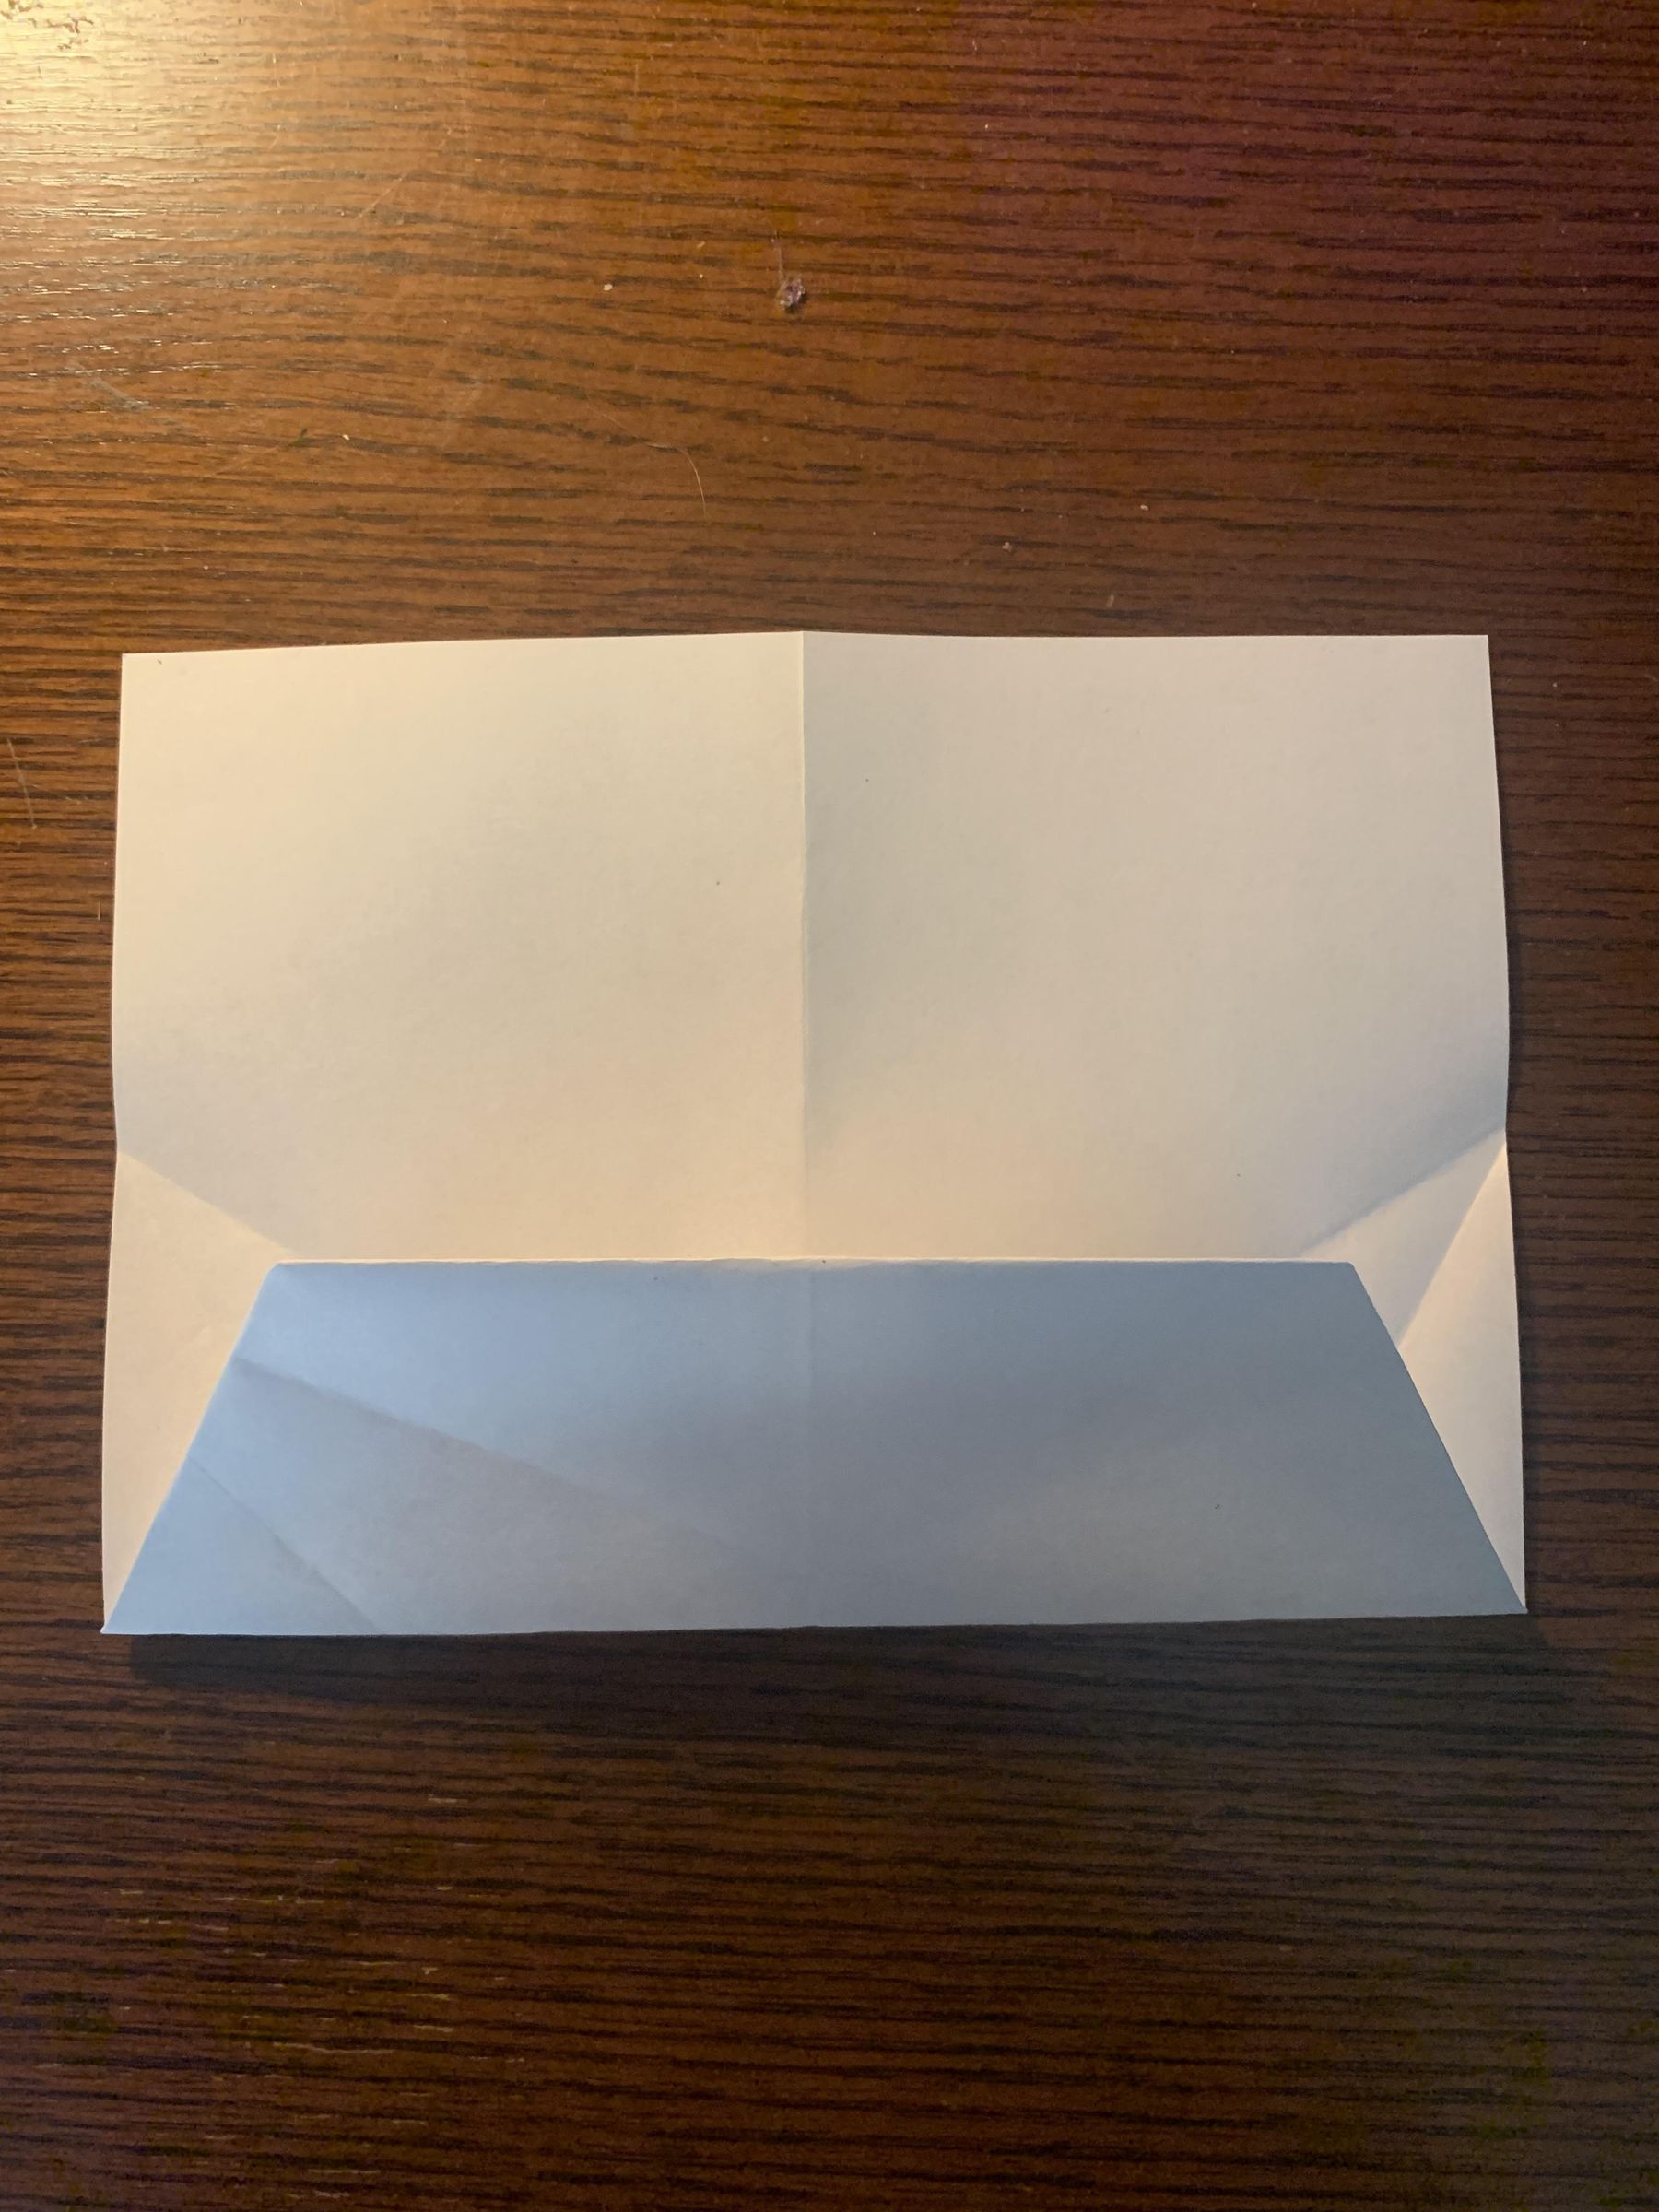
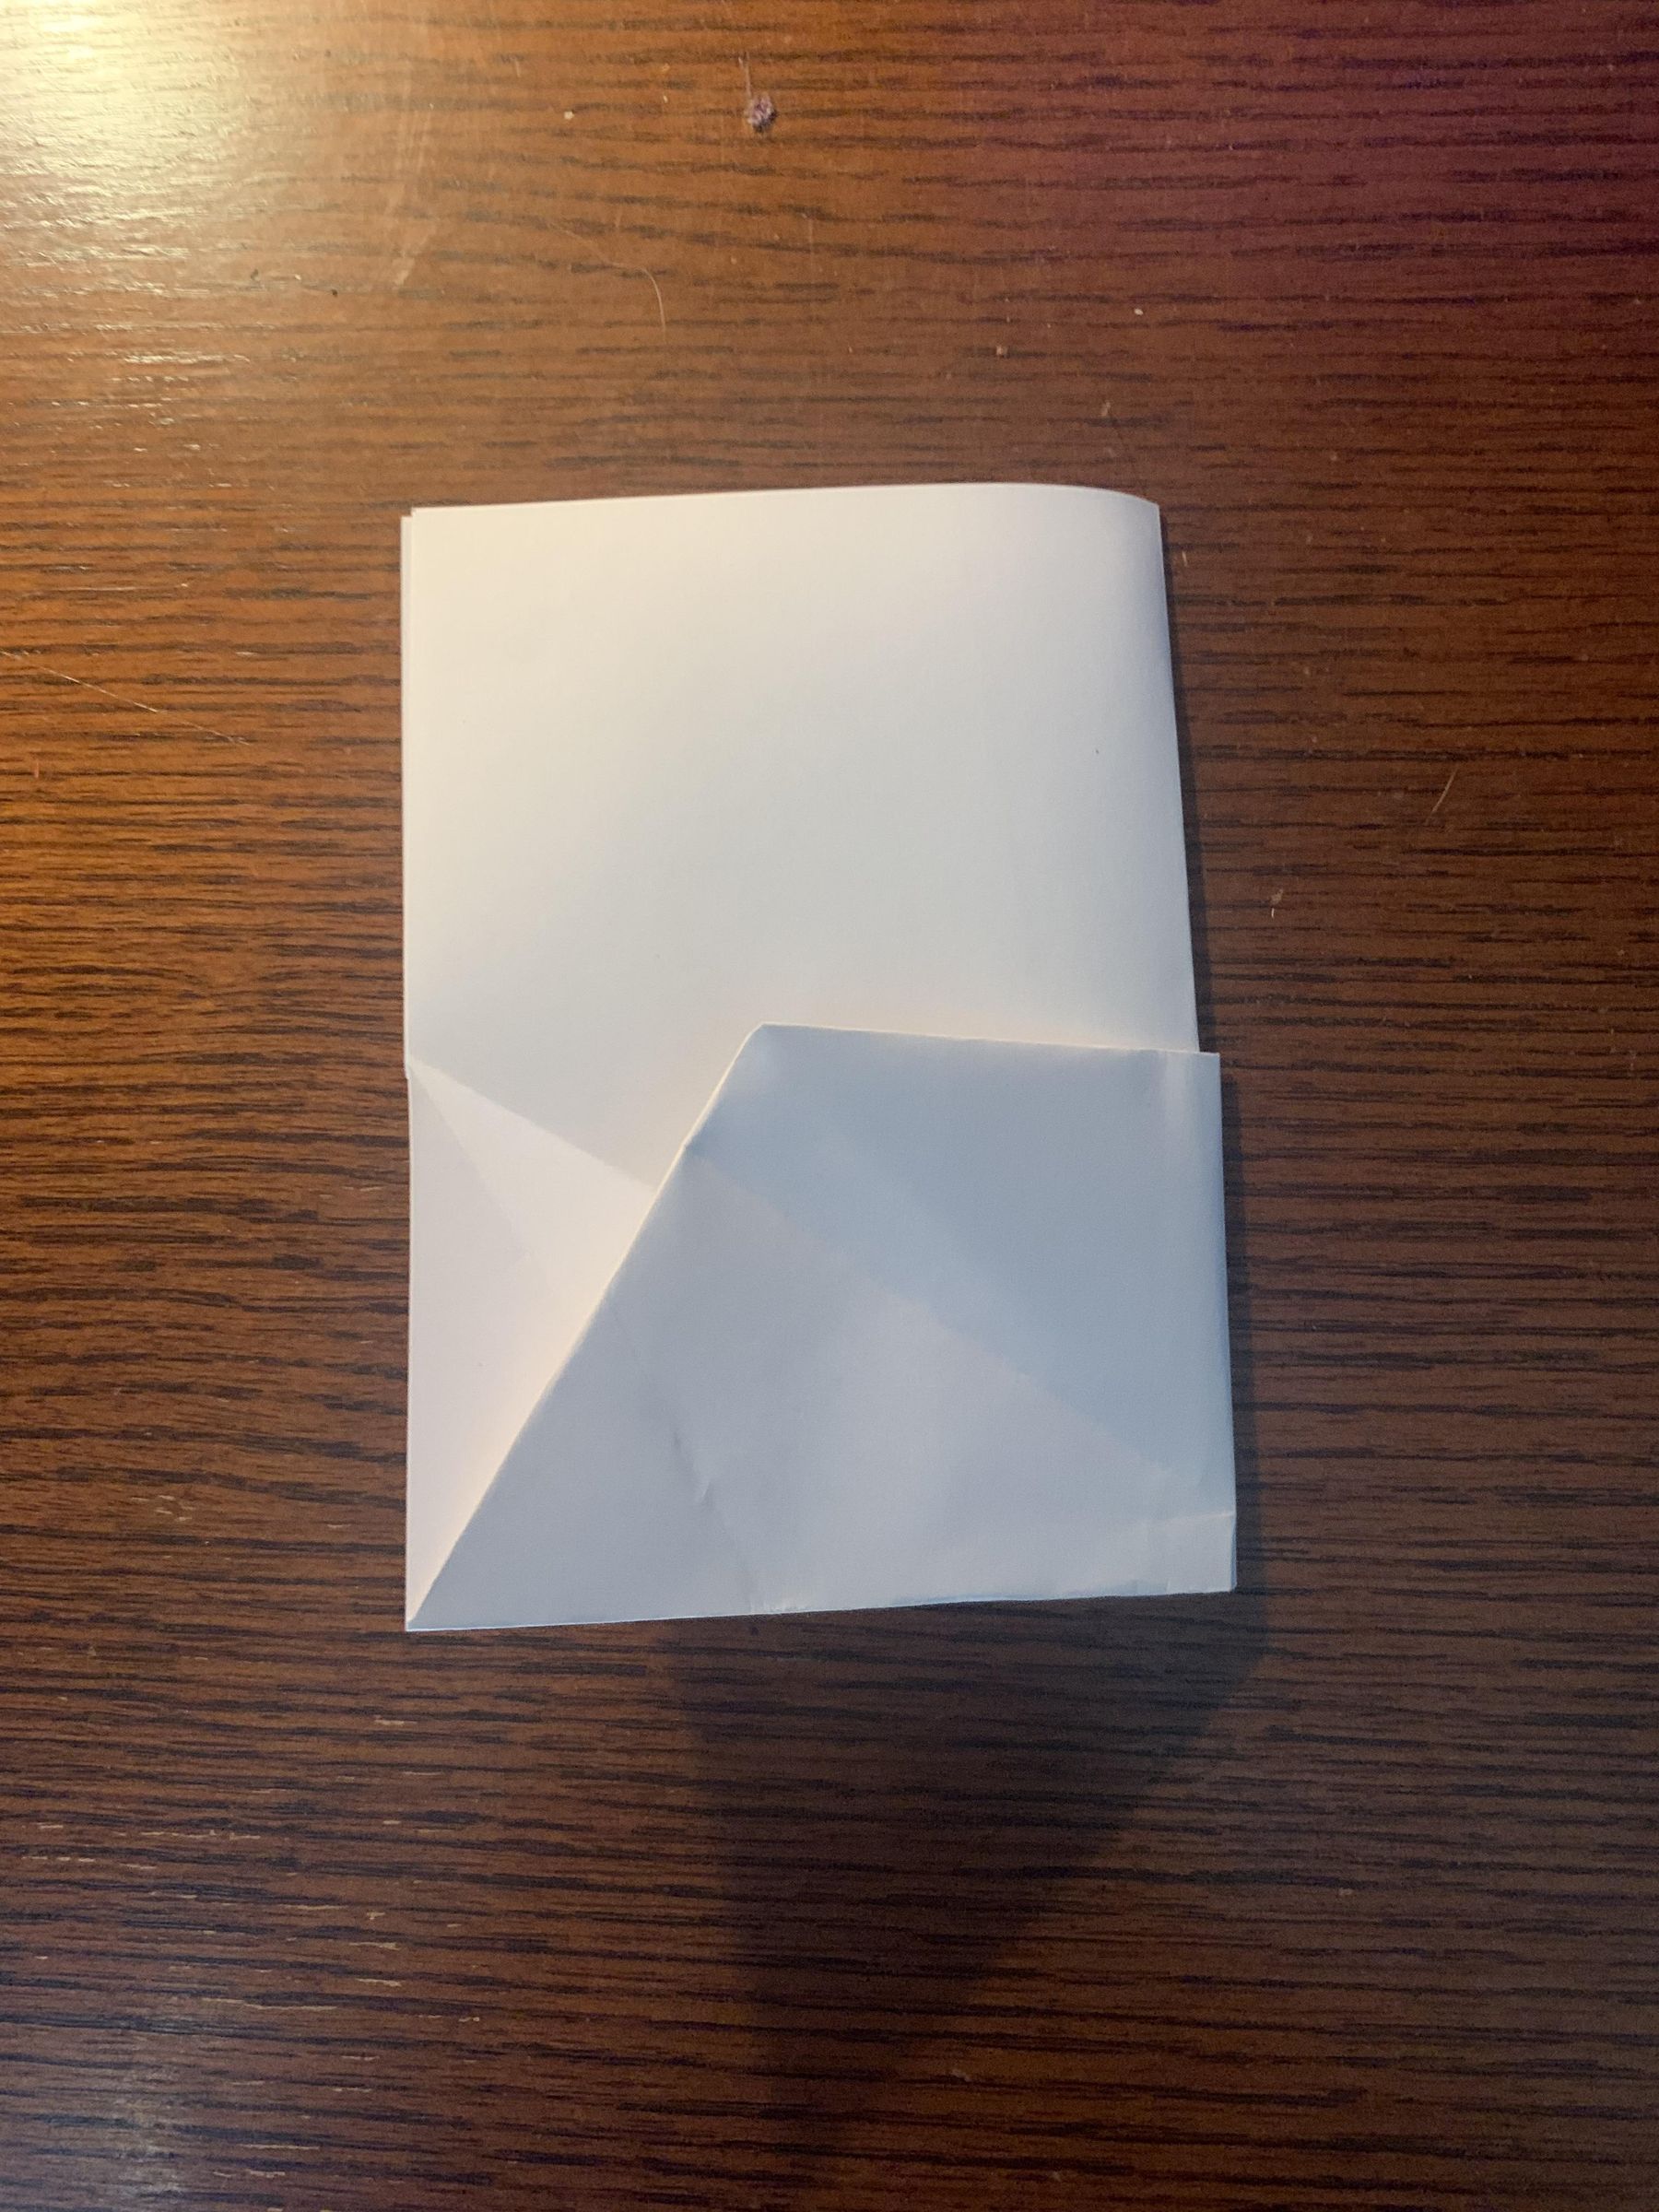
Now fold that entire sequence down on an existing crease and fold in half in the center crease.
Fold Wing Flaps and Nose Lock
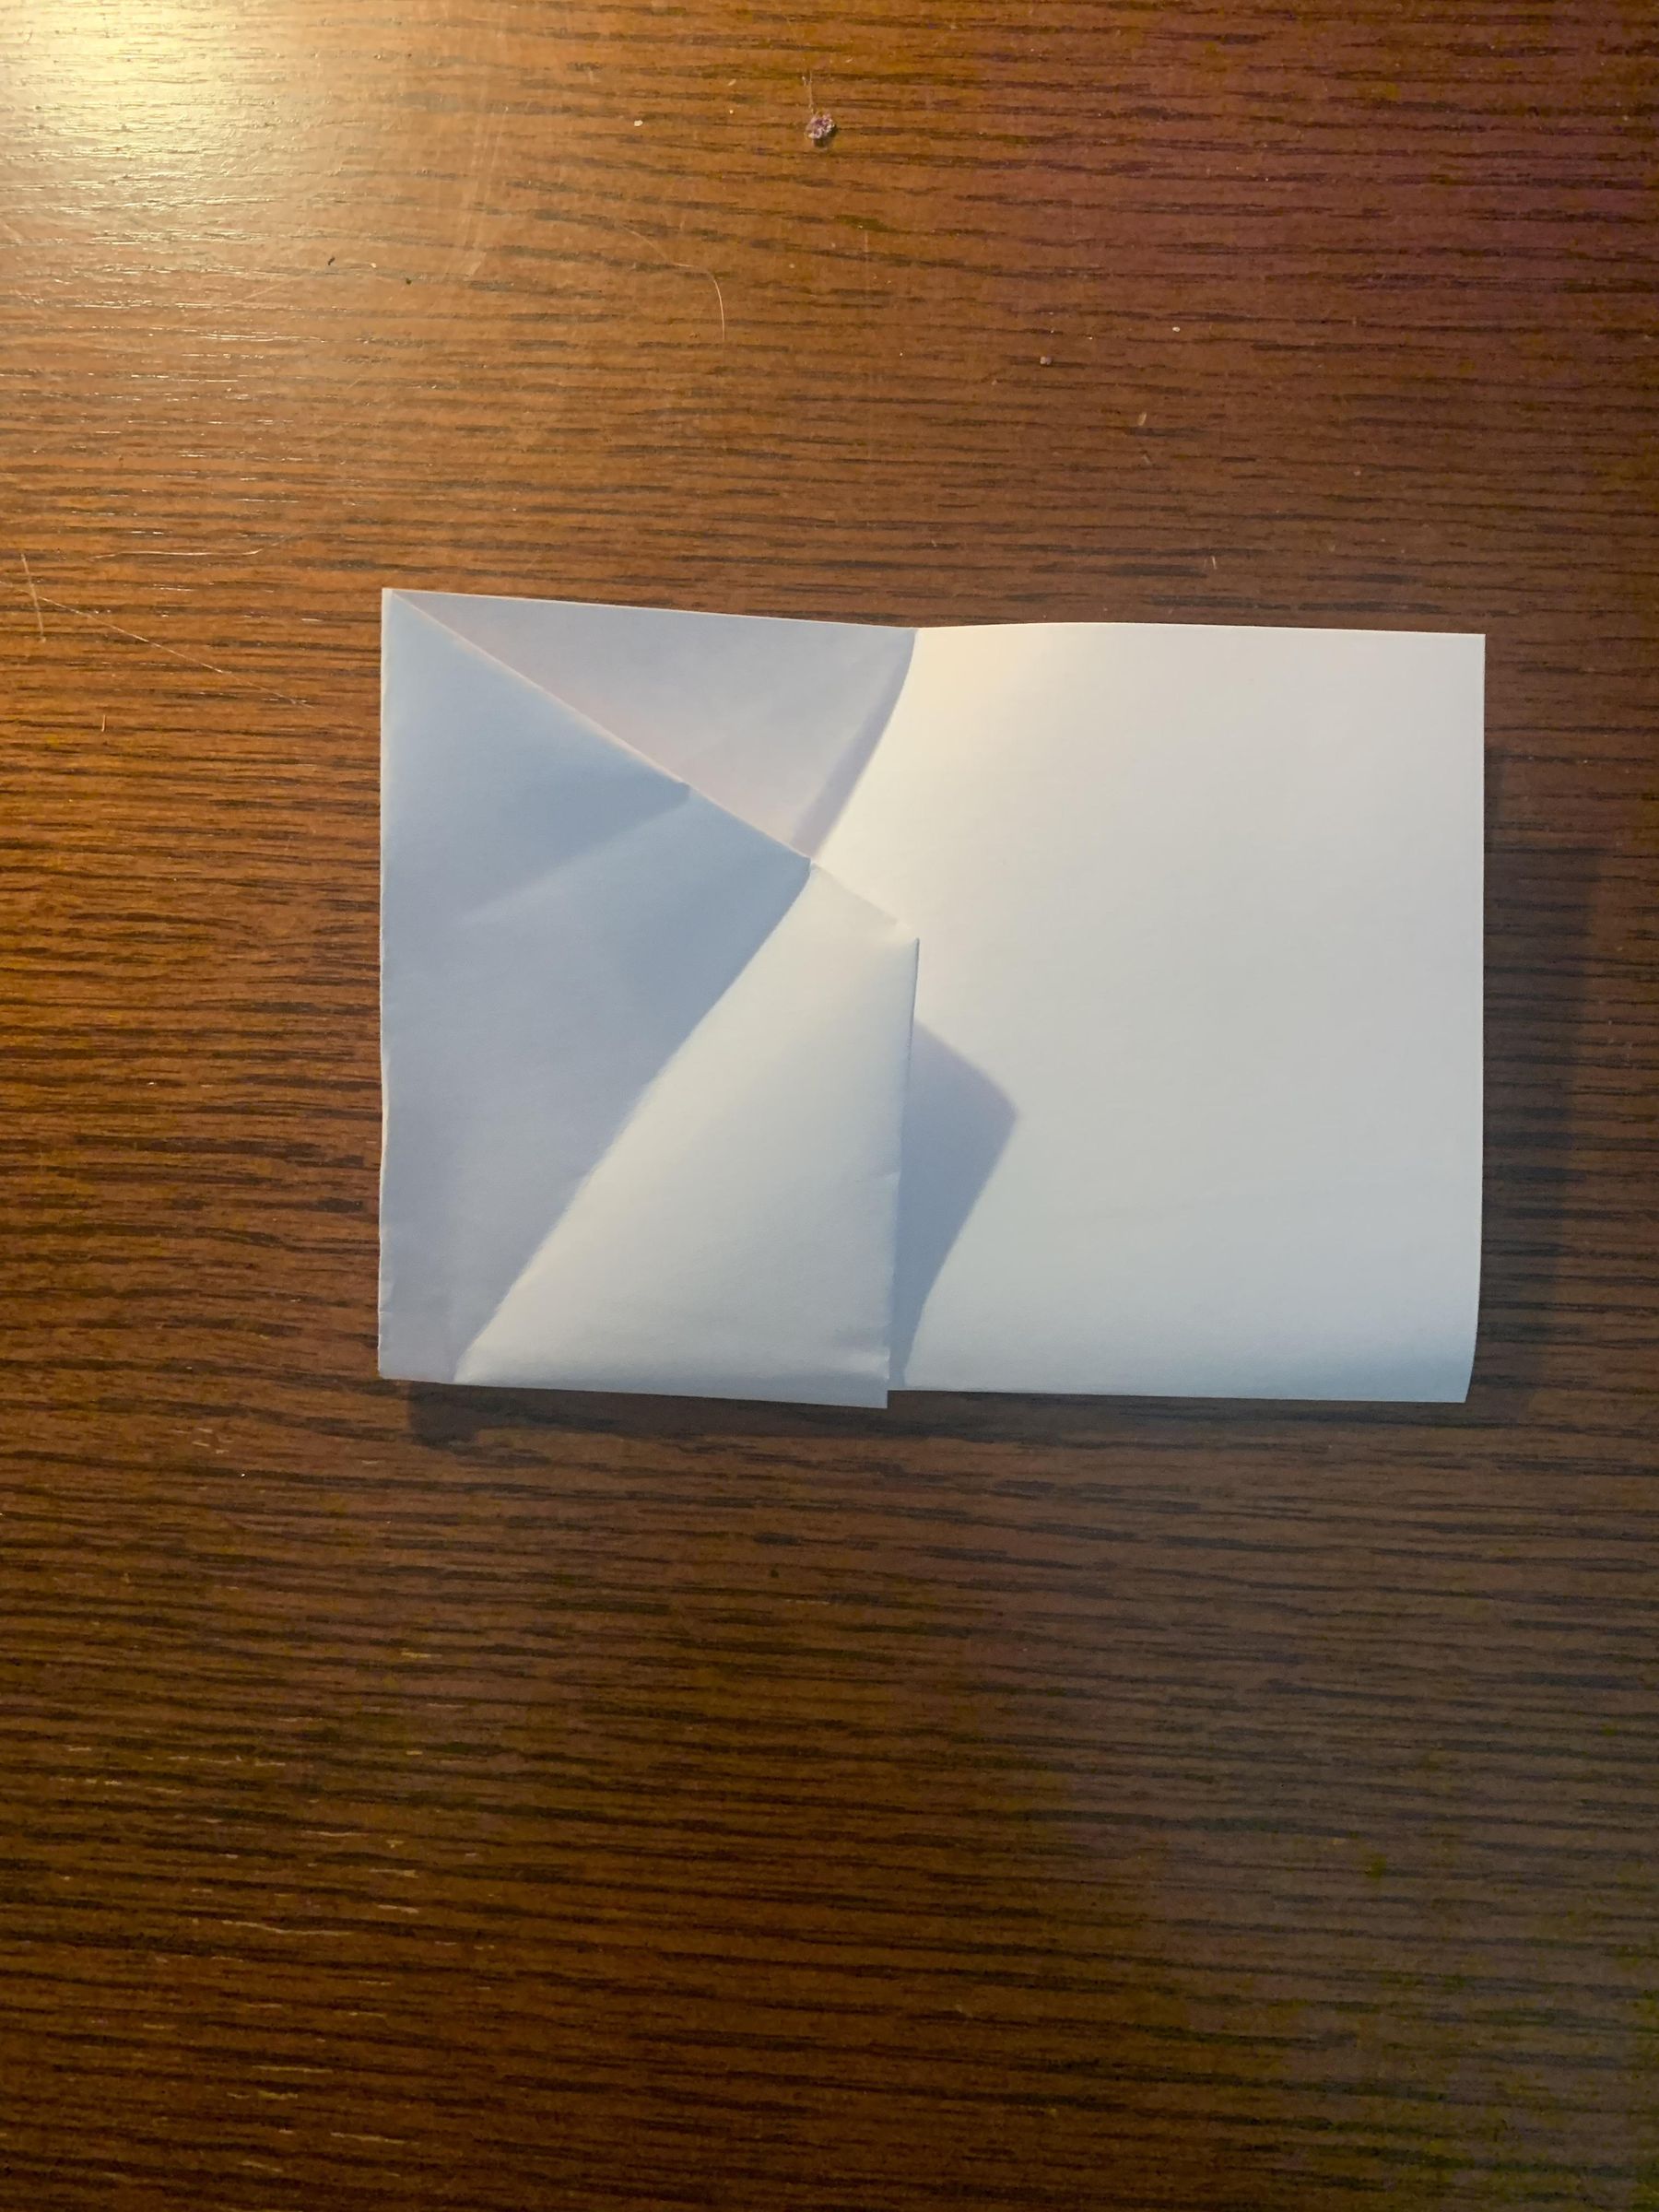
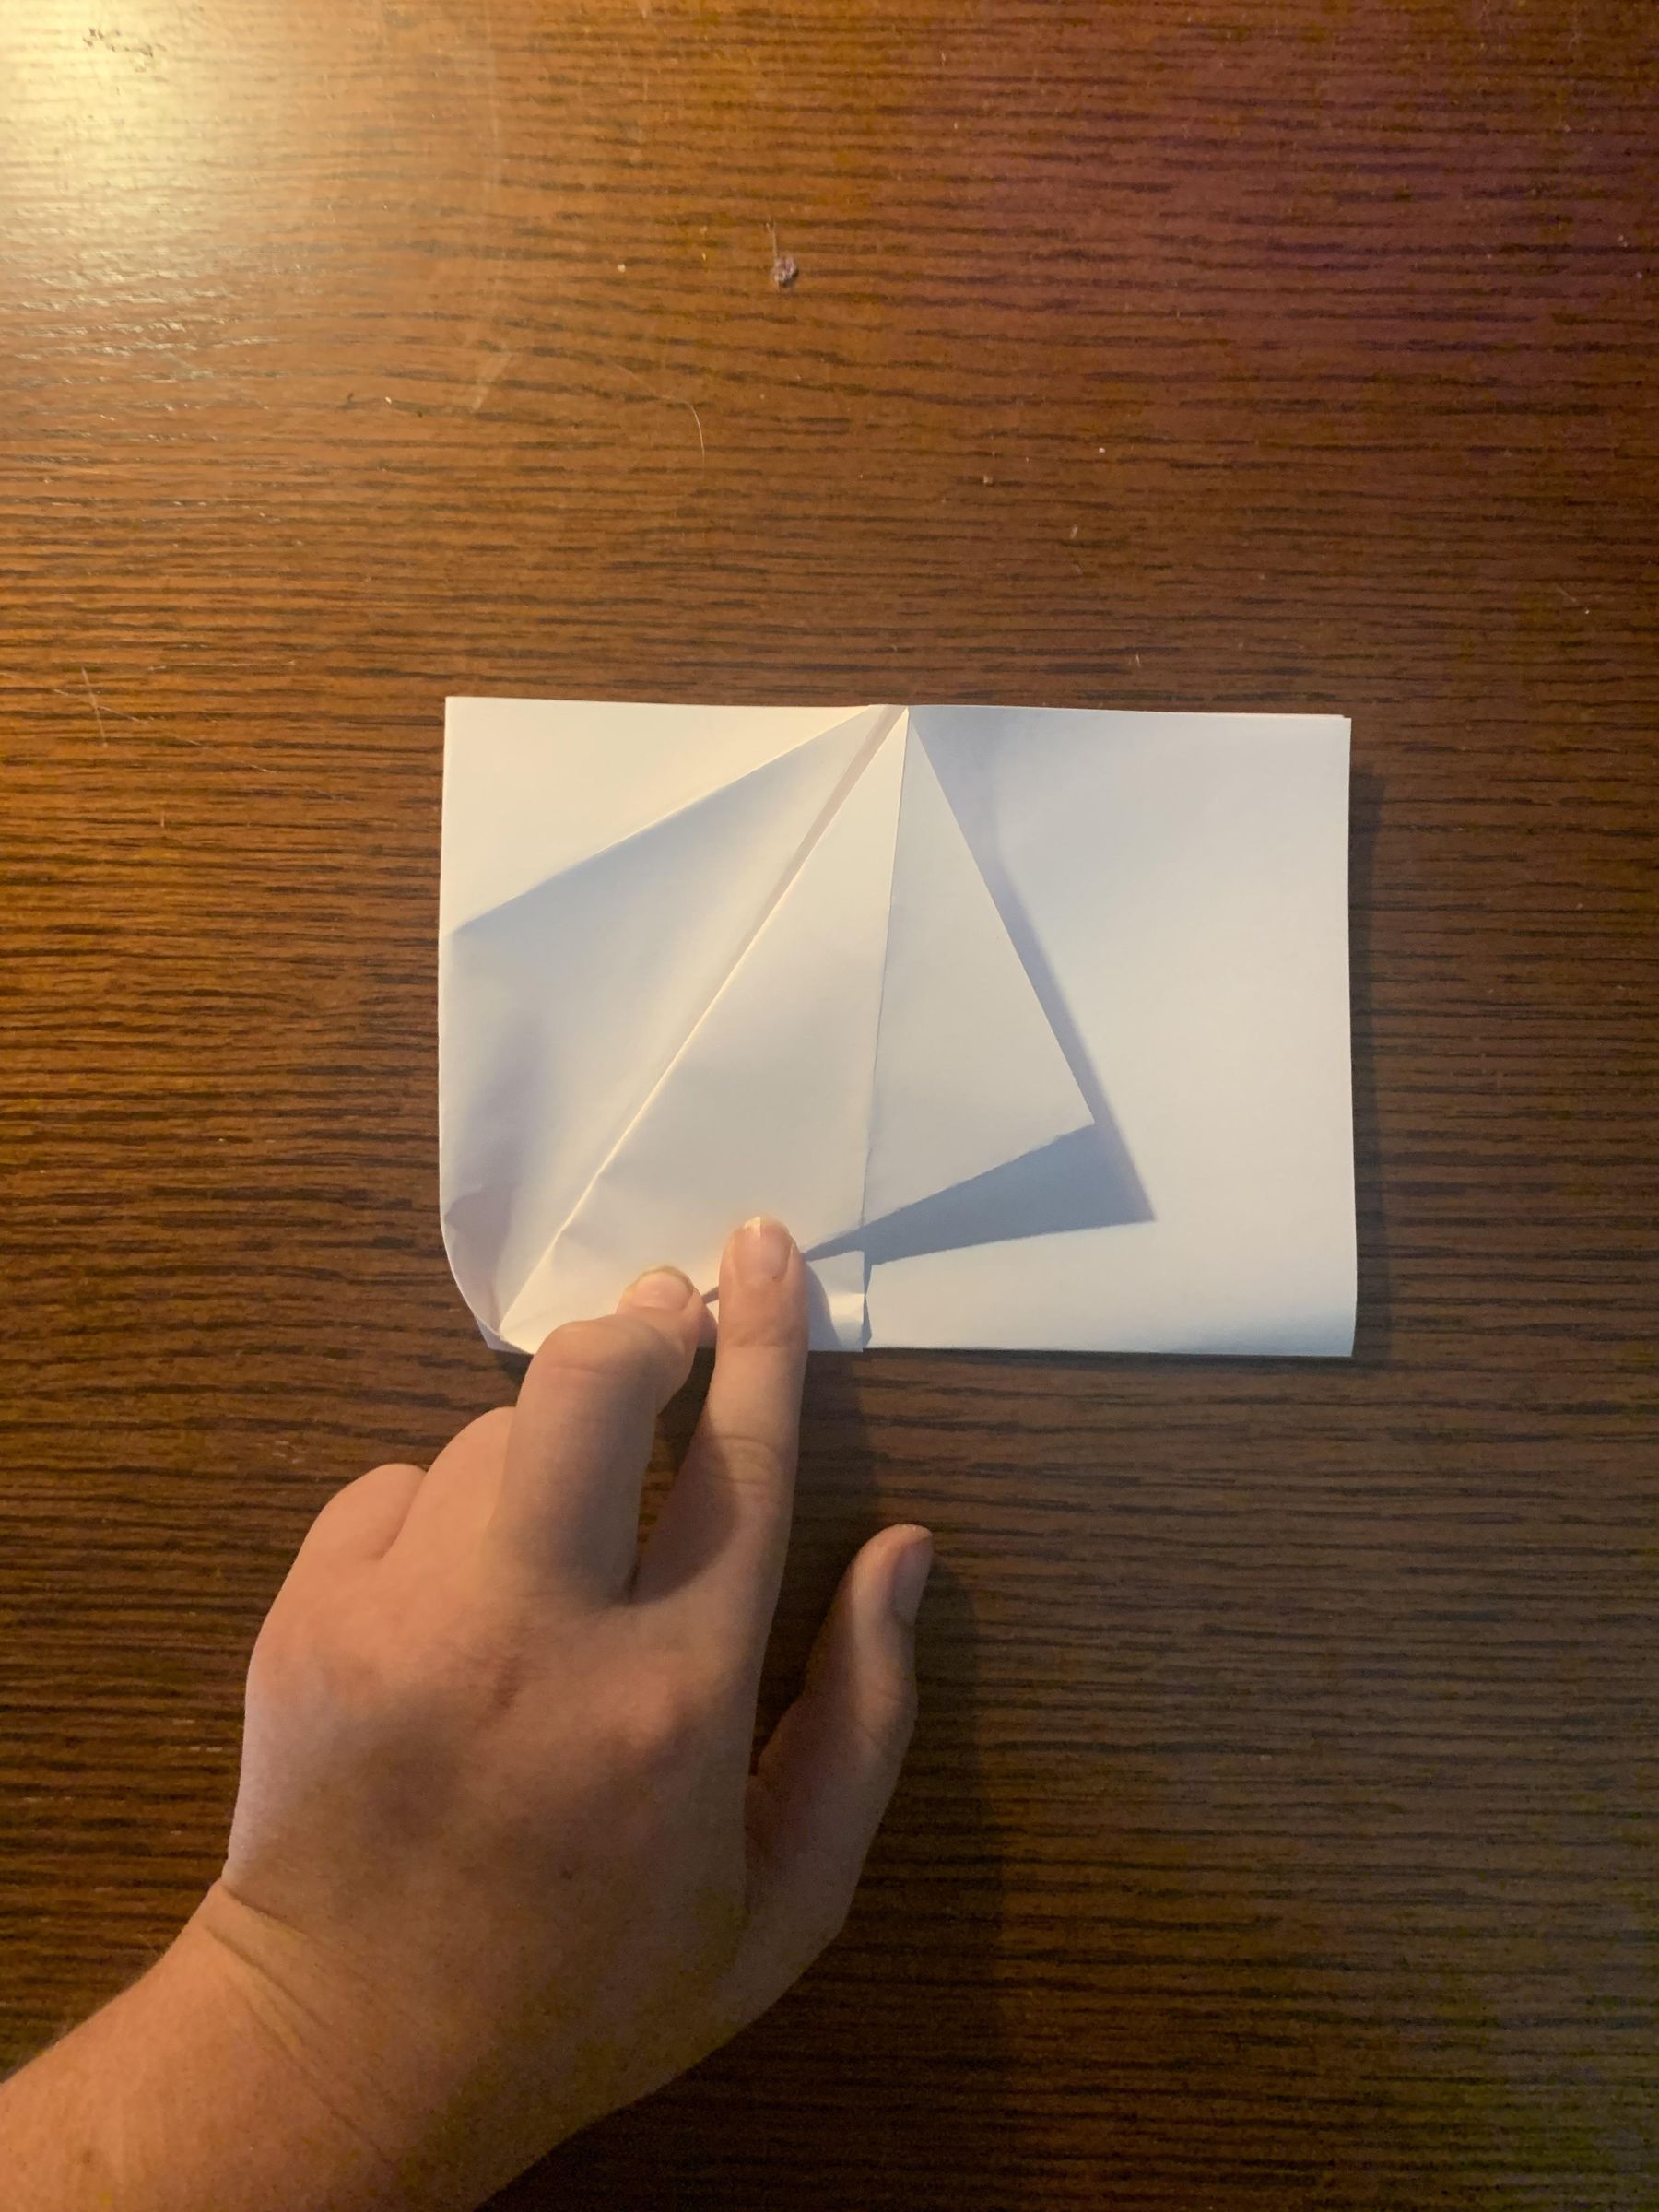
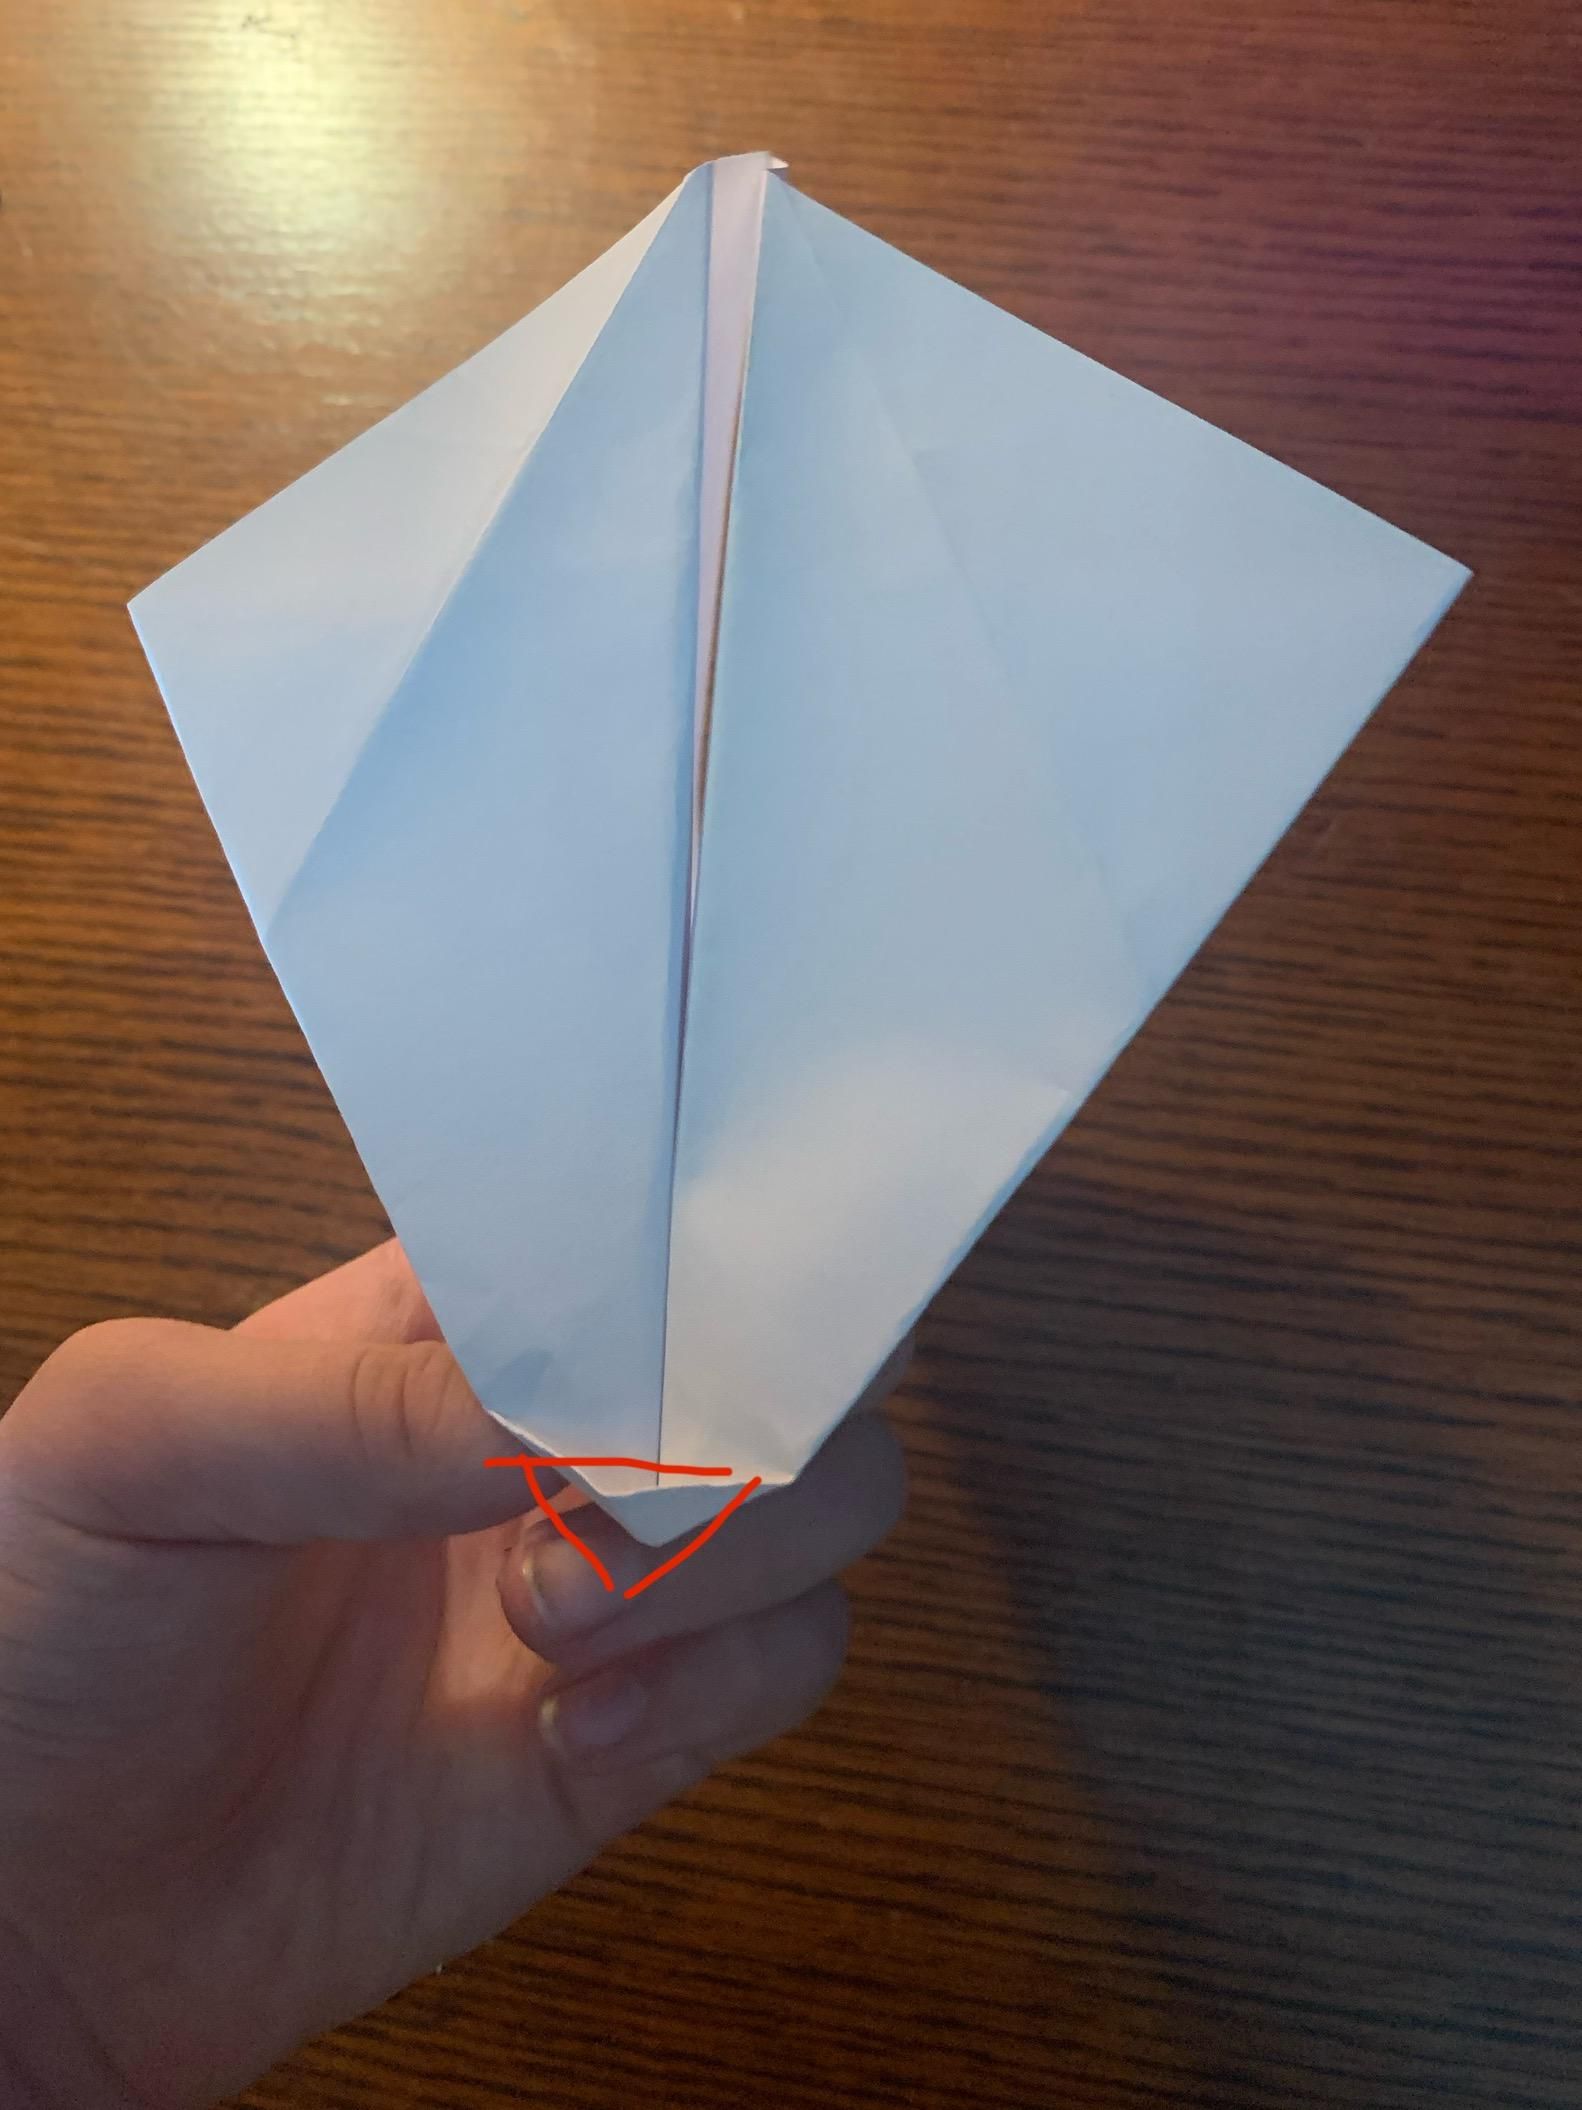
Now fold down one wing flap, then the other, and fold the nose lock when folding the wing flaps at the same time and flatten the pocket on the tip of nose then fully crease.
Tuck the Extra Flaps in a Pocket Behind
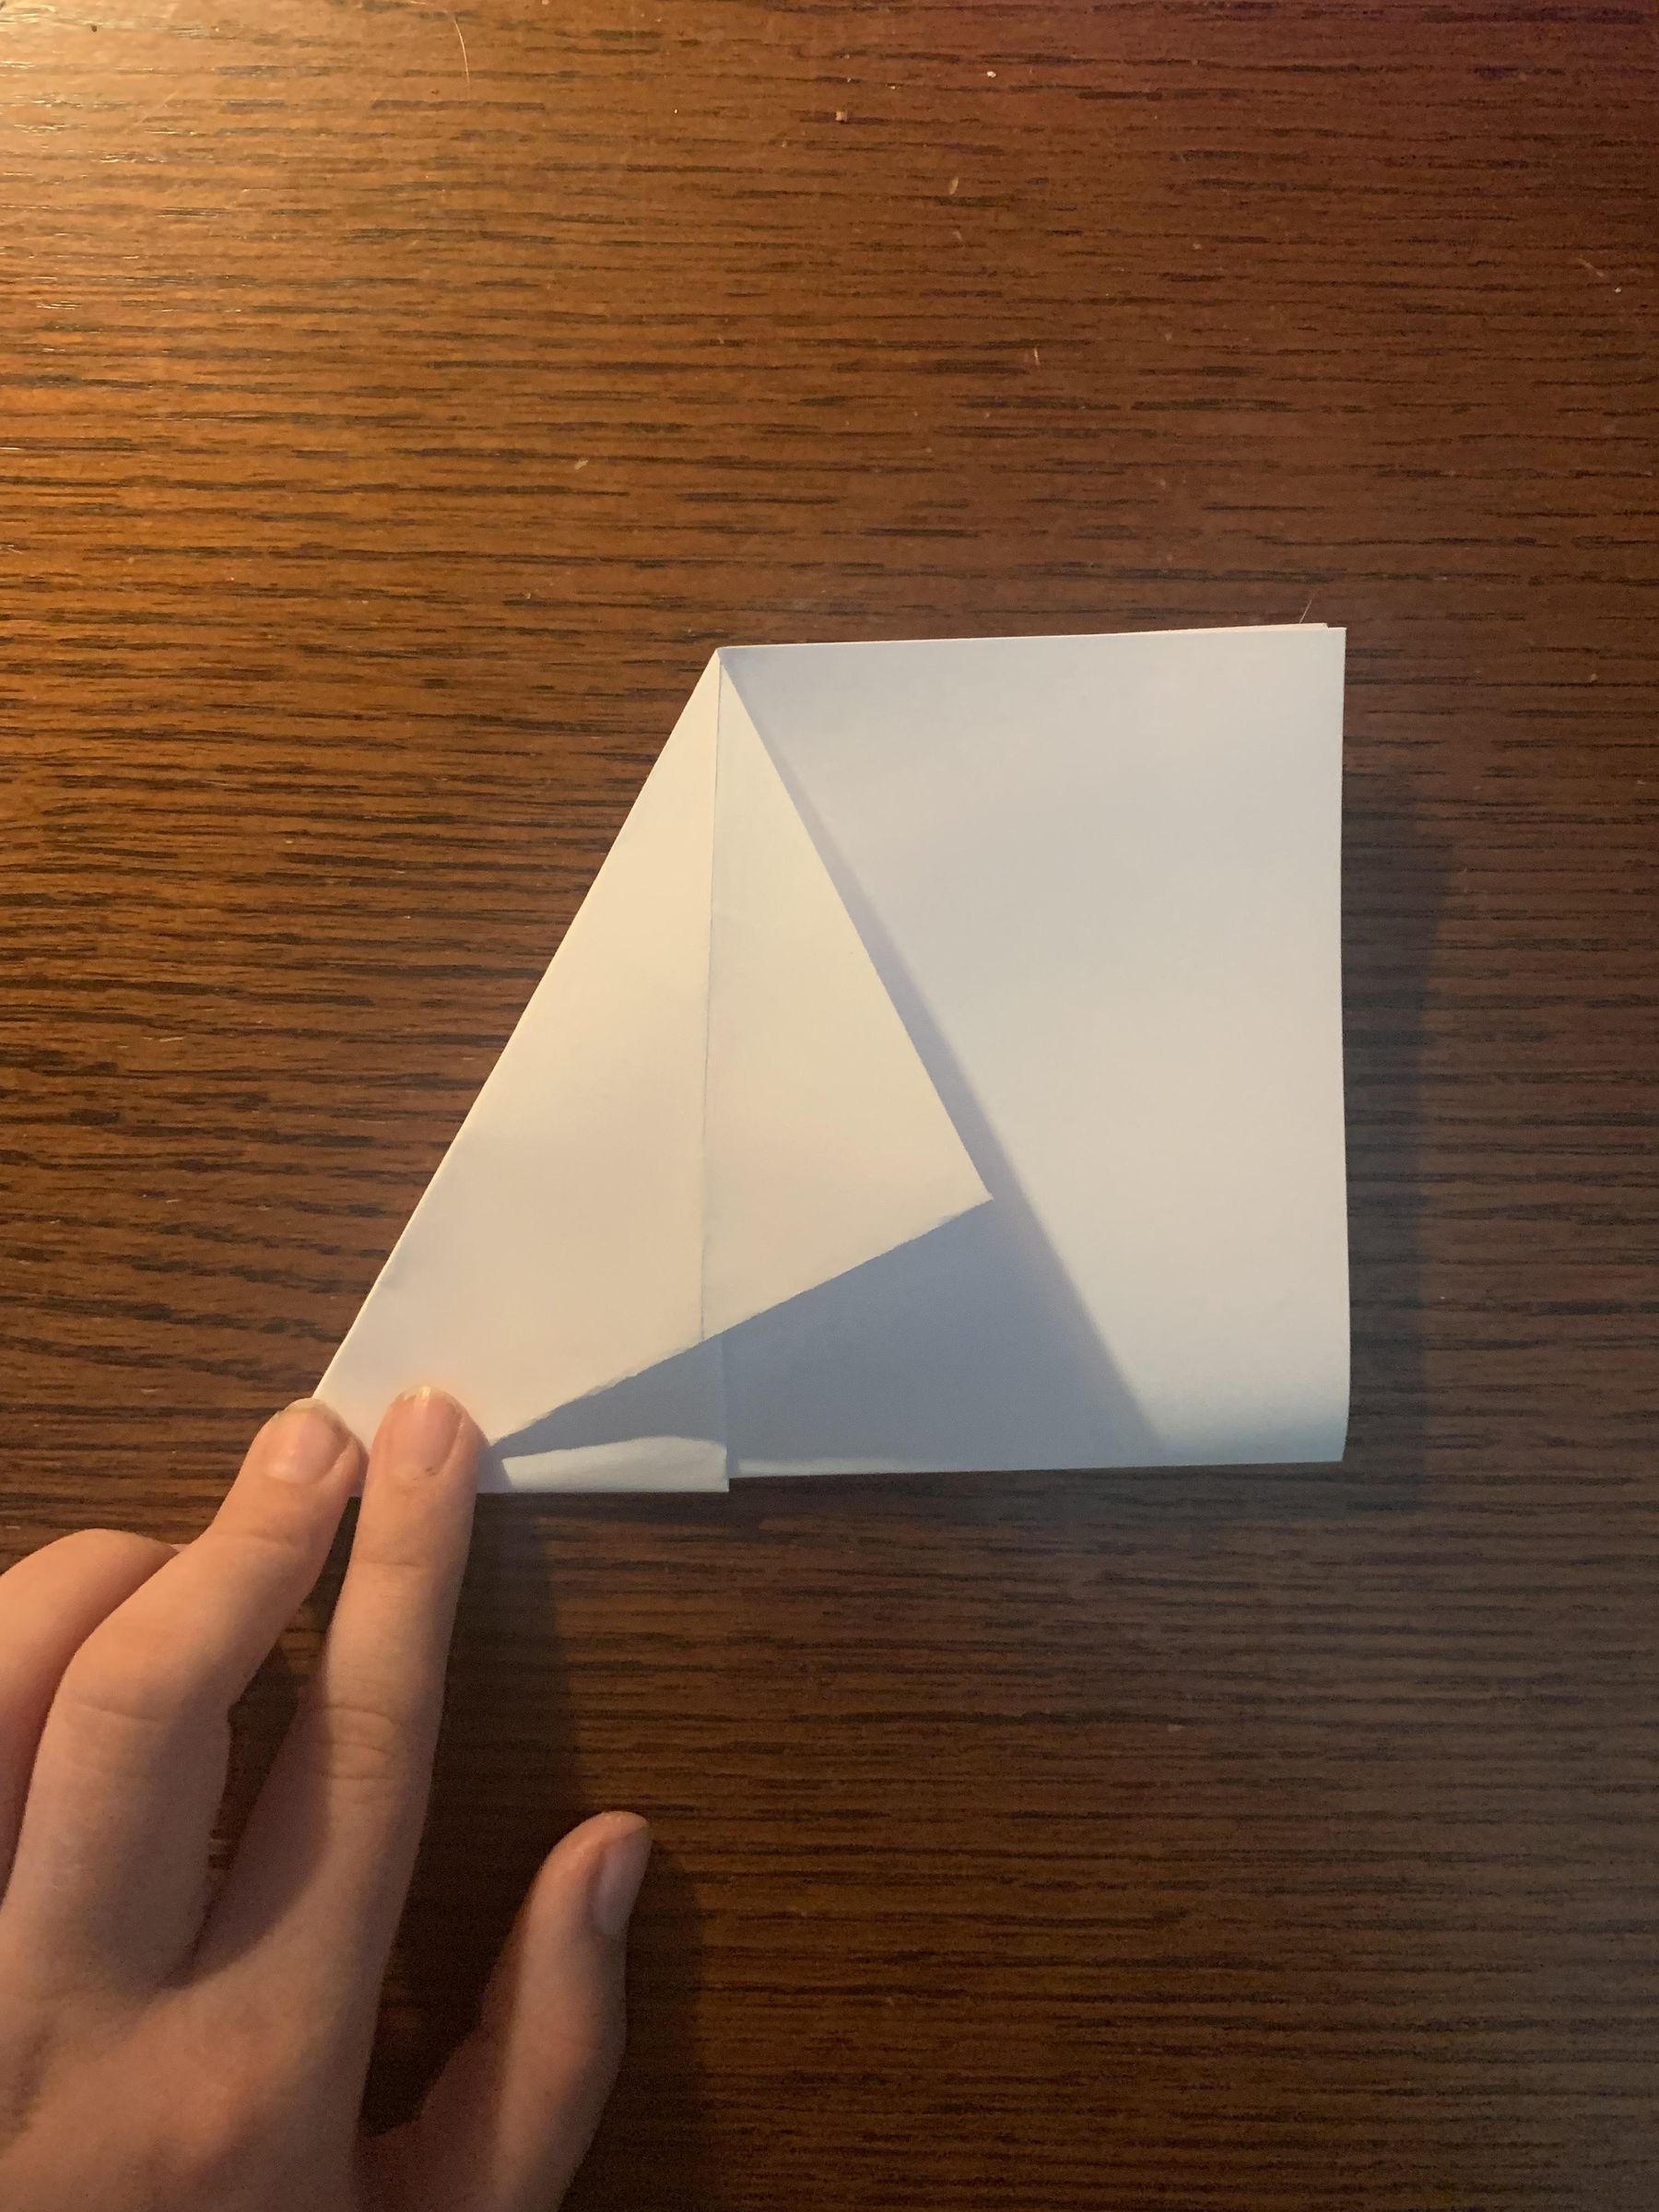
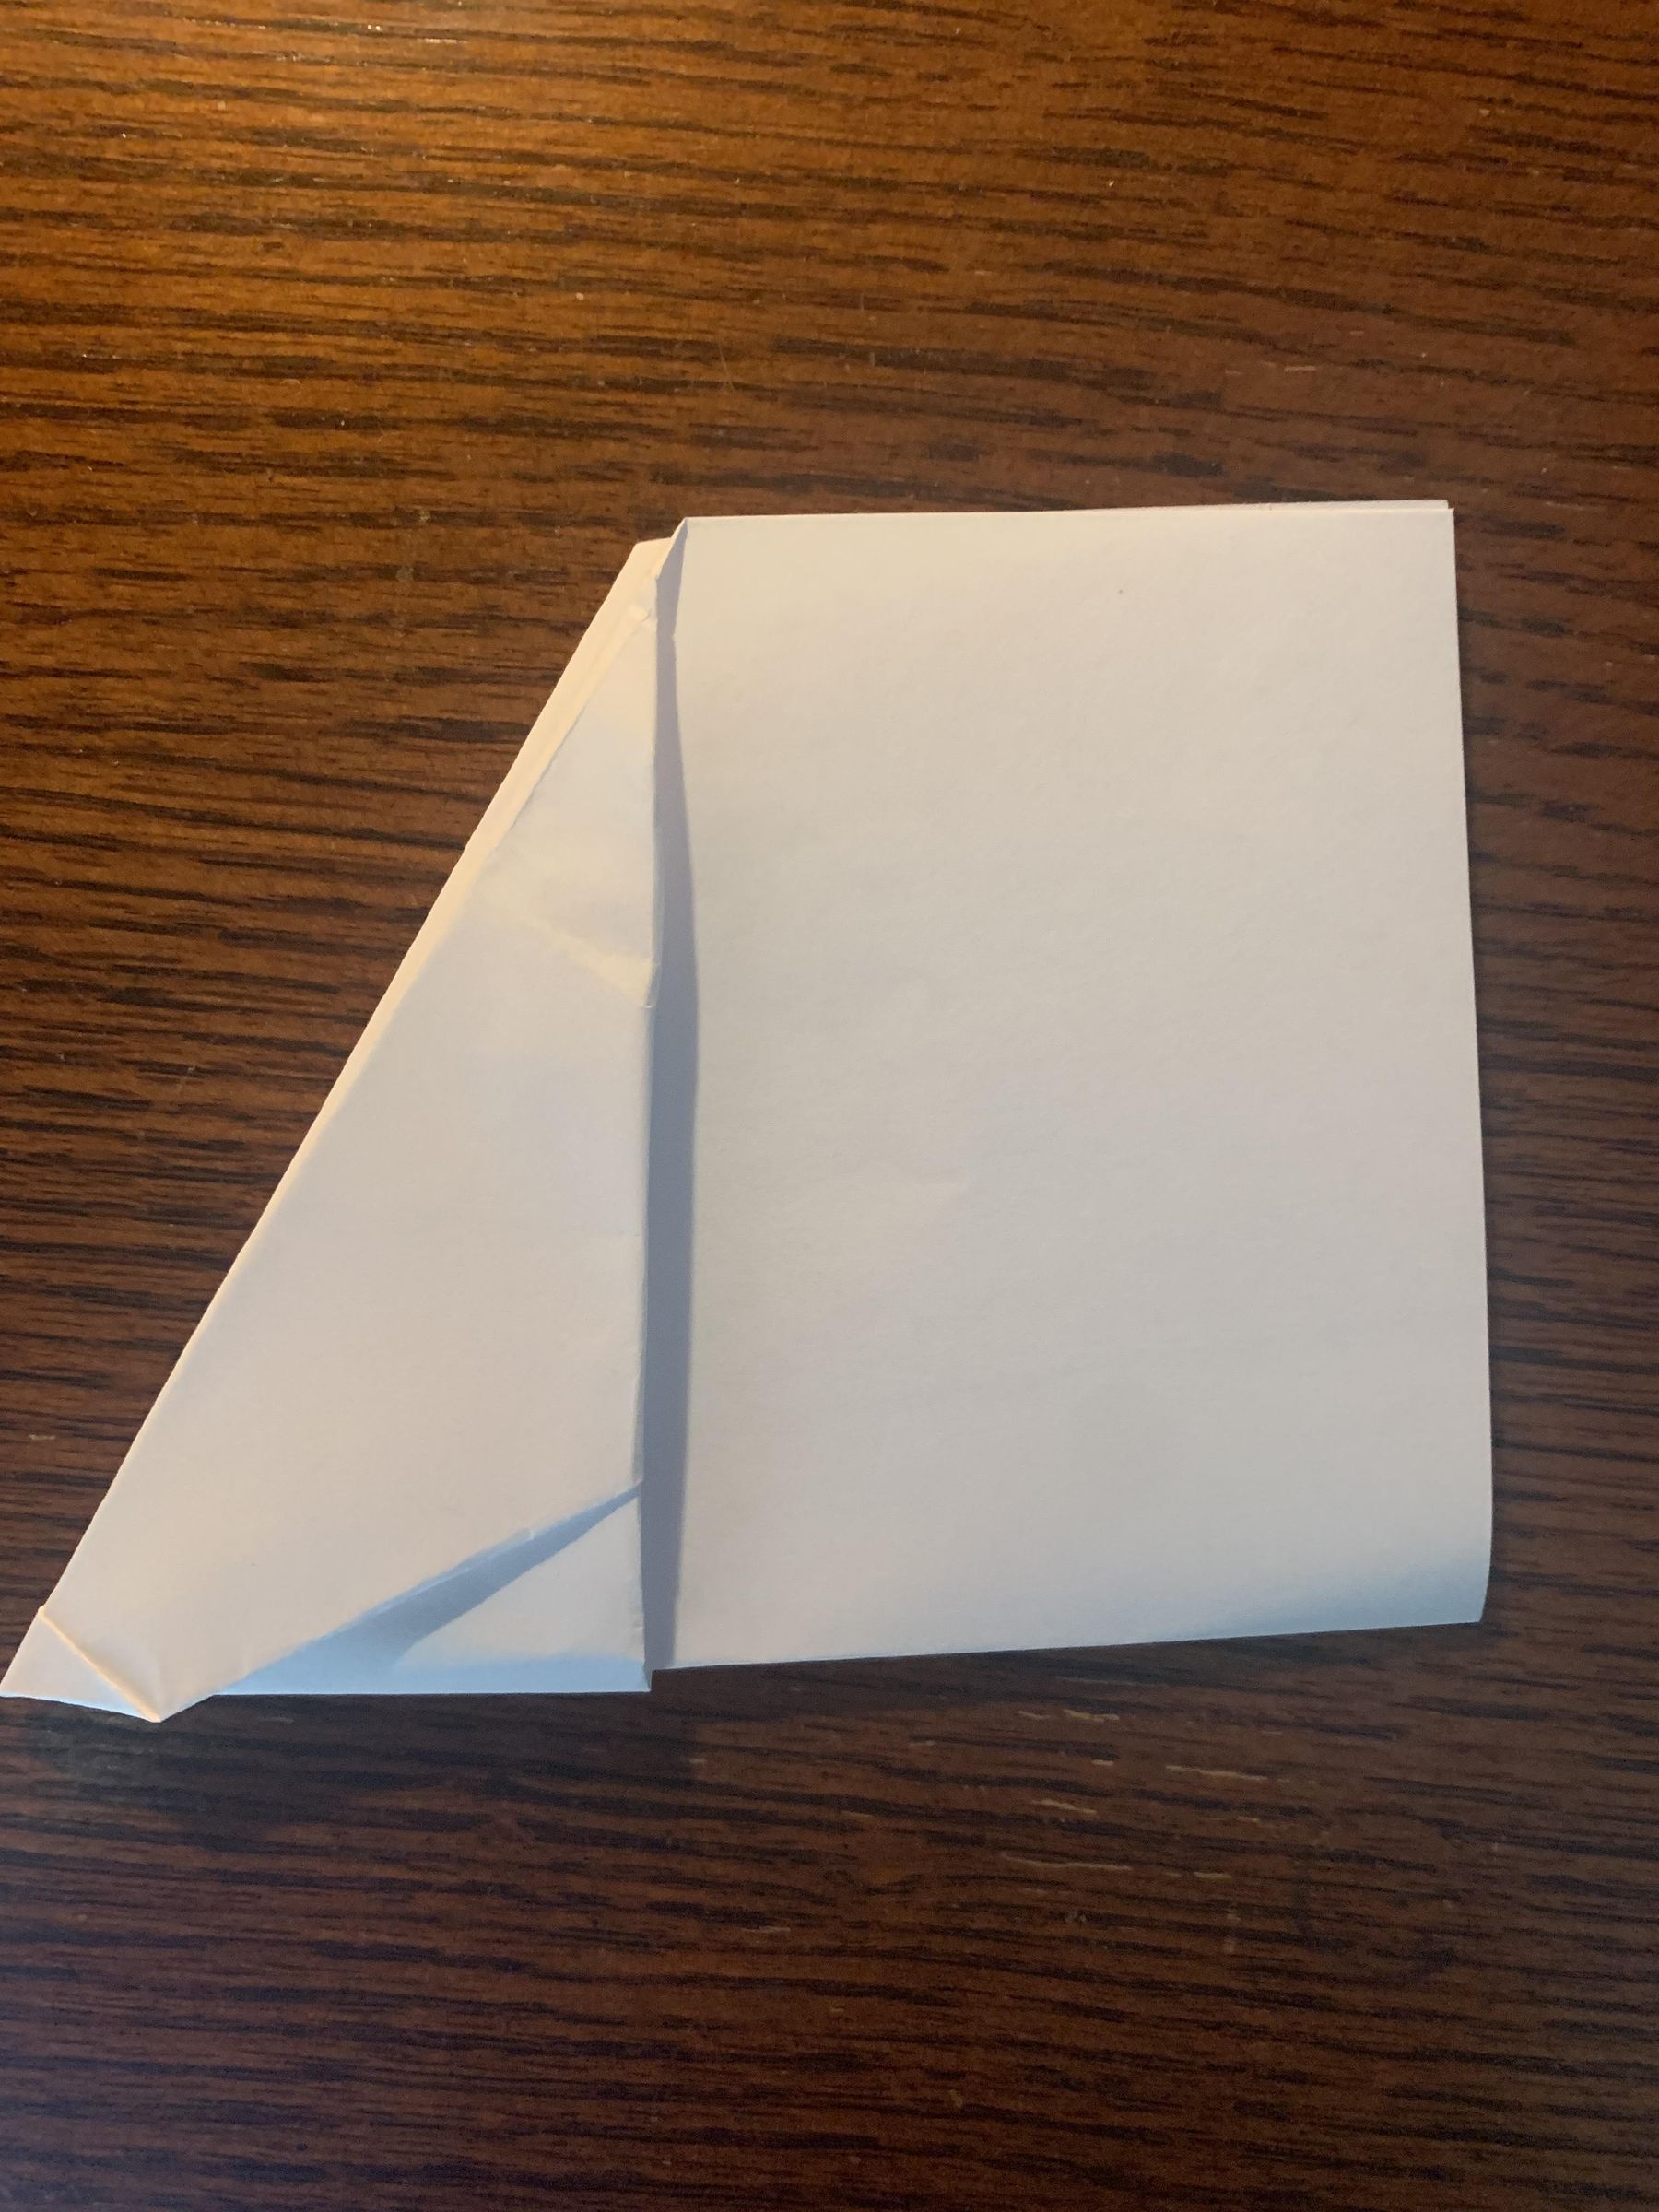
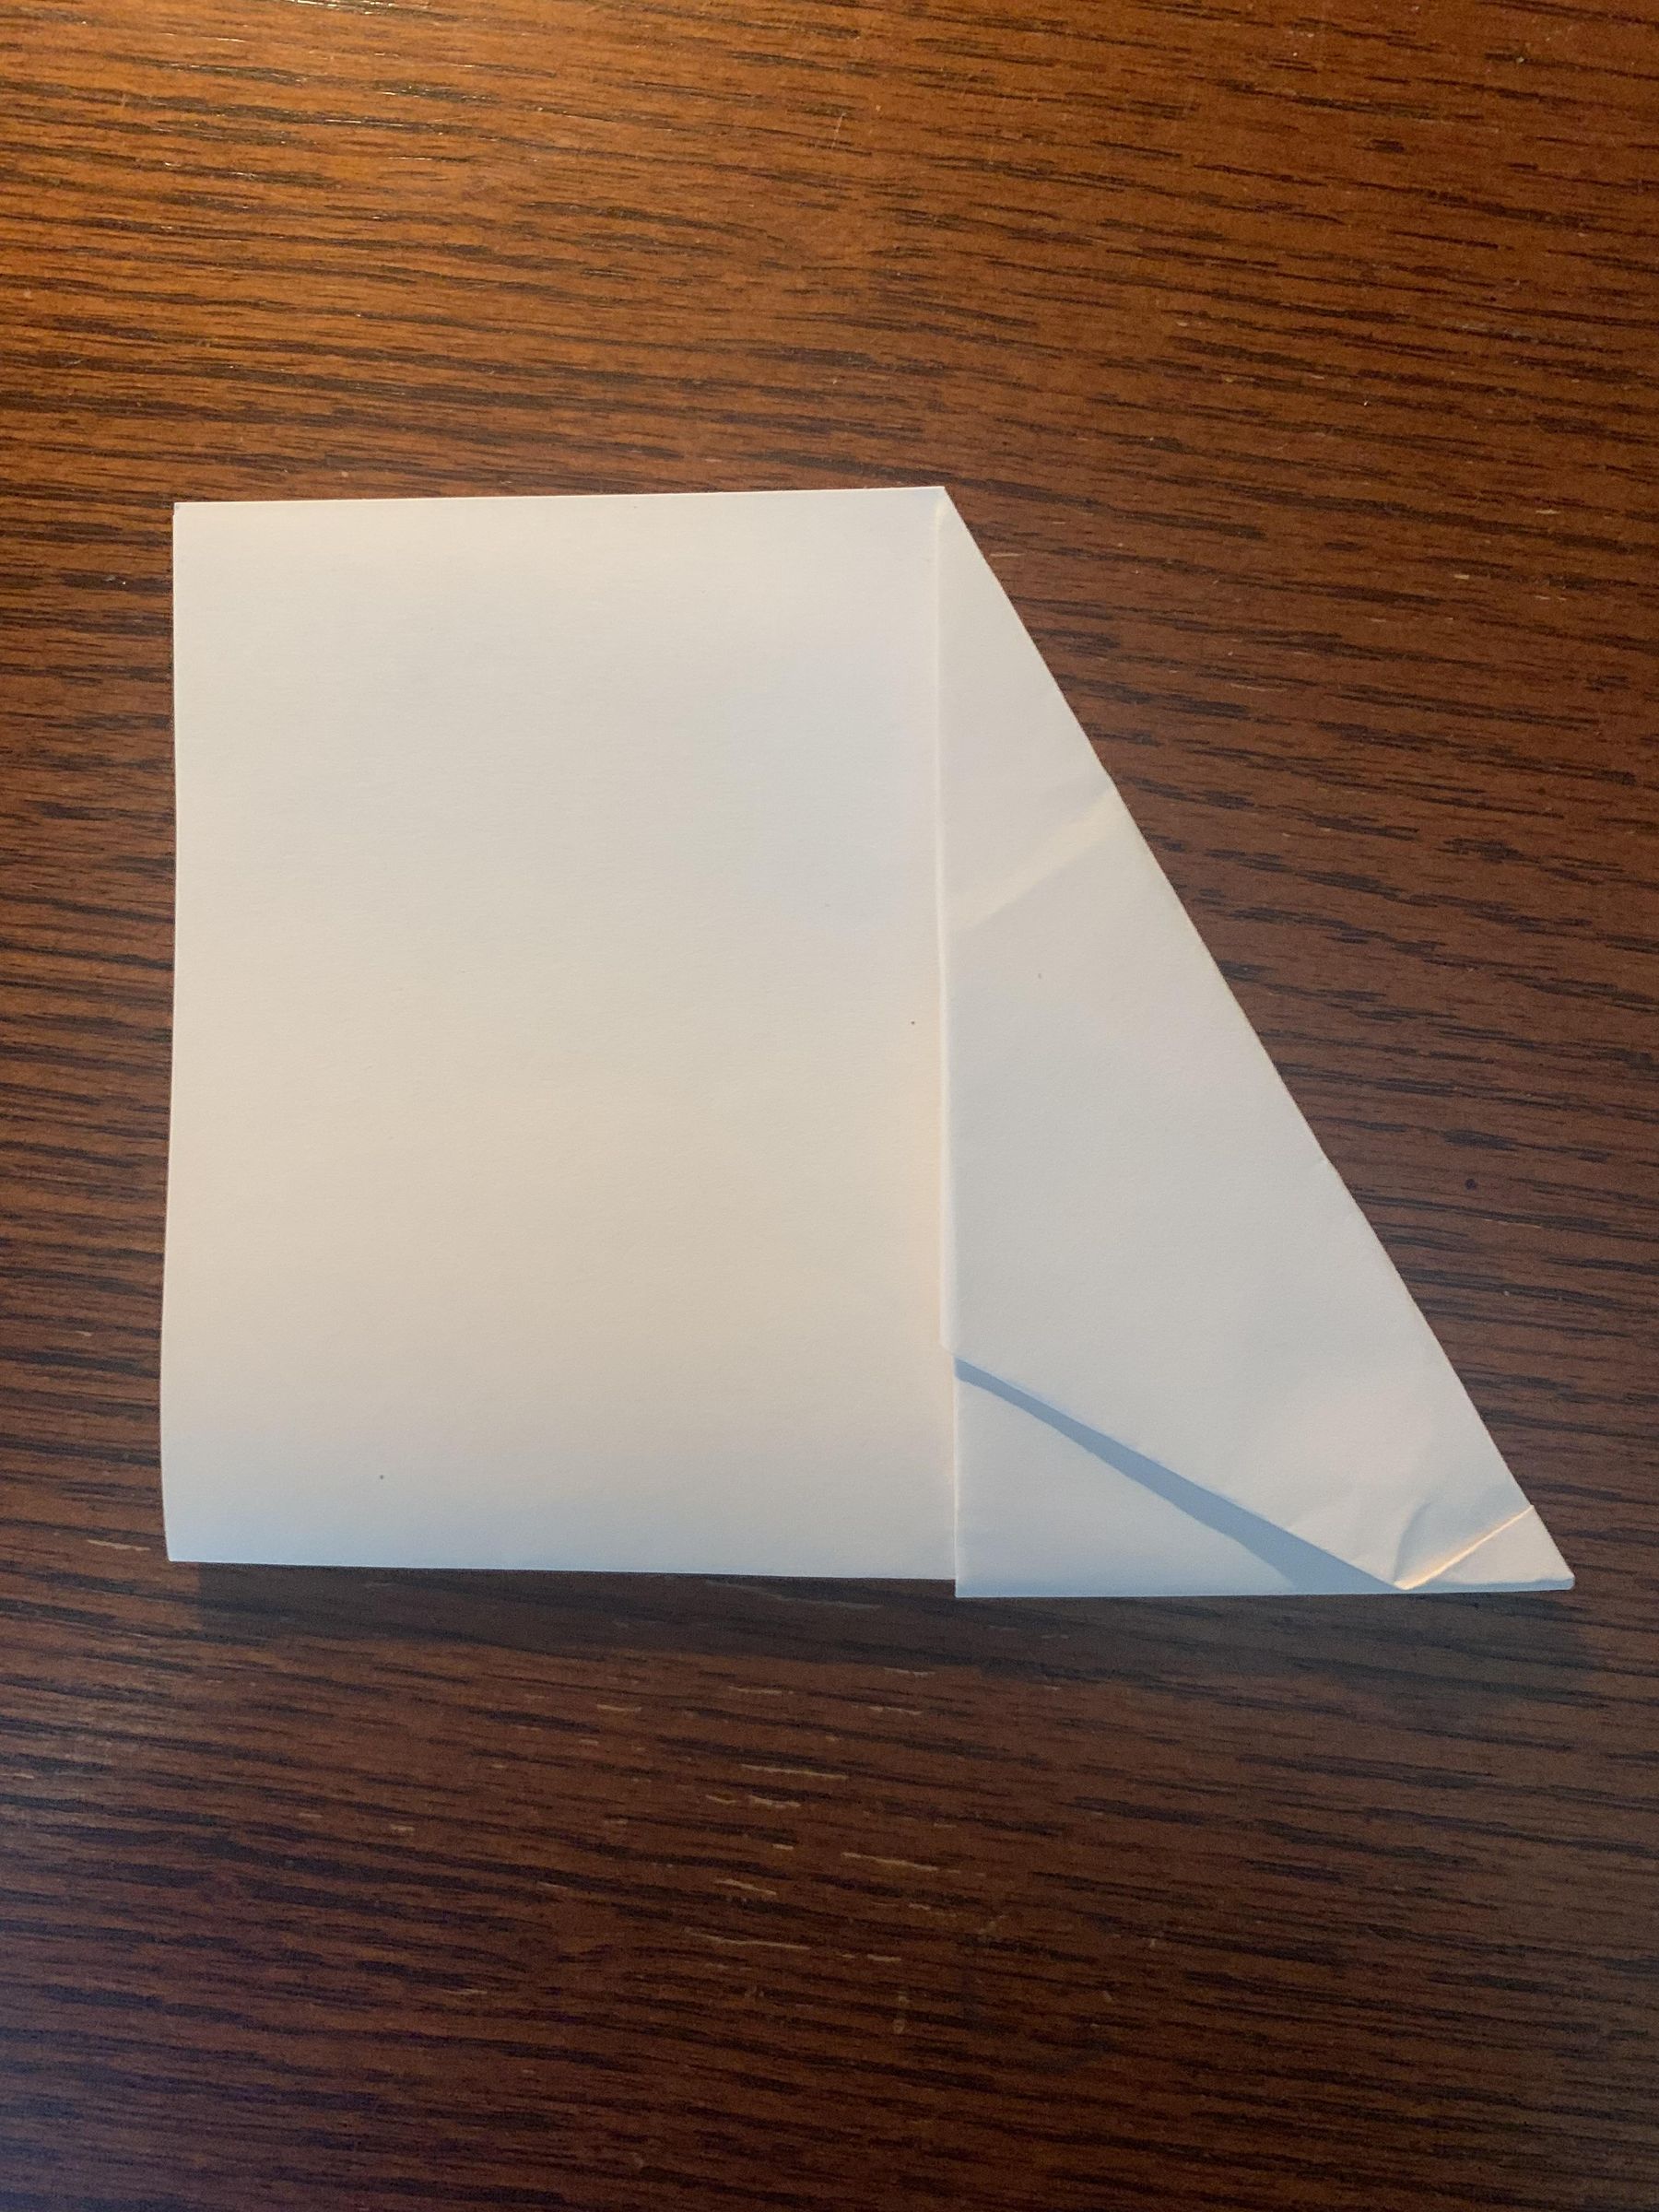
Now tuck the remaining flap in the pocket behind on both sides as shown.
Fold and Then Unfold the Wings
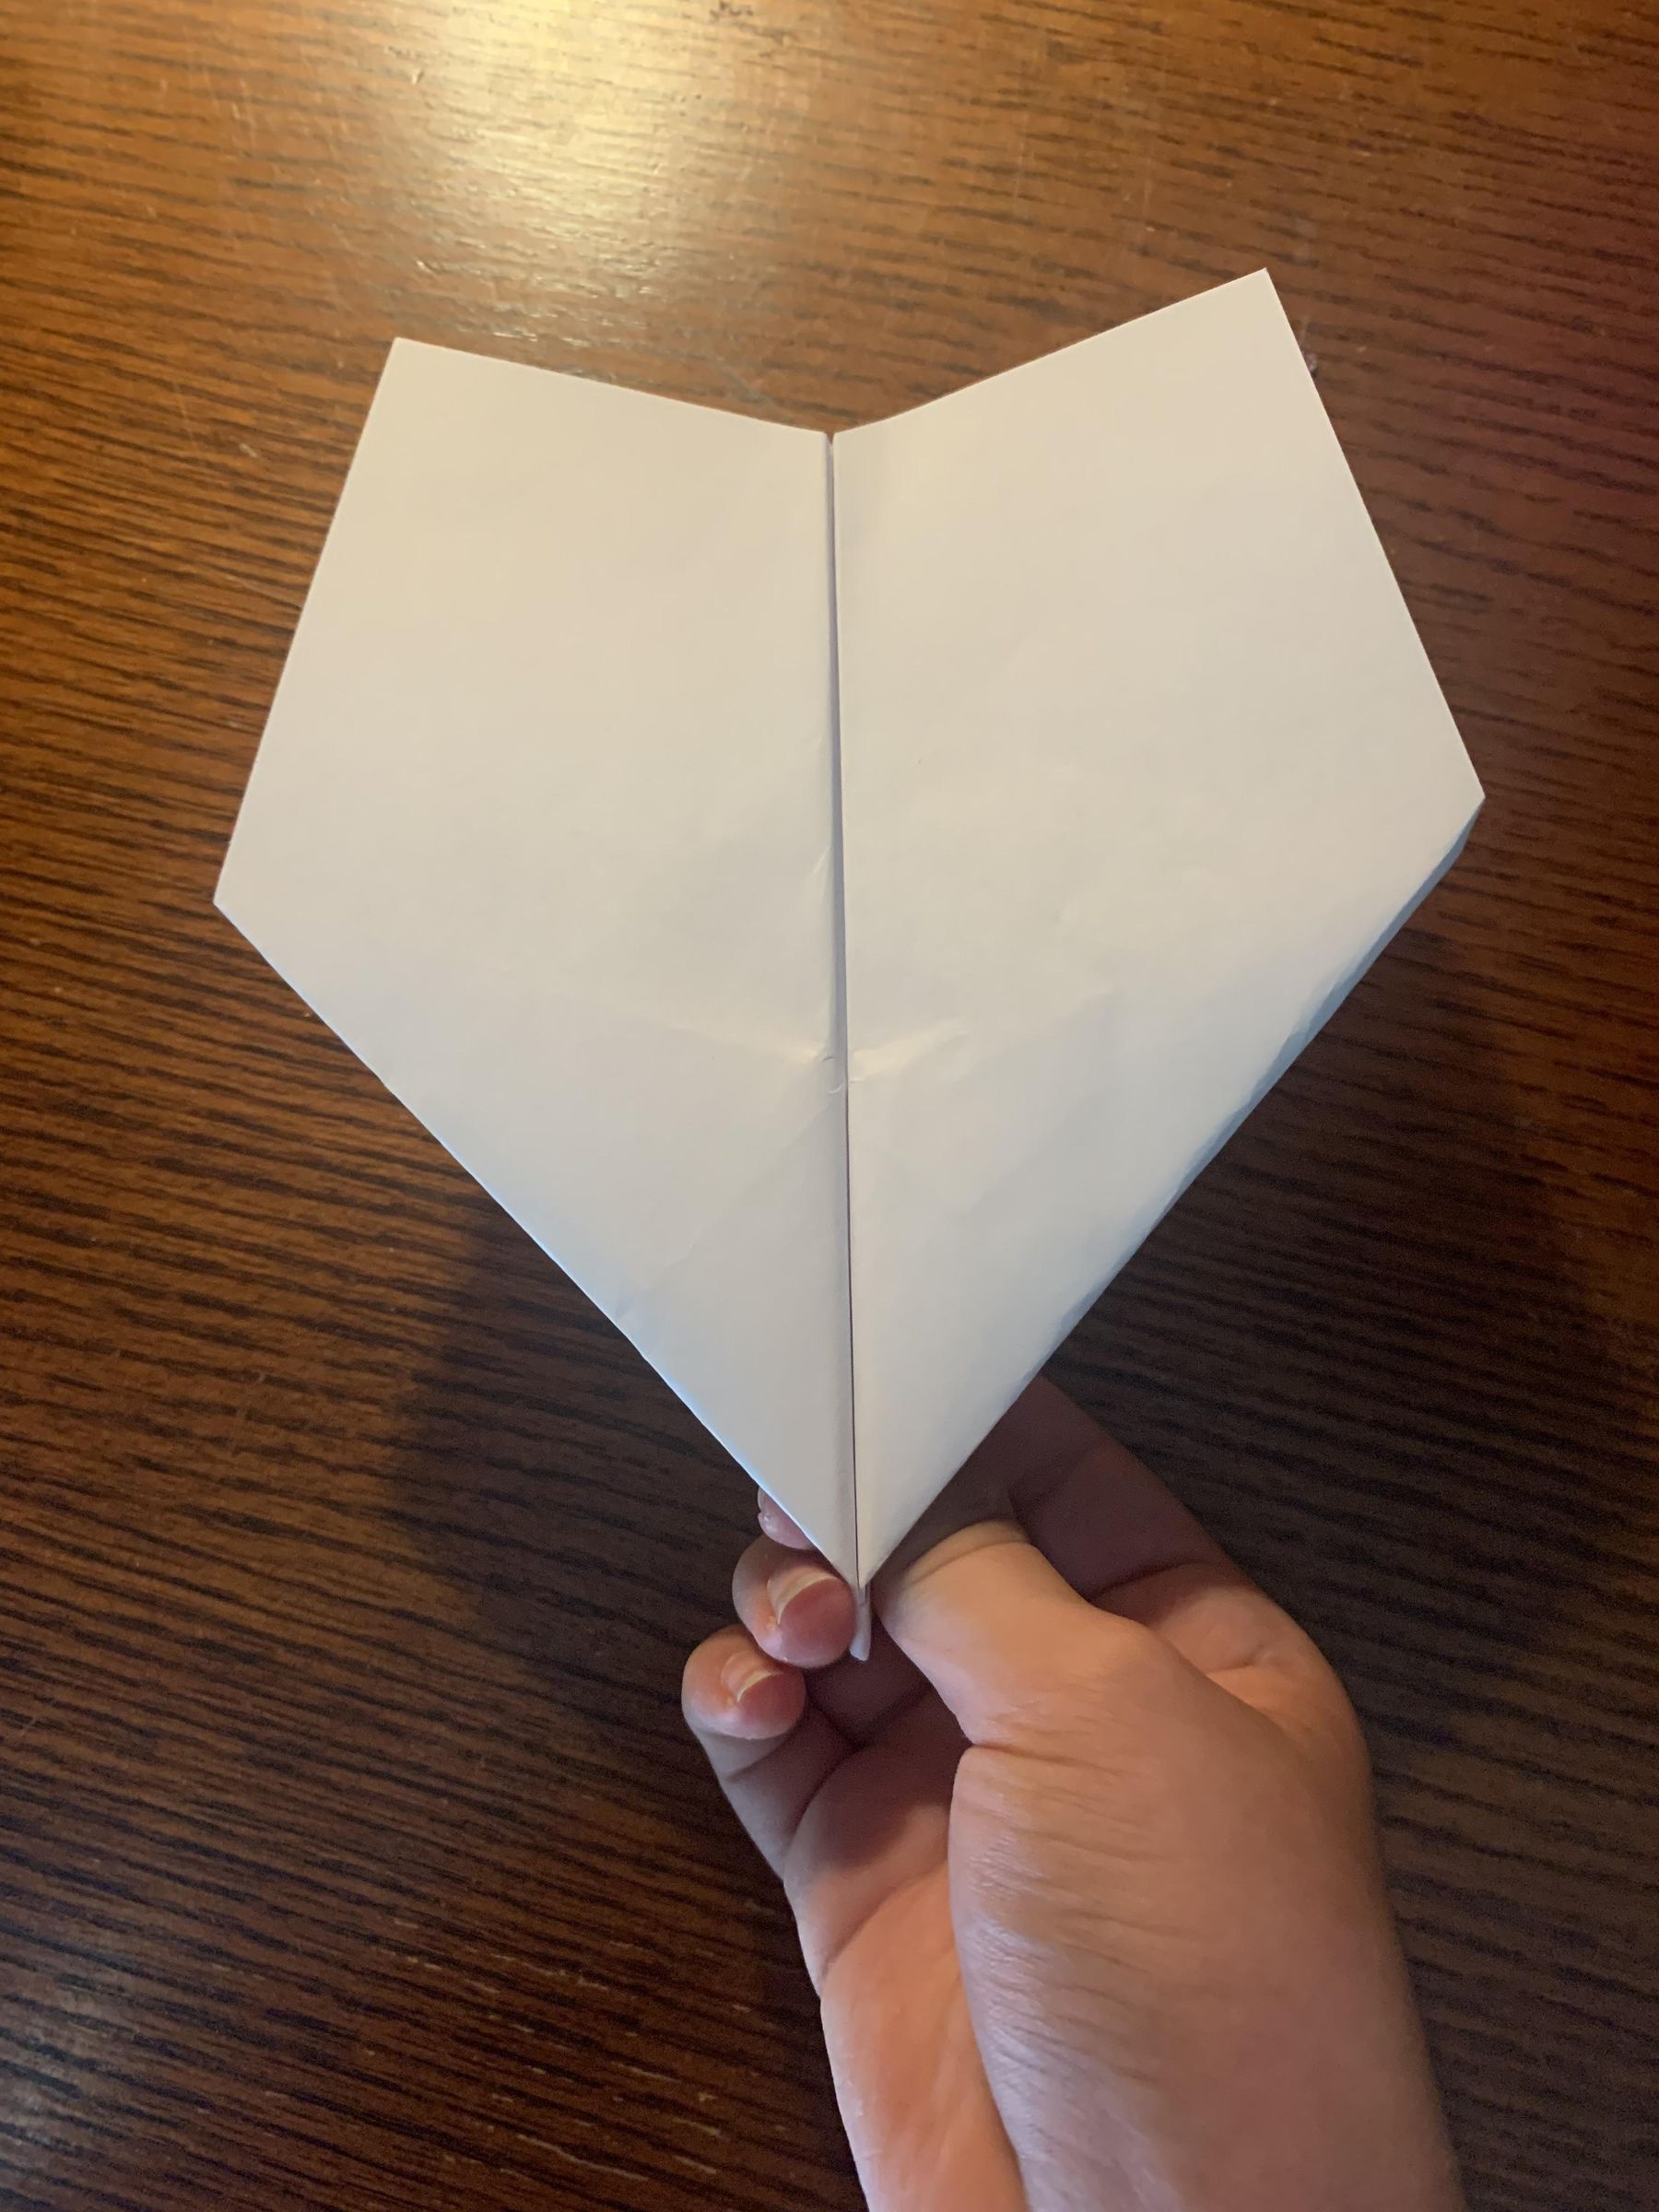
Now fold down some wings at about 3-3.5” measuring from the back of the plane to the nose, and then unfold the wings at any angle you like.
Finished
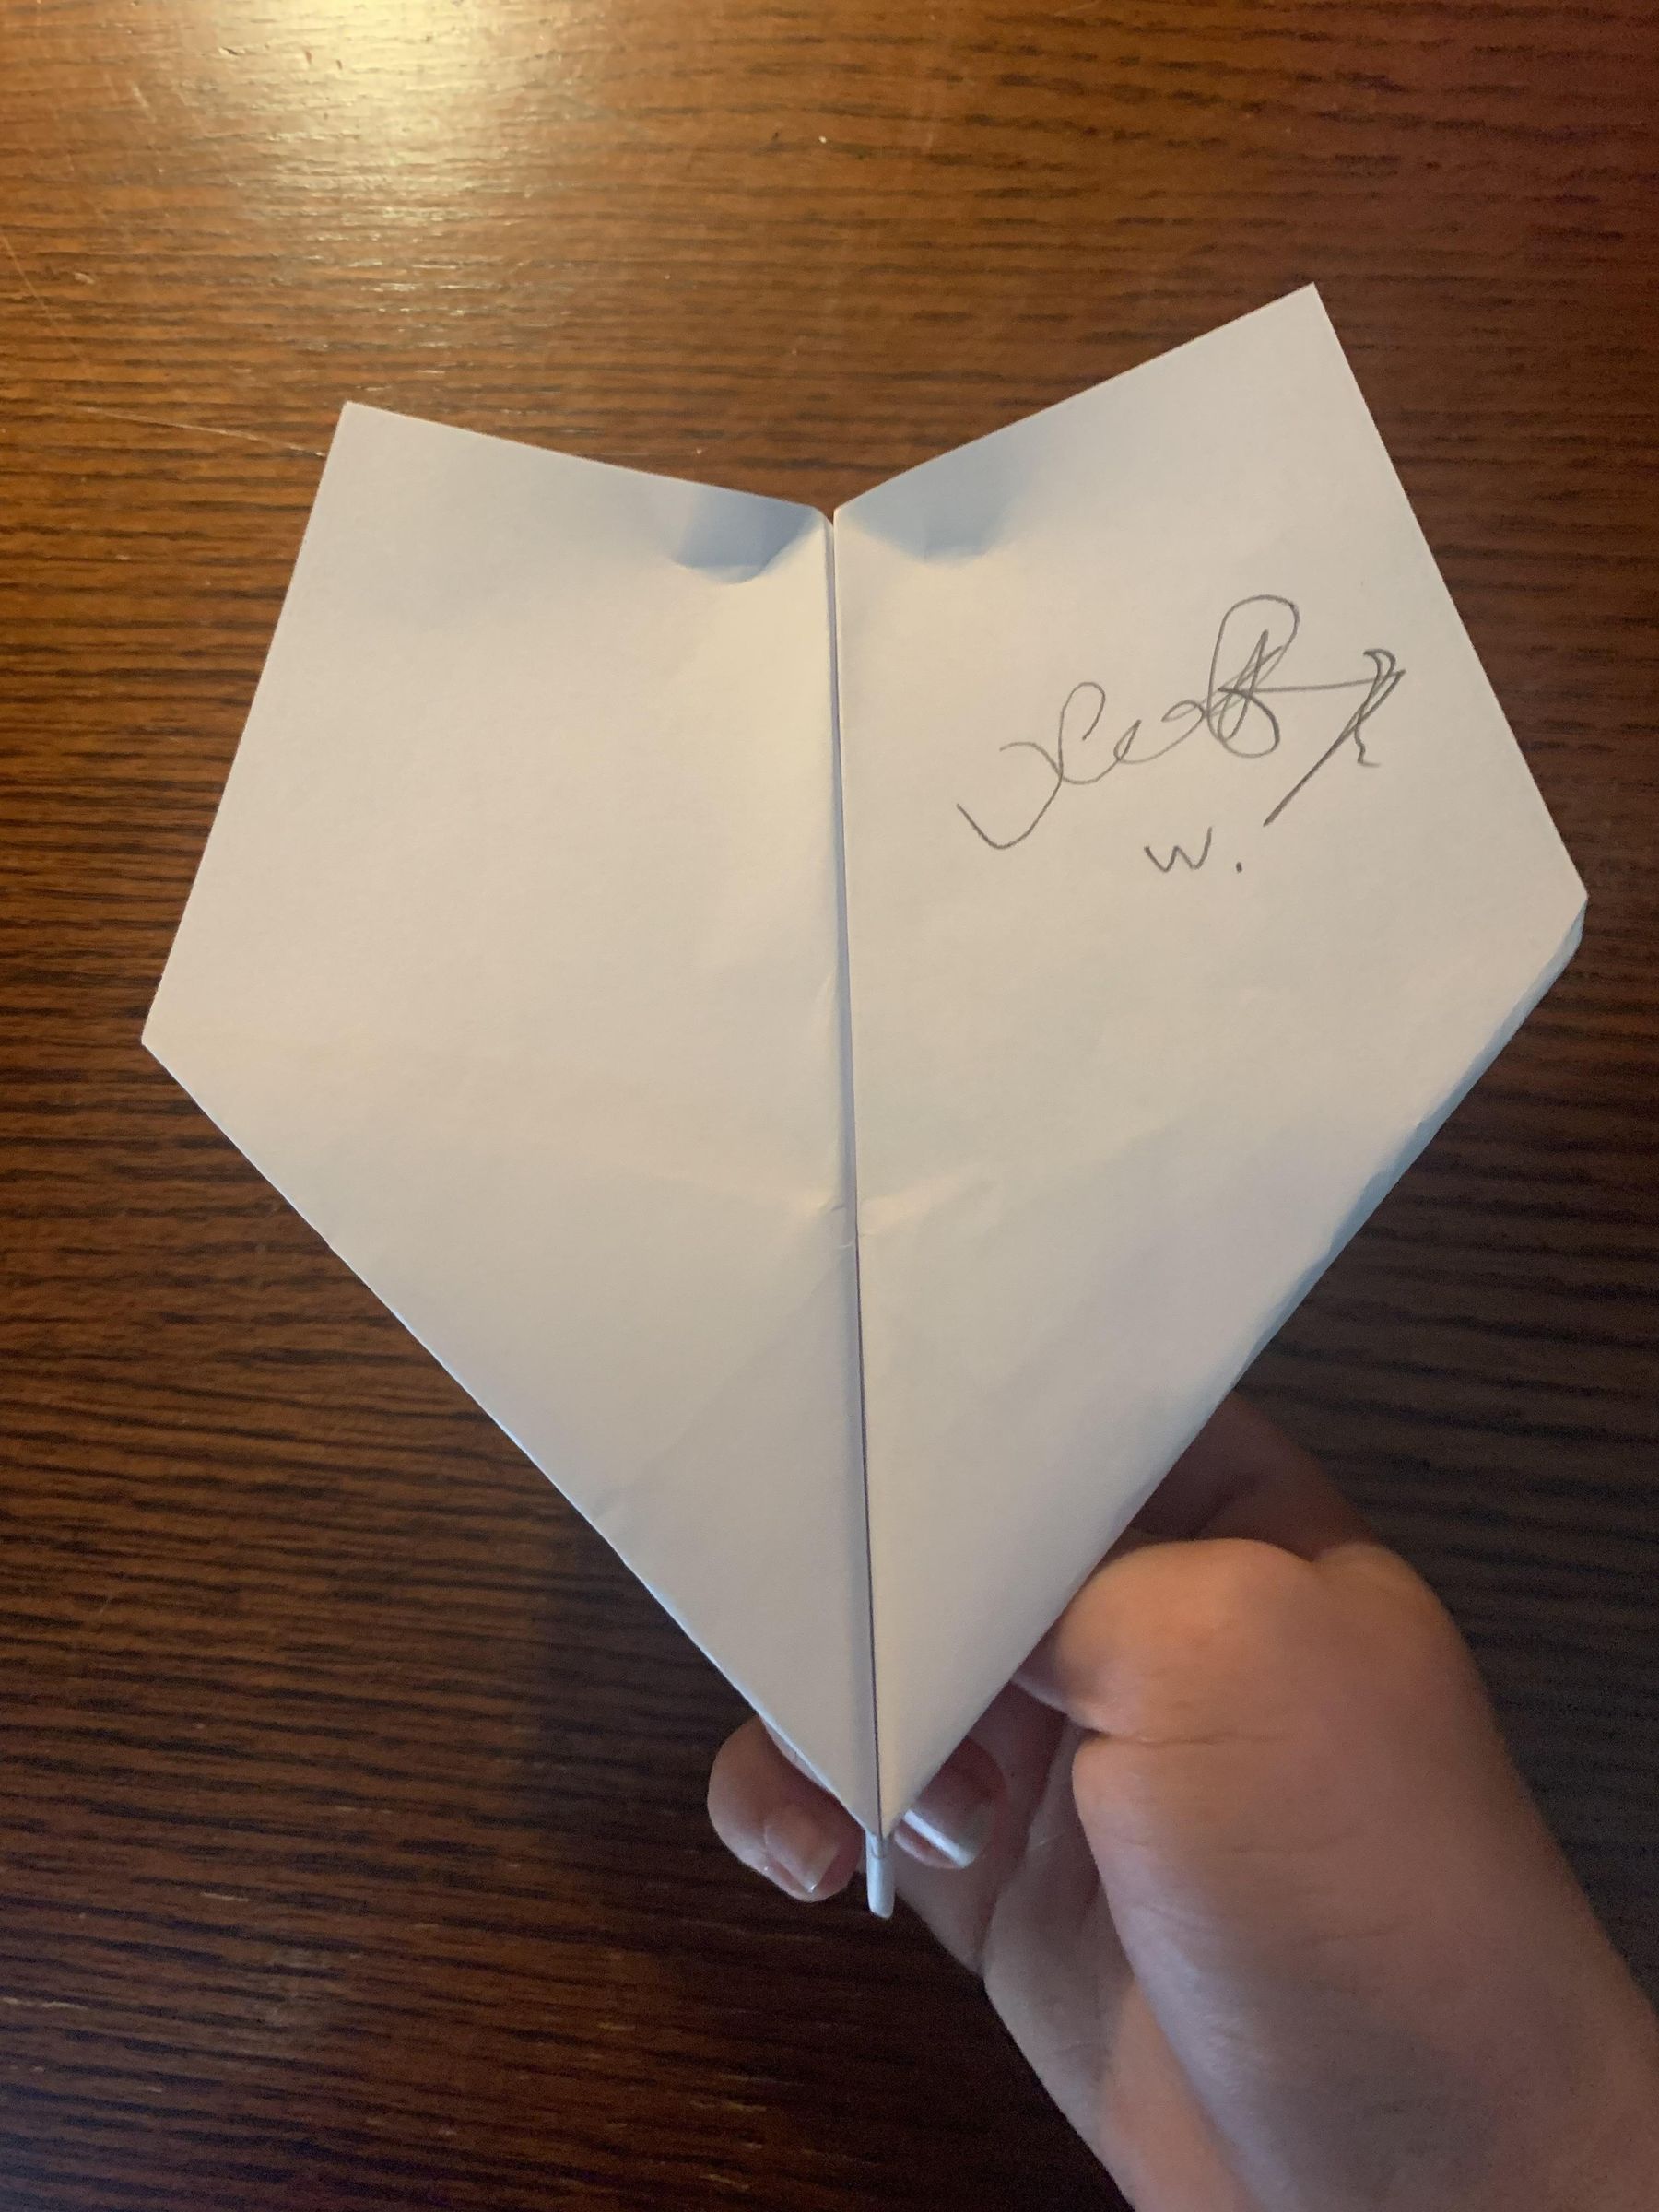
You can now add up elevator pinches to make it fly better and you can also add a signature if you would like. Now you are finished with the Cardinal and you are ready to fly.