Feel-The-Code (A Haptic Morse Code Reader) - Part 1: Software
by bikeframe in Circuits > Assistive Tech
7409 Views, 27 Favorites, 0 Comments
Feel-The-Code (A Haptic Morse Code Reader) - Part 1: Software
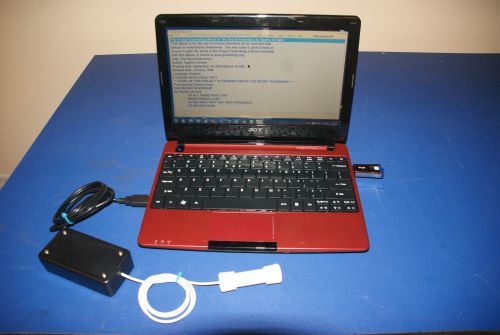


Feel-The-Code (F-T-C) is a vibra-tactile Morse Code text reader. It has a software component and a hardware component. Its purpose is to make it possible to read any text file silently and without looking at the computer. With F-T-C a person who is blind can read text easily and unobtrusively.
There are some advantages to using Morse Code rather than using Braille or audio text. Morse Code is quite easy to learn and can present the letters and characters of an eText about as fast as Braille can. The big advantage for F-T-C is that it can be smaller, lighter and much less expensive than a Braille reading system. F-T-C will also work for individuals who have limited touch sensitivity because of a disease like diabetes.
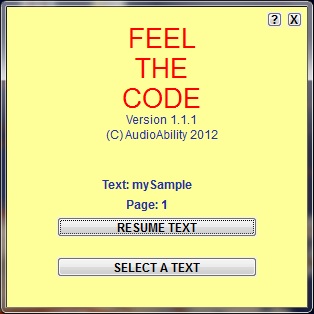
This is Part 1 of a 3-part IBL that will describe how to build F-T-C very inexpensively. You will need a Windows PC to run the F-T-C software. (Other types of PCs and mobile devices can be used with the hardware, but my free software only works with Windows for now.) The F-T-C software, like the hardware, is compact and portable. It can be installed on a flash drive (Pic 1) and carried from PC to PC without a complicated install process (Pic 2).
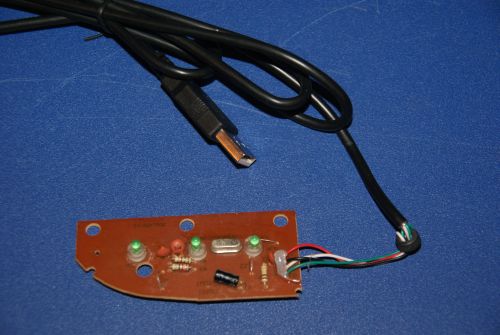
The hardware LED vibra-tactile component (Pic 3) is described in Part 2. The hardware audio amplifier vibra-tactile component (Pic 4) is described in Part 3. These can be built for as little as $25 and work with the F-T-C software described here. These too are compact and portable so they can be carried from PC to PC.
Part-2-LED-Hardware/
Part-3-Amp-Hardware/
I want to make it clear that this project is still in the early stages of development. I am working with two people who have vision limitations and they are encouraging me to continue the project. I hope to be able to test the F-T-C devices soon with a group of students who have vision challenges. I will keep you informed of their feedback and suggestions.
Concept


The F-T-C software converts an eText (or almost any other text document) into Morse Code in a letter-by-letter stream. The software can be used alone to listen to the audible Morse Code presentation of the text. (This can be handy when you are just learning Morse Code, but does not take full advantage of its potential.) However, the power of the software really comes into play when it is used to drive a hardware device that presents the dits and dahs of the Morse Code as vibrations you can feel. This silent, vibra-tactile mode is perfect for someone who needs to read textual material discretely.
A computer with F-T-C software will be able to produce two kinds of output: audio tones and on-off LED signals. The hardware described in Part 2 of this IBL (Pic 2) uses the LED signals to switch the vibra-tactile motor on and off to form the dits and dahs of the Morse Code. The hardware described in Part 3 of this IBL (Pic 3) uses the audio tones to switch the vibra-tactile motor on and off to form the dits and dahs of the Morse Code.
A computer with F-T-C software will be able to produce two kinds of output: audio tones and on-off LED signals. The hardware described in Part 2 of this IBL (Pic 2) uses the LED signals to switch the vibra-tactile motor on and off to form the dits and dahs of the Morse Code. The hardware described in Part 3 of this IBL (Pic 3) uses the audio tones to switch the vibra-tactile motor on and off to form the dits and dahs of the Morse Code.
Software
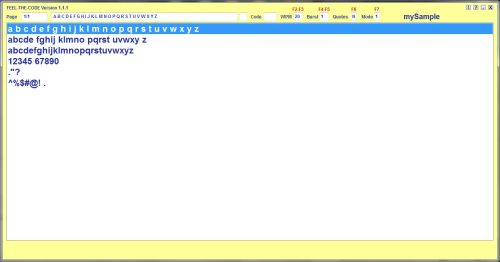

The F-T-C software will work best if your screen is at least 1024 pixels wide and you have Windows98 or better. You can download the software for free from my Web site at http://WWW.AUDIOABILITY.COM/FTC/
Unzip the downloaded file into a folder on your PC hard disk or onto a flash drive. I suggest you put it in your root directory so that it can be accessed at C:\F-T-C (for example). There are no complicated DLL or registry entries, so you can easily move or rename the directory if you want to.
When you start F-T-C it will ask you to select a new eText or to resume reading a book at the page where you left a bookmark. New text files you have written yourself or downloaded can be placed in the \Texts folder at any time and these will show up in the menu. You can store these text files in a folder any place your computer can access (such as on a network drive or on a flash drive) by placing the path in the initialization file (/Program/F-T-C.INI). When you first unzip the download you will have a default /Texts folder containing three Project Gutenberg novels (WWW.GUTENBERG.COM) and some other sample files to read and practice with. Write your own text using Windows Notepad or Wordpad.
That is pretty much all there is to getting started. The individual settings available to you are described in the steps below, but you can run the software and listen to the Morse Code with the default settings. You can customize and save your settings as you learn Morse Code and increase your reading speed.
The top line of the F-T-C main screen (Pic 2) displays the page number, title of the text file you are reading, the line of text selected at the moment and the character being translated to code and the Morse Code for that character. That is not helpful to a person with limited sight, but it can be used by a helper training the new Morse Code reader.
Speed (F2-F3) and Burst Size (F4-F5)


The speed with which the Morse Code for each letter is sent can be adjusted down with the F2 key and up with the F3 key across the top of your keyboard. This is displayed as WPM and is the approximate Words Per Minute that will result. This is a rough estimate since word size and complexity affect it. You can adjust this any time you are reading and the new speed will be saved as your new preference when you do a bookmark. The default is 12 WPM but you can slow it down to as little as 2 WPM for learning Morse Code and speed it up to 20 WPM for quick reading.
The burst size also affects the speed of reading. The burst size sets how many letters are translated to Morse Code each time you press the space bar. The F4 key reduces the burst size (to as little as 1 letter per press) and the F5 key increases it (to as many as 20 letters per press). The default is 1, but you will soon be reading longer bursts as you master the code.
(Note that spaces between words and special characters are treated as letters in the burst count.)
Quotes Options (F6)

The F6 key (Pic) toggles a yes or no answer to the question of whether or not to send the Morse Code for each quote mark in the text. Some novels have a lot of quoted lines and it wastes time listening to the quote code all the time. You can turn this on or off as you desire.
The Modes (F7)

There are four modes in F-T-C and you toggle from one to the others by pressing the F7 key.
Mode 1 just sends audio tones to the headphone jack without turning any LEDs on or off. This Mode is good for code practice without a haptic device attached to your computer or it can be used with the amplifier-based vibra-tactile device.
Mode 2 sends both audio tones to the headphone jack and toggles the Screen Lock (SCR) LED on and off for each dit and dah of the Morse Code in the letters. The on and off signals are used to turn the vibra-tactile motor on and off to produce the tactile code.
Mode 3 sends both an audio tone to the headphone jack and toggles the Num Lock (NUM) LED on and off for the letters. This is an alternate to the SCR LED used in Mode 2.
Mode 4 toggles the SCR LED on and off for a dit and the NUM LED on and off for a dah so that two vibra-tactile motors can be used. Using two vibra-tactile motors may be a way to read the code faster.
Part 2 of this IBL will describe different haptic devices and explain which mode works for each one.
Bookmark (Save Preferences) (F10), Open the Menu (F11) and Exit (F12)


The F10 function key along the top of your keyboard bookmarks a text file name and the page you are on in the text. It also saves all of the setting changes you have made as described in the steps above. Each time you start F-T-C you will get the choice of whether to resume at the bookmark or select another text from the menu (Pic 2). You can select a new text, read it and exit without bookmarking it. When you start F-T-C again the original bookmark will still be there.
You also have the choice (press the F11 key) of opening a new text anytime without restarting F-T-C. Just press F11 and double-click on the text file name.
The F12 key closes F-T-C and exits.
You also have the choice (press the F11 key) of opening a new text anytime without restarting F-T-C. Just press F11 and double-click on the text file name.
The F12 key closes F-T-C and exits.
Navigation Keys
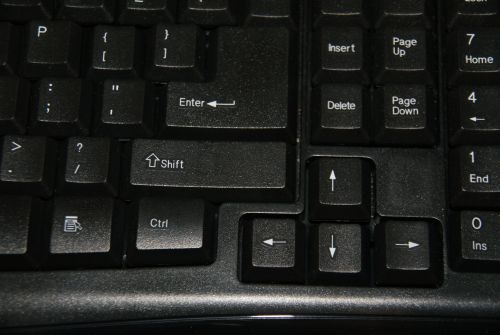
You move through the pages of the book with the PgUp and PgDn keys.
Once on a page, the up and down arrow keys change the line being translated.
Once on a line, the left arrow key will move you one burst back on the line (to relisten to a burst) and the right arrow key will move you one burst forward on the line.
(Again, note that spaces between words and special characters are treated as letters in the burst count.)
The space bar is always the "play" key in F-T-C. The space bar is what moves you along through the reading of the text. Each time you press the space bar you will be "sent" a burst of letters. If you have set the burst length (as described above) to "6", you will be sent 6 characters each time you press the space bar. You can hold the space bar down to get a continuous stream of letters along the line of text. You can change the burst length to get smaller or larger chunks of the text each time you press the space bar.
Haptic Devices

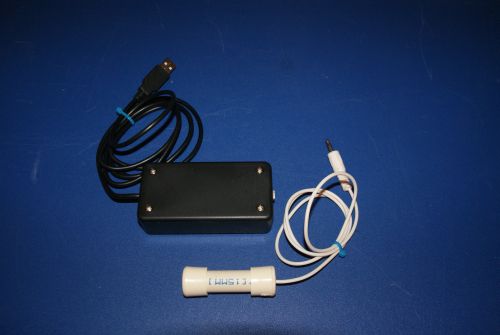
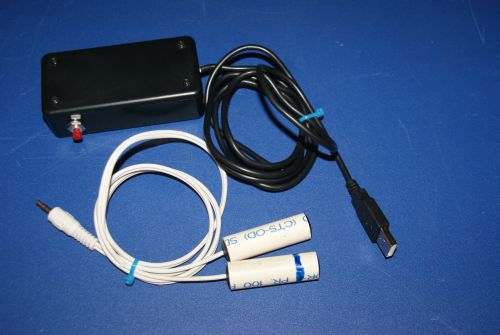
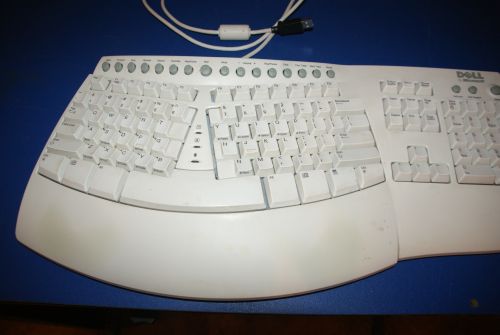
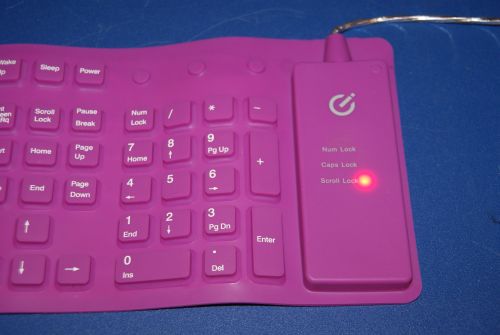
Part 2 and 3 of this IBL describe how to build and use a variety of haptic Morse code hardware devices. Some use the LED signals to turn the vibra-tactile motor in the device on and off to make the dits and dahs of the code (Part 2). Others amplify the tones and switch the vibra-tactile motor in the device on and off with those signals (Part 3). Either way can drive a vibra-tactile devices that you can hold or wear (or even sit on).
Pic 1 Shows the basic F-T-C LED relay box with a hardwired handheld vibra-tactile tip.
Pic 2 shows a jack and plug (removable) handheld vibra-tactile tip.
Pic 3 shows a F-T-C relay box with two handheld vibra-tactile tips, one for dits and the other for dahs. (This may make it possible to read faster.)
Pics 4 and 5 show keyboards with the vibra-tactile motor mounted inside.
These are all described in Part 2 of the IBL.
So let's get started and Feel-The-Code!
References and Thanks

I first started working on this project about a year ago when I saw the IBL written by "jamesh". He in turn had built on other IBLers. What a great community!
https://www.instructables.com/id/USB-controlled-mini-lava-lamps/
https://www.instructables.com/id/USB-controlled-mini-lava-lamps/