Fireworks Controller
by systemf92 in Circuits > Remote Control
244620 Views, 734 Favorites, 0 Comments
Fireworks Controller

DISCLAIMER:
The information contained herein is for the sole purpose of information and education. Build this project AT YOUR OWN RISK. I have NO responsibility whatsoever for any injury, death, legal issues, encounters with law enforcement, or damage to property of anyone operating or involved with using this fireworks controller. In no event will the author be liable for any loss or damage including without limitation, indirect or consequential loss or damage, or any loss or damage whatsoever arising from the use of, or in connection with the use of this firework ignition controller. Look up your local and state laws regarding pyrotechnics before starting this project and make your own smart decisions when it comes to using it.
Fireworks are dangerous, so watch what you are doing and don't do anything stupid with this. Be careful when handling explosives. Clear the area before launching the fireworks, check to make sure your battery is disconnected while wiring up the fireworks. Once again, build at your own risk.
Okay, now that that's over, on to the fun part!
Parts
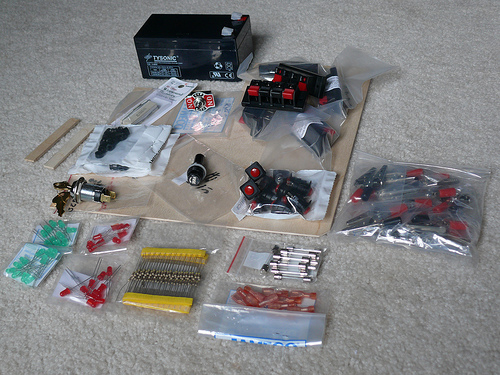

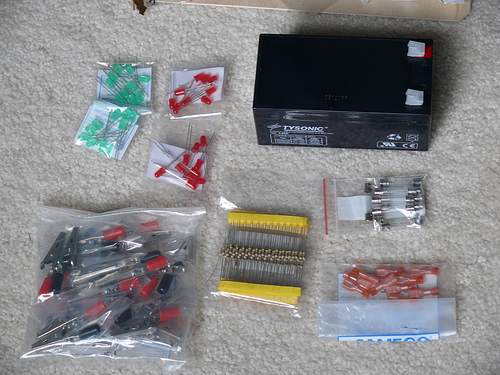
Here is the parts list. I bought most of the electronics from Jameco , but also bought things from Parts Express , Radioshack, and Michaels.
From Jameco Electronics
1- 12v Sealed Lead Acid Battery
1- SPST (Off-On) Keylock switch
1- SPDT (3 position On-Off-On) Toggle switch
24- LED mounting hardware
12- SPST ( Off-(On) Momentary) Pushbutton switches
12 - Red LEDs
12- Green LEDs
48 - 470 ohm Resistors
12- Alligator clip pairs (24 total)
2- battery clips
1- 1/4" fuse (there is no specification on the fuse for right now, the original fuse value had not worked and I am currently figuring out what amperage fuse to use. Sorry for the inconvenience. You can still build the controller, since it still works without a fuse. Use a short piece of wire to bypass the fuseholder for now.)
From Parts Express
6- Four conductor speaker terminal
Check out this page for different types of terminals. This controller's circuit is expandable, so it can have as many channels as you want it to have, so be creative!
From Michaels or any craft store
One 12 x 12 piece of wood panel - must be 1/8" thick - available at Michaels, possibly at hardware stores
Other Parts
> A case to put it all in -I got mine at a thrift shop for $5.00. It was used as a carrying case for an old VHS video camera.
> 12 short wood screws (that fit inside speaker terminal mounting holes but can still reach the wood panel below them)
> Also, you will need wire for connecting the panel components. I used 22AWG solid wire, but any wire from about 22-18AWG should work fine.
> You will also need long speaker wire or any insulated 2 conductor wire. How much depends on how much you can afford or how far away you want to be from the fireworks. Both Lowes and Home Depot sell some cheap wire in bulk and in spools. Wherever you buy it, buy it in bulk to save money. We're not looking for audio quality here. I used 18 gauge lamp wire, which I bought in a bulk spool and cut into smaller lengths.
Not every one of these parts has to be used, feel free to experiment or use different switches, buttons, terminals, etc. Make yours unique to suit your needs, you don't have to build yours like mine, but you can.
Hardware Needed
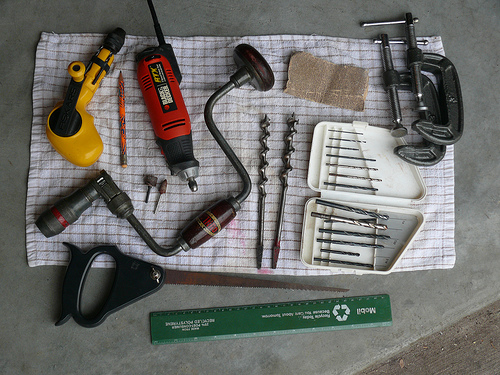

- Drill (hand or power)
- Ratchet brace (or a bigger drill). I have one of these, so I used it. You don't have to use this.
- Auger bits (spiral shaped large drill bits)
- Drill bits - check with the place you bought your components from for hole diameters and dimensions.
- Dremel or other rotary tool
- Dremel bits (sanding)
- A small saw (for cutting the plywood)
- C-clamps
- Screwdriver
- Pencil
- Ruler
A drill press would help to cut the holes in the panel, but I don't have one of those and you can still cut the holes with a regular drill.
If you don't have the right size drill bit for all of the panel-mounted parts you can use a dremel to widen the holes like I did.
Electronics Tools
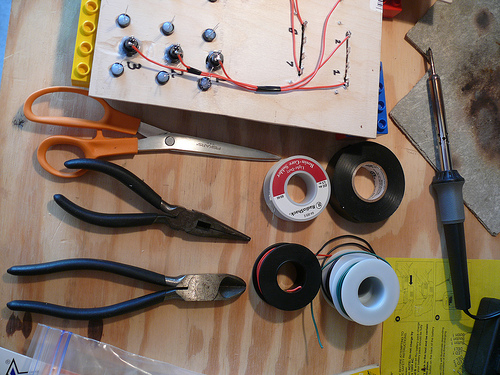
- Soldering iron
- Rosin-core solder
- Electrical tape
- Needle nose pliers
- Wire cutters
- Scissors
- Helping hands (or build your own)
Designing a Template
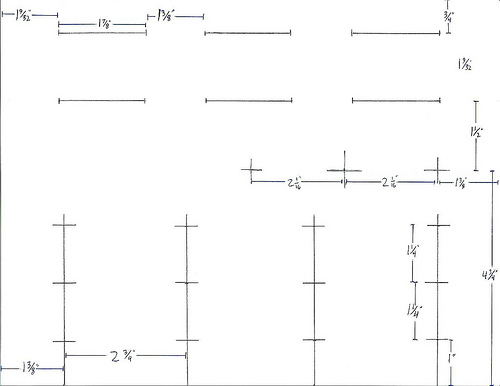
Start with arranging the speaker terminals, which I put on top in two rows of three. They have an outside dimension of 2-3/4" x 15/16".
Next came the toggle switch, key switch, and fuse holder. I centered the toggle switch horizontally on the board right under the speaker terminals. The key switch is to the right of the toggle switch, and the fuse holder is to the right of the key switch.
Underneath these main switches are the pushbutton switches and LED status indicators.
The buttons I arranged in 4 columns of 3 buttons. Each button also has two LEDs; one on either side. I did not include the LEDs on the template, because I just eyeballed where to put them. You also might want to arrange them differently on yours, by putting the LED pairs under the switch or above them instead of on opposite sides.
Attached is a PDF template so you can print it out yourself. Print it and tape it over the panel you choose to use, and you can drill/saw through it to get everything properly lined up if you want to match my layout.
Downloads
Cut the Wood
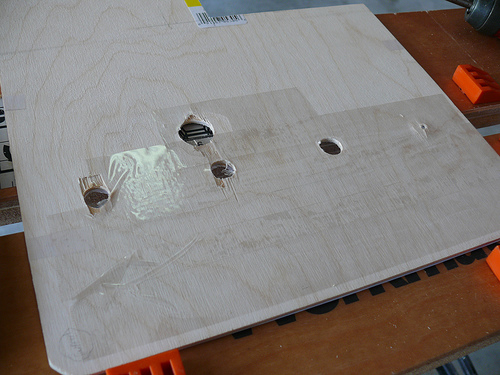
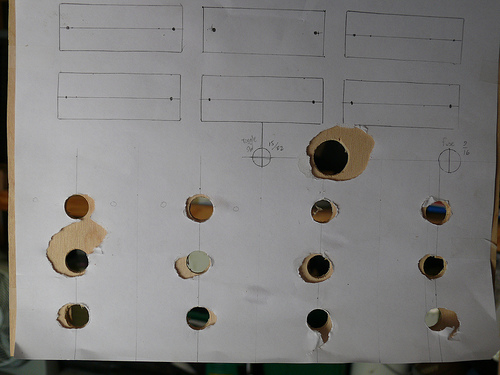

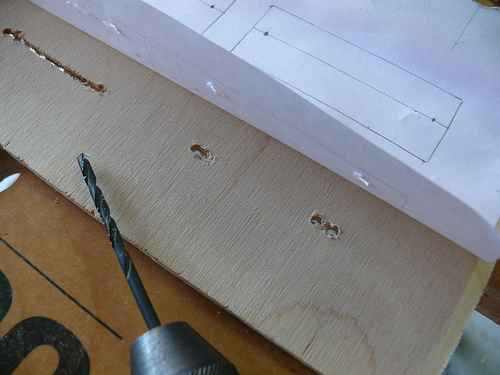
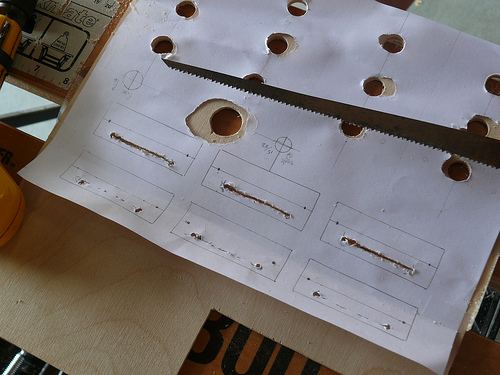


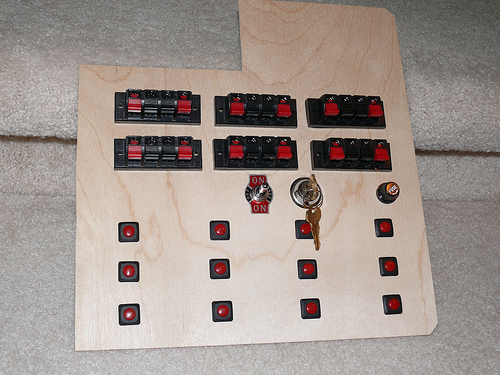
One thing I do suggest is to cover the back with tape to prevent splintering of the wood since you are working with such thin material. I also drilled halfway through one side and then flipped it over to drill all the way through the other side to keep it from splintering even more.
After that you should drill the toggle switch and fuse holder holes (I didn't do this in order, don't know why not). I don't have the correct size drill bit, so I used the dremel to widen these holes to the correct size.
After you get those holes drilled, start cutting the slots for the speaker terminals. I used a drill to drill pilot holes at each end of the line, then a small saw to cut the wood in between them. The saw cut a wide enough line to slip the thin metal tabs of the speaker connectors through them. Use a dremel sanding bit to smooth out all the holes and cuts and get rid of rough edges and splinters.
After this you can test fit the components to make sure everything is lined up well and fits. Take everything back out when you are done, because there's more to do.
Drill the LED Holes

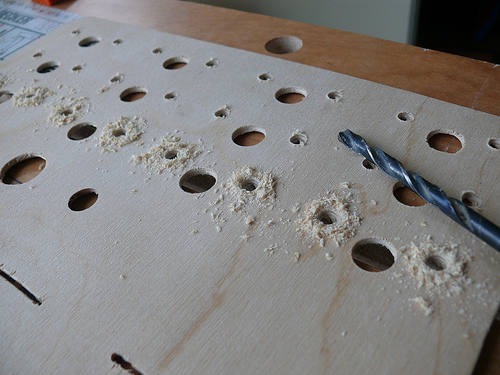


Arrange them however you want to on yours (below the buttons, above them, on one side of them, etc.)
After you have all the holes drilled, you'll have to sand down the backsides of them so that the back parts of the LED mounts can snap on to the front parts. The wood is too thick do do this without sanding it down. I used the barrel-shaped sanding bit for the dremel to do this, by pushing down on one side, rotating 180 degrees and doing it again (see pictures). If you can find a different way to mount the LEDs you might not have to do this.
Now that all the woodworking is done, we move on to mounting the panel's electronic components.
Mount the Components
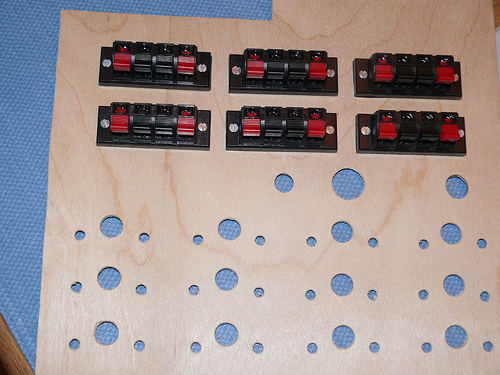

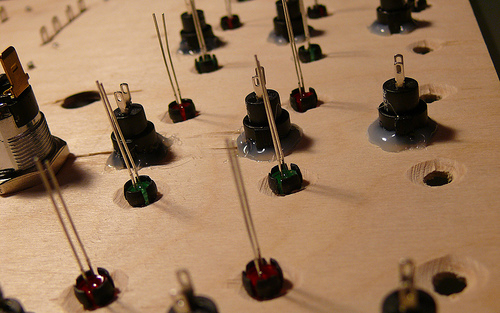


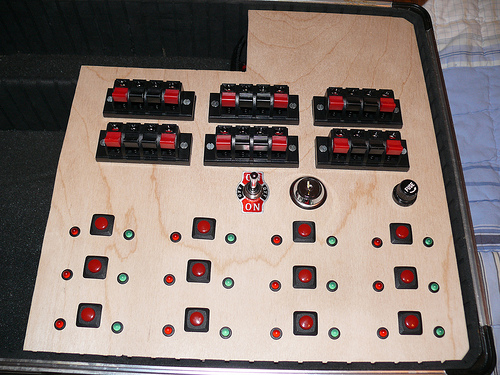

Grab your 12 screws and your screwdriver, then place each speaker terminal block in each of the six slots on the top of the wood. If one or two don't quite fit through the slot, swap them out with another one. Some of the speaker terminal soldering tabs were more spread out than others on mine, and they all ended up fitting in one slot or another.
Screw in each speaker terminal with two screws, then use a dremel cutoff disk to grind down the part of the screw that sticks out on the other side so it won't cut through the wires that will be on the back.
After that, I installed the key switch, toggle switch, and fuse holder. All of these components had nuts on the back that would secure them through the mounting holes. Tighten them in with pliers or a wrench, but be careful not to splinter the wood; they don't have to be excessively tight, just tight enough to not spin when you turn the key or flip the switch, etc.
The pushbutton switches had tabs on the sides that put pressure on the sides of the hole and held them in. Reinforce them with hot glue on the back to better secure them and keep them from spinning in place.
Next, install the LEDs. Gather all the LED mounts and pair the tops with the bottoms. The tops are the ones with four tabs that come down, and the parts that go on the back of the panel are the plain rings of plastic.
To mount the LEDs:
1. Slide the top part of the mount over the top of the LED until it snaps into place with the four tabs past the bottom of the LED (not the leads, just the light)
2. Mount the LED on the board. Depending on the size of the hole it will snap through and stay there.
3. Flip the board over
4. Take the bottom part of the mount (the ring without tabs), and slide it over the LED leads and onto the top part of the LED mount. Due to the thickness of the wood, it won't completely snap onto the top part of the mount, so put a good dab of hot glue over the whole thing.
You also might want to label the back of the panel to help you remember what's what when you wire it.
Now that you have all the components mounted, we can continue on to the electrical wiring.
Wiring the Components: Part 1
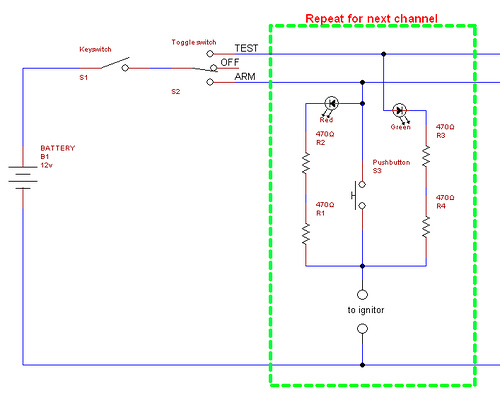
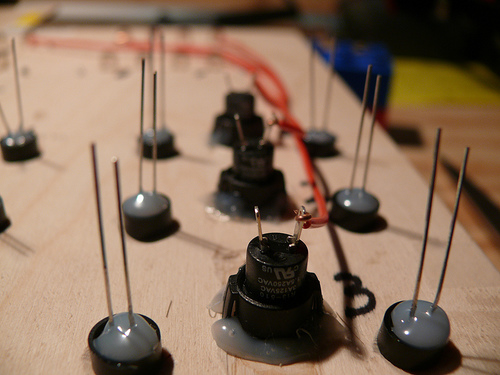


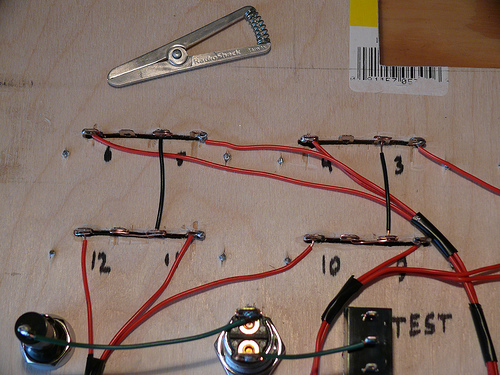

I wired the push button switches to the speaker terminals first, running wire from one side of the pushbutton switches to each of the corresponding speaker terminal tabs. See the schematic for details.
After wiring these, I connected the fuseholder to the keyswitch and the keyswitch to the middle pole of the toggle swtich.
Next, connect all of the negative tabs of the speaker terminals (the pair in the middle) to each other and then together to a single wire leading to the quick connect tab that will later attach to the battery.
See the photos for more detail (they are in order). There is also the schematic file that made the image below. It was made in TinyCad.
Downloads
Wiring the Components: Part 2


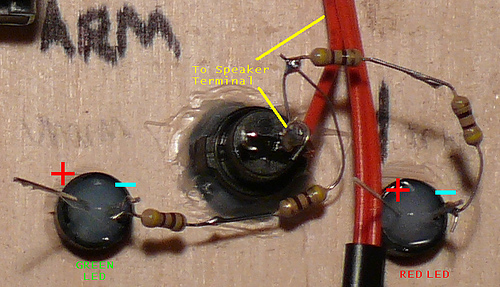
Once all 24 pairs of resistors are soldered together, you can solder them in between the negative side of the LEDs (the shorter lead) and the side of the pushbutton switch attached to the speaker terminal for each channel. We'll be doing both the green and red LEDs in the same step, since they both connect to the same place.
To make things easier when soldering the resistors to the LEDs, where they connect to the pushbutton switch, you can solder the resistors for the red LED to the switch tab, and then solder the green LED resistors to the red LED resistor lead so they are not both attached directly to the small pushbutton switch tab. A diagram is included in the photos below to help clear this up since it is a bit confusing.
Wiring the Components: Part 3 (Armed Circuit)
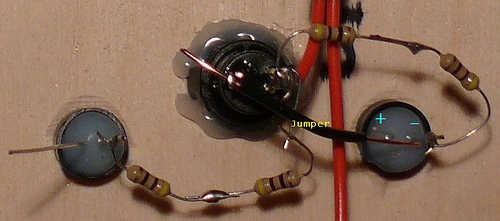
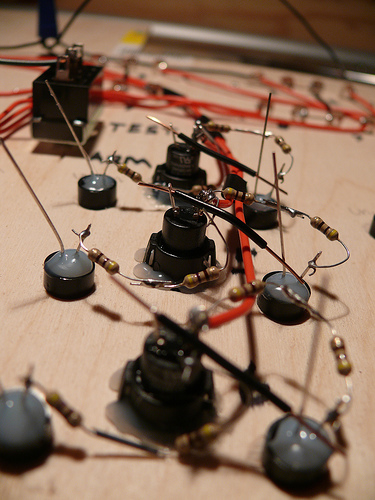

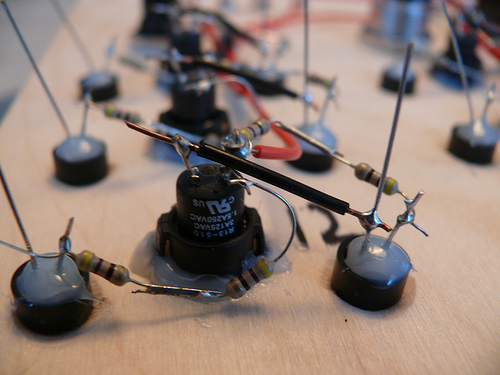
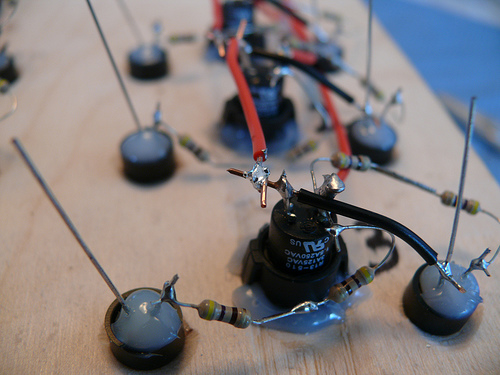
This will be achieved through the use of a short jumper connecting the currently unused tab on the pushbutton switch to the positive lead of the LED. The negative side of the LED is already connected to the speaker terminal via the resistors to the wire leading to the terminal blocks.
Cut 12 short lengths of wire, stripping each end about 1/4". Slide one end all of the way through the hole in the pushbutton switch tab, and lean the other against the positive lead of the red LED. Solder the jumper to the pusbutton switch tab and the positive lead of the LED, then snip off the extra wire on the LED side only. Leave the extra sticking out through the switch tab, since we will be connecting the main armed circuit to it. Do this for each of the 12 channels.
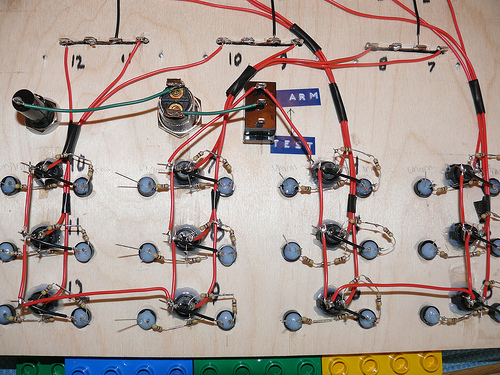
Now it's time to connect all of the individual channels to each other and to the armed circuit. Cut 8 more wire jumpers, once again stripping 1/4" off of each end. Use red wire if you want to keep things visually organized. The red jumpers will be connected between the extra wire on the black jumpers so that the left sides of the pushbutton switches are all connected to each other.
Connect all of the channels to each other in each column, then bridge each half of the columns together. The middle two will have a second jumper on the top channels (4 and 7) in each column that will run directly to the toggle switch. See the last picture below to clarify this.
Now the armed circuit is complete.
Wiring the Components: Part 3 (Test Circuit and Final Wiring)

Cut 8 short jumpers out of black hookup wire, stripping 1/4" off of each end, and solder them between the positive leads of the green LEDs in each column. Connect the first two columns together and the second two columns together using a longer jumper along the bottom of the columns. Then use jumpers to connect each half of the channels to the lower, unused tab on the toggle switch. This is the same arrangement as the armed circuit.
The last thing to wire is the positive connection to the battery. This will go directly from the fuseholder to a quick connect terminal and then to the battery, since everything past the fuseholder is already wired and ready to go.
Testing Your Wiring

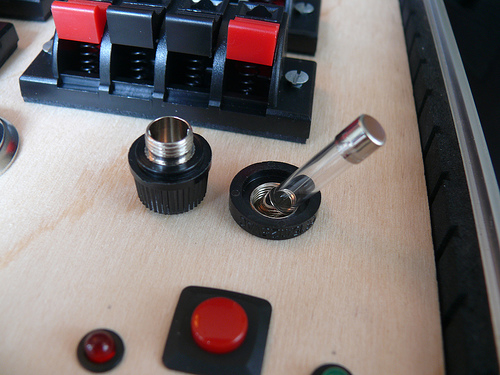
Install a fuse in the fuseholder and attach the negative lead (that goes directly to the speaker terminals) to the negative connection on the battery and the positive lead (that goes to the fuseholder) to the positive connection on the battery.
To test my panel, I hooked up a short length of 2 conductor wire (2 ft or so) to the board, and on the other end just wrapped a strand of steel wool between the wires to use as a test. This way I could make sure the resistor values were correct for the LEDs (to not ignite the wire in test mode, but do so in armed mode) and that the steel wool burned up when the button was pressed.
Once you have verified that all LEDs operate properly and each channel successfully burns the steel wool in Armed mode only, disconnect the battery and flip the panel upside down. Cut off all excess LED lead sticking up past the solder connection on the jumpers and check to make sure there aren't any wires crossed that shouldn't be.
Find a good spot to place the board in the metal suitcase, or whatever you have decided to place the controller in, and make sure the battery is securely attached inside of the case.
The final step is to label it, and you're ready for some remote fireworks detonation action.
Label the Front Panel

I just used a Dymo embossing label maker, but you could also write it on the wood with a marker if you want to. I labeled each speaker terminal pair, each pushbutton switch, and the main switches (Toggle and keylock). See pictures below for layout.
Ignition Wires


Strip off about 1/2" on each end of the 12 wires, and solder the alligator clips on one end, or wrap the wire around the screw on the alligator clip. Make sure this connection is secure and wrap it in electrical tape. Polarity does not matter for the ignition wires, neither does the color of the alligator clip, it just has to complete the circuit with the ignitor.
Finished Board

- make sure battery is disconnected and all switches are on the off position
- connect all of the ignition wires, one per channel:
2- On the other side connect an igniter using the alligator clips, one on each wire.
- connect the battery
- insert key into the main on/off keyswitch and turn to on
- turn toggle switch to test, make sure green lights are turned on for each channel that you have something connected to, if not check your connections and make sure the ignitor is securely attached to the launch wires.
- clear the area around the fireworks and make sure you are at a safe distance from people, animals, cars, houses, trees, dry grass, etc. (the normal precautions)
- once all connected channels have green lights, flip the toggle switch to arm
- the red LEDs will turn on, and at this point pressing a pushbutton will supply full power to the ignitor, setting off the firework.
- once a firework is detonated, if the ignitor burned completely, the red light will turn off and you will know that that firework has already been used.
- Turn the toggle switch to the off position
- Turn the keyswitch to the off position and remove the key (put it in your pocket)
- Disconnect the battery
- Unplug each of the long wires from each channel that lead to the fireworks
- Dispose of burned ignitors
Acknowledgements and Notes

Also, the construction of the actual igniters is covered in a separate instructable located here.
I would like to thank the following people for their answers, explanations, and contributions to this project:
- Jon Witucki for the inspiration to make this controller and info on speaker terminals
- everyone at electro tech online, especially eblc1388 for his schematics and electronics knowledge
- tobyfan57 for making me realize what wasn't clear on the instructable to start with and finding a few inconsistencies in the steps
- Also, thanks to TinyCad for keeping their program open source and easy to use so I could make my schematic