Floatable Pool Cooler
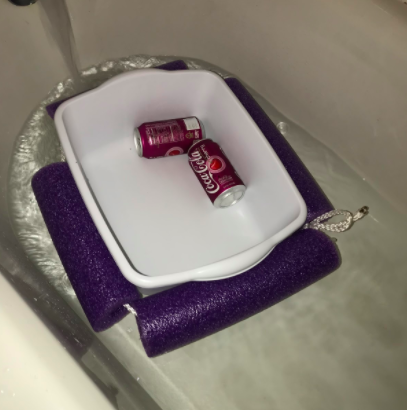
Is mom nagging you about running through the house all wet from being in the pool-- when you just want to get a drink?
Is your drink all warm from sitting in the sun on the table next to the pool?
Do you ever wanna just enjoy a refreshing, cold, beverage while staying cool in the pool?
THE FLOATABLE COOLER FIXES ALL OF THESE PROBLEMS!
Why is this Floatable Pool Cooler worth building?
*Takes about 5-10 minutes to build
*Inexpensive
*Reusable
*Easily accessible/convenient materials
Gather All Materials
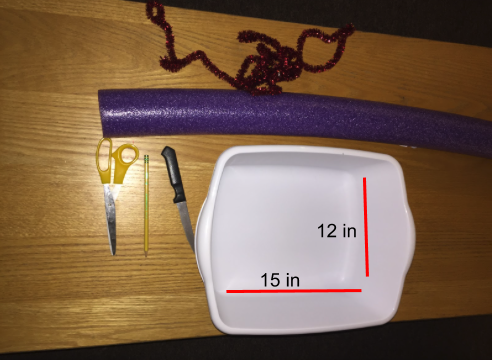
- Materials Needed:
- (Target Prices)
- Mid-size plastic container (around 15 x 12") - $1.72
- Foam pool “noodle” with hole through center - $1.99
- Rope/string - $2.99
- Serrated knife- $9.99
- Pencil/pen- $2.49
- Scissors - $2.99
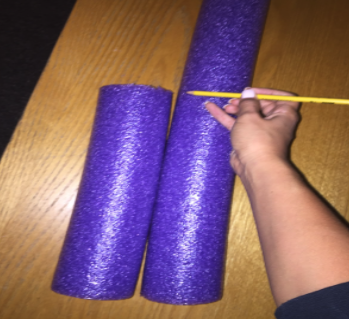
Measure the 12" & 15" Noodle
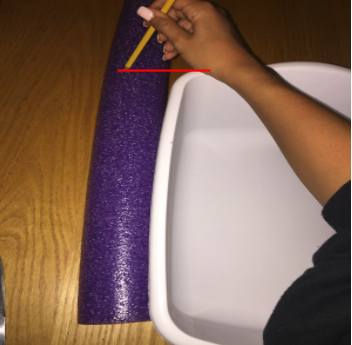
- Place the noodle directly next to the 12" side of the container, so that they are touching
- Draw a horizontal line with pen/pencil on the noodle where the container ends (red horizontal line in picture)
COMPLETE THE SAME PROCESS FOR ADJACENT 15" SIDE
- Place the noodle directly next to the 15" side of the container, so that they are touching
- Draw a horizontal line with pen/pencil on the noodle where the container ends (red horizontal line in picture)
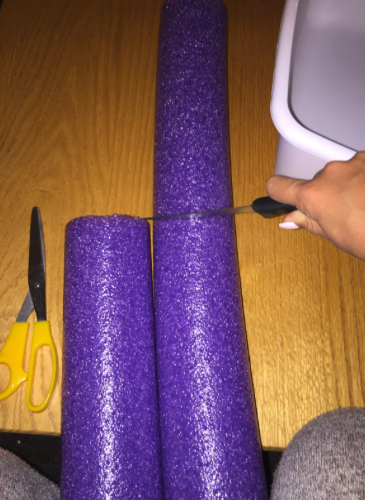
Cut the 12" & 15" Noodle
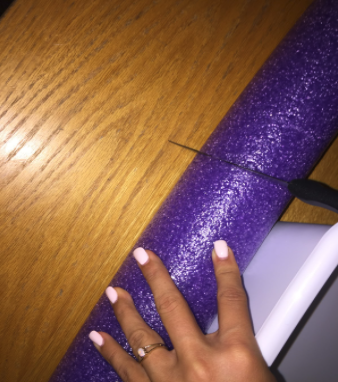
- While holding the foam noodle with one hand, cut along the pencil line with the serrated knife
- Complete the task ^ above for both the 15" and 12" marks on the foam noodle
- Resulting in 2 pieces of foam noodle --> one that is 15" and one that is 12" long
- SAFETY CONSIDERATIONS:
- Hold foam noodle firmly so that the knife does not slide
- Keep hand at least 2" away from the knife- while holding the foam noodle
- SAFETY CONSIDERATIONS:
Cut the Noodle Into 4 Pieces
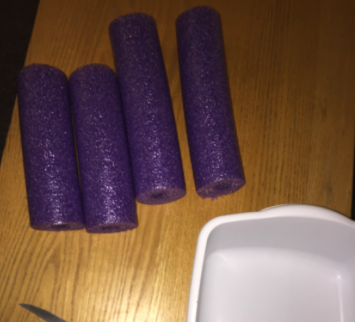
- Place the 12" piece of foam noodle next to the leftover (unused) noodle
- Draw a horizontal line with a pen where the 12" noodle ends
- While holding the noodle with one hand, cut the noodle with the serrated knife- along the pencil line
- Resulting in 2 pieces of noodle that are the same length (about 12")
- Complete the steps above for the 15" piece of noodle
- Place the 15" piece of foam noodle next to the leftover (unused) noodle
- Draw a horizontal line with a pen where the 15" noodle ends
- While holding the noodle with one hand, cut the noodle with the serrated knife- along the pencil line
- Resulting in 2 pieces of noodle that are the same length (about 15")
Insert Rope Through Holes of Noodles
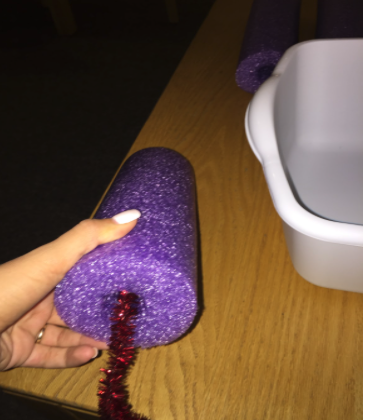
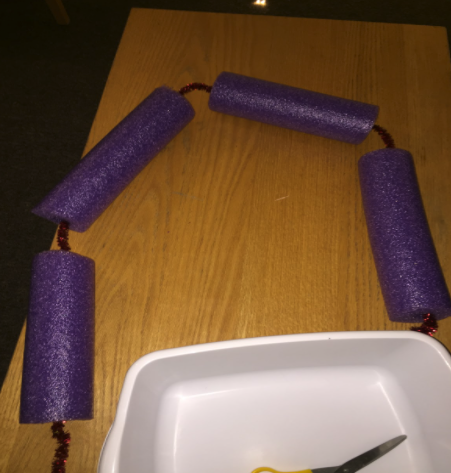
- Place the noodles in a line so that the 2 circular ends are touching in the following order
- 15", 12", 15", 12"
- Next insert the rope into the 15" piece of foam noodle and push through until the rope appears on the other end of the noodle
- Now push the rope from the 15" noodle into the 12" noodle and continue until all 4 noodles are placed onto the rope
Wrap the Container With Noodles & Tie Knot
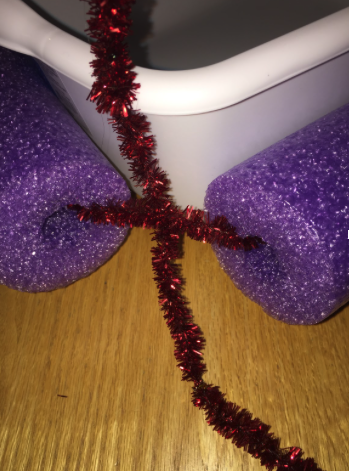
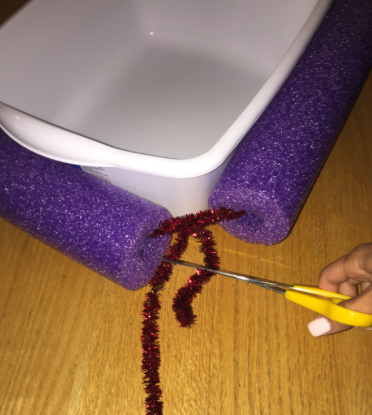
- Align each side of the container with the properly measured noodle
- The two 15" sides of the container should have the two 15" pieces of noodle placed tightly next to it
- The two 12" sides of the container should have the two 12" pieces of noodle placed tightly next to it
- Now pull the rope from both ends around the container tightly so that the foam noodles are firmly pressing against the container
- Now it is time to tie the knot
- Cross the 2 ends of the rope- making an X
- Using your right hand pull the bottom end of the rope toward the top loop and then pull it down so it completely wraps around the cross in the X
- Now pull both ends of the rope
- --> May need to complete this process twice if rope is thinner
- Now it is time to tie the knot
Fill Container With Ice & Drinks
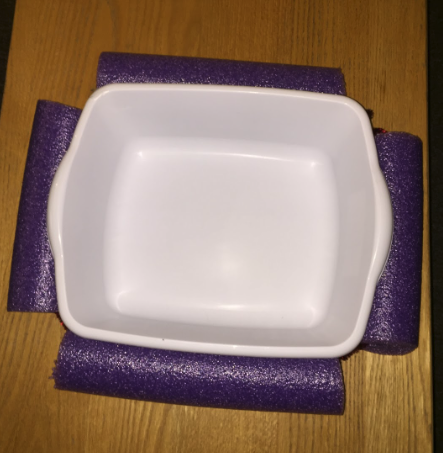
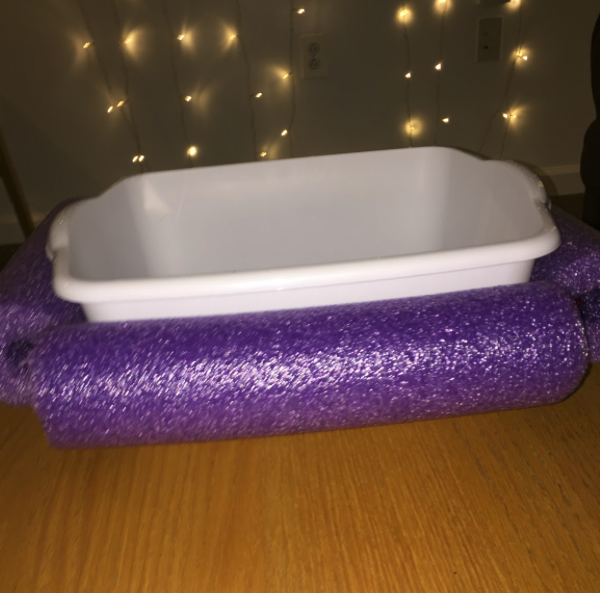
The main structural portion of this process is done!
- Add ice & drinks inside the container
Enjoy your summer with a cold beverage in the floatable pool cooler!