FloraVox: Smart Vase Arduino & Creative Coding
by aleynakkan in Circuits > Arduino
332 Views, 0 Favorites, 0 Comments
FloraVox: Smart Vase Arduino & Creative Coding



This project was created as a course assignment at the California State University, Long Beach; taught by Dr. Behnaz Farahi: DESN 586 Human Experience and Embodied Interactions Studio.
Group: Aleyna Akkan, Cho Chen, Zhenming Qiao
Supplies

- A computer with Arduino IDE installed
- 3D Modelling
- P5JS for interaction
- 3D printing for model
- Hanging holes
- Drain
- A4 Paper
- Arduino
- LED Strips
- Moisture sensor
- Projector
Problem: How Can We Increase Communication Between Plants and Their Owners?
Problem:
It is difficult to create communication between plants and their owners. To have a healthy plant, it's important to understand its needs. But sometimes this can be especially challenging, particularly when they need water. Busy lifestyles can make it difficult to understand a plant's needs. According to that, this project aims to create better communication between humans and their plants.
Solution:
This research project delves into developing a next-generation smart indoor plant machine that fosters healthy plant growth and bridges the communication gap between plant owners and their greenery. This innovative system will integrate automation, personalized features, and a flexible design to address plant care challenges while promoting user engagement and a deeper understanding of plant needs.
How to measure it:
We assessed this issue with user feedback after using the product. We did observational research and asked questions about, how they would like to communicate with their plants. We wanted to increase their communication so that they could create a strong bond together. We inquired about the accuracy and error rate of the moisture sensor, as well as the user-friendliness of the interactive features. We also asked if the digital screen helped them communicate better and if the design caught their attention and affected their communication with their plants. The answer to all these questions was yes!
Story Behind the FloraVox

Floravax is a system designed to help you communicate with your flowers more aesthetically and enjoyably. Research shows that people find it difficult to care for plants. This is because they are not sure when to water them and therefore cannot meet the needs of their plants. This situation prevents many people from wanting to own plants, even though they would like to have healthy communication with their plants.
So what if I told you that communicating with your plant is now much easier? With Floravax, your plant can tell you when it needs water! You can also decorate your home while using this system. With Floravax's 3 different designs, you can use your plant as a flower and light source. Thus, you can both communicate with your plant and help beautify its surroundings!
Benefits of Floravox:
Floravox;
- Encourages regular interaction with plants, improving plant care.
- Serves as a daily reminder of plant needs through visual cues.
- Combines decor and functionality, appealing to aesthetics while serving a practical purpose.
- Reduces the likelihood of plant neglect.
- Provides a calming, interactive element to homes.
- Educates owners on proper plant care, enhancing their gardening skills.
Are you ready to establish a whole new communication with your plants with Floravax?
Starting With Curved Folding


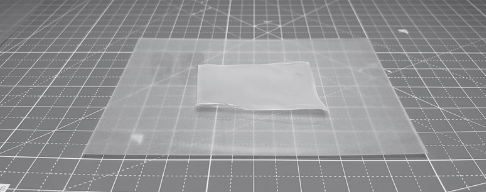

Curved folding combines elements of both folding and bending a sheet, creating a surface composed of both curved creases and smooth, developable surface patches.
So we started with understanding the material’s behaviour. We used different materials to understand curved folding better, such as different fabrics, 3D printing, paper, leather and foam board.
Step 1: Material
Heat Shrink Plastic Selection
We selected heat-shrink plastic sheets for this project. Here's what we used:
- Heat shrink plastic sheet (sanded, semi-transparent)
- Size: Approximately 7.9 x 5.7 inches (20 x 14.5 cm)
- Thickness: 0.3 mm
- Features: One side frosted, one side glossy
Step 2: Heating Tool
We used a heat gun to manipulate the heat-shrink plastic. Here are the specifications of the heat gun we used:
- TDAGRO Heat Gun for crafting (1800W)
- Variable temperature control: 122℉ to 1202℉
- Two temperature settings
- Four nozzles
- Fast heating (1.5 seconds)
- Blue colour
Starting With Sketches


We started with getting inspirations from Midjourney. Here are ideas we generated using Midjourney. Then we created some sketches. We digged into different areas, but focus mainly on the lamp.After the sketches, we modelled it with 3D software.
Exploring Material Options and Facing Challenges


After experimenting with various materials, we encountered challenges in aligning our material choices with our problem-solving goals and effectively integrating curved folding techniques. Each material presented its own limitations:
- Paper: Shaping paper proved to be a difficult task, and the material lacked the desired durability for our project.
- Plastic Sheet: While plastic sheets offered some potential for creating a lamp structure, we felt that our efforts were better directed towards addressing a more pressing problem.
- Fabrics: The different fabrics we explored also proved to be insufficient in achieving the desired shapes and forms.
Despite these material-related setbacks, we remained committed to our pursuit of innovative solutions. These initial trials served as valuable learning experiences, highlighting the importance of carefully considering material properties and their suitability for specific applications.
We recognized that our initial goal of solely utilizing curved folding techniques might be too restrictive. Instead, we began to explore a broader range of design possibilities, embracing a more flexible approach that allowed us to combine curved folding with other techniques.
This shift in perspective opened up new avenues for exploration, enabling us to move beyond the limitations of individual materials and focus on the overall functionality and problem-solving potential of our designs.
Arduino Schematics and Working With Ardunio
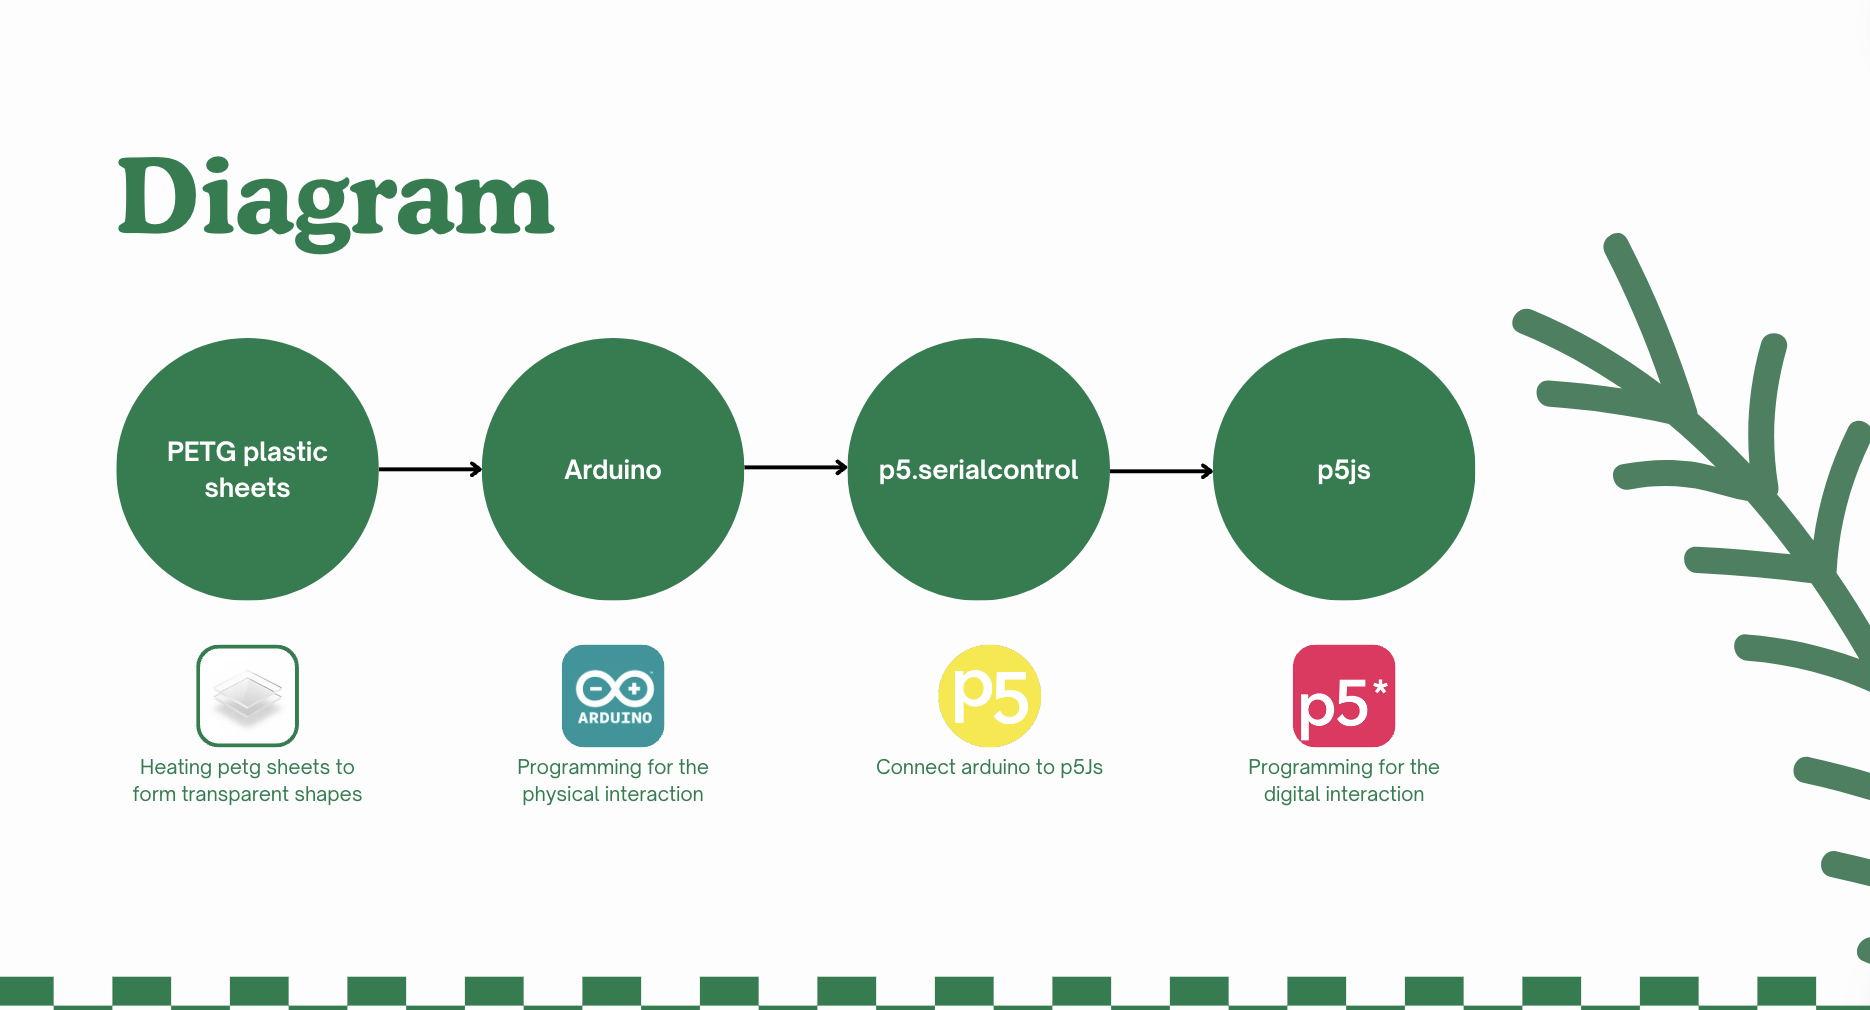
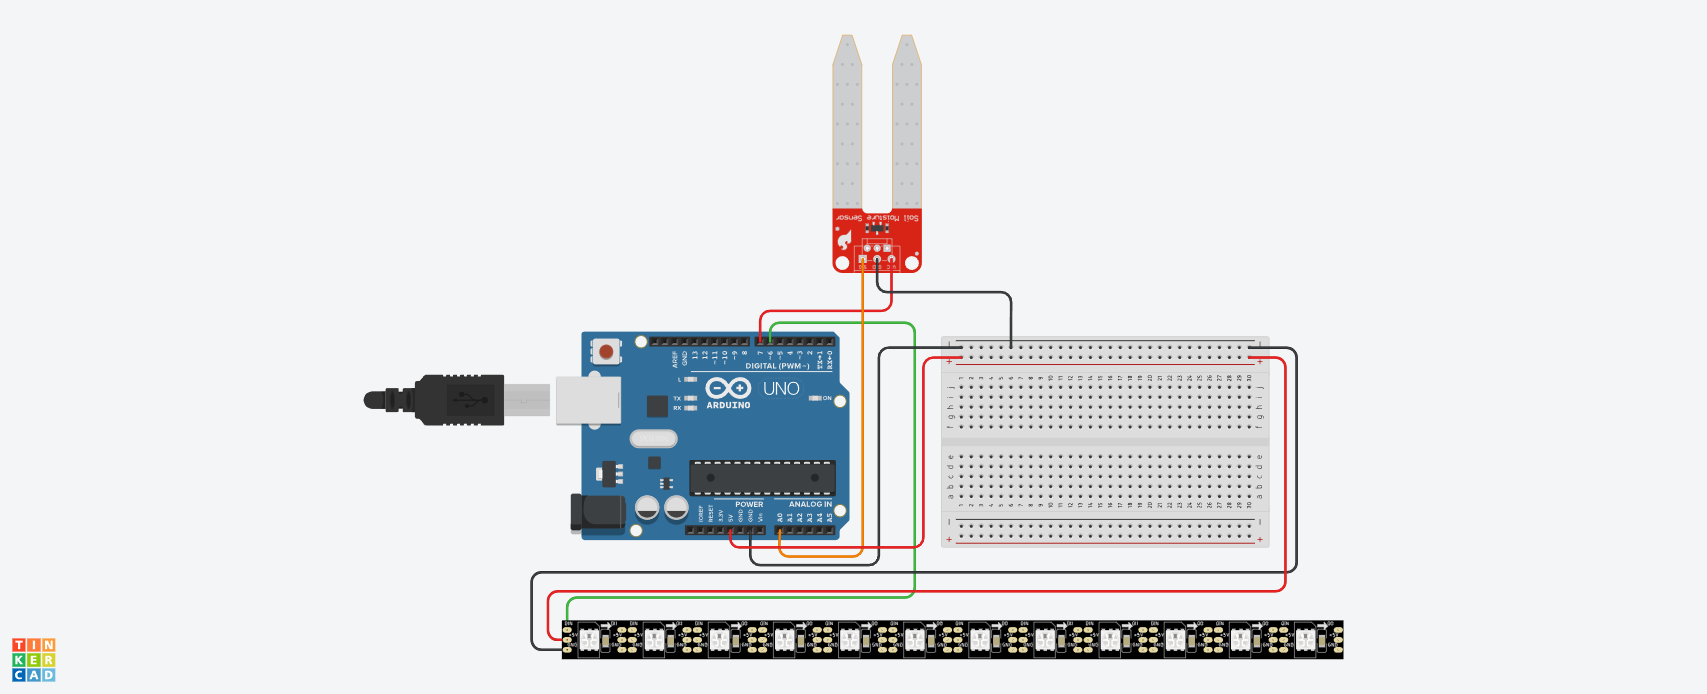
As a first step, we decided to go with Arduino. Firstly we choose which sensor are we planning to use. Moisture sensor and LED Strips. Moisture sensors helped us to understand the level of the water in the soil. We connected it with the LED Strips. For red LED, it means the plant needs water. And when we put water, the plant get yellowish, which means that the plant is fine.
If you would like to create a communication with moisture sensors and LED Strips, firstly you need to get the sensor and LED.
01- Download Arduino
02-Connect the Arduino Uno to your computer using a USB cable.
03- Write the code which is in here.
04-Make sure you connect the moisture sensor and LED light strips to your Arduino. Make sure to follow the schematics, so that you can create a connection between LED and moisture sensor. Because they need to work together.
04-Upload the program to the Arduino Uno. Make sure that everything looks fine and the data is working.
Combining Arduino With Model


Testing the Arduino-Coded Project on the Draft Model
We began testing our Arduino-coded project on the draft model, utilizing soil to simulate real-world conditions. Our objective was to have a red LED illuminate when insufficient water was detected and a green LED illuminate when adequate moisture was present, effectively indicating the plant's hydration needs. As previously mentioned, we employed a moisture sensor and LEDs for this purpose, with the LED colours controlled by the Arduino.
Our testing process involved two stages:
1. Initial Testing with Water:
- We initially tested our code using water to ensure the proper functioning of the moisture sensor and LEDs.
- This initial testing phase allowed us to refine the code and verify that the system accurately responded to varying water levels.
2. Testing with Soil:
- Once the initial testing was complete, we transitioned to using soil to simulate the real-world environment the plant would encounter.
- This testing phase presented a unique challenge: the extended time required for the soil to dry out sufficiently between waterings.
- To address this challenge, we adopted a methodical approach, carefully monitoring the soil moisture levels and adjusting our testing procedures accordingly.
Through this rigorous testing process, we successfully validated the functionality of our Arduino-coded project on the draft model, paving the way for further refinement and optimization.
Creating Vast


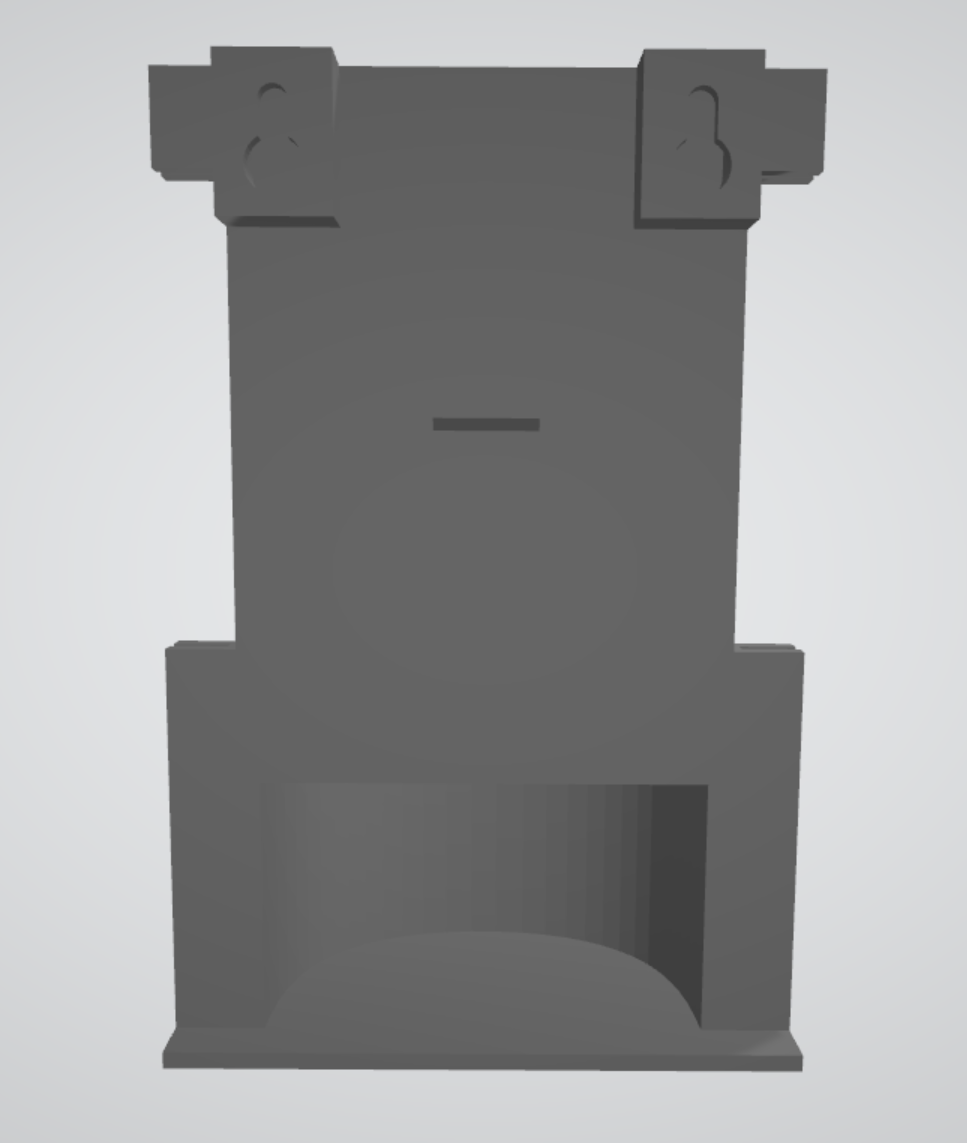
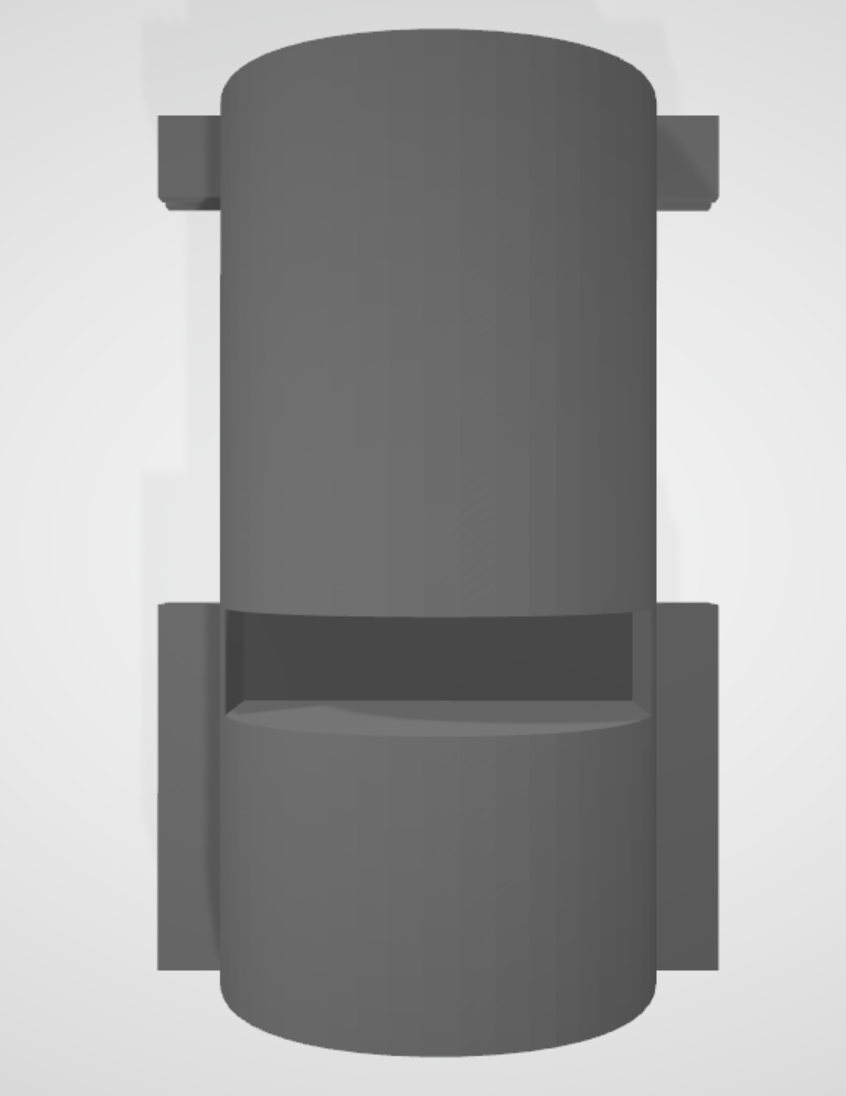

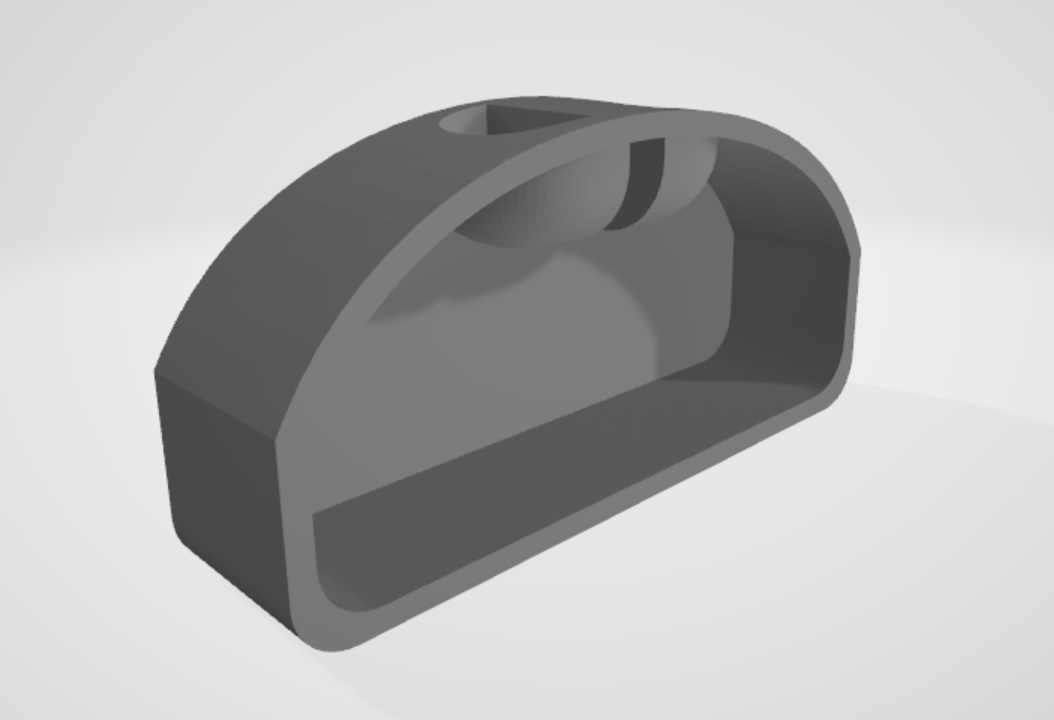


We Used Adobe Fusion for 3D Modeling
For 3D modelling, we utilized Adobe Fusion. After sketching the designs, we printed them using a 3D printer. Prioritizing functionality, we tested the first printed product with water and sensors. This allowed us to evaluate both ourselves and the model we created before proceeding to the final prototype.
Here's a more detailed breakdown of the process:
1. 3D Modeling with Adobe Fusion:
- We employed Adobe Fusion, a versatile 3D modelling software, to create detailed digital representations of our design concepts.
- This software enabled us to precisely define the dimensions, shapes, and features of our product, ensuring a seamless transition from concept to physical prototype.
2. 3D Printing and Initial Testing:
- Once the 3D models were complete, we utilized a 3D printer to bring our designs to life.
- The initial printed product served as a crucial testing ground, allowing us to evaluate the functionality of the water distribution system and sensor integration.
- This early testing phase proved invaluable in identifying potential design flaws and refining our approach before finalizing the prototype.
3. Refining the Design:
- Based on the insights gained from initial testing, we meticulously refined our design, making adjustments to optimize water flow, sensor placement, and overall functionality.
- This iterative process ensured that the final prototype met the project's objectives and delivered the desired performance.
By following these steps, we effectively utilized Adobe Fusion for 3D modeling, conducted thorough testing with an initial printed product, and refined our design to create a successful final prototype.
Creating Interaction for Communication


For the interaction part, we asked people how we increase the communication between plants and their owners. Firstly we wanted to create flow as an interaction. In our first prototype, when you get close to the sensor, the flow starts to create flowers. For the second prototype, according to people's feedback, we wanted to integrate emojis with flows, so that we created better communication with people.
For this project we used P5JS.
First, you need to open the P5js library.
01-Go to editor mode
02- Write your code
03-For flow interaction we used the code which is below:
let serial;
let data;
var points=[];
var mult;


function setup() {
  createCanvas(windowWidth, windowHeight);
  background(30);


var density = 15
  var space = width / density
  for (var x = 0; x< width; x+= space){
    for ( var y =0; y< height; y+= space){
      var p = createVector(x,y)
      points.push(p)
    }
  }

      serial = new p5.SerialPort(); // make a new instance of the serialport library

  serial.on('connected', serverConnected); // callback for connecting to the server
  serial.open('/dev/tty.usbmodem1101');
  serial.on('data', serialEvent);     // callback for when new data arrives
  serial.on('error', serialError);    // callback for errors
  serial.on('close', portClose);      // callback for the port closing


}


function serverConnected() {
  console.log('connected to server.');


}
function serialEvent(){
      data= serial.read();
      console.log(data);
}
function serialError(err) {
  console.log('Something went wrong with the serial port. ' + err);
}

function portClose() {
  console.log('The serial port closed.');
}
  function printList(portList) {
  // portList is an array of serial port names
  for (var i = 0; i < portList.length; i++) {
    // Display the list the console:
    console.log(i + portList[i]);
  }

  }


function draw() {
  noStroke();
 mult = map(data, 10, 255, 0.003, 0.01);
  for (var i =0; i<points.length; i++){
       var r = map(data, 0, 255, 50, 255); // Assuming 'data' ranges from 0 to 255
     var g = map(points[i].x, 0, height, 50, 255)
      var b = map(points[i].x, 0, width, 300, 50)
      fill(r,g,b);

    var angle = map(noise(points[i].x *mult, points[i].y * mult), 0,1,0,720);

    points[i].add(createVector(cos(angle), sin(angle)));

    ellipse(points[i].x, points[i].y, 1);

  }
}
04-After creating the code, connect it to Arduino so that you can use your sensors in P5JS.
05- For creating a P5 serial library, follow the steps here.
06- Then we created emojis to see how interactions are changing.
You can find the code below:
let emojis = [];
let numEmojis = 50;
let emojiSize = 30;


function setup() {
  createCanvas(windowWidth, windowHeight);
  background(30);


  for (let i = 0; i < numEmojis; i++) {
    emojis.push({
      x: random(width),
      y: random(height),
      emoji: '🥲',
      color: color(random(255), random(255), random(255)),
      vx: random(-1, 1), // Hız
      vy: random(-1, 1)
    });
  }
}


function draw() {
  background(30);


  for (let i = 0; i < numEmojis; i++) {
    let emojiA = emojis[i];
    fill(emojiA.color);
    textSize(emojiSize);
    text(emojiA.emoji, emojiA.x, emojiA.y);

    for (let j = i + 1; j < numEmojis; j++) {
      let emojiB = emojis[j];
      let distance = dist(emojiA.x, emojiA.y, emojiB.x, emojiB.y);
      if (distance < 150) {
        // Çizginin rengi
        stroke(lerpColor(emojiA.color, emojiB.color, 0.5));

        // Çizgi akışını oluştur
        let flowX = emojiB.x - emojiA.x;
        let flowY = emojiB.y - emojiA.y;
        let midX = (emojiA.x + emojiB.x) / 2;
        let midY = (emojiA.y + emojiB.y) / 2;

        // Çizgi akışını göster
        let numSegments = int(dist(emojiA.x, emojiA.y, emojiB.x, emojiB.y) / 10);
        for (let k = 0; k < numSegments; k++) {
          let segmentX = emojiA.x + (flowX / numSegments) * k;
          let segmentY = emojiA.y + (flowY / numSegments) * k;
          let noiseVal = noise(segmentX * 0.005, segmentY * 0.005, frameCount * 0.01) * 50;
          segmentX += cos(noiseVal);
          segmentY += sin(noiseVal);
          point(segmentX, segmentY);
        }
      }
    }

    // Emoji'lerin hareketini güncelle
    emojiA.x += emojiA.vx;
    emojiA.y += emojiA.vy;

    // Ekran sınırlarında kalmayı sağlama
    emojiA.x = constrain(emojiA.x, 0, width);
    emojiA.y = constrain(emojiA.y, 0, height);
  }
}
Then we decided to combine two codes:
In here you can find the last code:
Final Arduino Codes and p5Js codes.
Arduino Code:
#include <Adafruit_NeoPixel.h>
#ifdef __AVR__
#include <avr/power.h>
#endif


#define PIN 6
Adafruit_NeoPixel strip = Adafruit_NeoPixel(30, PIN, NEO_GRB + NEO_KHZ800);


#define soilWet 500
#define soilDry 900
#define sensorPower 7
#define sensorPin A0


int currentIndex = 0;
int waveCount = 0;
int active = 0;
int lastMoisture = 0;
int lastMoisture2 = 0;
int moisture;
unsigned long lastUpdate = 0;
int lightCount = 0;
int startIndex = 2;        //Led lights start from which one, 0 is first one


void setup() {
#if defined(__AVR_ATtiny85__)
  if (F_CPU == 16000000) clock_prescale_set(clock_div_1);
#endif


  strip.begin();
  strip.show();
  pinMode(sensorPower, OUTPUT);
  digitalWrite(sensorPower, LOW);
  Serial.begin(9600);
}


void loop() {
  //continuousWave();
  lastMoisture = moisture;
  moisture = readSensor();
  Serial.print("Analog Output: ");
  Serial.println(moisture);


  if (moisture > soilDry) {
    slowFlicker();
  } else if (moisture < soilWet) {
    setBrightness(255);
  }


  else {
    if (moisture > lastMoisture) {
      slowDimming(moisture);
      // } else if (abs(moisture - lastMoisture2) >= 30) {
    } else if (moisture < lastMoisture - 80) {
      if (active == 0) {
        active = 1;
        waveCount = 0;
      }
      // lastMoisture2 = moisture;
    }
  }


  if (active == 1) {
    continuousWave();
  }


  delay(500);
}


int readSensor() {
  digitalWrite(sensorPower, HIGH);
  delay(10);
  int val = analogRead(sensorPin);
  digitalWrite(sensorPower, LOW);
  return val;
}


void setBrightness(uint8_t brightness) {
  strip.setBrightness(brightness);
  strip.fill(strip.Color(255, 255, 0), 0, strip.numPixels());
  strip.show();
}

void slowDimming(int moisture) {
  int brightness = map(moisture, soilWet, soilDry, 255, 10);
  brightness = min(255, brightness);
  brightness = max(10, brightness);
  setBrightness(brightness);
}


void slowFlicker() {
  static unsigned long lastFlickerTime = 0;
  static bool lightOn = false;
  unsigned long currentMillis = millis();


  if (currentMillis - lastFlickerTime > 500) {
    lastFlickerTime = currentMillis;  // Update the last flicker time
    lightOn = !lightOn;               // Toggle the state of the light


    if (lightOn) {
      strip.setBrightness(50);                                   // Set brightness to 50 for "on" state
      strip.fill(strip.Color(255, 0, 0), 0, strip.numPixels());
    } else {
      strip.setBrightness(0);
    }
    strip.show();
  }
}

void continuousWave() {
  unsigned long currentMillis = millis();
  if (currentMillis - lastUpdate > 50) {
    lastUpdate = currentMillis;
    for (int i = 0; i < strip.numPixels(); i++) {
      strip.setPixelColor(i, strip.Color(0, 0, 0));
    }
    int space = 6;  //    shines how many at once
    currentIndex = max(startIndex, currentIndex);
    if (lightCount % 2 == 0) {
      for (int i = currentIndex; i < currentIndex + space; i++) {
        if (i < strip.numPixels()) {
          strip.setPixelColor(i, strip.Color(255, 255, 0));  // Turn on new with yellow color
        }
      }
    }
    strip.show();
    //strip.setPixelColor(currentIndex, strip.Color(0, 0, 0));  // Turn off previous
    if (lightCount % 2 == 0) {
      currentIndex = (currentIndex + space) % strip.numPixels();  // Update index
    } else {
      currentIndex = (currentIndex + 4) % strip.numPixels();  //    how many to jump, current4
    }
    lightCount++;


    if (currentIndex < (space + 1)) {
      waveCount++;
      if (waveCount == 4) {         //play how many times loop
        active = 0;
        waveCount = 0;
        lightCount = 0;
      }
    }
  }
}
p5Js Code:
sketch.js
// Fractal Trees - Object Oriented
// Coding Train / Daniel Shiffman
// https://thecodingtrain.com/challenges/15-object-oriented-fractal-trees


// https://youtu.be/fcdNSZ9IzJM
// Code from challenge: https://editor.p5js.org/codingtrain/sketches/JDT5wrxVj


let port, reader, writer;
let tree = [];
let leaves = [];


let currentIndex = 0;
let targetIndex = 5;
let countList = [];
let portValue = 100;
let maxValue = -1;
let playAni = false;


async function setup() {
  createCanvas(800,800);


  tree[0] = getRoot();


  noLoop();
  ({ port, reader, writer } = await getPort());
  loop();
}


function getRoot() {
  let a = createVector(width / 2, height);
  let b = createVector(width / 2, height - 100);
  let root = new Branch(a, b, 0);
  return root;
}


async function readPort() {
  if (reader) {
    try {
      const { value } = await reader.read();
      if (value) {
        let arr = value.split("Analog Output: ");
        portValue = int(arr[1]); // take off when test mousepressed
        console.log(portValue);
      }
    } catch (e) {
      console.error(e);
    }
  }
}


function mousePressed() {
  portValue += 20;
  console.log(portValue);
}


function add() {
  if (currentIndex <= 5) {
    let myCount = 0;
    for (let i = tree.length - 1; i >= 0; i--) {
      if (!tree[i].finished) {
        tree.push(tree[i].branchA(i));
        tree.push(tree[i].branchB(i));
        myCount += 2;
      }
      tree[i].finished = true;
    }
    currentIndex++;
    countList.push(myCount);


    genLeave();
  }
}


function genLeave() {
  for (var i = 0; i < tree.length; i++) {
    if (!tree[i].genLeave) {
      let leafPos = tree[i].end.copy();
      leaves.push(new Leave(leafPos));
      tree[i].genLeave = true;
    }
  }
}


function removeNode() {
  if (tree.length > 0) {
    for (let i = 0; i < countList[currentIndex - 1]; i++) {
      let target = tree.pop();
      tree[target.parentIndex].finished = false;
      tree[target.parentIndex].genLeave = false;
    }
    currentIndex--;
  }
}


function draw() {
  background(0);


  readPort();


  push();
  translate(width / 2, height);
  scale(2.5);
  translate(-width / 2, -height);
  if (portValue) {
    if (portValue >= 900) {
      targetIndex = map(portValue, 900, 1024, 6, 0);
      targetIndex = int(targetIndex);


      if (!playAni) {
        maxValue = portValue;
      }
    } else {
      targetIndex = 5;
    }


    if (
      !playAni &&
      maxValue != -1 &&
      portValue < maxValue &&
      abs(portValue - maxValue) >= 30 // Moisture value changed from last time
    ) {
      playAni = true;
      currentIndex = 0;
      leaves = [];
      tree = [getRoot()];
    }


    if (!playAni && portValue >= 500 && portValue < 900) {
      let splitLen = map(portValue, 500, 900, leaves.length, 0);
      splitLen = int(splitLen);
      for (let i = 0; i < leaves.length; i++) {
        if (i < splitLen) {
          leaves[i].reset();
        } else {
          leaves[i].active = true;
        }
      }
    }


    if (!playAni) {
      let len = abs(currentIndex - targetIndex);
      if (currentIndex > targetIndex) {
        for (let i = 0; i < len; i++) {
          removeNode();
        }
      } else if (currentIndex < targetIndex) {
        for (let i = 0; i < len; i++) {
          add();
        }
      }
    } else if (frameCount % 20 == 0) {
      //  Animation speed how many frames per second 3 times persec now
      if (currentIndex < 6) {
        add();
      } else {
        playAni = false;
        maxValue = -1;
      }
    }


    for (var i = 0; i < tree.length; i++) {
      tree[i].show();
      tree[i].jitter();
    }


    if (portValue < 900) {
      for (var i = 0; i < leaves.length; i++) {
        let leave = leaves[i];
        leave.show();
        leave.update();
      }
    }
  }
  pop();
}


function mousePressed() {
    fullscreen(true);
 }
leaves.js
class Leave {
  constructor(pos) {
    this.originPos = pos.copy()
    this.pos = pos;
    this.active = false;
    this.life = true;
  }


  update() {
    if (this.active) {
      this.pos.y += random(0, 2);
      if (this.pos.y >= height) {
        this.life = false;
      }
    }
  }

  reset() {
    this.life = true;
    this.active = false
    this.pos = this.originPos.copy()
  }


  show() {
    fill(0, 255, 0, 250);
    noStroke();
    ellipse(this.pos.x, this.pos.y, 8, 8);
  }
}
branch.js
class Branch {


  constructor(begin, end, parentIndex) {
    this.begin = begin;
    this.end = end;
    this.finished = false;
    this.parentIndex = parentIndex;
    this.genLeave = false;
  }


  jitter() {
    // this.end.x += random(-1, 1);
    // this.end.y += random(-1, 1);
  }


  show() {
    stroke(255);
    line(this.begin.x, this.begin.y, this.end.x, this.end.y);
  }


  branchA(parentIndex) {
    let dir = p5.Vector.sub(this.end, this.begin);
    dir.rotate(PI / 6);
    dir.mult(0.67);
    let newEnd = p5.Vector.add(this.end, dir);
    let b = new Branch(this.end, newEnd, parentIndex);
    return b;
  }


  branchB(parentIndex) {
    let dir = p5.Vector.sub(this.end, this.begin);
    dir.rotate(-PI / 4);
    dir.mult(0.67);
    let newEnd = p5.Vector.add(this.end, dir);
    let b = new Branch(this.end, newEnd, parentIndex);
    return b;
  }
}
index.html
<!DOCTYPE html>
<html>


<head>
  <script src="https://cdnjs.cloudflare.com/ajax/libs/p5.js/1.5.0/p5.min.js"></script>
<!--   <script src="https://cdnjs.cloudflare.com/ajax/libs/p5.js/0.7.3/addons/p5.dom.min.js"></script> -->
  <script src="https://cdnjs.cloudflare.com/ajax/libs/p5.js/0.7.3/addons/p5.sound.min.js"></script>
    <script
      language="javascript"
      type="text/javascript"
      src="https://cdn.jsdelivr.net/gh/ongzzzzzz/p5.web-serial/lib/p5.web-serial.js"
    ></script>
  <link rel="stylesheet" type="text/css" href="style.css">
  <meta charset="utf-8" />


</head>


<body>
  <script src="sketch.js"></script>
  <script src="branch.js"></script>
  <script src="leave.js"></script>
</body>


</html>
style.css
html, body {
  margin: 0;
  padding: 0;
}
canvas {
  display: block;
}
With those codes you should be able to duplicate this whole project!
Process and Final Video

