Classic Car Restomod - Part 1: 1600 GT Kent X-Flow Engine Rebuild:
by steve-gibbs5 in Workshop > Cars
63 Views, 1 Favorites, 0 Comments
Classic Car Restomod - Part 1: 1600 GT Kent X-Flow Engine Rebuild:
.PNG)
.PNG)
.PNG)
.PNG)
.PNG)
.PNG)
.PNG)
.PNG)
.PNG)
.PNG)
.PNG)
Welcome dear reader.
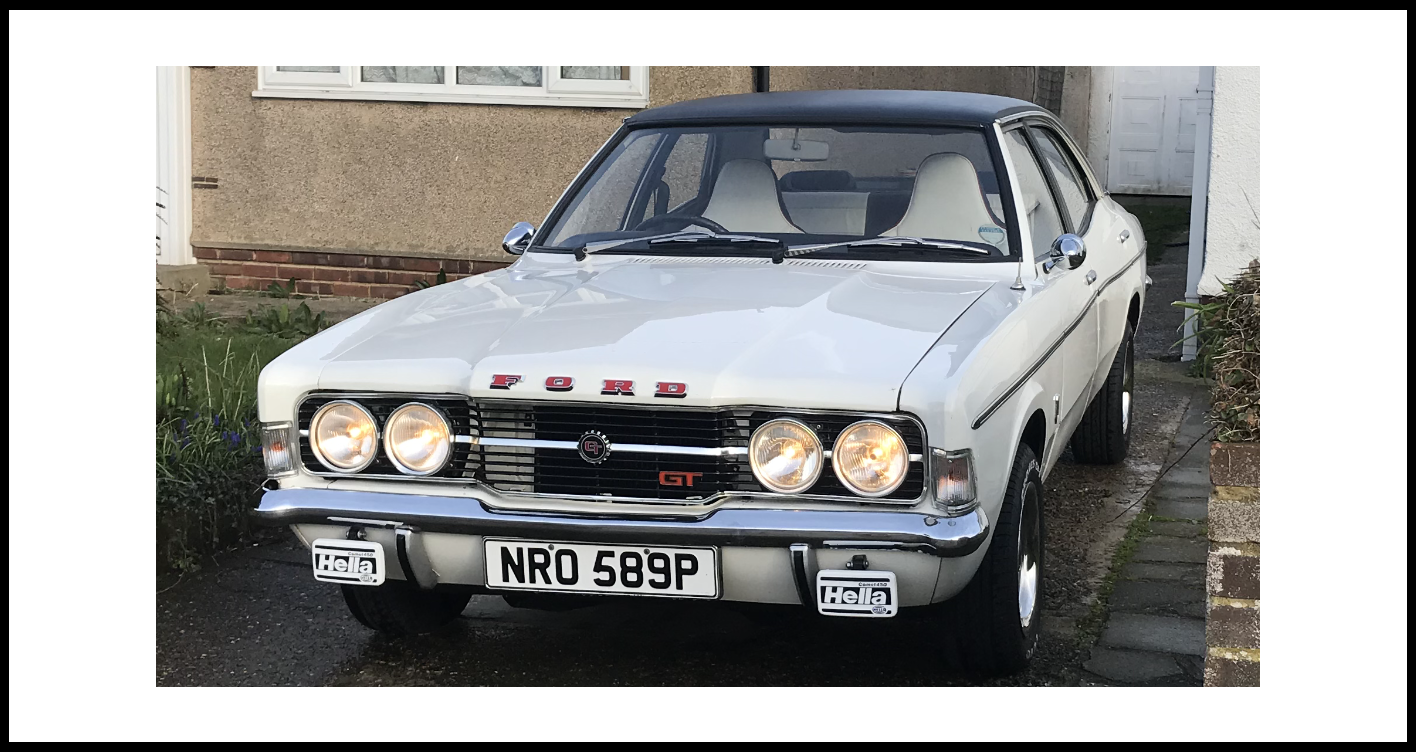
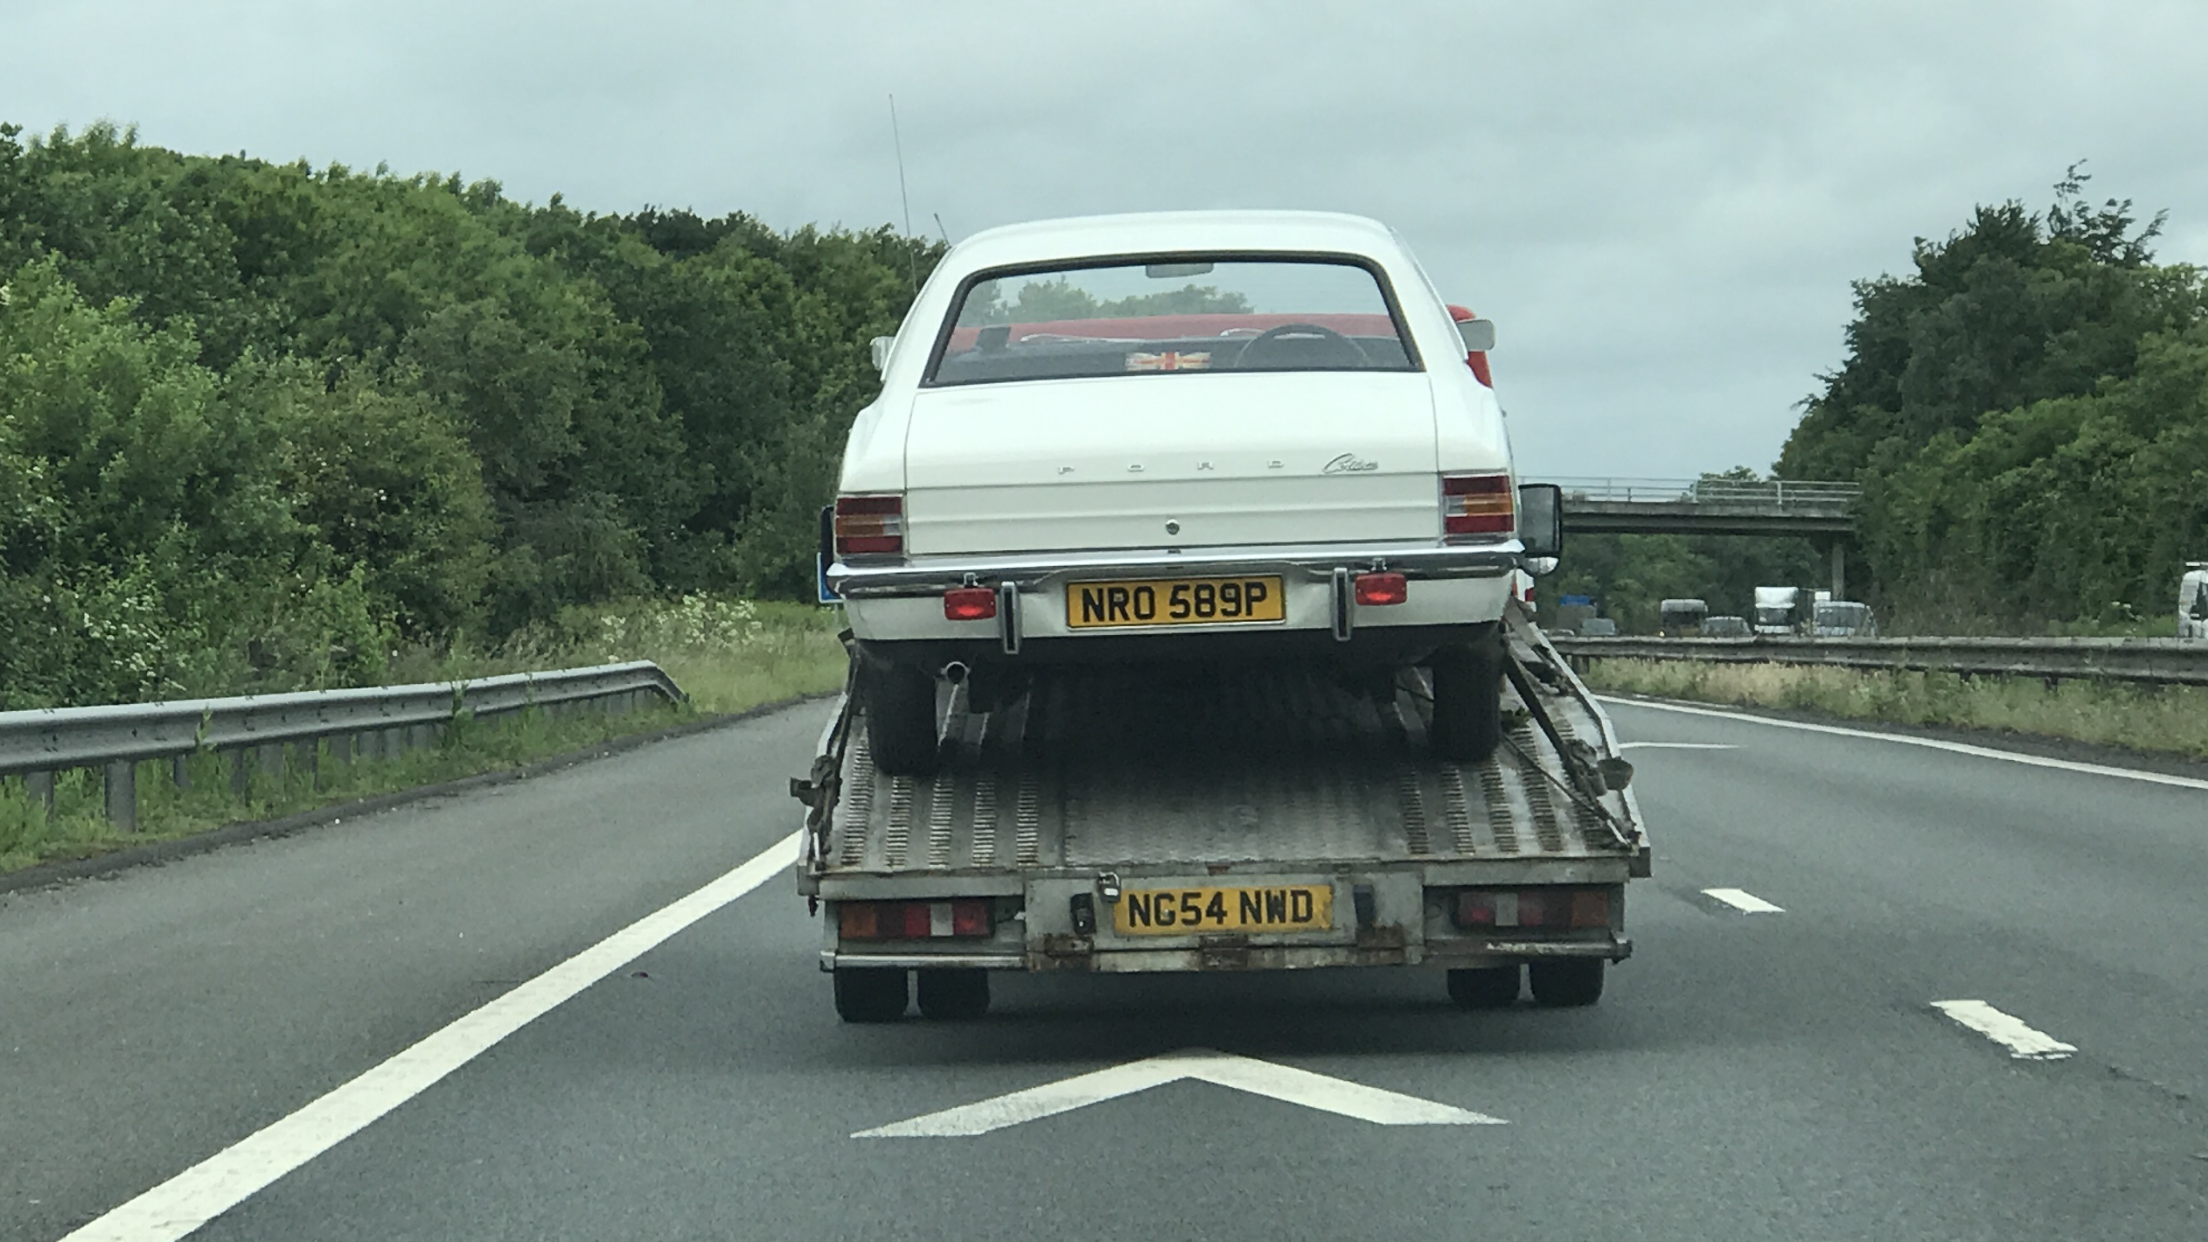
I am doing something a little different here. Instead of a single project Instructable, I am doing a collection Instructable sharing a classic car restoration/modification project broken down into different parts... this being 'Part 1'. For the example car, I will be using my 1976 Ford Cortina MK3 1600GT. This was an enjoyable, albeit a sometimes stressful project, but on top of what I already knew, I managed to learn quite a lot so I wanted to share the process in case somebody else wants to do something similar in an aim to make their lives a little bit easier. Although the Instructables are based on the MK3 Cortina, a lot of the information can be carried over to most makes and models of classic or even some newer car as although they do have their differences from carburettors to fuel injection, dynamo's to distributors etc. engines, interiors, exteriors are pretty much of the same basic designs and fitting so I hope that people will find my collection useful.
The Project:
For a long time I wanted to do a classic car restomod project, and wanted to do it with a late model MK3 Ford Cortina as I have always loved the shape of the car and was lucky enough to own one in the early 90's. So about 3 years ago after partially recovered from a long term injury, I was in a position to make the idea into a reality. This was going to be a big one from rebuilding the engine, to stripping out and improving the interior and doing some exterior work to bring an old car back into life, and to have something a little different.
I found a car someone was selling which had been parked up in their garage for years, unused, but regularly started. It was a basic 1600cc model which had a professionally rebuilt 5 speed manual transmission and had been professionally repainted a few years previous. After viewing it and going over the car and paperwork with a fine tooth comb, apart from a very tired looking interior (which was perfect for me) I found it all to be in excellent shape for the year, rust free, it ran, and it was straight... so I bought it.
Because of my past injury, I was not and never will be fully recovered, so bending over engine bays for any long period of time is a thing of the past, but I wasn't going to let that stop me. I also had/have a good life long friend who's a professional mechanic who gave me some space in his garage and helped me along the way which was particularly helpful for the engine rebuild as he had all the knowhow and tools to help me do it. With the exception of covering the roof, the interior and exterior work I did myself at home, and after about 4 months of weekend and evening work (I also cannot work as quick as I did), I ended up with something I was, and still am very pleased with. I have had lots of thumbs up on the road and interested people coming up to me asking questions and telling me their car stories. Although the interior design is not to everyone's taste as everyone has their own likes and dislikes, the people who were not so keen on it still very much appreciated the work that went in to it.
The Collection:
As I mentioned, this Instructable is one of seven parts that I have spent the past month putting together with the aim of guiding anyone interested through the different aspects of the work I did on my car so they can work on their own. I photographed as much as I could specifically for this Instructable collection and written each part in hopefully easy to follow steps. Here is a list of the parts to this collection...
- Part 1 (below): 1600 GT Kent X-Flow Engine Rebuild:
- Part 2: Exterior - Front End:
- Part 3: Exterior - Rear End & Roof:
- Part 4: Interior - Door Cards and Steering Wheel:
- Part 5: Interior - Dashboard and Center Console:
- Part 6: Interior - Seats:
- Part 7: Exterior - Wheels and Body Styling:
The steps in each part are condensed down into short bullet point stages in order of operation in an aim to make things easier to follow and to keep everything universal for other car makes, but in the case of this subject, always keep a good quality workshop manual for your car at hand for more detailed instructions for your specific engine.
Supplies

Tools & Workshop Equipment:
- Full socket set (metric & imperial, ⅜" & ½" drive)
- Torque wrench (up to at least 80 lb.ft)
- Ring/open-ended spanners
- Screwdrivers (flat & Phillips)
- Feeler gauges (for valve clearances & points, if still fitted)
- Piston ring compressor
- Valve spring compressor
- Micrometer or bore gauge (for checking clearances)
- Engine stand & hoist (or crane)
- Oil drain pan & funnel
- Soft mallet / dead-blow hammer
- Engine assembly lube / moly grease
- Cleaning brushes, scrapers & rags
- Gasket scraper or plastic razor blades
- Protective gloves & eye protection
Engine Parts & Consumables:
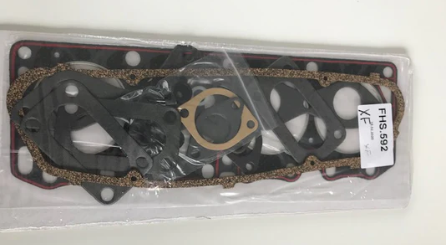
- Full engine gasket set (head gasket, sump, timing cover, etc.)
- New cylinder head bolts (recommended)
- Pistons + rings (oversize if cylinders bored)
- Main bearings & big end bearings
- Thrust washers
- Timing chain & tensioner
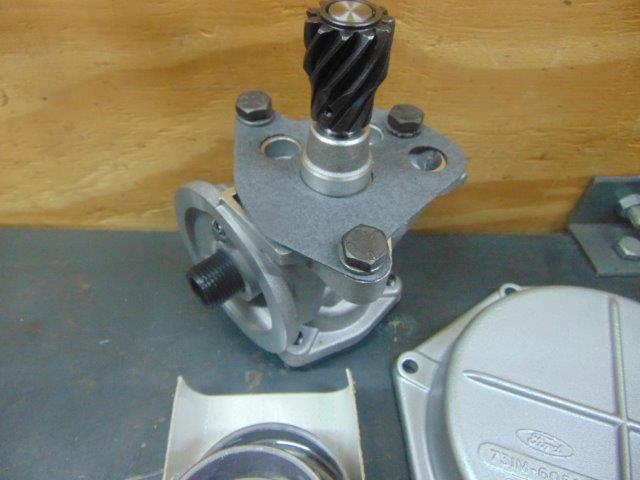
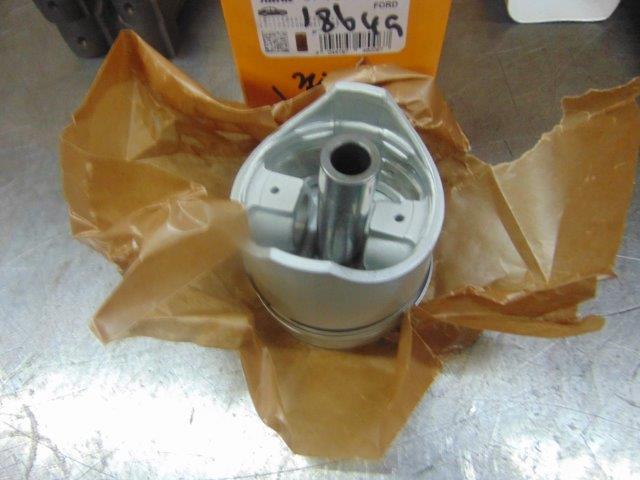
- Oil pump (new or reconditioned)
- Water pump
- Thermostat + housing gasket
- New radiator (correct spec for Mk3 1600 GT)
- Radiator hoses & clips (You can re-use the clips if they're in good shape)
- Core plugs (freeze plugs) set
- Distributor 1600 electronic
- Distributor cap, rotor arm, points/condenser (or electronic module if upgrading)
- HT leads
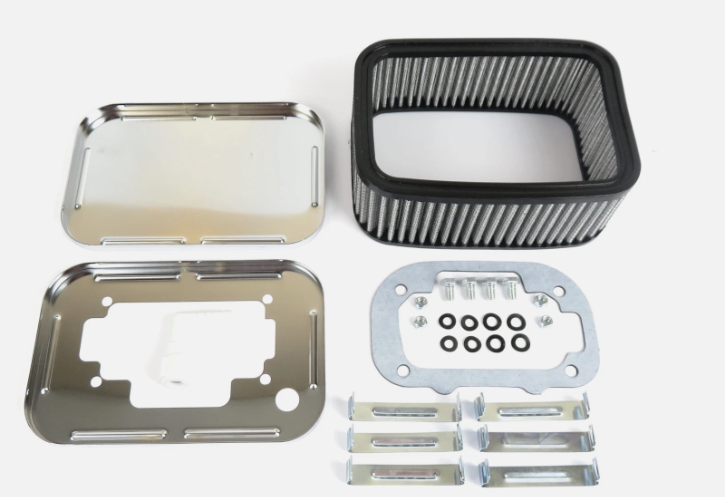
- Air filter
- Fuel filter
- Fan belt
- Exhaust manifold gasket
- Standard GT unleaded engine 1600cc (90 bhp)
- Oils, oil filter antifreeze fitting gaskets etc.
- GT 4 into 2 into 1 Exhaust manifold
- Adaptor and cut and shut and Fitting to existing exhaust
- ARP Big end bolts
- ARP Flywheel bolts
- Magnecor lead set
- Plugs NGK X4
- 1600 GT Twin choke Webber carb 32/36dgv
- 1600 GT Webber inlet manifold to suit
- Inlet adaptors for engine breather and servo studs and nuts for carb etc
- Sports chrome air filter
- Water pump
- Clutch 3 part to suit type 9
- Engine Mounts
Fluids & Sealants:
- Engine oil (20w50 mineral oil for running in)
- Assembly lube or engine build grease
- Coolant/antifreeze (50/50 premix)
- Gear oil (if also draining gearbox while engine’s out)
- Gasket sealant (sparingly applied)
- Copper grease (for bolts/threads where needed)
Finishing Materials:
- High-temperature black brush-on engine enamel (or spray if you prefer)
- Degreaser/engine cleaner
- Drill
- Wire brush attachments (drill-mounted)
- Masking tape & paper (to protect mating surfaces before painting)
Prep & Parts:
.PNG)


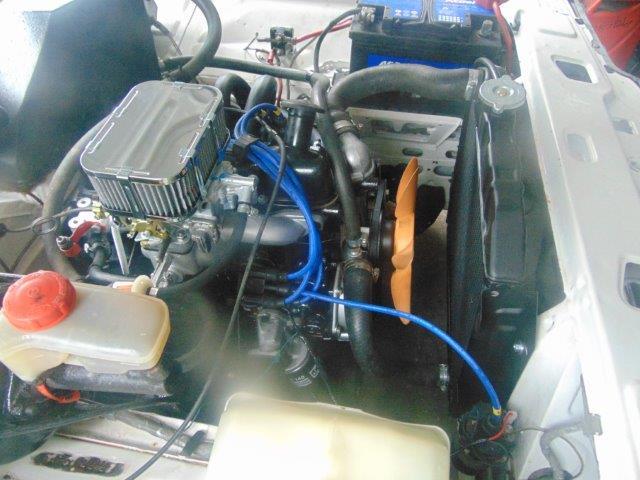
I was lucky enough to have a good friend who runs his own garage who very kindly gave me access to a workspace and tools that I didn't own. My friend did some of the big engine jobs I couldn't, but I was there assisting for most of the time he did the work. But knowing that everyone won't have the options I did, there are other options available such as your own garage or workspace or renting one out short term. And the same goes for tools as well. Tool hire shops are one option or friends who may have the tools needed, but there are also workspaces that can be hired which include tools you can use. Check your area for the best option for you. The work to rebuild the 1.6L engine was not only to make it 'like new', but to also add parts to give it the GT spec giving it a little extra CC meaning it would have a little extra horsepower so it could keep up with modern day traffic.
Workspace: You’ll need a clean bench, plenty of light, drip trays, and a way to keep parts organised (zip bags + labels are a lifesaver).
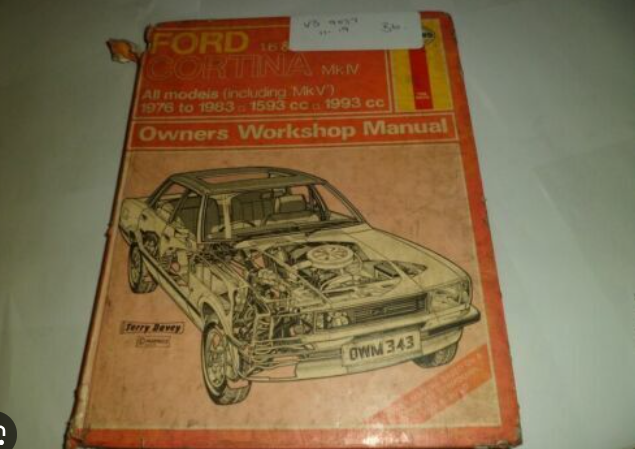
Manual: Ford Cortina MK3 workshop manual (or for whatever car you're working on) for torque specs and clearance tables. Keep it open nearby.
Parts list:
- Pistons + rings (oversize to suit bored cylinders).
- Main, rod, cam bearings + thrust washers.
- Full gasket and seal kit.
- New camshaft & lifters.
- Timing chain & sprockets.
- Oil pump and pickup.
- Water pump, thermostat, hoses, belts.
- New radiator + pressure cap.
- Ancillaries: plugs, leads, filters.
- Paint: high-temp primer + black engine enamel.
Before the engine is removed, the following jobs need to be done...
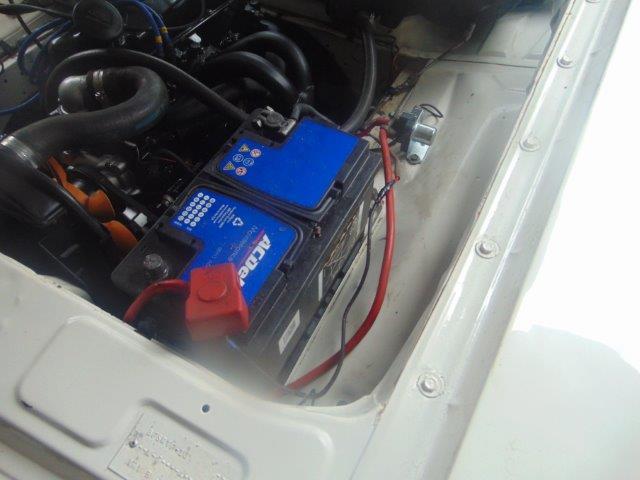
- Disconnect battery.
- Drain coolant and engine oil.
- Label and disconnect all hoses, wiring, throttle cable, choke cable, and fuel line.
- Remove radiator, fan, and shroud.
- Detach exhaust manifold from downpipe.
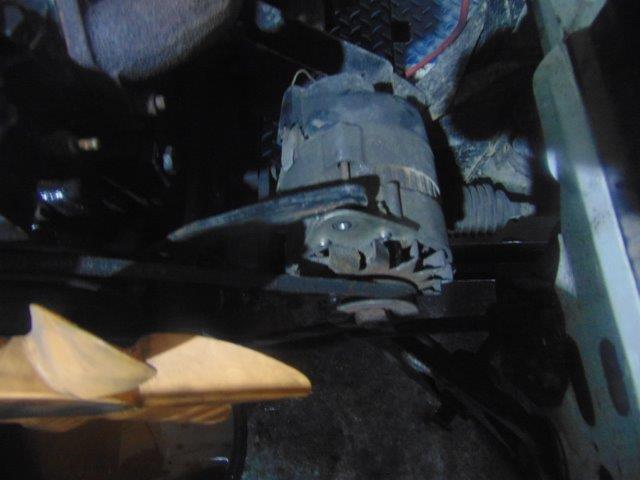
- Remove air filter, carburettor, alternator, starter motor.
Top Tips:
Don't rush a project like this. Take your time to not only get the jobs done right, but to also enjoy the process and don't be afraid to ask for help if you're unsure on something.
I've worked on cars for about 35 years but I am not mechanical expert by any means and I did a lot of research before taking on this project. So make sure you do some research first, not just for how to do things, but for parts availability too.
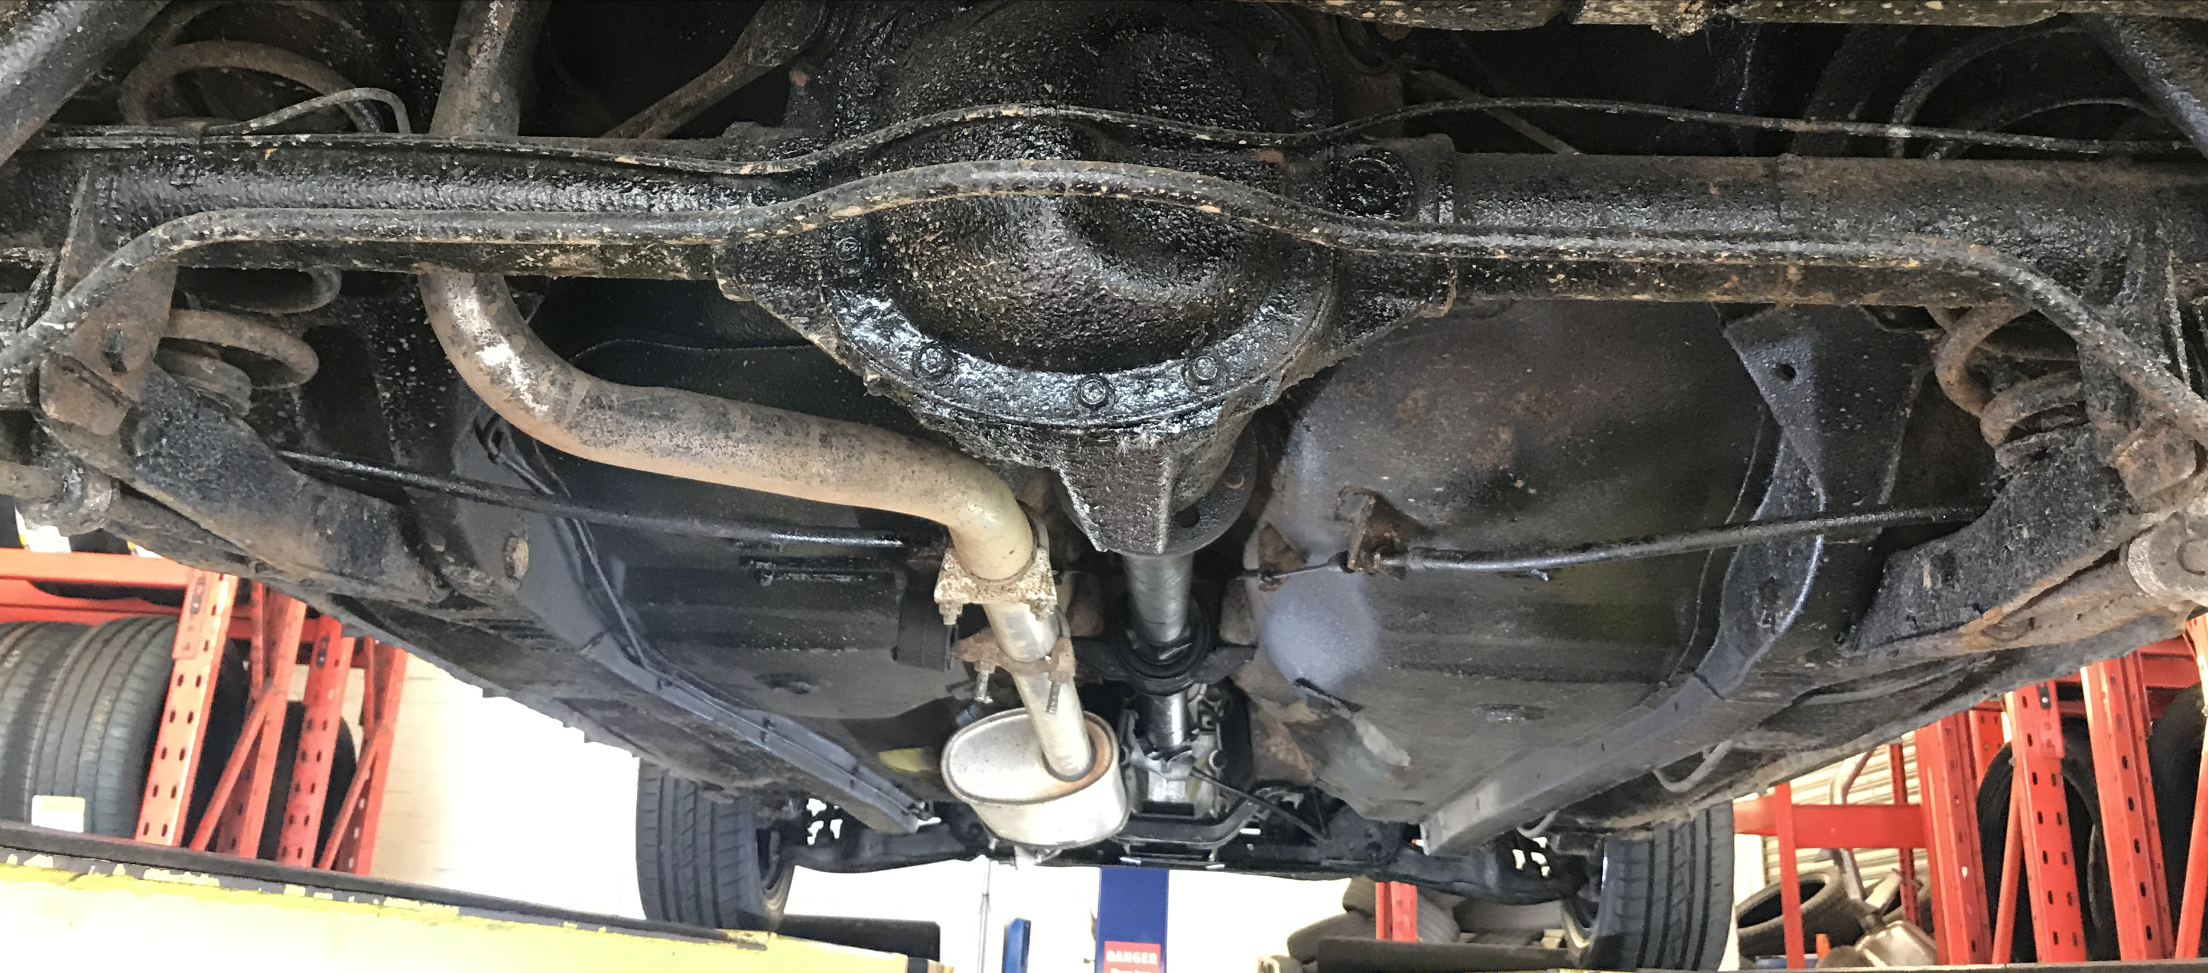
Engine Removal:
Separate Engine from Gearbox:
- Support the gearbox with jack or block of wood.
- Unbolt the bellhousing bolts connecting engine to gearbox.
- Remove the clutch slave cylinder (leave hydraulics intact if possible).
- Remove the engine mounts.
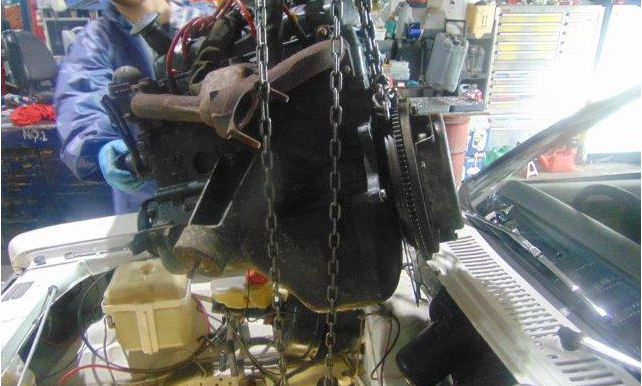
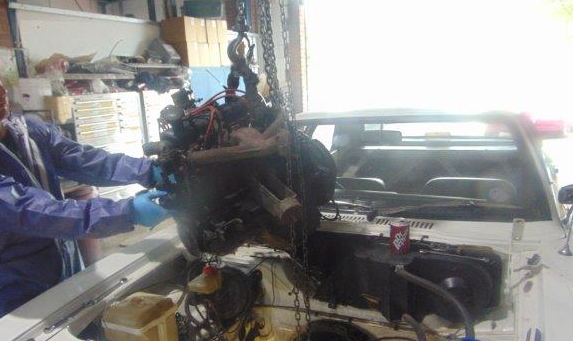
Engine Removal:
- Attach hoist chains to lifting eyes on the engine.
- Lift engine carefully upwards and forwards, clear of gearbox input shaft.
- Remove engine from car and mount onto engine stand.
Top Tip:
An engine can be removed by one person with an engine hoist, but I really suggest to have somebody to help with the process. I strongly advise it so they can check if everything is disconnected and also help if there is a snag while the engine is being lifted.
Strip-Down and Initial Clean:

First thing to get the show on the road is to take out all of the engine parts and drain all fluids.
- Remove the rocker cover, rocker shaft, pushrods.
- Remove the cylinder head.
- Remove sump and oil pump.
- Remove pistons and connecting rods.
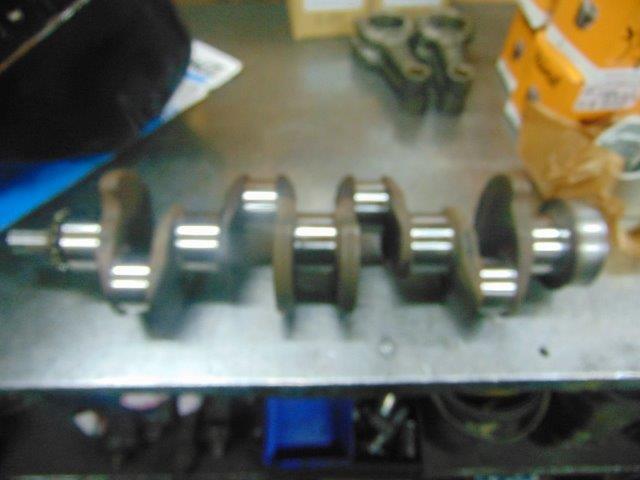
- Remove crankshaft, bearings, and thrust washers.
- Strip timing chain, camshaft, and all remaining ancillaries.
Then move on to cleaning.
- Scrape any carbon from piston crowns and head combustion chambers.
- Degrease the block, crank, rods, head with paraffin/parts washer.
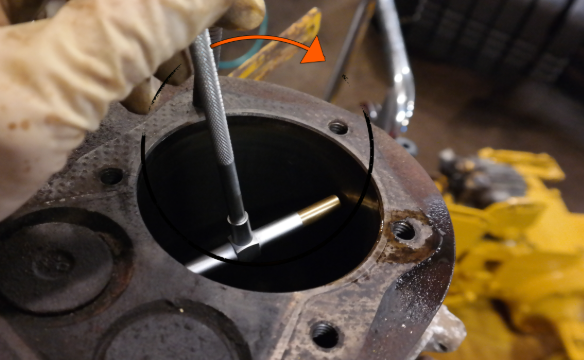
- Knock out the old core plugs and oil gallery plugs.
- Brush oilways and blow out with compressed air until spotless.
- Chase all threads with tap/die to ensure bolts torque properly.
Inspect & Measure:
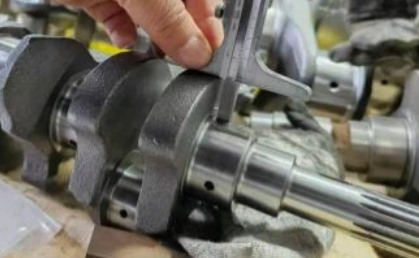
Before we go any further, there are some important observations that need to be done first.
- Block: Check for cracks around head bolt holes, water jackets.
- Bores: Measure taper and ovality with bore gauge at top, middle, bottom of each bore.
- Crankshaft: Measure journals with micrometer, check for scoring.
- Rods: Check for bent/twisted rods with jig or machine shop help.
- Deck & head: Use straightedge and feeler gauge to check warp.
- Decision: Based on wear, order correct oversize pistons and undersize bearings.
With that done, we can now move on to the next step.
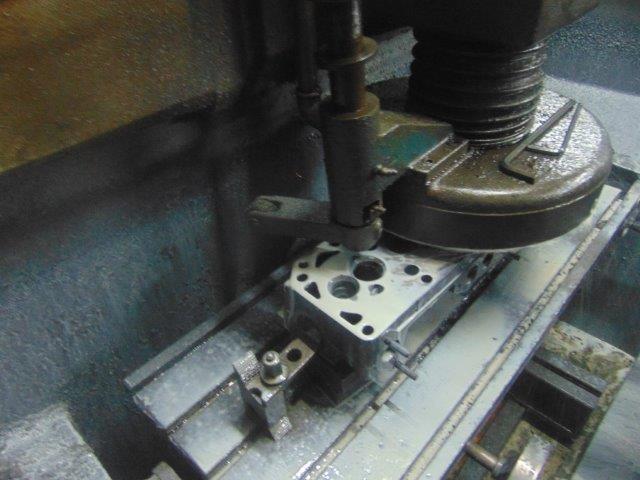
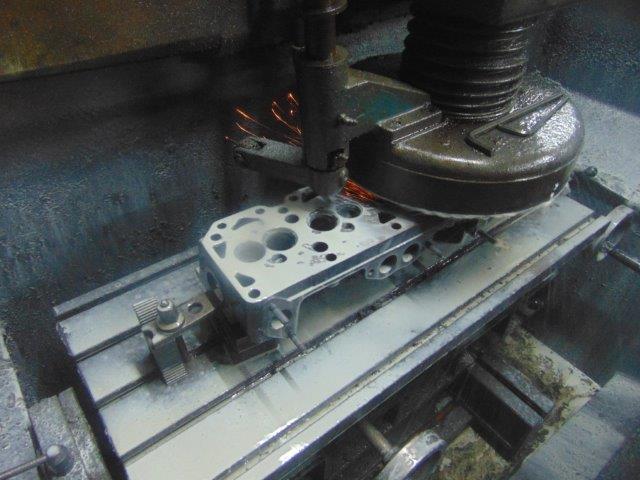
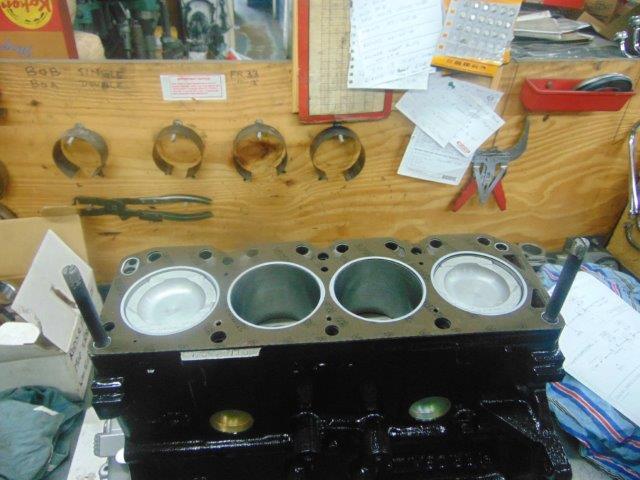
Machine Shop Work and Critical Final Clean:
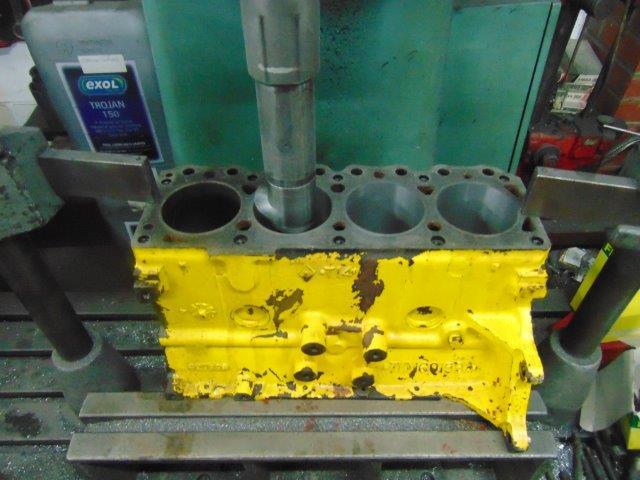
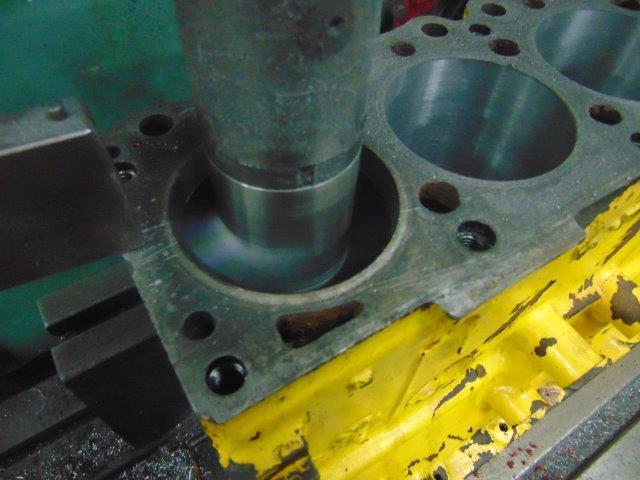
- Hot wash the block; shot blast if heavily rusted.
- Bore/hone the cylinders to correct oversize; finish hone with a crosshatch pattern.
- Skim the block deck if it's warped.
- Fit new cam bearings and core plugs.
- Grind/polish the crank journals to next undersize if worn.
- Resize the conrods; replace little-end bushes if sloppy.
- Balance the rotating assembly (crank, rods, pistons, flywheel, clutch).
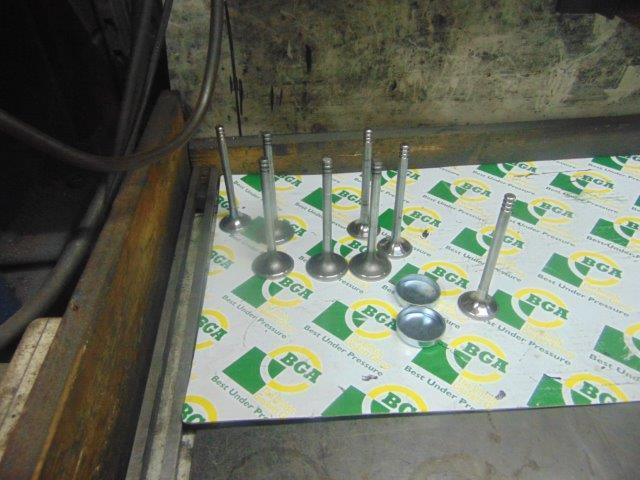
- For the head: fit new guides, cut or replace valve seats, lap or replace valves and skim if warped.
Now it's time for the all important final clean up.
- Wash block in hot soapy water; scrub bores with a nylon brush.
- Dry thoroughly; wipe bores until cloth stays clean.
- Immediately oil bores, crank journals, and machined surfaces to stop any rust forming.
- Blow through every oil gallery once more.
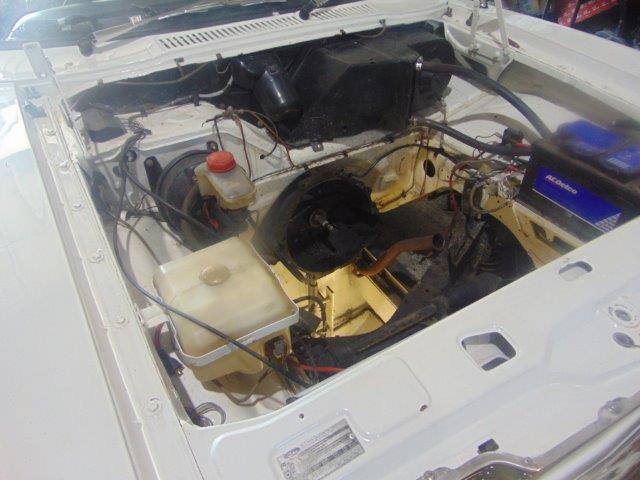
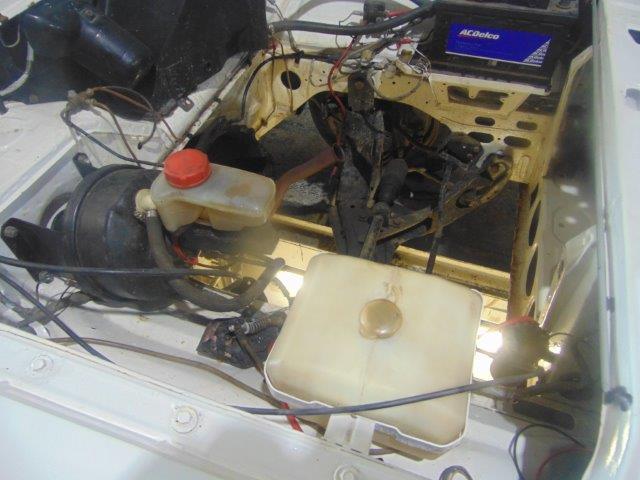
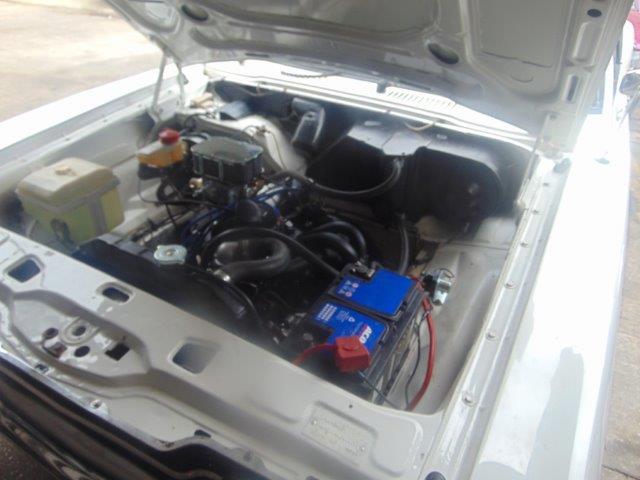
- And now is the best time to move over to the car and thoroughly clean out the engine bay.
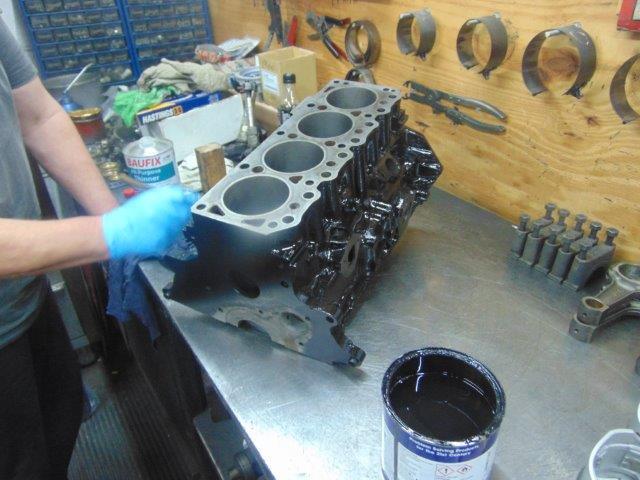
Painting the Block:


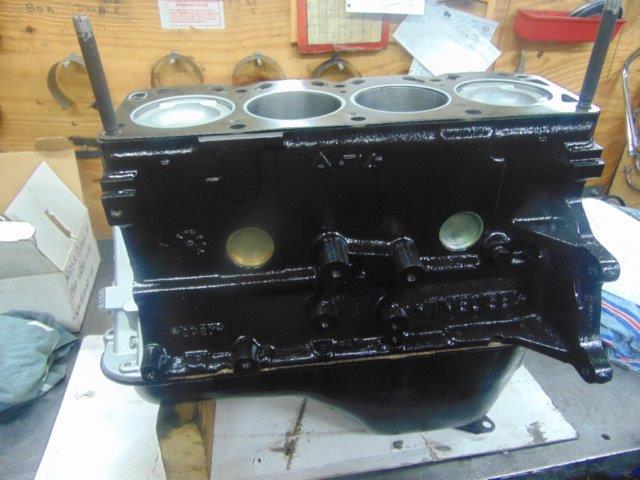
- Mask off the machined surfaces, threads, and bores.
- Lightly sand the exterior with fine paper; degrease with solvent.
- Apply high-temp primer in thin, even coats.
- Follow with 2–3 coats of black engine enamel; allow 24 hours cure.
- Remove all of the masking carefully.
Trial Fits & Clearances:
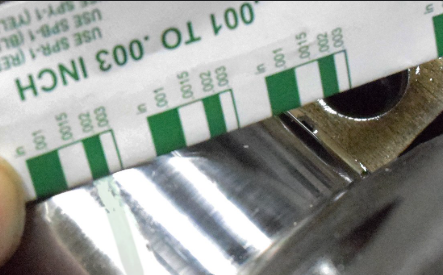
- Fit the bearings into block dry, drop in the crank and measure clearance with a Plastigauge.
- Confirm the crank end-float using feeler gauge and thrust washers.
- Check piston-to-bore clearance (slip gauge or feeler test).
- Fit the rings to the bore, push square with the piston, measure end gap with a feeler gauge then file gently to achieve correct gap.
- Check the piston deck height relative to block with a dial indicator.
- Clay test the piston-to-valve clearance if using a performance cam.
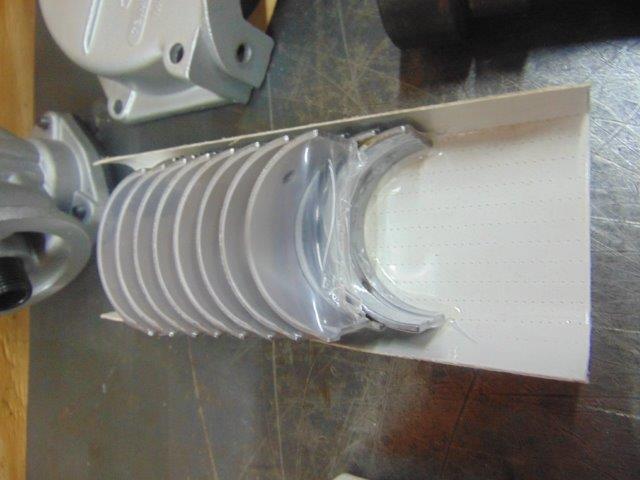
Bottom End Assembly and Oil System:

- Coat the main bearings with some assembly lube, install the crank and torque caps in sequence.
- Fit the thrust washers either side of the centre main.
- Rotate the crank. This should spin freely.
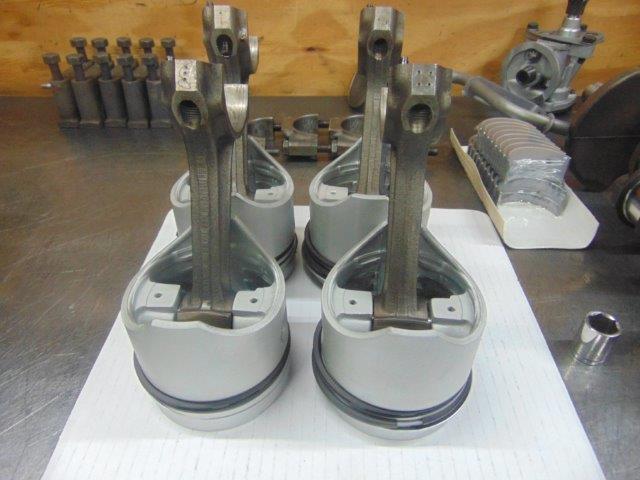
- Fit the rings to the pistons (oil ring first, then compression rings, gaps staggered).
- Lubricate the pistons and bores, then insert with ring compressor.
- Torque the rod bolts; check crank still spins freely after each piston.
- Pack new oil pump with assembly lube to aid priming.
- Install the pump, pickup, torque bolts, check pickup clearance to sump base (about 6–8 mm).
- Now fit the sump with new gasket and thin smear of sealant.
Cam & Timing:
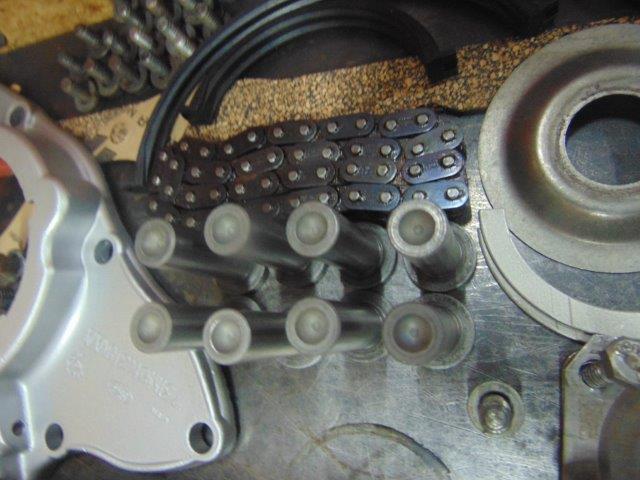
- Coat the cam lobes and journals with cam some paste.
- Slide camshaft into bearings carefully (don’t nick the bearings).
- Fit new lifters with cam lube.
- Install the sprockets and timing chain... line up timing marks.
- Degree the cam properly with a dial gauge and degree wheel.
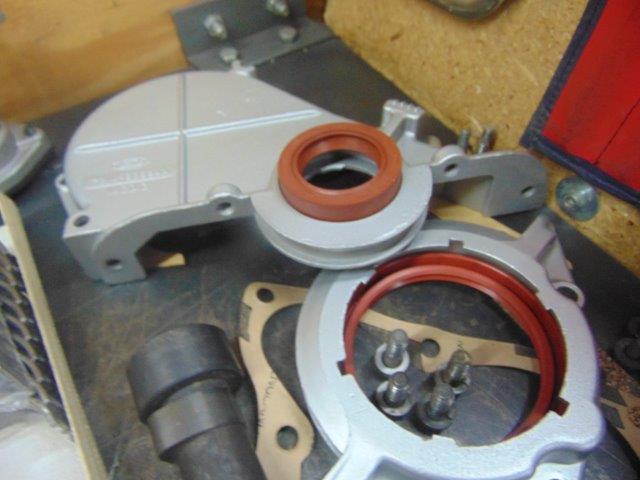
- Fit the timing cover with a new seal.
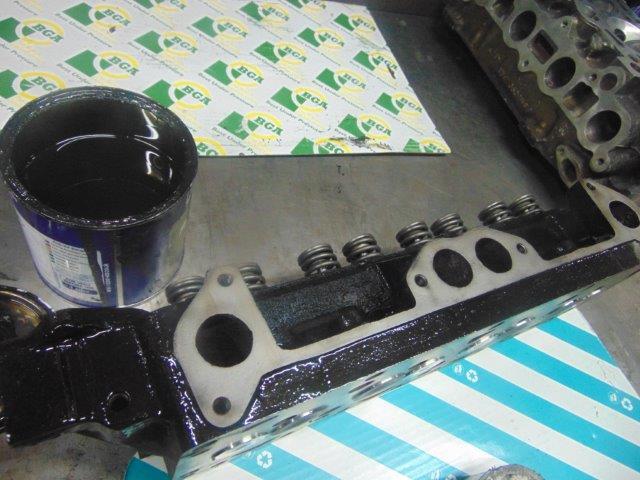
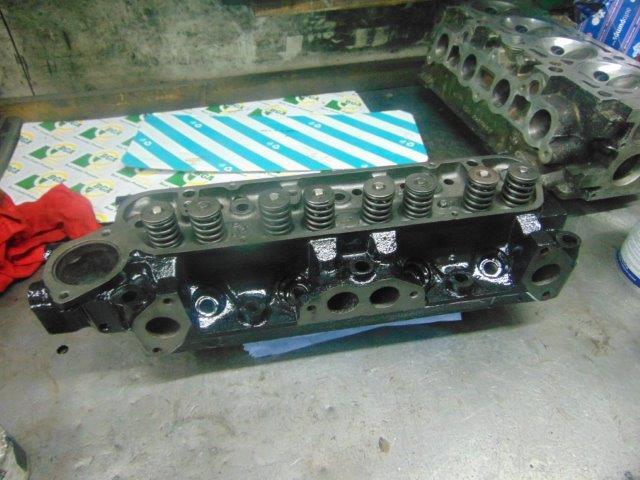
Cylinder Head:
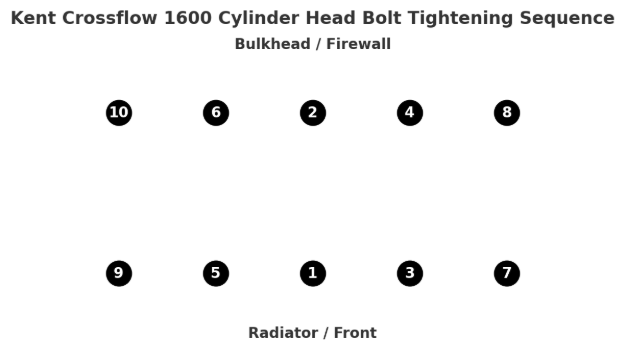


- Assemble the valves with new stem seals, springs, retainers.
- Check the installed spring height and pressure if you uprated the cam.
- Place a new head gasket on the clean block deck (correct orientation).
- Fit the head; torque the bolts in sequence in three stages.
- Fit the rocker gear, pushrods, and set valve lash or lifter preload.
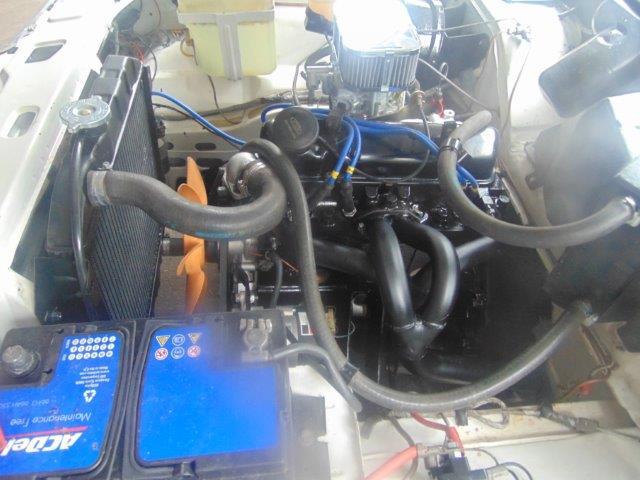
Ancillaries & Sealing:
- Fit the new water pump, thermostat, and housing.
- Fit the fuel pump, manifolds, carb with new gaskets.
- Install the new distributor, plugs, leads.
- Fit the rear main seal and crank pulley.
- Fit all of the new belts, hoses, and engine mounts.
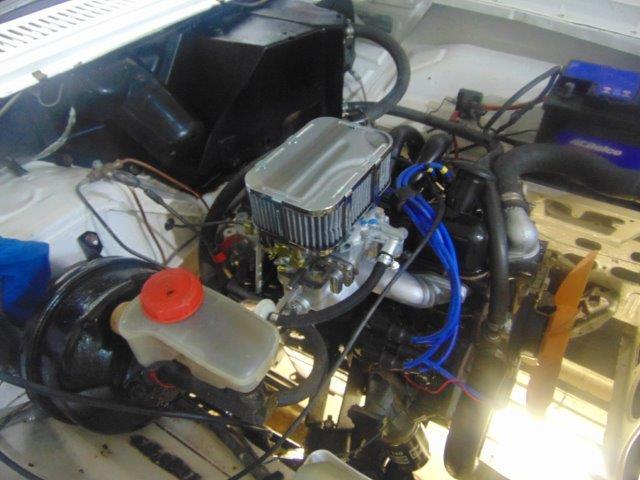
Engine Refit:
Clutch & Flywheel:
- Fit the flywheel (torque bolts). You don't have to fit a new flywheel, but it is recommended.
- Fit the new clutch plate and cover (align with tool).
Engine Refitting:
- Lower the engine back into bay with the hoist.
- Align the gearbox input shaft with clutch splines.
- Bolt the bellhousing to engine.
- Refit the engine mounts.
Reconnect Systems:
- Refit the clutch slave cylinder.
- Reconnect the exhaust system.
- Then reconnect the wiring, throttle, choke and fuel lines.
Top Tip:
As with removing the engine, get someone to help with the refitting.
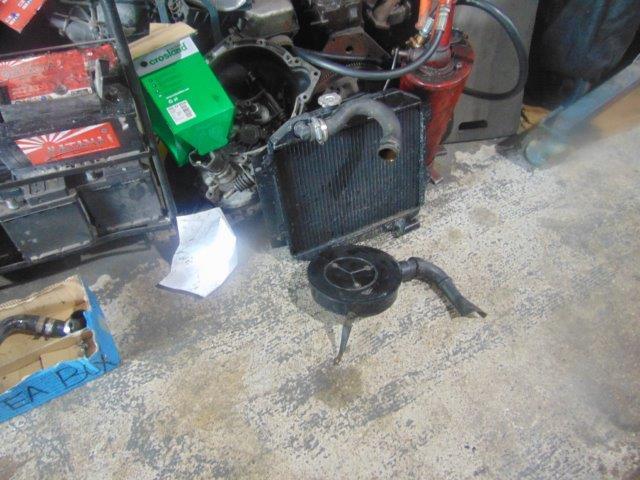
Radiator & Cooling System:

- Install the brand new radiator with mounting rubbers.
- Connect the upper/lower hoses and heater hoses then secure with clamps.
- Fit the correct pressure-rated radiator cap.
- Ensure the fan and shroud are properly aligned.
Pre-Start Setup:
- Fill the oil sump with 4L of break-in oil (non-synthetic, high zinc if possible).
- Spin the oil pump with a drill via the distributor shaft until oil flows from the rocker gear.
- Set the distributor for static timing (about 10° BTDC for initial fire).
- Pre-fill the carb float bowl with fuel to save cranking.
Cooling Fill Procedure:
- Close all the drain plugs.
- Pour 50/50 antifreeze/distilled water mix slowly into the radiator.
- Squeeze the hoses to expel any trapped air.
- With the cap off, start the engine; top up as the thermostat opens.
- Fit the cap once the coolant level stabilises, the heater is blowing warm, and there are no more bubbles.
- After cooling, recheck the radiator and the expansion tank levels.
Post Engine Fitting Jobs:
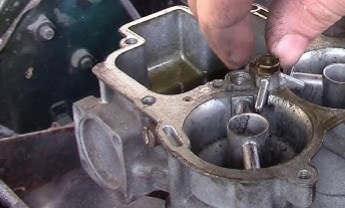
Carburettor Tuning & Ignition:
- Static time ignition at 8–10° BTDC.
- Start the engine and warm up.
- Adjust the idle mixture and speed (about 750–850 rpm).
- Fine-tune the ignition with a timing strobe (10–12° BTDC at idle, vac advance off).
First Fire & Cam Break-In:
- Start up the engine, bring it immediately to 2,000–2,500 rpm for about 20 minutes.
- Watch the oil pressure gauge (should be 40–60 psi cold).
- Also watch the coolant temp; ensure fan cycles, no leaks.
- Turn the engine off and let the engine cool.
- Re-torque the head if required by gasket type.
Post-Run & Run-In:
- Drain the oil and fit a new filter immediately after break-in.
- Drive for 500 miles gently using varied throttle and speed, avoid using a constant rpm. Do not do any full-throttle runs or long idling.
- At 500 miles: change the oil & filter, then tune ignition timing and the carb properly.
Final Checks:
- Check for leaks (oil, fuel, coolant). You can pressure-test the cooling system to check for leaks.
- Re-torque the head bolts after heat cycles.
- Recheck the valve clearances.
- Road test and monitor the temperature and oil pressure.
- Recheck the valve lash, torque head and manifolds again after heat cycles.
- Confirm the charging system, oil pressure, and steady idle.
- Step back, admire glossy black and chrome engine, then accept praise graciously.
Conclusion of Part 1:
.PNG)
.JPG)
A big time consuming job, but really worth it. The running in is incredibly important, so as much as you may be tempted to see what it's got, go easy for that first 500 miles as the end results will really pay off. I hope that the bullet point style of laying things out was useful and easy to follow. I could have gone into more detail, but as every make/model car engine has their differences, following this Instructable along with a detailed workshop book for your car should be enough to get you going. Not wanting to put anyone off, but this kind of job is not for the faint of heart so if you feel this is beyond your capabilities, seek help from someone trustworthy and genuine.
So with the car now running, it was now time to drive it home and get on with the rest of the jobs. In part 2, I will be showing you how I gave the front end of the MK3 a facelift.
See you there.