Classic Car Restomod - Part 2: Exterior - Front End:
by steve-gibbs5 in Workshop > Cars
157 Views, 2 Favorites, 0 Comments
Classic Car Restomod - Part 2: Exterior - Front End:
.PNG)
.PNG)


.PNG)
.PNG)
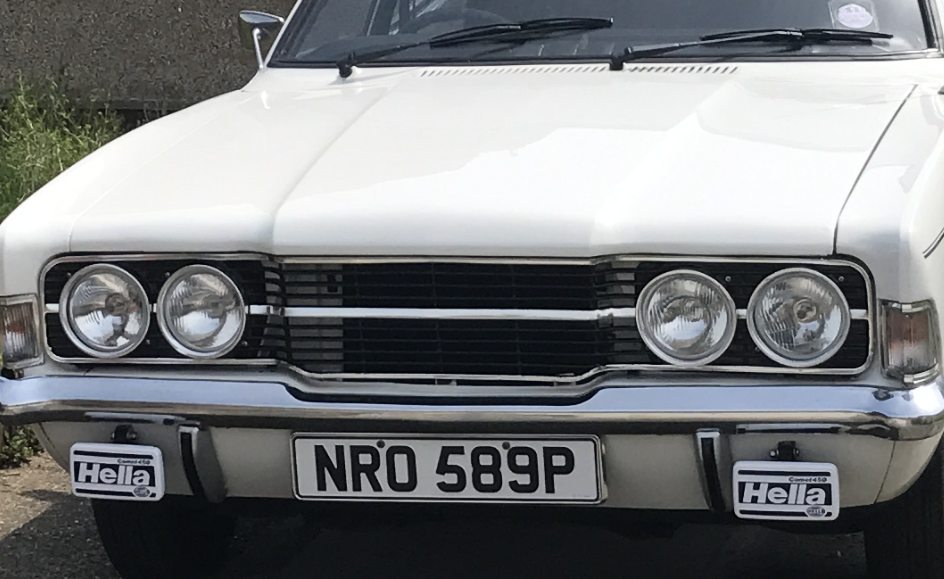
Welcome to Part 2 of my restomod Instructable collection for my 1976 Ford Cortina MK3.
In this part, I will be showing you how I gave my 1976 Mk3 Ford Cortina 1600GT a facelift taking it from a basic model look to a more sporty quad light GXL model look. Finding good quality parts that were not at extortionate prices was a bit of a challenge, but patience and regular web searches was the best way to play this game. Also being prepared to travel the country which when comparing online e-commerce website prices + delivery against petrol money to pick up the parts myself actually worked out cheaper, plus the fact that I could visually inspect the parts and also managed to pick up some bonus items from the people selling the parts I originally went for. That in itself was an enjoyable experience as I met a lot of great people and got to see some fabulous classic vehicles too.
So to the task at hand. As with all of the other parts in this collection, I will be be using my Cortina as the example and breaking the steps down into hopefully easy to follow stages in a way that should transfer over to other makes of car, not just the Ford Cortina. In this step we will be looking at how to change the headlights, add fog and spotlights, changing the front grille and under riders. Something to note, I used a really good chrome spray paint on certain parts, but if you are prepaid to pay extra, chrome plating is the best alternative if the parts are in good condition.
Supplies
.PNG)
Tools:
- Cross head screwdriver
- Drill/driver and drill bits
- Spanners
- Wire cutters/strippers
- Soldering iron
- Wire wool
- Wire brushes
Parts:
- New 4 x headlight kit with new bulbs
- Quad headlight mounting plate
- Quad headlight chrome surround rings
- Pair of chrome under riders
- Pair of fog lights
- GXL Radiator grille
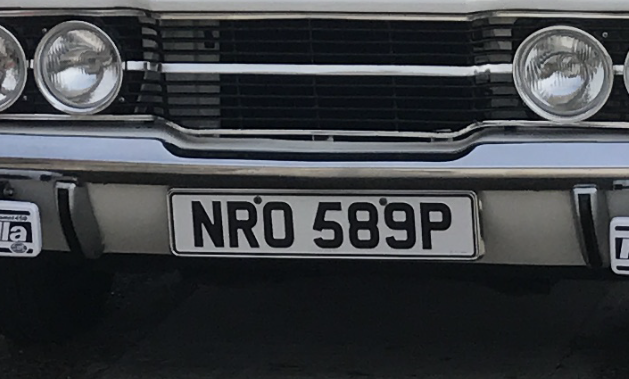
- New front number plate
- Clear lens front indicator housings with chrome edging and new orange turn signal bulbs
- Chrome effect number plate surround.
Additional:
- Rust remover
- Heavy duty paint remover
- Good quality chrome spray paint
- Grey spray primer
- Black gloss spray paint
- Chrome spray paint
- Clear spray lacquer
- Rubber rejuvenator compound
- Masking tape
- Metal polish
- Clean microfibre cloths
- Container for soaking parts in rust remover
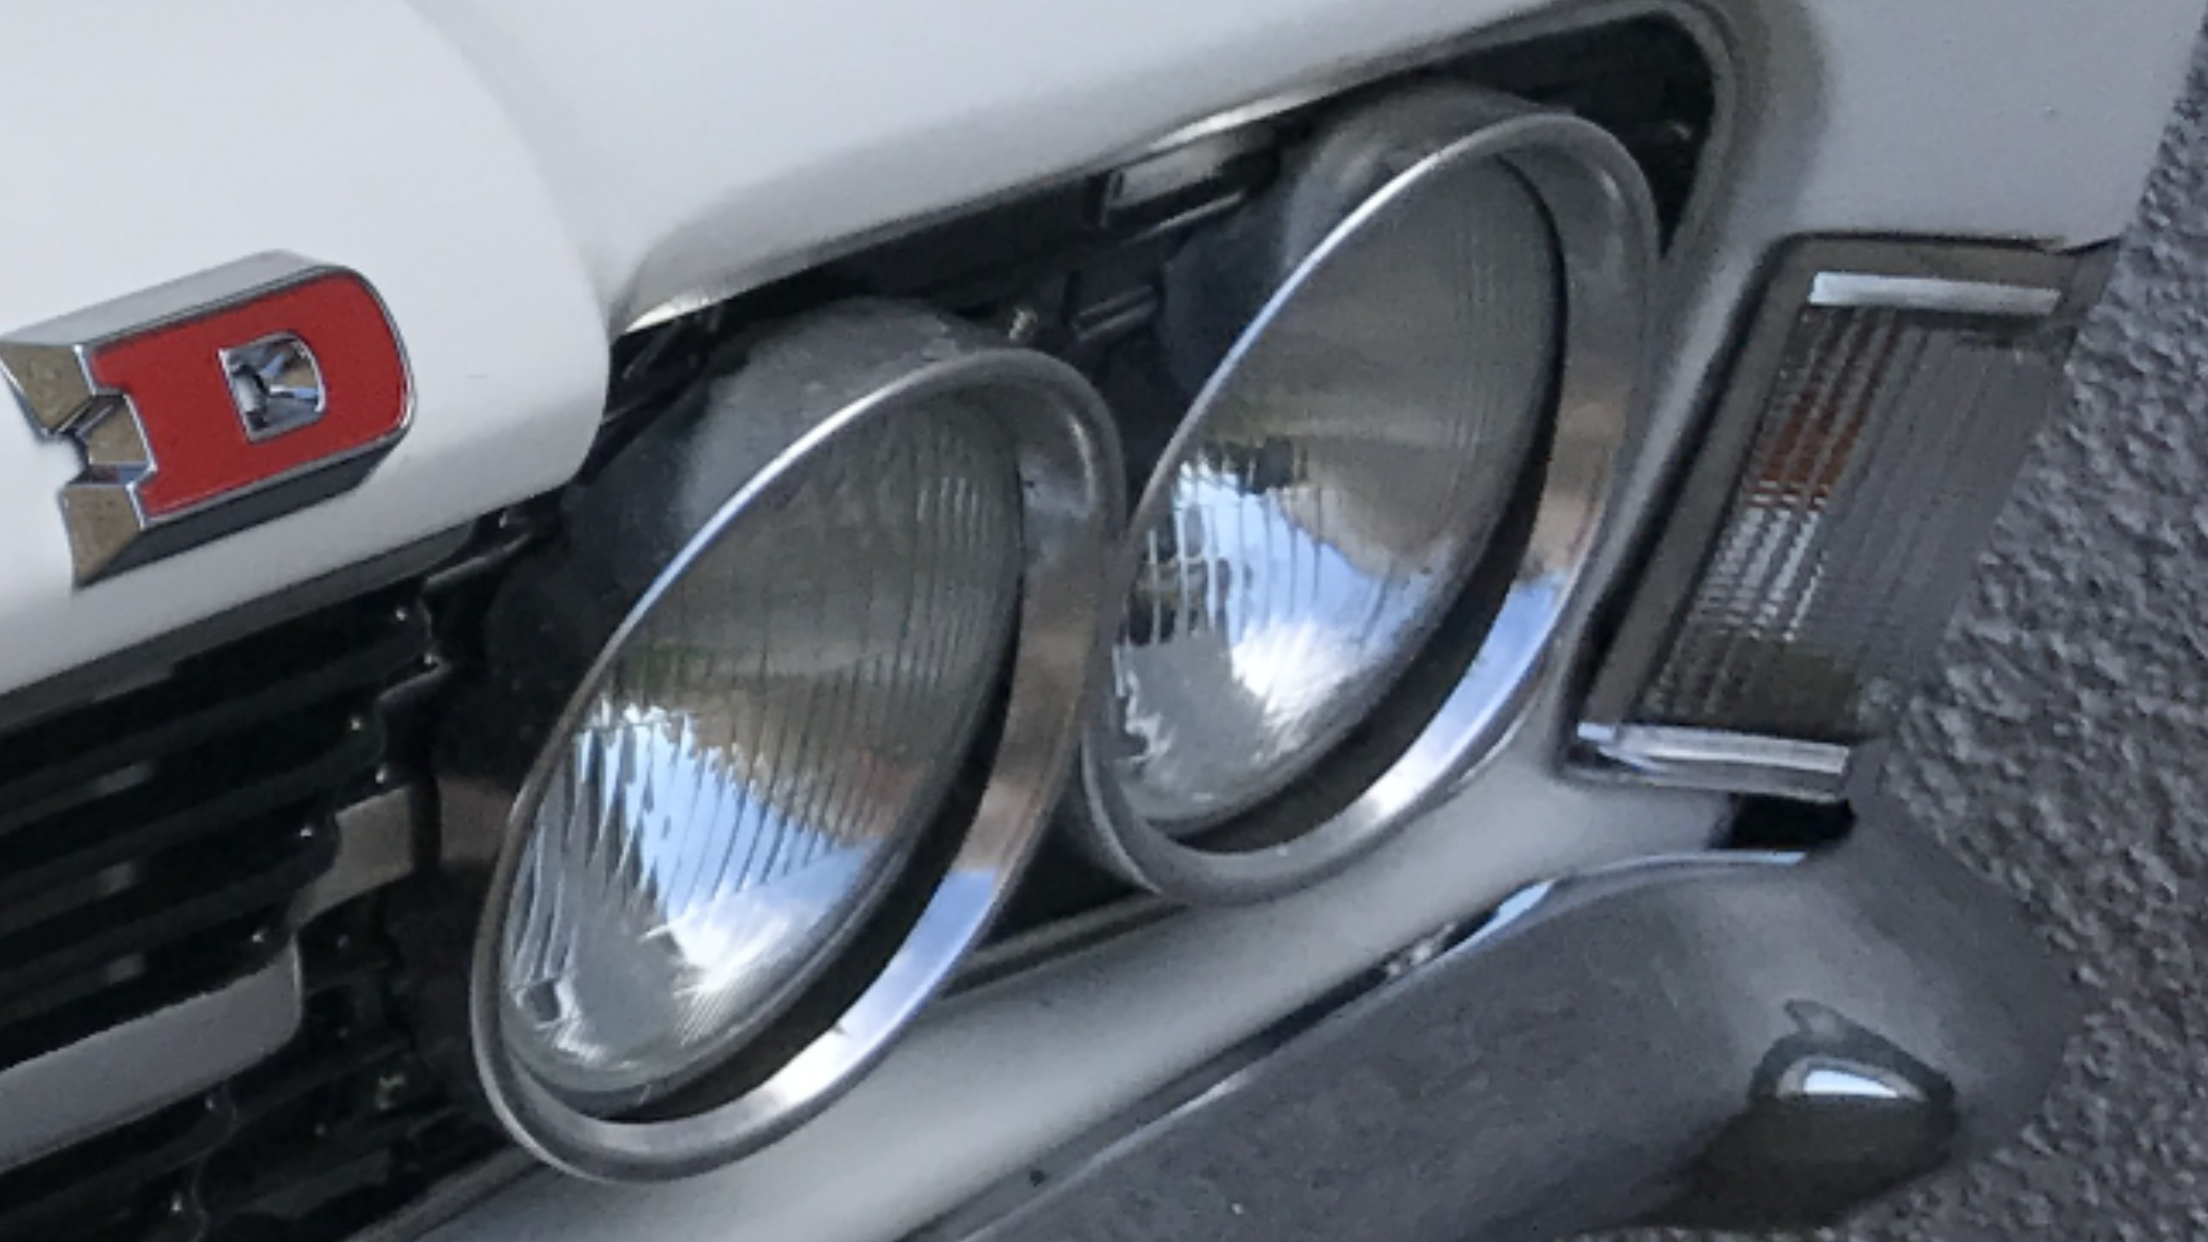
Quad Headlights:
.PNG)
.PNG)
.PNG)
.PNG)
.PNG)
.PNG)
.PNG)
.PNG)
.PNG)
.PNG)

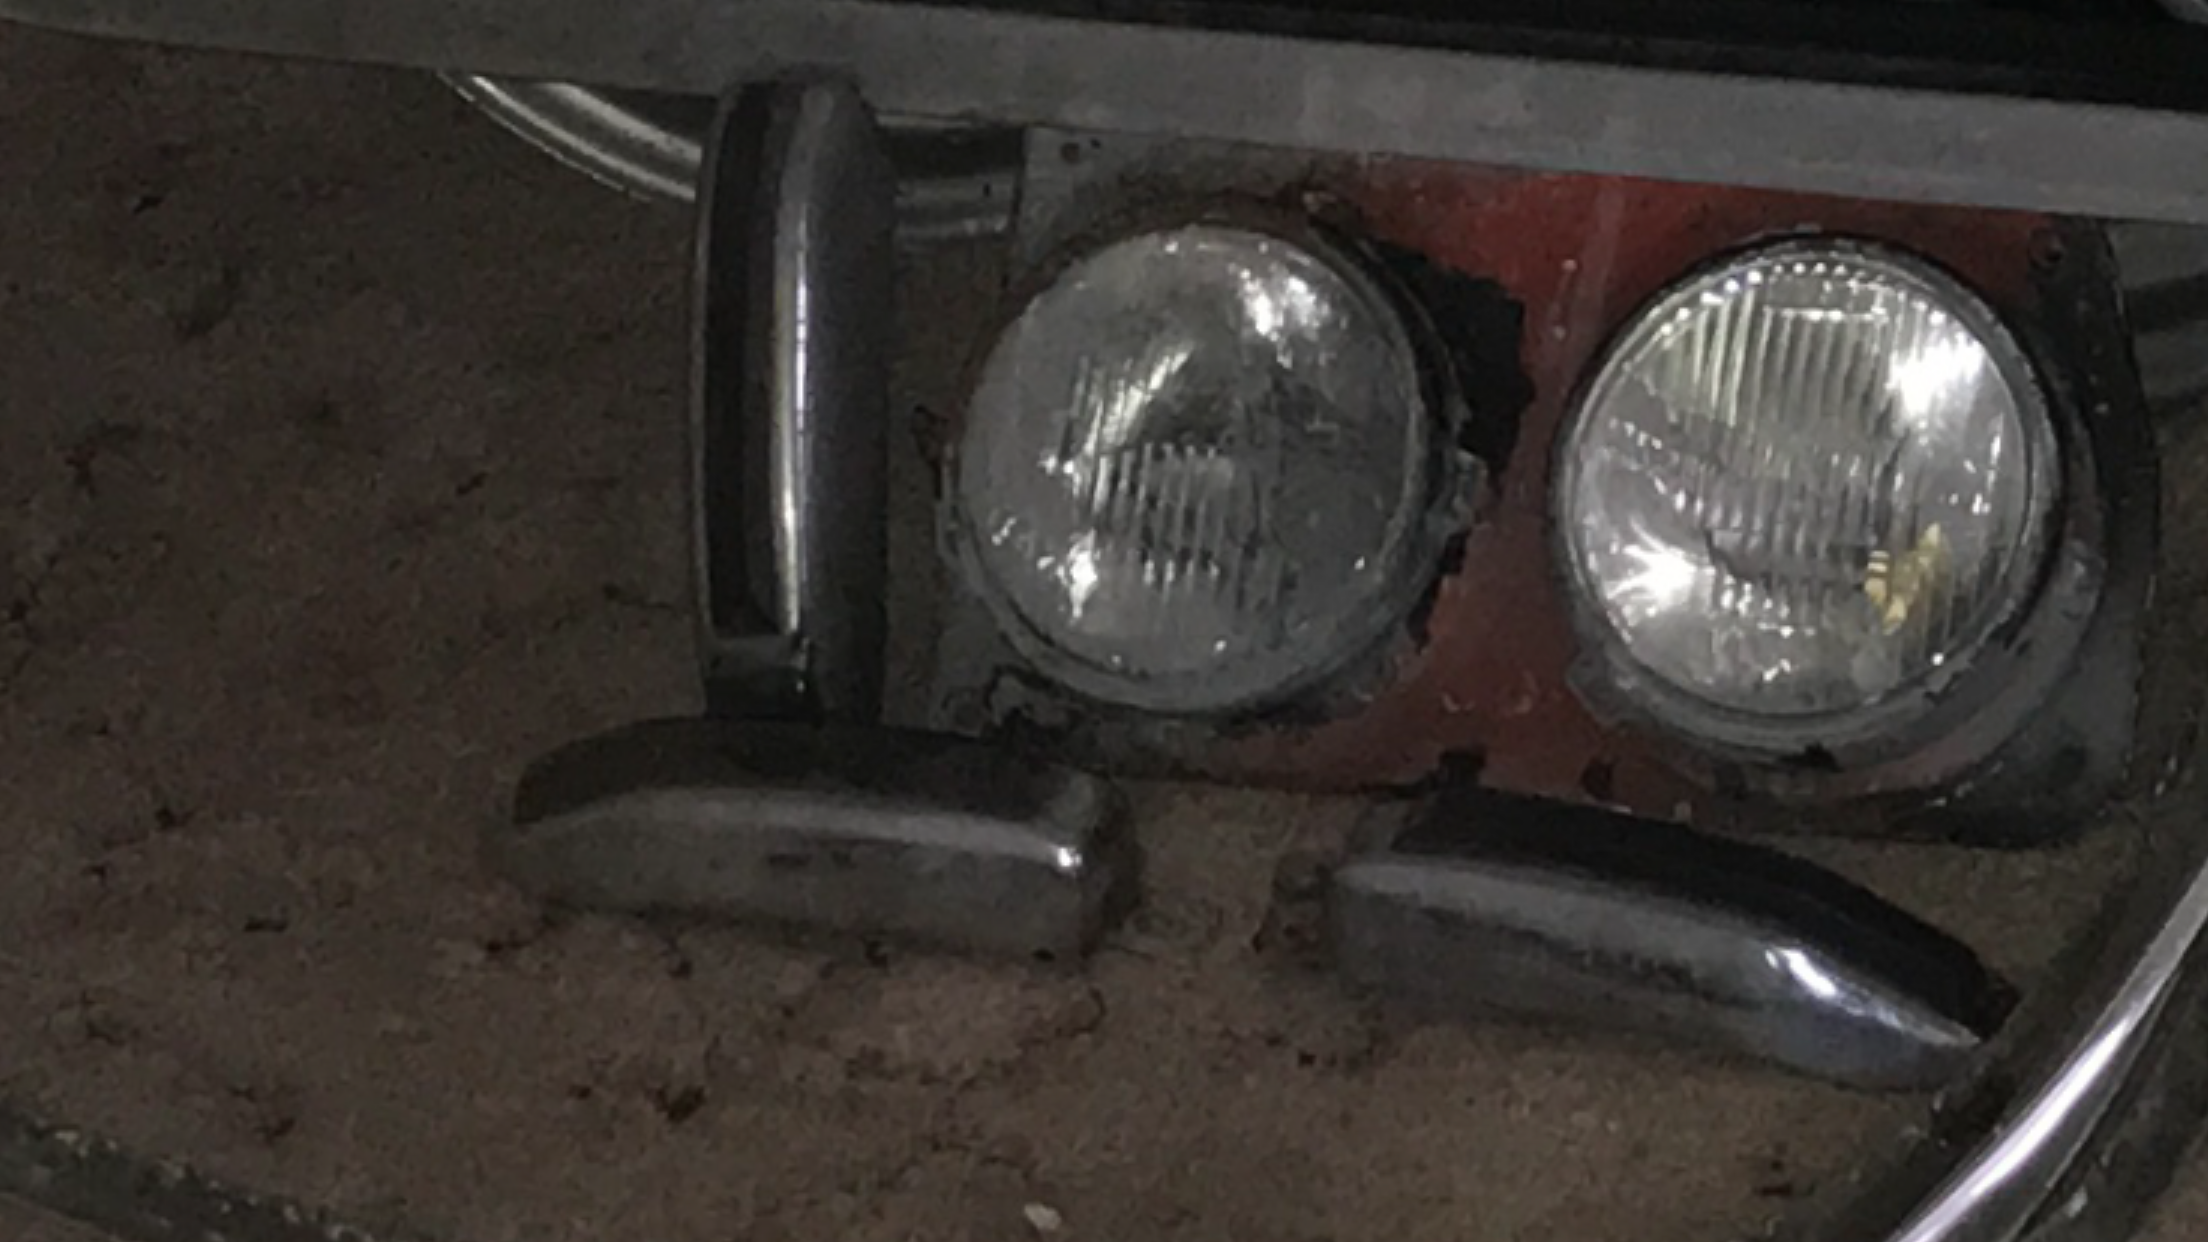
The biggest job on the front end was the lights. Not particularly difficult, but needed to be done right as we are adding lights to an older electrical system. One of the hardest things for me to find was the GLX twin headlight mounting plates. I finally managed to track some down which came with the headlights and the springs attached. However the lights were not in the best shape so I ordered some new ones which were much easier to find. An added bonus was that the mounting plate also came with the chrome surround rings in good shape, but needed a really good clean. So here's what I did...
- First off, strip down the light assemblies and give the backing plate and springs a clean up with soapy water, wire wool and a wire brush.
- Next, place the mounting plates, Headlight mounts, springs and surround rings on a container and soak in rust remover for at least 24 hours. The rust remover I used is called Evapo-rust which not only does it do the job well, but it is non-toxic and can also be reused a few times. You can use this product without protective gloves, but I advise wearing some as it can be a mucky job.
- After 24 hours, remove the parts, thoroughly rinse off with clean water and wipe dry. Depending on the paint quality, the next stage is to apply paint remover all over the mounting plates and headlight mounts then leave for another 24 hours (or whatever the directions are on the paint remover you use). This is where you defiantly need to wear protective gloves.
- When the 24 hours are up, clean off all the old paint and again thoroughly rinse off with clean water and wipe dry. Repeat the process if necessary.
- Spray on 3 or 4 coats light even coats of grey paint primer and wait its fully dry. Then 5 to 6 light even coats of black gloss paint and wait to fully dry, then 4 coats of clear lacquer. Follow the same process for the chrome ring trims, but use the chrome paint. Generally the waiting time between coats is around 20 minutes depending on environment temperature, but follow the instructions on the spray you're using.
- Attach the new lights to the mounting plates with the springs, install the new bulbs and attach the new rubber headlight backing covers.
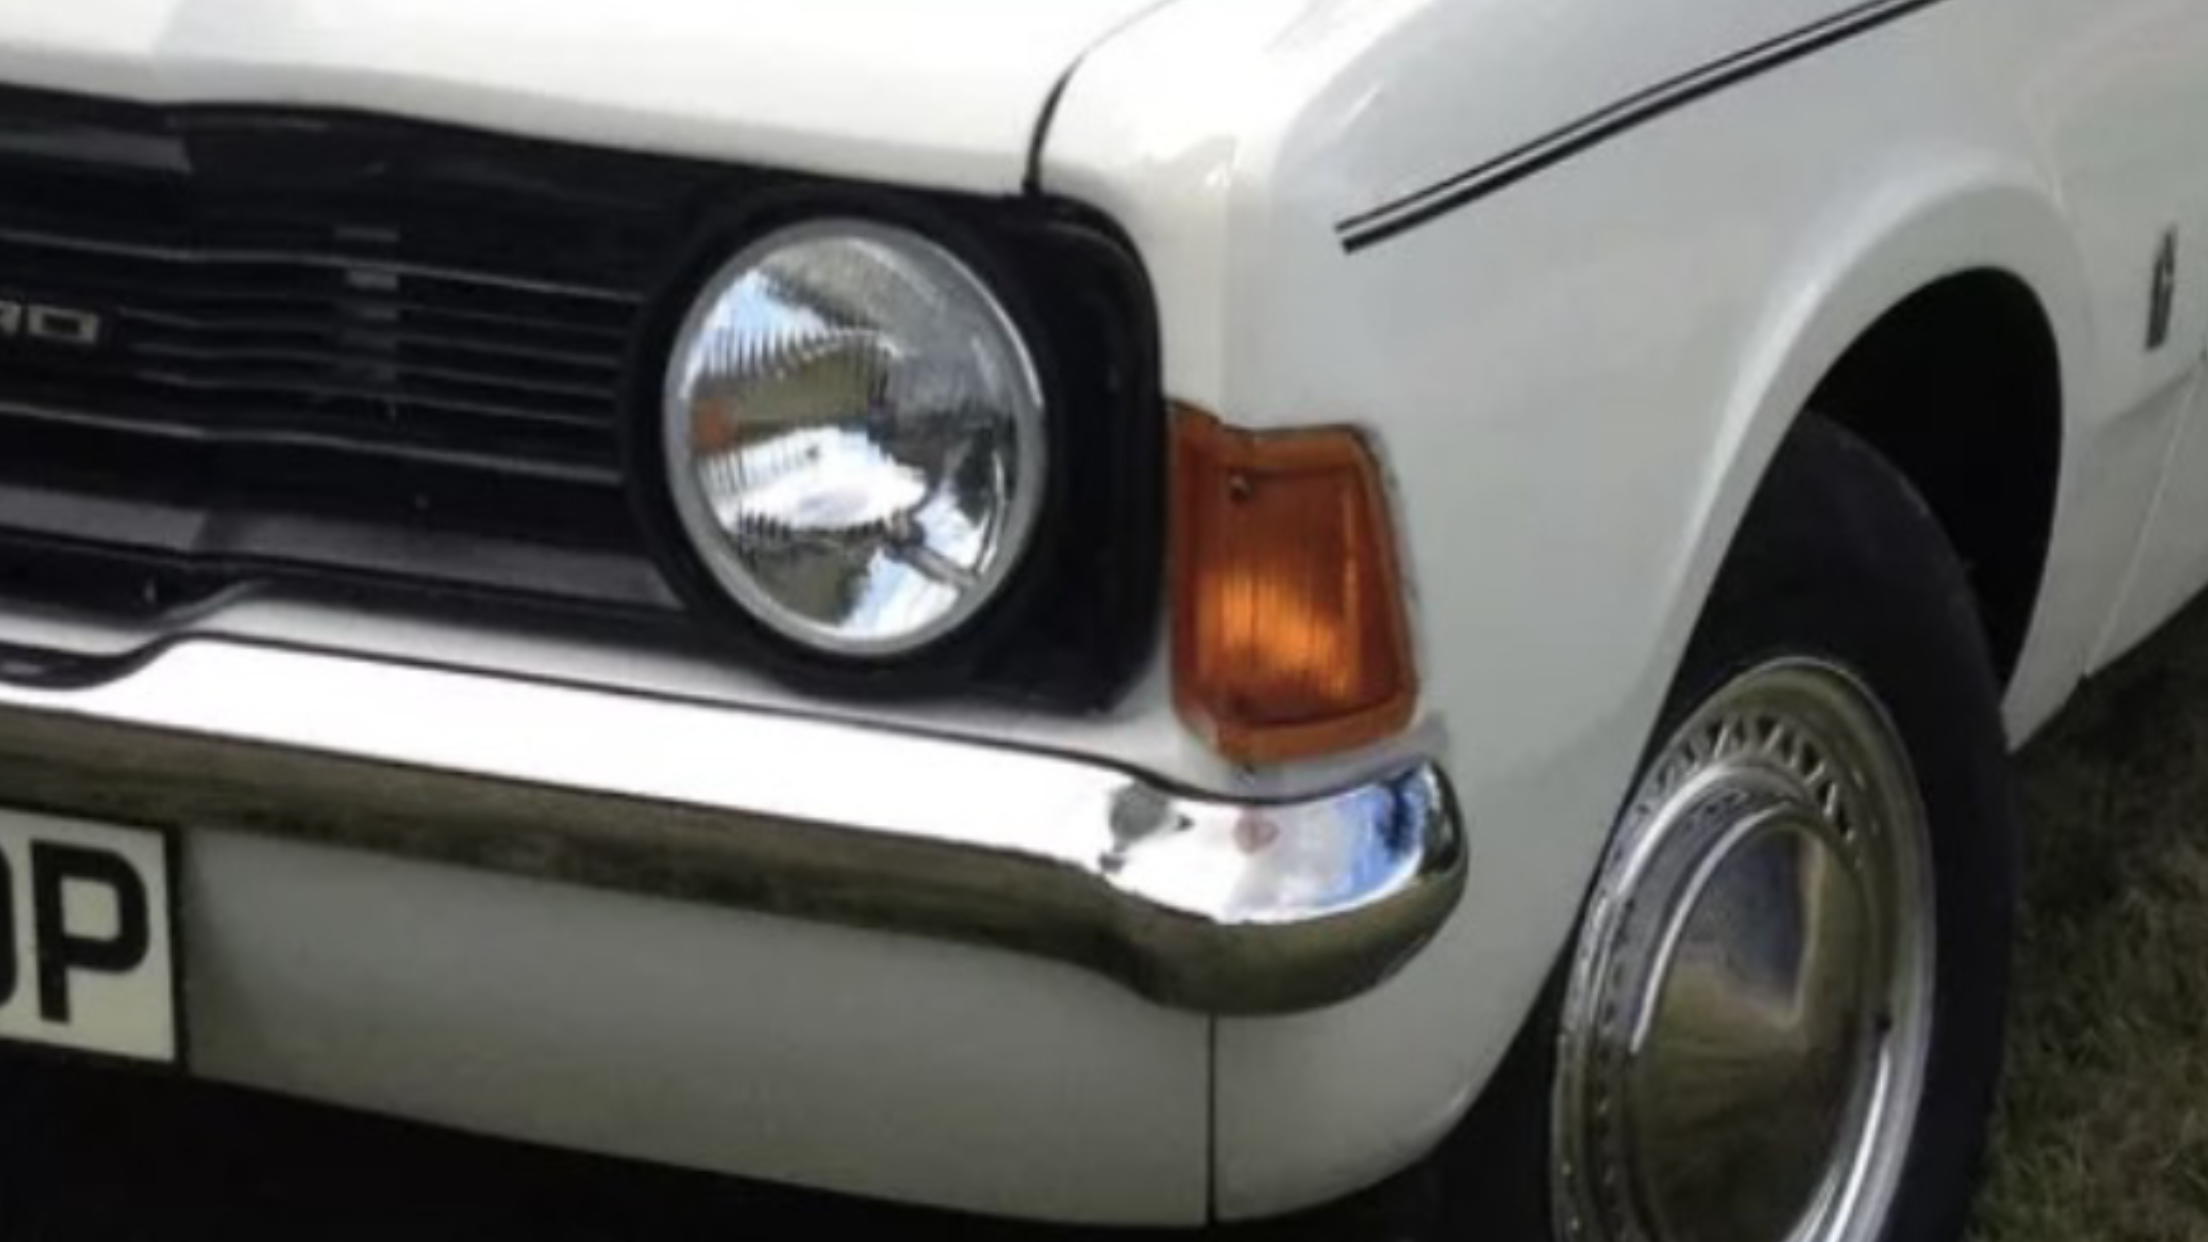
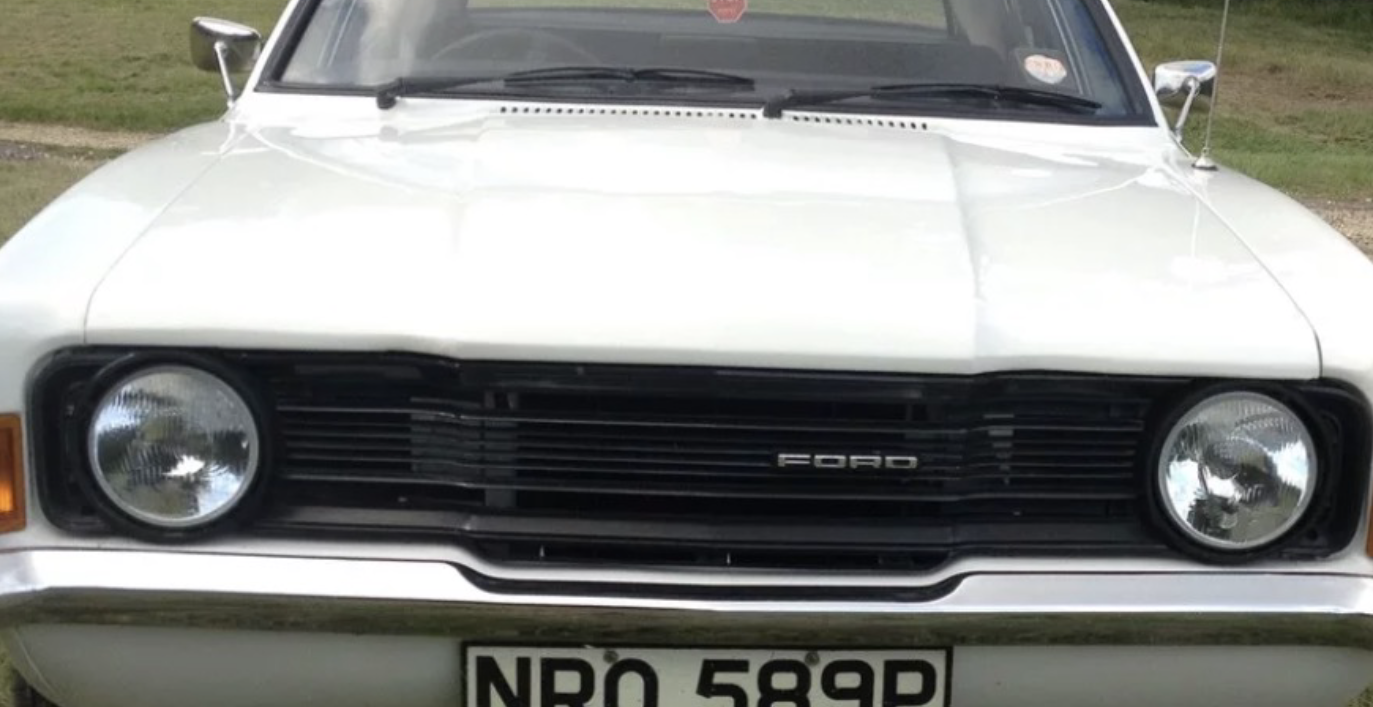
With the new lights painted and assembled, we can now swap the lights over on the car. For the Cortina, the single light and twin light mounting plates are a straight swap as the car bodies were made the same for different models. Check your car specs to see if upgraded parts will fit or if any additional parts and/or work would be needed. With the change from 2 to 4 lights, I decided that I wanted the additional two inner lights to be on the main/flasher beam with the outer lights for sidelights, dipped and main/flasher beams.
- Disconnect the battery, remove the radiator grille, then disconnect and remove the headlights and old mounting plates.
- Fit the new light assemblies and tighten up all of the screw/bolts.
- Now to wire the lights up. Some additional work is needed here as we are now using 4 lights instead of two, meaning more power draw.
- The original wiring can be connected to the two outer lights.
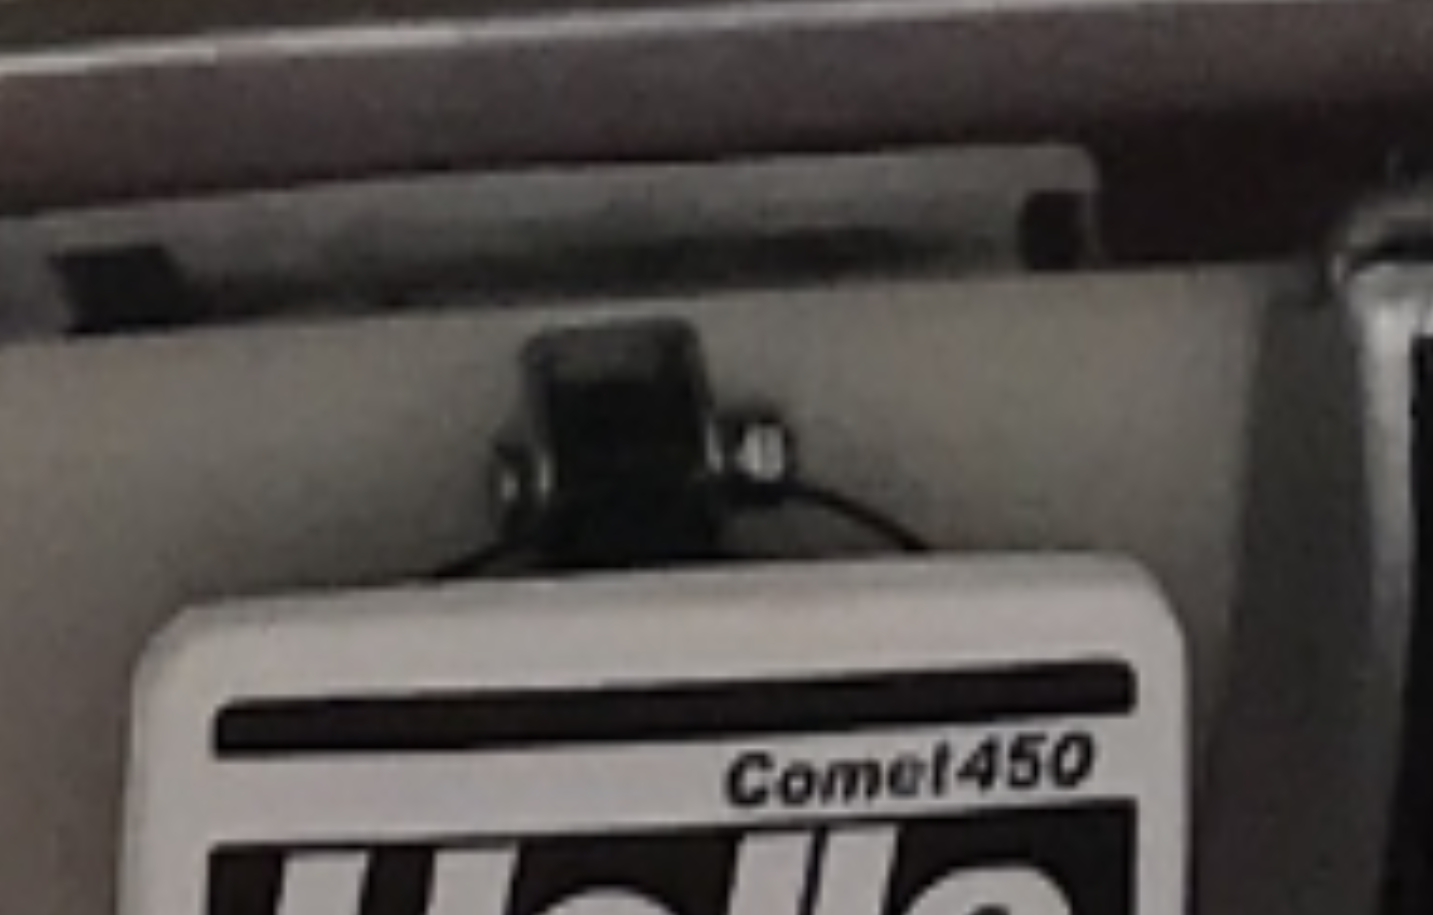
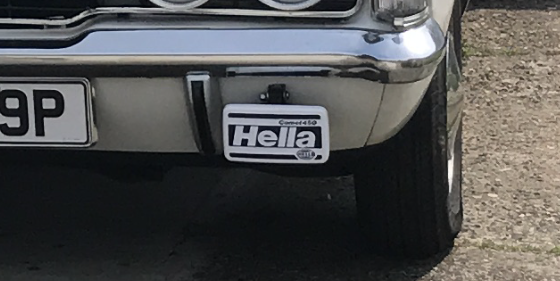
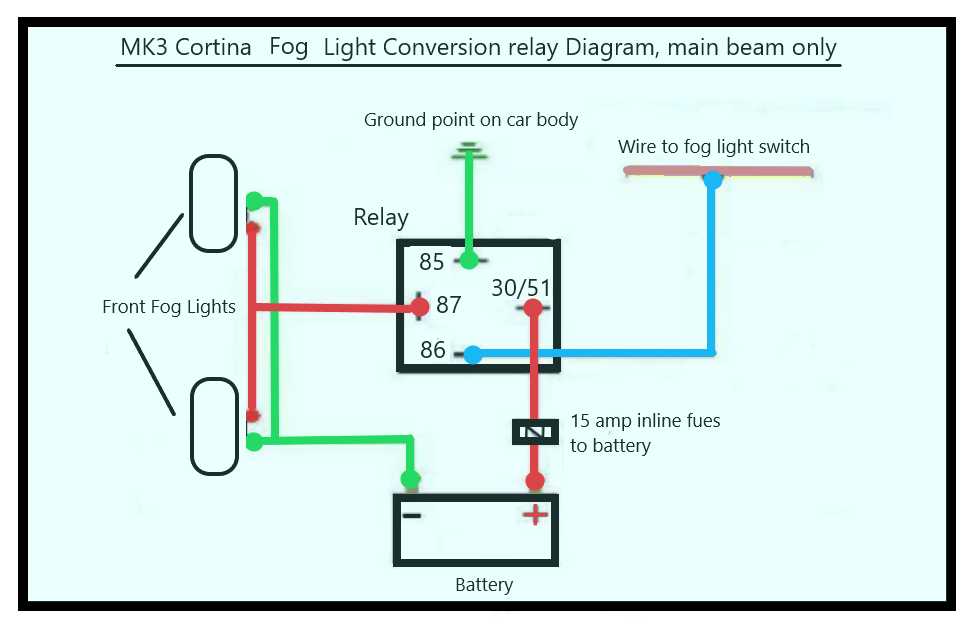
- Drill a hole where you want to install the relay, a hole small enough to act as a thread for the screw to attach to firmly. This can also be used as a grounding point for the relay ground wire.
- For the two inner lights, follow the attached diagram. Because of the additional power draw from the original wiring, a relay and additional wire is needed. The relay can be connected to the original main beam wiring from the outer lights as the power to energize it is minimal. The new inner lights on the other hand needs to be connected to the battery with an inline fuse and the relay takes care of the switching on and off.
- Temporarily reconnect the battery to test the lights. If there is an issue, check the wiring again, especially the ground wire connections. When all is working, disconnect the battery again.
Fitting the fog lights and replacing the indicators are next.
Fog Lights and Turn Signal Indicators:
.PNG)
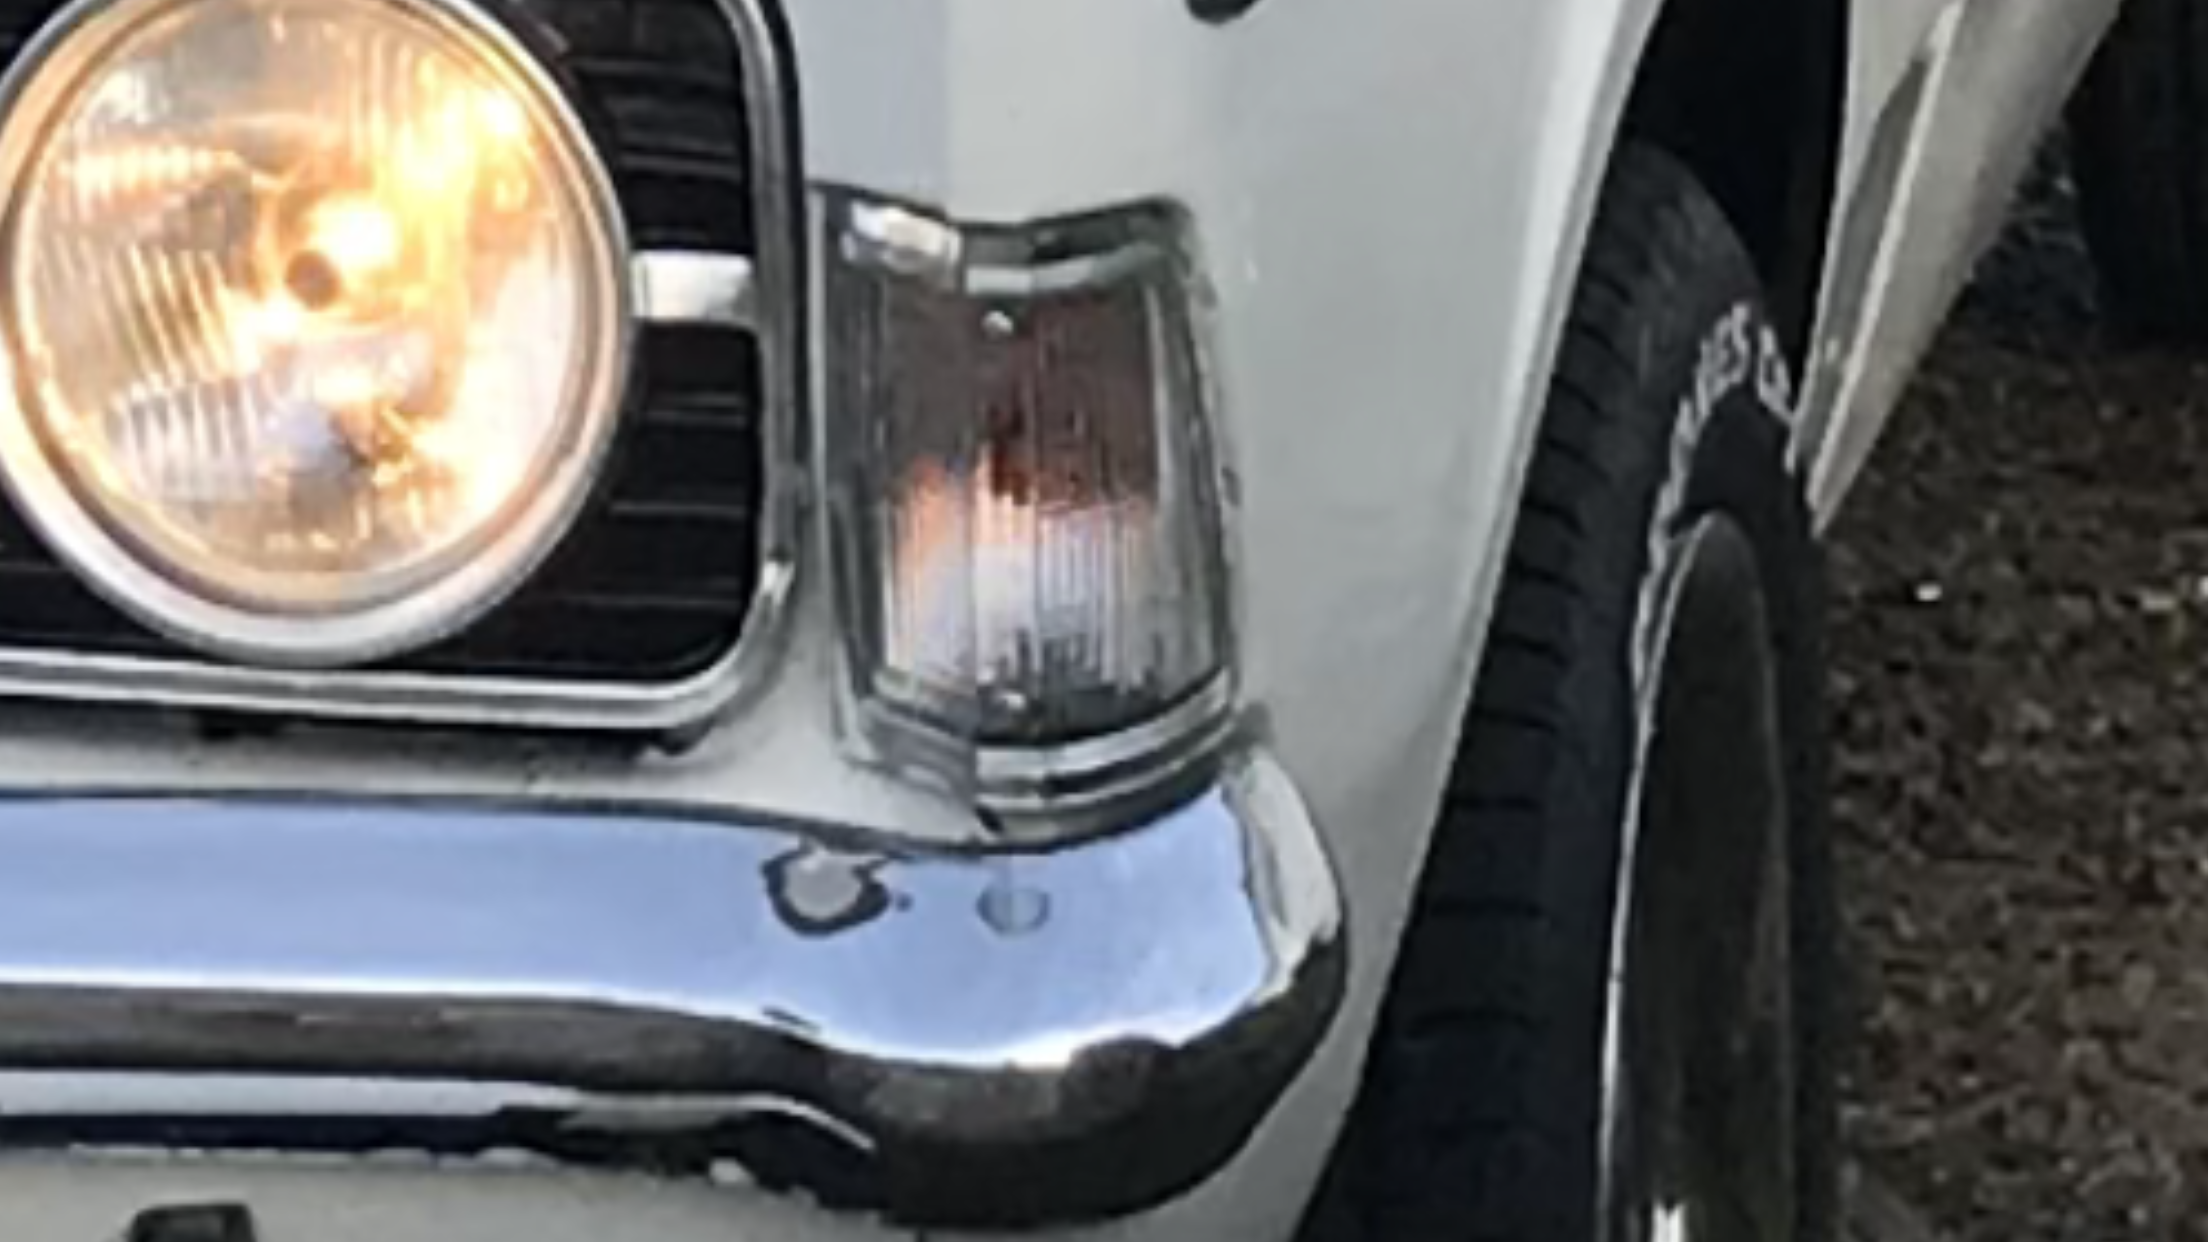
First we will fit the fog lights.
- Measure, mark and drill the mounting bracket holes into the car body where the lights are to be mounted. Then drill the holes just underneath where the wires need to be fed through.
- Feed the mounting bolts through the back of the hole and attach the lights mounting brackets. Then fit a rubber gromet into the hole for the wires.
- Feed the wires through the gromet. Now attach the lights with the new bulbs fitted, adjust to position and then tighten up.
- Drill a hole where you want to install the relay, a hole small enough to act as a thread for the screw to attach to firmly. This can also be used as a grounding point for the relay ground wire.
- Wire up the fog lights with a relay and wiring to the dashboard fog light switch.
- Connect the battery to test the lights, making any adjustments to each light if needed, then disconnect the battery.
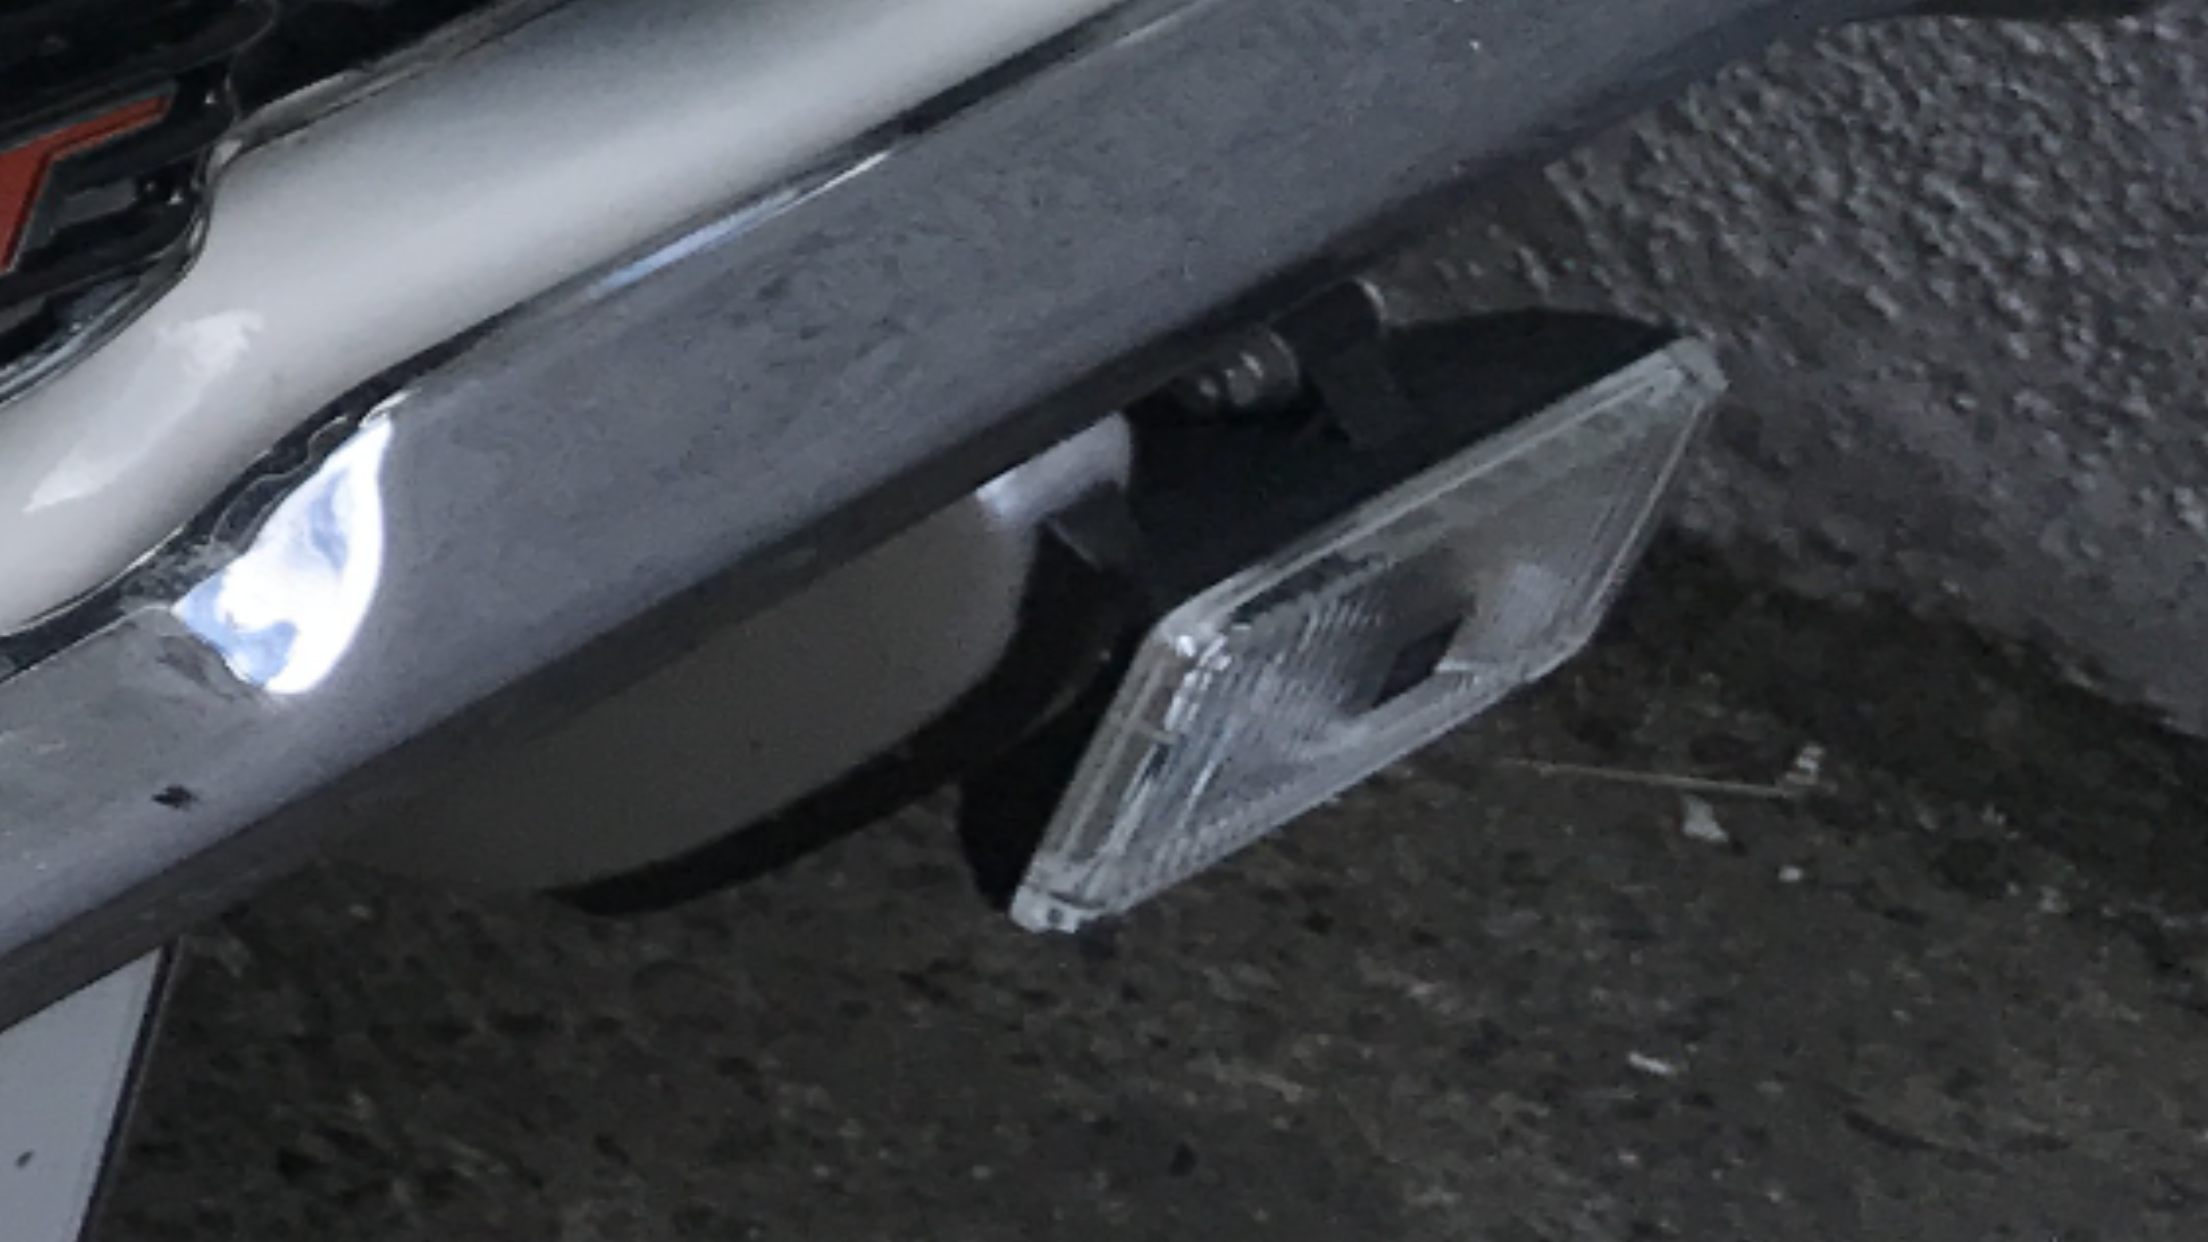
Now we will swap out the turn signal indicators.
- Remove the old front indicators, and disconnect the wiring.
- Fit new orange bulbs to the indicator wiring.
- Clean around the exposed bodywork while the lenses are off the car. Take this opportunity to clean up the old screws with a wire brush.
- Reconnect the bulbs/wiring to the new lenses and fit them to the car.
- Reconnect the battery to test that they are working correctly.
With the lights fitted and working, we can now work on the front grille.
NOTE: Try not to skimp on cleaning up old screws, nuts, bolts and clips. If they cannot be nicely cleaned up, replace them with new ones because having your nice and new/refurbished parts fitted with old dirty/rusty screws etc. really effects the overall look of the finished job and become more noticeable.
Radiator Grille:
.PNG)
.PNG)
.PNG)
The GLX grille I purchased was in reasonably good shape, but needed some attention.
- Give the grille a good clean with warm soapy water then thoroughly dry.
- Give all of the black areas a rub down with a fine grit wet and dry paper, then rinse and dry.
- Polish up the chrome areas with a good quality chrome/metal polish, and buff to a nice shine. Repeat the process if necessary.
- Mask off all of the chrome areas just leaving the black areas showing.
- Apply a two of three light coats of spray primer and leave to fully dry. Then apply 4 of 5 coats of gloss black spray paint and leave to fully dry. Finally spray on a few coats of clear lacquer then leave to fully dry and cure.
- Remove the masking tape, give the chrome work a final polish.
- Remove the old grille, give the exposed bodywork and grille mounting screws a thorough clean, then fit the new grille.
Chrome Under Riders:
.PNG)
.PNG)
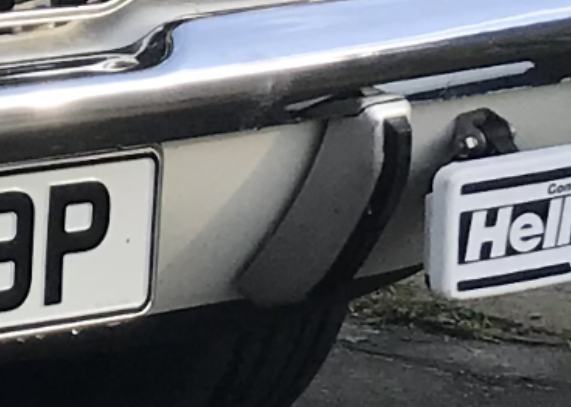
The chrome under riders were particularly a hard item to find at a reasonable price, but I did manage to find a full set which were in reasonable shape, no rust, mounting brackets in tact, and had a good set of rubbers, but the chrome work was a little pitted. If I had the money I would have paid to get them re-chromed, but as I was on a budget I spray painted them with a silver/chrome paint and I was very pleased with the results.
- Give both pairs (front and rear) of the under rides a good clean with warm soapy water then thoroughly dry.
- Give all of the chrome areas a rub down with a fine grit wet and dry paper, then rinse and dry.
- Mask off all of the rubber areas just leaving the chrome areas showing.
- Apply a two of three light coats of spray primer and leave to fully dry. Then apply 4 of 5 coats of gloss black spray paint and leave to fully dry (the gloss black will help to enhance the the chrome look). Then apply another 4 to 5 coats of the chrome spray paint. Finally spray on a few coats of clear lacquer then leave to fully dry and cure.
- Remove the masking tape, give the new paint work a final polish. Also apply some rubber rejuvenator compound to the under rider rubbers to make them more supple and to bring up the shine.
- Remove the front bumper, give it a good clean and polish, then mount the front under riders to the inside mounting plates of the bumper.
- Refit the bumper and the new number plate give the whole front end a final clean up.
Conclusion of Part 2:
.PNG)
.PNG)


.PNG)
I added new badges towards the end of the project as I had to wait a long time for them to be delivered which was fine as I still had a lot more to do. Also adding the badges would be a nice finishing touch job to look forward to.
So after this section was completed, as with all of the other jobs in the other parts of this collection, I was left with a lot of parts that I removed from the car. Don't rush in to dispose of these as there are people out there who just may be looking for these parts, even if they're not in the best of condition. Give the old parts a clean up and try to sell them or even give them away if you don't think they are re-sellable.
So with the front end pretty much completed, it was time to move onto the rear end which you can find in Part 3.
See you there.