Fort Jefferson/ Dry Tortugas National Park - Tinkercad Version!
by Maddogg0 in Design > Digital Graphics
1425 Views, 4 Favorites, 0 Comments
Fort Jefferson/ Dry Tortugas National Park - Tinkercad Version!


This Instructable is an entry in the scene category. I chose to design Fort Jefferson in the Florida Keys because of the complex architecture of the base itself, as well as the landmarks like the lighthouse, shot furnace, and the pier. The surrounding coral reefs and clear water make for a fun project as well! Designing this took around 14 hours, and I'm very proud of how it turned out.
Design Process


For the entire model, I used satellite images. I took the idea of a "quarantine vacation" to the next level, I guess! First, I sketched out a basic design and made a list of the features I would include. To make the main attractions, I tried breaking the objects into basic shapes, like rectangles, cylinders, and polygons.
Some of the main details I found worth CADing were: the lighthouse, the shot furnace, the arcs in the main walls, and the pier. Because some of the other buildings were not available to see in the satellite images, I went for a more simplistic approach (as you will see later).
American Flag
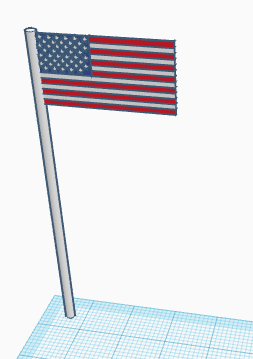
To start off the design, I made the American flag, visible from the fort entrance. I tried to make this as accurate as possible, referring to websites for the correct spacing. In total, I used 14 rectangles and around 50 stars. For the flagpole, I used a cylinder, making the width around 3mm. However, the actual dimensions didn't matter for me, as I would be moving and resizing the parts.
Garden Key Lighthouse


The lighthouse was mainly made of hexagons and cylinders. However, the second hexagon had a considerable bevel to it, so I used wedges (as holes) to create the slant, then used cubes to remove the rest, as seen it the photo collage above. After stacking 4 hexagons (with various heights), I added 2 cylinders. Then, to create the window, I used a polygon and removed material from the edges and center using rectangles and a hexagon, both on the hole setting. As a final touch, a cone with a sphere on top was added on top of the window.
The purpose of the Garden Key Lighthouse was to warn incoming ships of the surrounding coral reefs, where hundreds of shipwrecks occurred over the years. This inspired the construction of other lighthouses on the surrounding islands.
Cannons
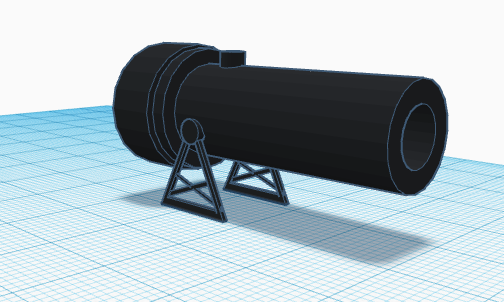

I built the cannon out of rectangles, cylinders and cylindrical holes. First, I started off by making the main body of the cannon. I used 3 cylinders of different thicknesses and stacked them on top of each other to create a gradient of large to small. Then, I made the supports using 5 rectangles (the width was around 0.1 mm) and a cylinder. I rotated two of the rectangles to create a triangle, then removed the overhanging material by grouping a cube (as a hole) with the supports. Finally, I rotated two more rectangles to create the "criss-cross," grouped all the entities, and changed the color to black.
The official name of the cannons are "Rodman guns" and they weigh 25 tons! When the U.S army left the fort in 1874, most of the metal was sold for scrap. However, these guns were left behind to rust, because of the remote location and condition of the guns.
Shot Furnace


The shot furnace building is slanted upwards, so I used a rectangle with a wedge on top. After grouping those, I made an overhanging roof by grouping a wider roof shape with a thinner roof hole. Then, I made a chimney by stacking two cubes, then aligning them with a hole. I colored the roof and top part of the chimney white, and the main building red. Next, I grouped an arc with cylindrical holes to create the area where the shots would go in. I added 3 rectangles to the same face of the building to create the metal decals. I used stars for the symbols on the outside of the shot furnace.
Second Building
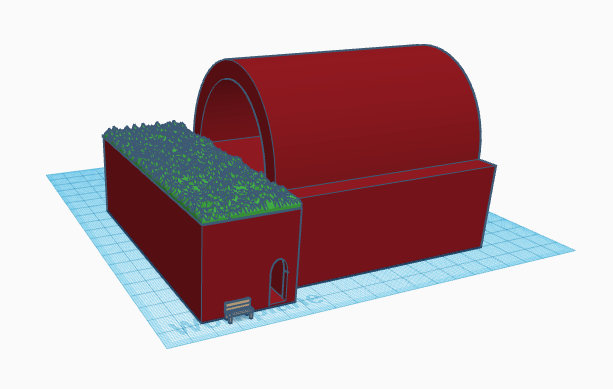
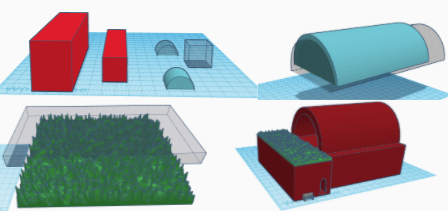
To create the second building, I used two arcs and two rectangles. I grouped the two arcs together in order to replicate the reference image. Then, I used the two rectangles to create the base. Following this, I imported a grass and park bench design from the Tinkercad user base (authors and files are on the last step). I trimmed the grass square by grouping it with a rectangular hole and repositioned it on top of the wider rectangle. Finally, I added a door and a walking space inside by grouping two rectangular holes and an arc hole with the base.
Fort Walls


The walls of Fort Tortugas are hollow and have a complex system of runways and arcs. For the main structure, I used two polygons (one of which was a hole). For each of the vertices, I added a rectangle grouped with half of an octagon. On the inside of the vertices, I added half an octagon and grouped all the shapes. The walls have two rows of arches with curved walkways inside. To make this, I grouped a rectangle and arc together and changed it to a hole. I pasted the shape 18 times and spaced each arch 35 mm apart from each other. Then, I copied the entire row, pasted it again, and adjusted the height. Each wall of the fort (in my design) has 36 arcs! To make the walkways, I grouped two arcs (as holes) with the main structure.
Grand Entrance

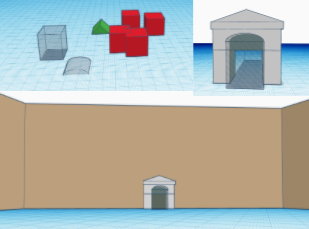
The doorway is composed of one roof and three rectangles. I laid out the shapes I needed and used the align tool to position everything properly. However, I did not want to group the door to the finished building, because I would be unable to change the color of the door. So, I used the arc and rectangle hole combo to shape the inside of the door. I made two copies of the hole, and grouped one to the door, and one to the fort walls.
Grass, Moat, and Walkway


To make the moat, I inserted a polygon that was larger than the base and changed the color to a light blue. Then, I used the transparency adjusters to make it clear. To remove the water inside the base, I copied the base structure and made another polygon roughly the same size as the inside of the base. I grouped these two holes with the water. To incorporate detail, I imported a fish design and partially submerged it into the water.
The moat is surrounded by a white walkway. To make this, I copied the water polygon and changed into a hole. Then, I created another polygon that was around 20 mm larger than the water polygon on each side. Then I grouped the two polygons.
I wanted the grass design to be low in detail (ie. not showing every strand of grass) and very short (around 5 mm tall). I imported the design from Free3D and made sure the dimensions were longer than the fort walls. I copied the fort wall and water shapes and turned them into holes. After grouping these three objects, I realized that I still had excess material left over. I removed these by rotating rectangular holes and grouping them with the grass shape. Now the grass was perfectly fit to the inside of the fort!
Sandy Path

On top of the fort walls, there is a sandy path that surrounds the top perimeter. I used the scribble tools to create slightly shaky lines and a U shape, then reused this design all around the fort.
Tips for using the Scribble tool:
I find that drawing four dots in the corners of the sketch plane allows you to see more of the surrounding area in the preview box.
Exterior and Interior Windows
Interior Windows
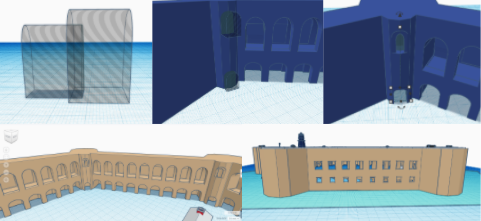
Inside the fort, the polygon towers on the inside of the vertices have two arc-shaped windows/doors. For the window on top, I used two arcs with a slight offset to produce the divot seen in the reference images. For the door on the bottom, I just used one arc. Since the towers are hollow, I centered a cylindrical hole that was 10 mm shorter than the fort walls in the tower. I grouped these holes with the main structure. I repeated this process with the remainder of the towers.
Exterior Windows
On the outside of the fort, there are two rows of square windows. In my design, I grouped 16 total square holes into the main fort walls. I made sure the length of the holes went all the way through the wall, into the arches on the interior face. Also, the row on top has larger square windows, which I made 10 mm larger and taller than the bottom row's windows.
Fort Jefferson Sign

To make the Fort Jefferson sign, I used roofs, three rectangles, and the text feature. I tried to imitate the national park logo on the sign by using triangles and matching colors. The sign itself is made out of brick, hence the dark red color. There is also a thin white rectangle on the sign for added detail.
Top Perimeter Details


For the trapezoids on top of the fort, I grouped a rectangle with two wedges and added an arc hole as a door. There are three of these shapes on each edge of the walls. Spacing between each of these shapes varied in my design.
Additional Buildings

There are some simple, nondescript buildings in the northwestern area of the fort. To make these, I placed a roof on top of a rectangle. Then, after copying the design, I altered the width and length for some variance.
Importing Trees and Final Steps
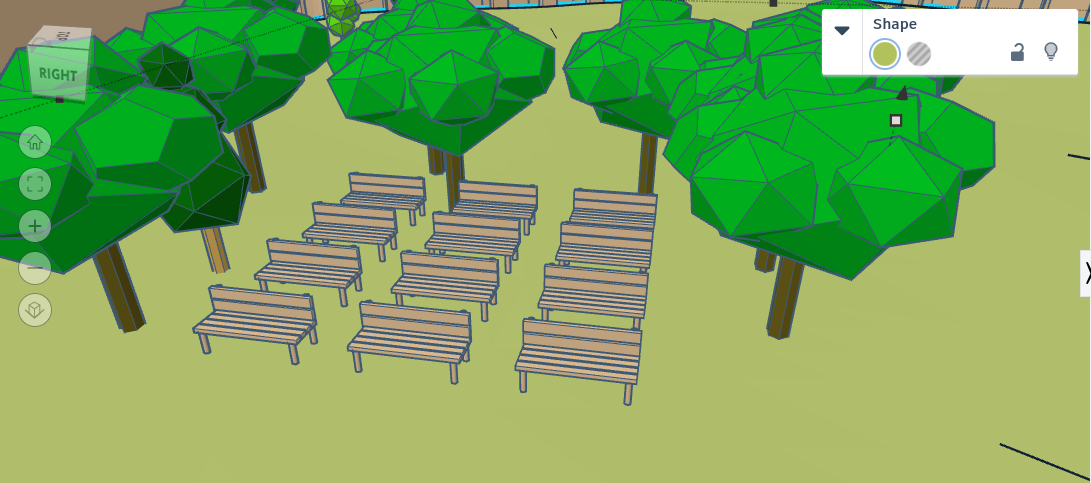

Inside of the fort, there are clumps of trees and bushes, as well as a park-like setting with rows of benches. I imported some low-poly trees from Thingiverse and bushes from the Tinkercad user base.
In Tinkercad, you can import anything, no matter the origin, as long as it's a .stl or .obj file
To make the park section, I copied the park bench design from the second building and laid them out in rows. Then, I surrounded this with trees. Then, referencing the satellite images, I added clumps of trees to the entrance and along the northwestern edge.
There are strips of grass surrounded by broken bricks along the north and southeast walls. I recreated the broken bricks by staggering three rectangles. I placed this next to a long green rectangle, then repositioned and rotated this until I was satisfied with the accuracy.
Fort Jefferson Boat Pier

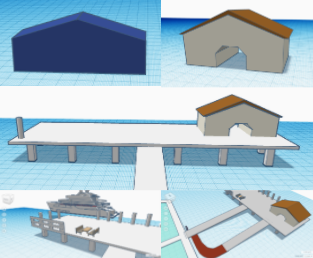
Next up was the boat pier. I made the house on the dock by stacking two wedges on a rectangle, grouping this, and adding a roof. Then I grouped a rectangle with half of a hexagon and turned this into a hole. I centered this with the building by using the align tool, and made sure the length of the shape went all the way through the building. Then I grouped the hole with the building.
For the dock, I used a rectangle for the base, and more rectangles for the posts on the bottom. I added a couple of cylindrical posts on the upper left corner and down the side. I grouped all of these shapes and changed the color to a warm grey. To make the ferry, I imported a design from Tinkercad and used the text tool to add “Dry Tortugas National Park Ferry” to the side. I added two rectangles as decals to either side of the text. On the frontmost edge of the dock, I imported two park benches and added a rectangle atop a cylinder to make a picnic table. To make the fences surrounding the front side of the dock and the ramps, I used rectangles with a width of 0.01 mm. The fences were made of three horizontal rectangles and vertical rectangles spaced 15 mm apart. Finally, I needed to connect the two ramps to the main entrance of the fort. In the reference image, they are connected by a brick path. I used the scribble tool to draw a curved shape, then adjusted the height.
Conclusion
For some finishing touches, I added cannons on each vertex of the fort, and rotated them so they all faced outwards.
I hope you learned something new about Tinkercad today! Also, I hope that this Instructable inspires you to create something, no matter the complexity. As a side note, I added some easter eggs to the landscape. Let me know in the comment section if you found any of them!!
Designs Imported
- Thomas the Tank Engine 1984 model by Thomas the Tank Engine and Friends
- fish by Dilys
- Boat by Arnaud Vanderplasschen
- Rectangular Grass Patch by printable_models
- Tree for Gloomhaven by Robagon
- Low poly tree sculptures by francfalco
Thank you for reading! You can view the finished design here.