Mustang Foxbody - Alternate Transmission Cooler Connectors Assembly Method
by Quadrifoglio in Workshop > Cars
112 Views, 0 Favorites, 0 Comments
Mustang Foxbody - Alternate Transmission Cooler Connectors Assembly Method
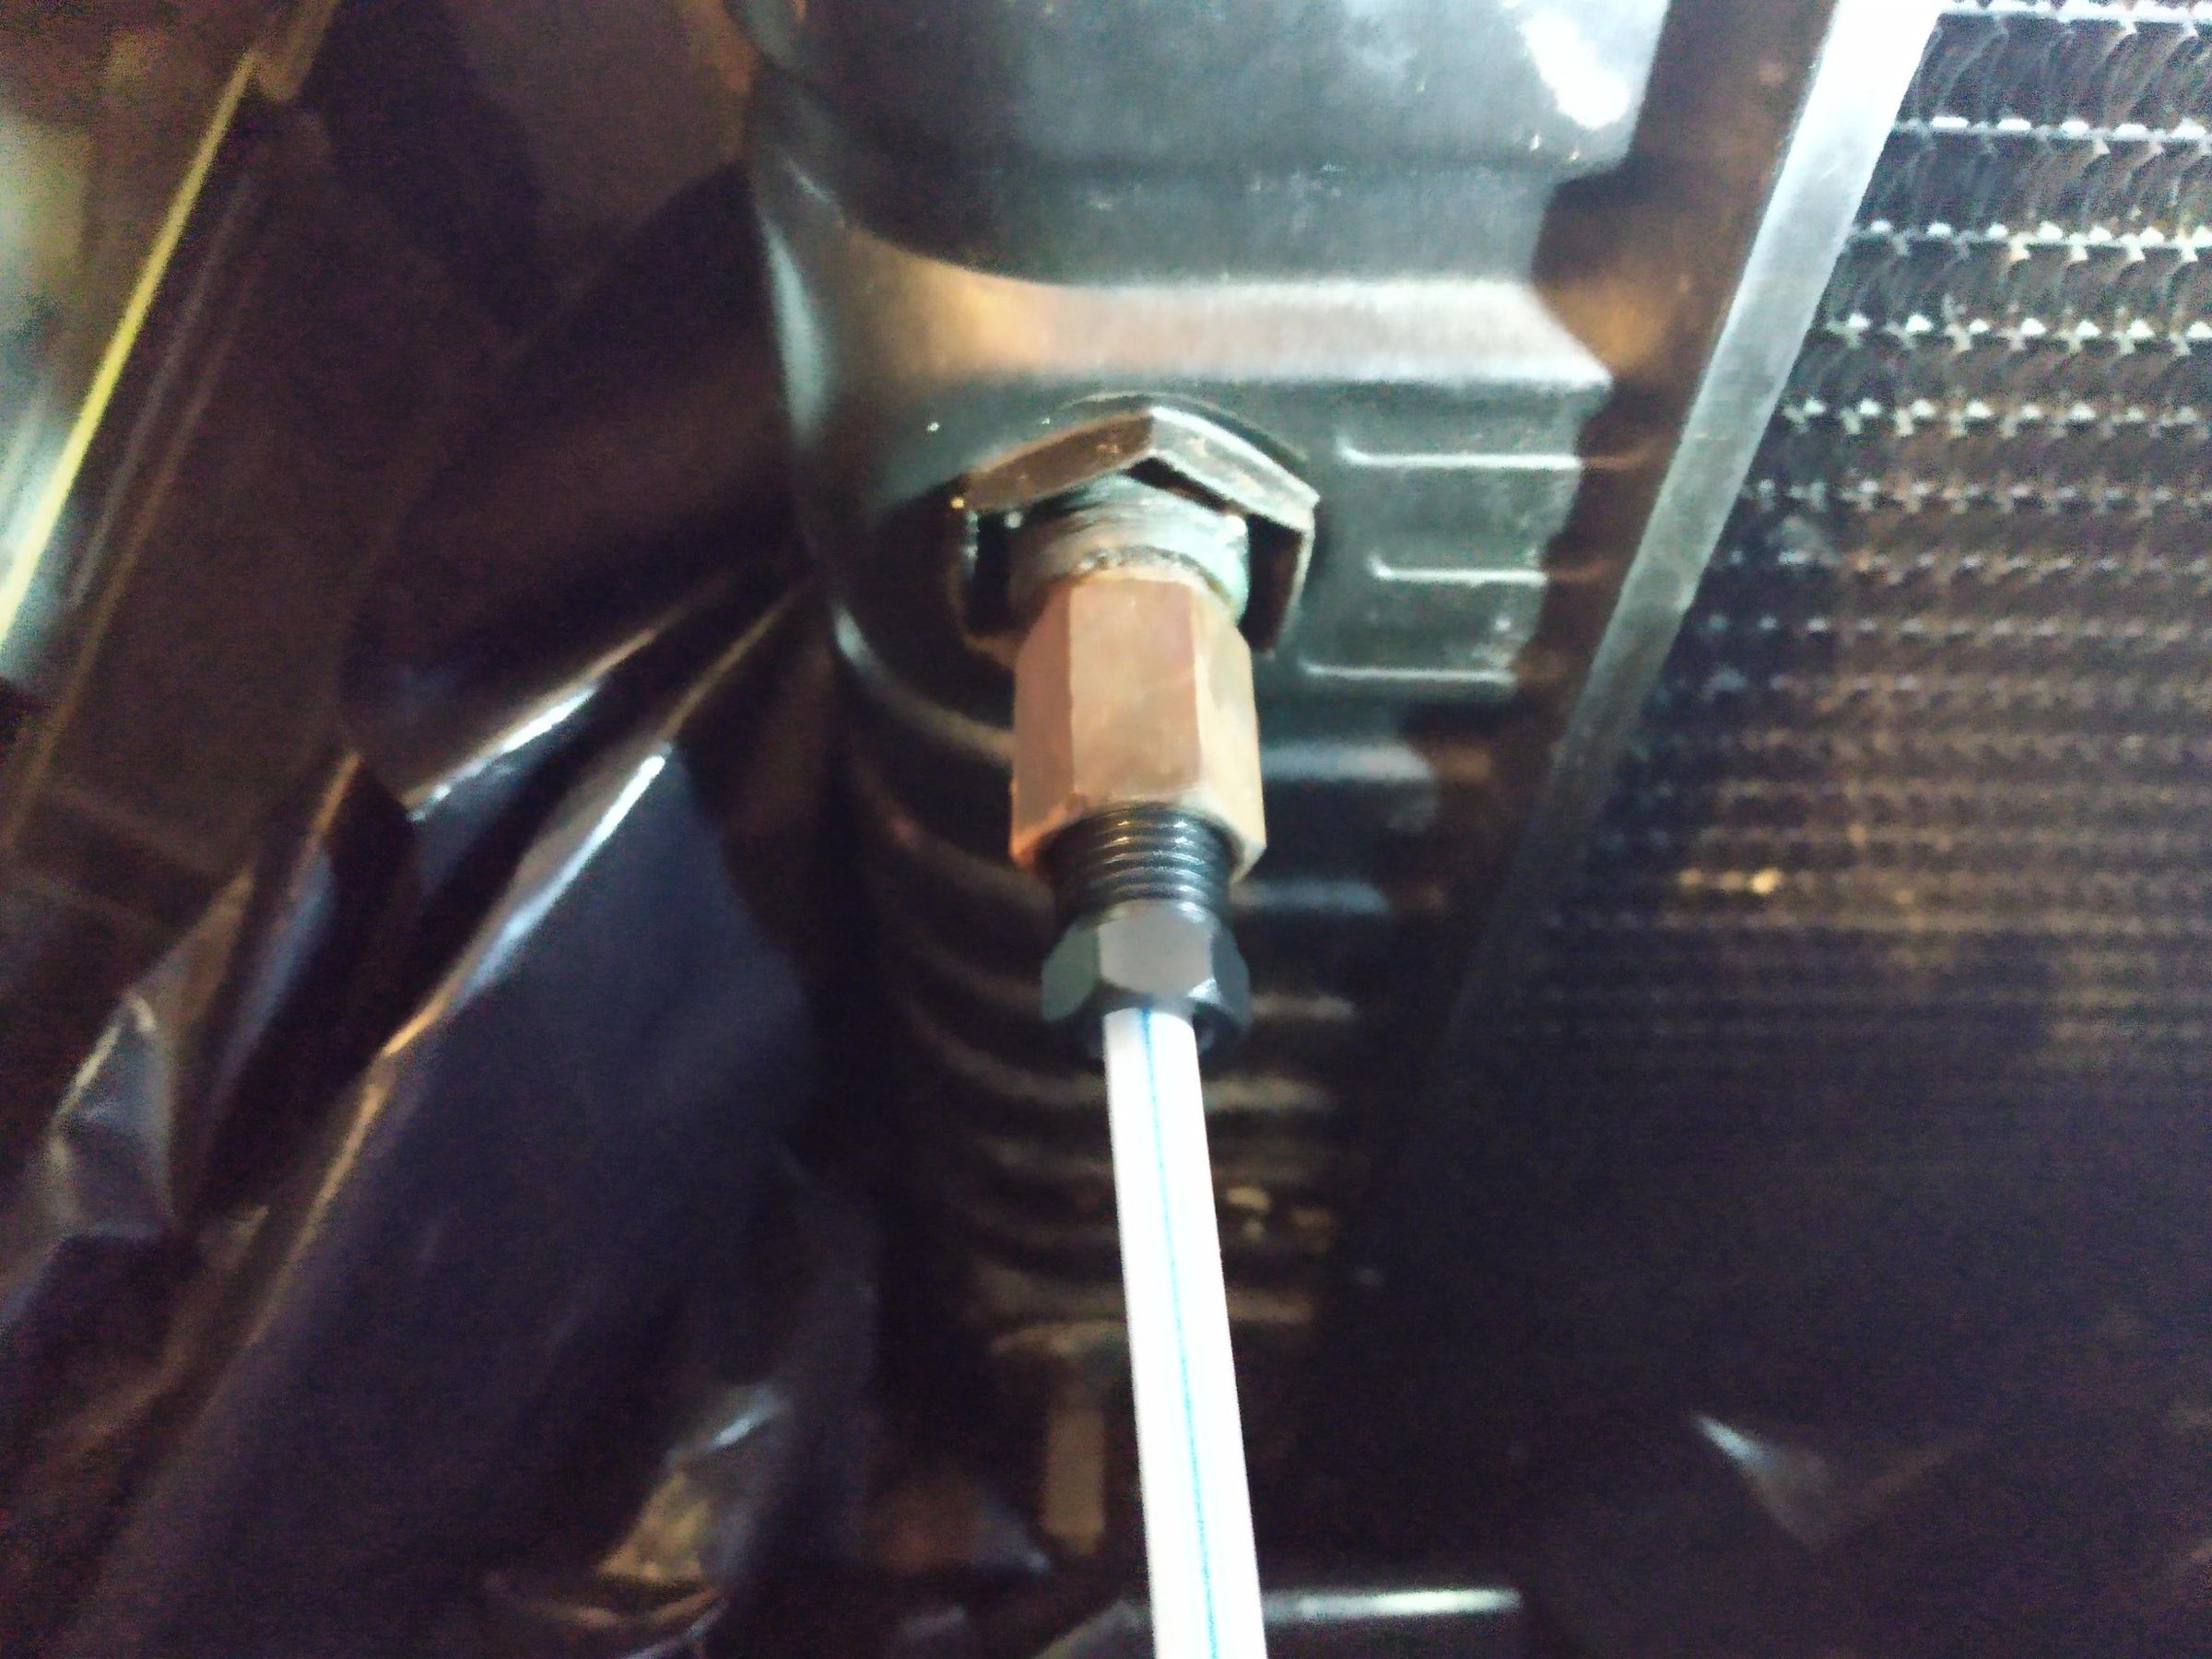
This method may exist somewhere else but I did not find it in my searches. I did find many, many complaints regarding reassembling the radiator adapter and tube nut onto the transmission cooler in the radiator. The complaints were that it was frequently a difficult task, getting the tube nut and tube lined up in the radiator adapter and the tube nut hand threaded. According to what I read, if the tube nut is off more than 0.5 degrees from the axis, it won’t thread. I can, with certainty, confirm it did not thread despite hours of adjusting the tube nut and tubing. The major problem is that the tube is steel, is extremely stiff, and won’t take an angle change. You keep doing the same thing over and over hoping it will thread this time. Sounds like the definition of insanity.
There were also many cautions about not cross threading the tube nut. The cautions are well founded because the long piloted tube nut, also called the long nose inverted flare nut (tube nut), appears to only be available by itself from one place. It is likely you will be buying an entire transmission coolant line if you cross thread the tube nut. A Watch Wes Work Nicopp to the rescue is unlikely. I have no idea of what lives at the transmission end of the cooler line but probably more trouble.
In my opinion, the method described here is quicker and less risky but I will include my favorite disclaimer. This disclaimer is from the author Samuel M. Goldwasser (http://www.repairfaq.org/sam/captest.htm) - “We will not be responsible for damage to equipment, your ego, blown parts, county wide power outages, spontaneously generated mini (or larger) black holes, planetary disruptions, or personal injury that may result from the use of this material.”
A bit off topic but related, I recommend buying the package of fan shroud clips for a radiator replacement. Getting them off the old radiator and back on to the new radiator without damaging the new radiator was a huge time investment. Yes, I should have spent the ten bucks for them.
Supplies
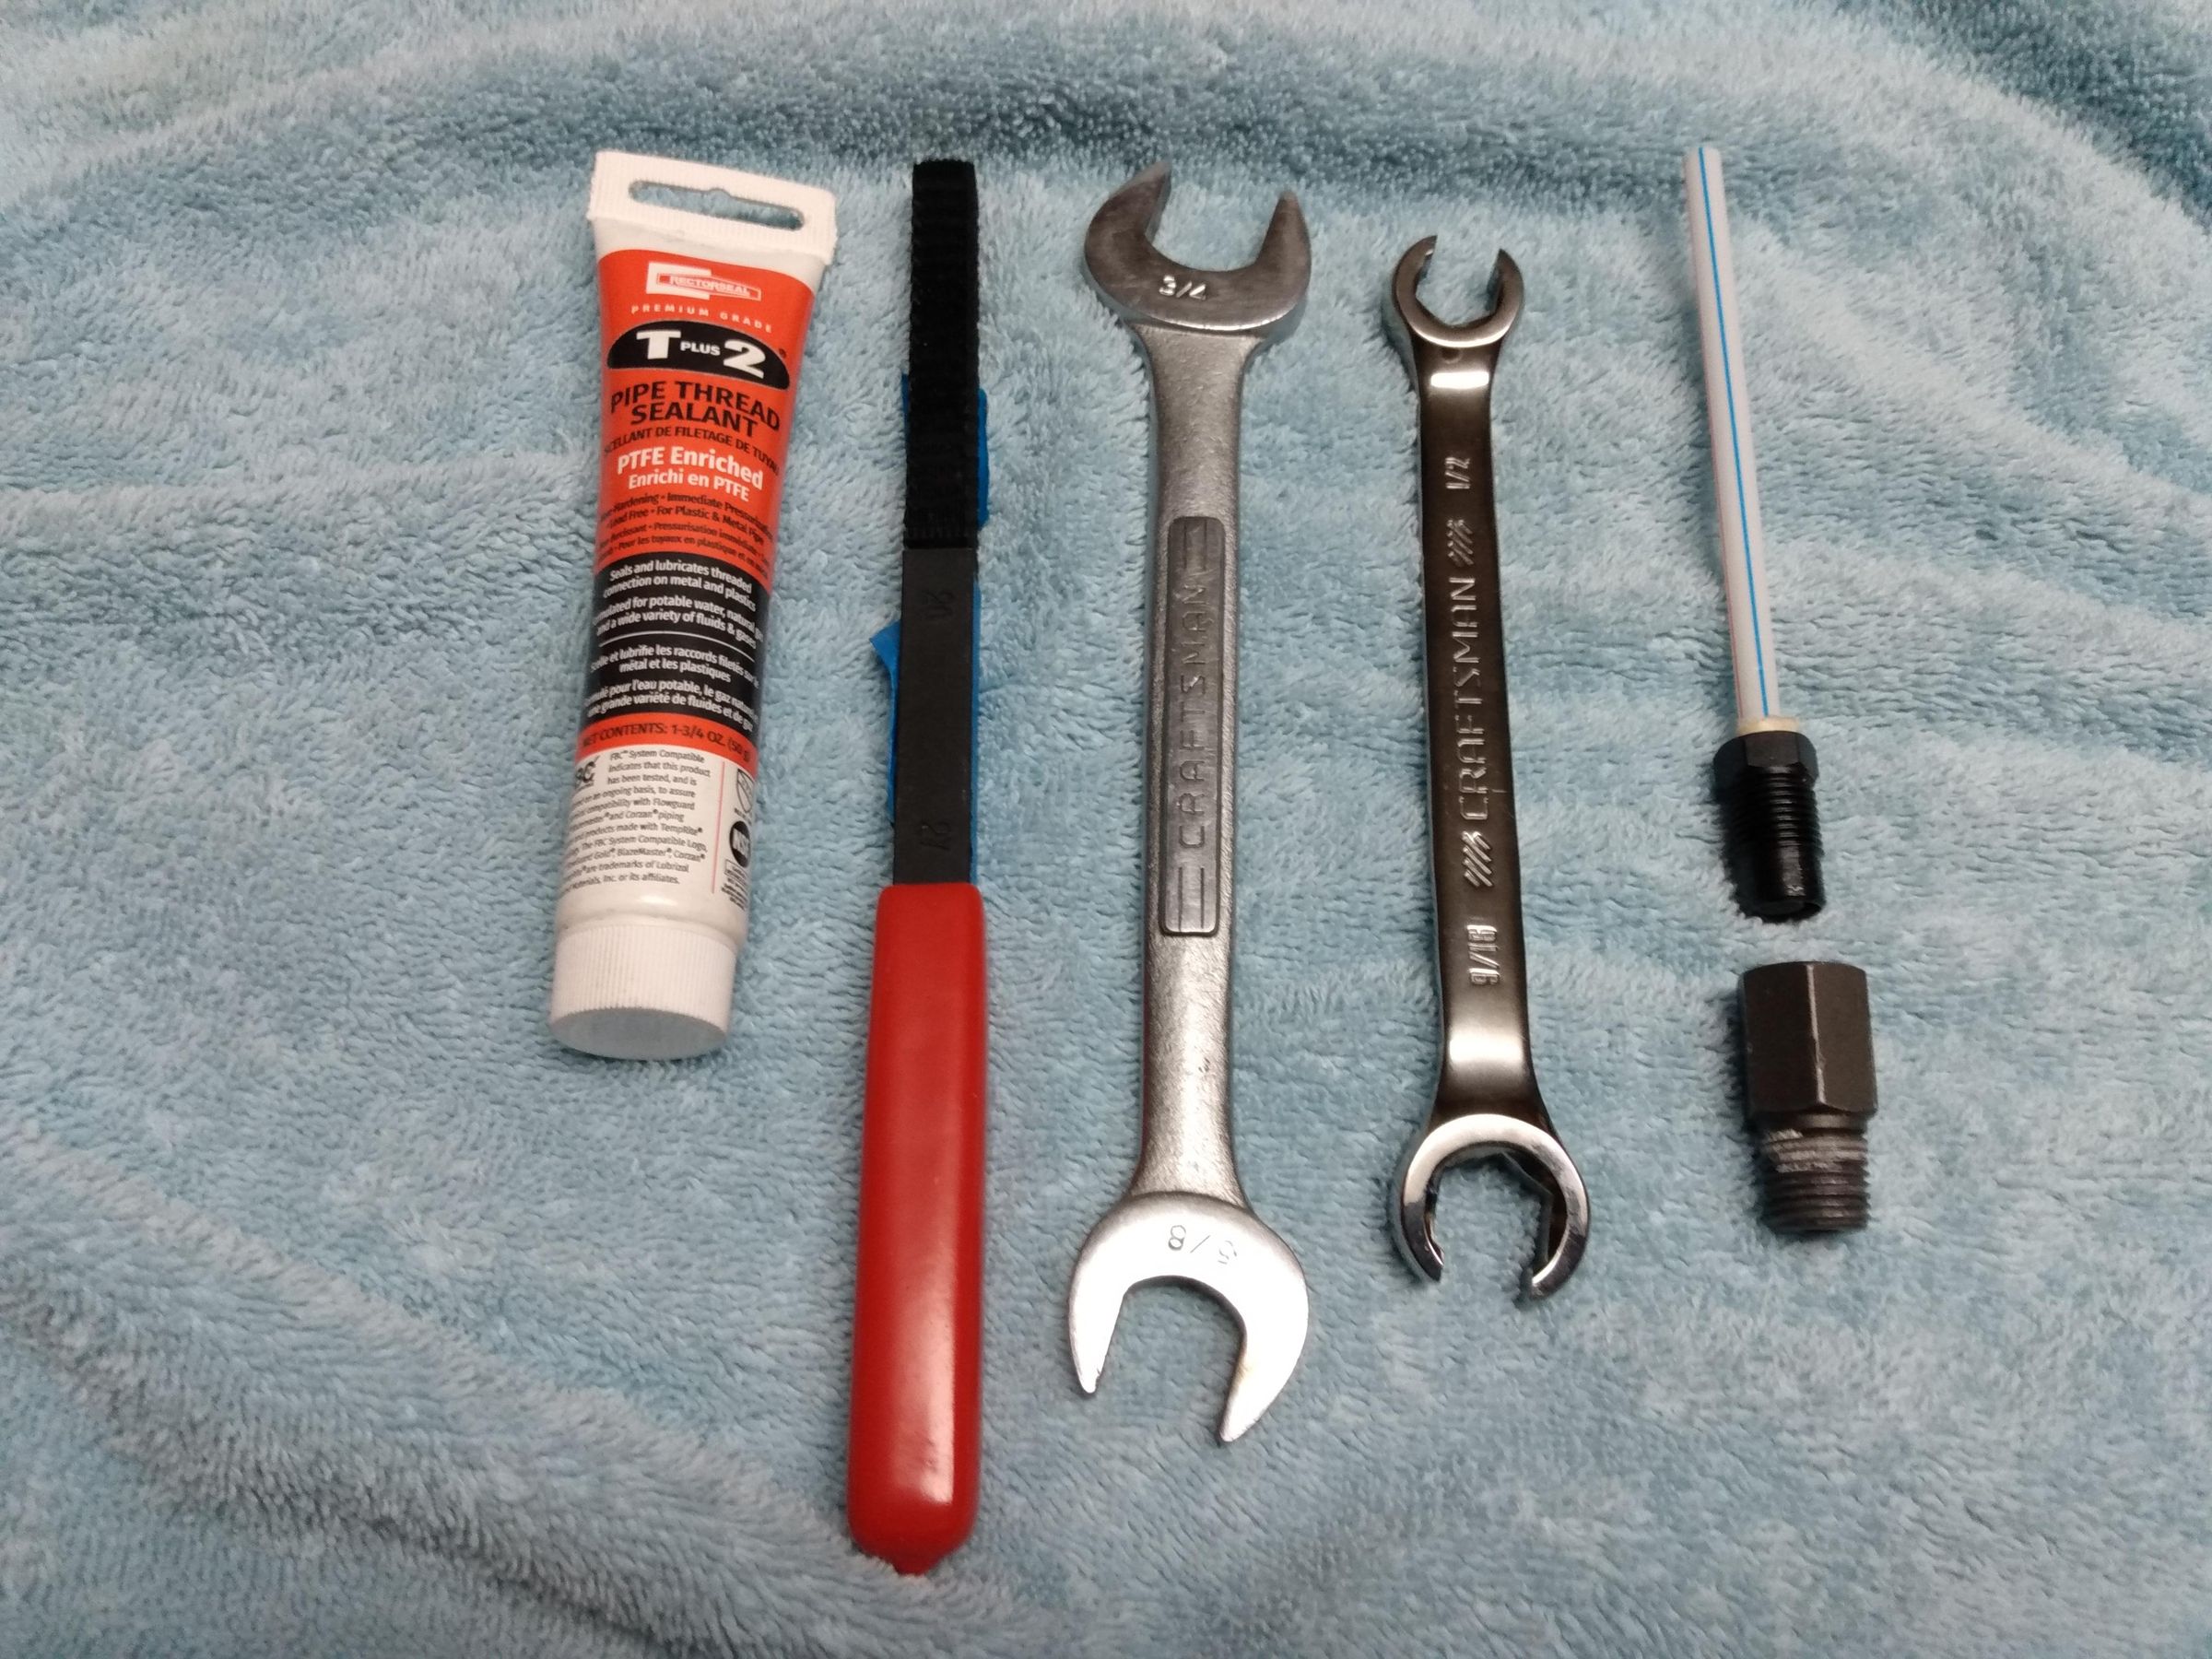
Check the dimensions of the radiator adapter and tube nut for your car. They may be different due to model, year, or level of molestation.
Flair wrench (1/2 inch on my car)
Open end wrench (5/8 inch on my car)
Liquid Teflon sealant
Optional – a #20 thread file
The flair wrench is recommended because it gives more support to the nut and reduces the likelihood of rounding off the nut.
Standard Method
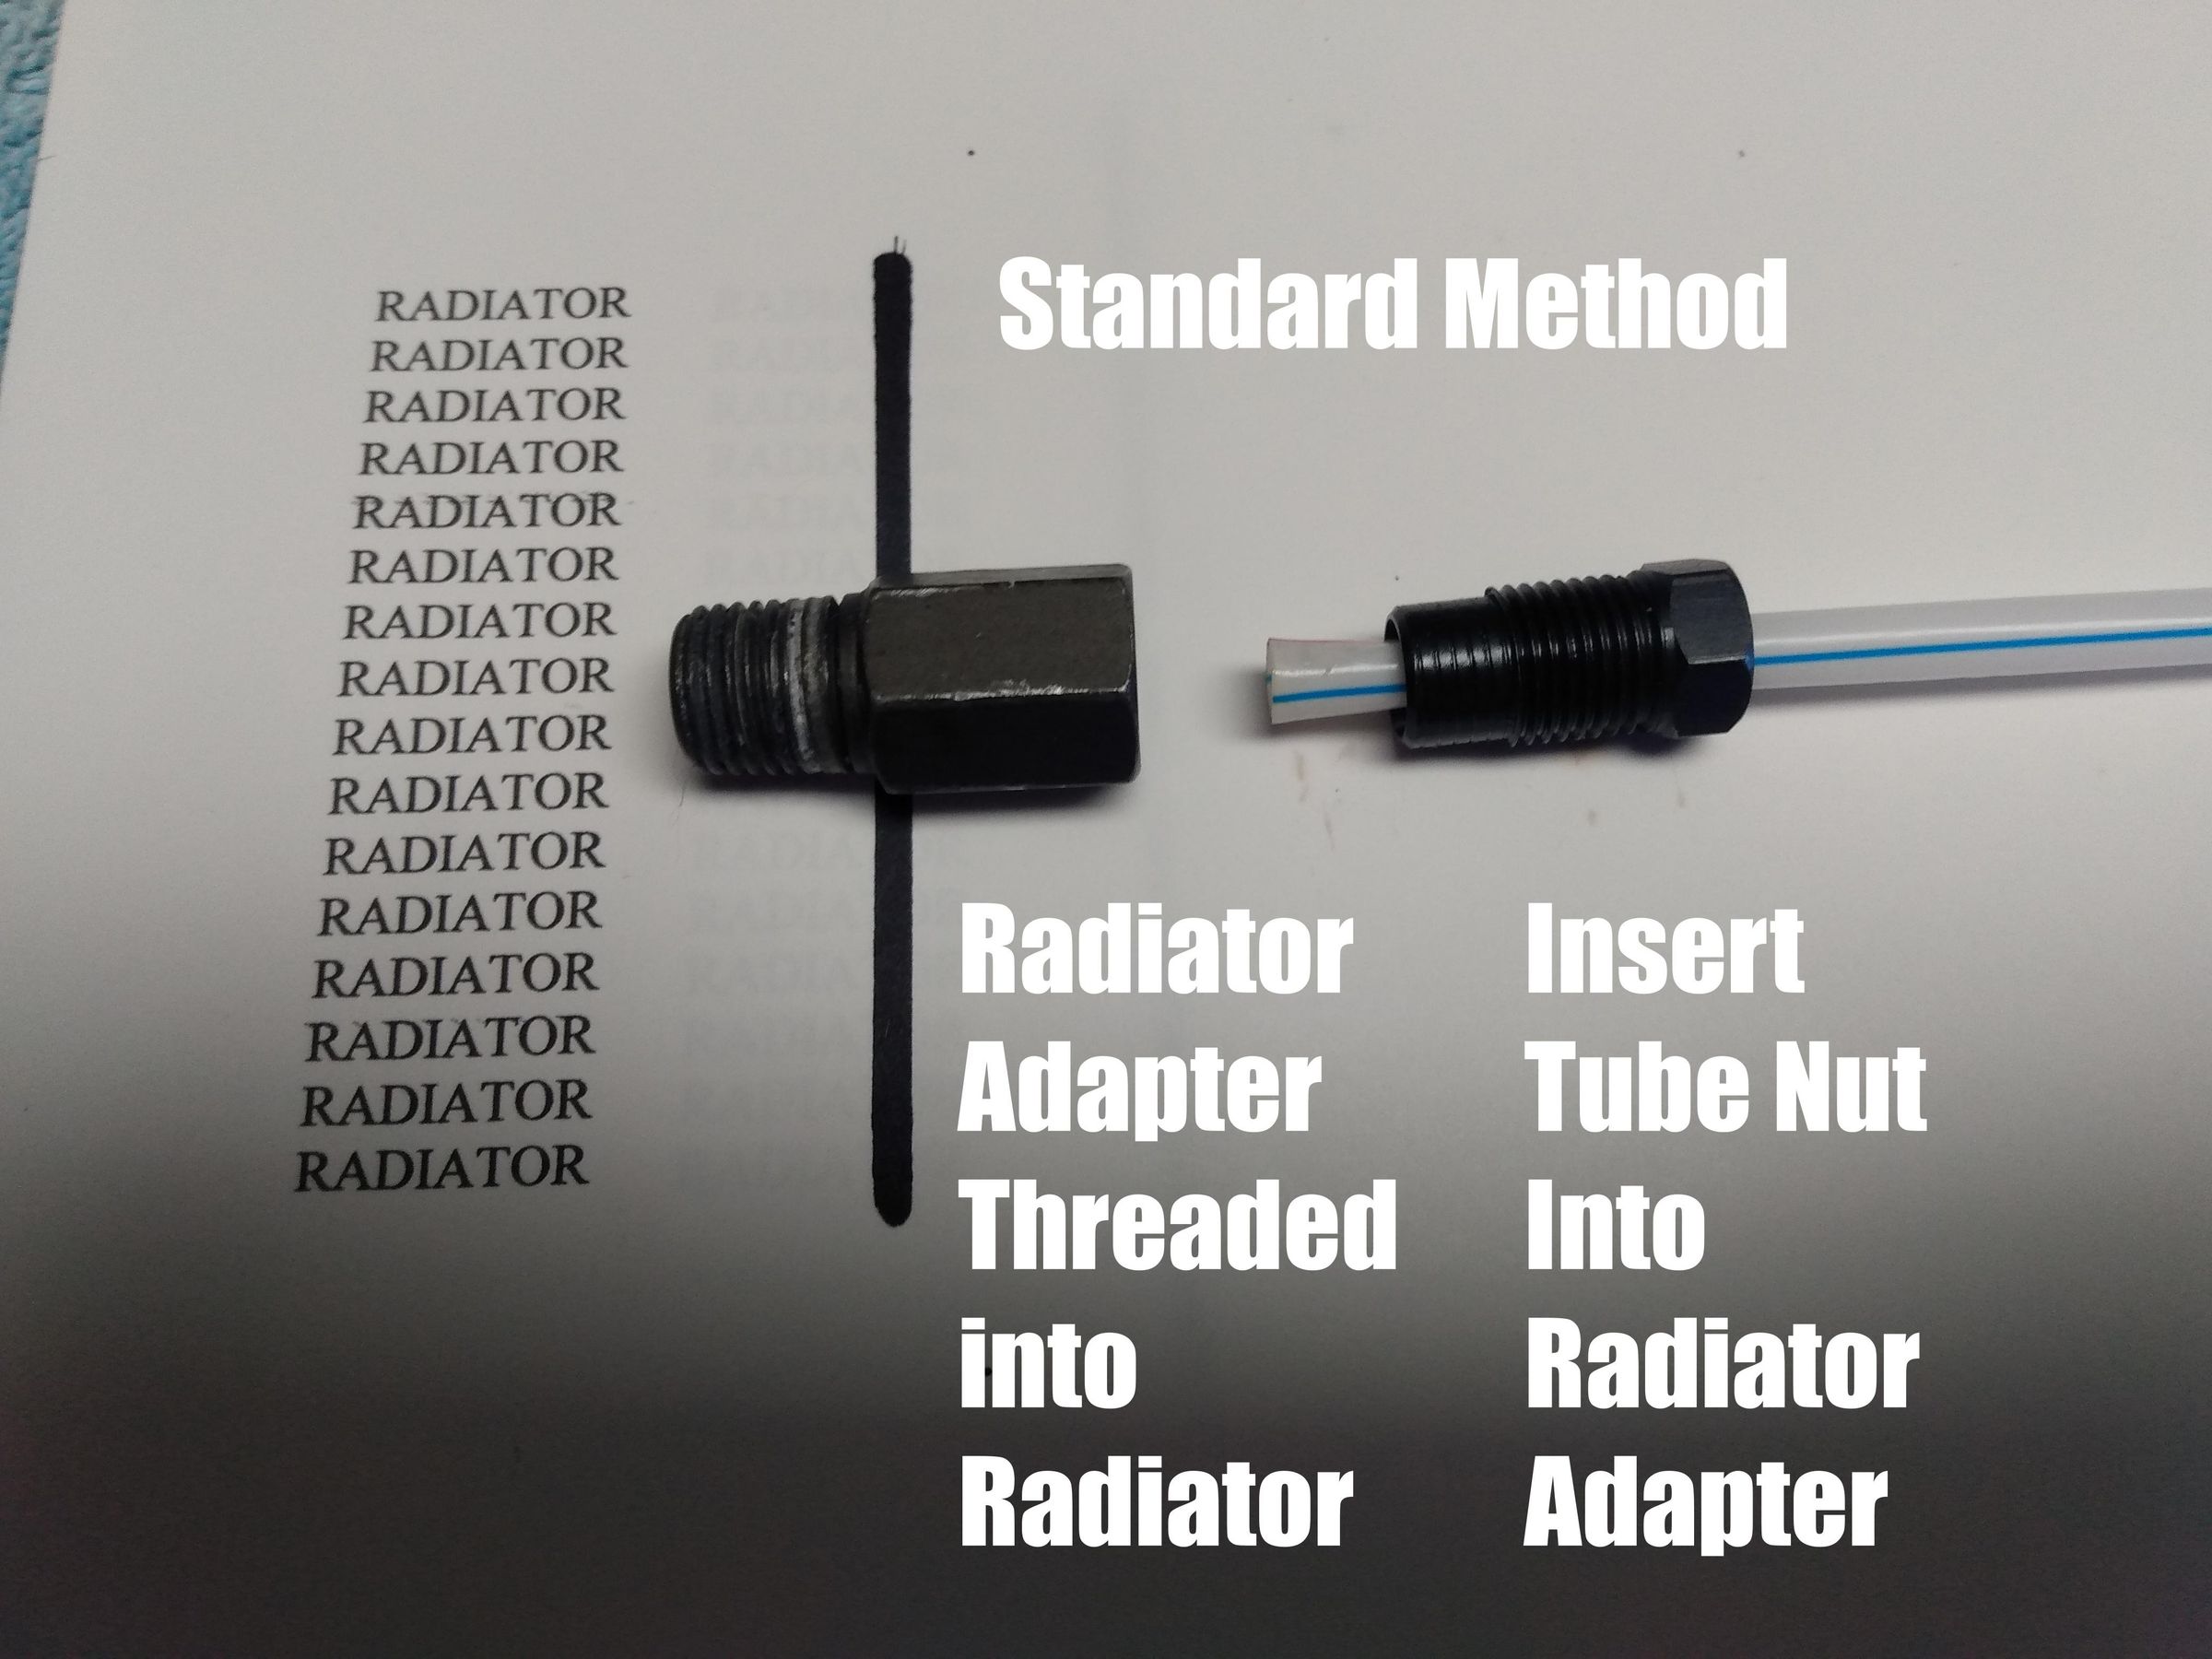
There are many sources for disassembly on the internet. Basically, it is unscrew the tube nut from the radiator adapter. Use a flair wrench on the tube nut and an open end on the radiator adapter. Hold the radiator adapter still and loosen the tube nut. Make sure you aren’t turning the tube. Finish unscrewing the tube nut and remove the tube and tube nut from the radiator adapter. On mine the top tube nut was hard to remove. It was impossible to restore using the conventional instructions.
The standard assembly instructions are to install the radiator adapter into the radiator and torque it down. Without a torque wrench it is generally accepted to be “just tight” plus a sixth to a quarter of a turn. Use liquid sealant, not tape sealant. Insert the tube and tube nut into the radiator adapter, align the tube and tube nut, and hand tighten. Do not force or cross thread. Tighten to “just tight” plus a sixth to a quarter of a turn.
The problem is starting the tube nut. The tube nut is on a steel tube and can be the devil’s own to get aligned. As I said, over 0.5 degrees off axis and it just spins and never catches the lead thread. With difficulty, I got the lower tube nut started. I tried for literally hours to get the upper one started before leaving it for tomorrow.
Alternate Method
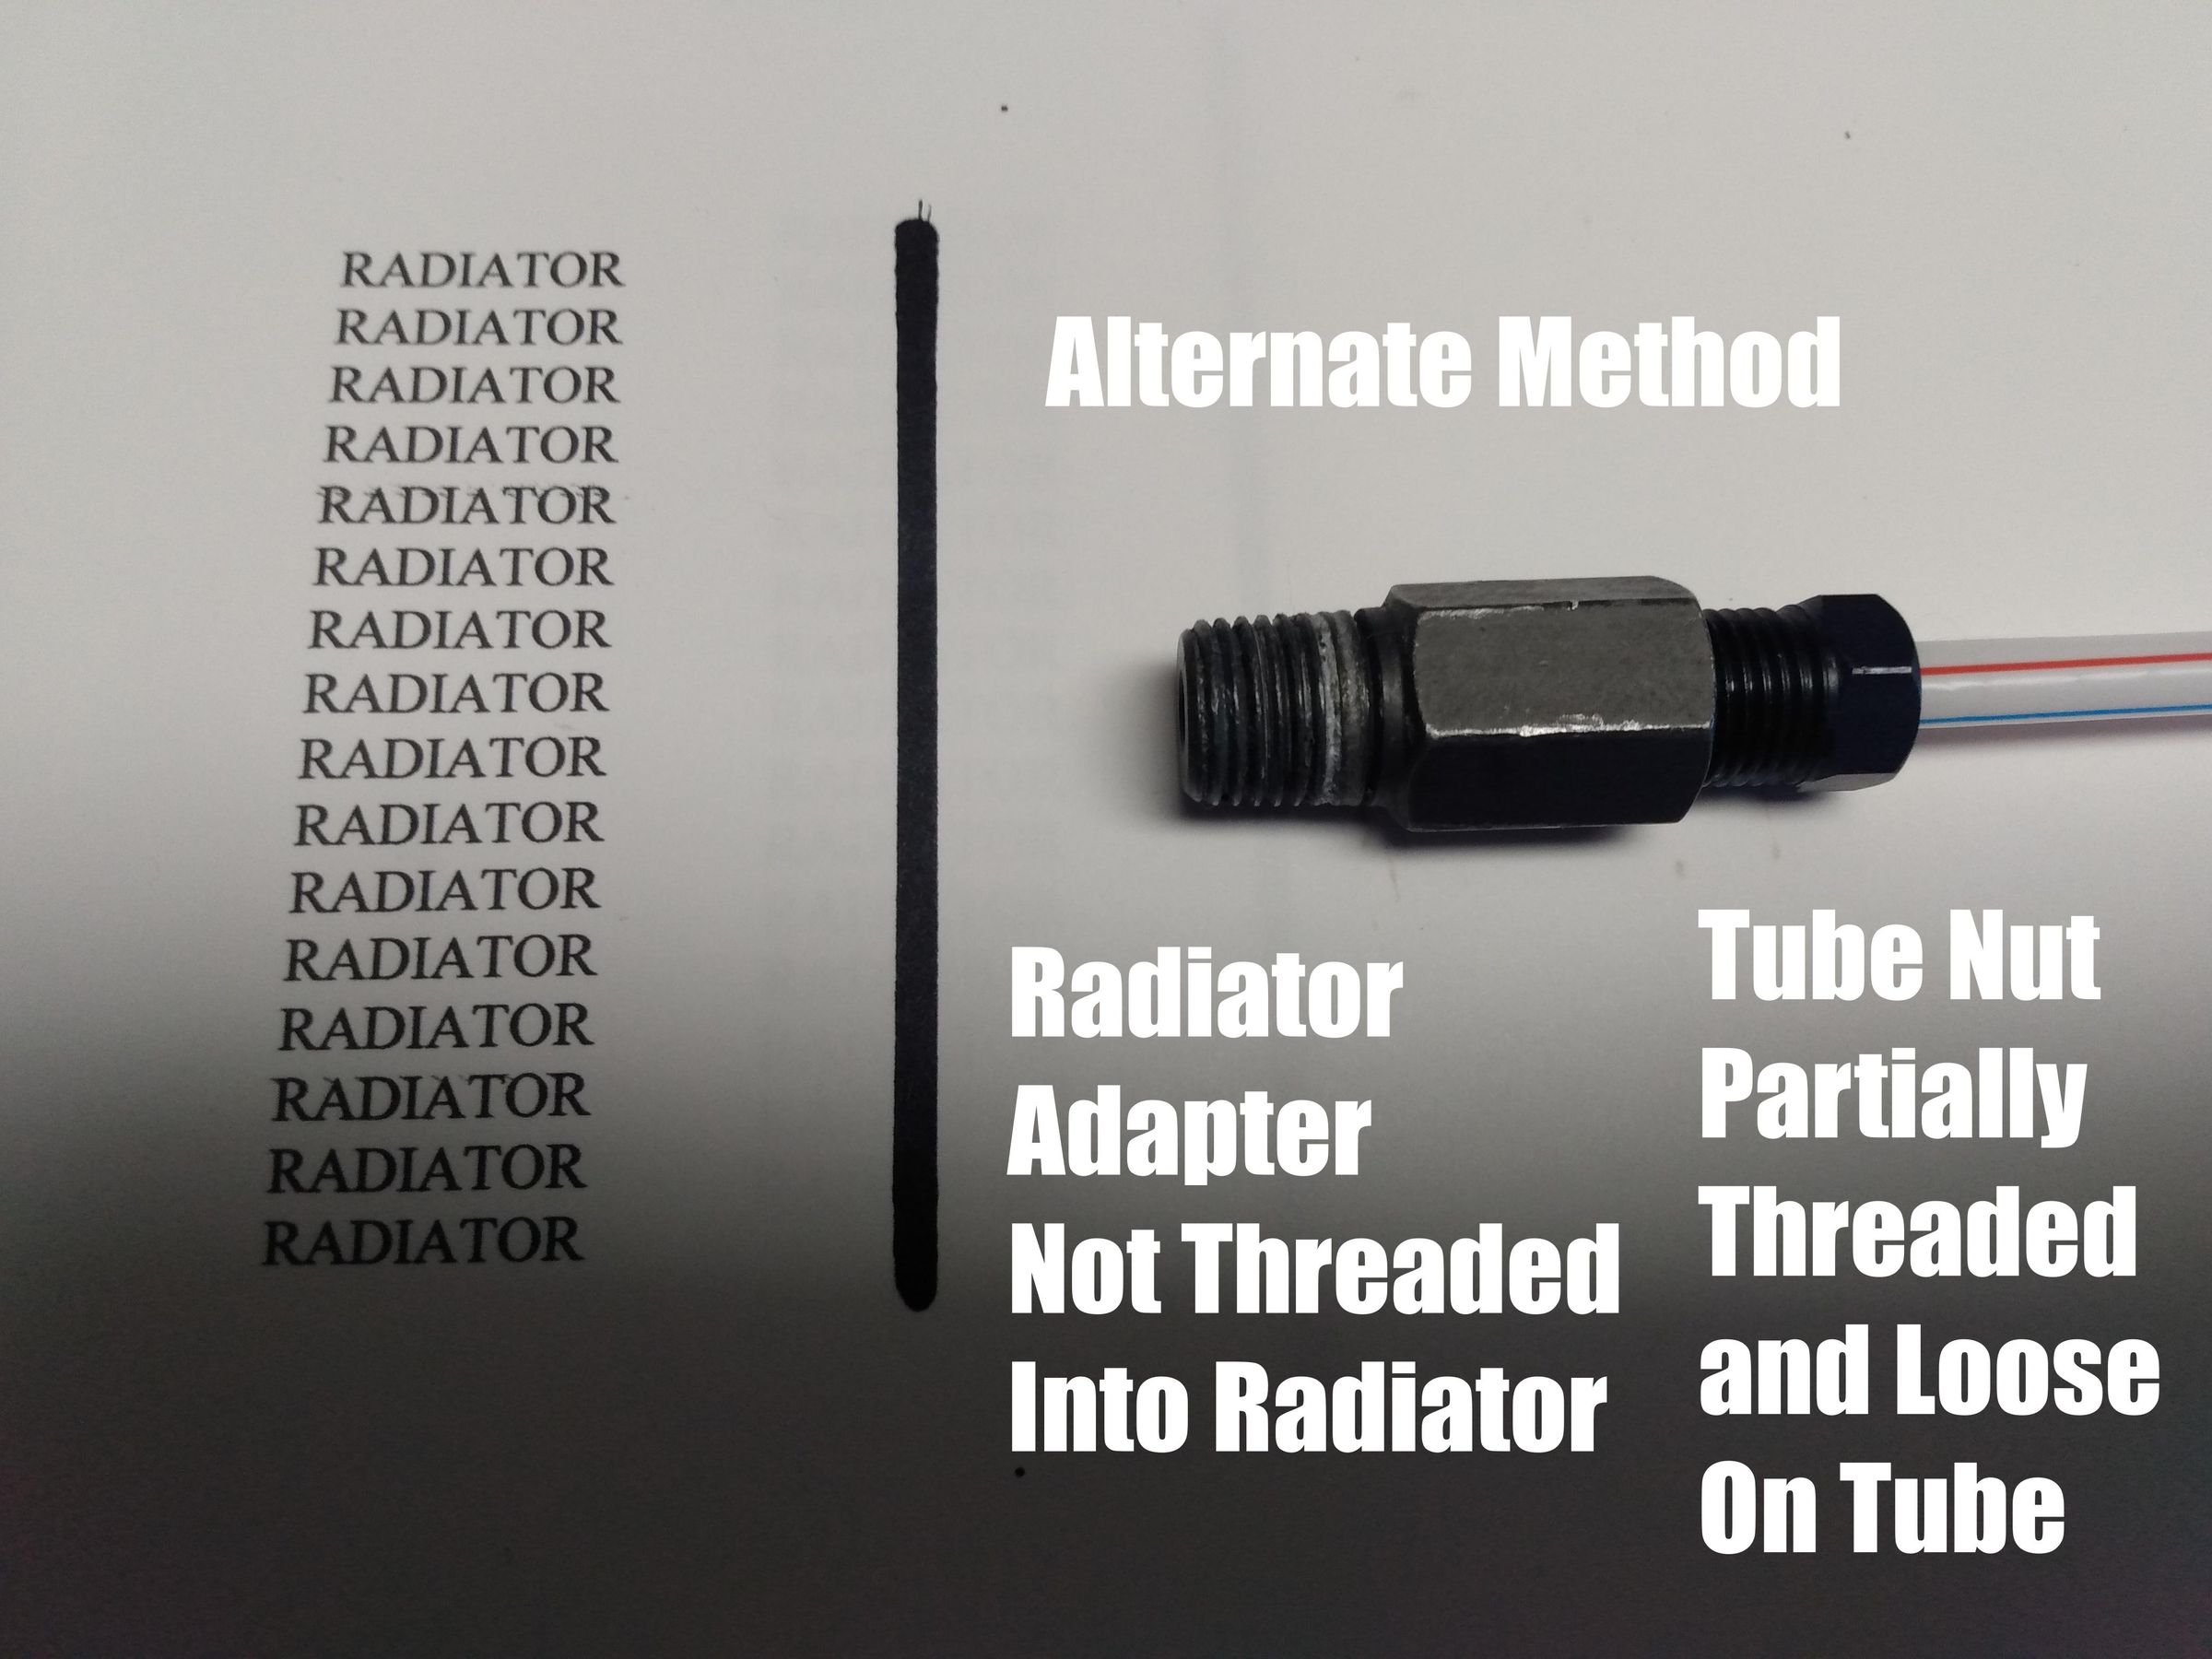
After I thought about it overnight, I tried this and it worked quickly and easily. Remember “don’t force”, “freely rotate”, and “hand tight”.
1. Do not thread the radiator adapter into the radiator. Keep it separated.
2. With the radiator adapter loose, insert the tube and hand thread the tube nut partially into the radiator adapter.
3. Make CERTAIN that the radiator adapter and tube nut freely rotate on the tubing.
4. Put the liquid sealant on the radiator adapter. Align and hand start the radiator adapter into the radiator.
5. Thread in the radiator adapter until hand tight. Make CERTAIN that the tube nut is freely rotating on the tubing. Loosen the tube nut if it isn’t freely rotating on the tubing.
6. Tighten the radiator adapter to be “just tight” plus a sixth to a quarter of a turn. Don’t over tighten. Use both wrenches.
7. Tighten the tube nut to be “just tight” plus a sixth to a quarter of a turn. Don’t over tighten. Use both wrenches.
In less than ten minutes I was done! I think that the larger diameter of the radiator adapter is more forgiving. Or it may be that you have better leverage to align the assembly. The important thing is it worked.
Miscellaneous
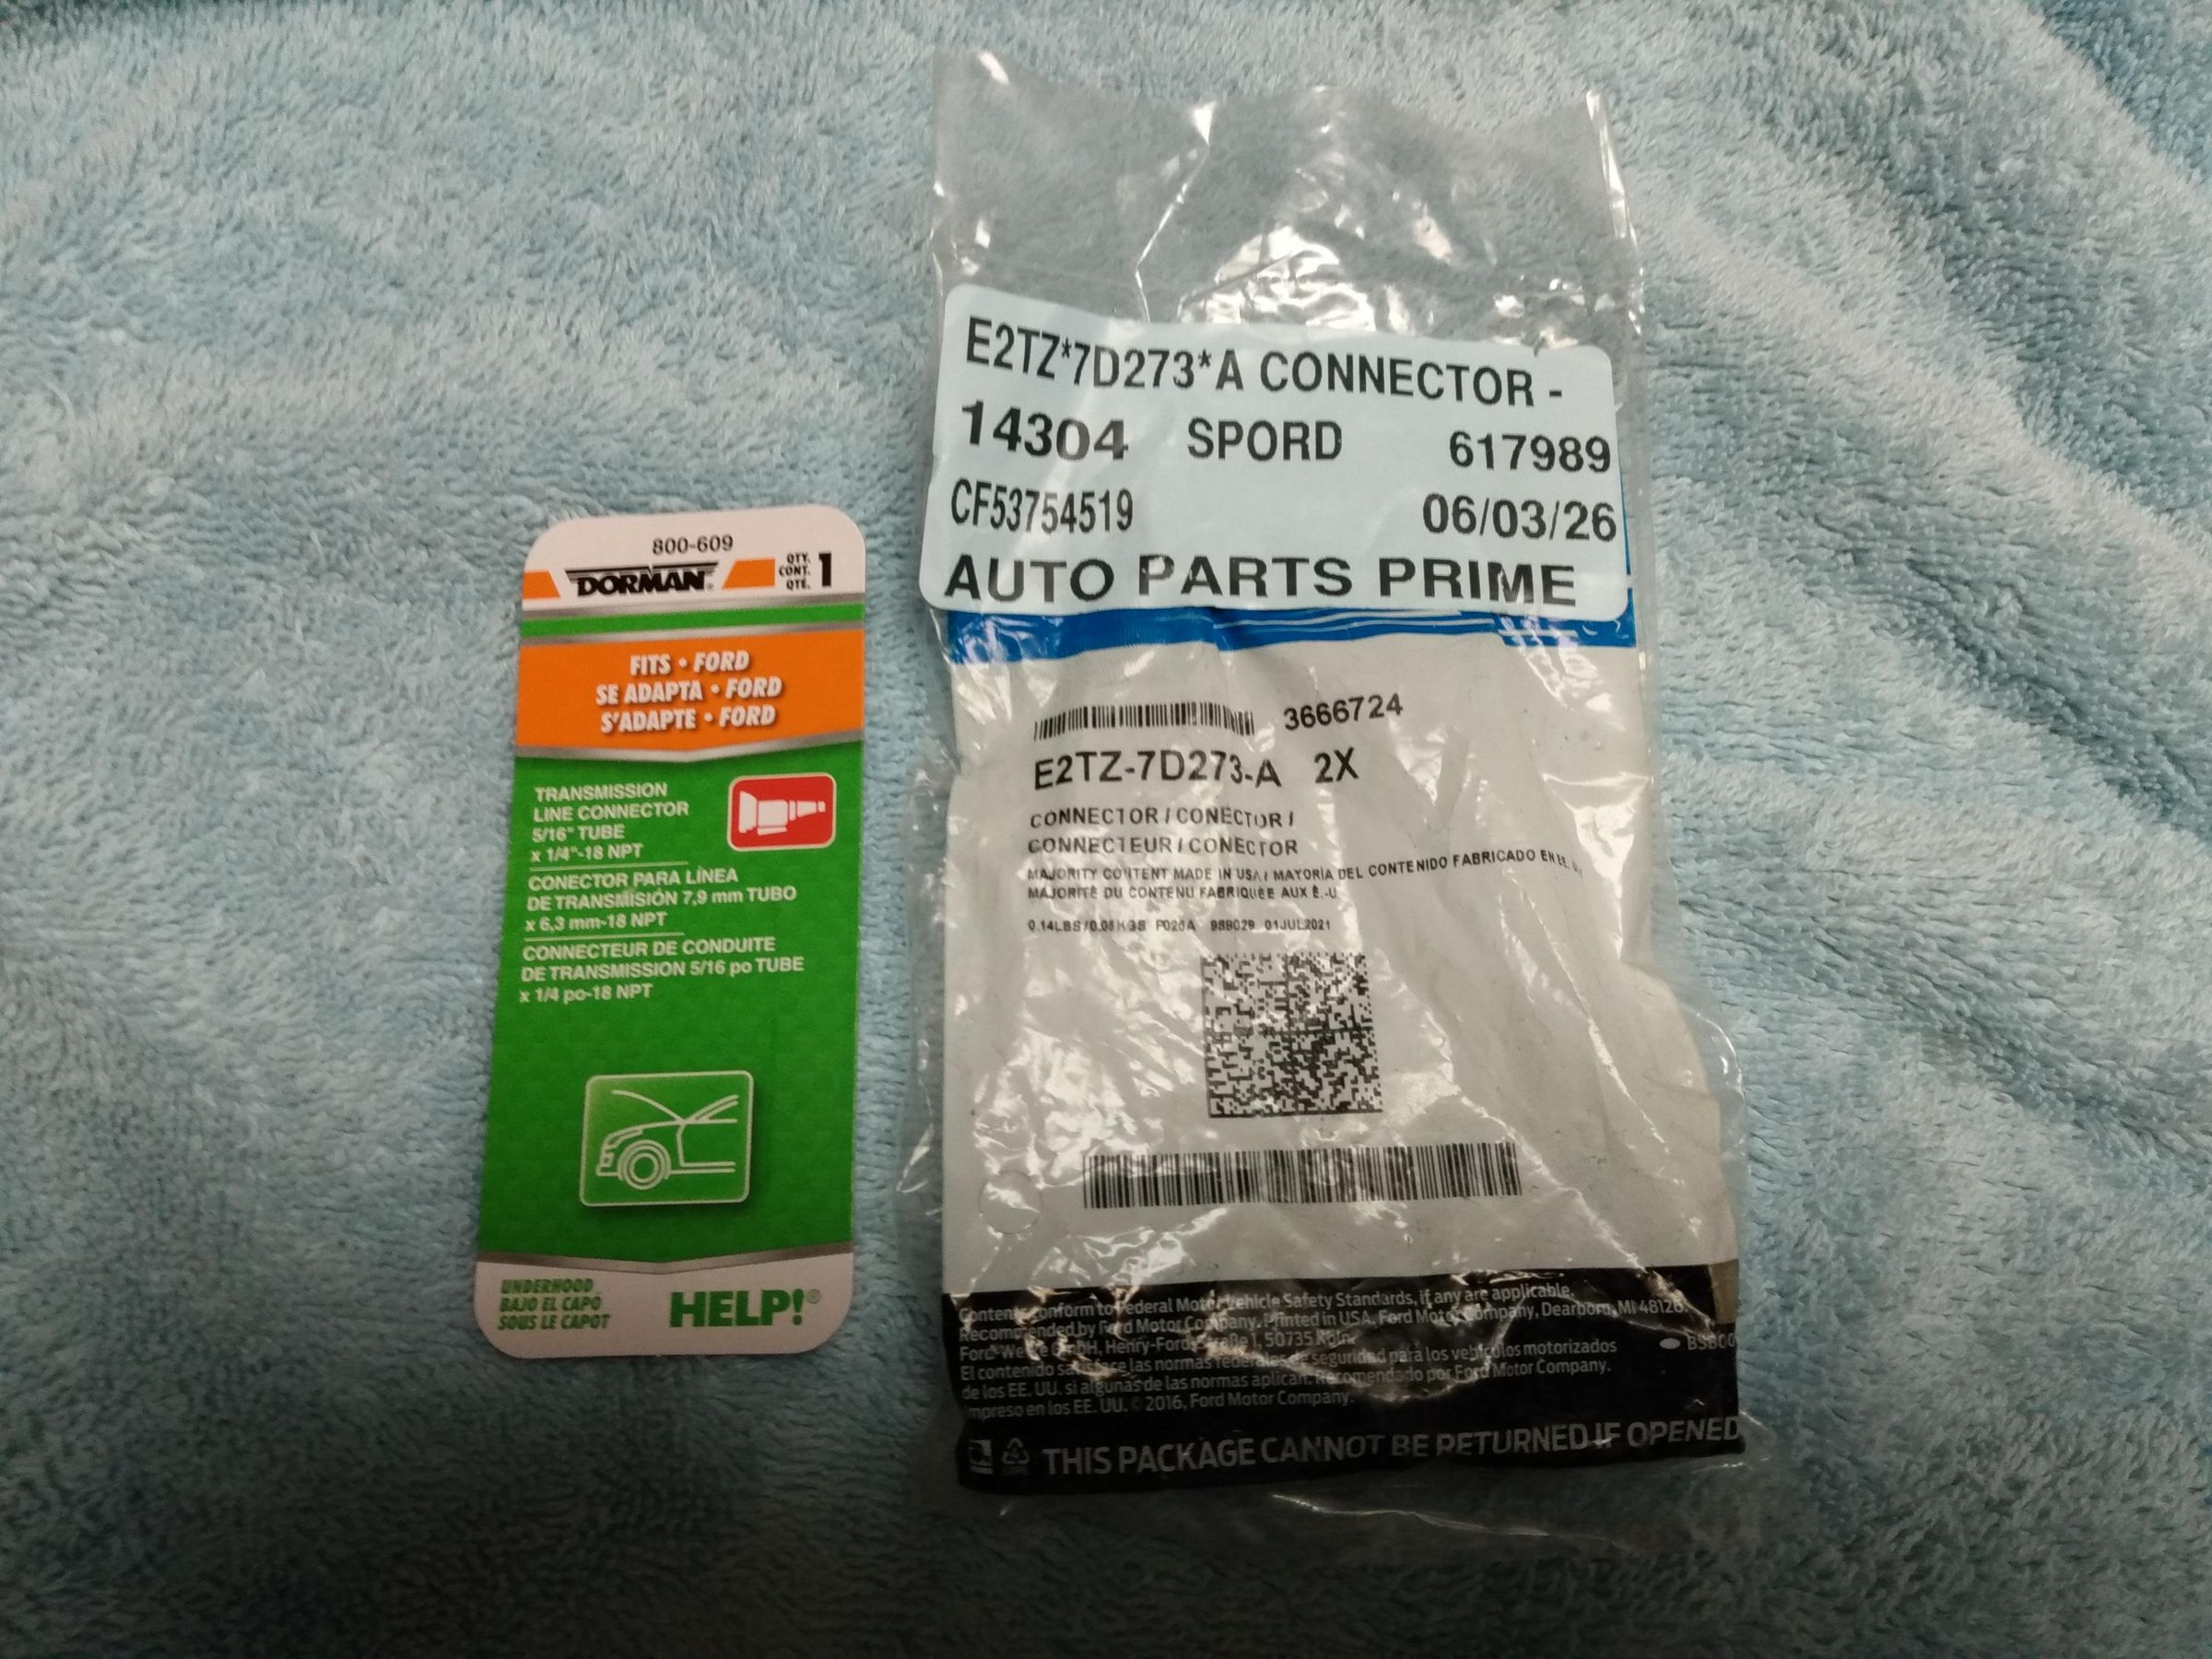
I used the Dorman 800-609’s radiator adapters that came with the radiator and they worked without a problem. I bought two OEM Ford E2TZ-7D273-A “connector - oil tube” as backups but they weren’t needed. Although OEM, they are not identical internally to the original radiator adapters. They changed slightly in three decades.
Tube nuts by themselves are only available from one place I could find. I bought a couple for the write up because I was not about to touch the ones on the car. They are installed, don’t leak, and hopefully the radiator will last for another three decades.
If you have a buildup of crud on the threads of the tube nut that brake cleaner or the like or a brush won’t remove, a thread file may work. Engage a SAE standard #20 fine or coarse, they are both the same thing, at the correct angle and slowly turn the nut. Don’t overdo turning the nut, you want to clean it not reshape it.
In a case of a cross threaded tube nut, a SAE standard #20 thread file may be able to rescue enough treads to use the tube nut. You can’t use a one piece thread chaser die because it won’t fit over the flair. It looks like you could use a two piece or split thread chaser but they tend to be specialty items.
Just a note, be careful of what AI tells you, it goes by what is quickly available and by the predominant “answer” even if it is completely wrong. Verify what an AI tells you. If it gives you a part number, a wrench size, who a part is available from, what a code means, etc. etc., etc., verify it.