Geeky Holiday Lantern
.png)
*quick note - I realize it's not Christmas anymore, but I neglected to finish the '12 days of Geekmas' series until now. So... sorry for the delay'
On the 11th day of Christmas my true love gave to me - a geeky holiday lantern with switchable panels!
Using a lantern model found over at Thingiverse, I designed some custom Holiday inspired inserts to make my own geeky holiday lantern.
Here's how I put it together:
Supplies
Supplies I used: (with affiliate links
White filament - https://amzn.to/2MnqlY3
Tea lights -
https://amzn.to/33cftmE
Tools I used:
Inkscape - www.inkscape.org
Fusion 360 - www.inkscape.org
3d printer - www.inkscape.org
Outline the Designs


The first thing I did was go to and find 4 geeky designs with a Christmas element to them. I decided on Godzilla eating Santa, a Christmas tree Triforce, the famous Leg Lamp, and The Grinch holding an ornament. I copied the images and brought them into Inkscape.
I used the pen tool and traced out each of the images, and used the adjustment tool to adjust the curves of the lines (where needed).
Extrude in Fushion

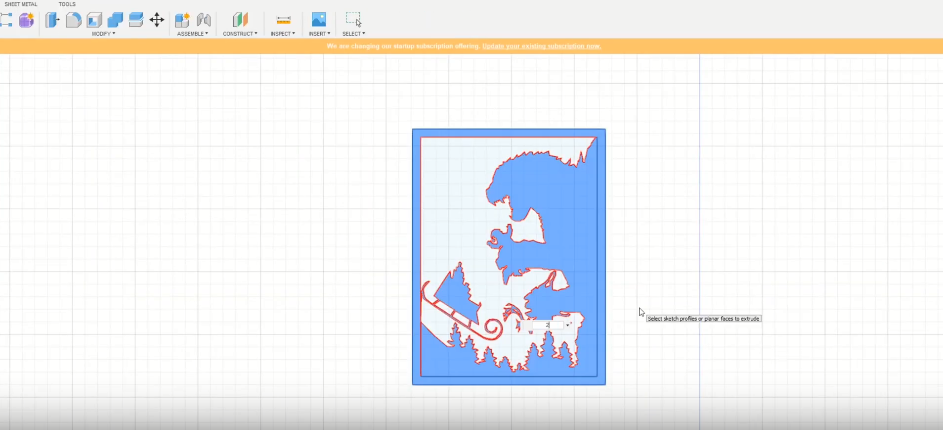
I exported each of the outlines and opened them in Fushion 360. At this stage I made sure that I can enclosed each of the shapes I wanted to extrude, returning into Inkscape to make any needed adjustments.
I extruded each of the panels, making them 4mm deep.
Print the Panels


I exported my panels into Cura (which is what I use for my 3d printer, but will work with any similar program), and sized them accordingly.
Note: I learned after the fact that because of my metric scaling in Fushion, when I imported the panels in Cura the panels were tiny. This can be fixed by changing your scaling in Fushion to inches instead of mm.
I then 3d printed the lantern and each of the panel pieces using white filament.
Putting It Together


With the prints done, I slid each of the panels into the lantern. I used some hot glue to glue the tube into place inside the lantern.
Adding a Tea Light

I added a tea light into the tube in the center of the lantern, put on the lid, and it was done!
Enjoy the Geeky Glow


Now that it was done, I could enjoy the geeky glow resonating from my holiday lantern.