HOW TO CREATE a 3D SUSHI TRAY IN 3D MODELLING SOFTWARE
by Simran Khuntia in Living > Kitchen
469 Views, 0 Favorites, 0 Comments
HOW TO CREATE a 3D SUSHI TRAY IN 3D MODELLING SOFTWARE
.png)
3D Designing is an extraordinary expertise and it's valuable in rejuvenating thoughts by making 3D layered models. In this tutorial article, we are making a 3D model of a cup holder utilising SelfCAD. SelfCAD is one of the least difficult, but amazing 3D design programs that you can use to get ready both basic and complex plans effortlessly.
Starting with designing the cube shape, we will transform it with devices like Group, Extrusion, Move, Inset, etc. SelfCAD is one of the most astounding 3D Modelling Software, including different features used to design the 3D objects. This tutorial guides the use of Inset tool to make our desired shape without disturbing the whole development.
You can also visit our website to go through our other articles such as how to design a 3D cup holder!
In this way, how about we start!!
Insert a Cube and Select Its Top Face
.png)
.png)
First of all, from the 3D shapes insert a cube to the working interface. Set width to 300, height to 10 and depth to 300. Then opt for face selection and select the top face of the cube.
Inset the Face
.png)
Next, from the modify category choose the inset tool. Set amount to 60. Then from the advanced option, click on add option to add the next macro step.
Extrude the Face and Add Another Cube
.png)
.png)
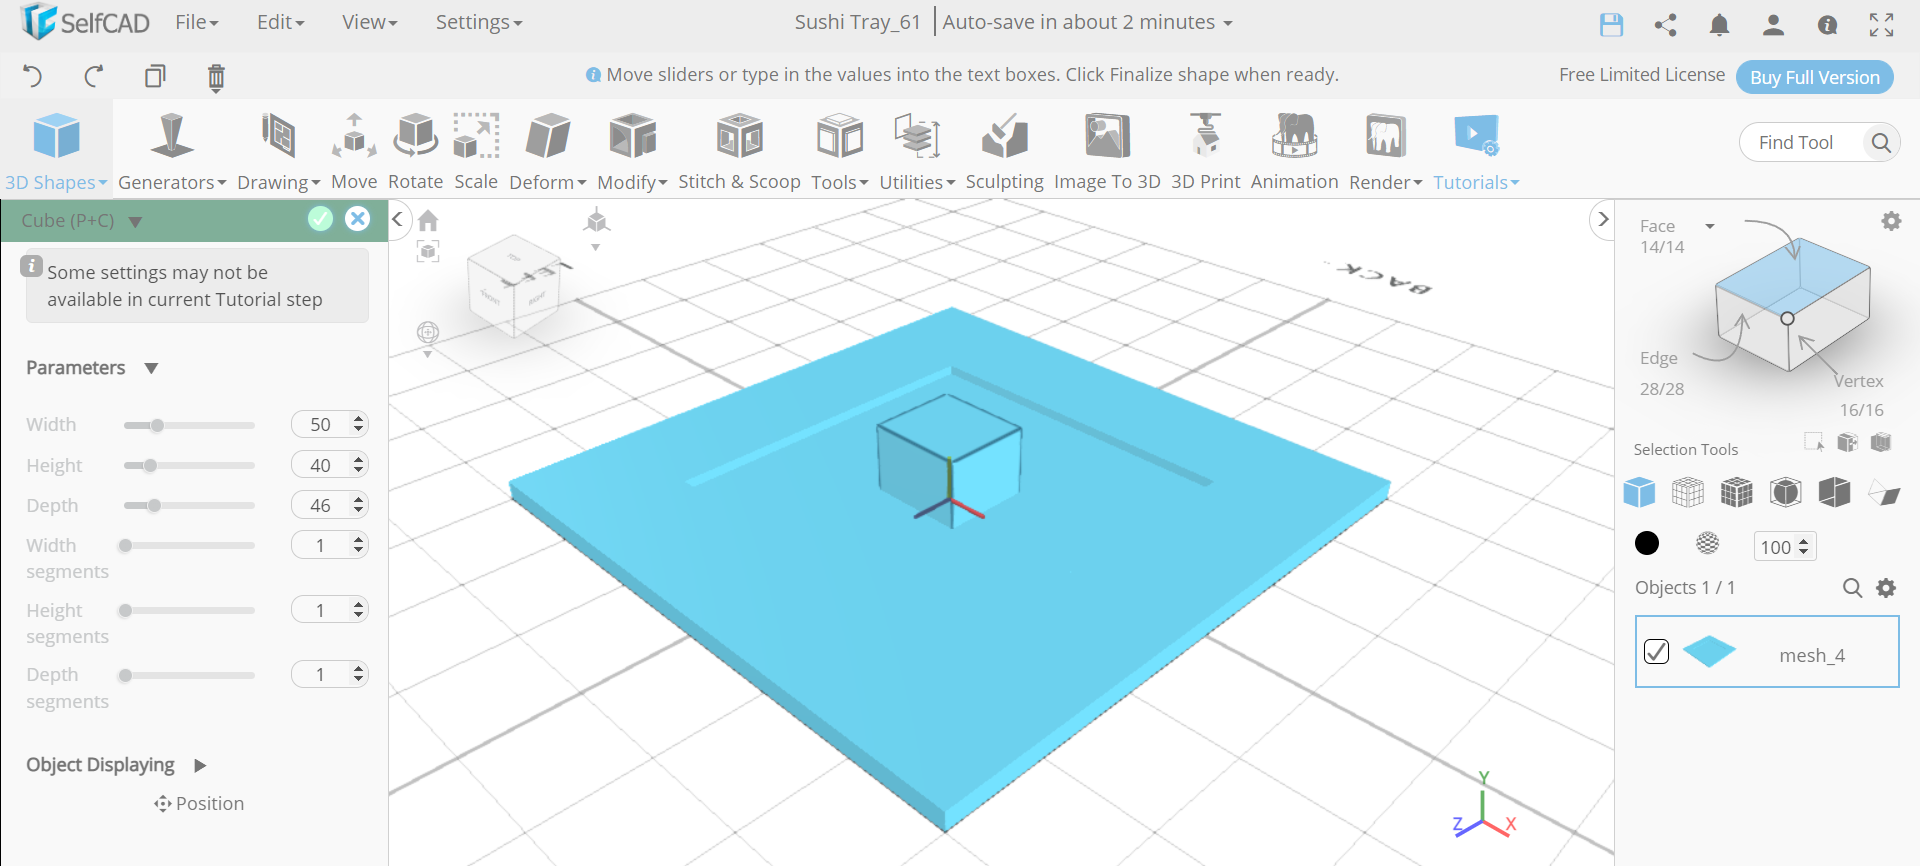
Now, we will set the operation to extrusion and amount to -5. Then insert another cube. Set width to 50, height to 40 and depth to 46.
Inset and Extrude the Newly Inserted Cube
.png)
.png)
Next, select the top face of the newly inserted cube and inset it to an amount of 3. Then add a macro step and set the operation to extrusion. Set the amount to -3. After that, add another macro step and set the operation to inset and amount to 12.
Extrude the Face and Copy the Cube
.png)
.png)
.png)
Now, add a new macro step and set the operation to extrusion and amount to -3. Then click on the copy button to copy the cube. After that use the move tool and set x to 54.
Copy the Cube in Sets
.png)
.png)
.png)
Next, copy the cube and set x to -53. Then select mesh_8, mesh_8(1) and mesh_8(2) and copy them. Move them by the z axis to -50. Again copy them and this time move by the z axis to 51.
Add Two Other Cubes and Make All of Them a Cube
.png)
.png)
Now, we will insert another cube and set its width to 10, height to 250, depth to 8, position y to 10, position z to 110 and rotation z to 90. Then copy the selected object and move it along the z axis to an amount of 124. After that, select all the objects. Go to the edit menu and make them a group.
CONCLUSION: HENCE, WE HAVE CREATED a 3D SUSHI TRAY IN SelfCAD
We've utilised various sorts of tools of SelfCAD to 3D design the Sushi Tray. We have generally used the Inset tool to change the cube to make the 3D model of the Sushi Tray. Aside from sorting out some way to 3D model the item, you can utilise a comparable strategy in 3D designing various models in SelfCAD. After you are done 3D modelling, you can involve free programming for 3D printing to set them up for 3D printing by cutting and producing G-code that you can ship off your printer. Register yourself in SelfCAD and investigate perpetual planning prospects!