Halloween Game: Candy Hunter With Pyxel Studio
by 3Designer game in Design > Game Design
98 Views, 4 Favorites, 0 Comments
Halloween Game: Candy Hunter With Pyxel Studio

After to learn coding last year at school , I have acquired knowledge in this area, And I have decided to practice a little to keep, conserve this skill.
So It's the main reason for the realization of this instructables, and the halloween contest gave me the theme of this game.
To realize this game, I use Pyxel studio because it has a drawing space with pyxel in addition to the coding space. It use python language, and has functions that we can use to facilitate our work, I'm going to tell and explain you the functions that we are going to use.
We have used pyxel studio in class and I found It easy to use at my level so I really like It. And maybe you'll appreciate it too.
I hope you will enjoy it and good viewing and reading !
Supplies
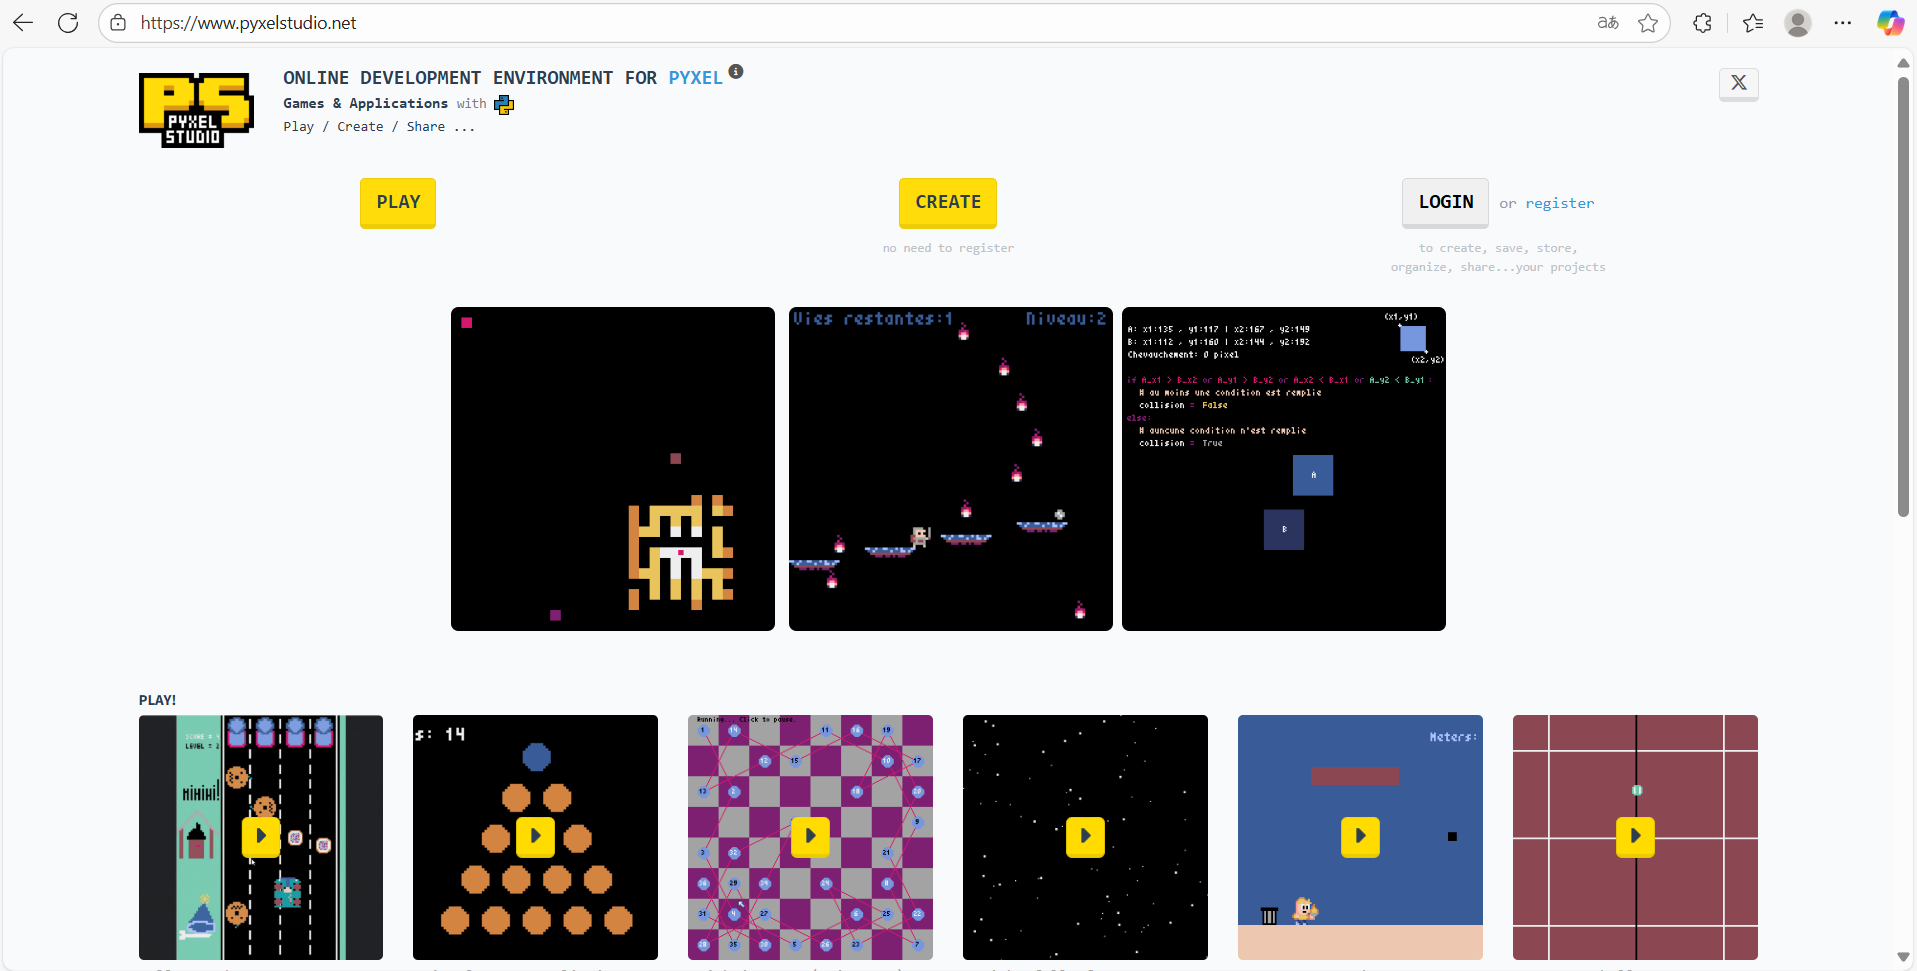
For this project, we just need a computer and a little knowledge in python coding. We have to go into the Pyxel Studio website, don't need to download so. The link of the website is https://www.pyxelstudio.net/.
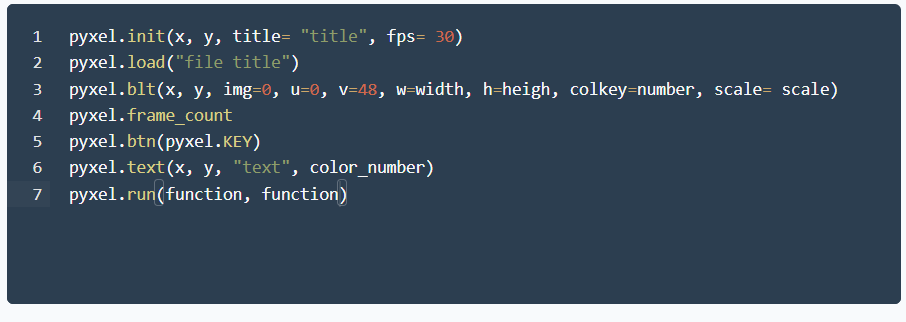
So in this game, we are going to use these 7 pyxel functions, presents in the second photo, which are:
- pyxel.init(): This function permeted to custom the game screen, the parameters are:
- horizontal legth (number of horizontal pyxel)
- vertical lenght (number of vertical pyxel)
- title of the game screen (title= ...)
- fps of the screen (fps = ...)
- pyxel.load(): It permeted to load files that we need to use, it accept only some files type as .py or .pyxress which are pyxel studio files. You have just to put the name of file(s) like parameter:
- pyxel.load("title")
- pyxel.blt(): Permeted to display picture from the pyxel studio's pyxel drawing file on the screen, the parameters are:
- horizontal position on the screen
- vertical position on the screen
- image number, we can have up to 3 images in pyxel studio's pyxel drawing, (I invite you to explore it a little because otherwise, I is difficult to understand and for me to explain) (img= ...)
- pyxel horizontal position (in the pyxel drawing file) where start the image
- pyxel vertical position where start the image
- windth of the image (w= ...)
- heigh of the image (h = ...)
- color number of the background (in the drawing file) that will become transparent on the game screen, so I invite you to take a color that you don't use, the background color is black initially (colkey = ...)
- pyxel.frame_count give the number of game screen refreshment (depending to the fps that you initially put in the pyxel.init() function)
- pyxel.btn(): Permeted to detects the pressing of a button, you have to put the name of the key inside the function like this:
- pyxel.btn(pyxel.KEY_...)
- pyxel.text(): Permeted to display a text on the game screen, the parameters of this function are:
- horizontal text position
- vertical text position
- the text ("...")
- color number of the text
- And finally, pyxel.run() permeted to put on road parameters functions during all the game time, so parameters are functions that we want to operate:
- pyxel.run(... , ...)
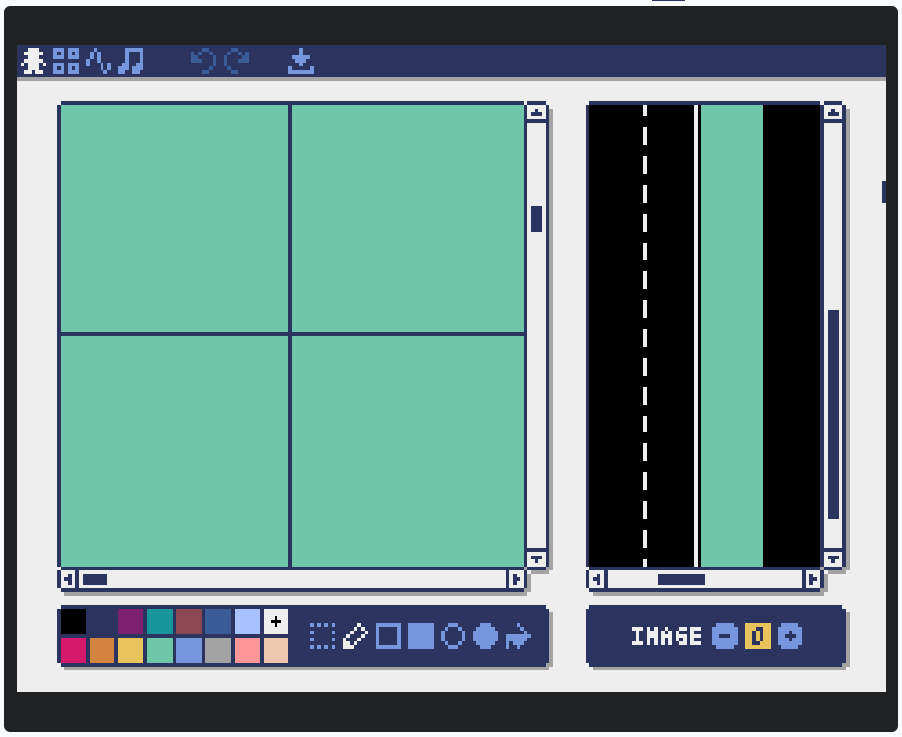
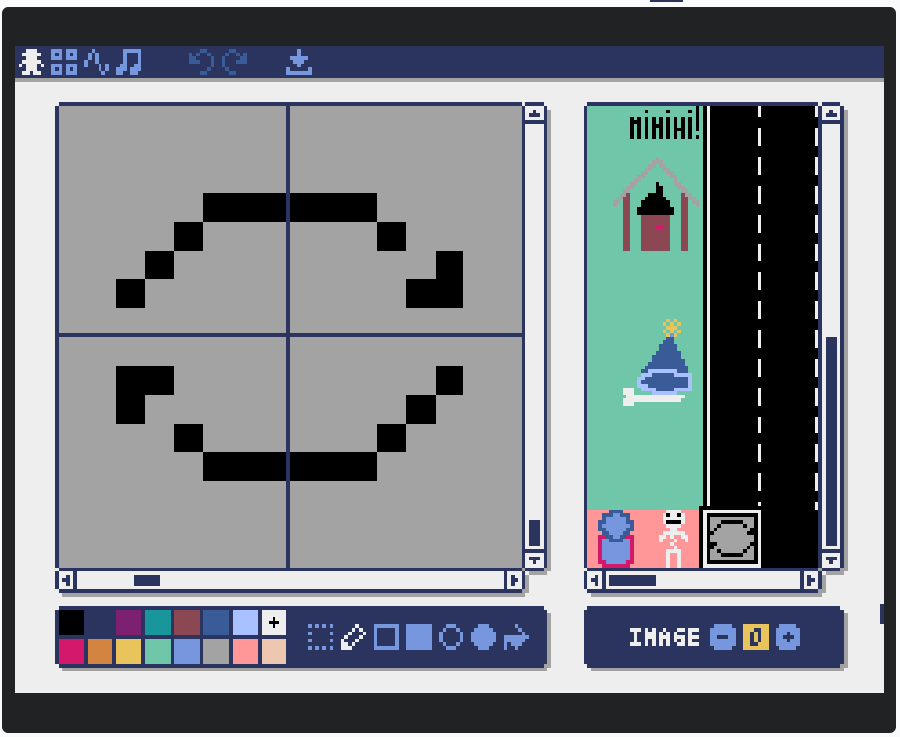
Explore Pyxel Studio Environment
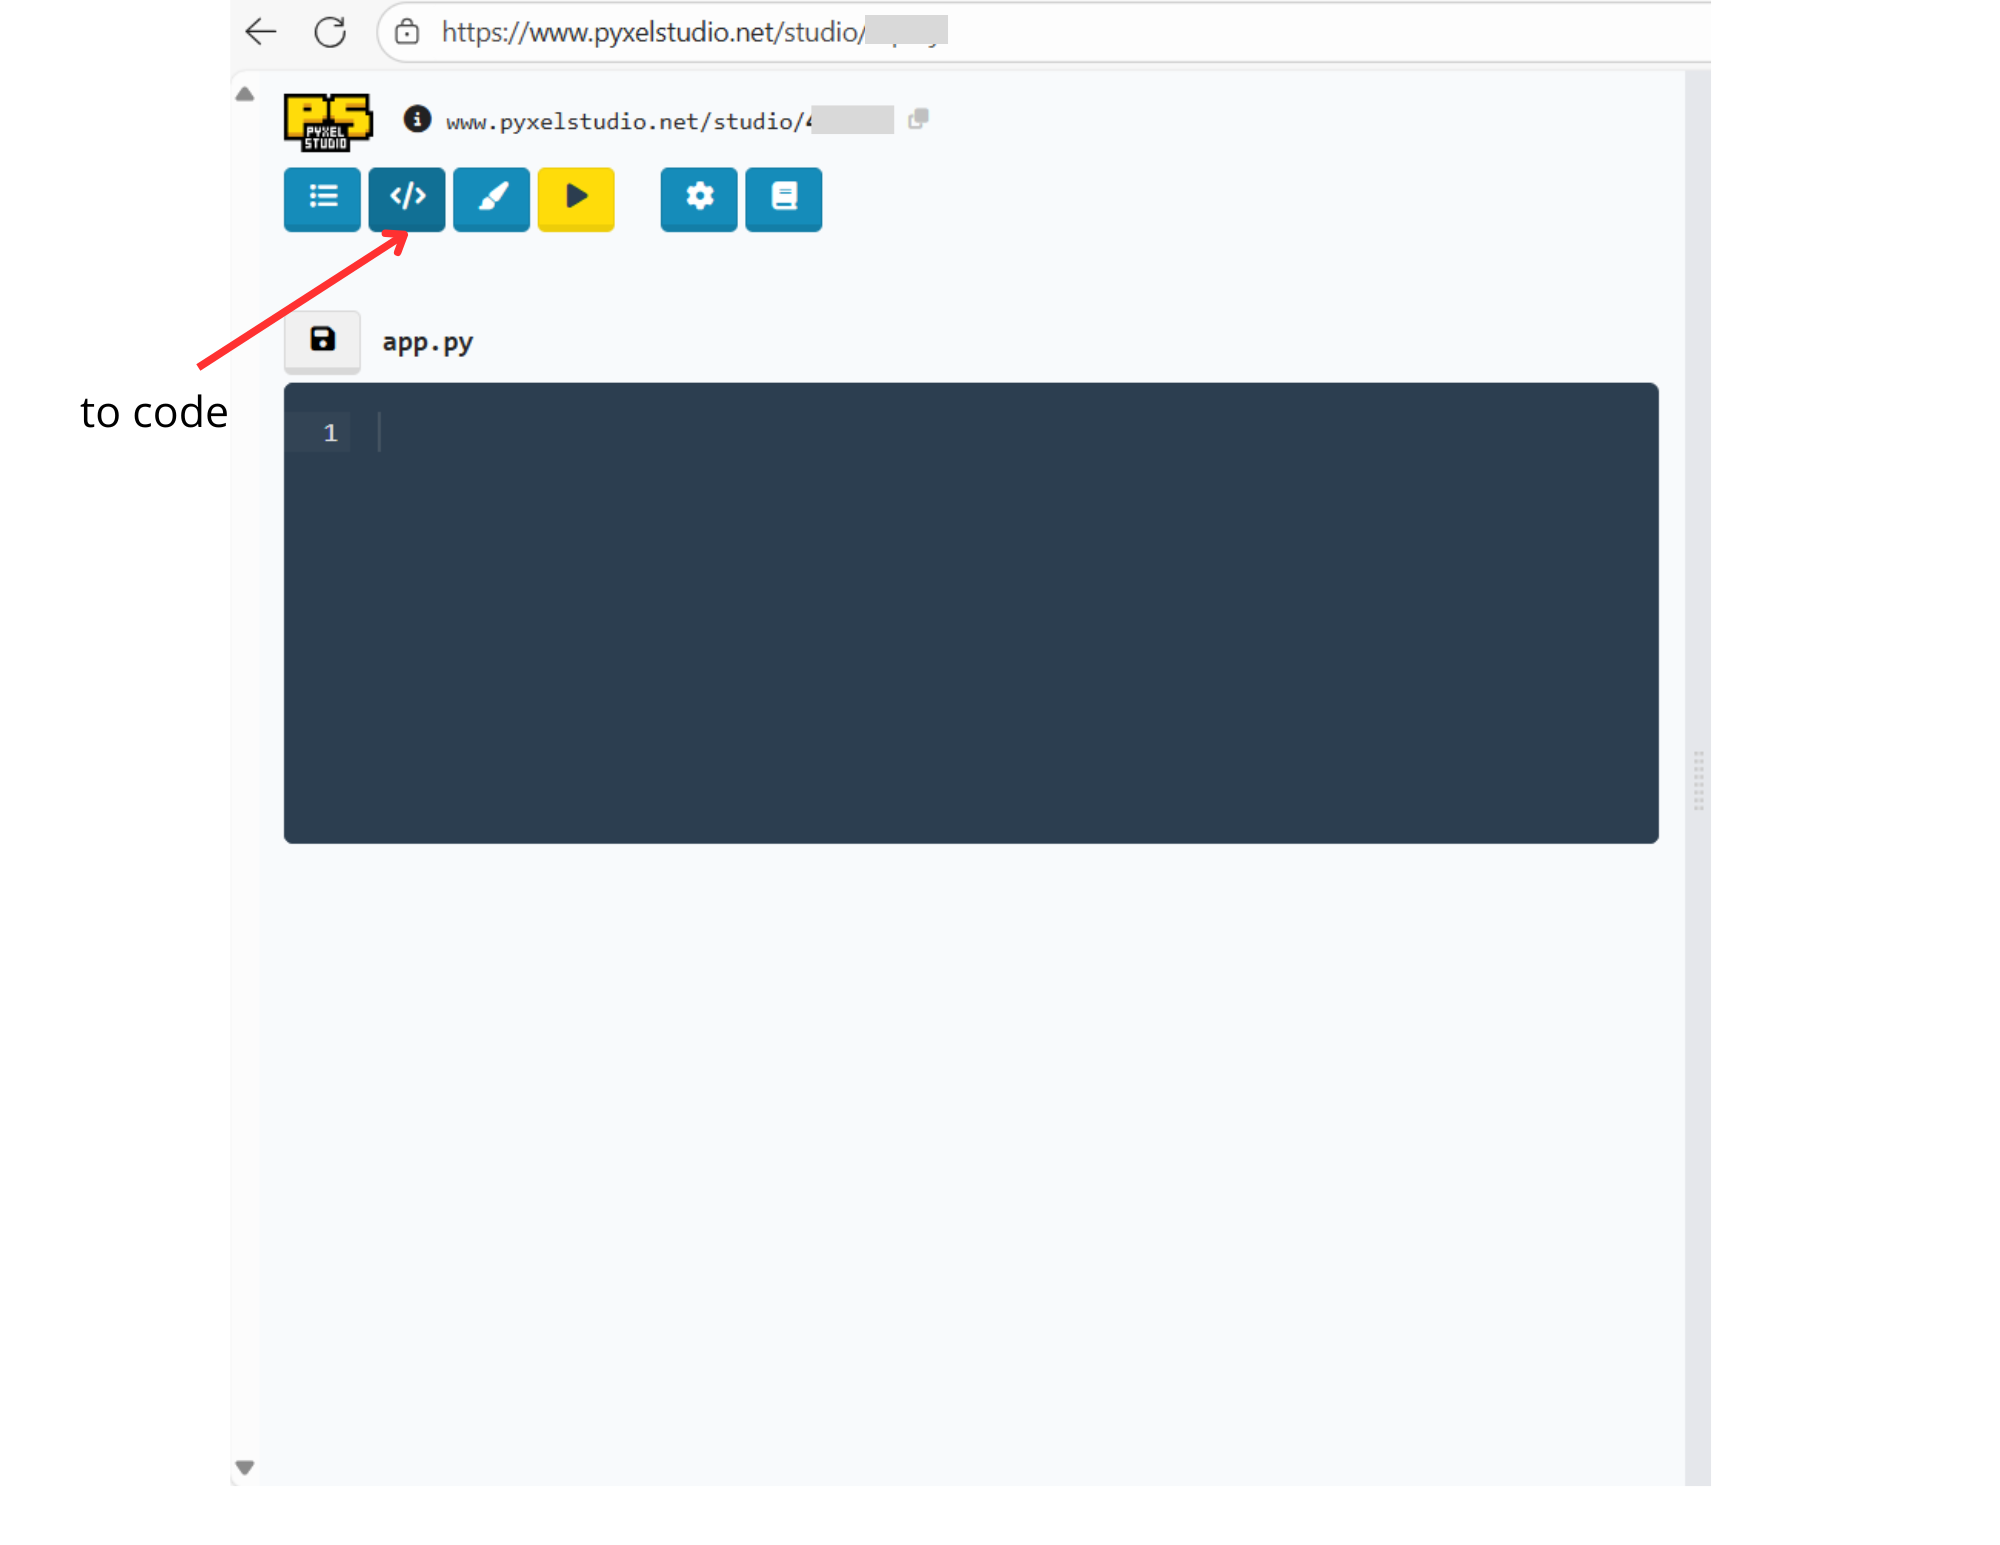
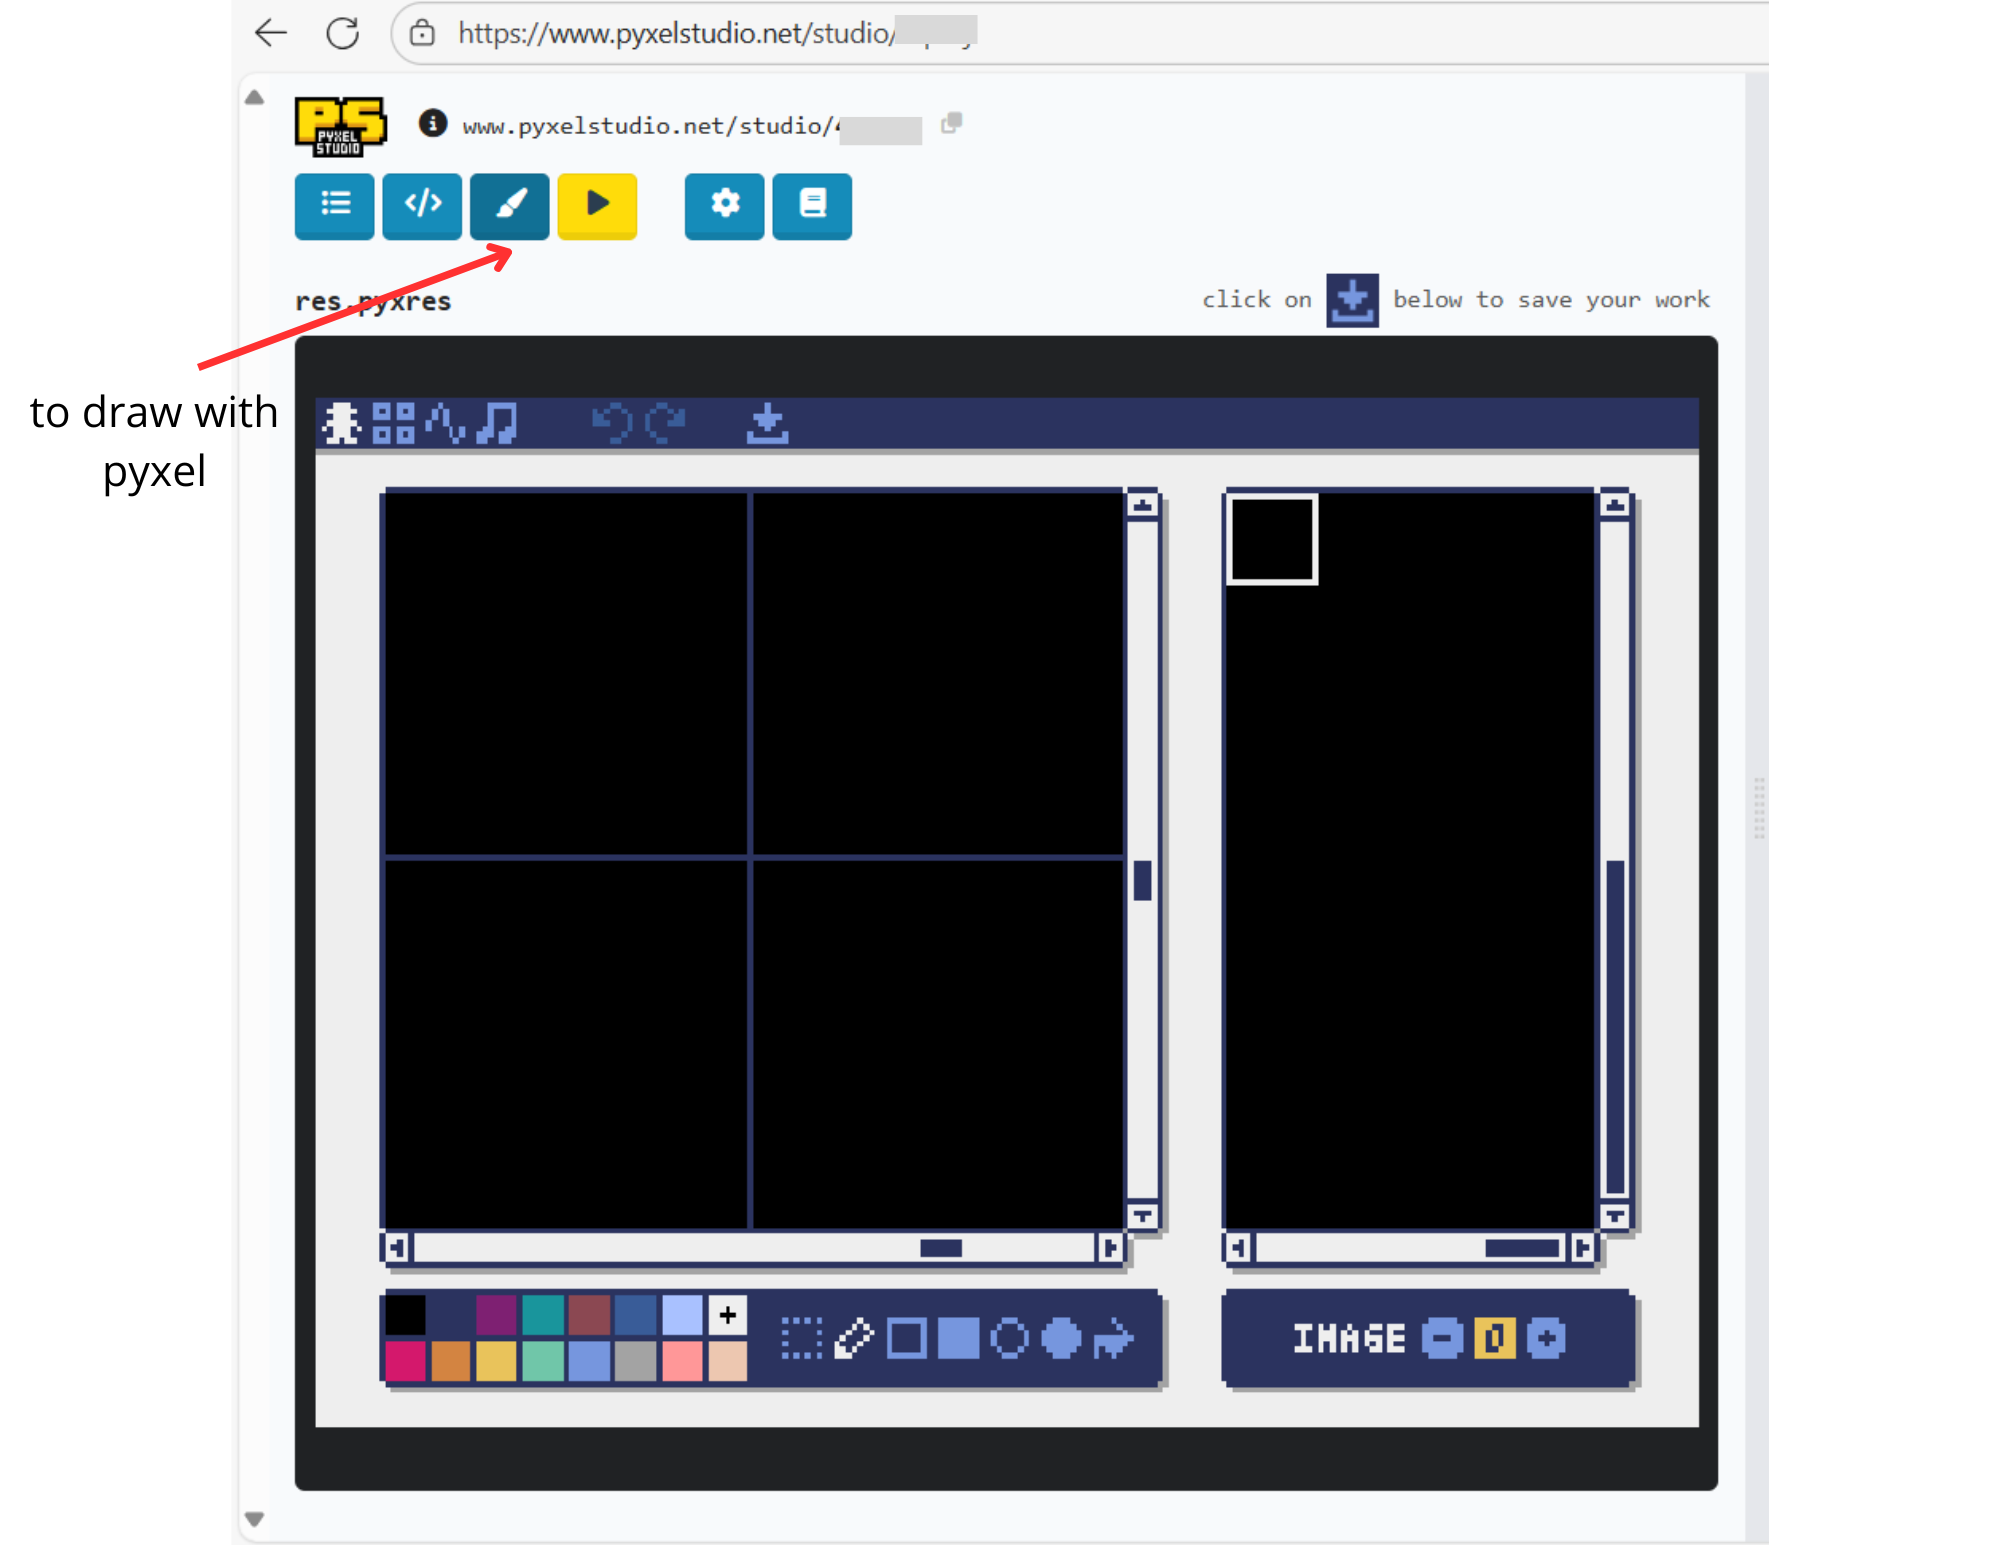
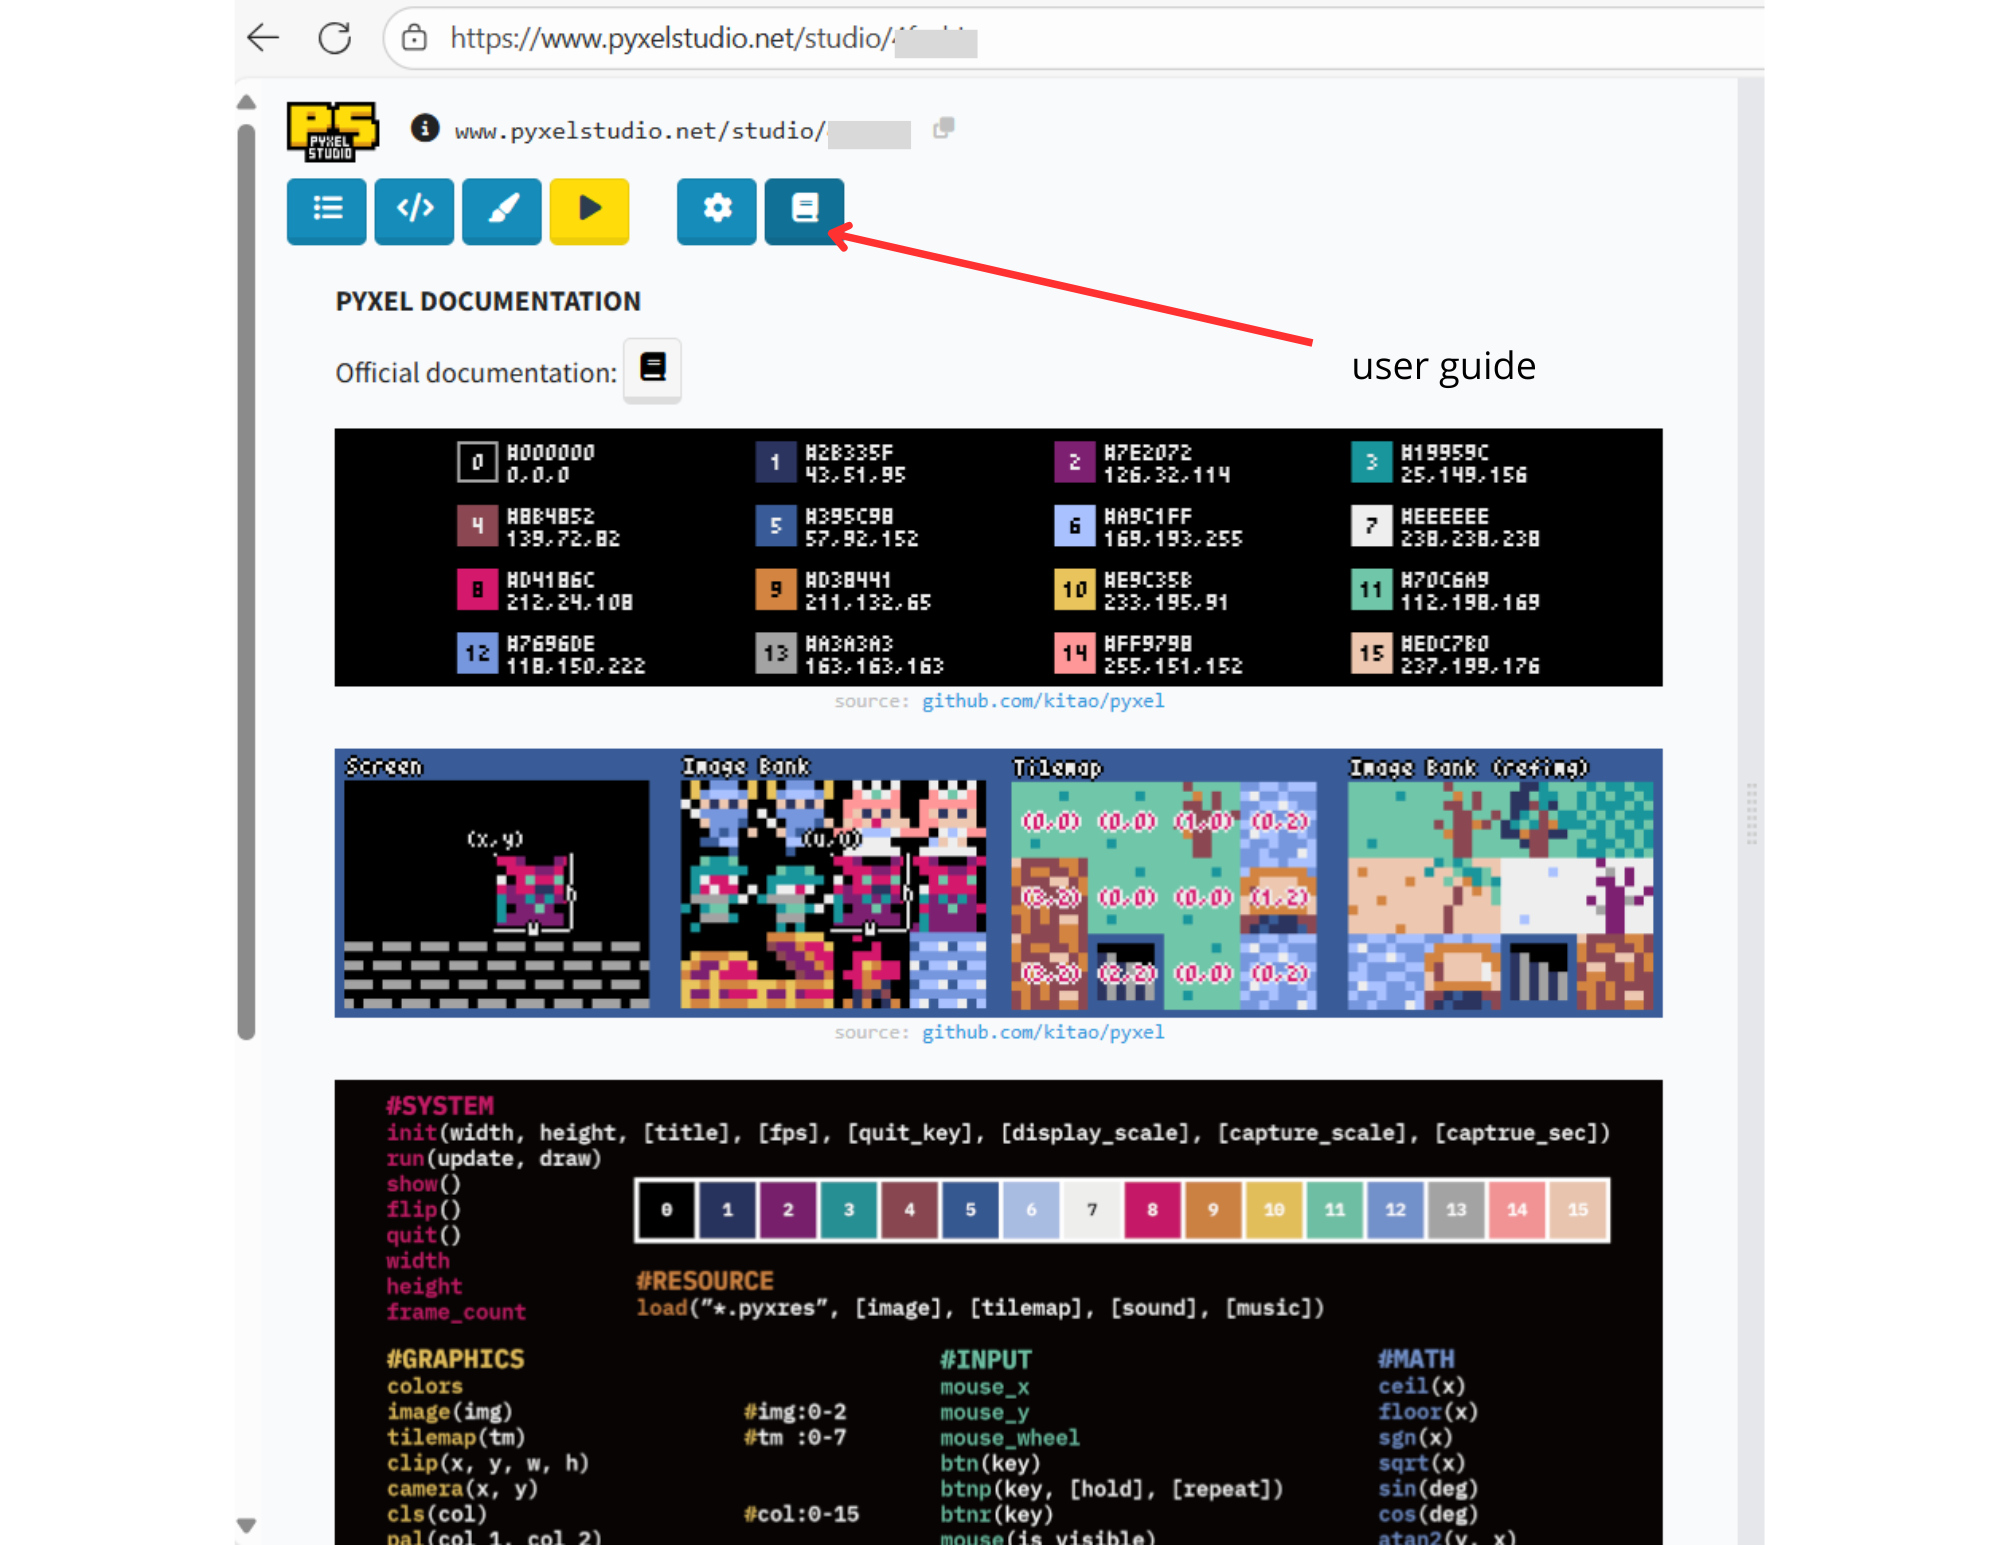
Firstly, It is important to understand the interface of this website.
So we have, like indicated in the first image by an arrow, we have the button to go into the coding place. We have, in the second image the place to draw with pyxel. And a little user guide in the third image, we can see at first in this user guide the number corresponding of each color that we need for some function as we have seen before.
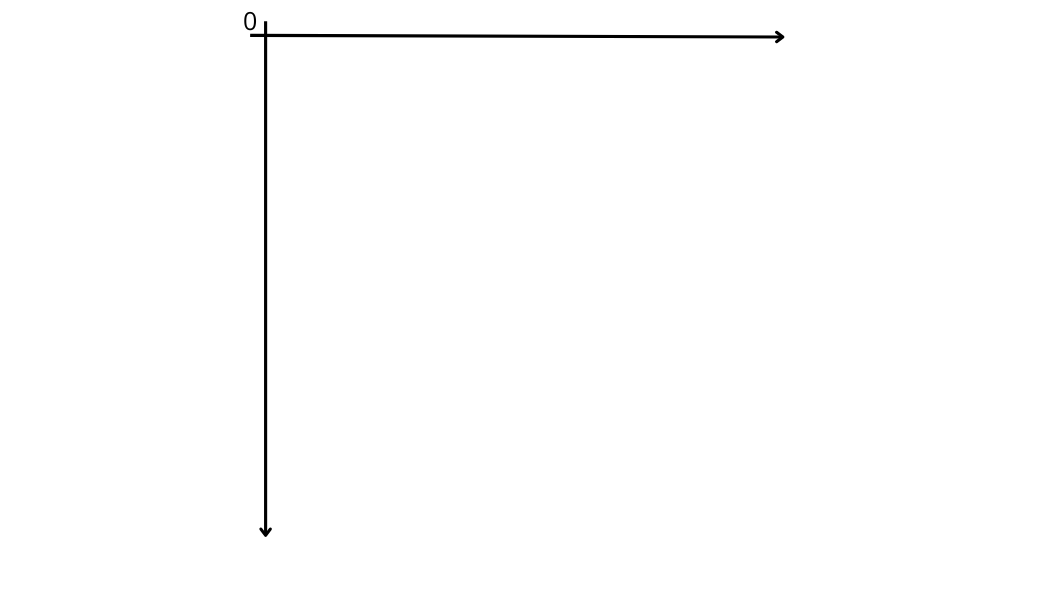
And also It is important to understand that on the screen, like we can see in the fourth image, the origin of the reference frame is on top left of the screen, not on the middle.
Imagine the Game
To create a game, It is important to imagine the gameplay: the goal, how it work ...
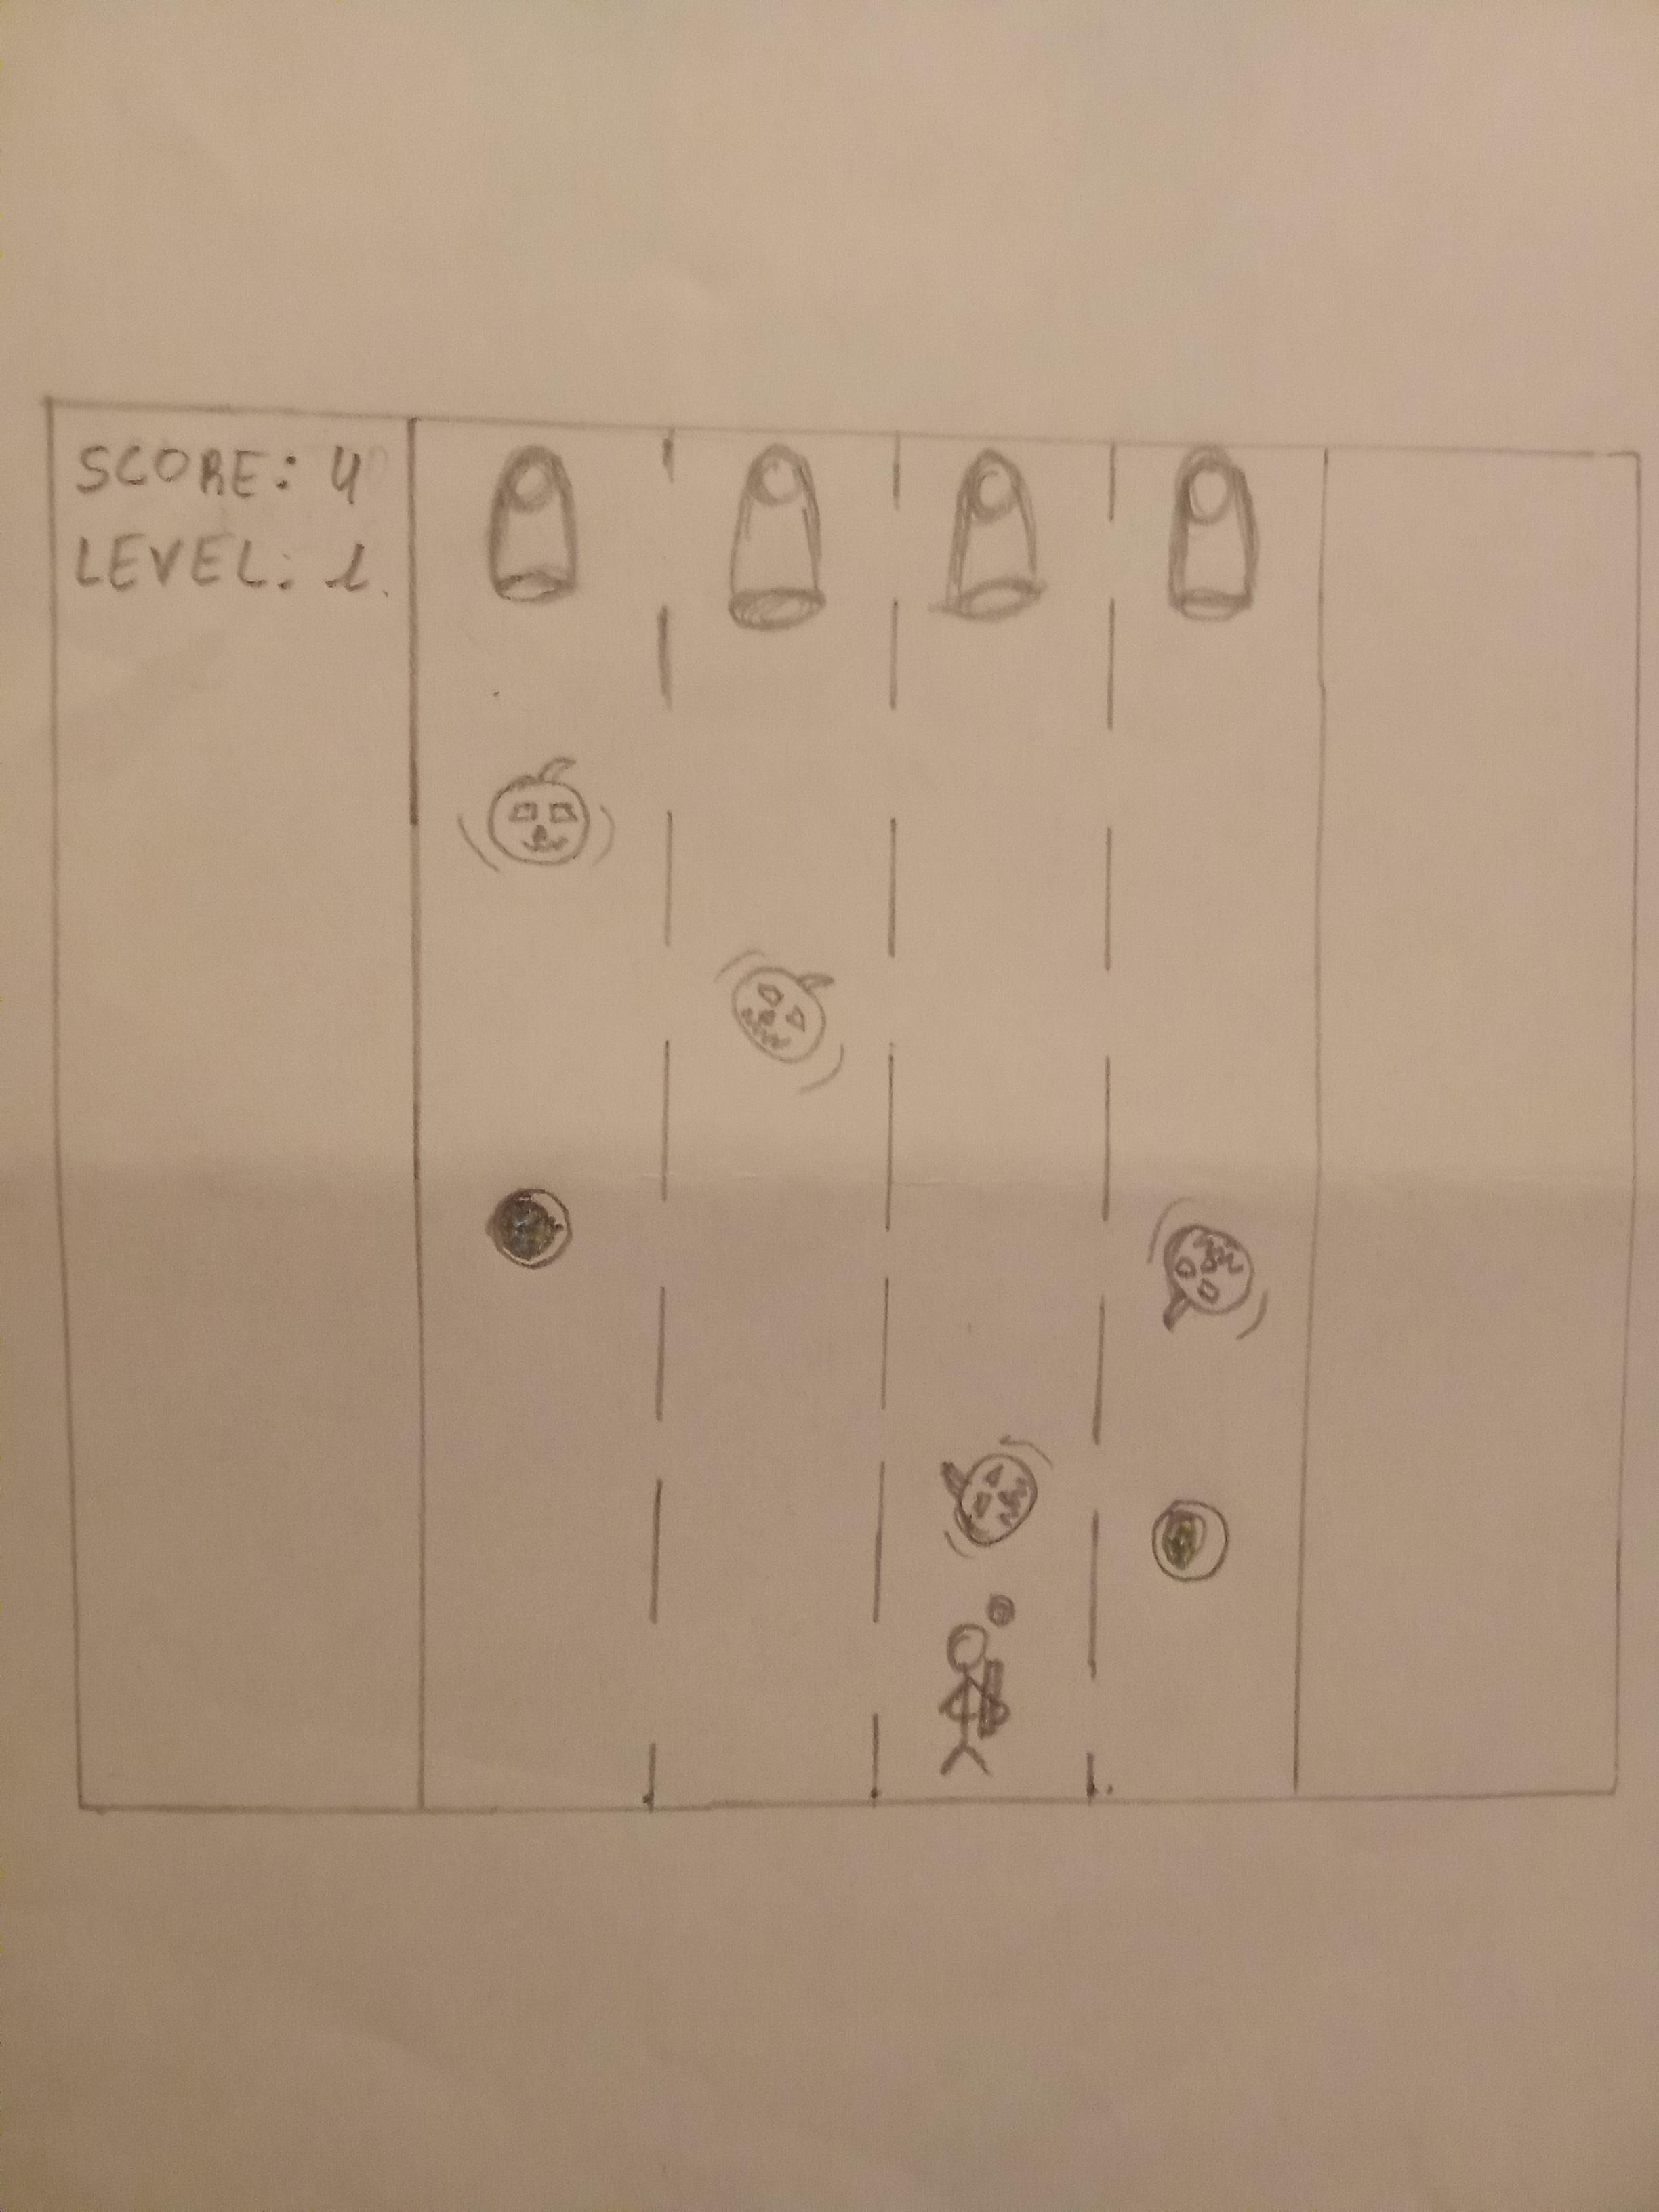
Like the theme of the game is Halloween, I imagine a game where the main character shoots at pumpkins, pumpkins that come out of cannons and have a spin effect, and go straight and south direction. If the character touches a pumpkin with one of his bullet, a candy bowl appears in the place where the pumkin was touched, and the character has to go into this place to collect the candy bowl.
If the character collects a candy bowl, his score goes up by one point, but if a pumpkin go out of the screen, he loses a score point.
Also, if her score reachs into 10 points, he climbs up a level, and climbing up a level means that pumpkins go faster. But if her score goes under 0 points, or a pumpkin touches the character, the game is over.
To make simply, the goal of the game is to shoot pumpkins, collect the candy bowl inside, and dodge the pumpkins.
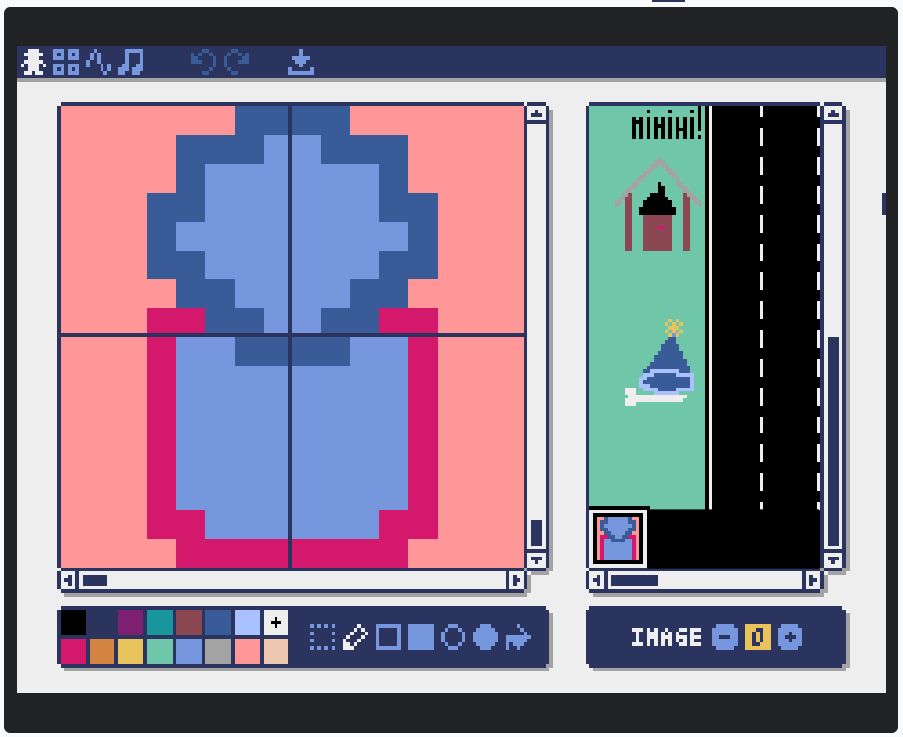
Draw the Pumpkin
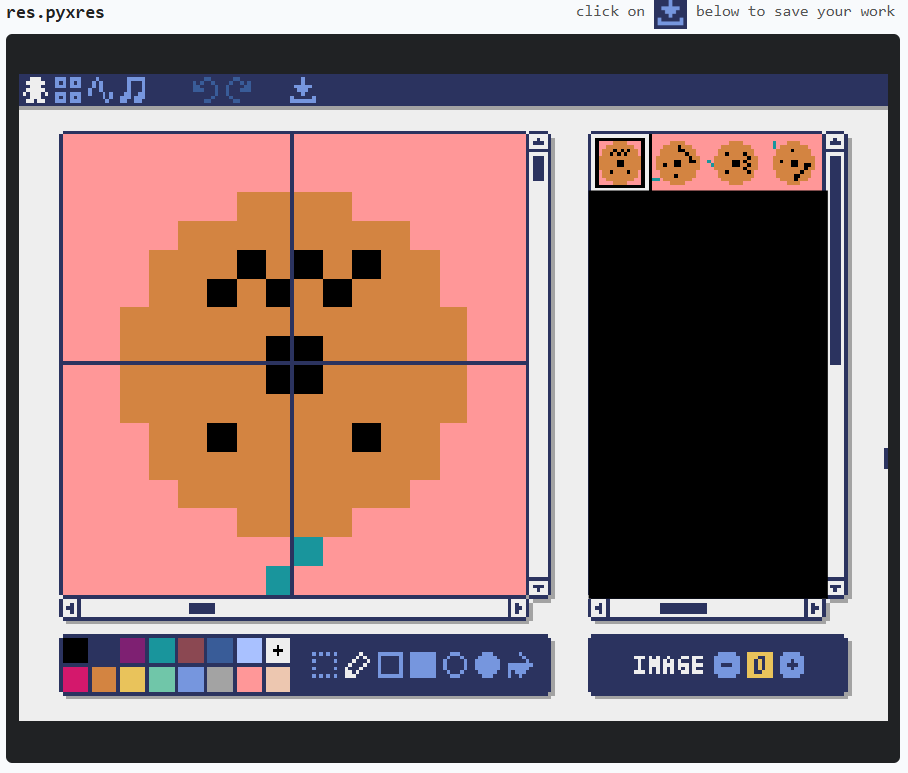
Now that we know the goal and the gameplay, we are going to design each element of the game.
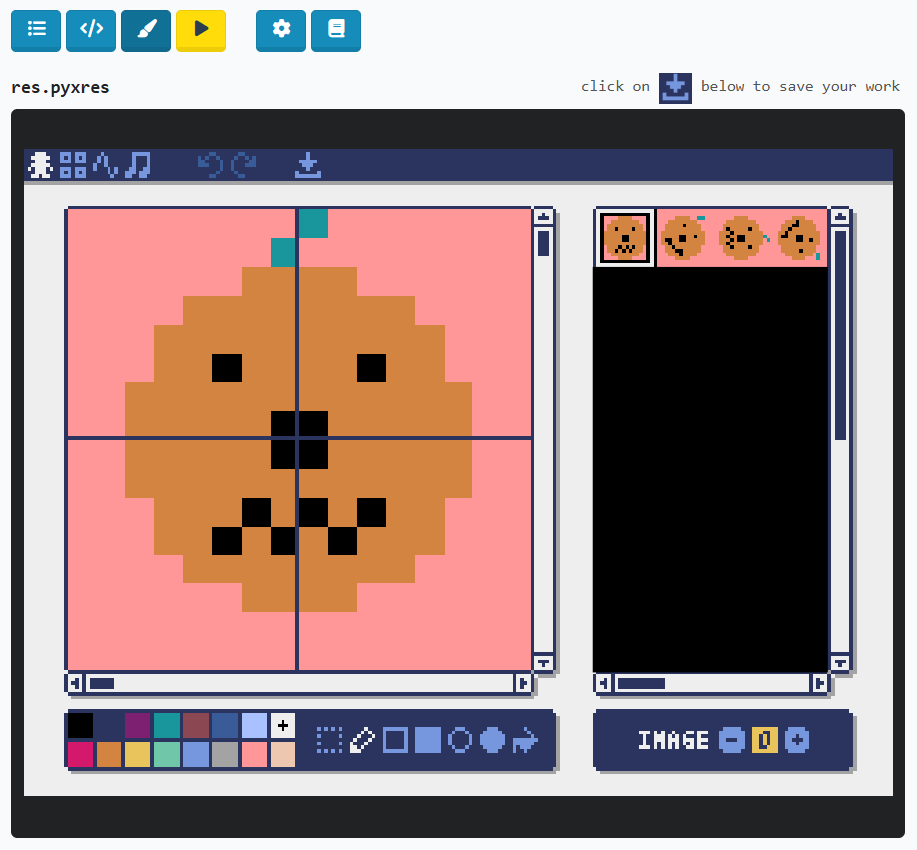
To start, like you can see in the photos, we are going to design the pumpkin. For this, we have to go in the pyxel drawing part of pyxel studio and, as I want to give a spin effect for the pumpkin, I draw 8 phase of different spin position.
And as we can observe, I change the color of the background instead black color initially, because I use the black so If I have conserved it as background, all black colors parts will become transparent when I will display It on the screen. So It is why I invite you to take a color that you don't use as background color.
Draw the Character and the Bullets

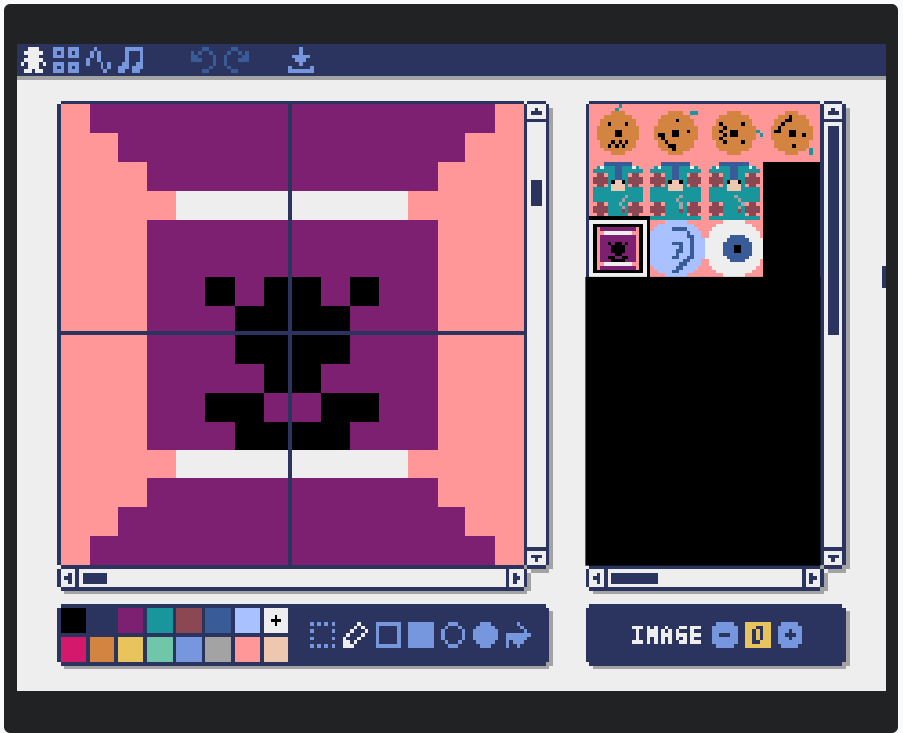
Then, we are going to draw the character and the bullets. I draw 3 characters image to give an impression of smoke movement going out of this human machine creature. I also draw 3 types of bullet to give a little diversity: monster candy, a marble ear, and an eye.
Design the Background of the Scene
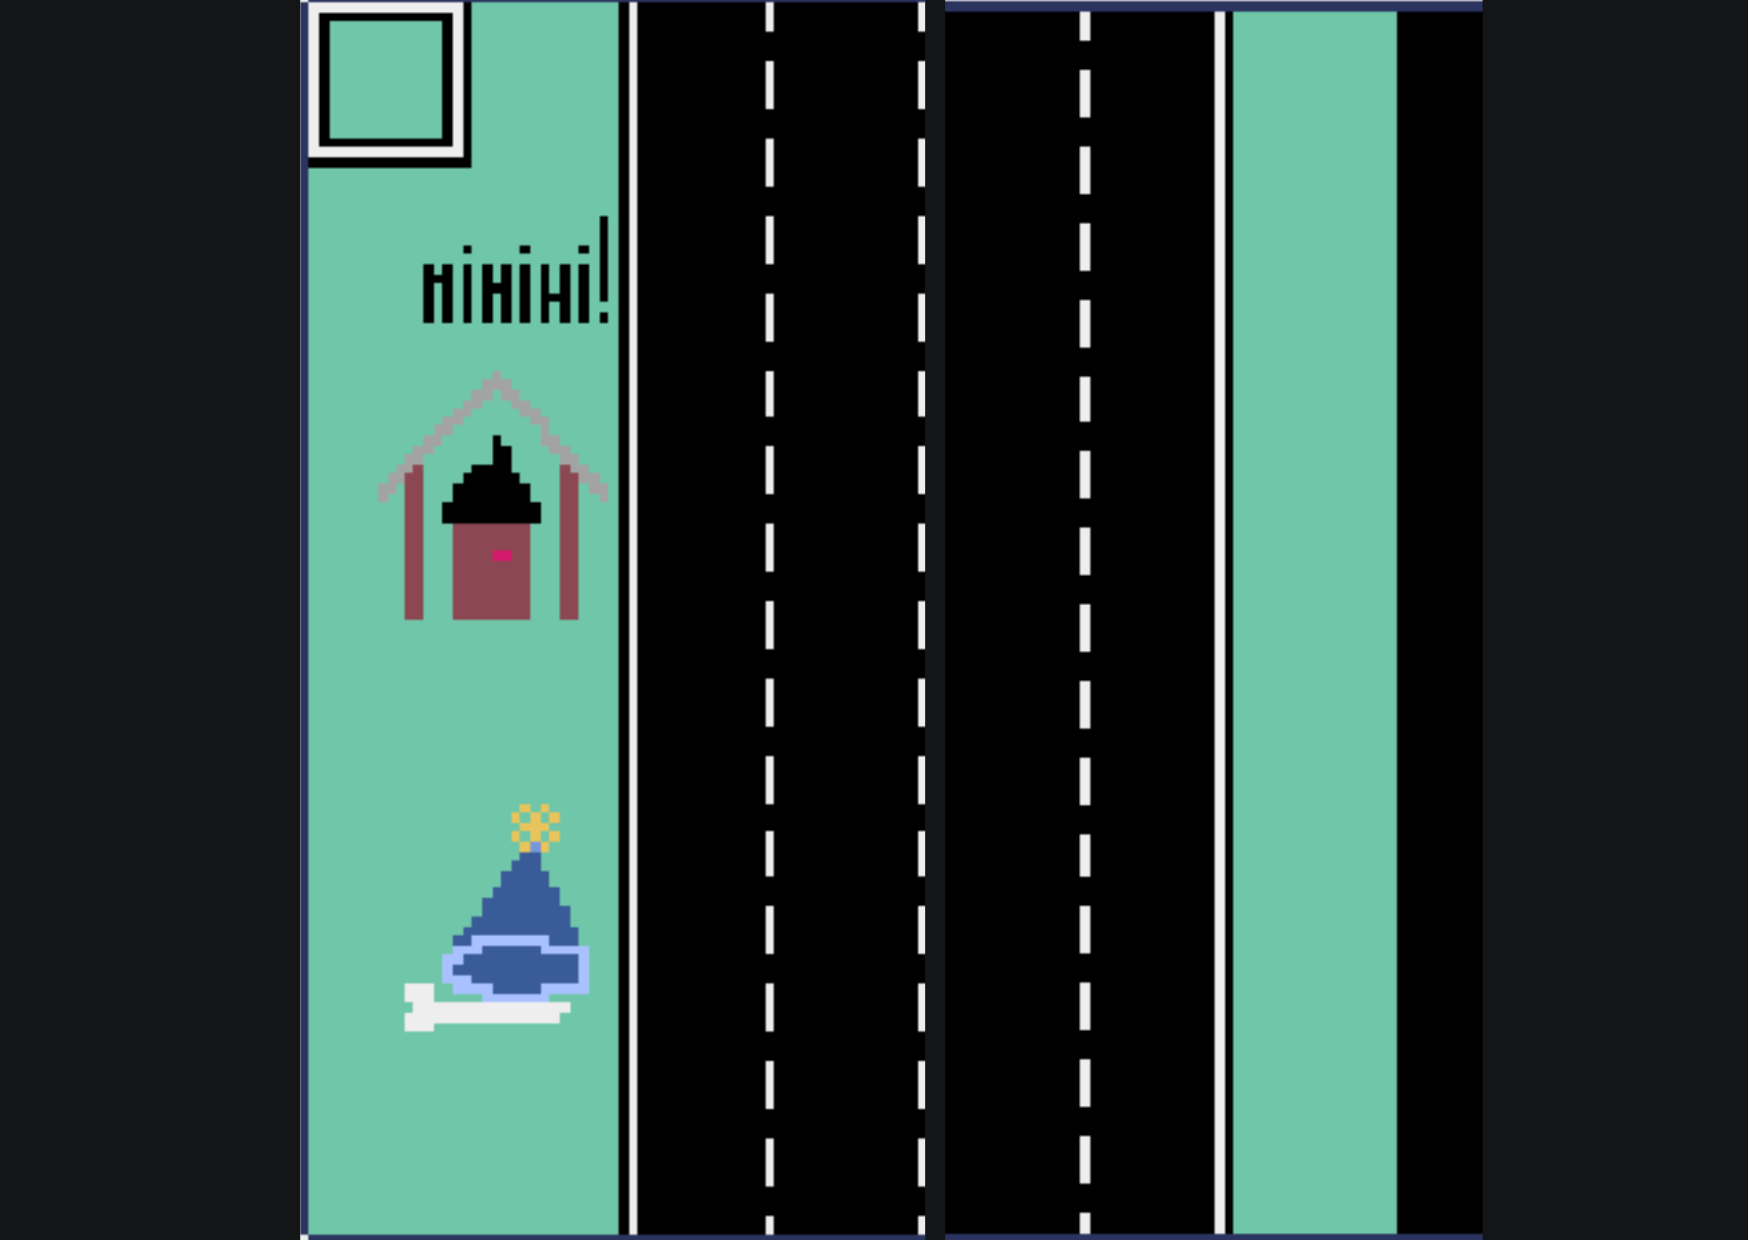
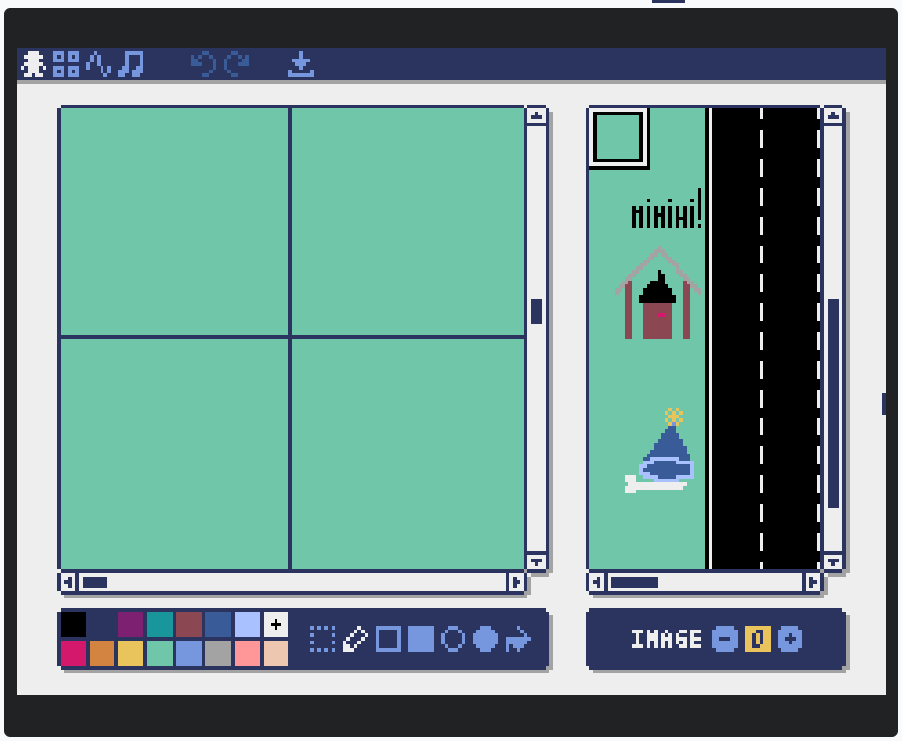
After, we draw the background. The background is a four-lane road, and I put decoration at the bottom of where we will display the score and the level.
It takes a lot of space.
Draw the Cannon and the Candy Bowl
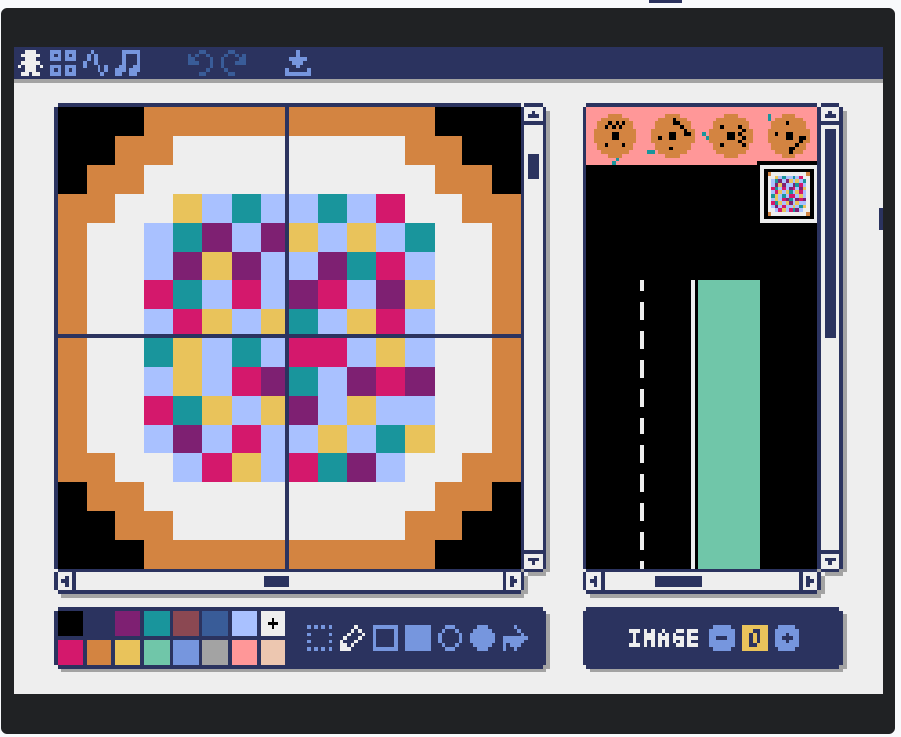
Then, we draw the cannon and the candy bowl. As you can see, I keep the black background for the candy bowl because I don't use this color so it does not cause transparence problem.
Draw Element for the End Screen
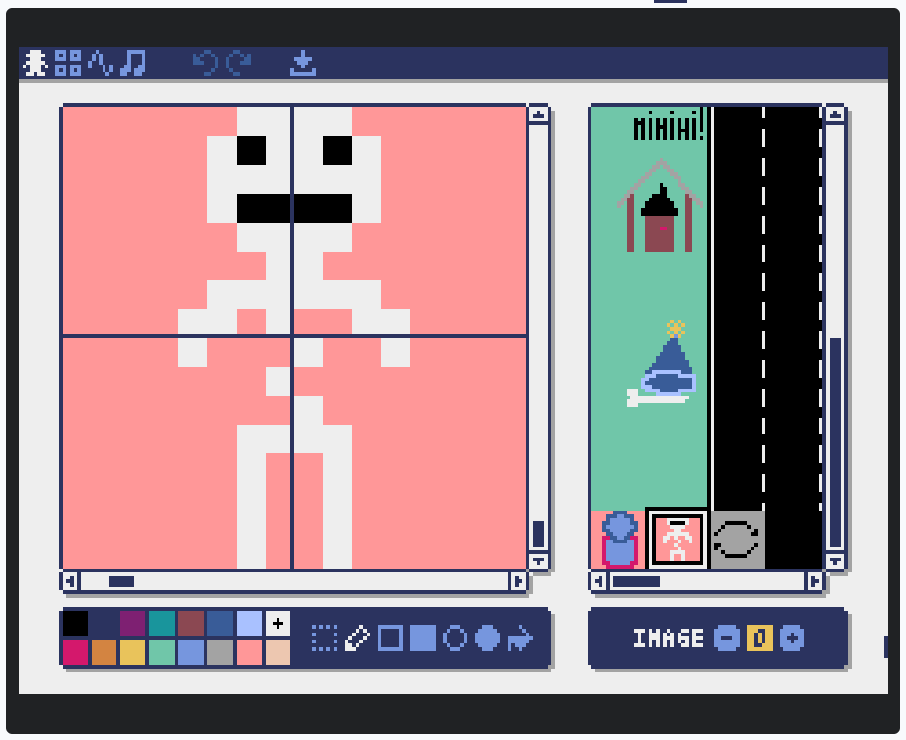
Finally, to close this drawing part, we draw elements for the end screen. A skeleton to indicate that the player lost the game, and an image to indicate the button to press to restart the game.
Import and Initialization
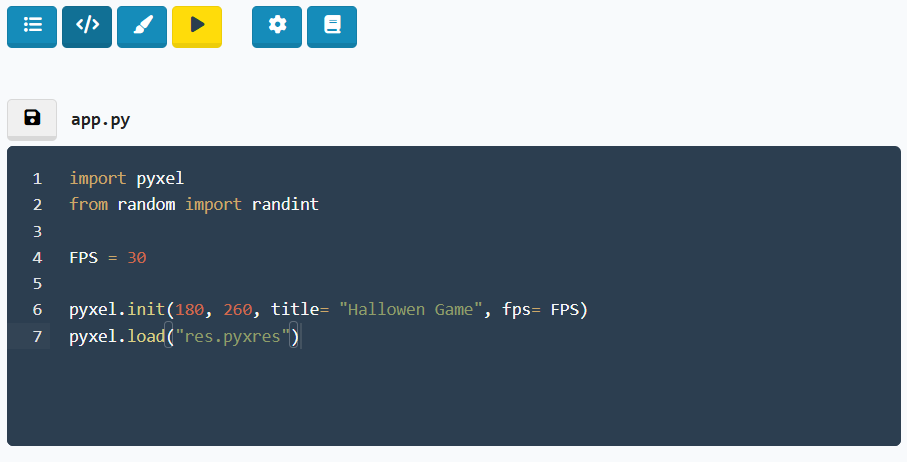
Now that we have finished the drawing, I'ts time to code.
So, to start, we have to go in the coding part of our pyxel studio project.
For coding instruction, I just will show you the code by images, and I'll explain you what are we doing, what do the code, the goal of the code. I have added also notes in the code to understant better.
So for this first code part, we import the pyxel library, "import pyxel" is initially present in the coding interface. I remind you that the library "pyxel" is not initially present in python, it is a pyxel studio library.
Then, we import randint function from random library because we will use it. After, we define a varable FPS because we will need the fps for the deadlines. Next, we initialize the screen by the pyxel.init() function and load file that we need, here, it is the pyxel drawing file from the pyxel drawing part, which name is initially "res.pyxress", and we don't need to download it in our computer when it is already on the pyxel drawing part.
Global Variables
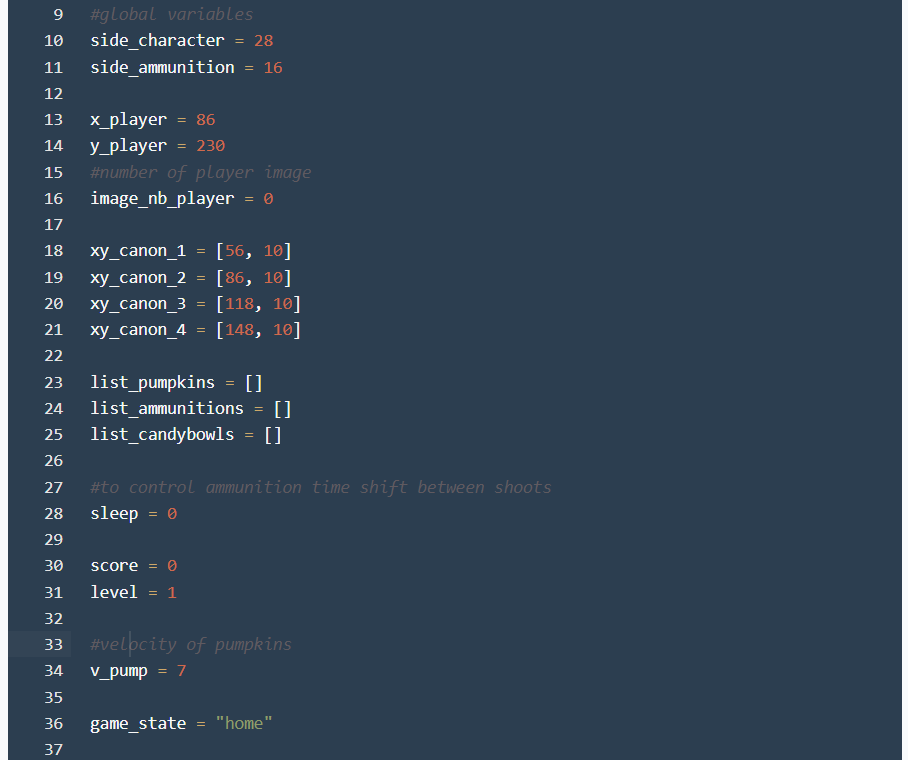
Then, we define global variables. Global variables are very usefull when we have values that we use several times.
Side_ammunition and side_character variables are going to be usefull to manage collisions, xy_canon_1 - 2 - 3 - 4 are the coordinates of the cannons on the screen. Then, we have list_pumpkins, list_ammunitions and list_candybowls variables, which are each, the list of coordinates of pumpkins, ammunitions, and candybowls that we have to display on the screen. And game_state permeted to have the state of the game: home, play, or end.
Display Player and Background Functions

Next, we are going to code functions that will make work the game.
To start, we have display_background() function which permeted, as its name suggests, to display the background. We have aslo the display_player() function which permeted to display the character and to give the movement of smoke.
Display Canons and Move Player Functions

After, display_canons() permeted to display the 4 cannons along the game, and move_player() function permeted to move the player by using arrows keys.
Add, Manage and Display Pumpkins Functions
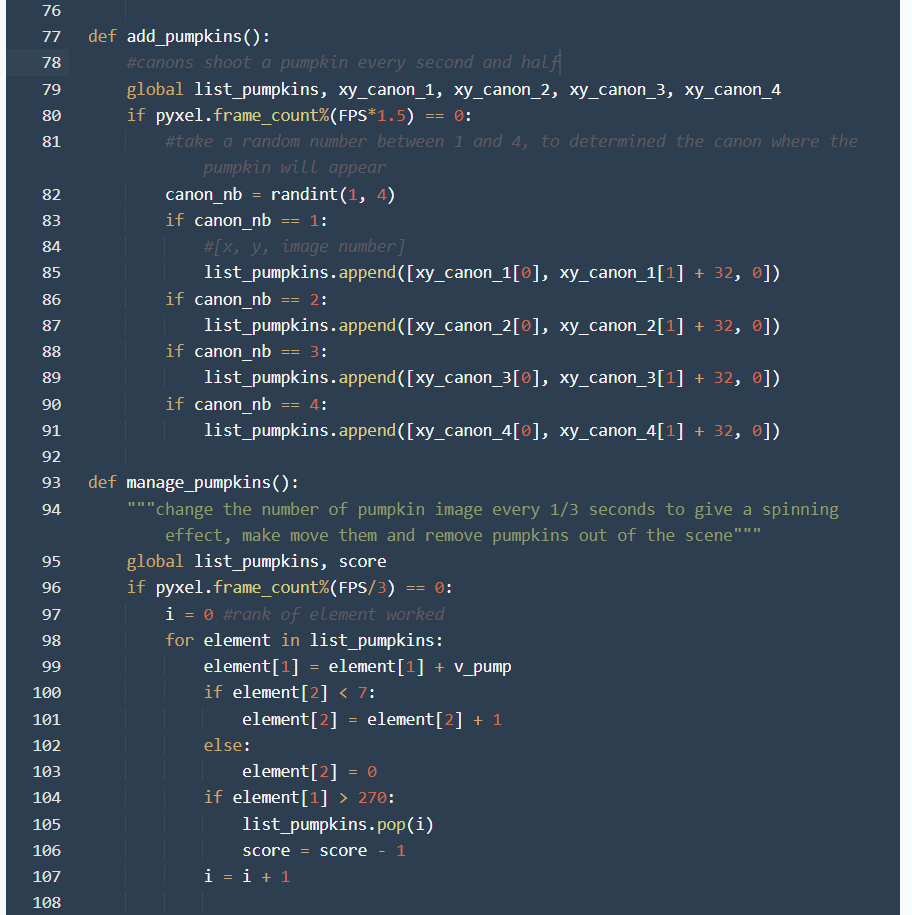
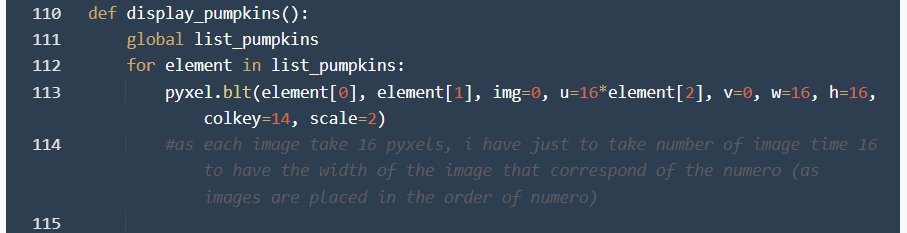
Then, add_pumpkins() function add a pumpkin every second and half, pumpkin that comes out of a cannon taken at random. manage_pumpkin() permeted to make move pumpkins forward, to remove pumpkins out of the screen and to remove a point from the score when a pumpkin go out (behind the character) . And display_pumpkins() permeted to display all pumpkins in list_pumpkins.
Manage, Move and Display Ammunitions Functions
.png)
Next, we have manage_amunitions() function which permeted to add a munition on the character position when space key is pushed and to do it a maximum of one time per 1.2 seconds. move_ammunitions() make move the ammunitions towards the cannons and remove them when they are near to the cannons, and display_ammunitions() displays all ammunitions in the list_ammunitions.
Managing Shocks Functions
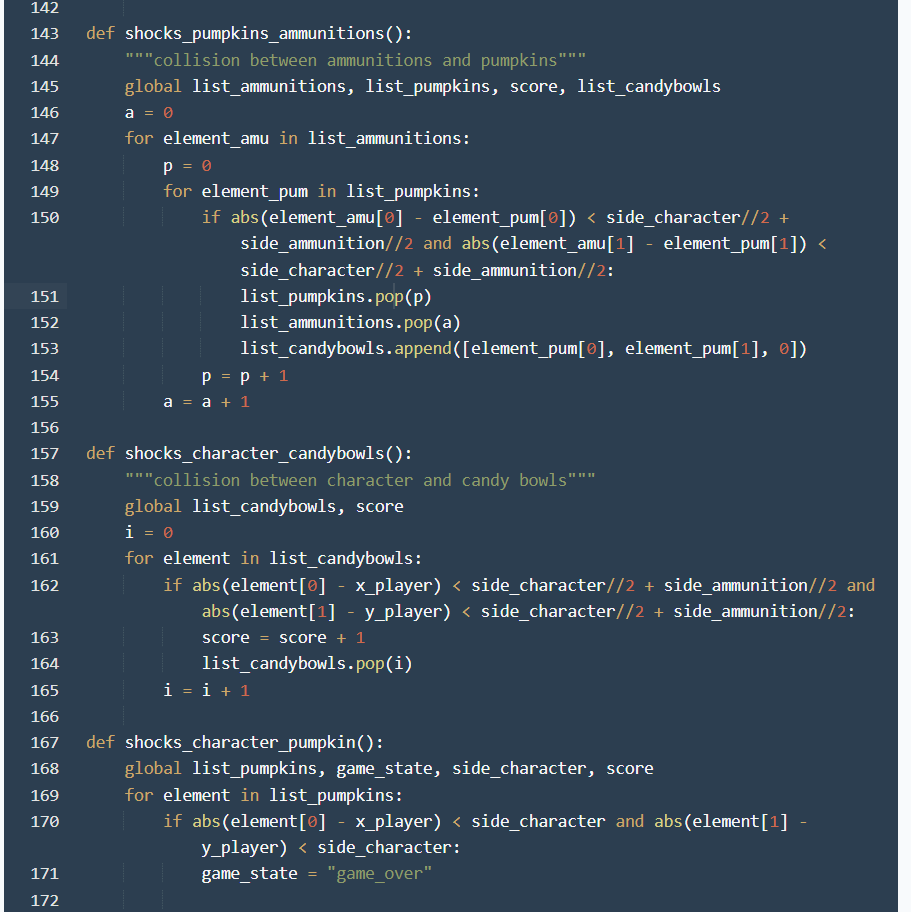
Then, we have to manage all shocks. Firstly, shocks_pumpkins_ammunitions() function detects collision between a pumpkin and an ammunition, removes these authors of the collision and put a candy_bowl in the pumpkin place. Secondly, shocks_character_candybowls() detects collision between the character and a candybowl, in this case, it removes the candybowl and add a score point. And thirdly, shocks_character_pumpkin() function detects collision between the character and a pumpkin, in this case, the game_state variable is changed into "game_over".
Manage and Display Candybowls Functions
.png)
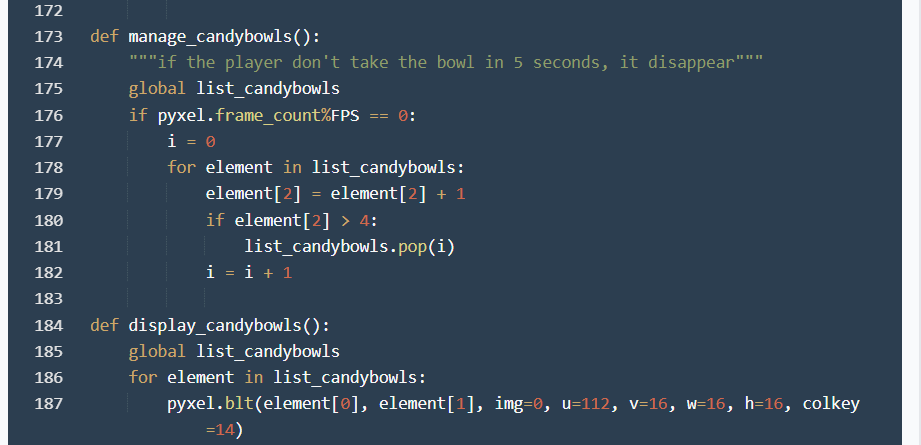
Next, we have to take care of the candy bowls. The manage_candybowls() function removes the candy bowls after 5 seconds if they are not collected, and the display_candybowls() function displays candy bowls on the screen.
Score and Level Functions
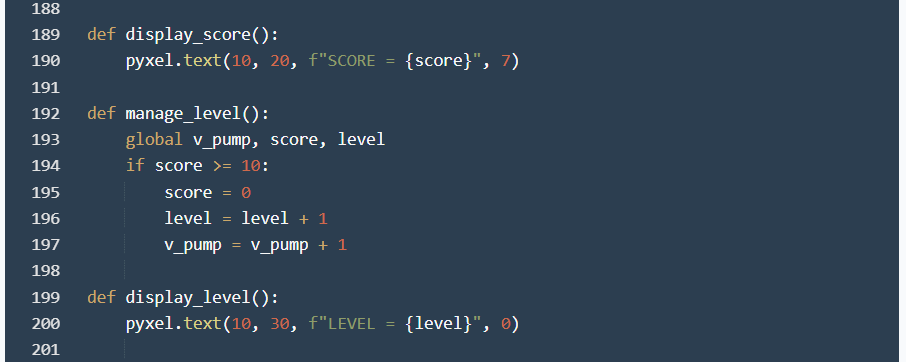
After, display_score() function displays the score on the screen, manage_level() adds a level point when the score reaches 10 points, reset score to 0 point and add one pyxel per 1/3 second in the velocity of the pumpkins v_pump. And display_level() permeted to display the level on the screen.
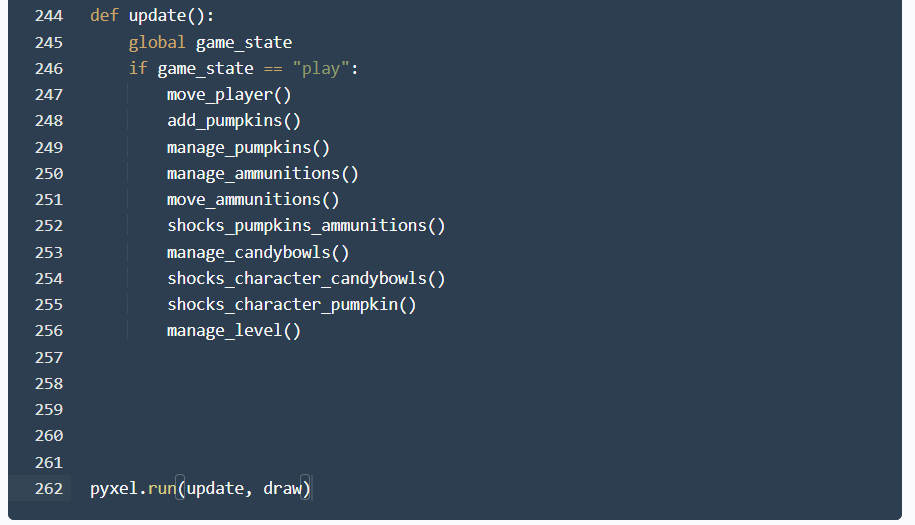
Draw and Uptade Functions, and Put the Game on Road
.png)
.png)
Finally, we are going to put all functions that we define before into two categories and into two functions: draw() and uptade(). We are going to put all functions related to display in the draw() function, and all functions related to management in the uptade() function.
In the draw() function, we are going to manage the display during the before game, when game_state == "home" (the home page) and the after game too, when game_state == "game_over".
The uptade() function will be active only during the play time, when game_state == "play".
And then, pyxel.run() permeted to put on road functions inside during all the gameplay time so we are going to put draw() and uptade() functions inside as parameters.
Gameplay Video and Link


And there we go, we have finished the game. I put you a gameplay video and here is the link of the game if you want to play it https://www.pyxelstudio.net/utc8439k , It is pretty fun and requires concentration and a good reaction.
I inform you also that during the coding, I discover that the website of pyxel studio bug when I use the "while" loop, i put you a video of this also. And if the videos don't work directly, you can watch the video on youtube.
I thank you for watching and reading and I hope you have liked It !
Bye !