Happy Jack-o'-lantern! (Autodesk Fusion Design)
by prittma27 in Design > 3D Design
209 Views, 0 Favorites, 0 Comments
Happy Jack-o'-lantern! (Autodesk Fusion Design)
This is a 3D Printable design of a Jack-o'-lantern. It was designed in Fusion 360 for some Halloween festivity.
Supplies
Computer
Mouse (optional)
Fusion Program
Open the Program
Open Fusion
Create New Project in Fusion

Click on the Plus Sign symbol in the Fusion browser to create a new project.
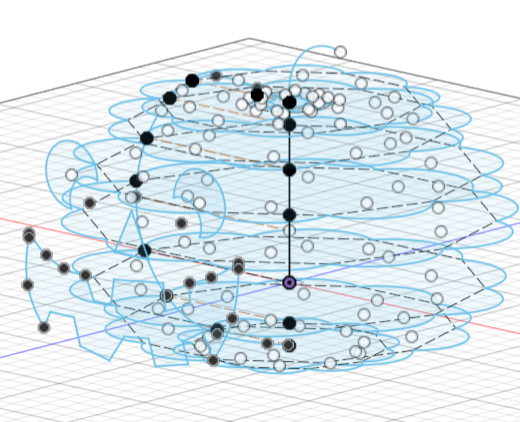
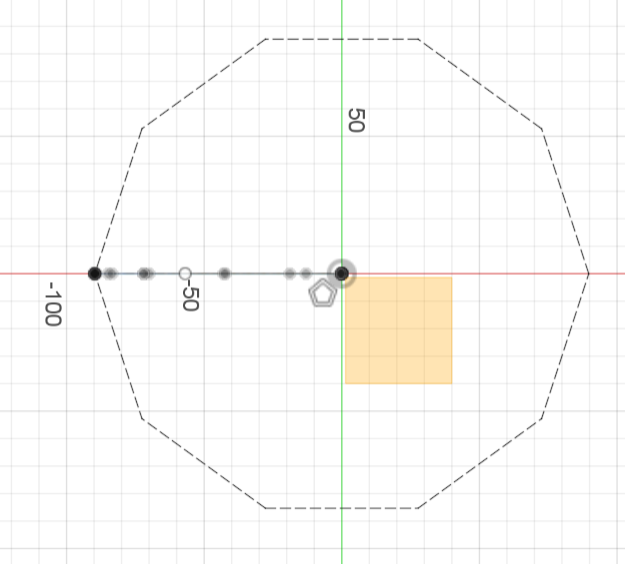
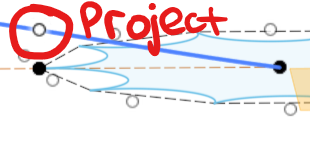
Create Your Pumpkin Outline

Create a New Sketch in Fusion on the front plane
Use the Spline tool to sketch a round, half circle-like shape
Adjust the spline so that the shape dips downwards at the top (later this will be where our stem goes)
Adjust any points on the spline to how you like them. This spline will determine how wide and tall your pumpkin is, as well as its general curvature.
When your sketch is to your liking, press Finish Sketch
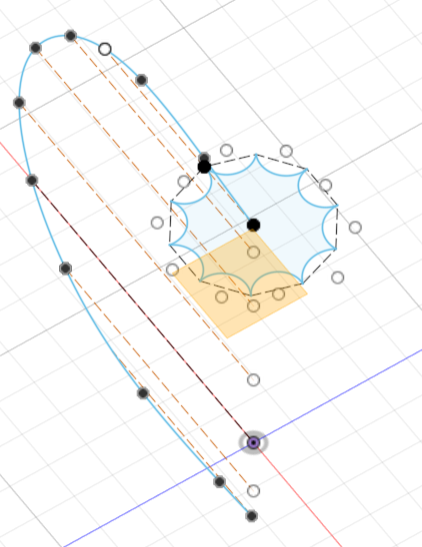
Construction Lines
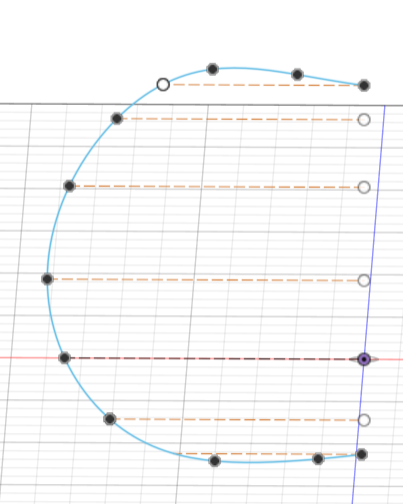
On each point on the outside of the spline, create a construction line. This is done by:
Creating a line sketch (you can press L on your keyboard as a shortcut)
Selecting the point you want your line to start from
Go horizontal from the point to the origin
Then, select the line and press X on your keyboard to turn it into a construction line
Press Finish Sketch
Repeat those steps for each point on the outside of your spline
You do not need construction lines for the points on the top and bottom of the spline
Offset Planes
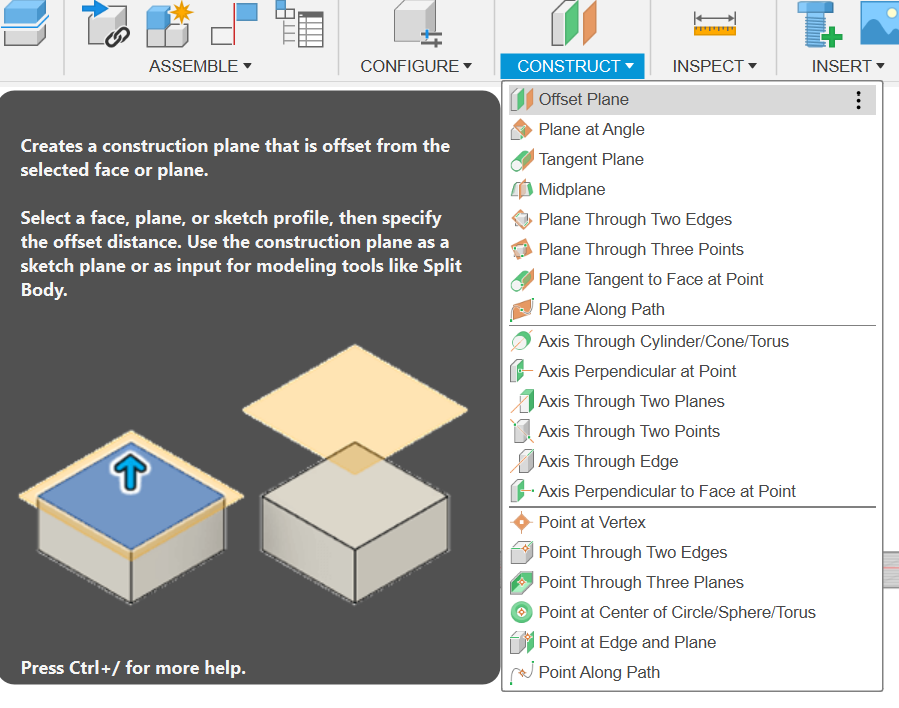
Create an Offset Plane at the same heigh of each of the construction lines you just made
This is done by:
Going to the Construct menu and selecting offset plane
Select the bottom plane as the one you are going to offset
Drag the plane up/down to be in line with your construction line
Repeat these steps for each of the construction lines
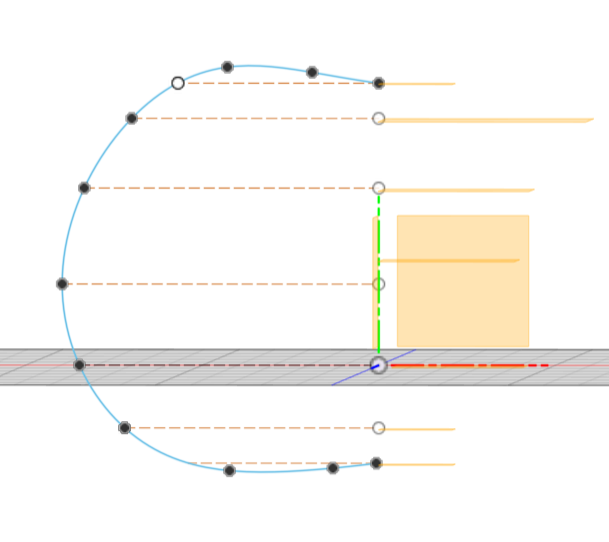
Pumpkin Shape
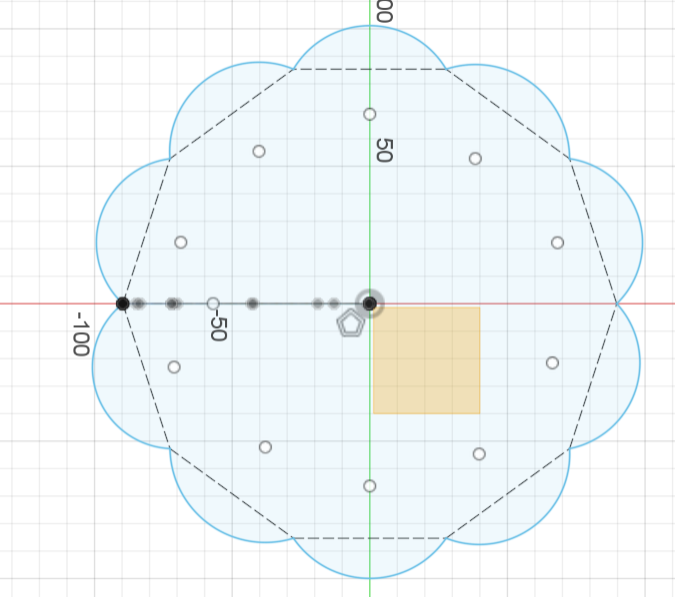
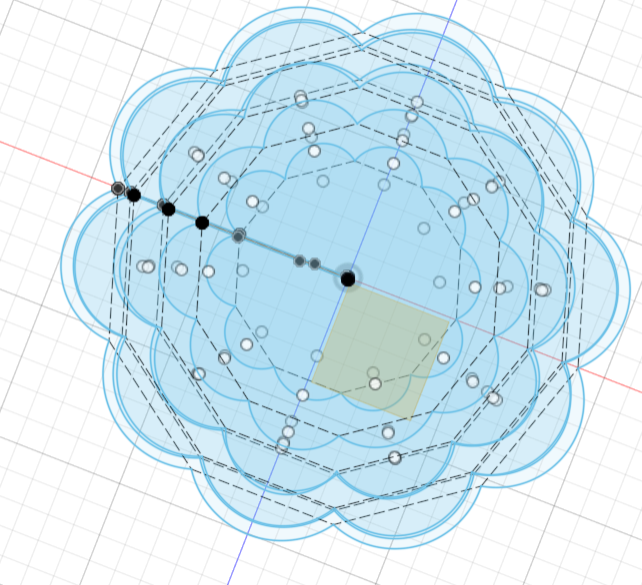
Create a new sketch on one of the offset planes you just made
For whichever point is equal to the plane project it:
Select the point and press P for project, then press OK
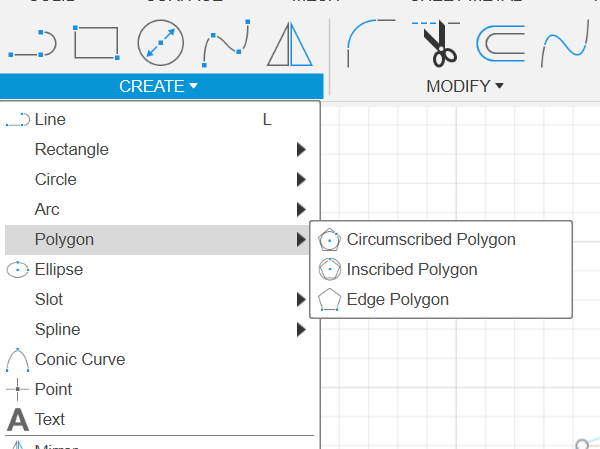
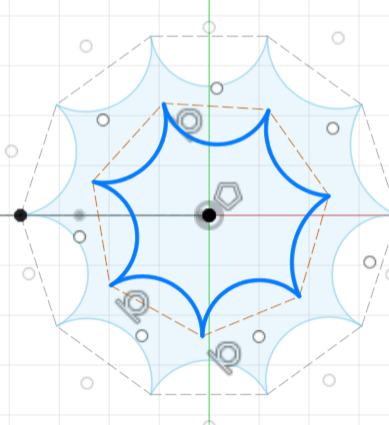
Then, in the create menu select polygon, and the inscribed polygon
Make the center of your polygon (the first thing you click) the origin
Then, adjust the amount of sides the polygon has, this will determine how many sections your pumpkin has (for my design I did 10, but you do as many/little as you like [for best result 6-12 sides])
Make the outside point the one on the spline you had just projected
Press Finish Sketch
Turn the polygon into a construction by selection it and pressing X
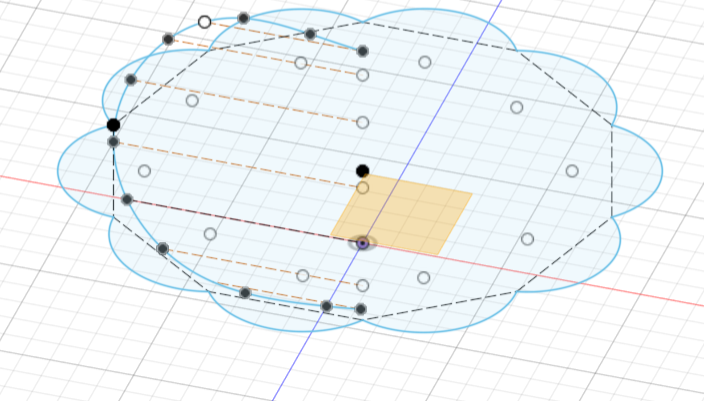
Add Arcs
Go back into the sketch menu and select arc, and then 3 point arc
Make the first point any of the vertices on your polygon, and the last the adjacent vertex
Make the arc as wide/curvy as you want your pumpkin ridges to be
Repeat these arc steps around the polygon sketch
Press Finish Sketch
REPEAT
Repeat all of these steps for each of the offset planes you have made.
Make sure the lines on your polygons are parallel to one another, and that the arcs are somewhat close in width
Top of the Pumpkin
On the top offset plane you created, create a new sketch
Project the top point
Similar to the previous step, go to the create menu and select polygon, and then inscribed polygon.
However, this time, when adding the arcs, make them go inwards rather than outwards
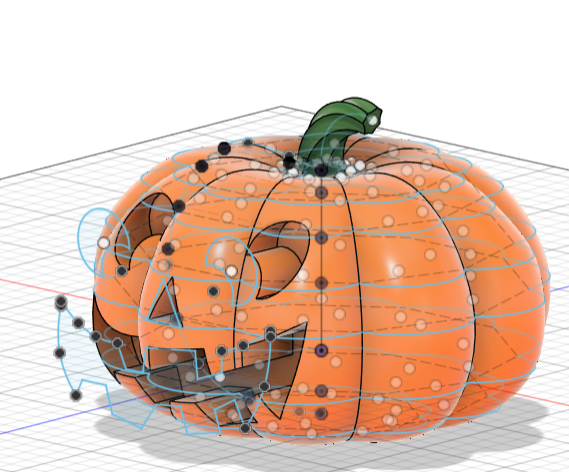
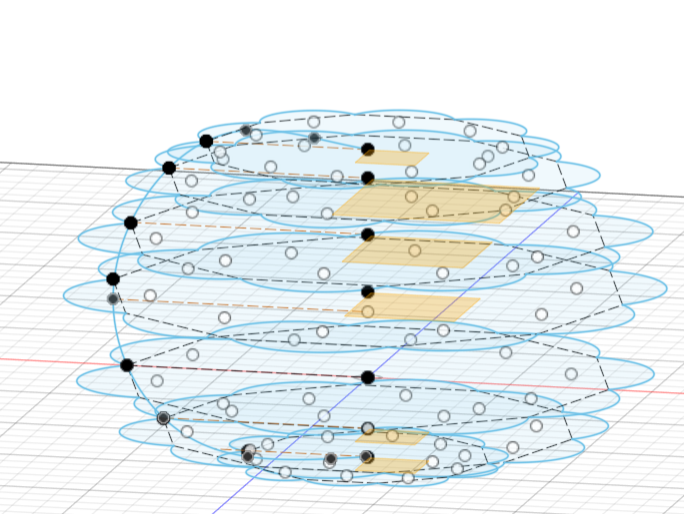
Loft (Making the Pumpkin)
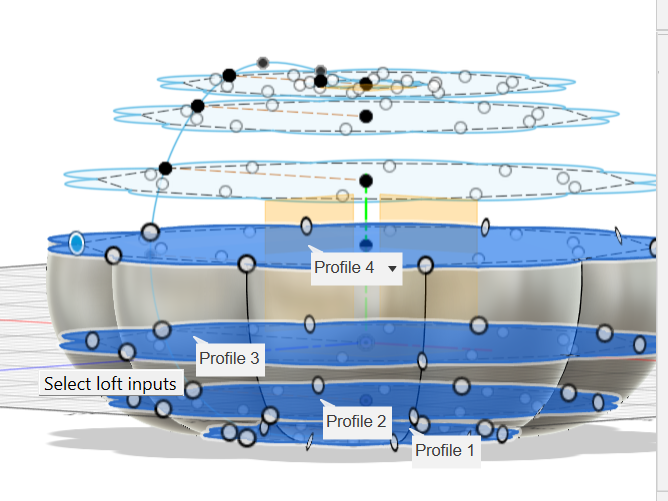
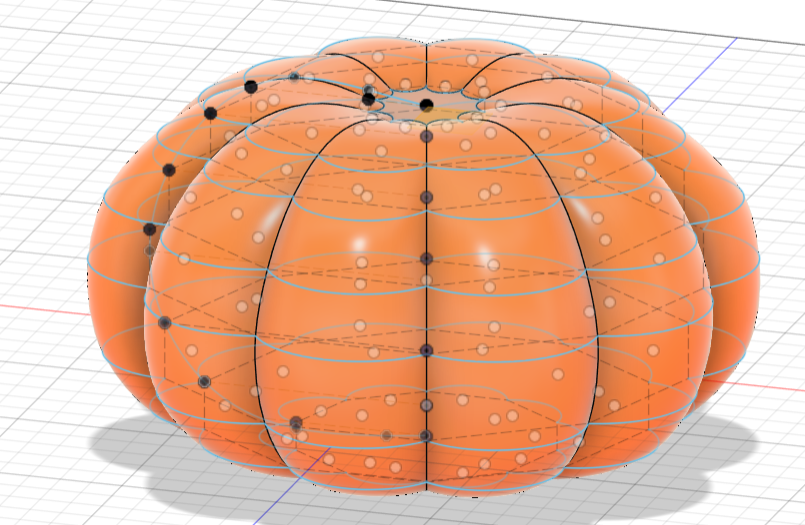
Here's the fun step!
Go into the create menu and select Loft
Select the profiles from bottom to top, working your way up the pumpkin
As you go, the pumpkin will begin to form!
Once you reach the top, you should have a pumpkin shape
Appearance
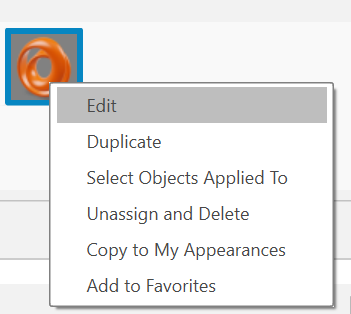
Then, go to the appearance menu (or press A as a shortcut) and drag the ABS (White) appearance onto your pumpkin
Then go into the appearance settings and edit your ABS (White) appearance (two finger click, and then select edit). Turn into some shade of orange
The Stem (Part 1)
Once again on the top plane, create a new sketch
This time, make a circumscribed polygon
Make the polygon smaller than the other ones made on this plane, and make it six-sided
Then, create arcs like we have been doing throughout this design, and make them go inward.
The Stem (part 2)
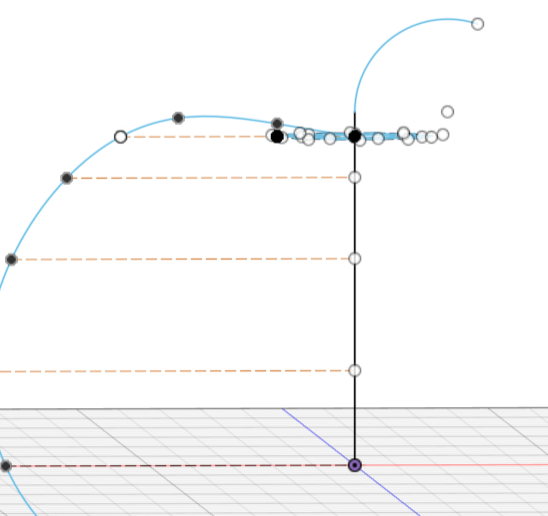
Create a new sketch on the front plane
Press L for line
Make the start point of the line at the origin and the end point the top of the pumpkin
Then, go back into the create menu and select arc, and then 3 point arc
Make the first point the top of the line we just created, and the last somewhere outside of the pumpkin. Dont make it too curvy or the next step will not work.
Now, we have the path for our stem
The Stem (Part 3)
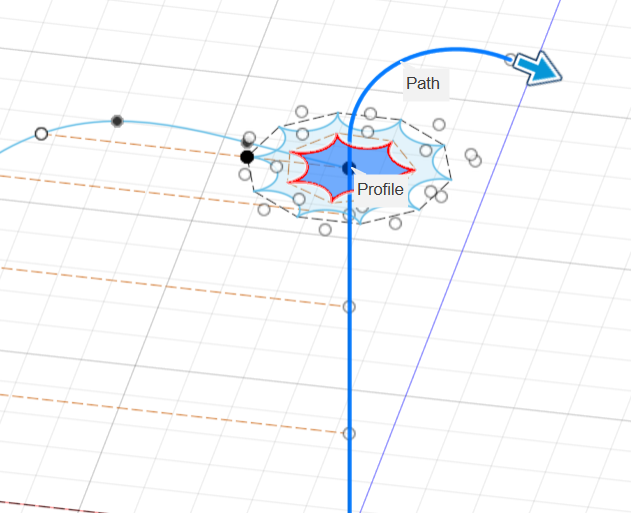
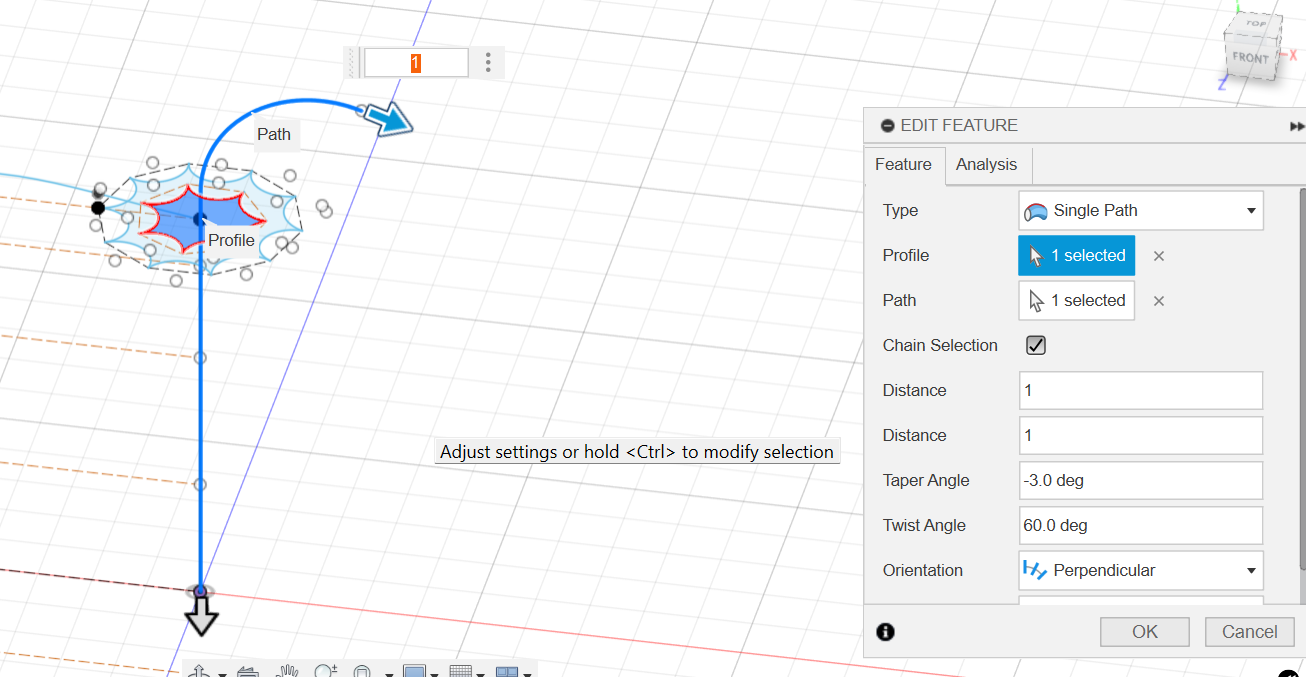
Go into the create menu and select Sweep. Then, make the profile the top sketch we most recently created, and the path the line/arc we just made.
Edit the sweep
Adjust the taper angle to -3
Adjust the twist angle to make your stem curvy (can be anywhere from 45-90)
The Face
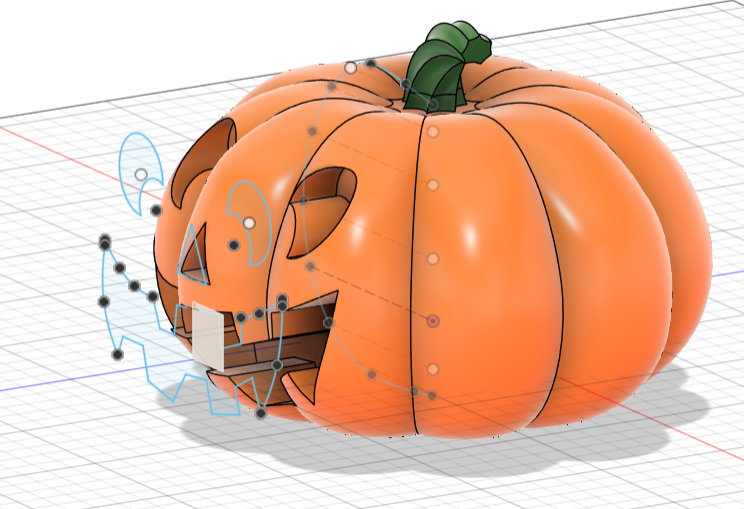
Create a new offset plane of the front plane
Make it go out to the edge of your pumpkin body
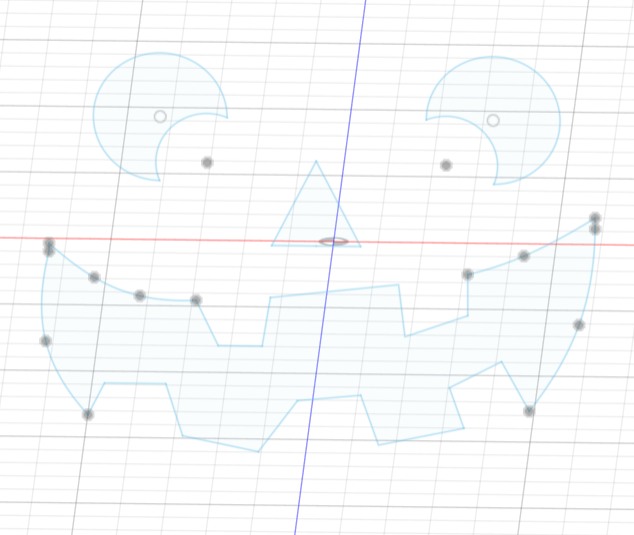
Then, create a sketch on this newly made plane:
Create the eyes using circles. You can put smaller circles on the inner edge of the eyes, and then trim to make the moon shape seen in my sketch
To make the mouth, use a combination of lines and splines. Lines for the straight parts, and splines for the parts that curve, like the sides of the mouth
To make the nose, use the line tool and draw a triangle
The face does not have to be perfect!
Carving the Face
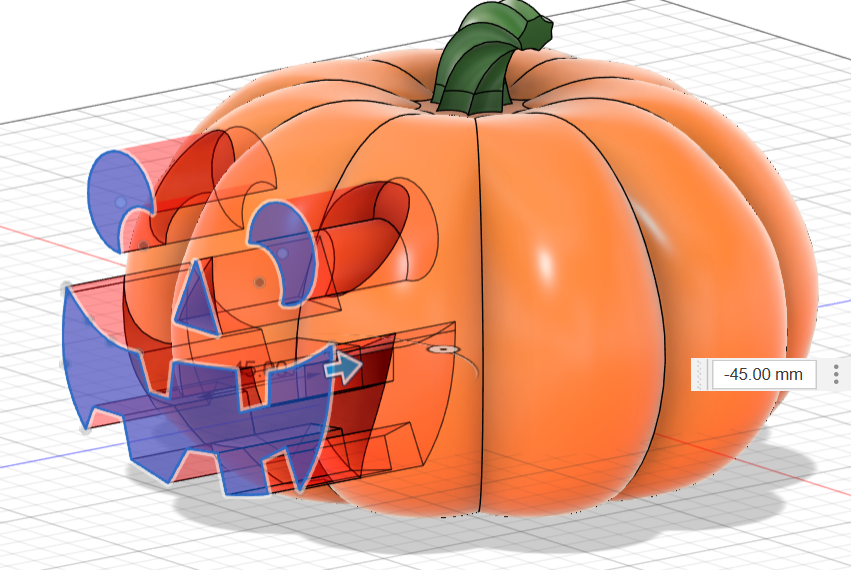
Press E on your keyboard to use the Extrude tool. Select the sketch profiles you just made (both eyes, the nose and mouth)
Then, set the distance to a negative number than makes the whole face cut through the pumpkin. (Mine was -45.00mm, yours may be more/less)
Make sure the operation is set to cut
Press OK
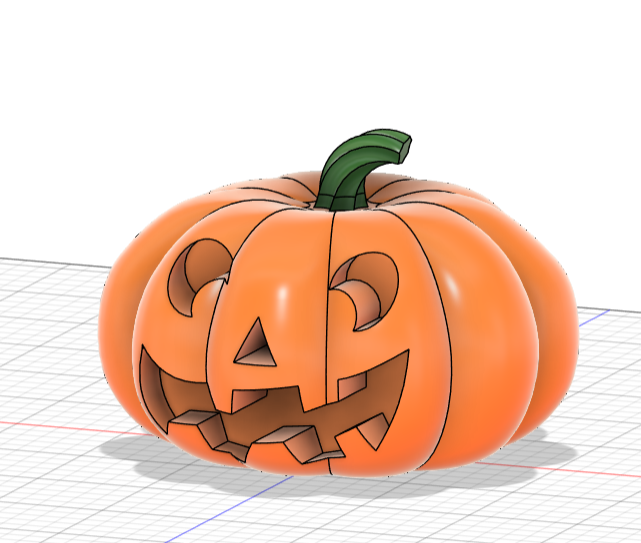
Appearance
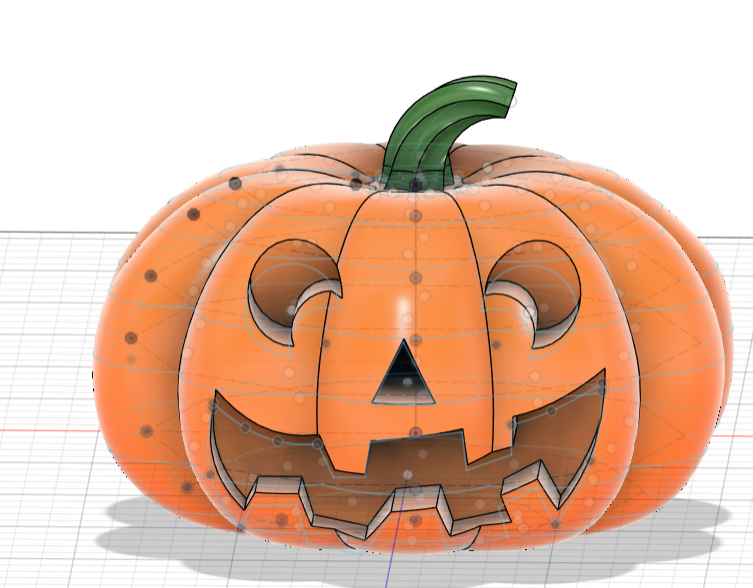
You should have a completed Jack-o'-lantern!
Now, adjust the appearance (if you'd like)
This can be done by changing the appearance settings to Faces instead of components
You can change the faces on the stem to make them green and/or the inside faces a darker color to show the hollowness of the pumpkin (like it has been carved)
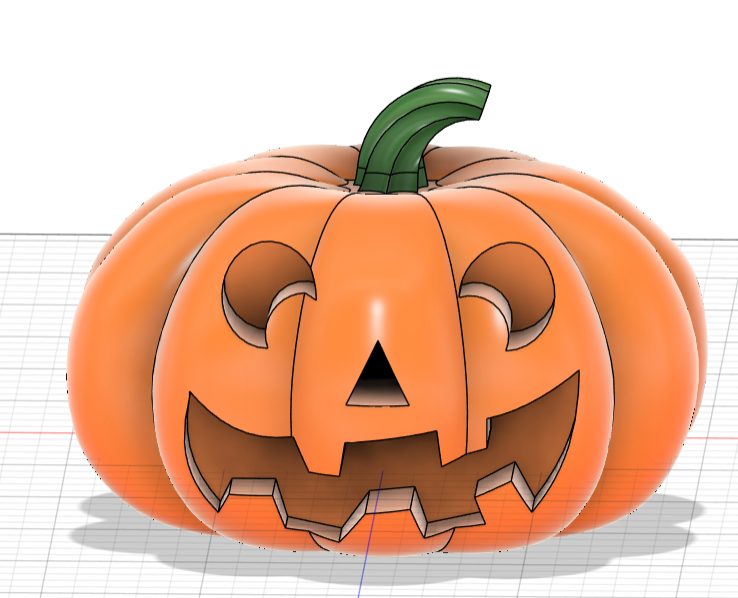
CONGRATS!!
The Jack-o'-lantern design is now complete! If you'd like you can now take this design into a 3D printing program to eventually print out your design as a piece of decoration!