A Better Hot Tub Cover
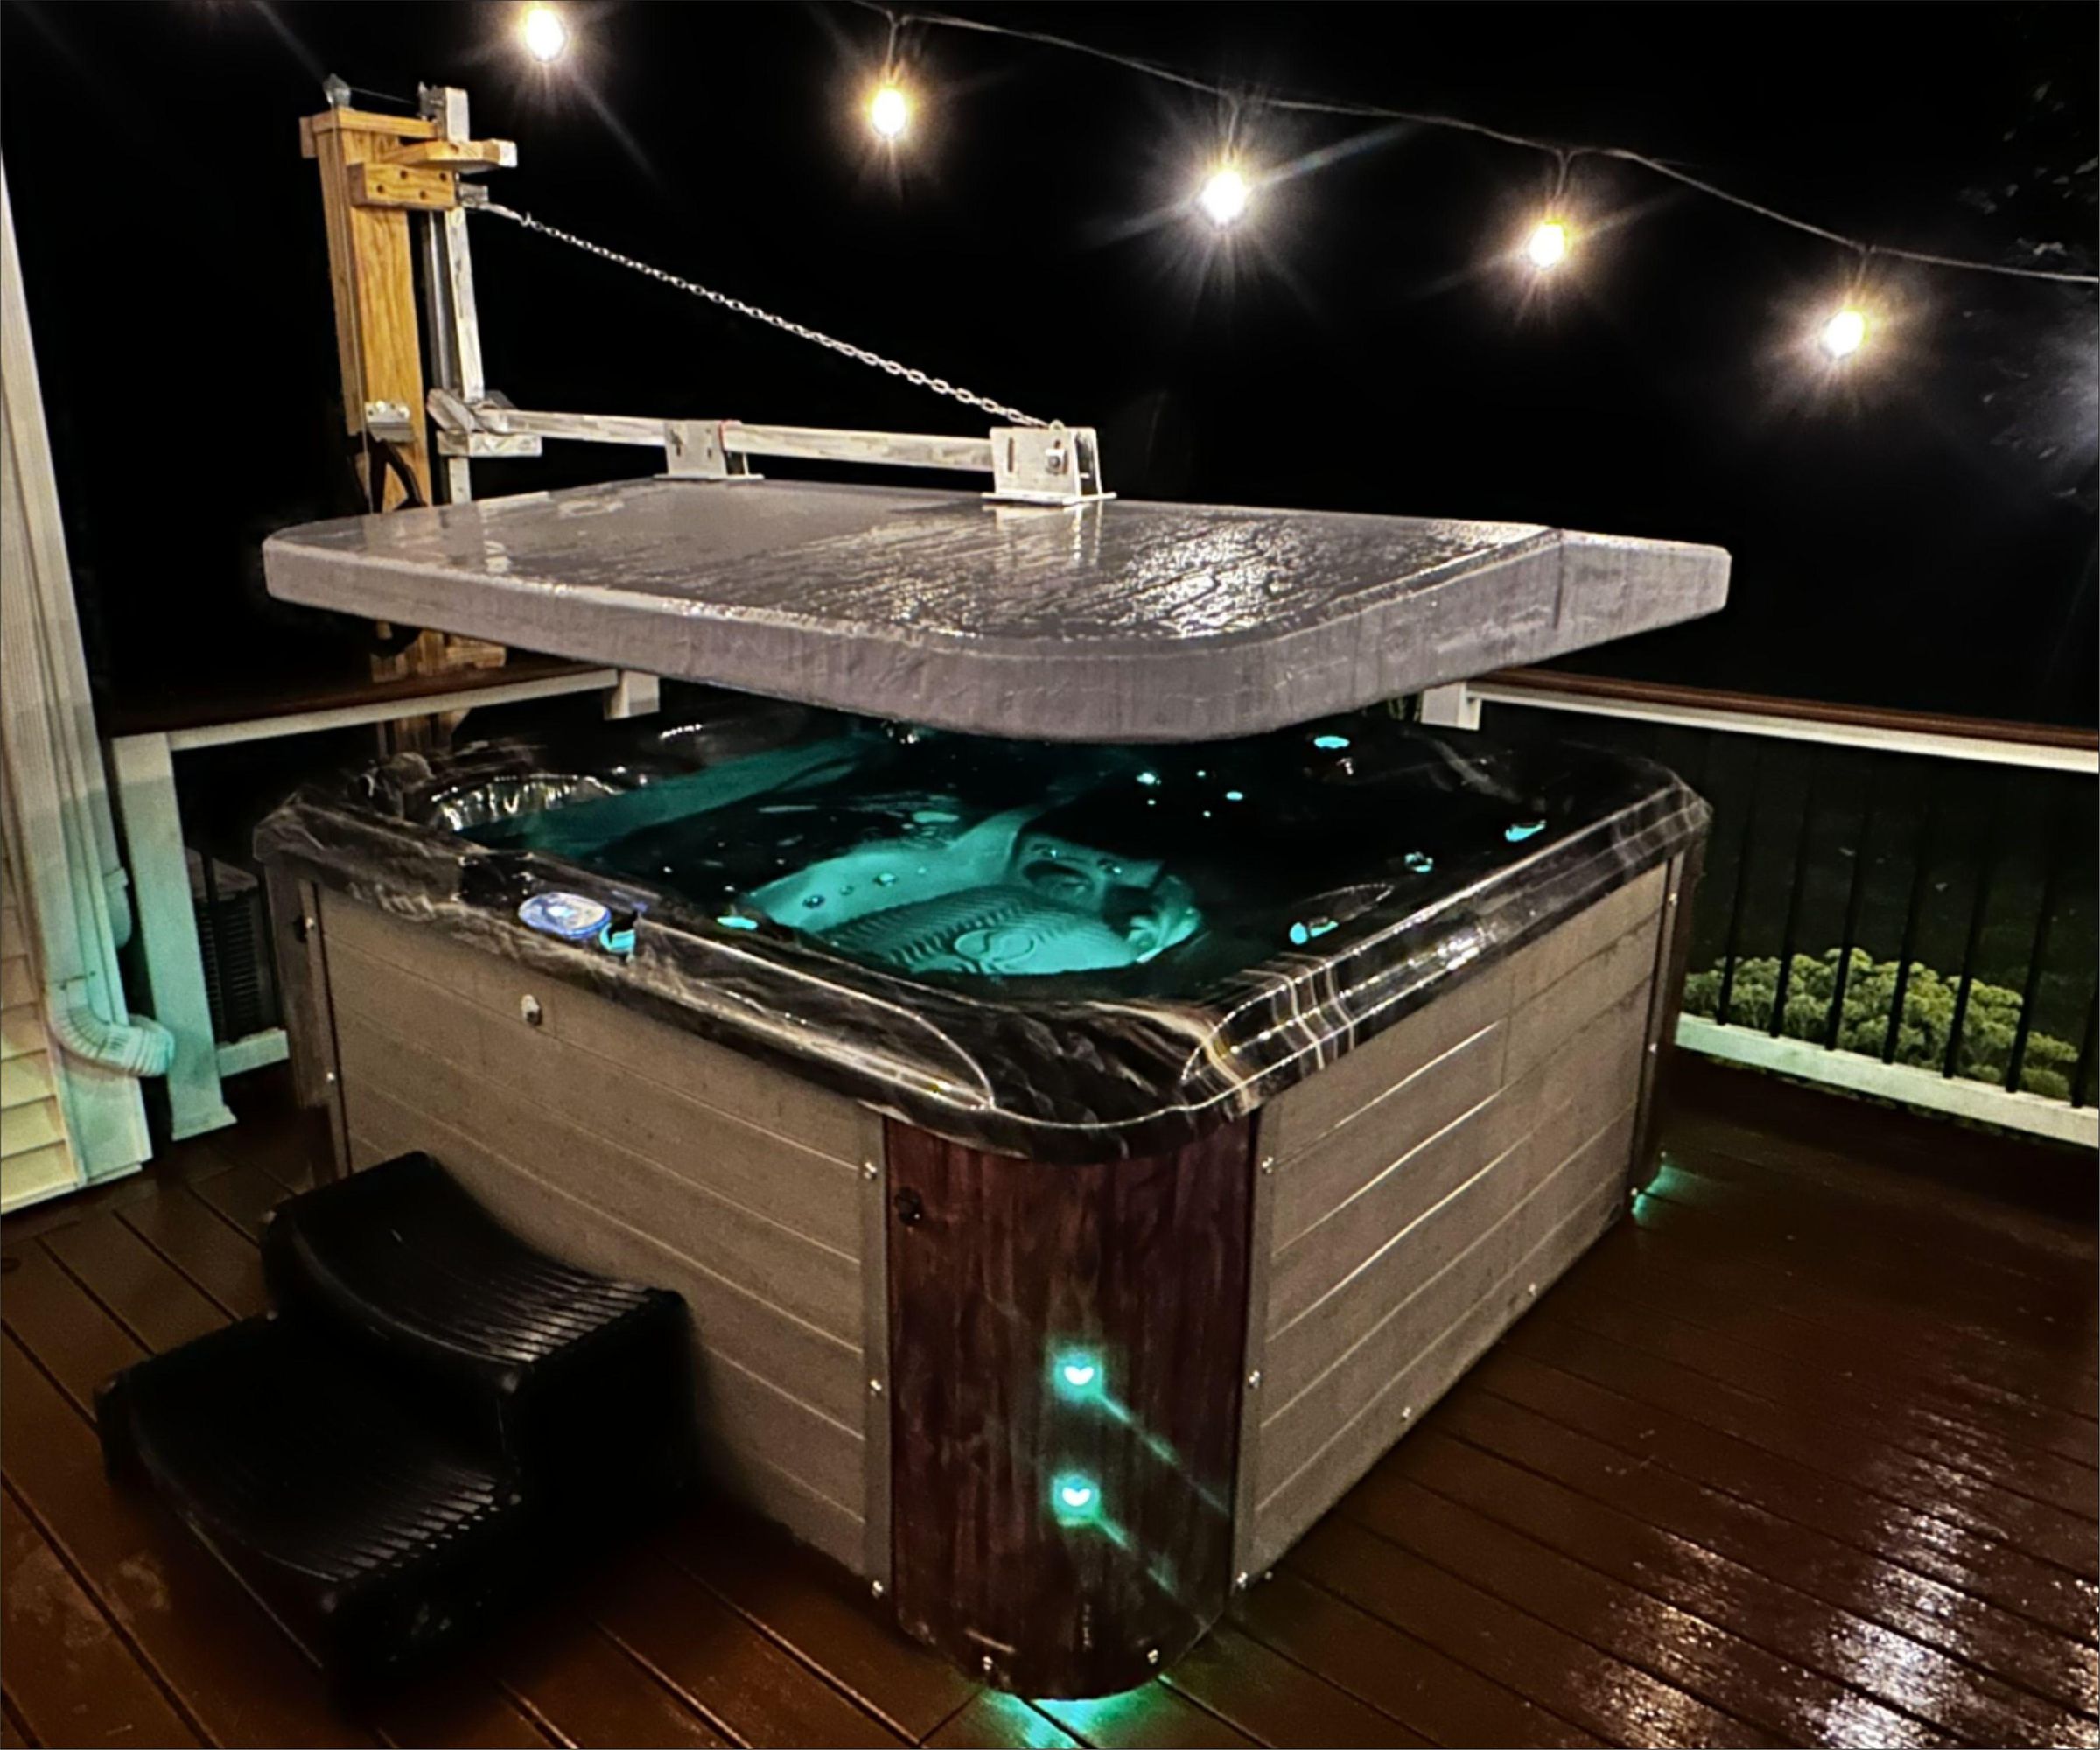
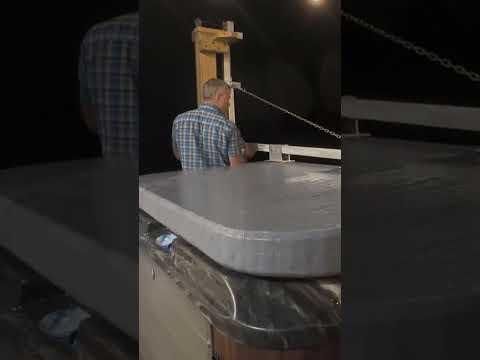
A hot tub cover lasts about 5 years (according to a quick search). Our hot tub cover failed a few years ago, eventually becoming so waterlogged that I had to put a post inside the hot tub to support the cover’s weight. The reason I didn't replace the cover sooner is that I wasn’t able to bring myself to buy another huge foam, plastic, and vinyl object that only lasts 5 years. Instead, I have tried to make a cover that will last a really long time. I made it out of rigid foam, epoxy, and fiberglass mat, and I painted it with topside paint. If I maintain it like a conscientious boat owner, re-epoxying and repainting every 5 years or so to prevent water infiltration, maybe I can keep it going indefinitely.
I decided to make the cover one piece for simplicity, efficiency, and longevity, so I had to design a lifter mechanism to raise it and get it out of the way. It turns out that this new cover system is actually fun to use. Our old hot tub cover was never fun -- not even when it was young and lithe. The lifter system also keeps the lid securely in place, so no buckles or straps are needed. And there's the added benefit that we can use it as a roof when we want shade or cover from the snow/rain. The instructions provided here are mostly about how to make the cover, but I have added a discussion about the lifter's parts and their functions.
It's been in use for about 8 months now, and the cover paint and epoxy are holding up very well. A few of the lift mechanism parts have needed to be replaced but that was planned; they were prototype parts, and I didn't want to bother with weatherproof materials.
My only complaint is the amount of headroom when the cover is hoisted as high as possible in "roof mode." I think I can alter the lifter to get some more room, but that's a project for later. Another project for later is an enclosure for really nasty winter days when I don't want snow blowing in my face. I've already bought the clear shower curtains.
Supplies
Materials and Consumables for The Cover:
- Rigid Foam -- Four 4'x8' sheets, approximately 2" thick
- Two 1"x4"x8' pine boards
- Fiberglass Mat
- Expanding Foam -- 2 cans of "Great Stuff"
- Weather stripping
- Polyurethane glue (Gorilla Glue)
- West System Epoxy. This stuff is great, but it's expensive! I only used about half of the refills.
- One of these (with pumps)
- And refills
- Hardener
- Resin
- Topside Paint [I think I called it "top coat" in a few places. Oops.]
- Rollers
- Brush
- Scotch Brite Pads
- 80-Grit Sandpaper
- Masking Tape
Tools For the Cover:
- Foam cutter
- Scissors
- Fan
- Mask (or snorkel like mine)
Materials for The Lift Mechanism:
- Aluminum tubing, brackets, and stainless steel hardware. I got mine from our front yard solar array that was "totaled" when a car crashed into it.
- Pressure treated lumber -- 4x4x8, 2x6x8, and 6x6x12
- Deck Screws
- Stainless Steel cable (1/8" or thicker)
- Brass bushings
- Plywood (encapsulated in polyester resin)
- Paint
- 2" PVC pipe
- Paracord
- Concrete (about three bags?)
- Large Neodymium magnets
- Scrap stainless steel sheet
- 1/2" bearings
Tools for the Lift Mechanism:
- Plasma cutter
- MIG Welder with spool gun
- Post Hole Diggers
- Wheelbarrow
- Swaging tool (for crimping cable)
- Grinder with flap disk
- Wire brush
- Woodworking tools
Measure Your Tub and Design the Cover
The topmost part of our hot tub is flat. I'm guessing that is true of most hot tubs. That makes the job of designing a cover easy, because the cover can just be flat on the bottom, with a footprint wide enough to cover the sides of the hot tub.
For ease of construction and energy efficiency, I decided to go with a one-piece design. If you don't want to bother with a lifting mechanism, a two-piece design might be better.
Make a Foam Cutter and Cut the Foam
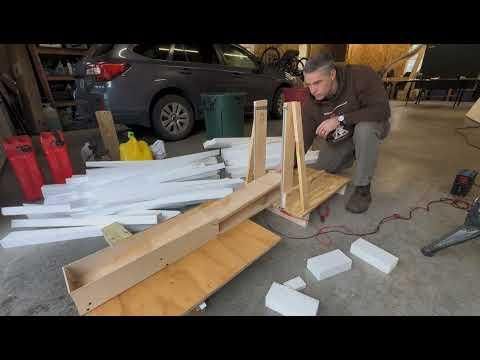
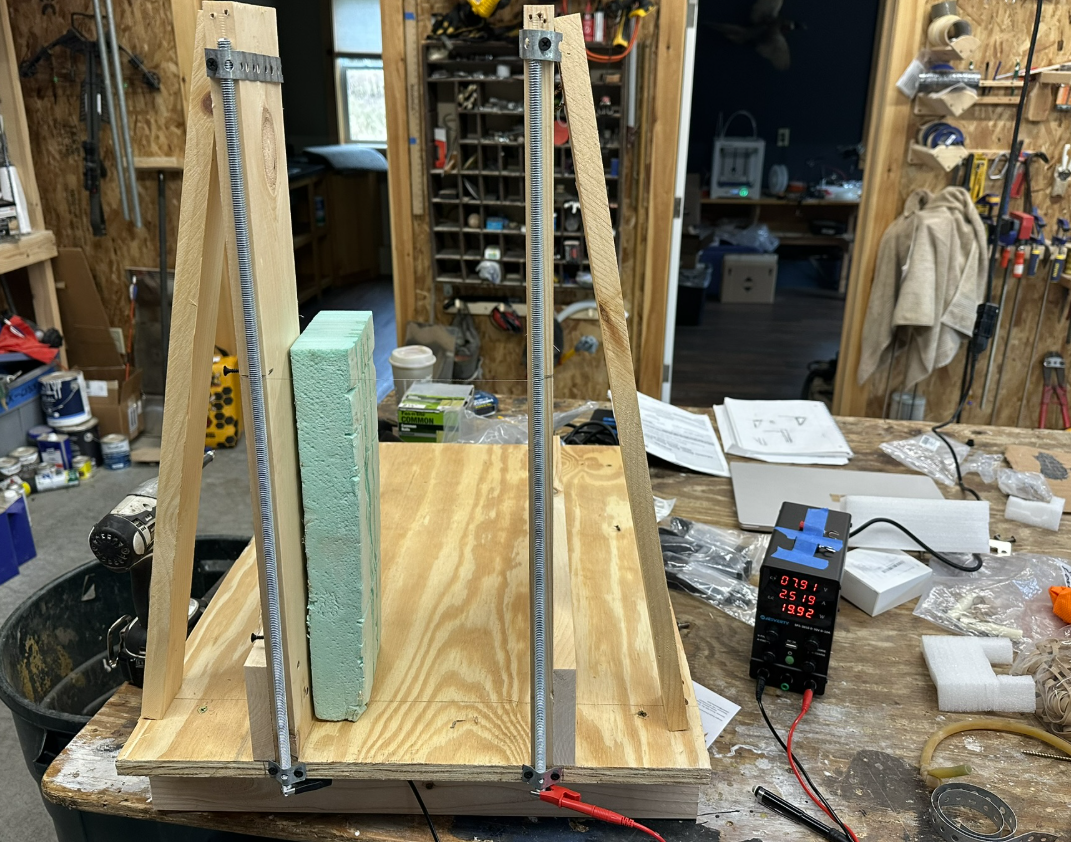
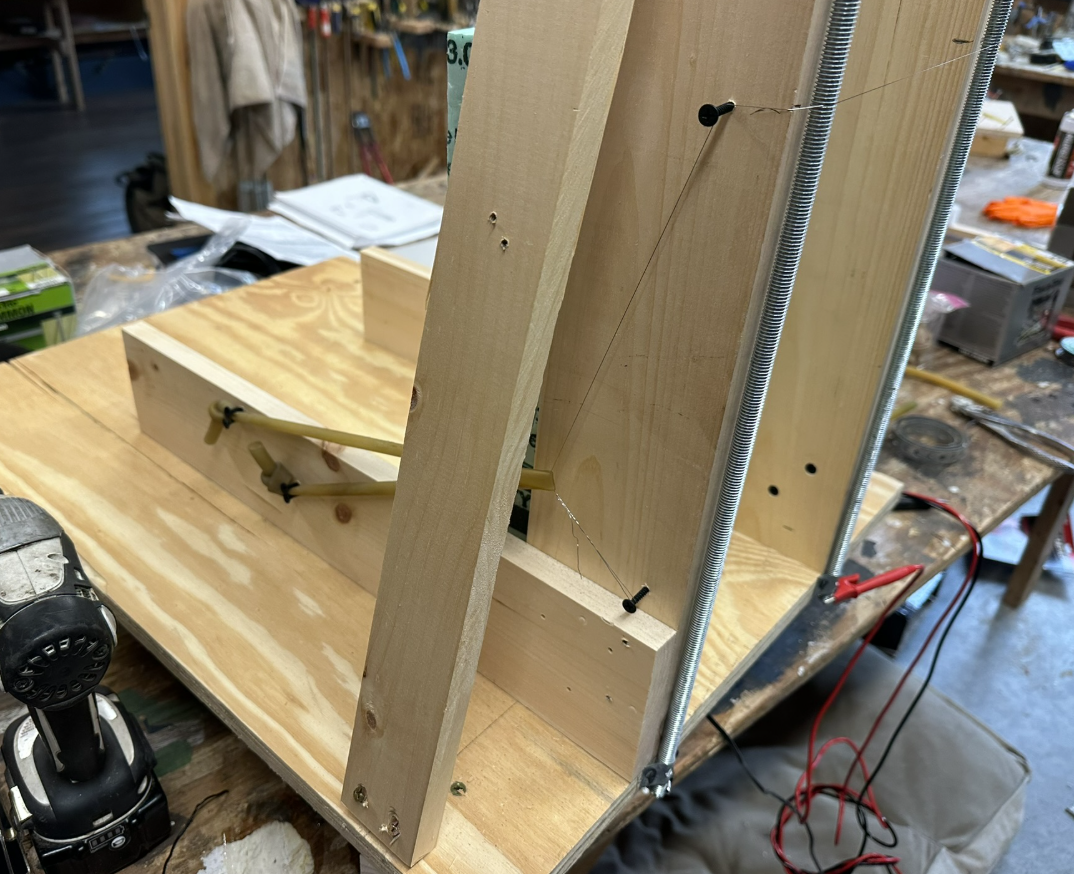
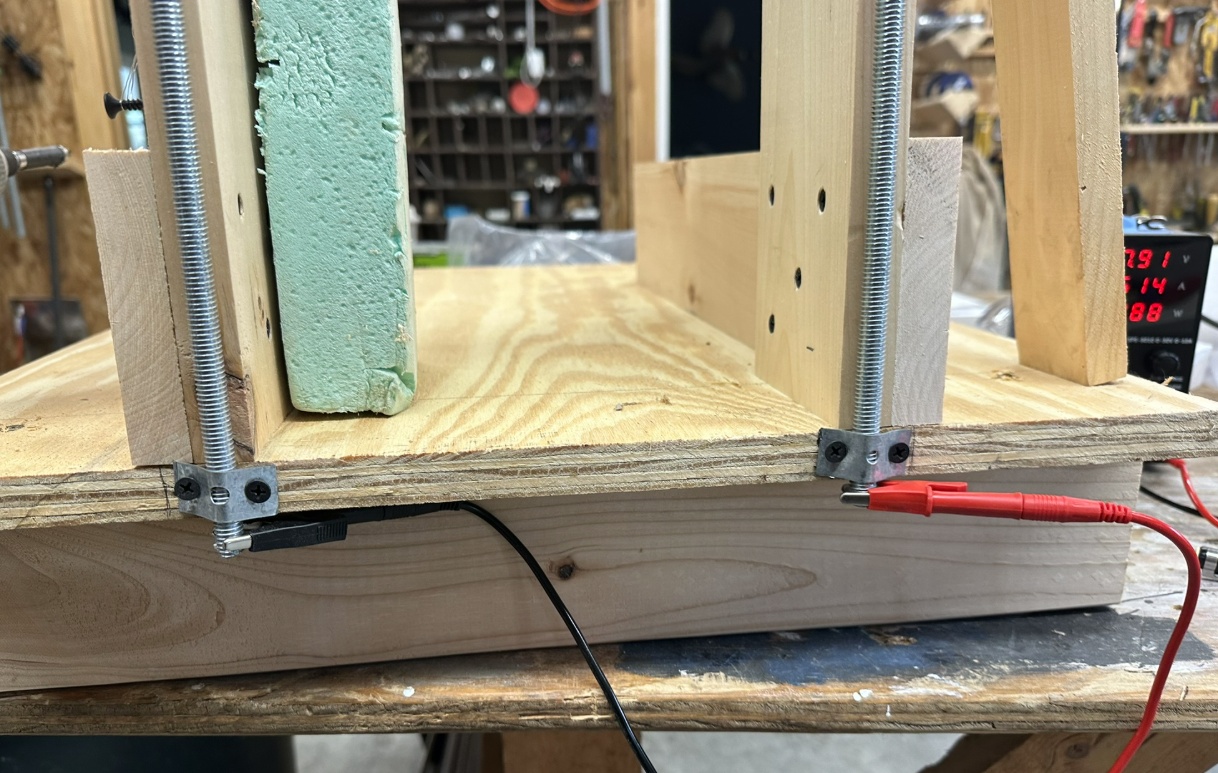
You don't really have to make a foam cutter. You can just cut and sand the foam. Back in the 90s I made outriggers for my canoe, and I just cut and sanded them into shape. But now that I know about microplastics, sanding foam doesn't seem like a great idea if I can avoid it. So I made a large foam cutter to cut the parts. One of the things you may not notice in my pictures and videos is that I always worked in a large open space and kept a fan on to blow away the fumes.
There are a lot of tutorials around that will help you make a foam cutter, so I won't go into great detail here. The foam cutter is essentially a DC circuit with one high resistance segment -- the nichrome wire. Current flows from the power source, up one threaded rod until it reaches the wire, across the wire to the other threaded rod, and back to the power source. The nichrome wire is the part of the circuit with the highest resistance, so it gets the most power, and it is the only part that gets hot.
Basic Features of the Foam Cutter:
- Nichrome wire
- Adjustable tensioning mechanism -- I used surgical tubing, but others use rubber bands
- Depth of cut adjustment -- grooves in the threaded rod keep the wire in position and offer virtually unlimited means of adjustment.
- Adjustable power source -- I kept the voltage a little under 8V, but that will vary depending on your setup. In the past I have used a car battery charger. If you don't have an adjustable power source, you can adjust the resistance of your wire by changing the length between the threaded rods.
Foam Cutting Steps:
- Remove foil backing (if there is any) from the foam sheets. I bought the cheapest foam I could find. I probably should have spent a little more and bought the green kind. It's supposed to be better for the environment, it has a higher stated R-value, and I wouldn't have had to bother with the foil. I never could get all of the wrap off of the foam.
- Cut the sheets to length.
- Cut the sheets to width.
- Cut the ribs
- Cut the the leftover pieces into thin rectangles.
- Use the triangle jig to cut the thin rectangles into two triangles.
Prepare the Center Board -- or Boards
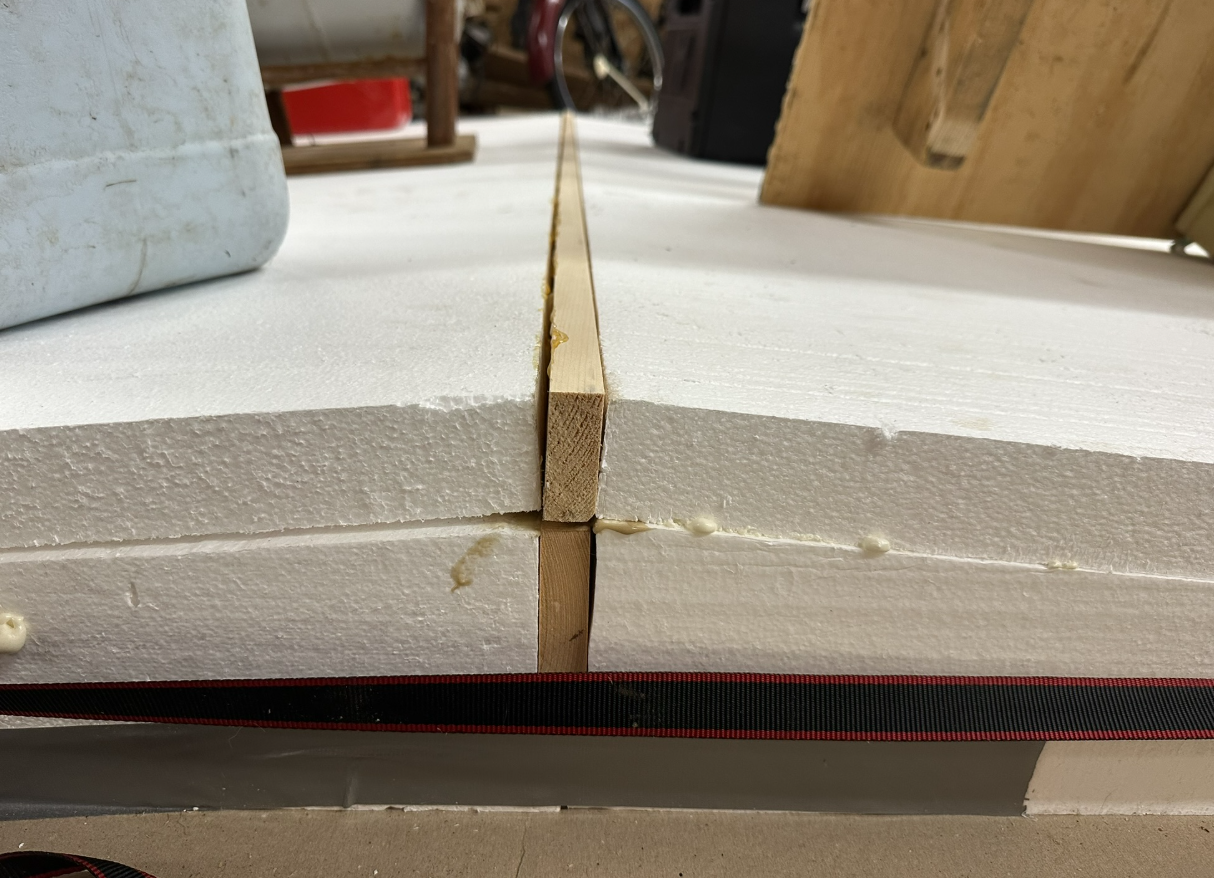
I ended up inserting two separate 3/4" pine boards (nominally 1") along the center of the cover (as shown in the picture). If I were to do this again, I would just use one board, as follows...
- Before gluing, mock up the final geometry of the cover by placing some ribs on the floor and the two top sheets in place on top of the ribs.
- A 3/4" pine board (nominally 1") will go between the ribs and the two top sheets. Measure from the floor to the top of the highest foam edge, and rip the board to this width.
- Cut the board to the length of the long edges of the foam sheets.
Glue It Up
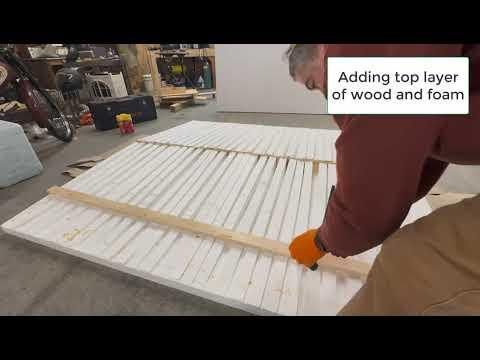
[Instructions are also provided in the video]
***Note: I was concerned that filling the voids with expanding spray foam would cause the top to rise up as the foam expanded, but I did a small scale test and it did not seem to be an issue. Nor was it an issue when I applied it to the actual cover. I would still stick with the regular (red) kind -- not the super-expanding stuff.
Glue Up Stage 1 -- Bottom Face and Ribs
- Find a perfectly smooth, planar floor to use as a work surface. Your cover will probably end up as flat as your floor.
- Prevent the cover from adhering to the floor by placing a wide strip of thin material on the floor. I used Ram Board.
- Glue together the long edges of the two foam bottom sheets and butt them against one another on the floor.
- Mix epoxy according to the instructions and use a roller to apply a thin layer over the entire top surface of the two foam sheets.
- Put some ribs in place. Apply glue to the center board and butt it up next to the ribs. Make sure the triangles are turned the right way, so that the ends near the center board are vertical.
- Continue until you have filled the spaces or used all of your triangles.
- Clamp the ribs in place by placing the other foam sheets on top of the ribs and weighting them down.
- If the top foam sheet is not pressing against all of the ribs (because they are not exactly the same dimensions), place something like a blanket between the ribs and the top foam "clam." This should help distribute the force.
Glue Up Stage 2 -- Top Face and Filling The Void
- After waiting 24 hours for the glue and epoxy to set, it's time to attach the top.fill the voids between the ribs, and just generally glue the heck out of it. First check for loose ribs and add a little more Gorilla (polyurethane) glue to them.
- Using a can of expanding spray foam for each half (I used Great Stuff brand), spray all over the ribs. Use cardboard to squeegee the foam down between the ribs, leaving a thin film on top.
- Unless you planned ahead and made your center board (for anchoring screws) tall enough, add your other center board, like I did, applying polyurethane glue to its bottom and sides.
- Place the top foam panels on top.
- Secure the panels by both weighting them down and strapping them inward. The uncured glue lubricates them, and they will slide down the pitch of the ribs unless something is keeping them together. I used multiple ratchet tie downs to make one big belt. At the corners, I inserted doubled-over cardboard to protect the foam from the pressure of the ratchet tie downs.
Contour Corners and Edges and Smooth the Surface
This requires more foam cutting. The procedures below are shown in the foam cutting video in step 2.
- Round the corners by using a drawing compass to make a template.
- Mark the cover and then cut. I added a guide to my foam cutter so that I could hold it and keep the wire perpendicular to the bottom of the cover.
- Chamfer or round the edges.
- Remove any other contours that you don't want to become permanent.
Add Any Extra Wooden Inserts Prior to Epoxying
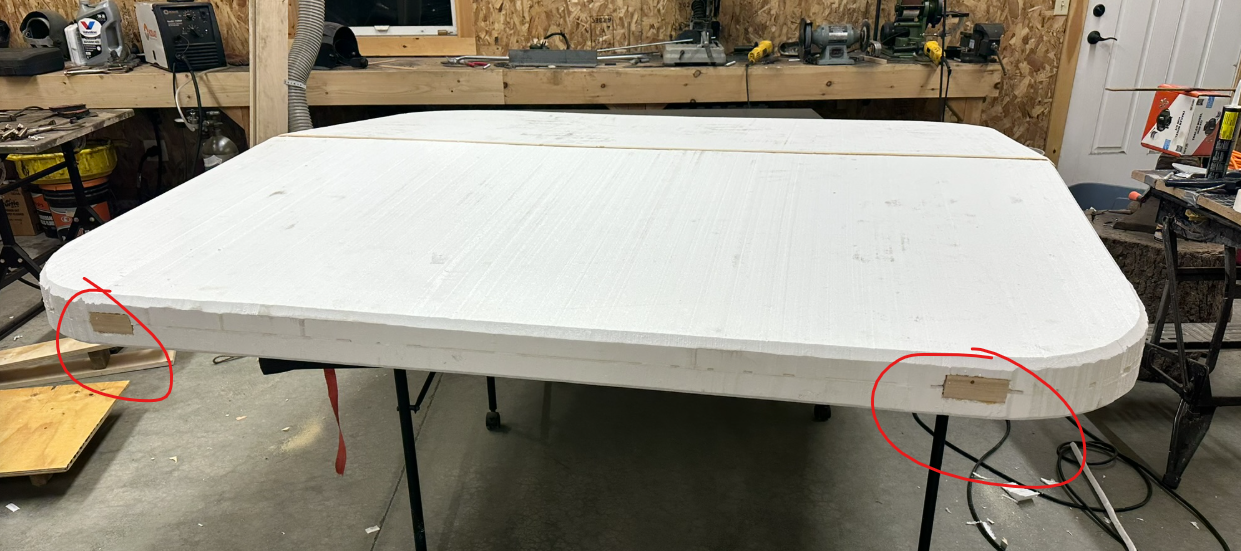
I had originally planned to add buckles to keep the cover on, but it turned out that no closure mechanism is necessary. The lifter mechanism keeps the cover in place. But if you do want to attach anything other than the lifter mechanism, I would suggest embedding some wood into the foam, so that you have something solid to screw into.
The picture above shows the chunks of 2x4 that I was planning to use to attach buckle hardware.
Cover With Glass Mat and Epoxy
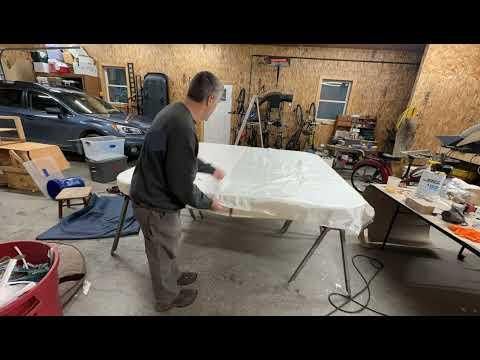
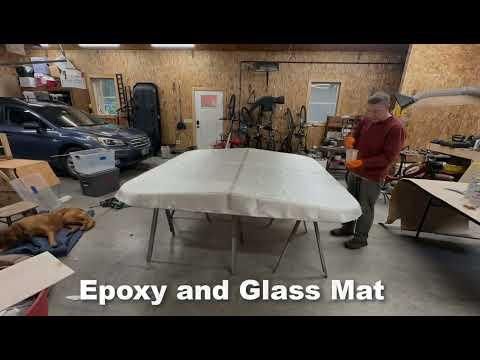
[Instructions are also provided in the video]
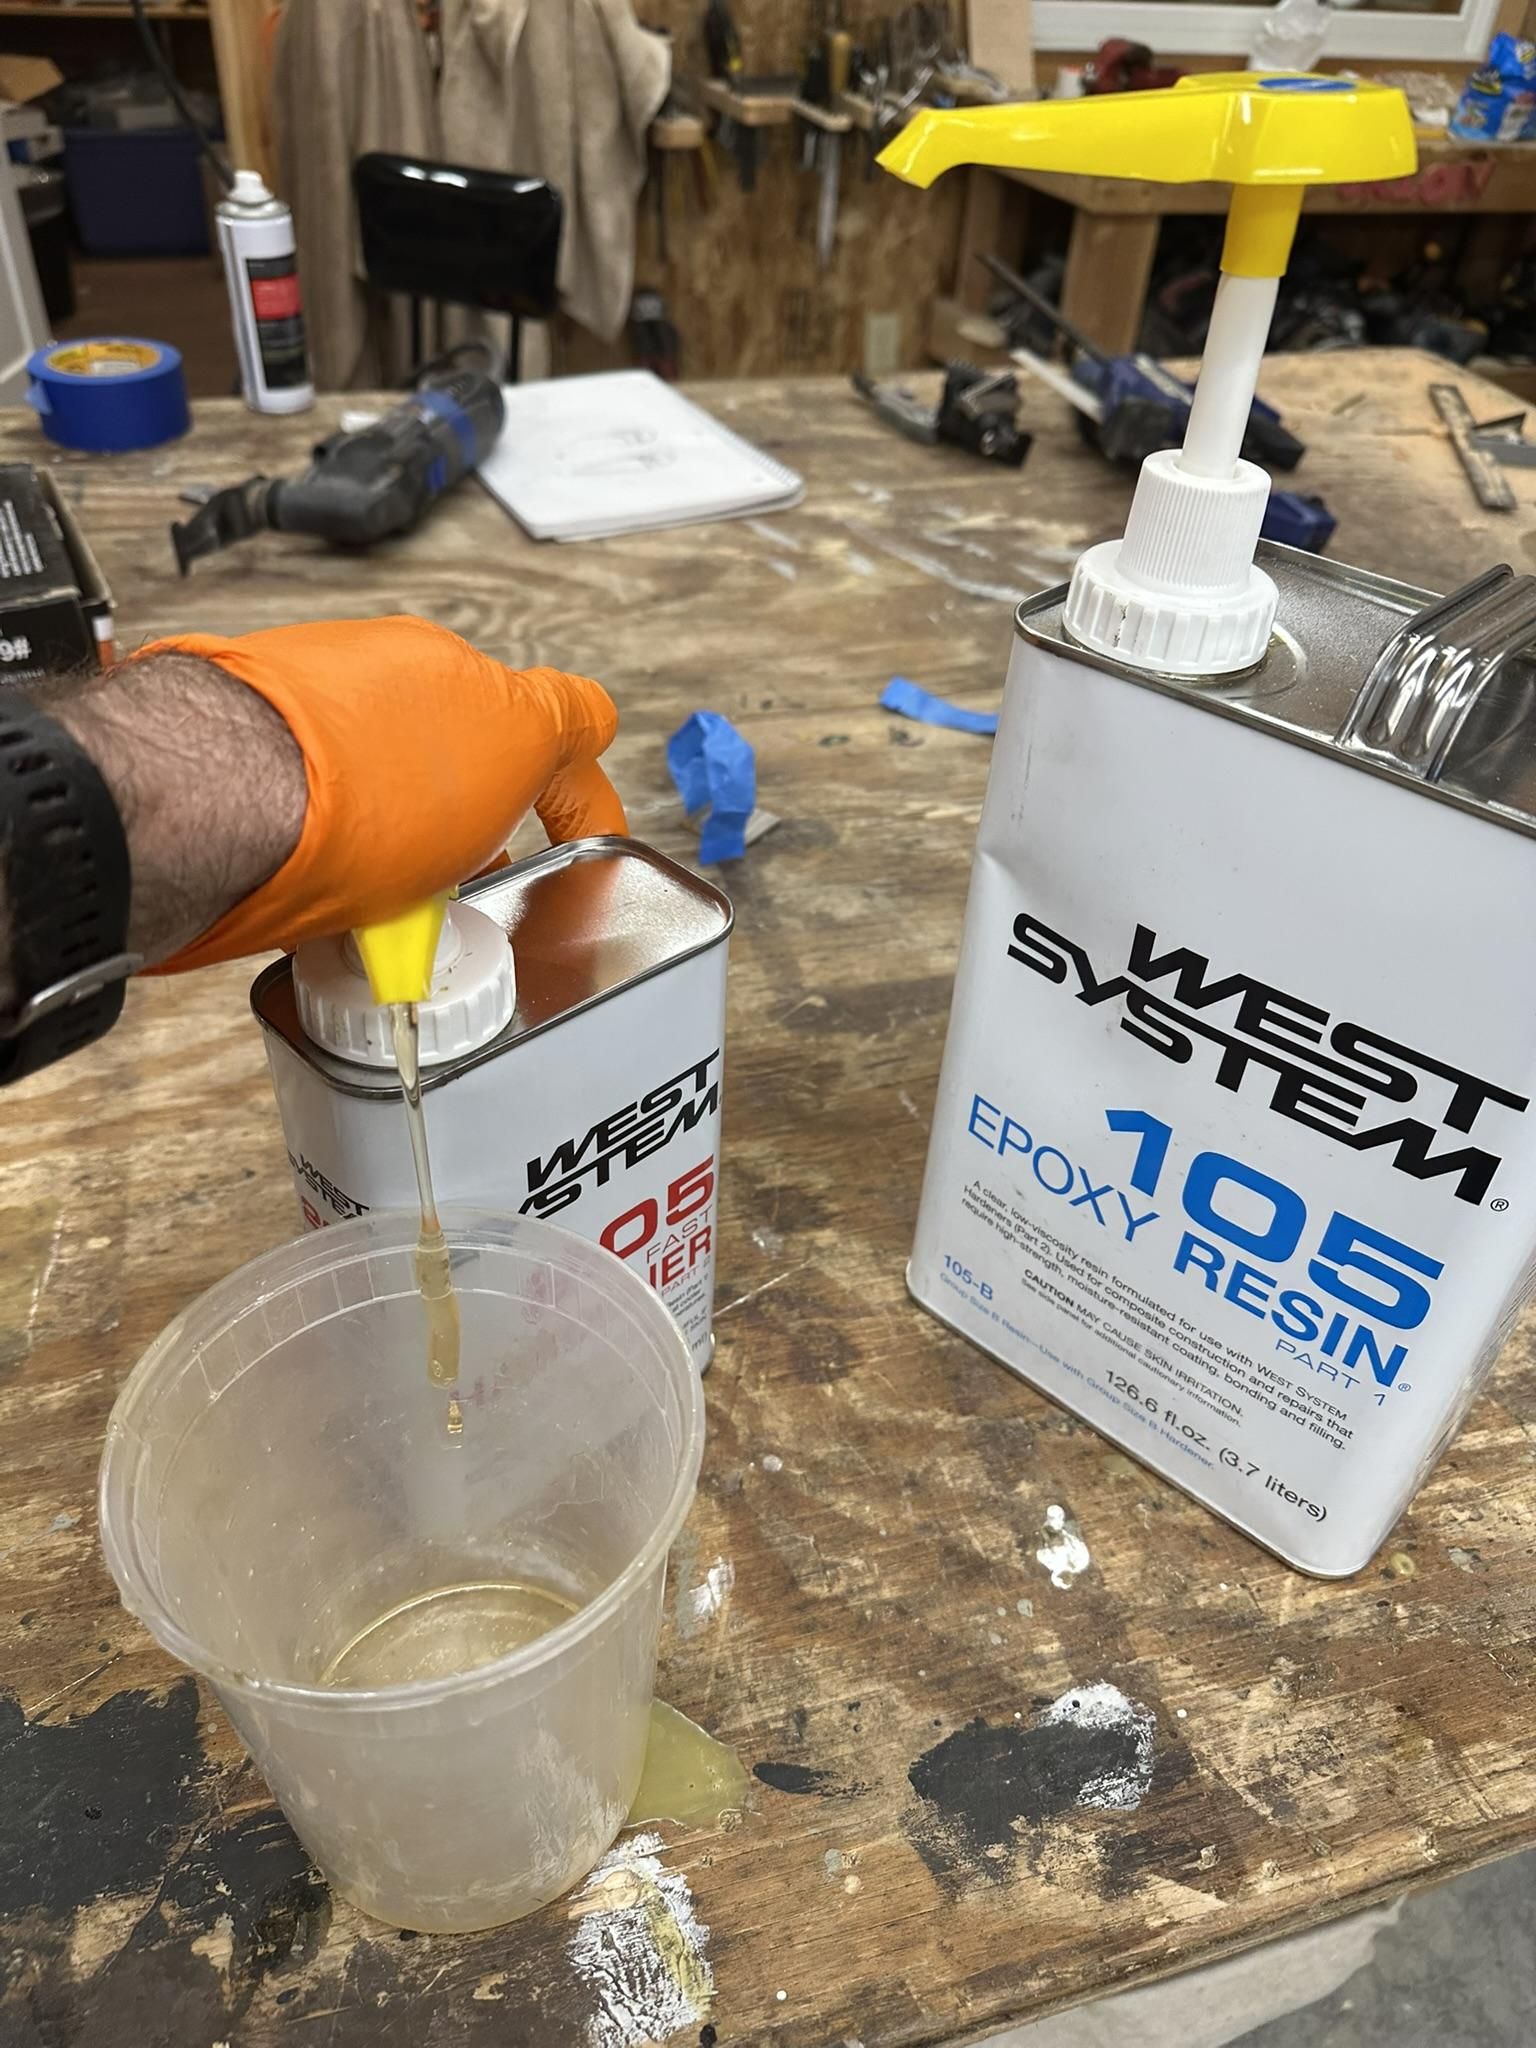
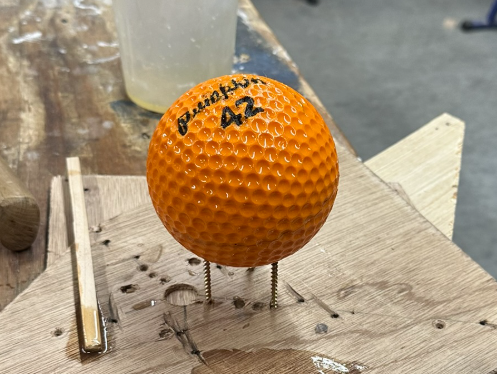
Why Epoxy? The quick answer is that fiberglass resin (polyester resin) dissolves this type of foam, so you can't use it directly on foam. Also, I had heard good things about West System epoxy, and I wanted to try it. After having used fiberglass resin (polyester resin) for years, using this system was a treat. Their kit includes pump heads that fit on their resin and hardener containers. If you follow the directions and count the pumps, you'll have just the right proportions. The mix actually smells kind of nice -- much better than the stinky "5 Minute Epoxy" I have used in the past. Because of the nice smell, I was able to work inside. I NEVER work inside with polyester resin. The working life is long, so I didn't have to hurry, but I did hurry, because I ended up putting 4 coats on the entire surface. The resin and hardener stay good for a long time in their cans without having to remove the pumps. As I speak, they're behind me under the counter, not stinking, ready to go when I need them for little projects like coating a 1-pound, dimpled "pumpkin" that we made to try to get an edge in last year's pumpkin chuckin' competition (see photo).
For me, the big downside to this epoxy is its price. It's several times more expensive than polyester resin. If I were to mass produce these covers, I would experiment with a base coat of epoxy followed by coats of polyester. I used that method on some canoe outriggers that I made in the 90s, and they held up well. But for me that would mean this would need to be a summer, outside project.
This is an area where you should read what the experts say. I used West System epoxy, and the company has a lot of excellent information about how to do this in your particular situation.
- Prepare the surface. I did a little light sanding here and used compressed air to clean it off. To control the foam dust, it may have been better to wipe the surface with a wet cloth and let it dry.
- Work on saw horses, and either place them on a tarp or work on a floor that you're not concerned about. I was able to knock loose my drips from the shop floor with a scraper.
- Spread out glass mat to cover the top. I butted the two sections of mat together, rather than overlapping them, and I held them in place with push pins.
- Trim the edges so that the mat hangs more than half-way to bottom of the sides. If the mat hangs all the way to the bottom it becomes difficult to get it to press neatly against the sides. If it is not at least half way, then there won't be full coverage when you flip it and do the other side.
- I mixed about a cup of epoxy at a time [I can't remember how many pumps that was].
- Starting from the center, I poured out epoxy and then used a roller to spread it outward. I also worked down the seam between the two sections of mat and outward from there.
- I continued outward, making sure that I had thoroughly "wetted" the fiberglass mat, and that there were no bubbles. [Later on, I realized that there were a few holes that I should have filled before I started. It was more trouble to fill and fix them up later. You should see what the experts say about filling small holes, but I didn't consult them. I did it with a mix of epoxy and sawdust, and it seemed to work.]
- When you get to the edges, take time to smash them down smoothly, or you'll have a lot of clean-up sanding to do later. The curves on this cover were big enough so that I didn't need to trim at the corners to make the mat lie down. The mat also has a lot of stretch, which helps it conform to different geometries. The epoxy working time is long, so there is time to get this right.
- Let it cure and then put on another coat. I generally let it cure overnight, but it was winter, and my garage was cool. In a hotter space it will cure faster, and you don't want to wait too long to add the next coat, or you'll need to do surface prep work. Consult the West System experts.
- Keep adding coats until the mat texture disappears. In my case, it mostly disappeared. I'd had enough after 4 coats.
- Flip the cover, sand the edges where you will have drips and sharp glass stalactites. Then repeat this process for the other side.
Paint (after Removing Amine Blush)
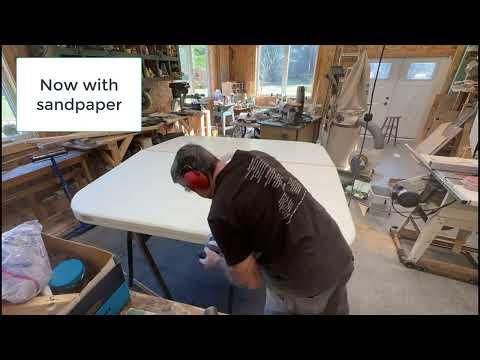
Epoxy that is exposed to sunlight needs to be coated. I used Rustoleum Topside Paint, in "Battleship Grey." Again, this is one of those processes for which you should consult experts. I'm just going to focus on the big steps.
- Remove the "Amine Blush" with water and Scotch Brite abrasive pads. My understanding is that amine blush is something that oozes out of epoxy during curing. It needs to be removed in order for the paint to properly adhere.
- Sand lightly.
- Check your paint to see if you need a primer. If you do, then prime.
- Paint with a roller. I applied 3 coats.
Add the Gasket Seal
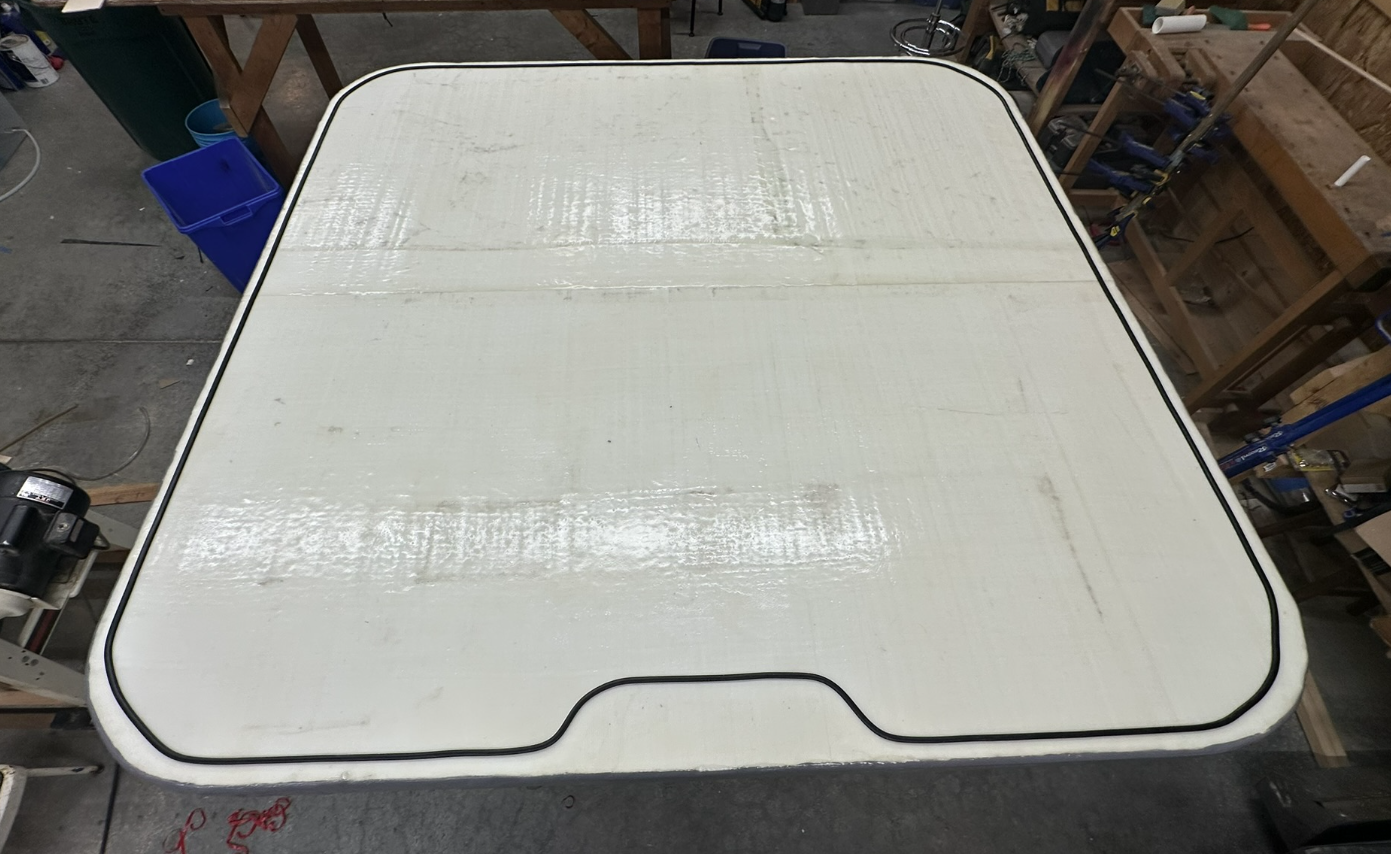
If your hot tub has a planar top surface, and if your cover is flat and smooth, there shouldn't be much of a gap to close. I used this "D-shaped Door Weather Stripping." I was worried that it wouldn't stay on, but it hasn't budged.
- Lay the cover on the hot tub.
- Use pieces of tape to mark the outer edge of where the cover meets the hot tub.
- Take the cover off. Clean and dry it.
- Use the cleaner that comes with the gasket. I had to rehydrate mine. I'm not sure if that is what I was supposed to do, but it was just a dry little packet of nothingness. When I added some water it seemed to activate. But maybe it didn't actually do anything at all.
- Carefully stick on the gasket. Use scissors to trim it and try to get a good butt joint between the two ends.
Optional -- Make a Contraption to Lift and Whisk Away Your Cover -- and Whisk It Back
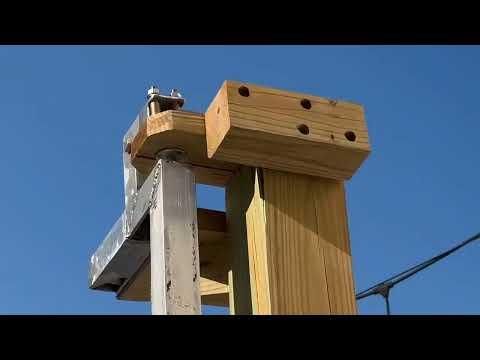
This could be a whole Instructable in itself. I didn't get footage of the construction, but this video is my off-the-cuff attempt to walk through the important aspects of the lift mechanism.
Maintenance
In my view, the bane of hot tub covers is water infiltration into the foam. Unfortunately, this even happens to epoxy and foam surf boards. I have heard that even a pinhole is enough to start the process. West System says their epoxy should last for the lifetime of the "boat," if properly applied. Still, I plan to sand and re-epoxy in about 5 years, just to be safe. It should be way easier than the initial construction.