How to Add IMI Lesson to Blackboard
by amwilliams7431 in Teachers > University+
251 Views, 0 Favorites, 0 Comments
How to Add IMI Lesson to Blackboard

In the dynamic world of online education, knowing how to upload lessons to Blackboard isn't just a skill—it's the key to unlocking a world of possibilities for both instructors and students. As the heartbeat of many educational institutions, Blackboard ensures accessibility, consistency, and seamless integration of course materials. With this know-how, instructors and developers can paint vibrant learning landscapes, peppered with multimedia and interactive elements, From monitoring progress to fostering flexibility, Blackboard empowers educators to tailor lessons that spark curiosity and drive success. So, embrace the upload button and embark on a journey where learning knows no bounds!
DISCLAIMER:
The following content is provided solely for educational purposes. I do not own Blackboard, nor am I affiliated with the company. I do not work for Blackboard or any related entity. The information presented is intended for informational and educational use only. Any references to Blackboard or its features are made in the context of general knowledge and do not imply endorsement or sponsorship.
A video tutorial can be found here. I attempted to embed this video, but received an error multiple times!
Supplies
Laptop
Blackboard Subscription (with instructor or developer role assigned)
Developed SCORM Lesson
Log Into Blackboard

Use provided login credentials to log into the system.
Navigate to Your Desired Course

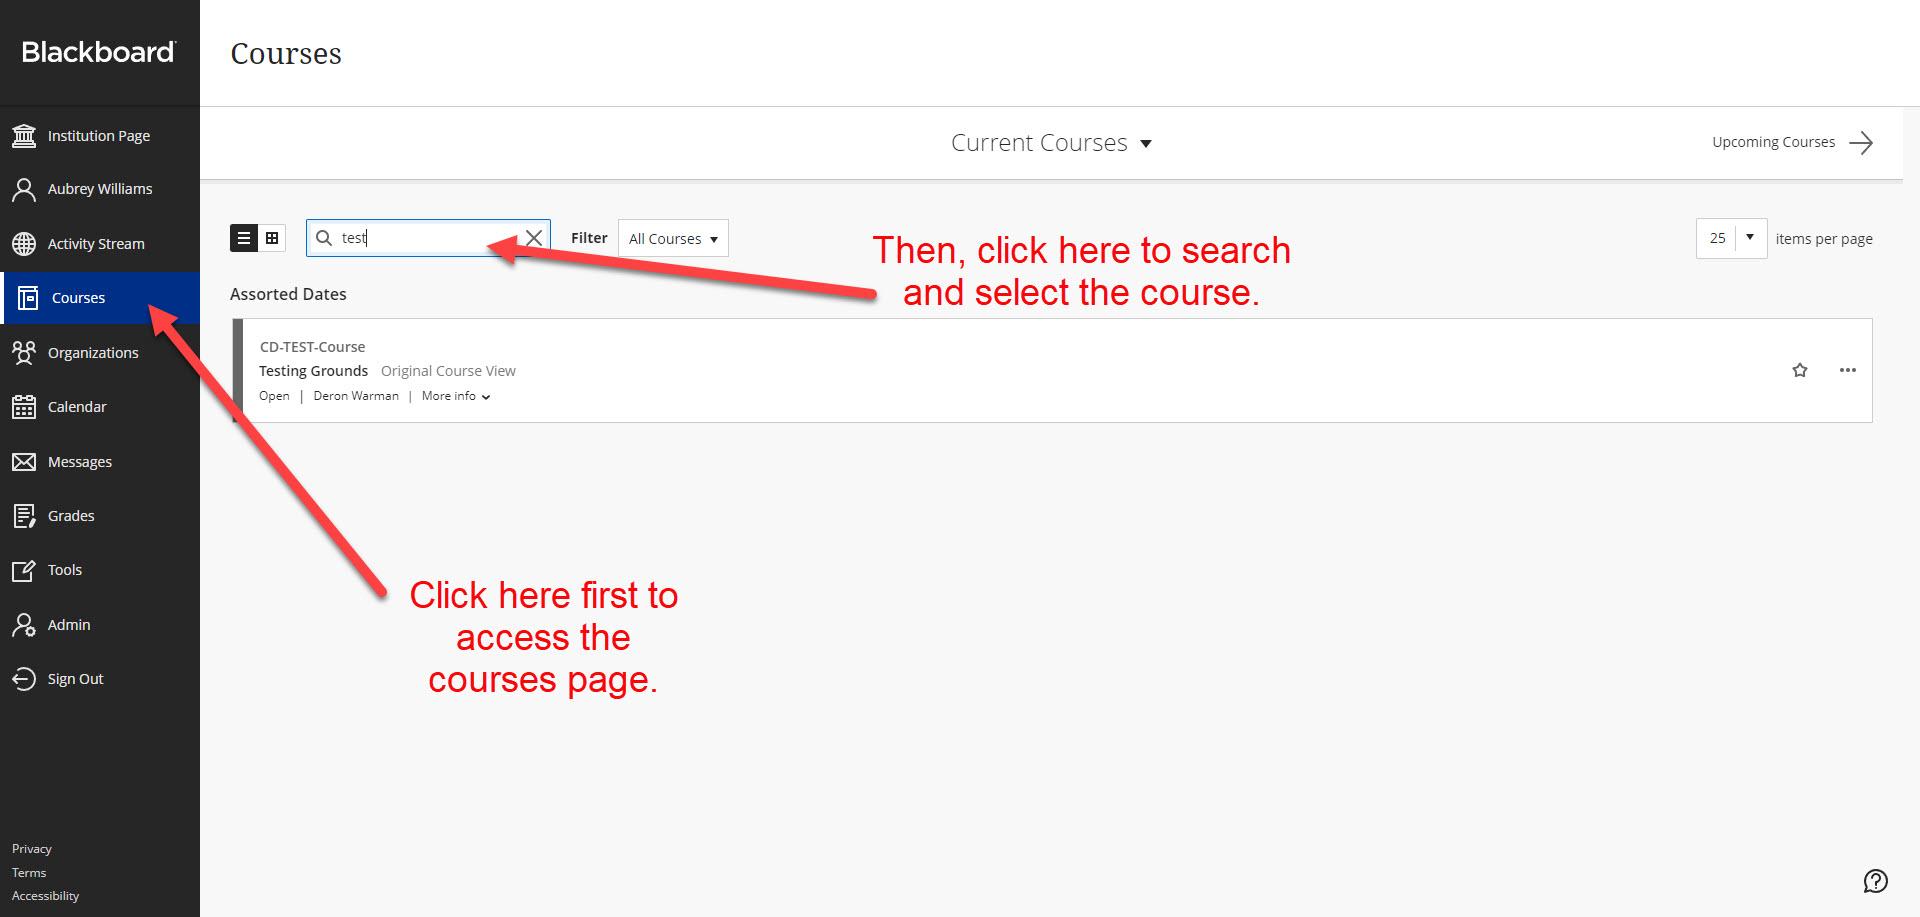
Click the courses tab in the left menu bar and search for (and select) the course title where you will upload your Interactive Multimedia Instruction (IMI). For this tutorial, we will be using CD-TEST-Course.
Select the Appropriate Location for Content

Depending on the length, size, and breakdown of your course, there may be several options for where to upload the lesson. Ensure you are selecting the appropriate location so that it is practical for students and easy to navigate. For the demonstration purposes, we will be uploading into Module 1.
Build Content

Hover over build content, by hovering over this menu, additional options for building course content will be displayed. After the menu options are displayed, the user should select this "Content Package (SCORM) to add a SCORM package to the course.
Upload Content


After making the previous selection, you will be brought to the "Add Content Package" page. On this page you will first select "browse course files."
**Note: It is important to choose this and NOT browse local files because your developer should already have all content uploaded in central course location for you and the local files come from your individual system. **
Selecting "browse course files" will display a popup box titled Browse Content Selection. You want to verify the location is titled the same as the course you are currently working in (circled in red above). Once verified you should see the content you need, which for us is "Intro to mySERVICES." To select this ensure you click the small circle to the left and NOT the name. Then select submit.
Confirm and Submit

You will be brought to a confirmation page. Verify the correct file was uploaded and select submit.
**If there was another file selected by accident, you can select cancel.**
Fill in Lesson Information

This page is pertinent to ensure students know what they are accessing and key details. You can change the title if desired and provide a description with anything you think they need to know in order to be successful.
Moving towards the bottom, it is IMPERATIVE to select yes for Make SCORM Available. If this step is skipped, the students will not be able to see the lesson. Next, you are able to specify how many times a student may access the lesson. If you wish to only have it available certain dates, you can manage that here as well.
Once you have updated all content information and availability, select submit.
Completion


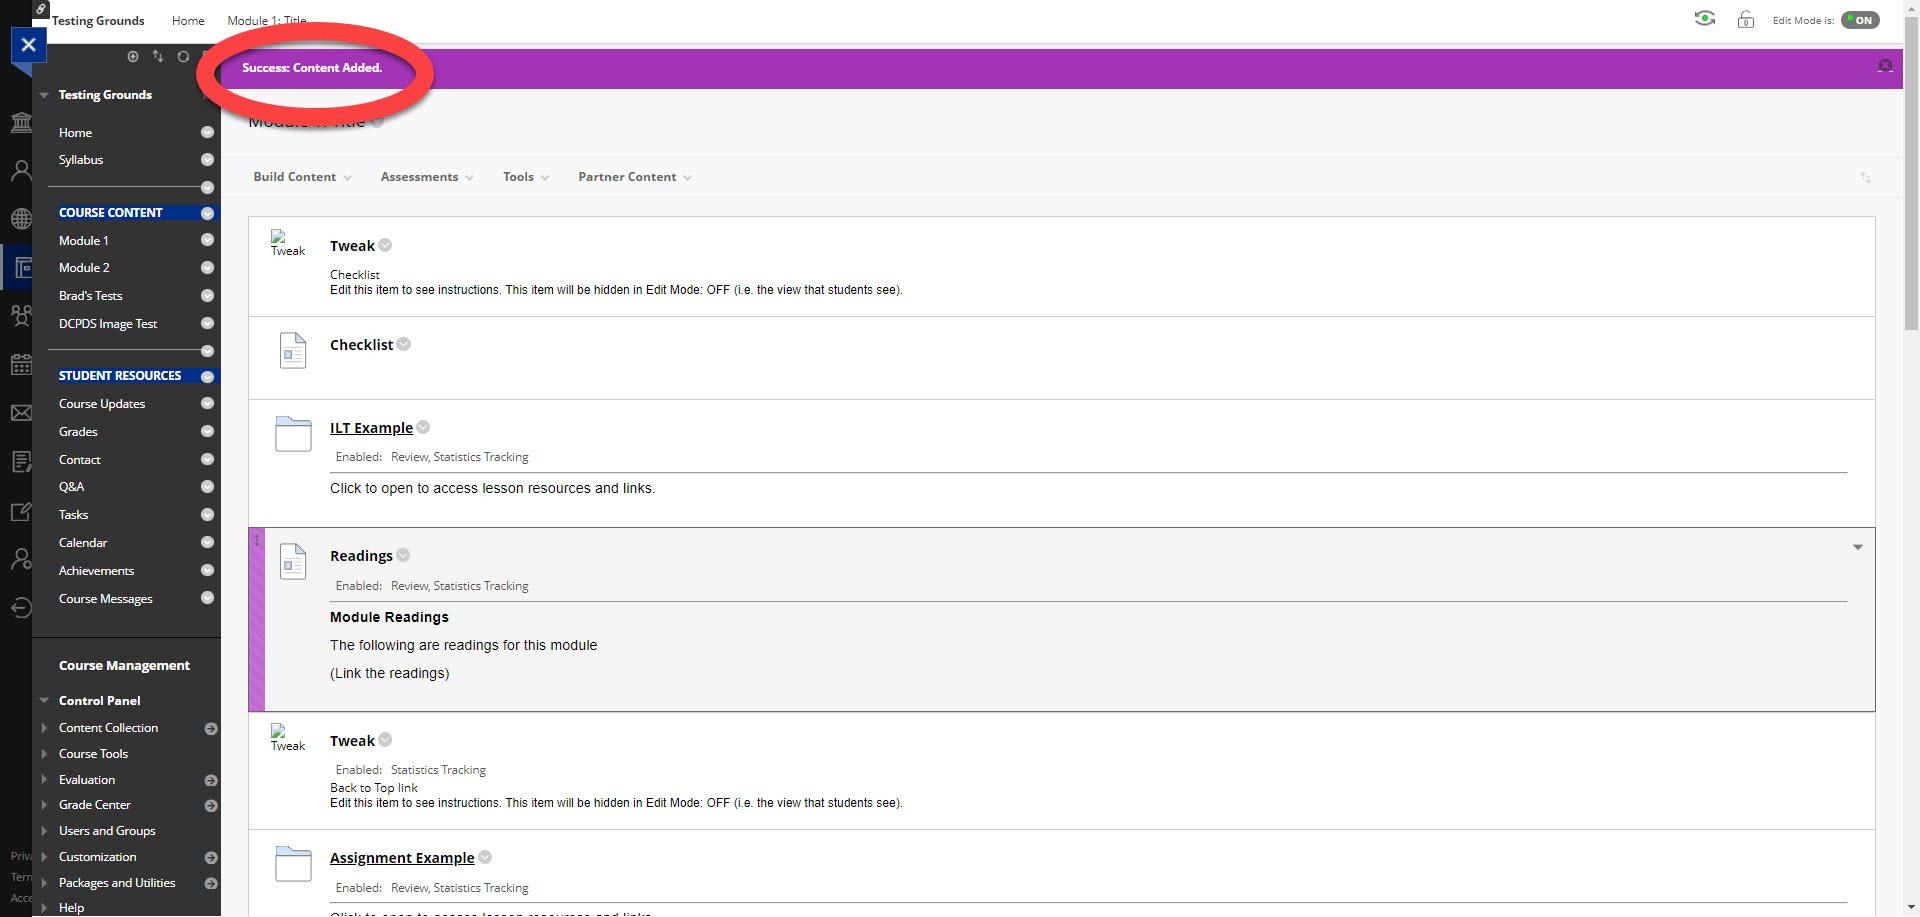
Upon submission, you will be taken back to your module page and should see a purple ribbon with "Success: Content Added." If you do, CONGRATULATIONS! You have successfully uploaded the IMI. You will also see the lesson displayed all the way at the bottom of the screen (shown in the second photo). Items can be moved and re-ordered, if needed.
If you receive an error message, you will need to re-accomplish steps 1-7.