How to Animate a Plane Landing Using Source Filmmaker
by Nadav Hakak in Design > Animation
642 Views, 1 Favorites, 0 Comments
How to Animate a Plane Landing Using Source Filmmaker

Whether you want to pick up a hobby or bring a movie idea to life, 3D animation is a useful skill to know. However, many 3D animation software can appear daunting and hard to learn. Fortunately, Source Filmmaker is an easy-to-understand software that has a high ceiling for potential. By following this tutorial, you can learn how to animate a plane flying like seen in the video above!
Supplies
There are no physical supplies needed to animate, just things you can get on your computer for free:
- A Steam account
- Source Filmmaker downloaded
- A video editing app(optional)
Getting Custom Models


Once you open Steam, go to the Library and click on Source Filmmaker(SFM). From there, go to the workshop to download models for the project that are not in the default app. Look up and subscribe to the three models in the images above. Once you've done this, start the app.
Loading a Map

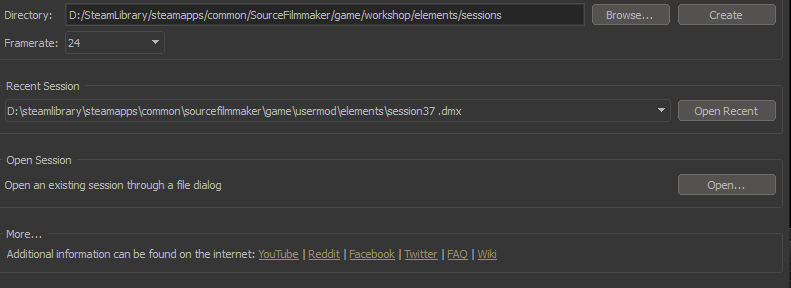
After being greeted with the screen above, create a new session by clicking the button. Then, right-click on the black screen that says "NO MAP LOADED", and select load map. From here, type in the name of the file from the map we downloaded earlier, and open it. This will give us the setting for the animation.
Bringing in and Posing the Models


To set up the scene, click shot one on the film editor(film reel icon in the middle). Go to the top left and hit the plus button, and add a new model. From here, insert the plane we downloaded, and any character you want flying it. I chose this model of a soldier who came downloaded with the software. Then, change the editor to the button to the left of the film editor(motion editor, or panel icon). Here, we can use the tools above to pose our models. To start, click a model name on the left, and then hold CTRL. Then, you will see what looks to be dots and a skeleton of our model. These are called bones, the parts at which we pose the models. By using the 4 tools above the editor buttons, you can drag using CTRL+ Right Click to pose each of these bones to how you want. As a beginner though, I would use only rotate and move tools. Start by selecting the root bone for the plane, and rotating it into a nose dive. Then, use the rotate tool on the soldier's rig(skeleton) to pose him into a sitting position as seen above. The best way to pose appendages is by starting from the trunk of it, and moving towards the end of it as you pose. When you are done editing the bone, release CTRL.
Locking the Models Together

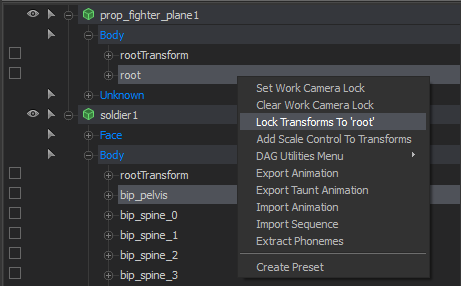
Of course, we want our pilot to stay in the vehicle. That's why we're going to lock his model and the plane's together. To do this, we move the pilot so he's sitting in the plane how we want him. After doing so, we go to the animation editor, select the pelvis bone for the pilot, and hold CTRL while selecting the plane's root bone. Then, select "Lock Transforms to 'root'". Now, the pilot will stay in the plane while it's moving. Before we get started, we want to animate the propeller. Do this by rotating it in circles for 20 seconds after hitting the space bar, and hitting it again when done. Now, it will stay moving for the next 20 seconds.
First Scene:Nose Dive

For the first scene, we're going to start by using the plus icon to add a new camera. After this, we select the camera and drag it onto one of the windows. After this, you can use CTRL and WASD to move it around to your liking. For this shot, move it back, away from the plane. Then, hit the camera1 box to change it to work camera, allowing us to move around without changing the camera's position. To animate the plane, we switch to graph editor, by pressing F4. You can make a key on the graph by selecting a bone, then a time, and hitting M. Now, the bone will move to however you had it when hitting M. You can use this to make multiple keys, so the plane automatically animates itself moving to those positions. We don't want it to move in a straight line from the top to the bottom of the nose dive though. Fix this by adding more keys in between each spot. Rotate the root of the plane to make it angle like a plane doing a real nosedive. Make sure the timing in between the keys is right, so the plane has realistic movement. Repeat the step of adding as many keys as necessary, re-posting the plane when necessary, resulting in a U-shaped flight pattern. The end product should look similar to the first scene in the linked video.
Second Scene:approaching Runway


To start, cut go back to the film editor and make a new scene. Do this by selecting the film, and where you want the scene to end. Then, hit SHIFT+B to cut the scene into two. Now, select only the second scene. Add a new camera, and use the same technique as before to lock it to the plane, giving us a view of the pilot's back, like so. Make sure the camera is locked to the plane's root before animating. Implement what we learned earlier to animate the plane slowly moving towards the runway, diving, and dipping along the way. Before animating, reposition the plane to the back of the map, so there is enough room for it to "fly" in this scene. Make sure the plane starts vertically, as that's how we left it in the first scene. Then, carefully animate the root of the plane moving into a horizontal position, and getting closer to the runway. The path should look like this when done. If you want a more realistic animation, switch from the work camera and back to camera 2. Now, you can move the pilot's body with the motion of the plane by using the 2 movement tools from before. Once you are satisfied, make another scene in the film and move on to the next step.
Scene Three: Landing

Now take a new camera, and assign it to the new scene. Before we use it though, use the graph editor to once more animate the plane. Get it to land on the runway this time, and add wobbling from air resistance by rotating it after animating it from the sky to the ground. Make sure all 3 wheels of the plane are on the ground by the time it lands. After animating that to your preference, use the graph editor on the camera to position and make a key where the plane starts, lands, and moves until the end of the scene. For the key where the plane lands, rotate the camera down and back to the plane to make it look like the impact of the plane shook the camera.
Scene Four:Landing


Make a new scene and position the camera far away from the plane, which should be once more repositioned to the end of the road to give it space to move. Then, use the graph editor to make the plane roll forward to the camera, and skid to a halt. Give it character by making the plane fall forward a little when braking. After this, give it a pause, and then have our pilot give a thumbs up to the camera for a landing well done. Do this by using the same animation technique for animating limbs: start with the trunk, and work the way to animating the fingers. If you want to add an element of comedy to your animation, we can have the ejector seat trigger accidentally. To animate this, just make the pelvis bone of the soldier move upwards with two very close-together keyframes. Make sure to animate the rest of the body accordingly, but don't put too much work in, as this only lasts a fraction of a second, so the viewer won't notice. Then, when he's off-screen, attach the parachute model we downloaded to his back, locking it to spine_3. We don't need to add a backpack for it to come out of because the viewer won't be able to see it. Then, while he's off-screen, move him further in the background, and then have him slowly fall down with far-apart keyframes. Now, we have our finished animation!
Sound Effects and Exporting


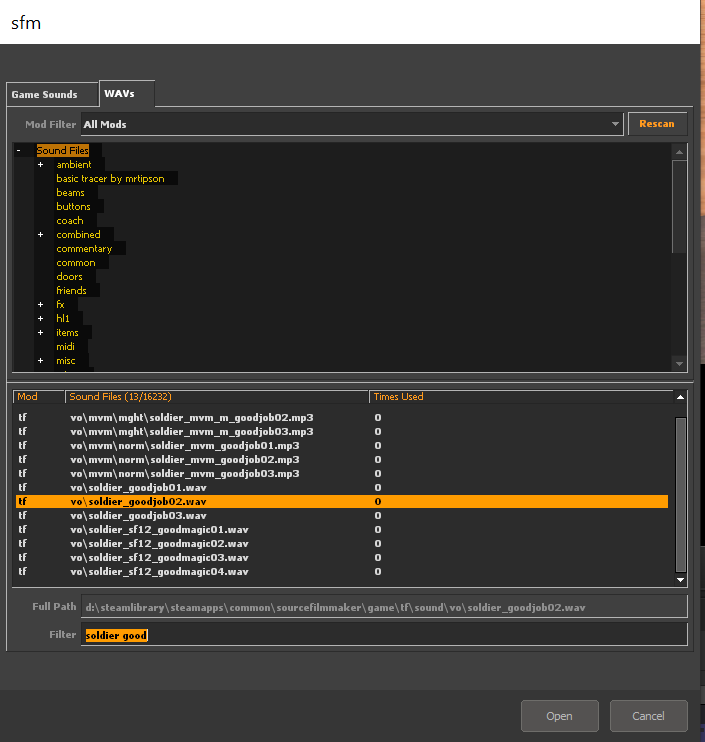
To add sound effects, go back to the film editor, and select the time when you want to add one. Hover the cursor above the "dialogue" channel and right-click to add a sound. Now, you have access to SFM's whole pre-installed sound base. Here, you can find a lot of sound effects for this animation. Find a rubber impact sound when the plane is landing, and insert it. Do this for the pilot's voice as well, which I used the "soldier" voice lines for. If we want our pilot to talk, we simply right-click on the sound to show the waveform. Then, right-click on the soldier model in the Animation set editor and extract the pheromones for this line. If there are more sounds you want to add, go to https://pixabay.com/ to get more. You can then move the audio file into the folder by following the path in File Explorer in the image above. Ensure the file is .wav, otherwise you might not hear it in the editor. You can then set the volume to show that the plane is far away when in the first scene. If you have complications with this step, add them to another video editor after exporting the file. To export your animation, go to file, and select Export. You will find the file by referencing the output path(which you can change) above.