How to Build a Cyberpunk Mini Fridge for Your Gaming Setup
by Mateo_J in Circuits > Electronics
355 Views, 4 Favorites, 0 Comments
How to Build a Cyberpunk Mini Fridge for Your Gaming Setup
.jpg)
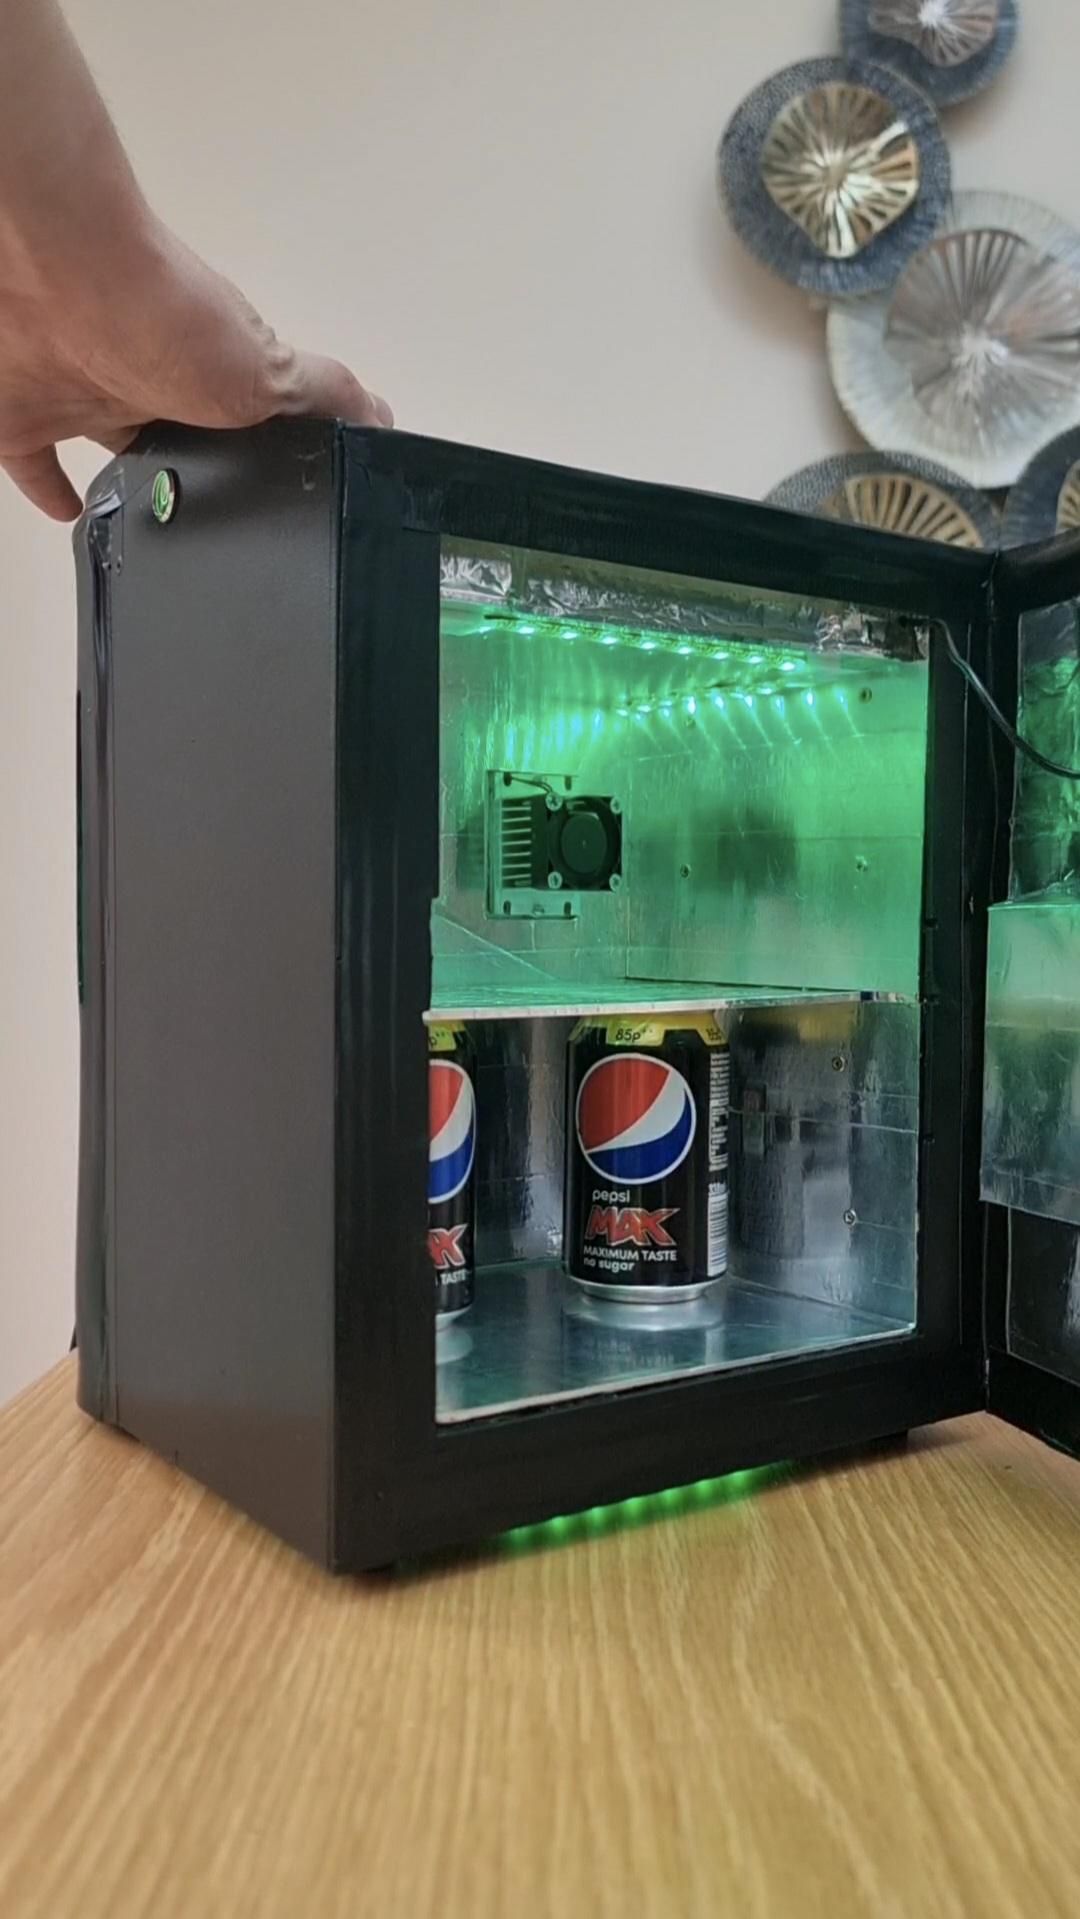
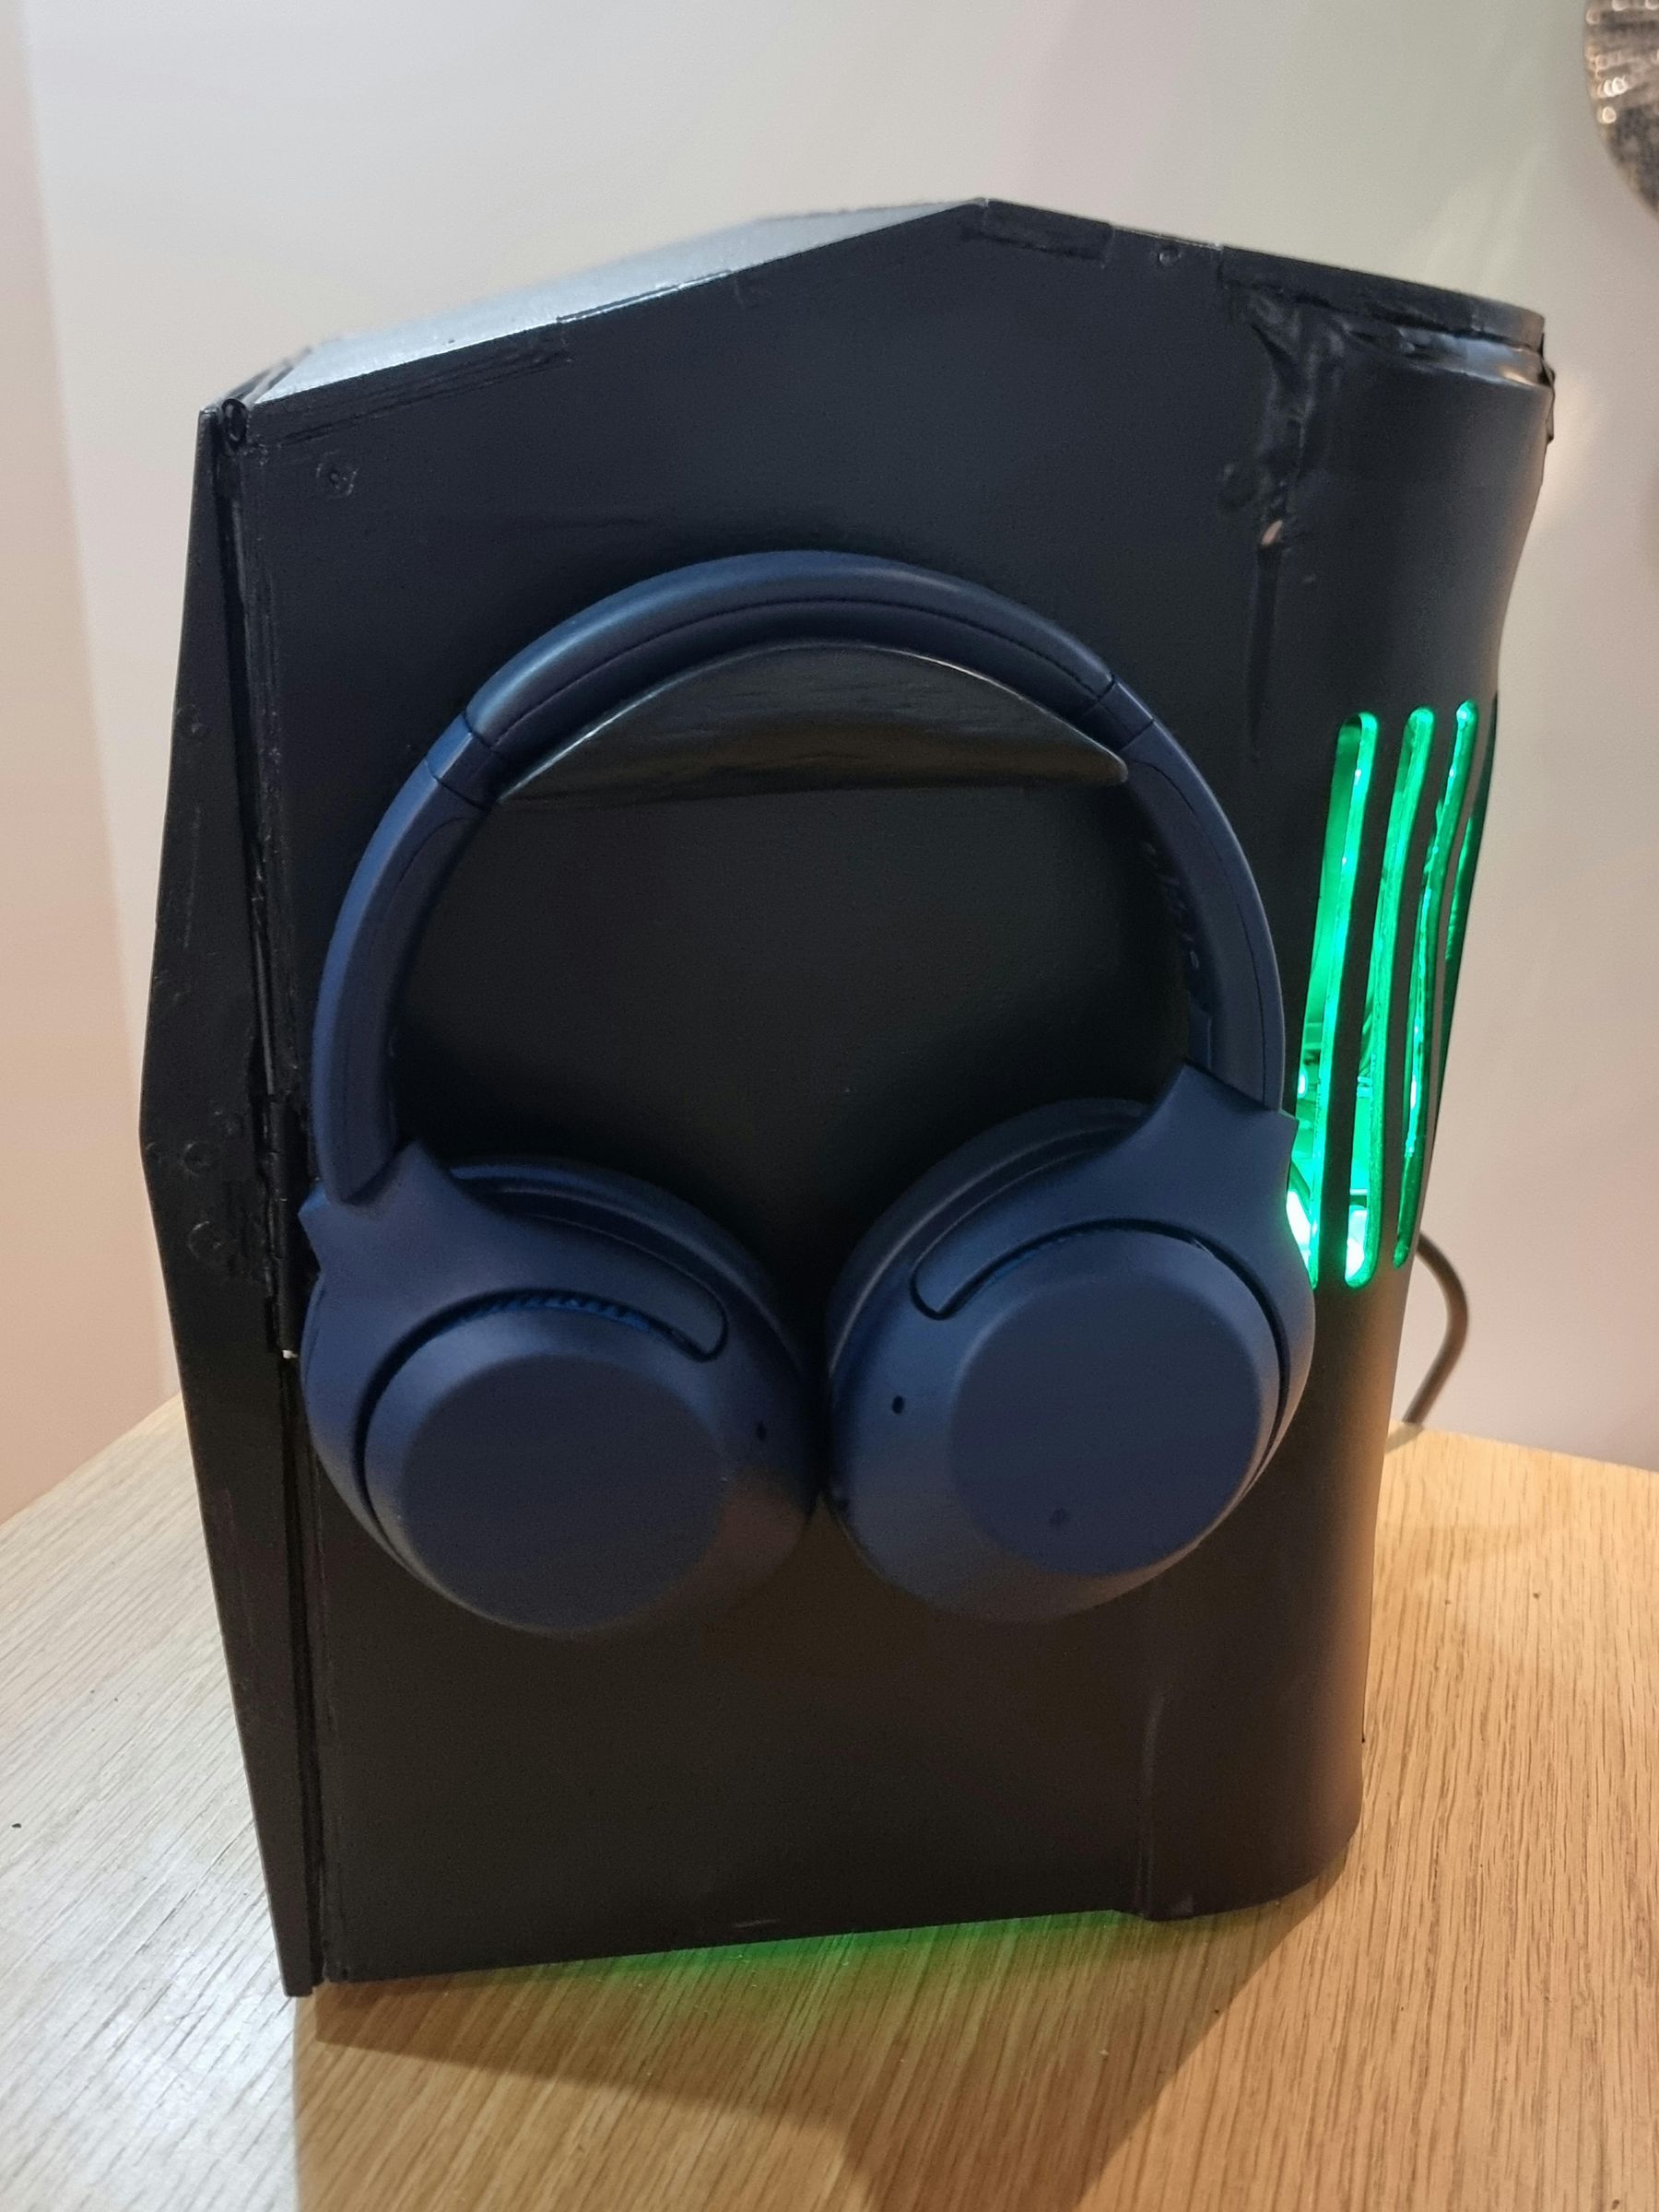
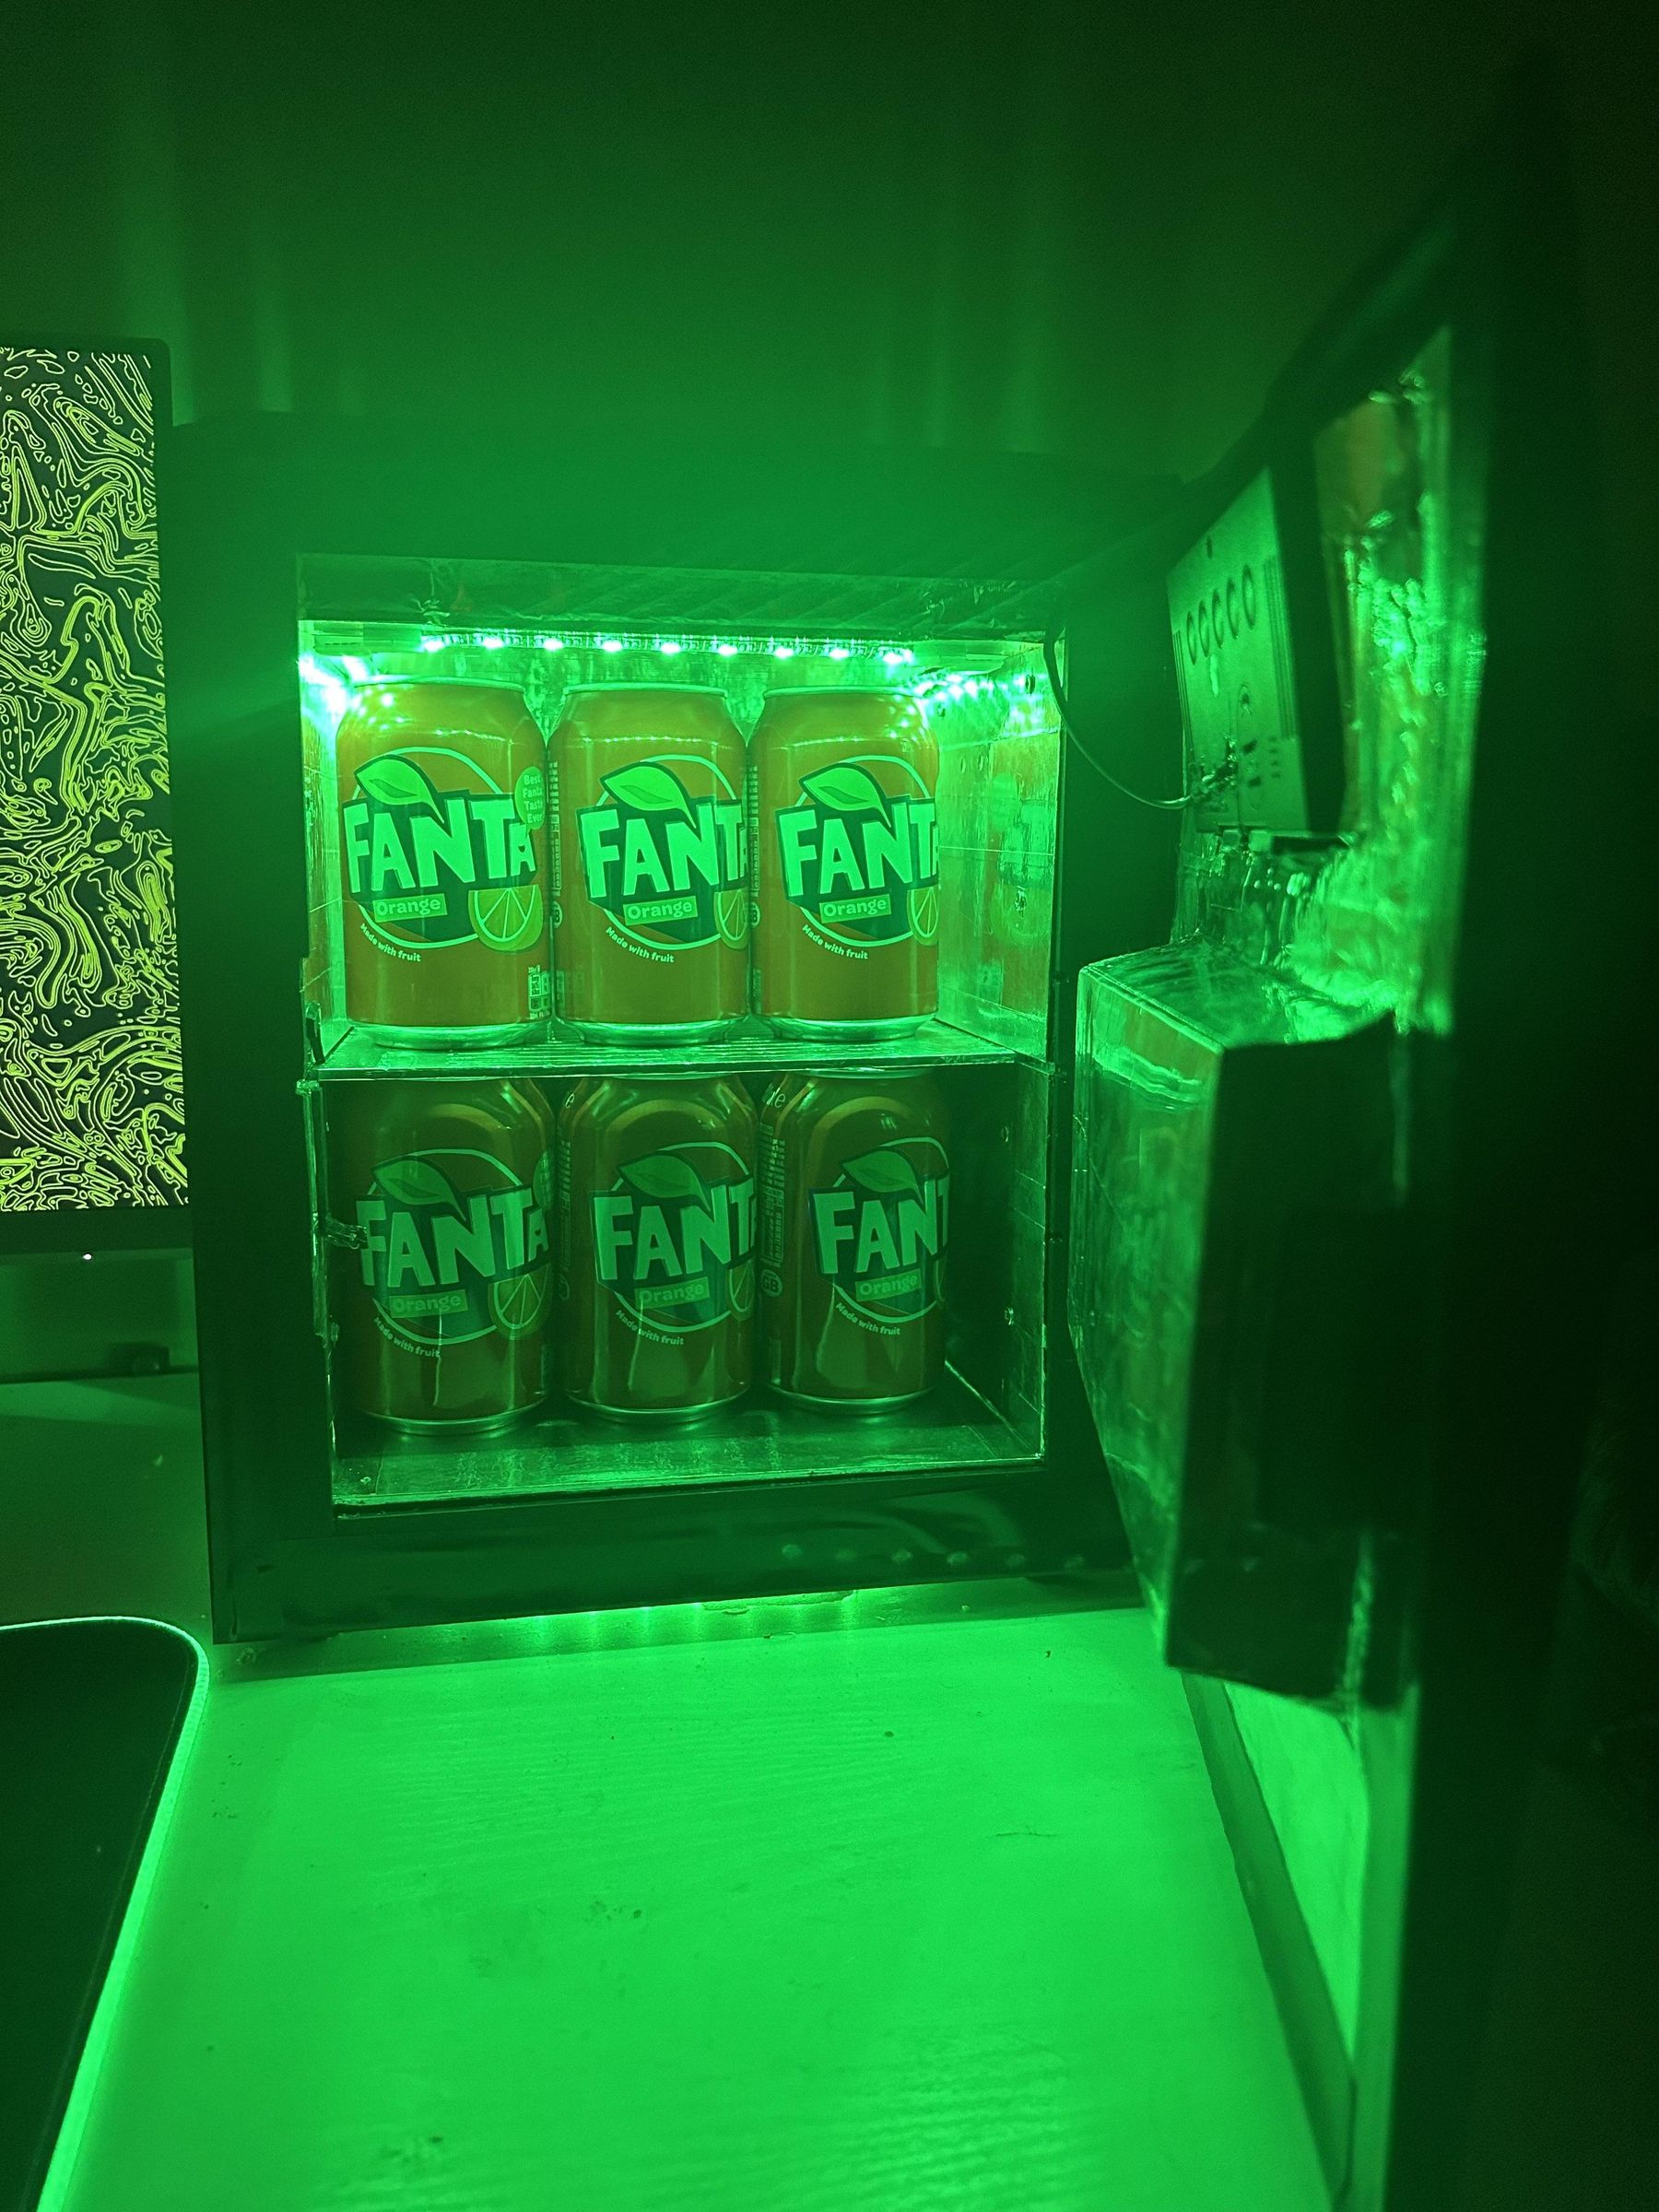
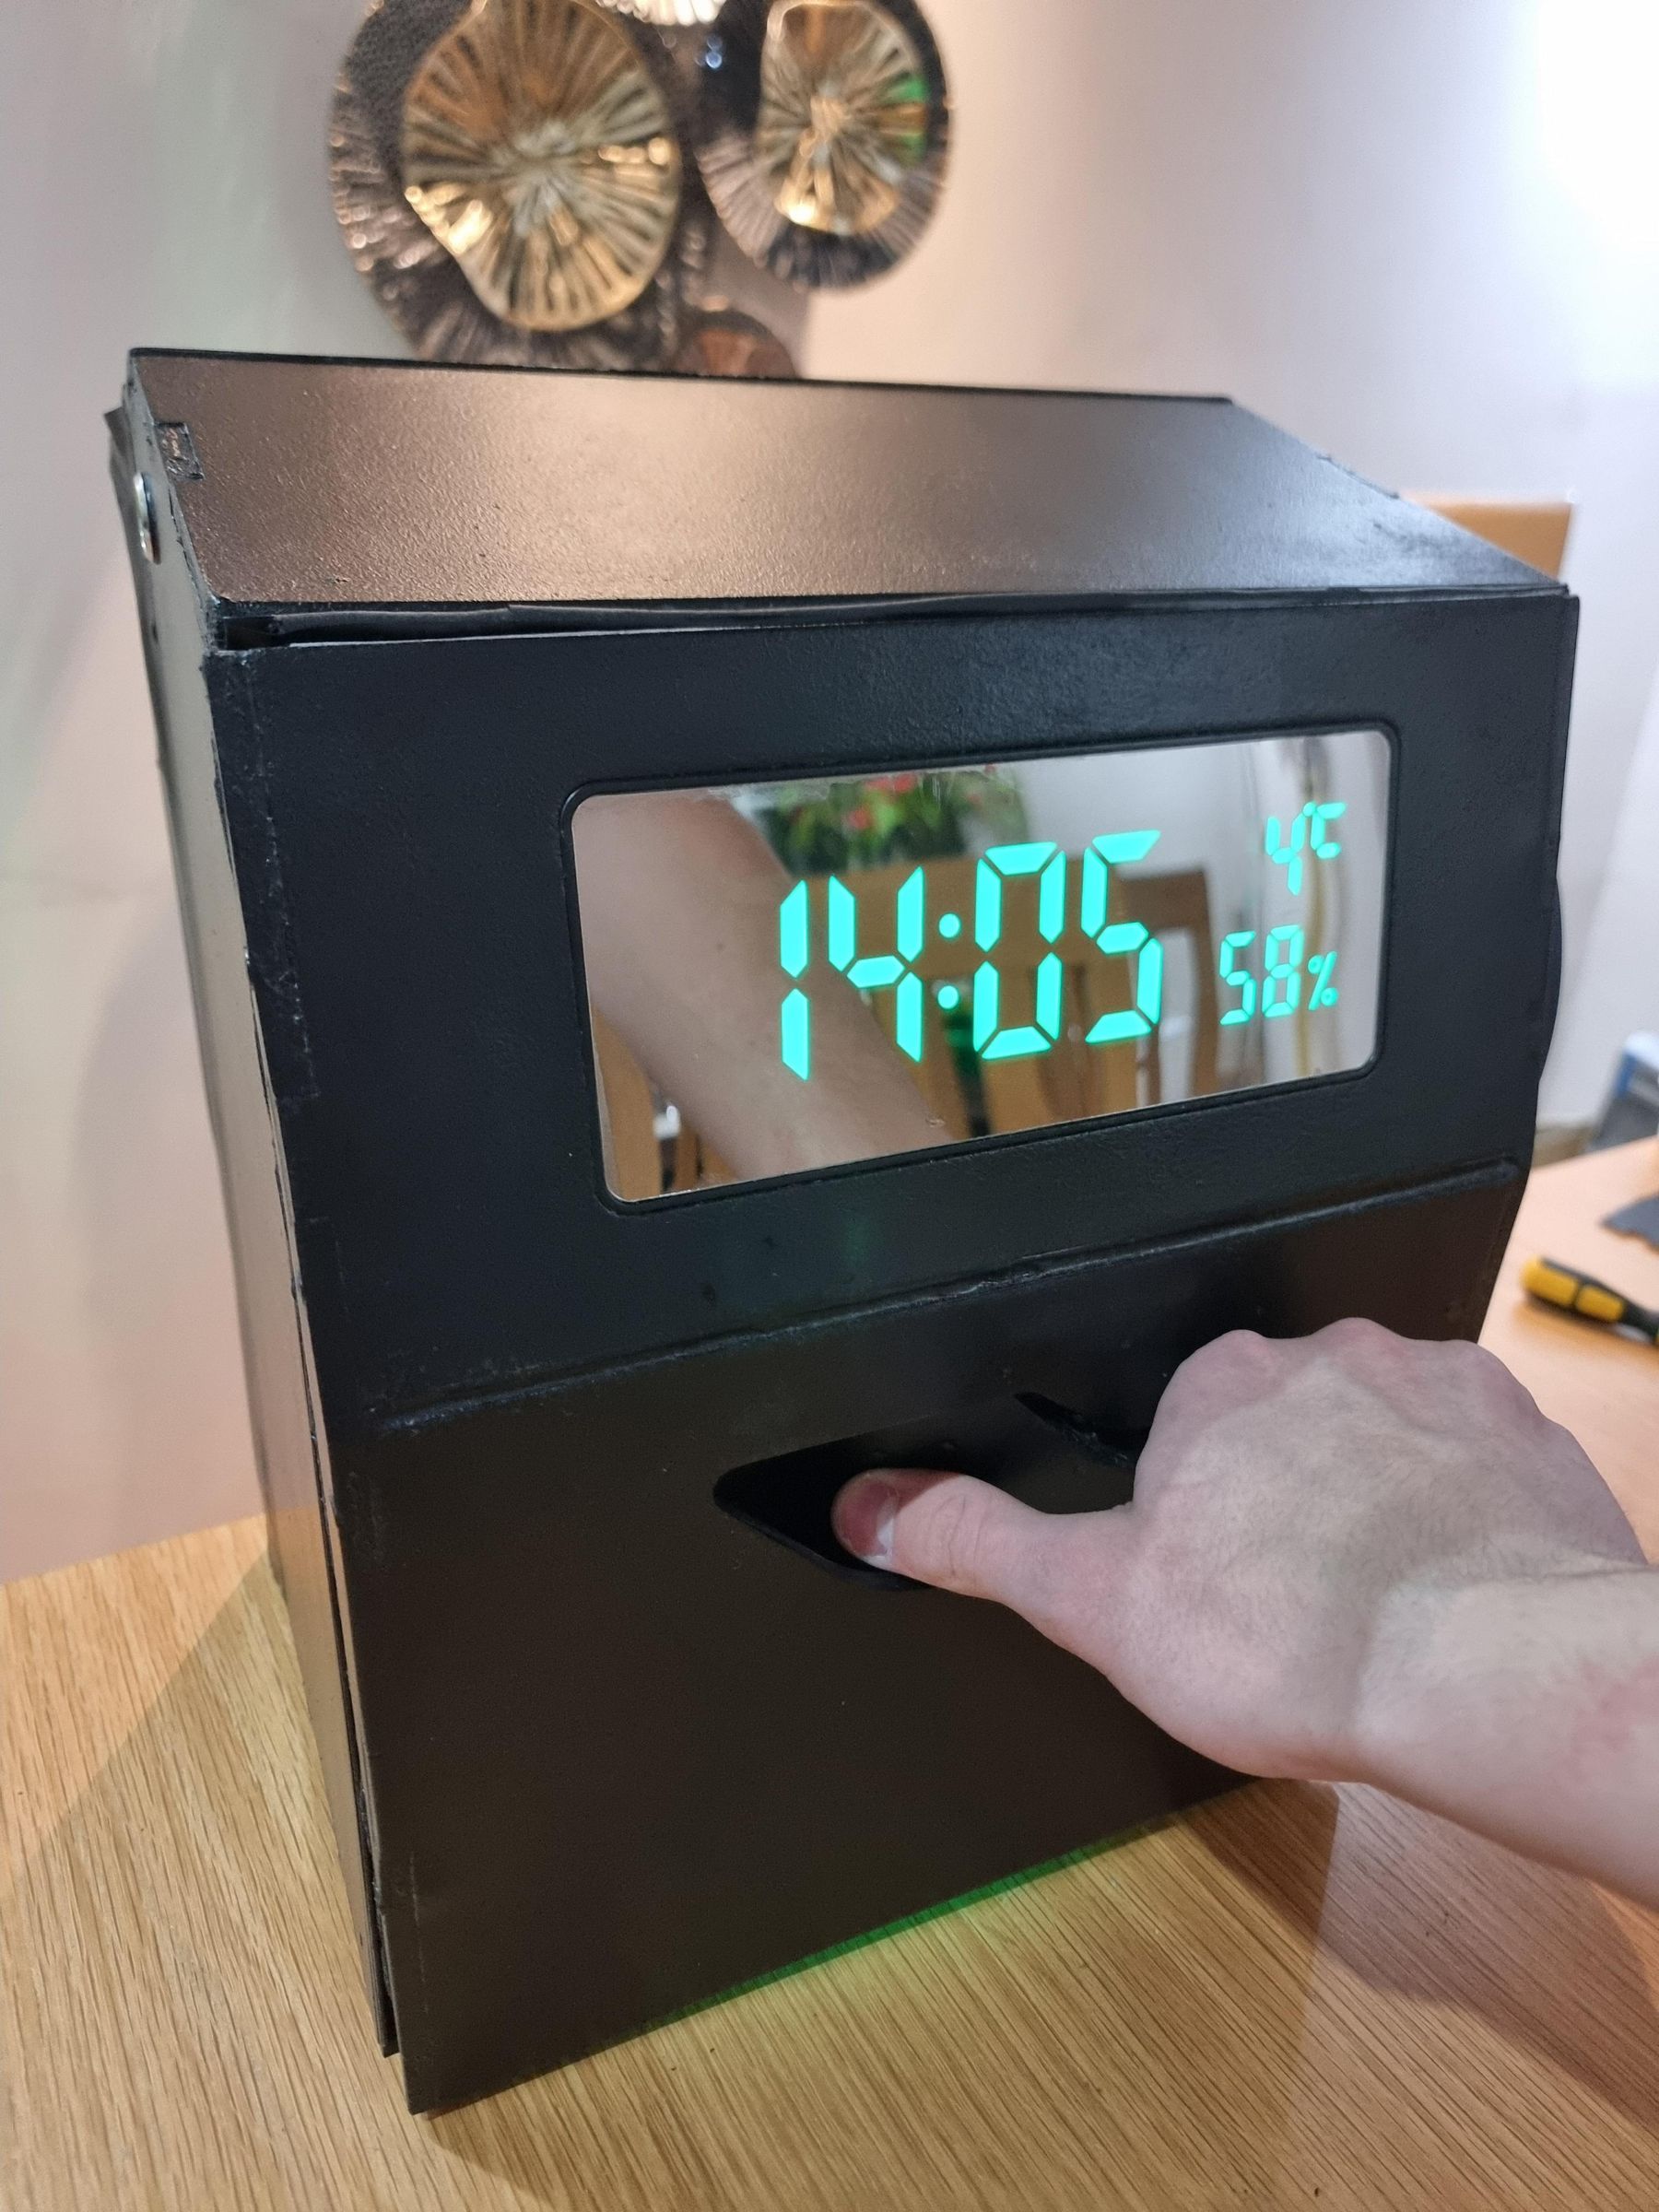
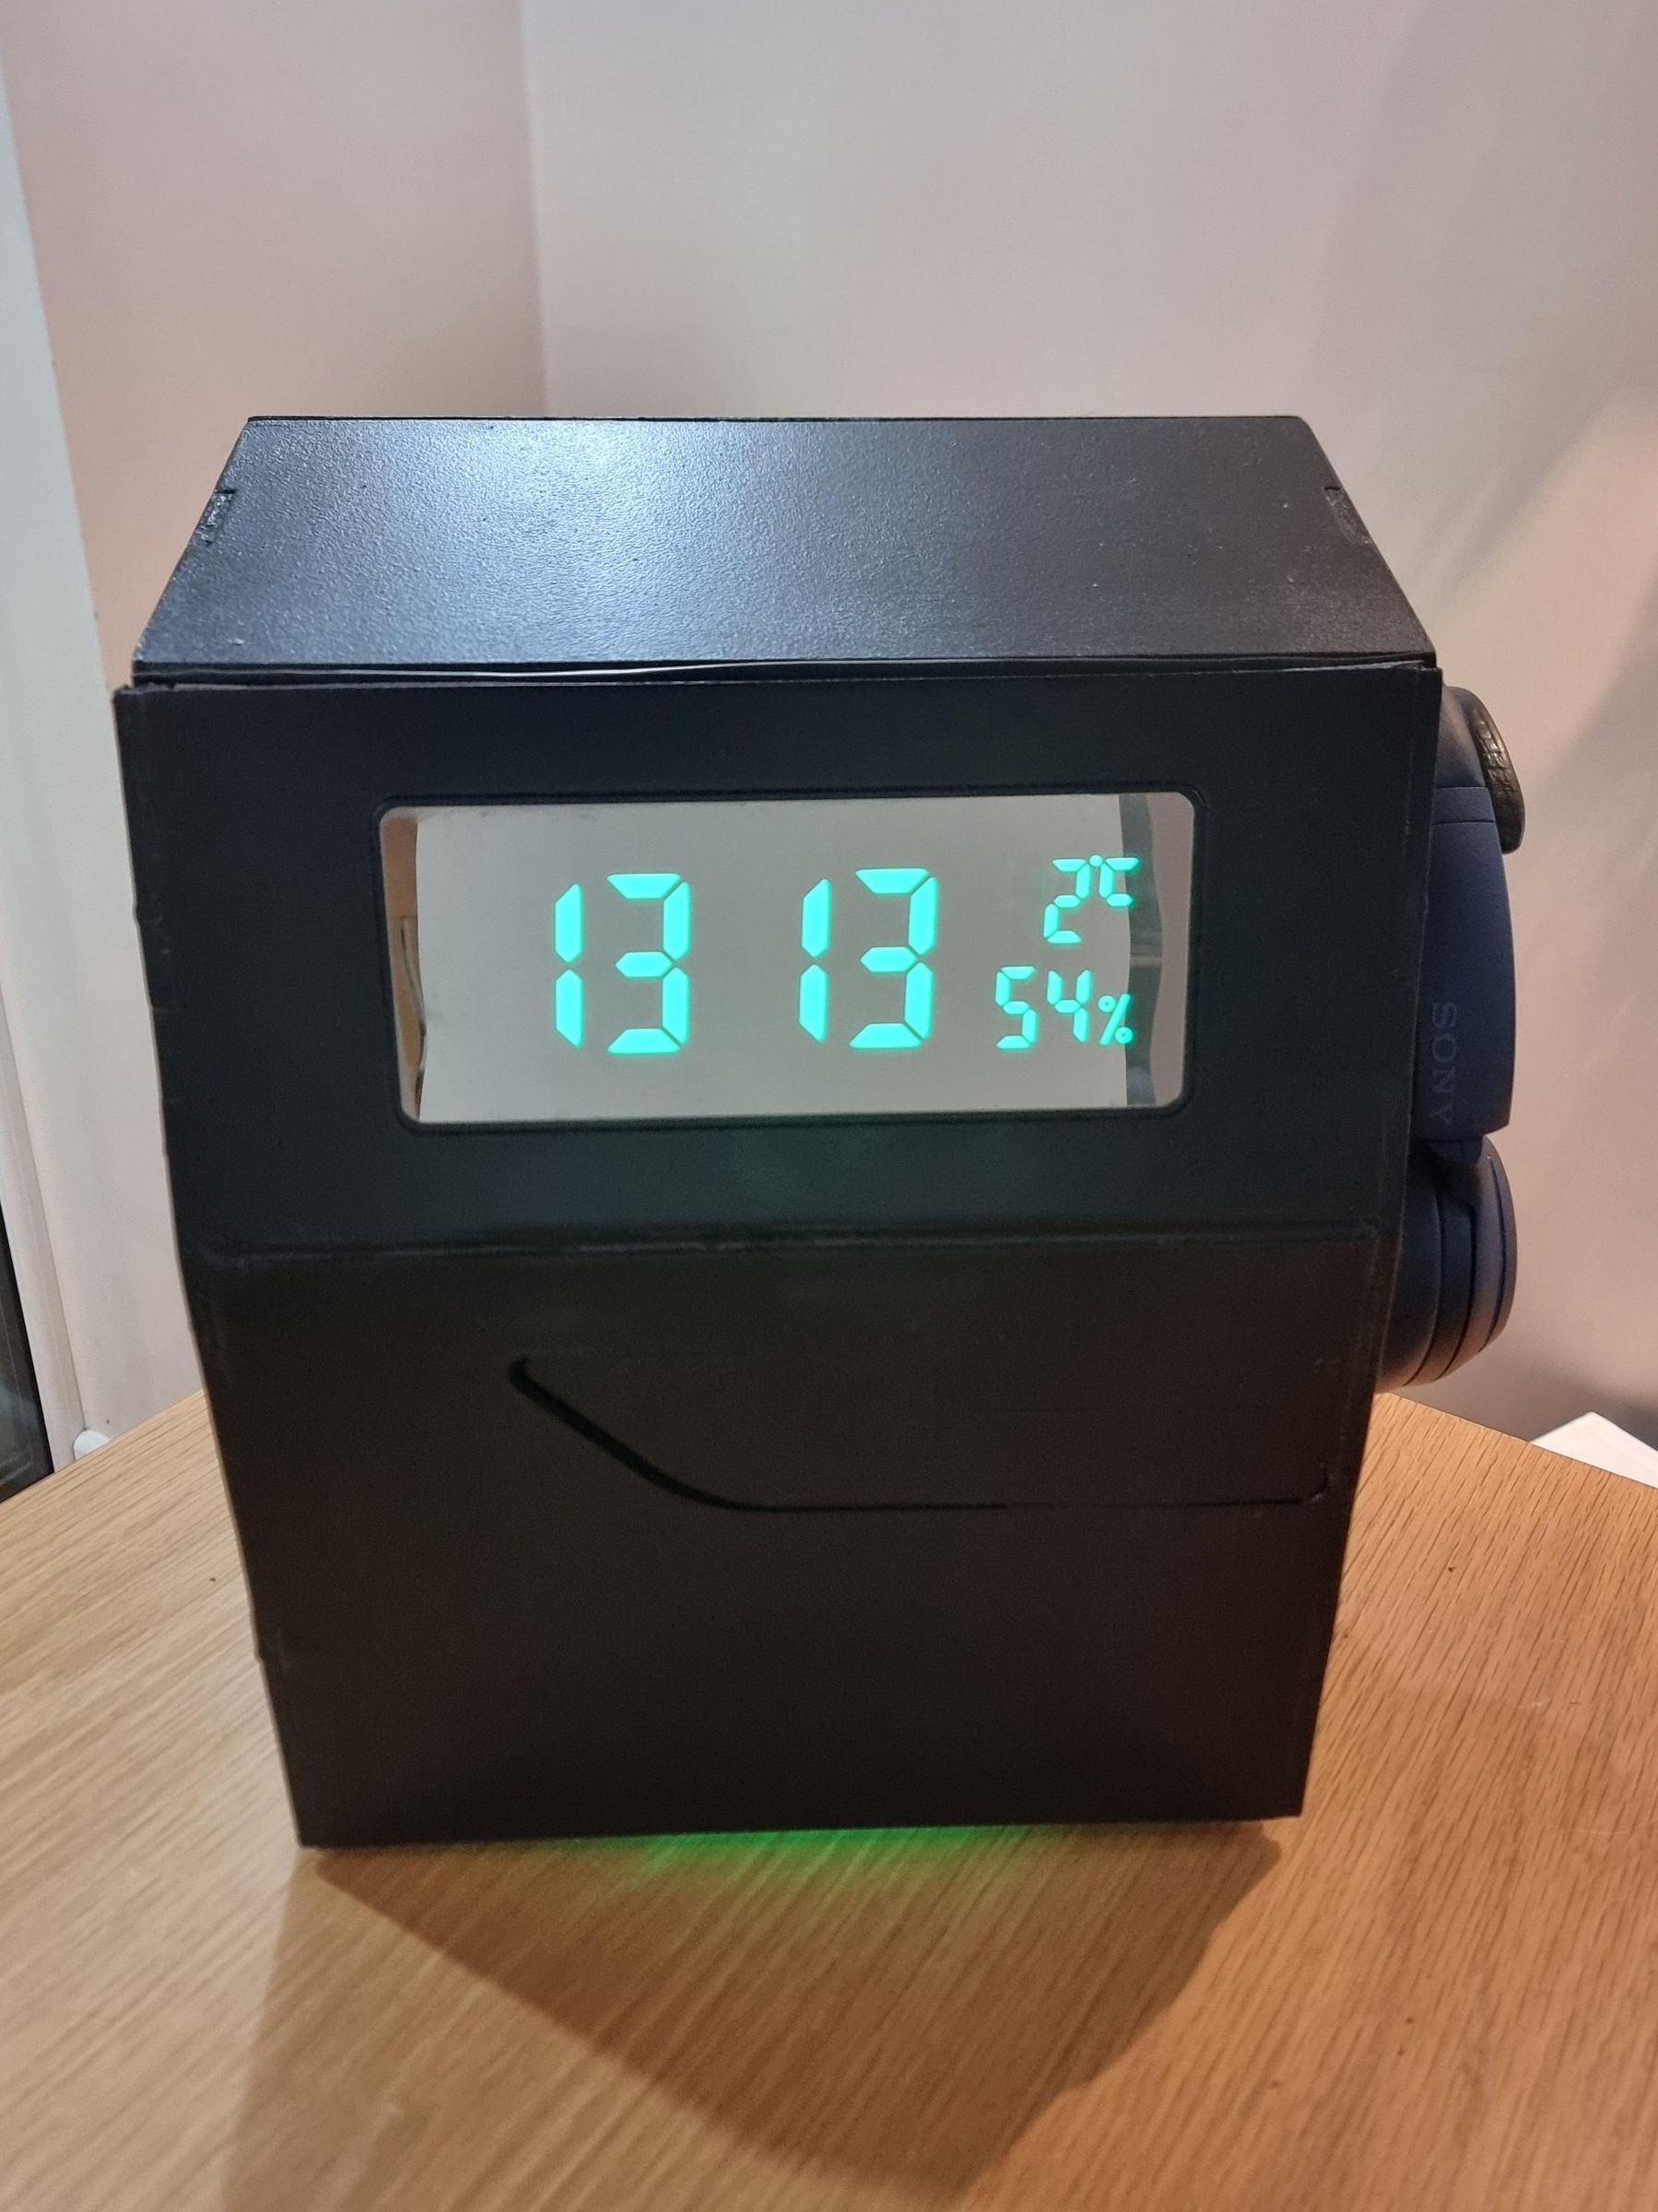
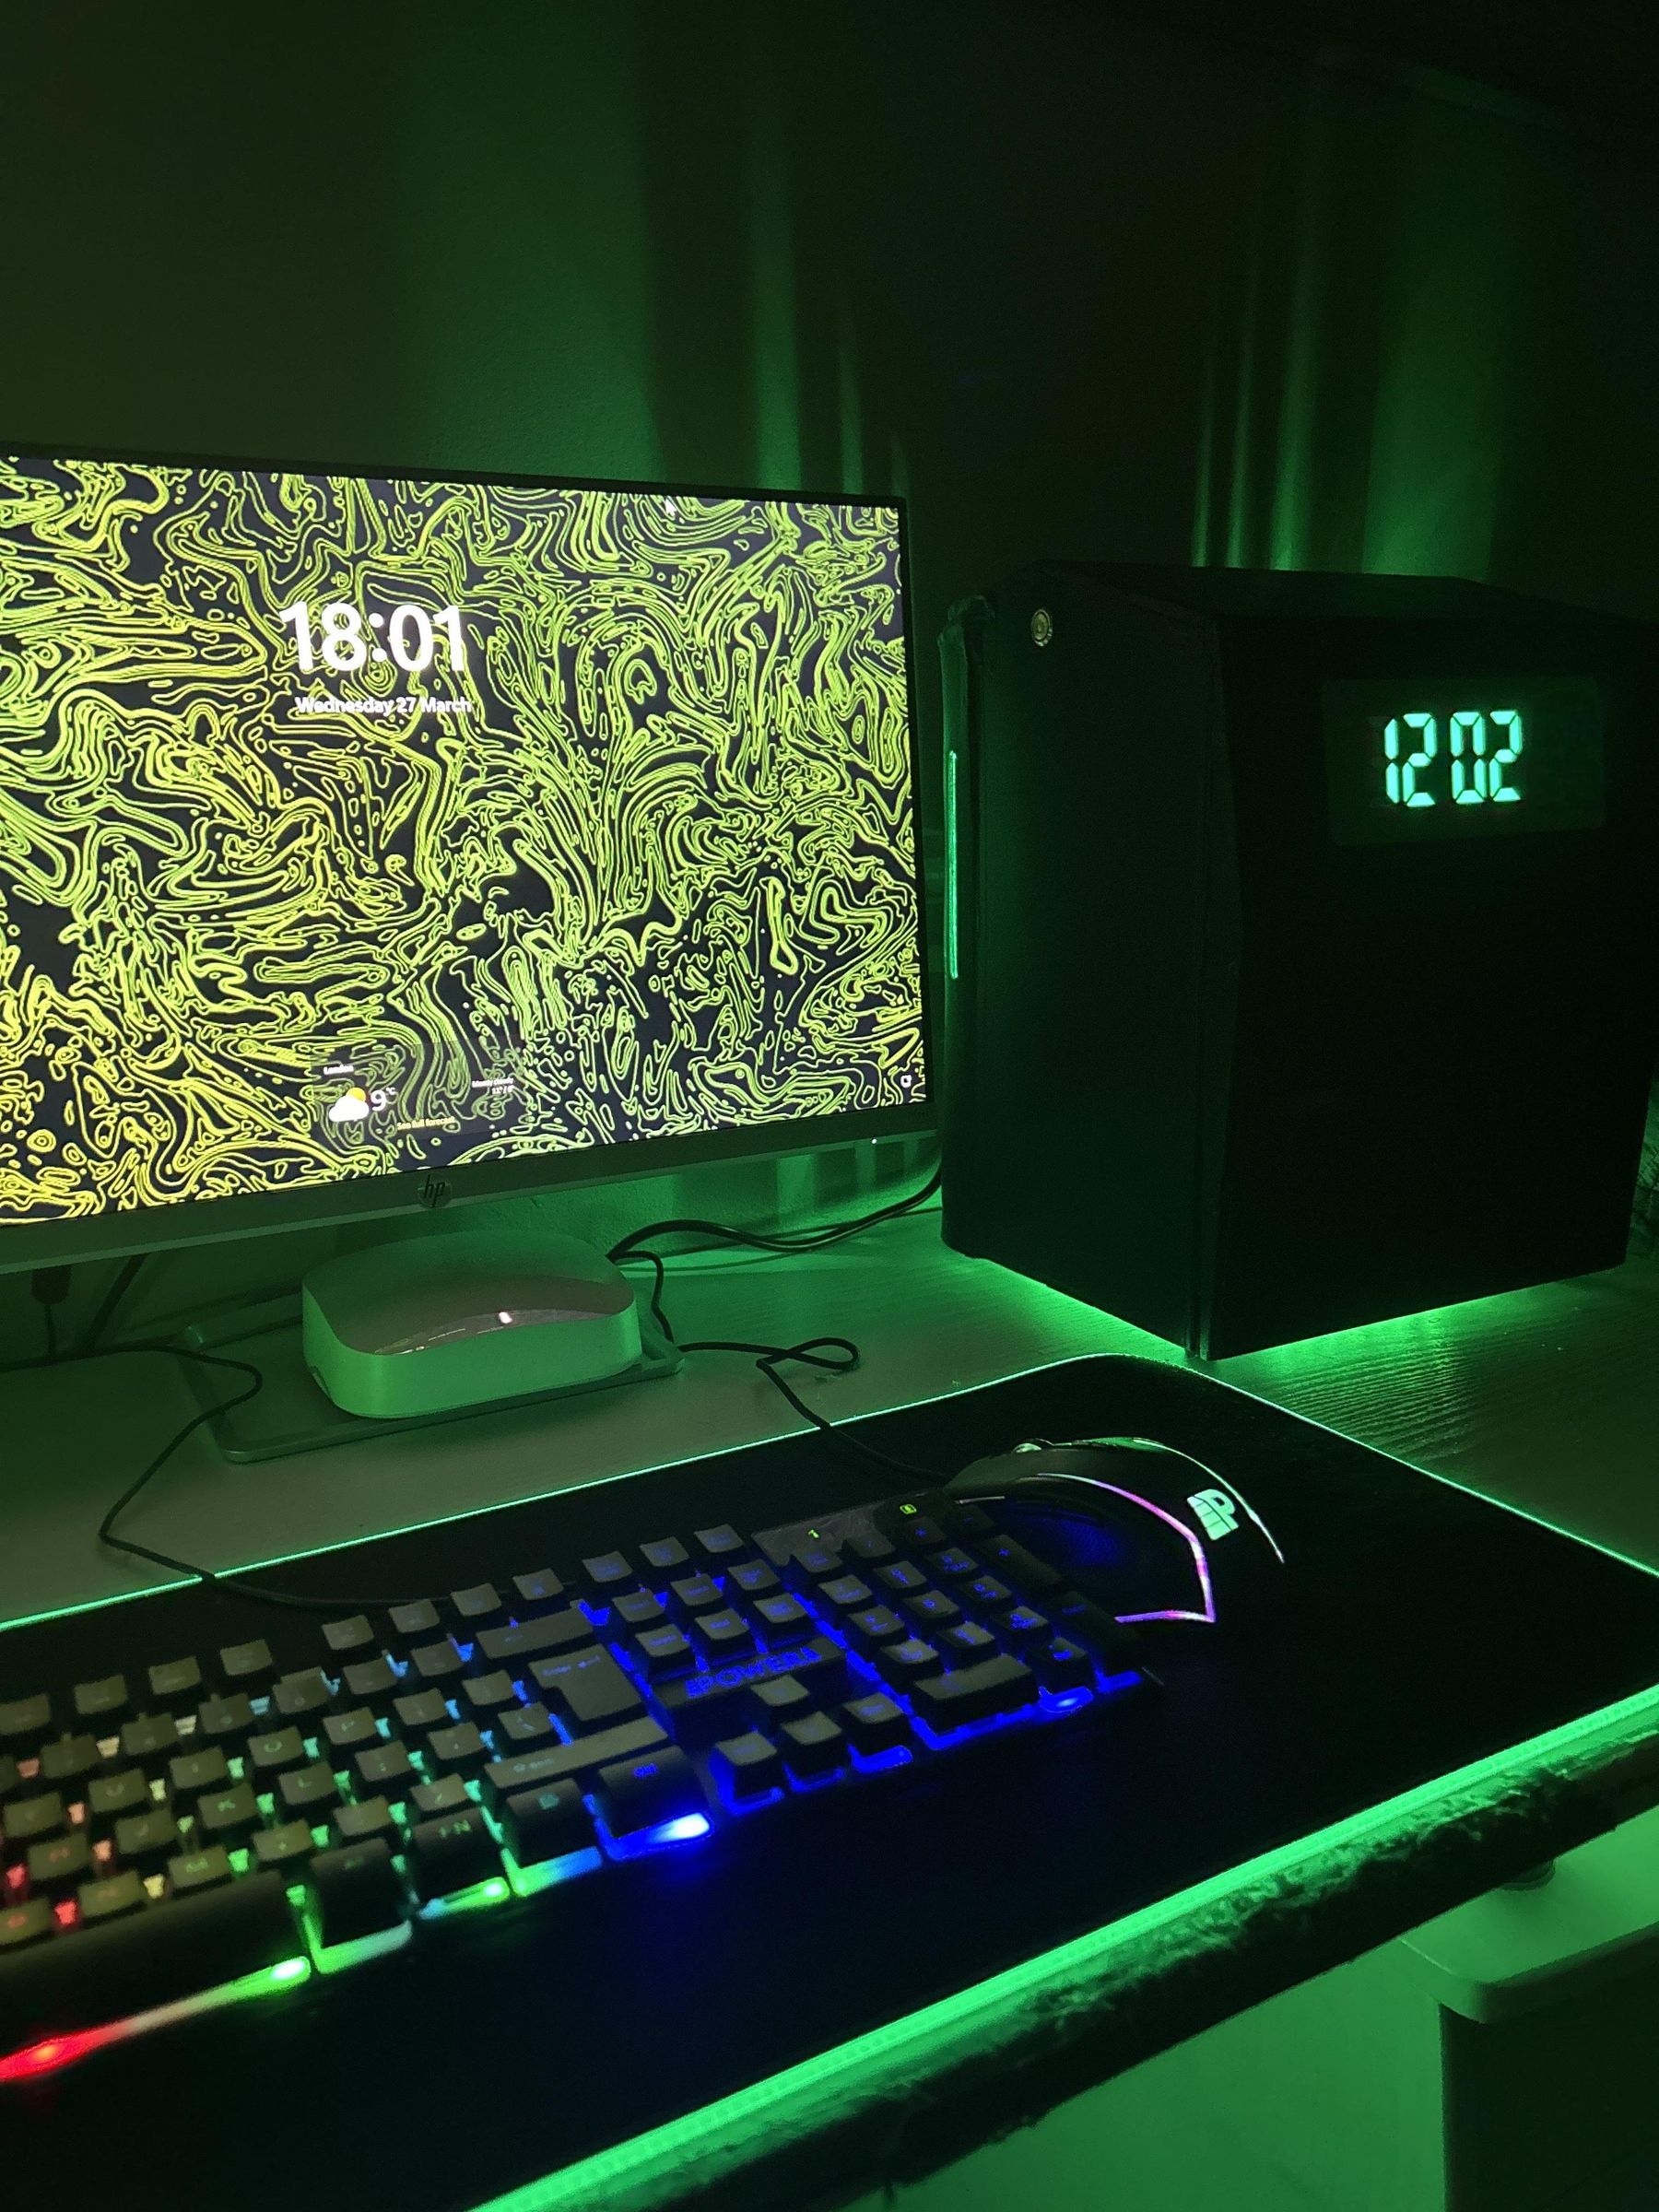
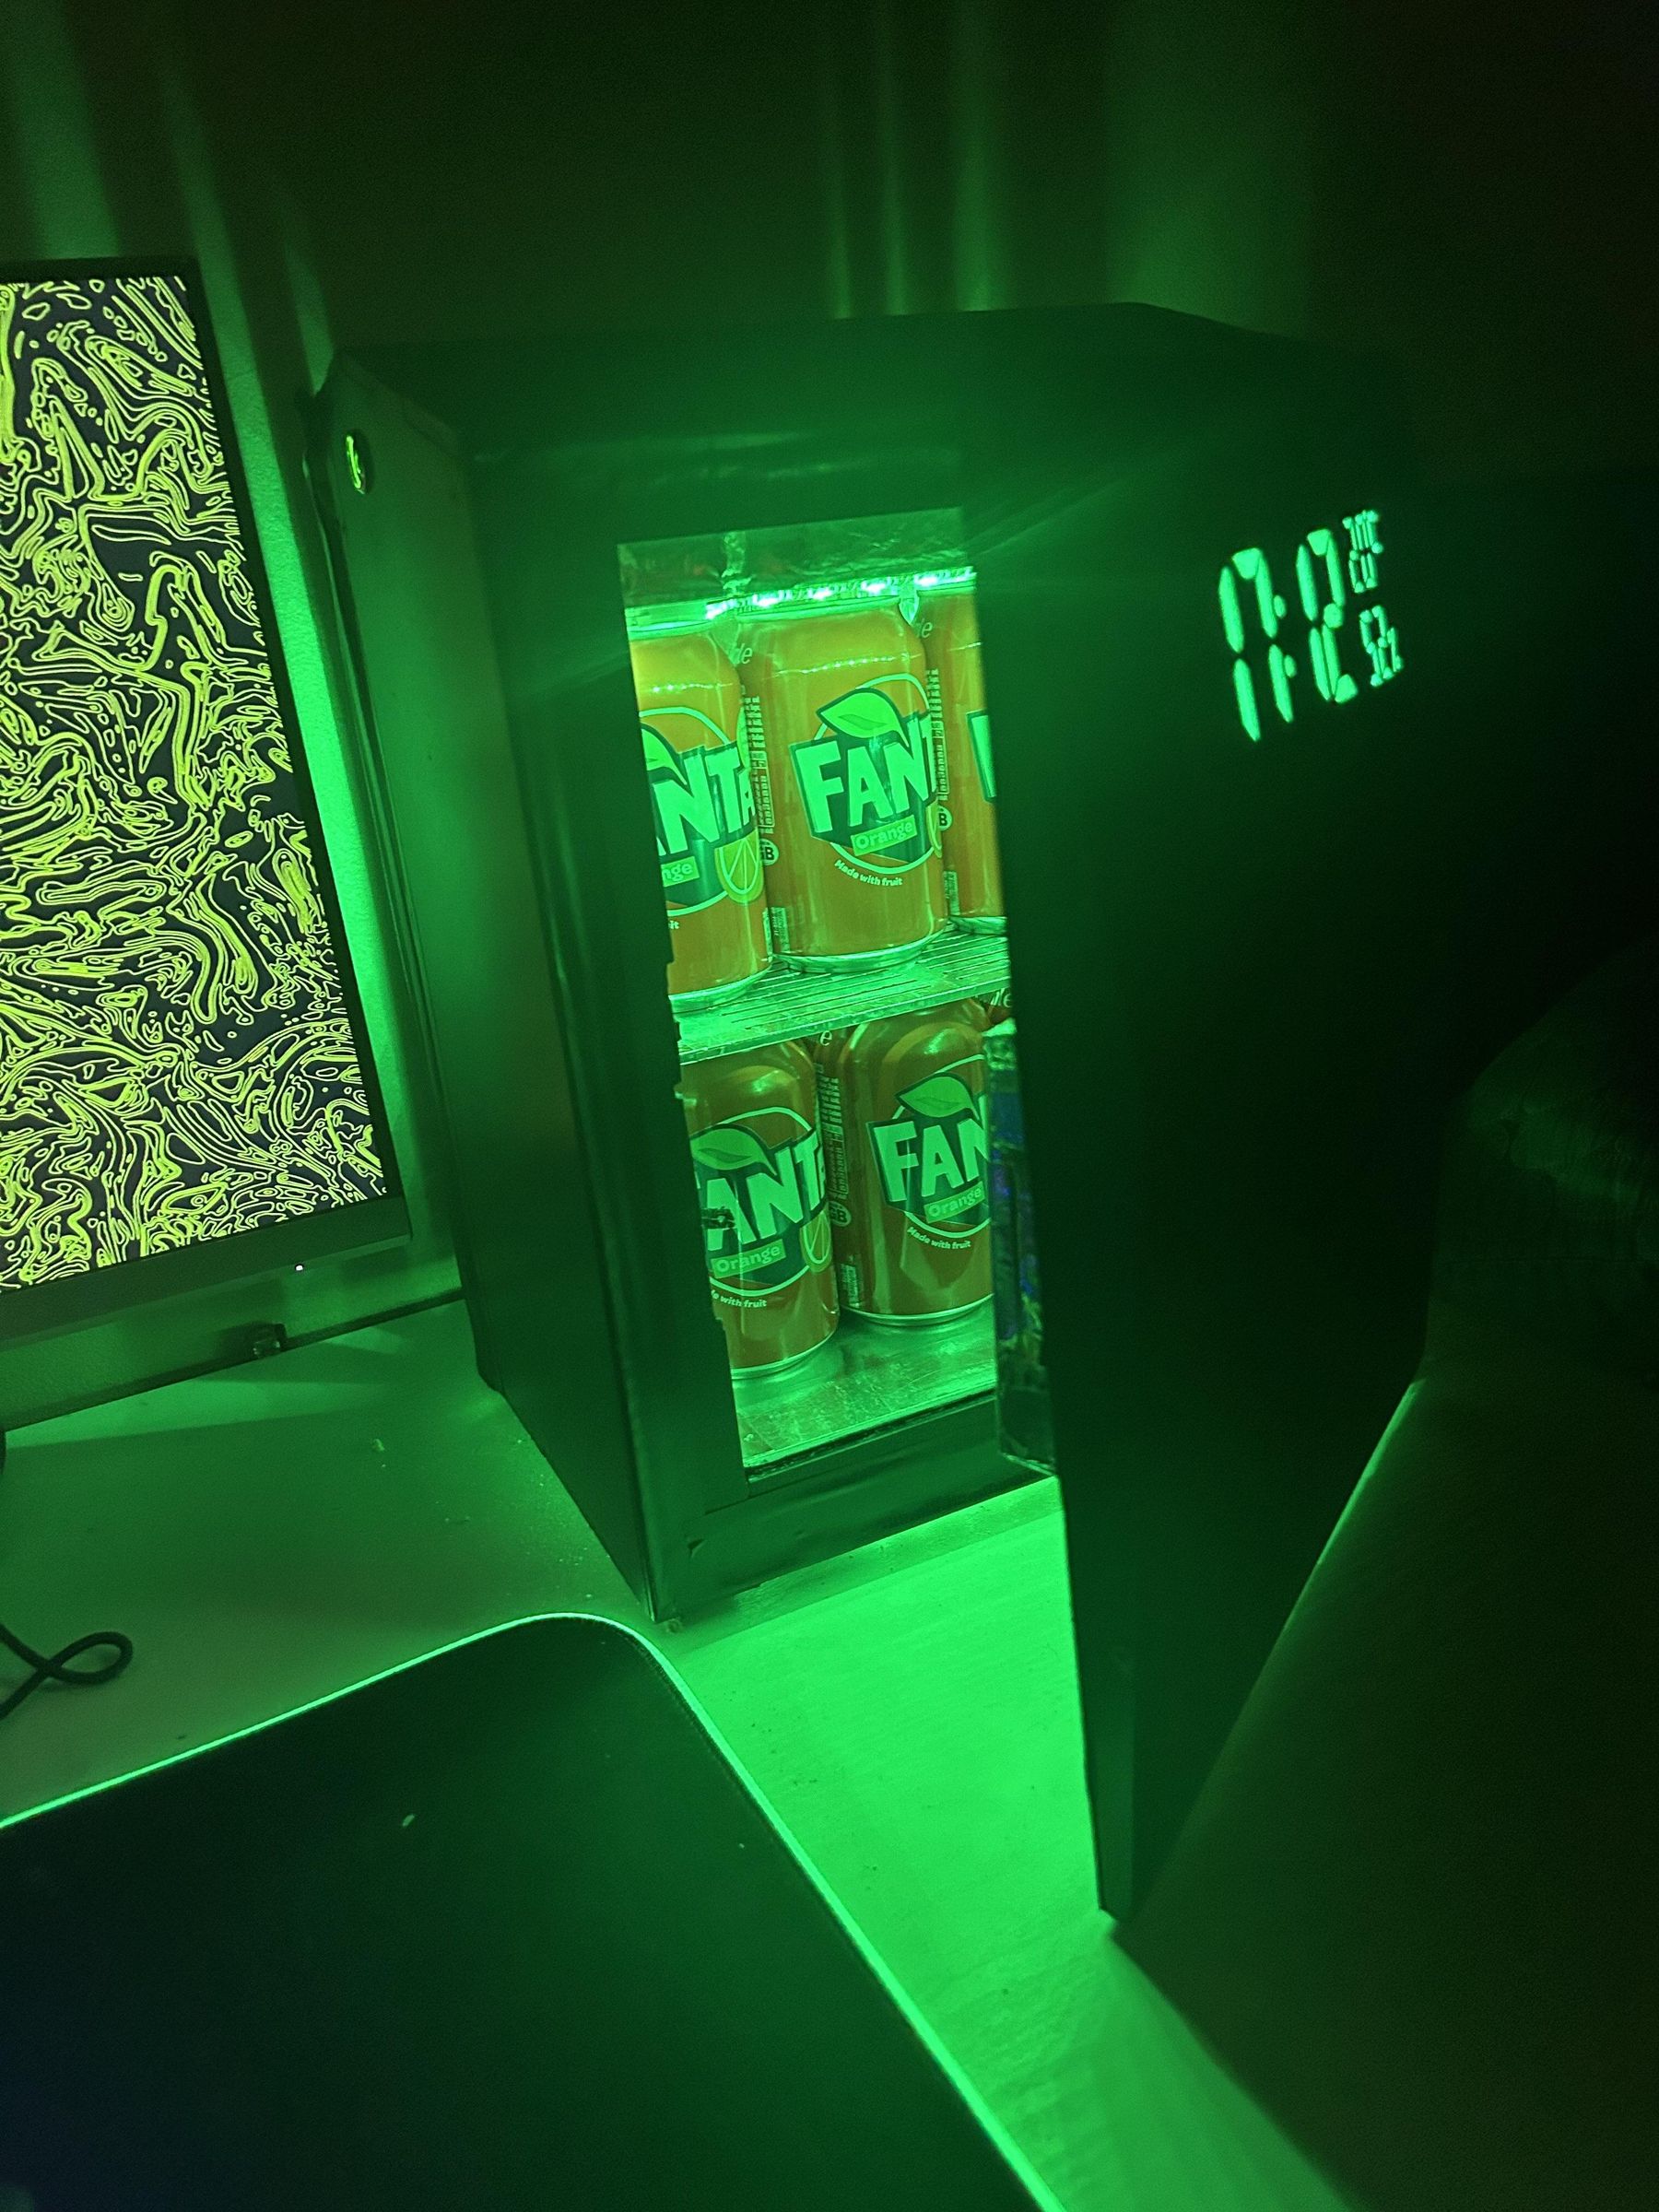
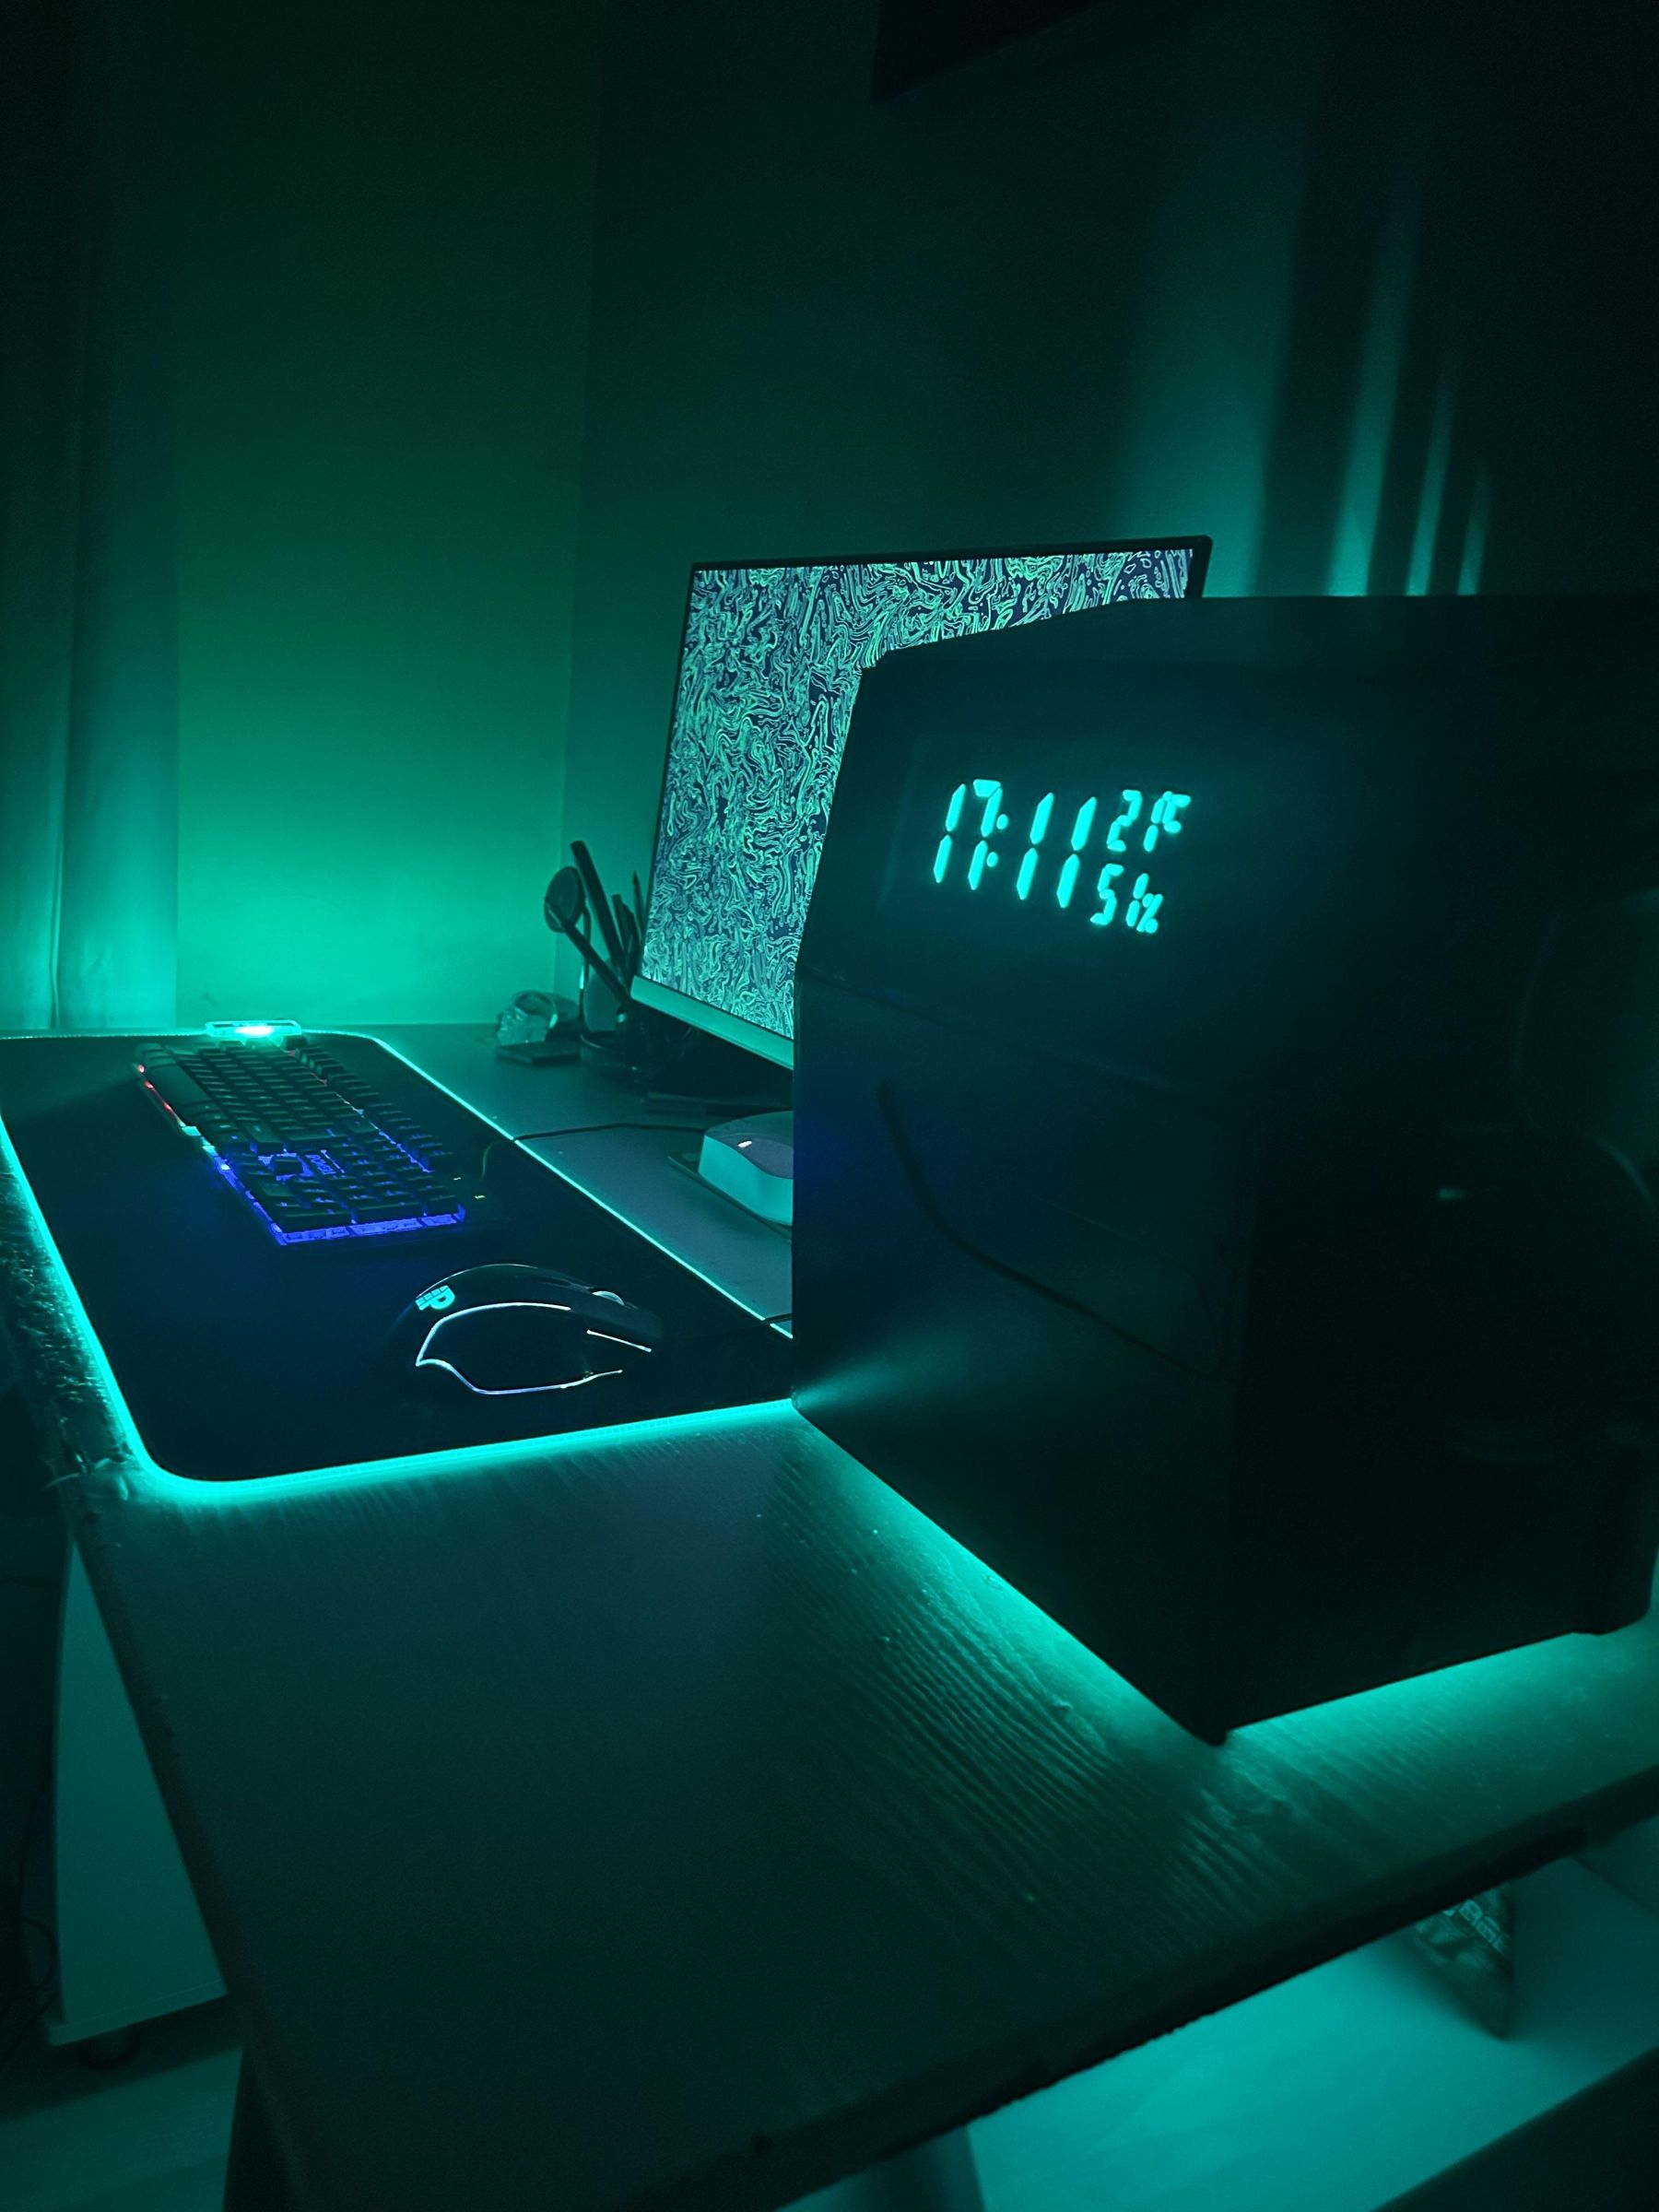
Hi, I am a student in the UK, and after going through a few hot UK summers, I wanted to build something that could keep cold drinks and snacks within arm's reach during long gaming and study sessions. The result is this Cyberpunk-inspired desktop DIY mini fridge designed to fit right into a modern gaming setup.
The fridge uses a thermoelectric Peltier cooling system instead of a traditional compressor. I gave it sharp, angular panels and an integrated handle (inspired by the Tesla Cybertruck design) and green internal lighting to create a futuristic look while keeping it small enough to sit comfortably on a desk.
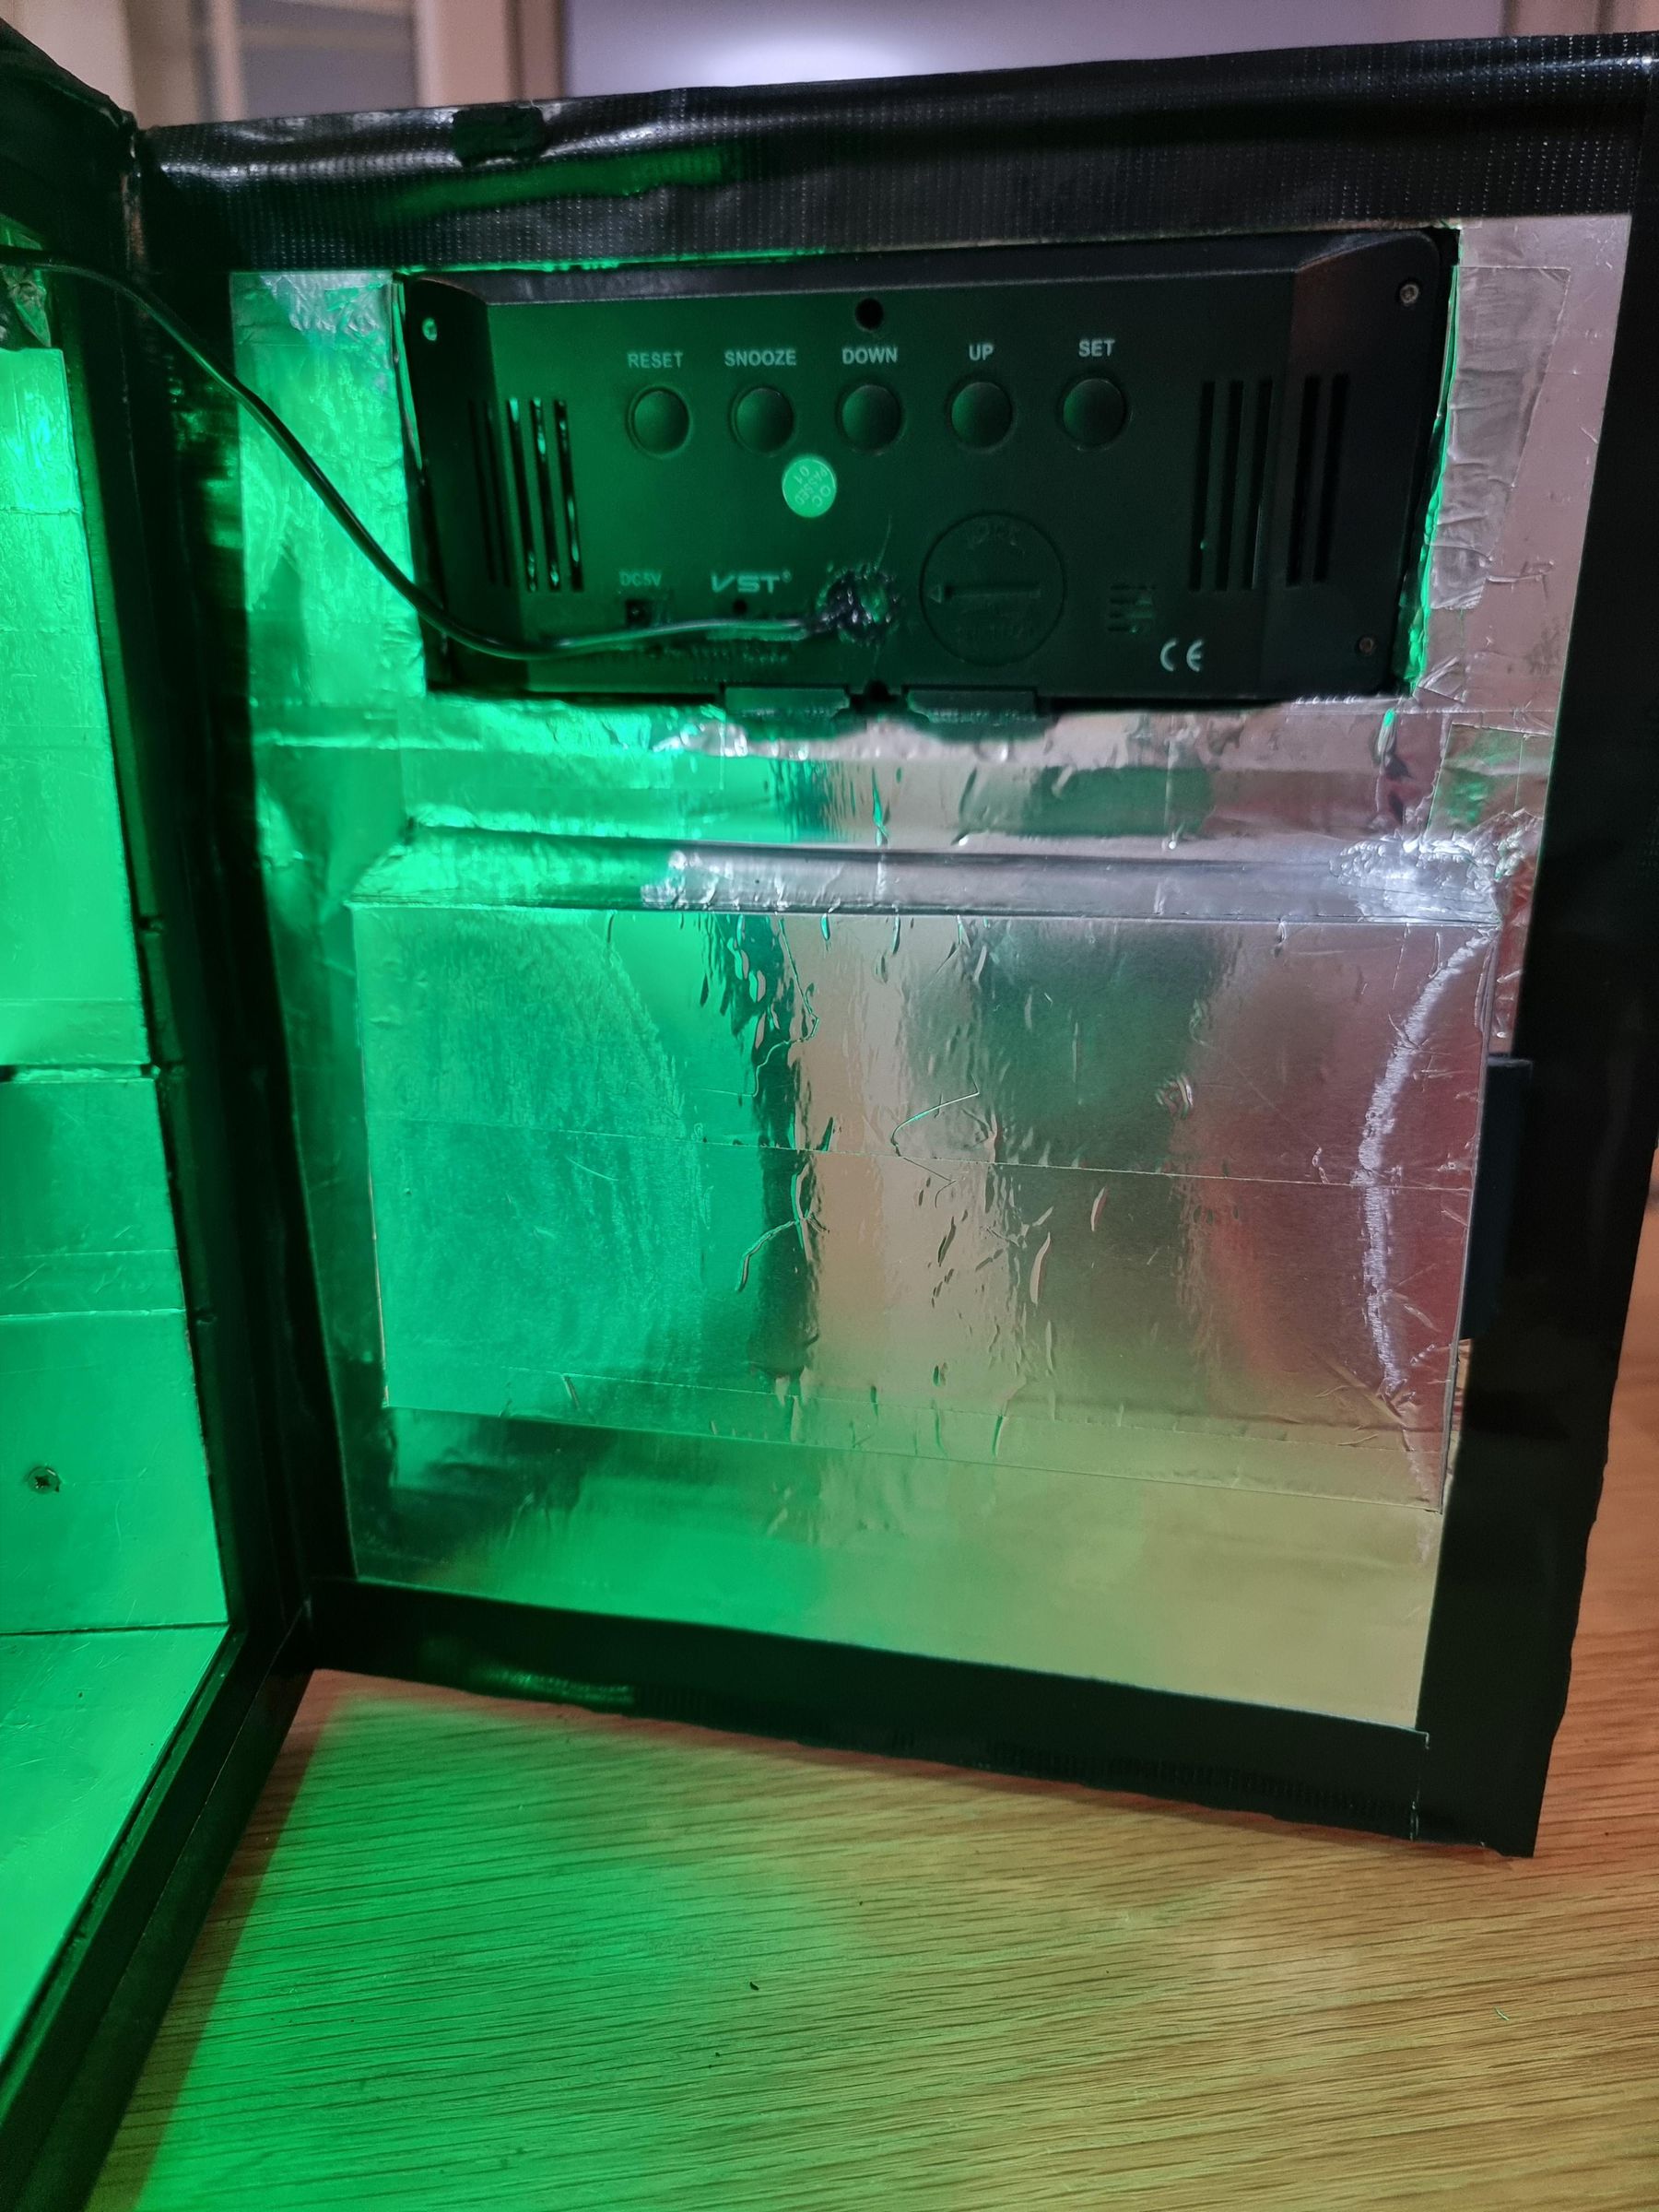
I also added a removable shelf, digital clock, temperature display, internal lighting, and headphone holder, making it more than just a cooler and helping it blend into a gaming setup.
In this Instructable, I'll show you how I designed and built the fridge, and explain how insulation, airflow, and the Peltier module affect its cooling performance so you can build your own custom desktop cooler.
*A quick note about AI: I designed, built, and tested this project myself. I used AI only to help organise my written instructions and make this Instructable clearer and easier to follow.*
Supplies
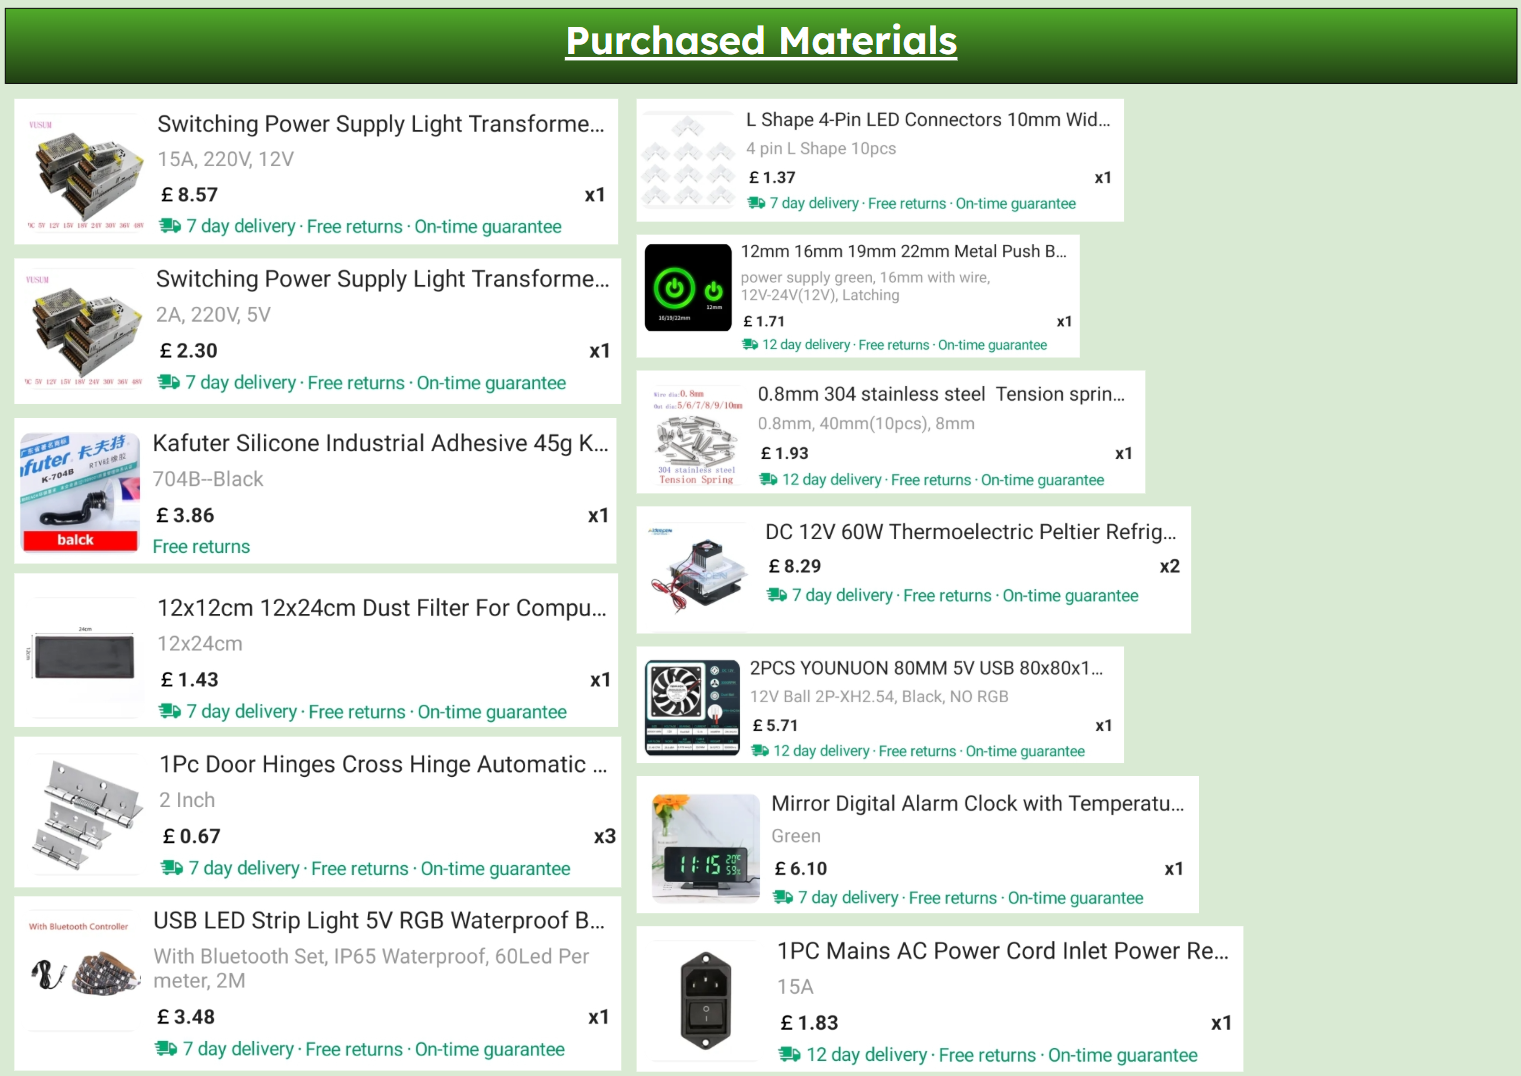
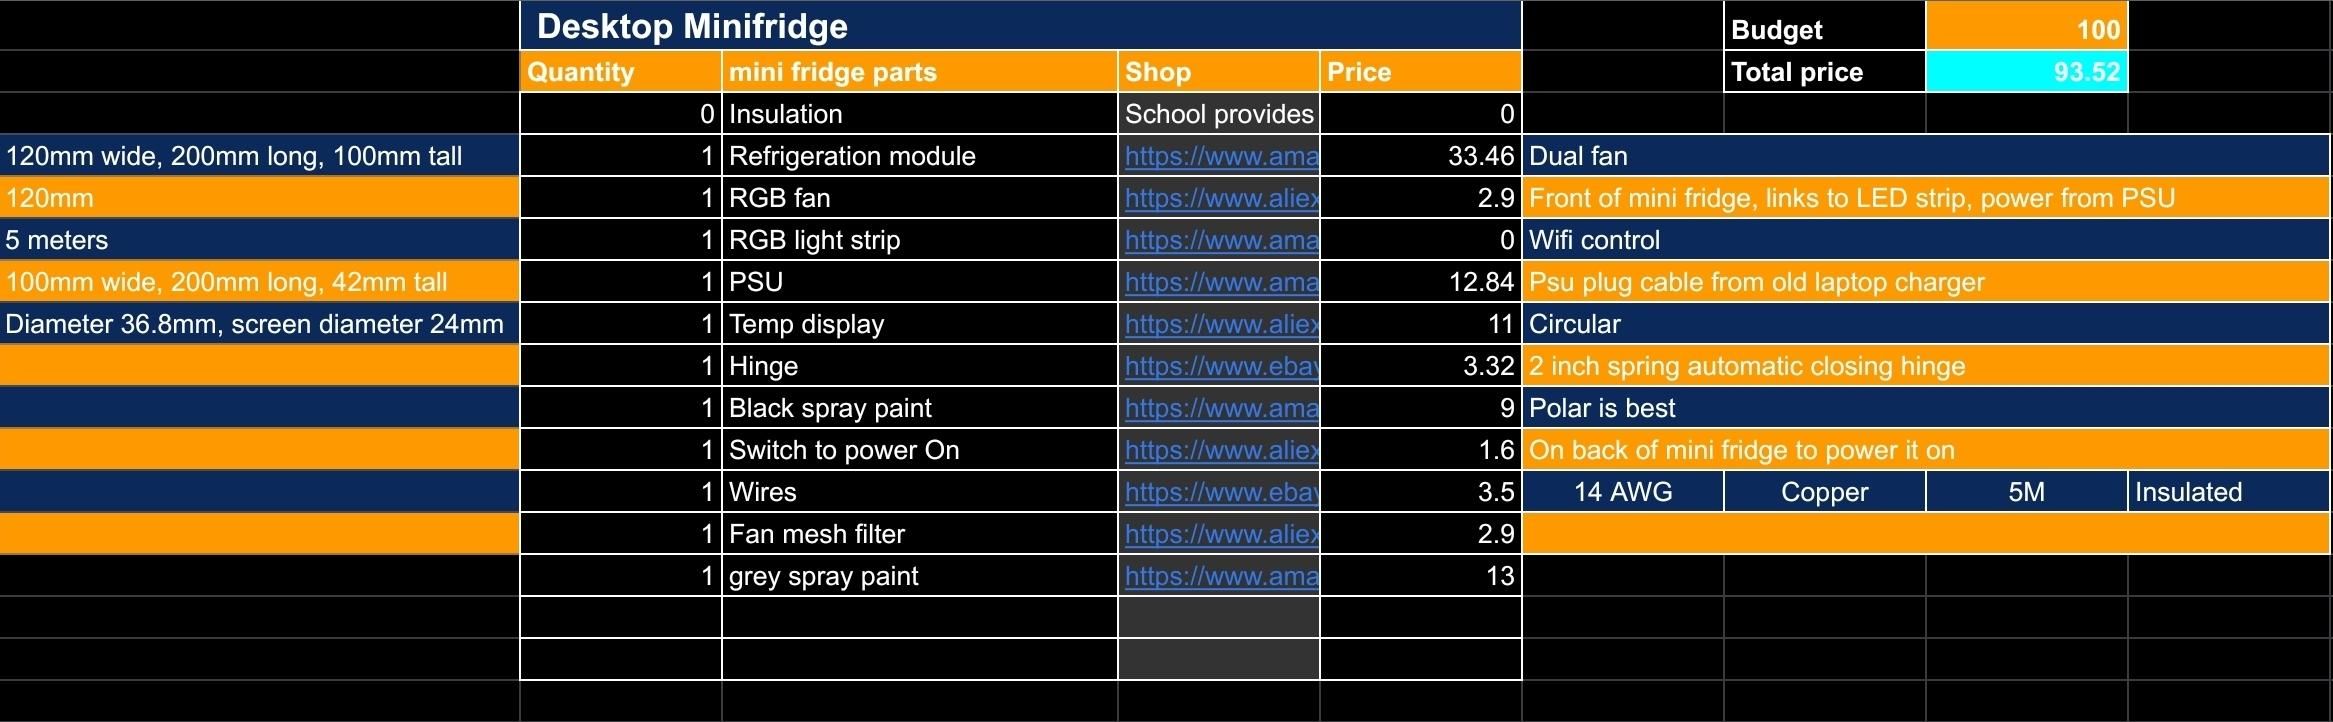
Main Materials I Used
- 3 mm acrylic sheet for the inside lining
- 6 mm MDF sheet for the main outer box
- 3 mm MDF sheet for the front frame and smaller panels
- Polystyrene, polyurethane foam, or reused packaging foam for insulation
- Aluminium foil tape for the inside cooling surface
- PLA filament for 3D-printed parts, such as the handle mechanism
- Small piece of wood or oak for the headphone holder
- Small screws, preferably M3 or M4
- M3 or M4 nuts / nylock nuts
- Hot glue sticks
- Silicone sealant or strong adhesive
- Double-sided tape
Cooling and Electronics
- Peltier thermoelectric cooling module
- Heat sink for the hot side of the Peltier module
- Small cooling fans
- Power supply suitable for the Peltier module and fans
- Power socket / DC connector
- On/off switch
- Temperature display
- LED strip or small internal LED light
- Wires
- Heat-shrink tubing or electrical tape
Tools
- CAD software, such as Fusion 360
- Laser cutter, or a saw if cutting the panels by hand
- 3D printer
- Drill
- Screwdriver
- Hot glue gun
- Craft knife
- Ruler or measuring tape
- Sandpaper or file
- Soldering iron, if soldering the electronics
- Clamps, optional but useful
- Thermometer
Safety Equipment
- Safety glasses
- Heat-resistant gloves when using hot glue or heat-forming plastic
- Mask or ventilation when cutting, sanding, spray painting, or using adhesives
- Basic electrical safety equipment when wiring and testing the power supply
**I provided a photo of the components I purchased online, however the project can be done with cheaper parts and the LEDs and Clock aren't necessary! Parts can be upgraded too. I recommend if you want to try this project to use lower current Peltier modules and using thin aluminum sheets inside the fridge rather than aluminum foil tape and acrylic.**
Designing
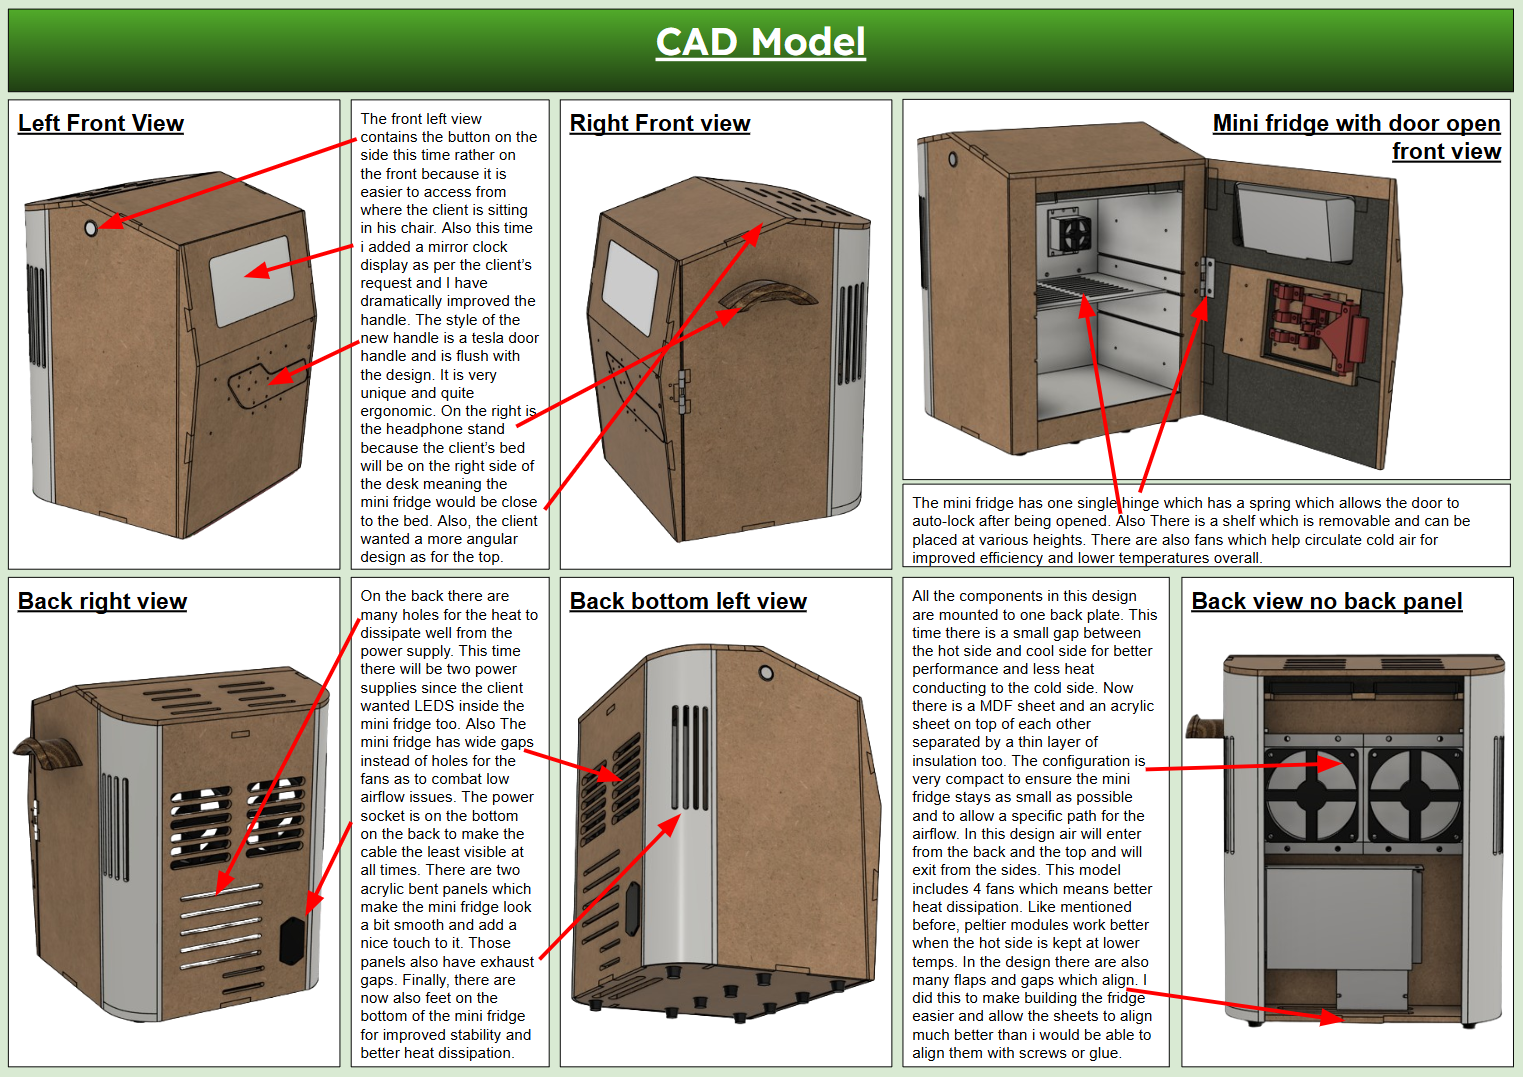
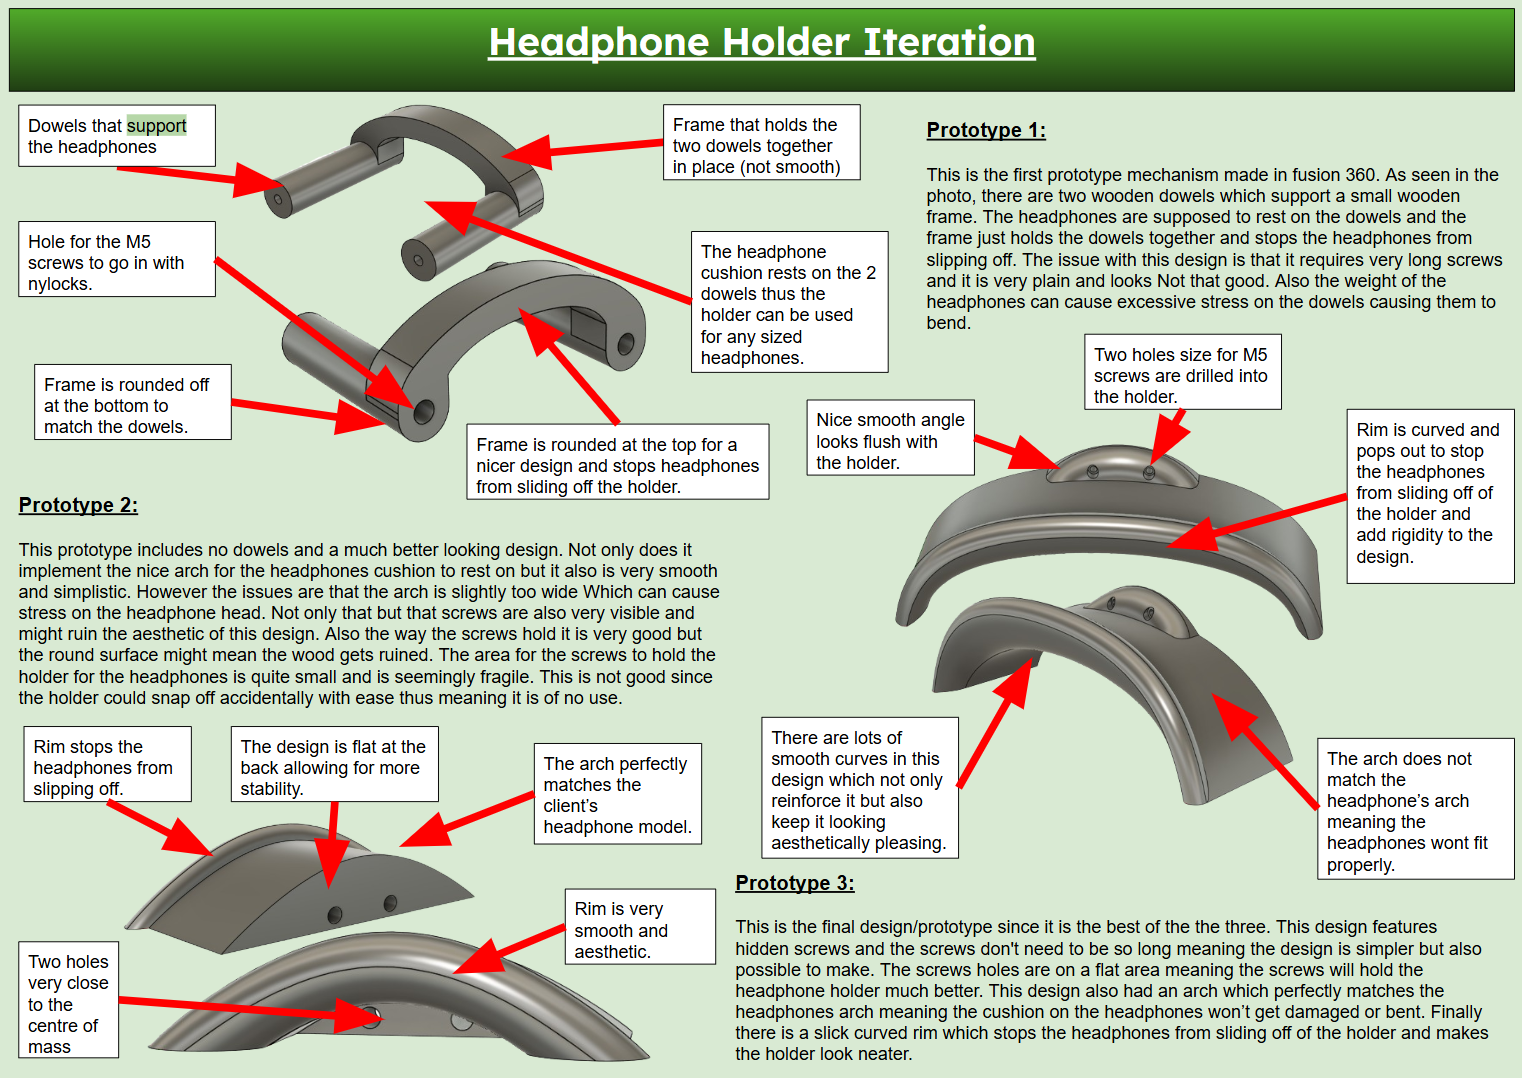
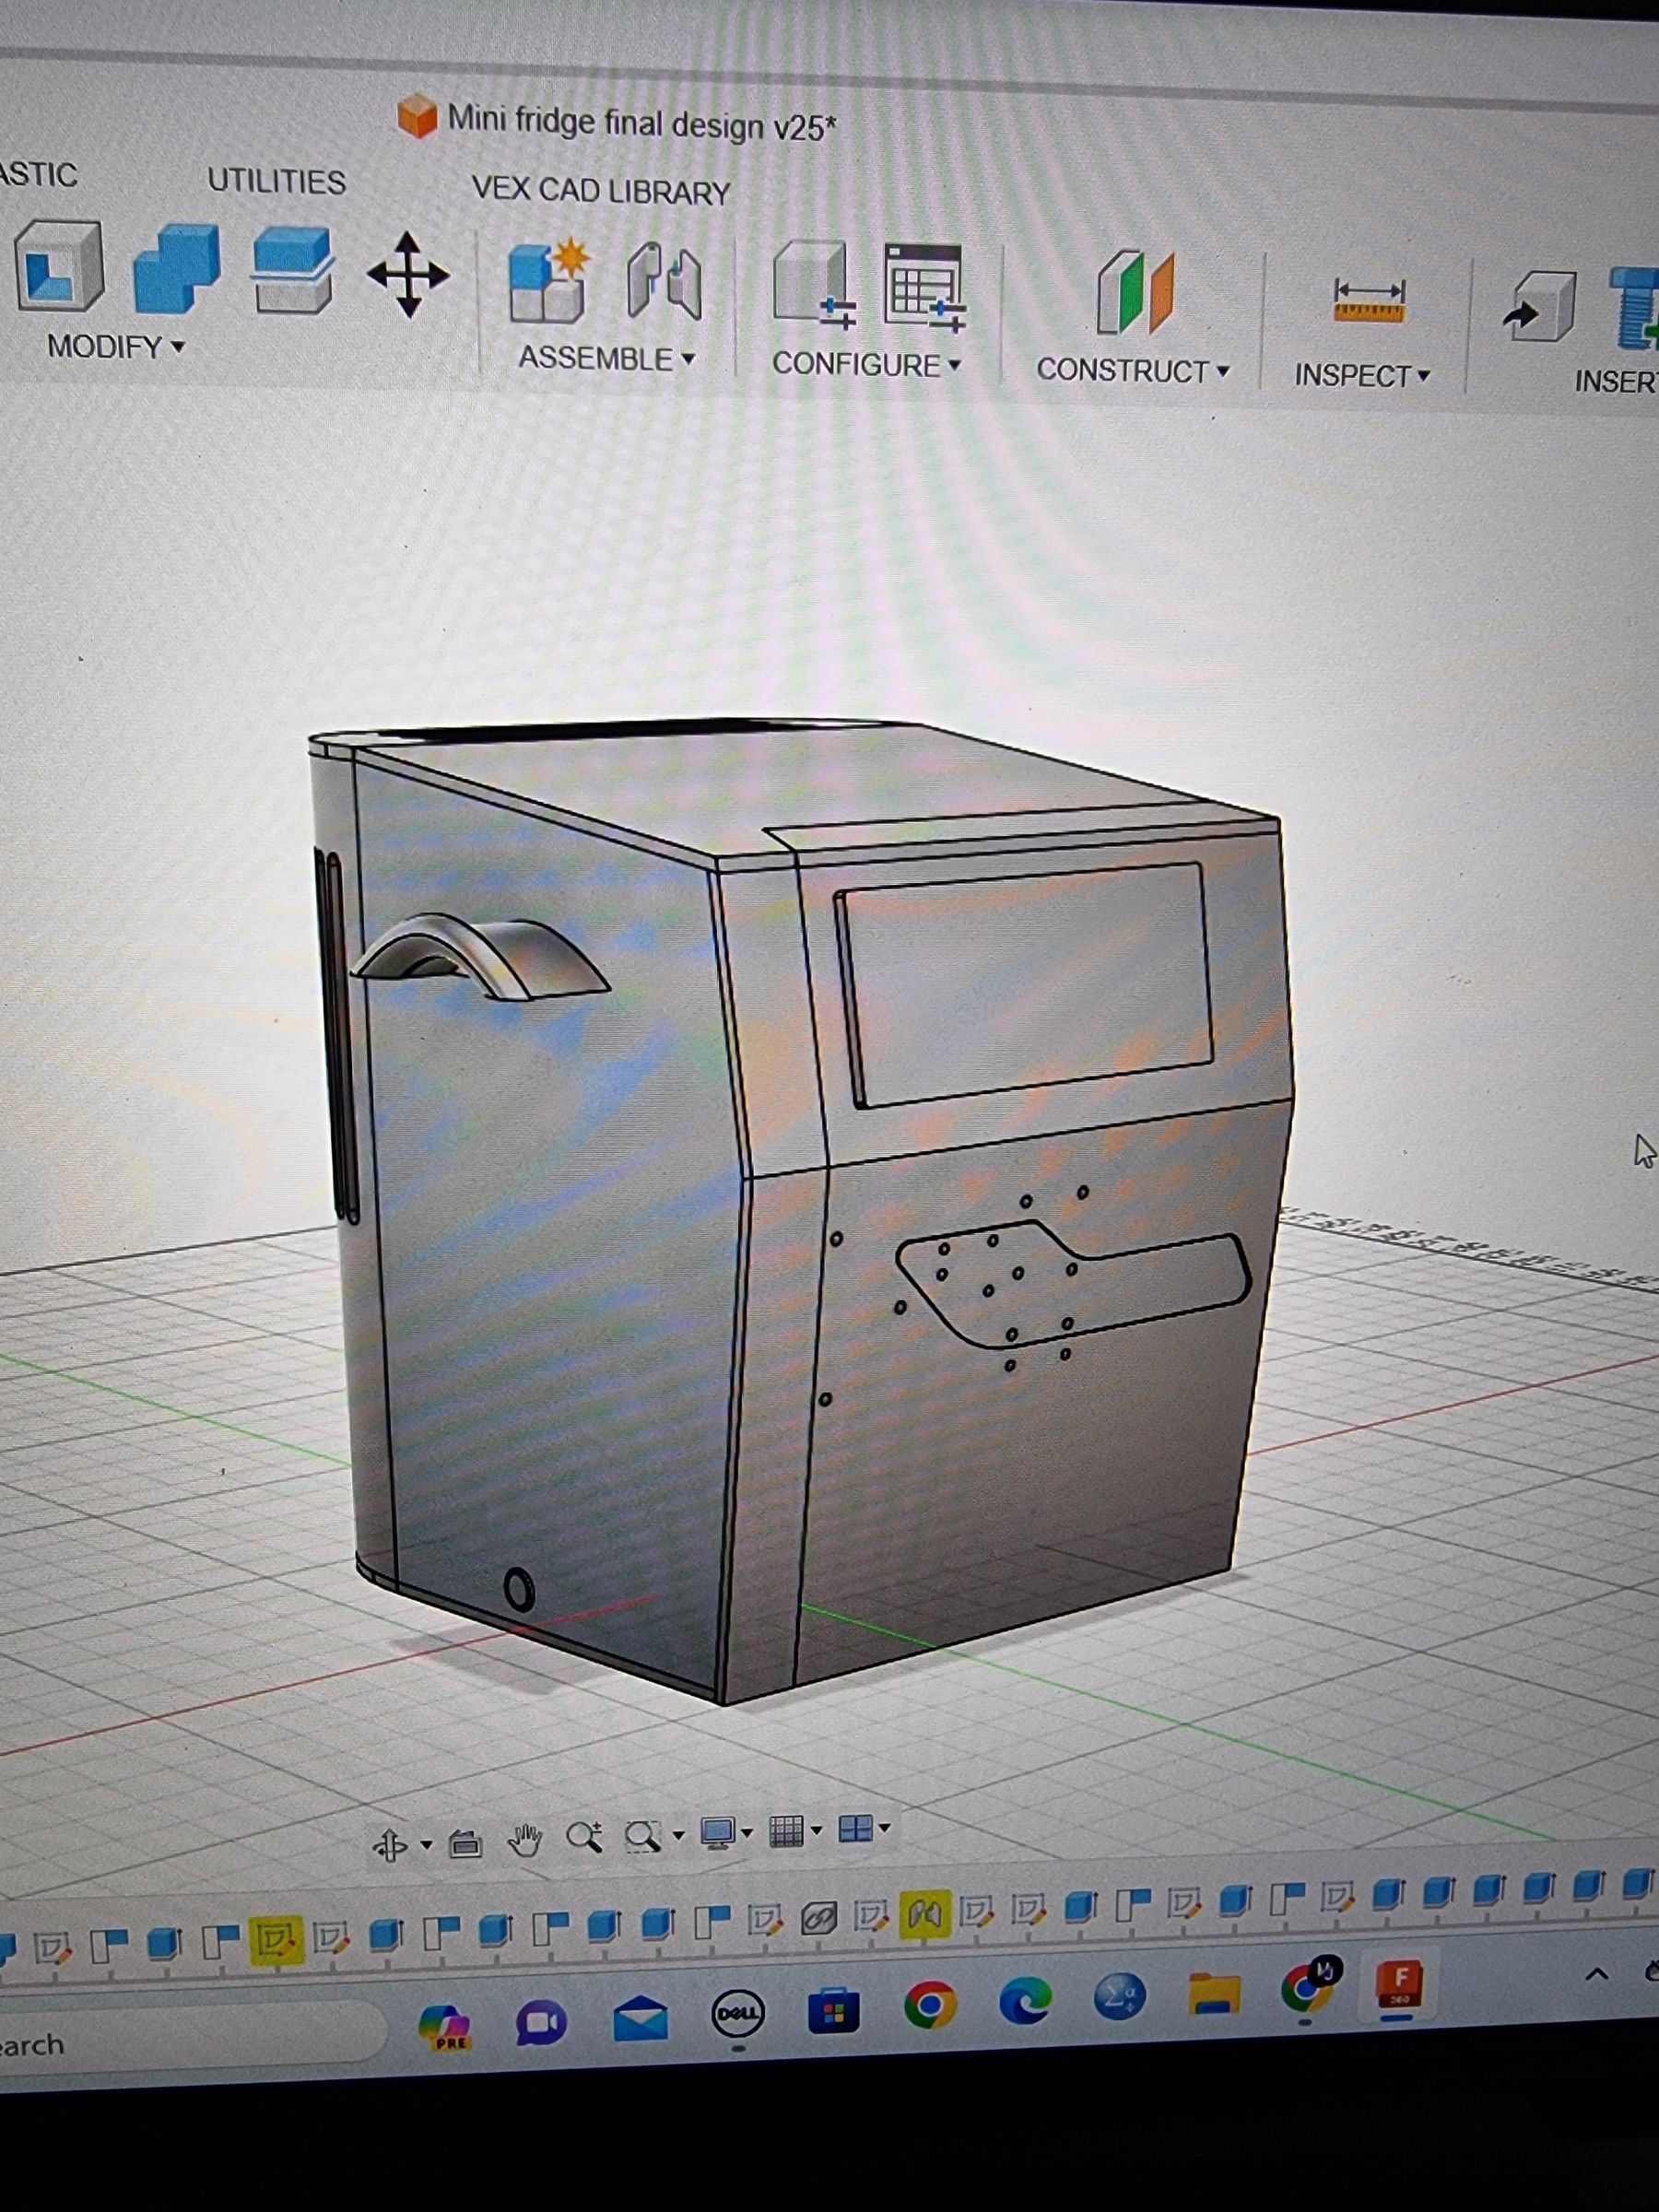
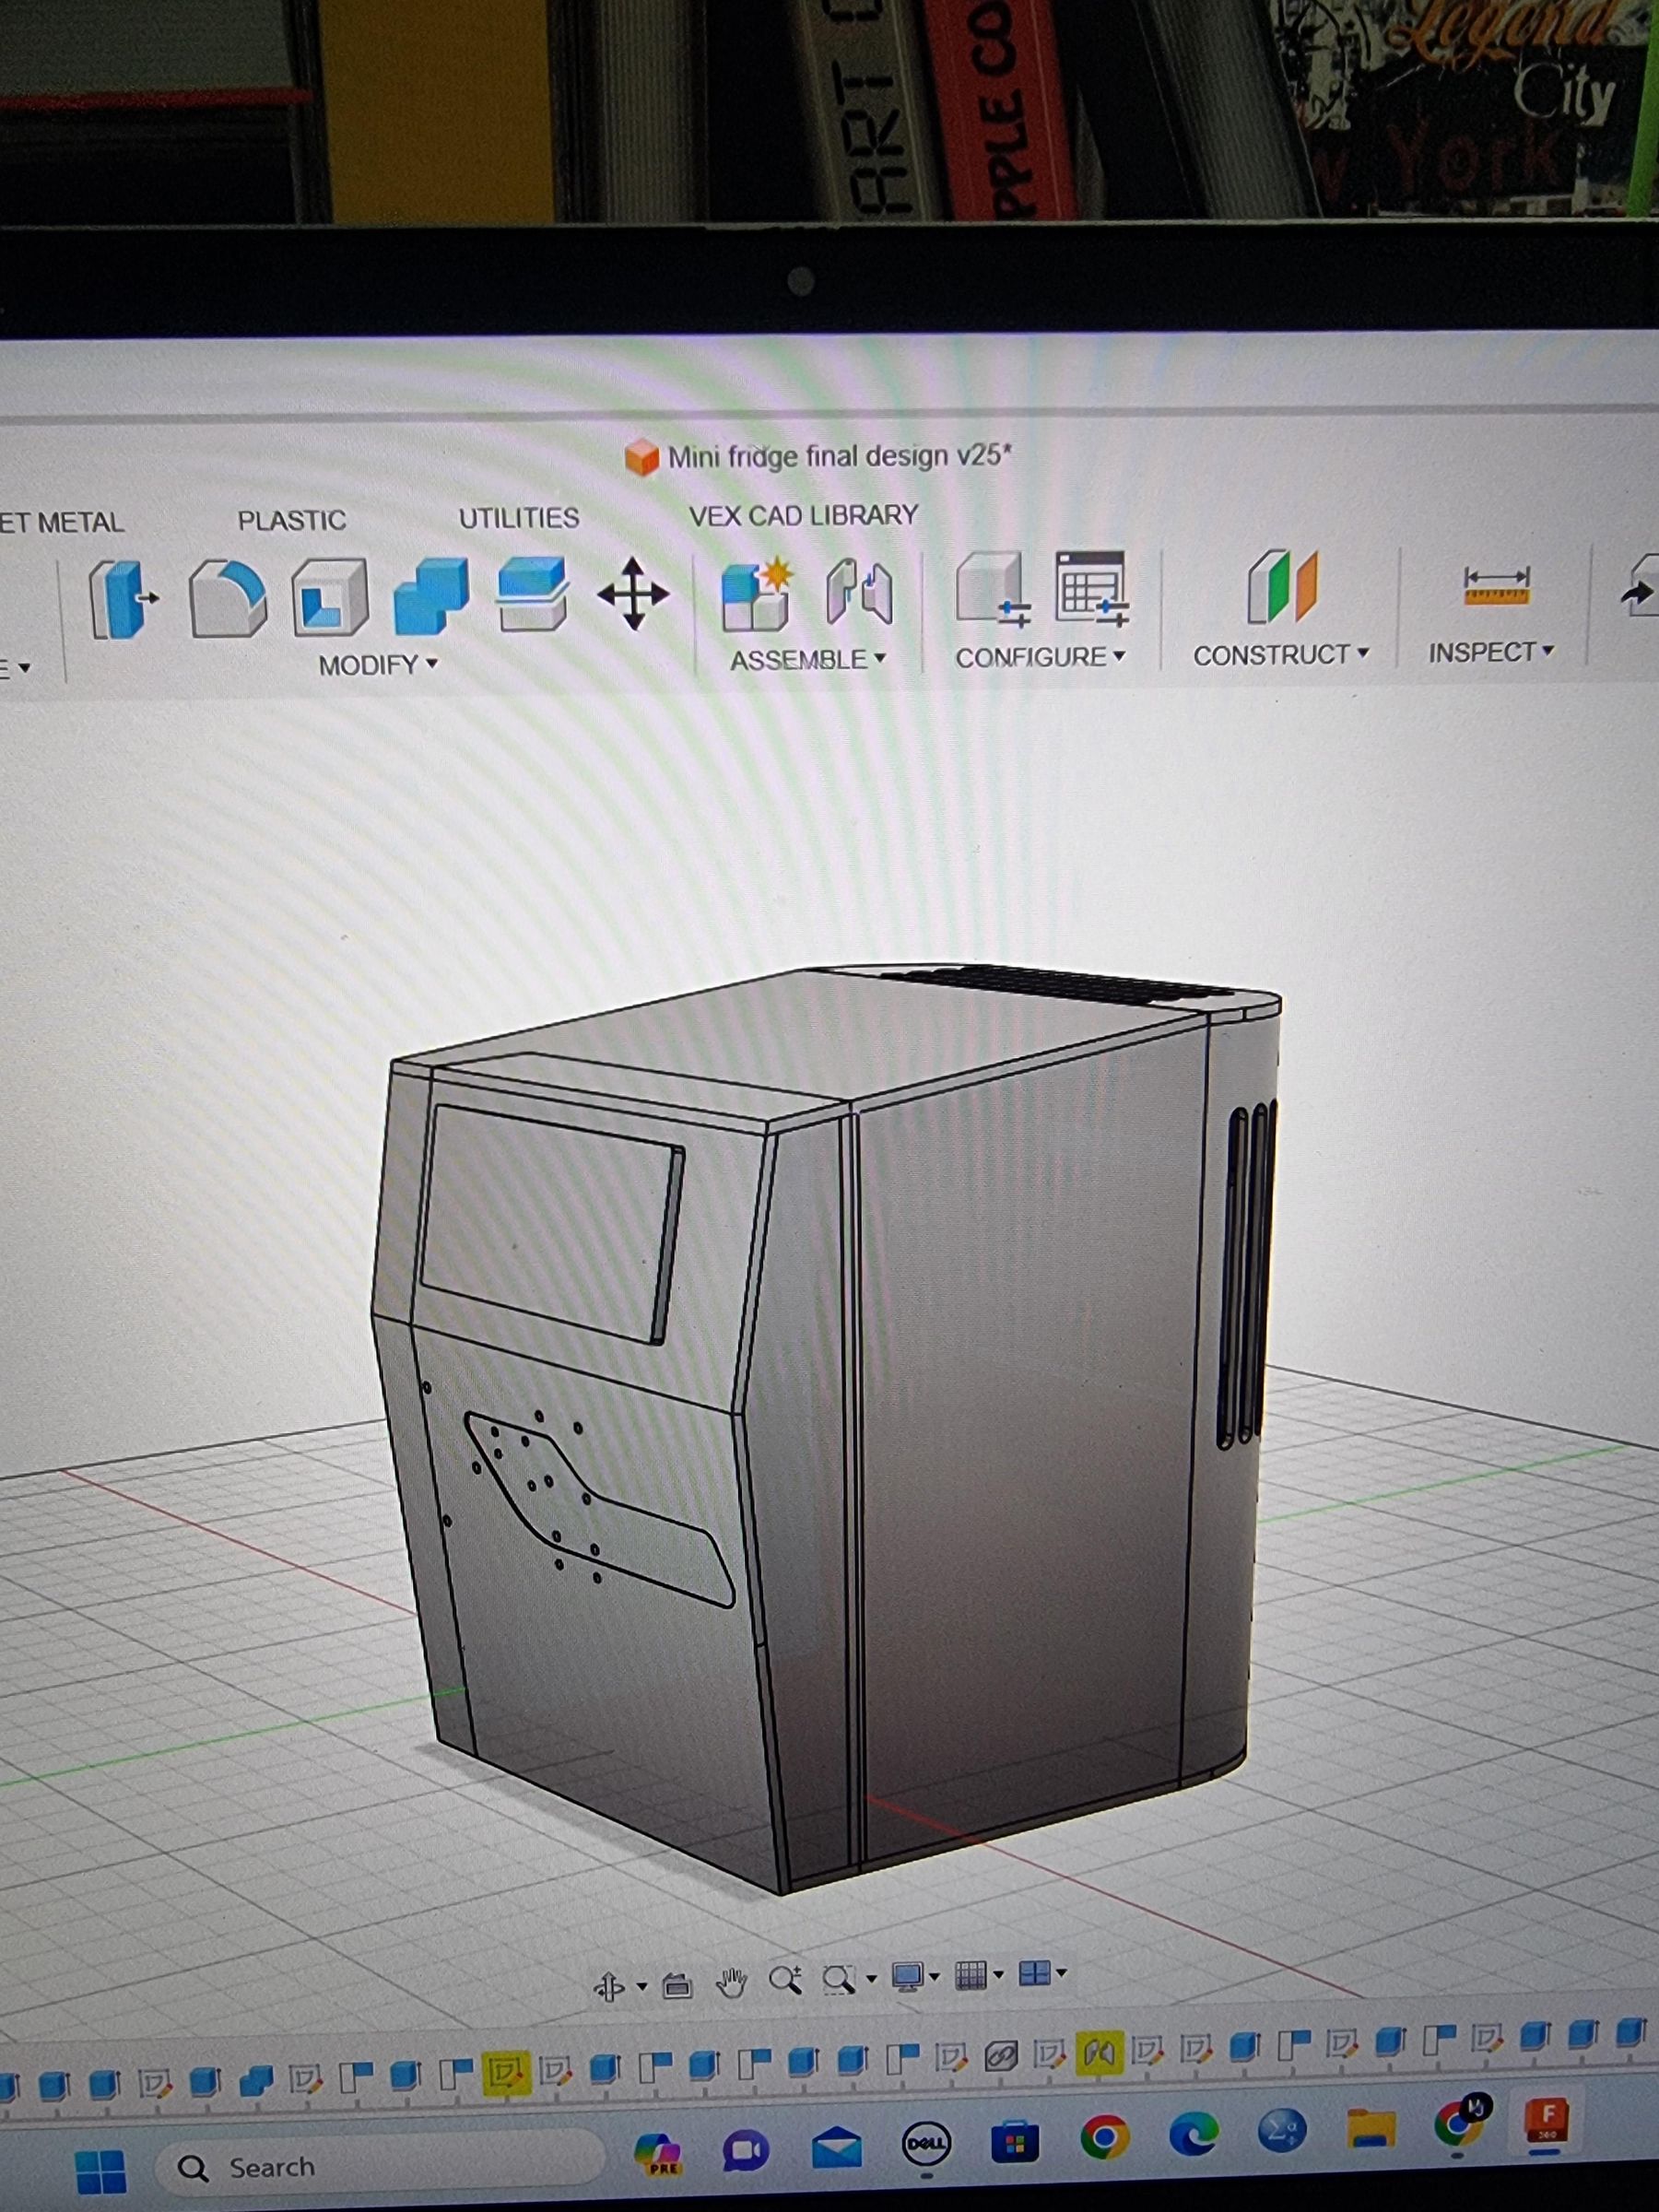
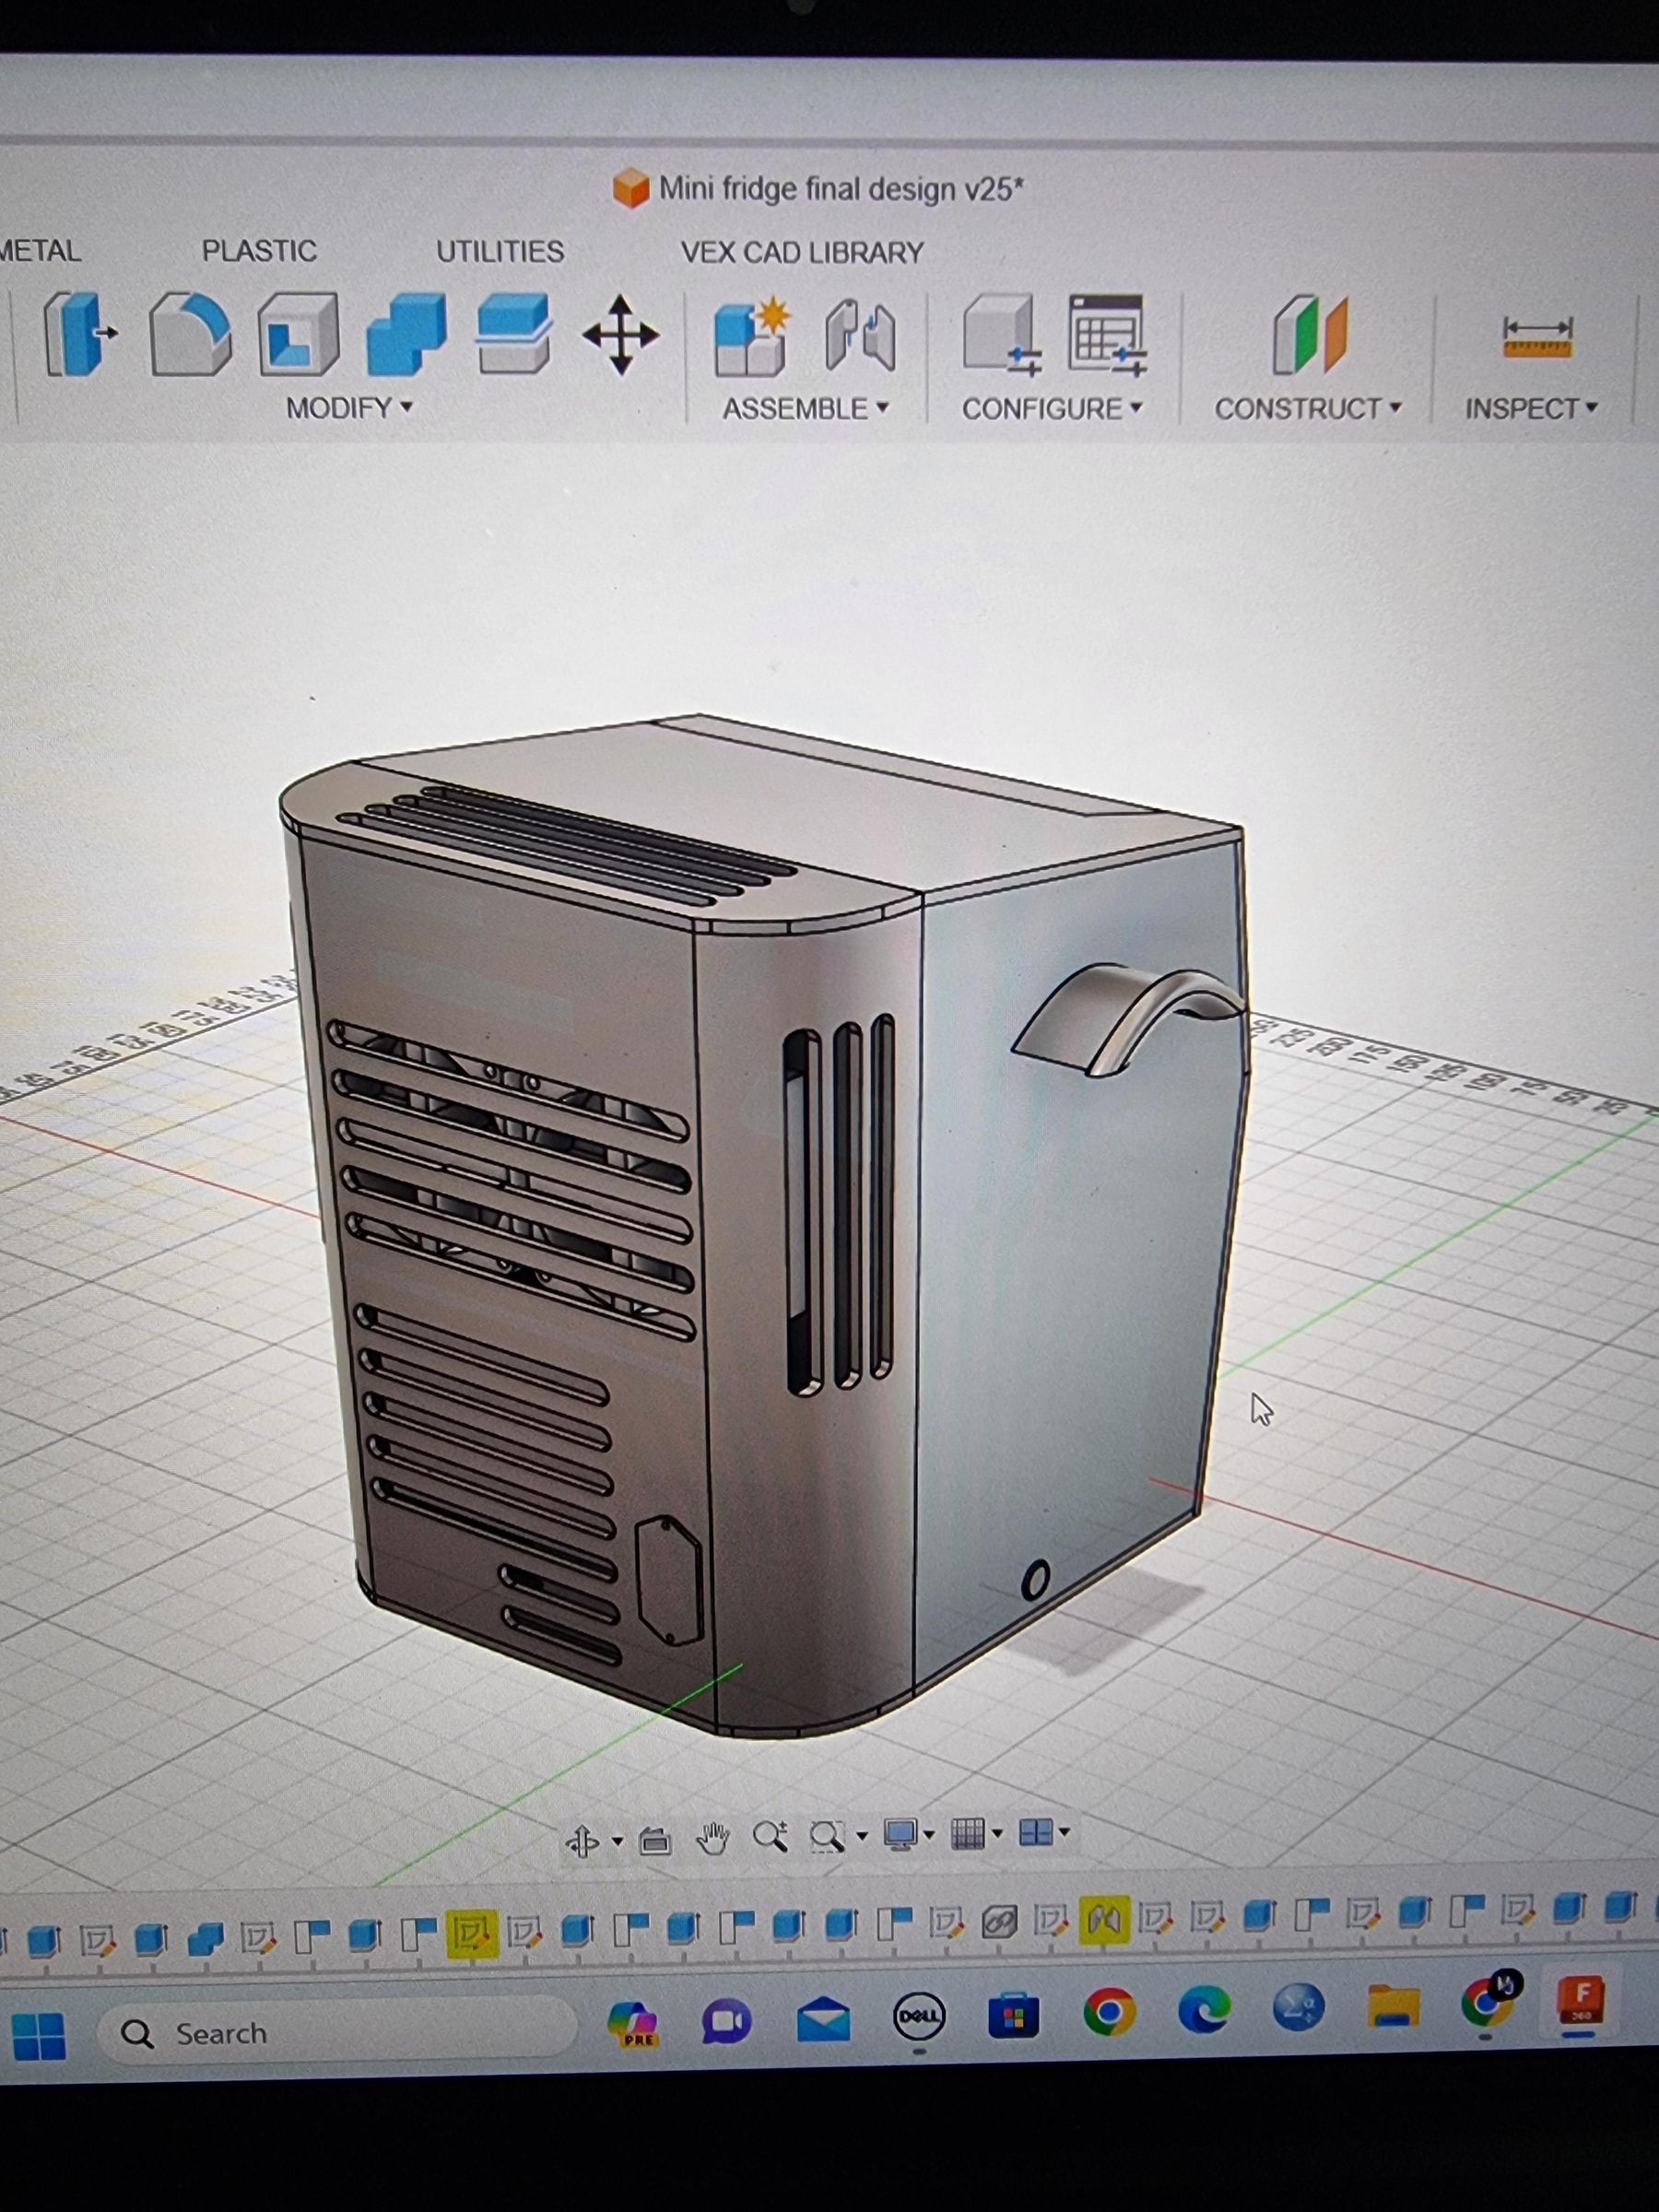
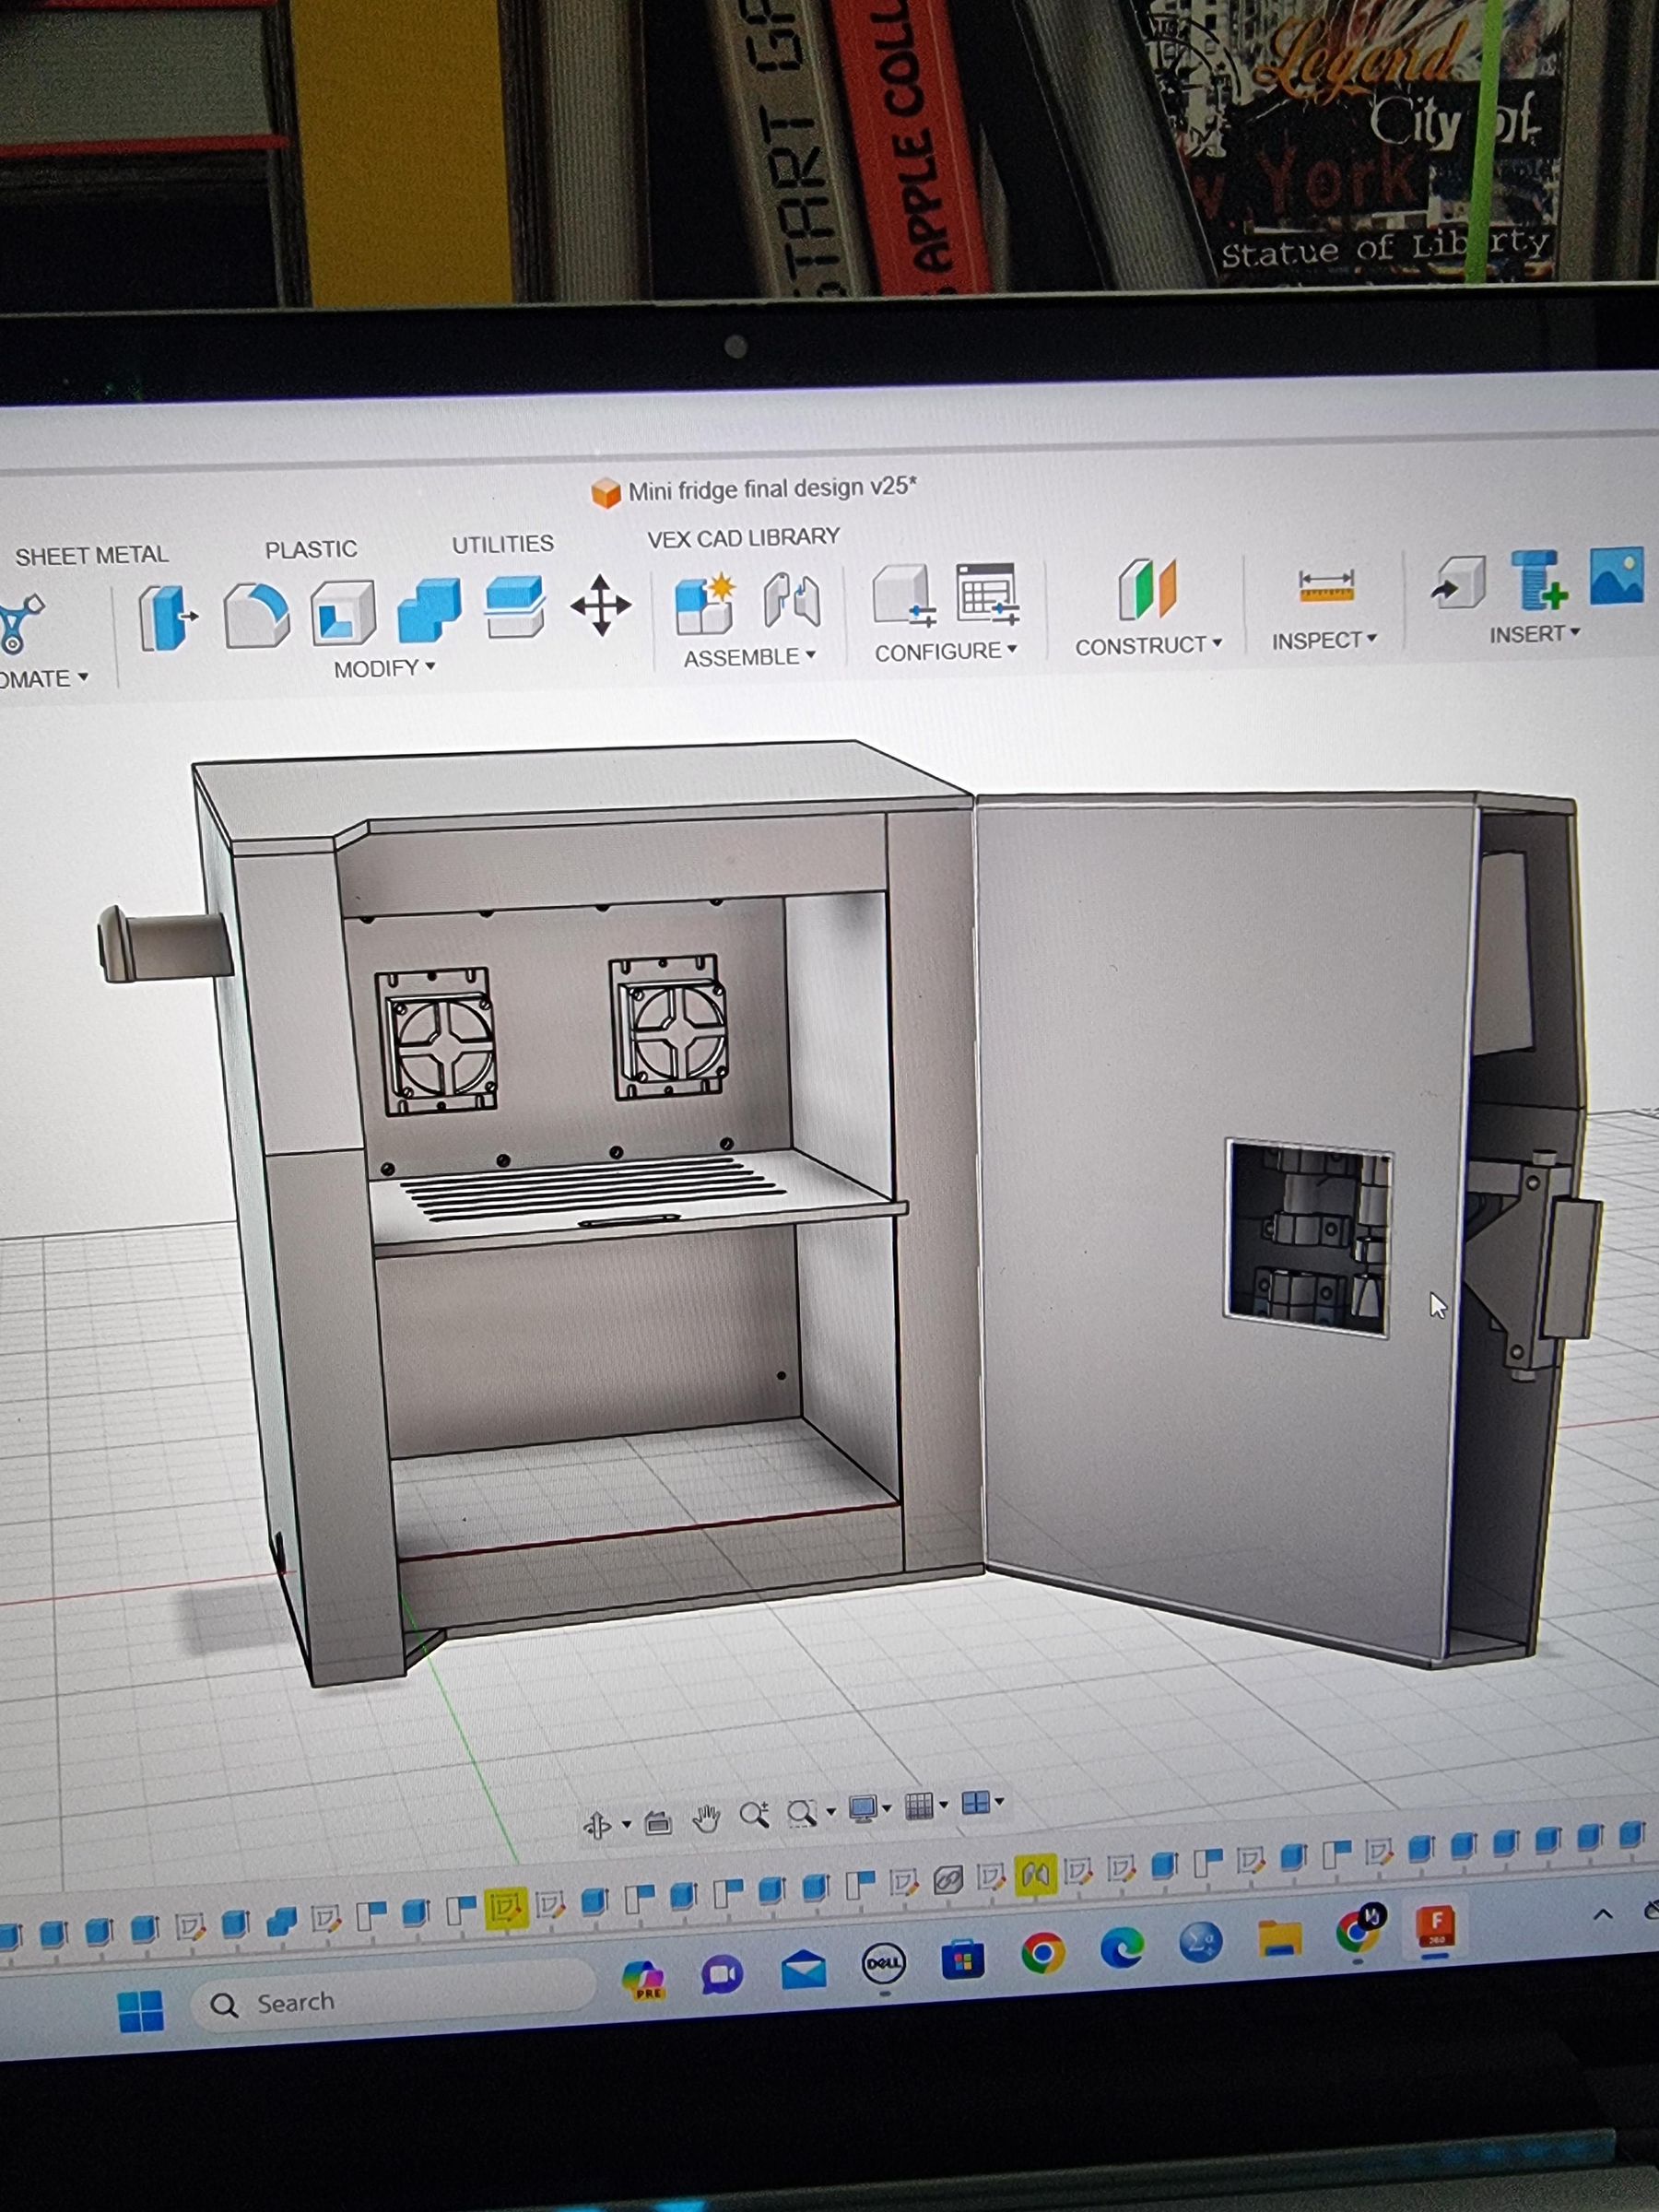
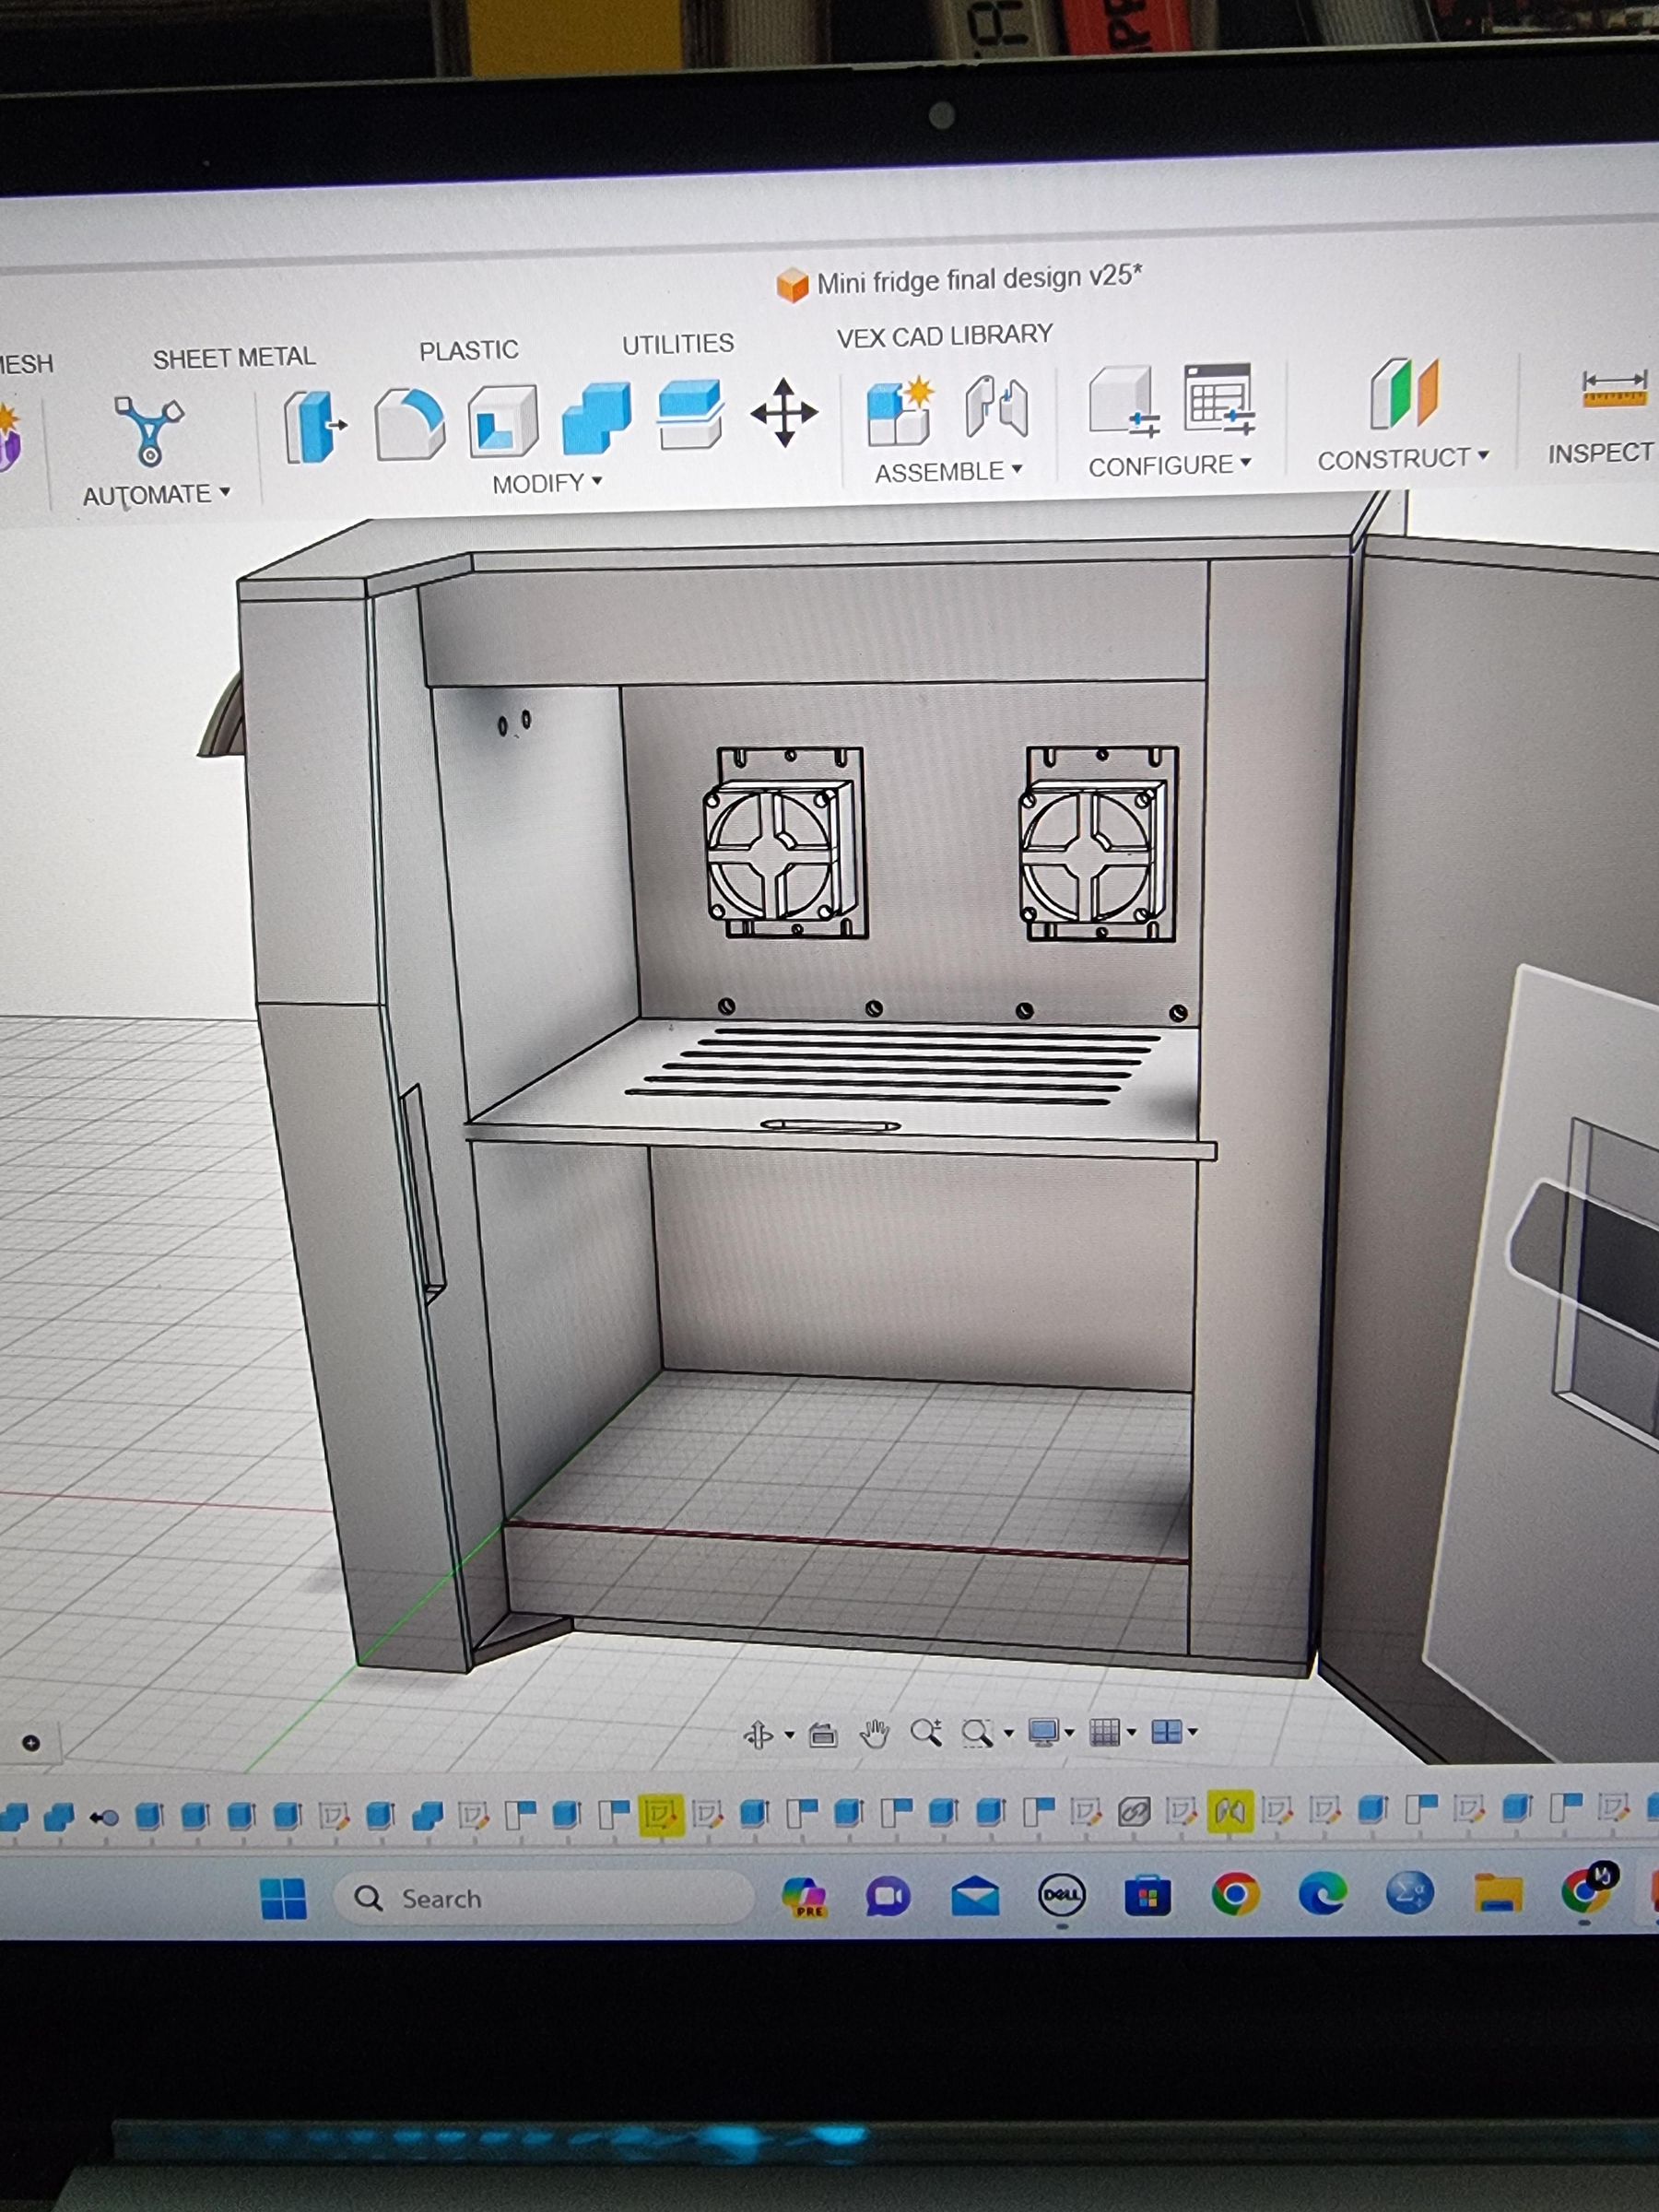
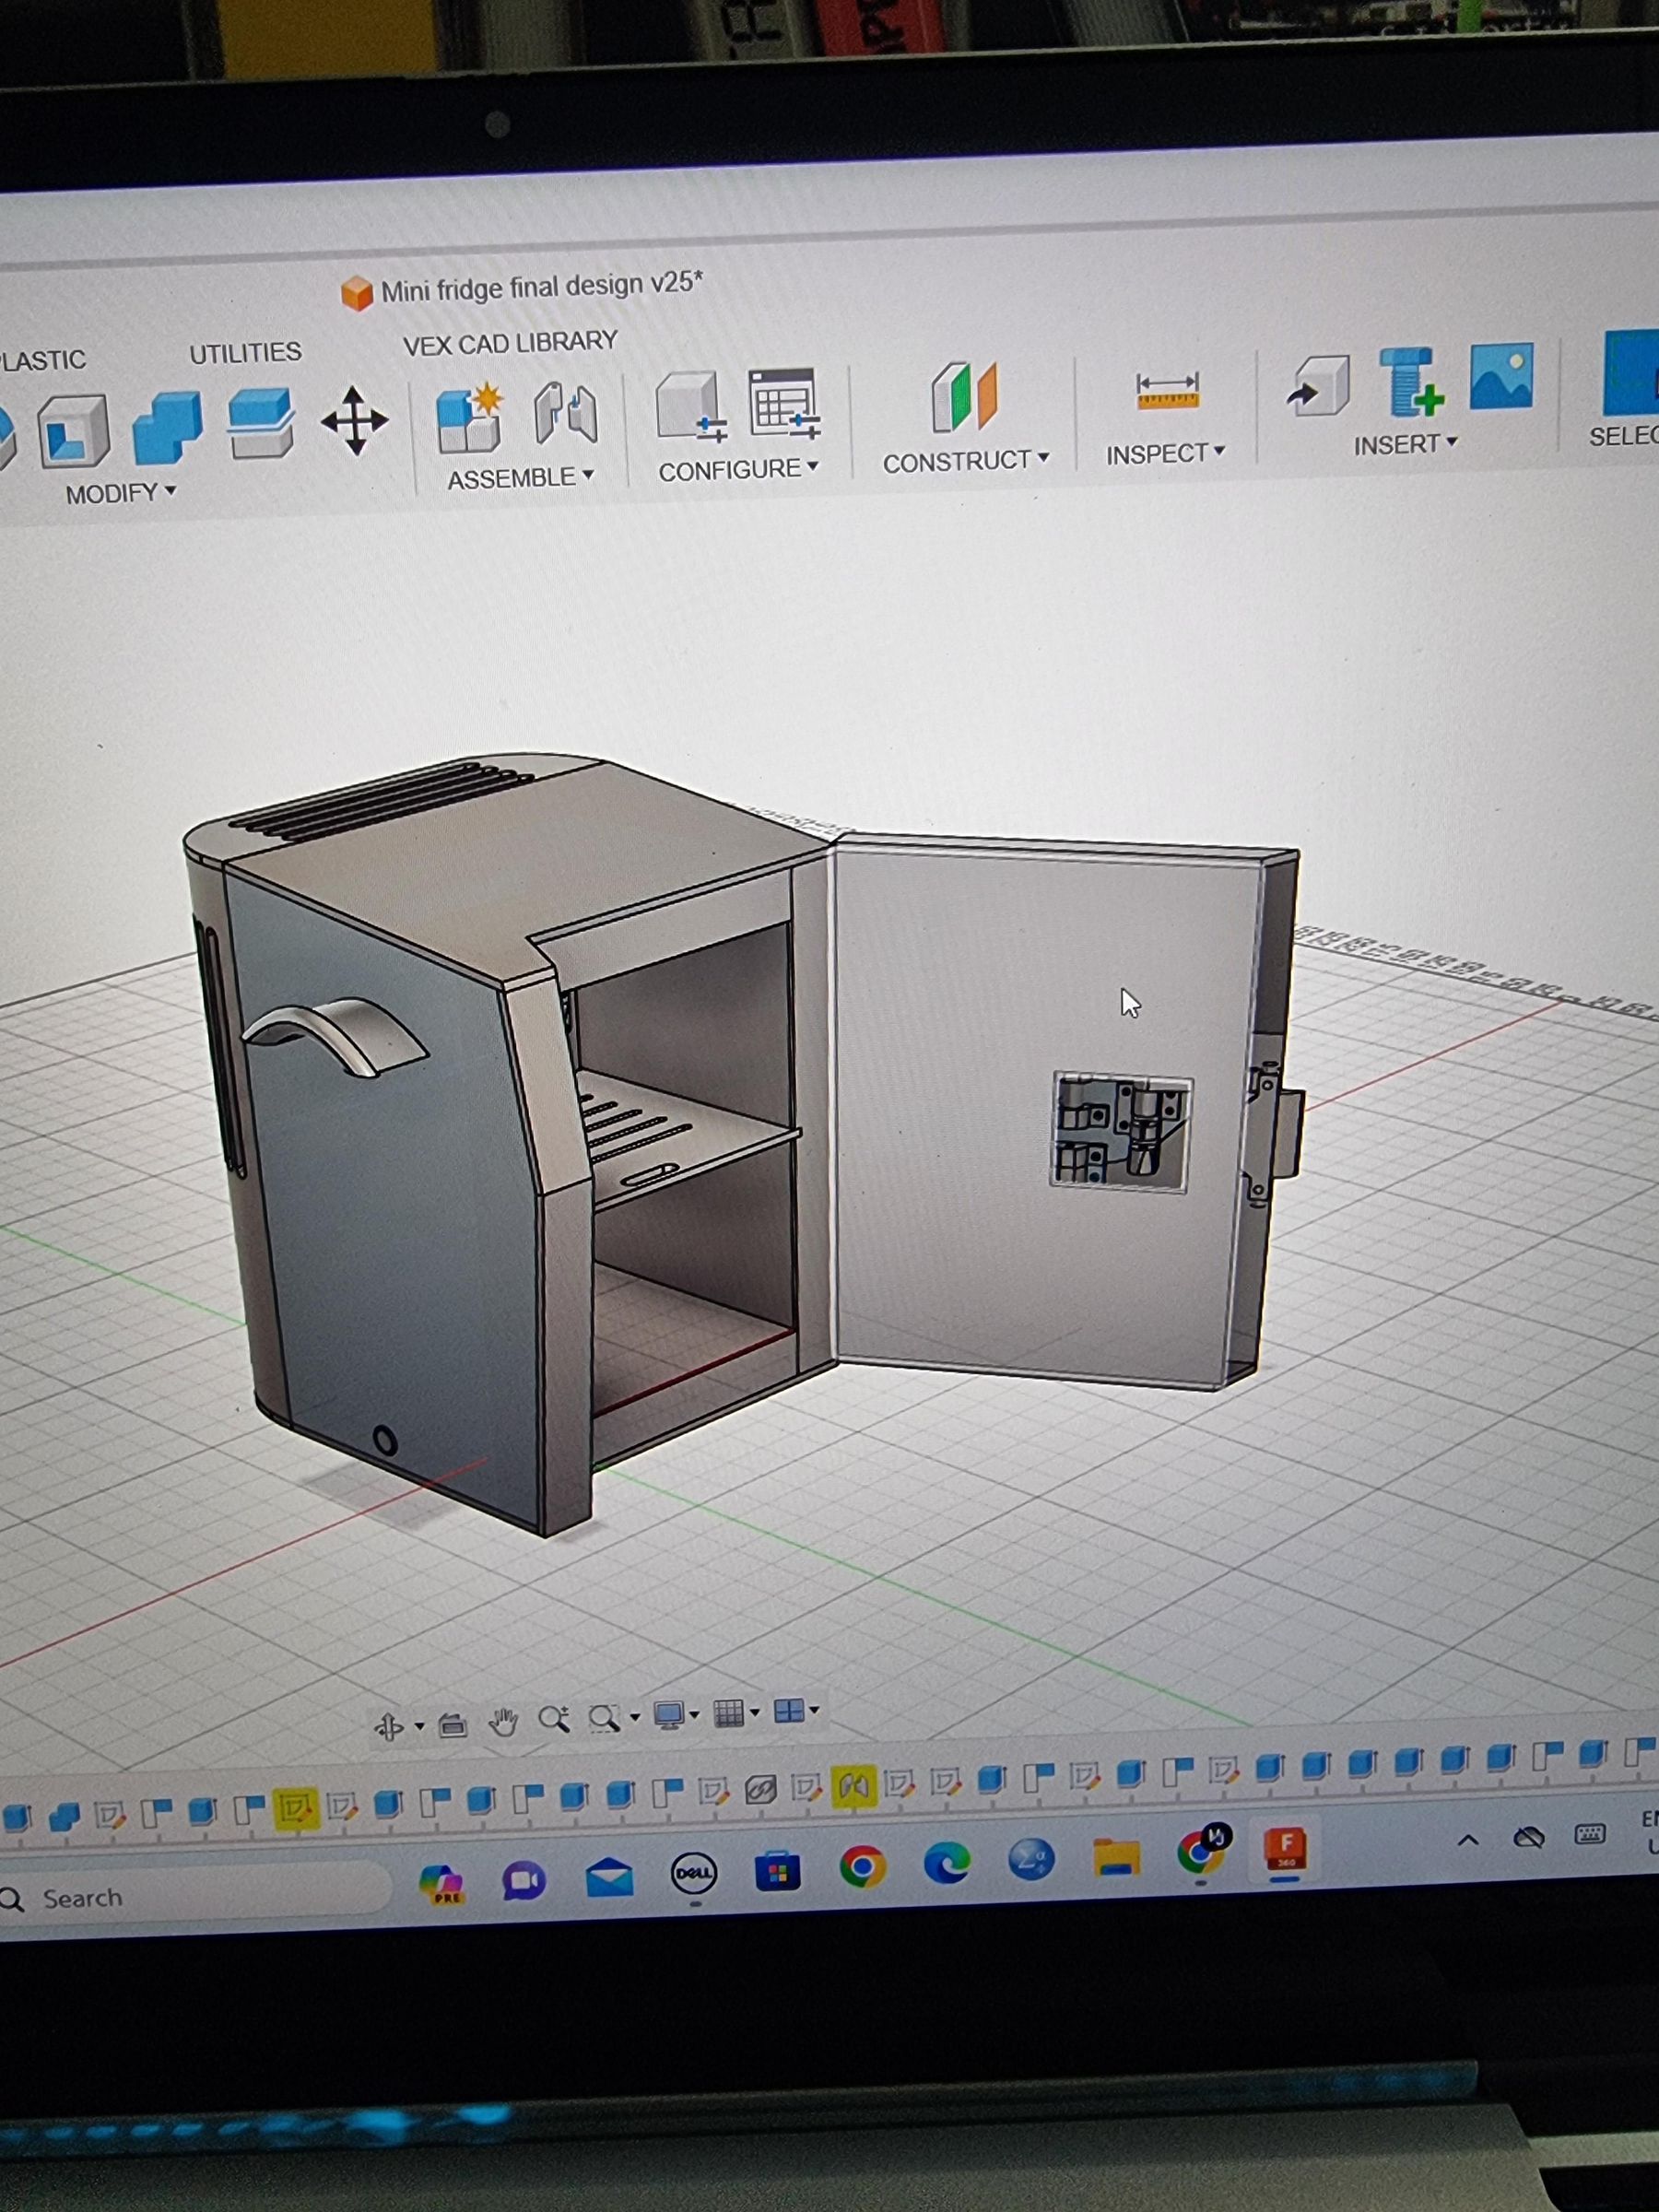
Before building the mini fridge, design it carefully in CAD. This will help you plan the shape, check that all the parts fit, and avoid wasting material later.
I wanted my mini fridge to have a futuristic and angular look, so I used sharp geometric panels inspired by the Tesla Cybertruck. I also designed a flush-style door handle to make the front look cleaner and more modern.
*I uploaded some photos of my previous version just to show the iteration in the design process.*
1.1 Measure the space where the fridge will go
First, measure the area where you want to place the mini fridge. This could be on your desk, under your desk, on a shelf, or next to a gaming setup.
Check the maximum:
- Width
- Depth
- Height
Do not make the fridge too large, especially if it will sit on a desk. Leave enough room around it for your keyboard, mouse, monitor, and cables.
1.2 Decide what you want to store inside
Next, decide what the fridge needs to hold. For example, you may want to store:
- Cans
- Small bottles
- Fruit
- Chocolate bars
- Snacks
- Small food containers
Use these items to estimate the internal storage size. If you want to add a removable shelf, leave enough height so drinks and snacks can fit comfortably.
1.3 Measure the Peltier cooling module
Measure your Peltier module before designing the cooling section. The Peltier module is the part that creates the cold side and hot side.
Make sure your CAD design includes enough space for:
- The Peltier module
- The cold-side metal plate or heatsink
- The hot-side heatsink
- The cooling fans
- Wires
- Mounting screws or glue points
Do not design the box first and then try to fit the Peltier system afterwards. The cooling system should be planned from the beginning.
1.4 Plan the hot side and cold side
A Peltier module has two sides:
- The cold side faces inside the fridge
- The hot side faces outside the fridge towards the heatsink and fans
The hot side must release heat properly. If the hot side gets too hot, the cold side will not cool the inside of the fridge effectively.
Add ventilation holes, slots, or gaps near the hot side so air can move through the heatsink. In my design, I added ventilation at the back and sides to help hot air escape.
1.5 Choose your insulation thickness
Plan the insulation before cutting anything. Insulation is very important because it keeps the cold air inside the fridge.
Thicker insulation usually improves cooling, but it also reduces the internal storage space. For example, if your outer box is quite small and you use very thick insulation, there may not be enough room left inside for drinks.
When designing, consider:
- The thickness of the insulation foam
- The thickness of the inner lining
- The thickness of the outer material
- The final internal storage space
1.6 Check your material thickness
Measure the actual materials you are using. Do not guess.
For example, check the thickness of:
- MDF
- Acrylic
- Foam insulation
- 3D-printed parts
- Wooden parts
If your CAD model uses 3 mm material but your real sheet is 6 mm thick, the parts may not fit together correctly. This is especially important for slots, joints, shelves, and the door frame.
1.7 Design the outer shape
Now design the main body of the fridge. I made mine with sharp, sloped panels to create a futuristic angular style.
You can keep the design simple, but try to make it look intentional. A plain box will work, but shaped panels can make the project look more original.
When designing the outer shape, make sure it is still practical to build. Very complex angles may look good in CAD but can be difficult to cut and assemble.
1.8 Design the door and handle
Design the door so it opens easily and seals properly. A poor door seal will let warm air enter the fridge and reduce the cooling performance.
I designed a flush-style handle inspired by modern electric vehicle door handles. This helped the front look cleaner while still giving me a way to open the fridge.
Make sure the handle is:
- Easy to grip
- Strong enough to pull the door open
- Not too thin or fragile
- Positioned at a comfortable height
1.9 Add shelves and internal features
If you want a removable shelf, design slots or supports inside the fridge. This will let you change the layout depending on what you want to store.
You can also plan space for:
- Internal LED lighting
- A temperature display
- A small fan to circulate cold air
- Aluminium foil tape or a metal lining to spread the cooling effect
Keep the inside simple so it is easy to clean.
1.10 Add ventilation and cable openings
Add openings for airflow and wiring. The cooling system and power supply need space to breathe.
Include:
- Ventilation slots near the fans
- A cable hole for the power supply
- Space for switches or connectors
- Mounting points for electronics
Do not block the fans with panels or insulation. Good airflow is one of the most important parts of the design.
1.11 Check the full assembly in CAD
Before exporting the design, check that all parts fit together.
Look carefully at:
- Door clearance
- Shelf clearance
- Fan position
- Peltier module position
- Insulation thickness
- Screw positions
- Material thickness
- Internal storage space
- Overall size
This step helps you catch mistakes before you start cutting or printing.
1.12 Export the design files
Once the design is complete, export the files.
I have provided both:
- STL file — useful for viewing the model or 3D printing parts
- STEP file — useful for editing the design in CAD software
The STEP file is better if you want to modify the design, change the size, or adapt it to your own materials and cooling components.
Designing the fridge first makes the whole build much easier. It helps you avoid wasting material, makes the final product more accurate, and ensures the cooling system has enough space to work properly.
Prototype Testing
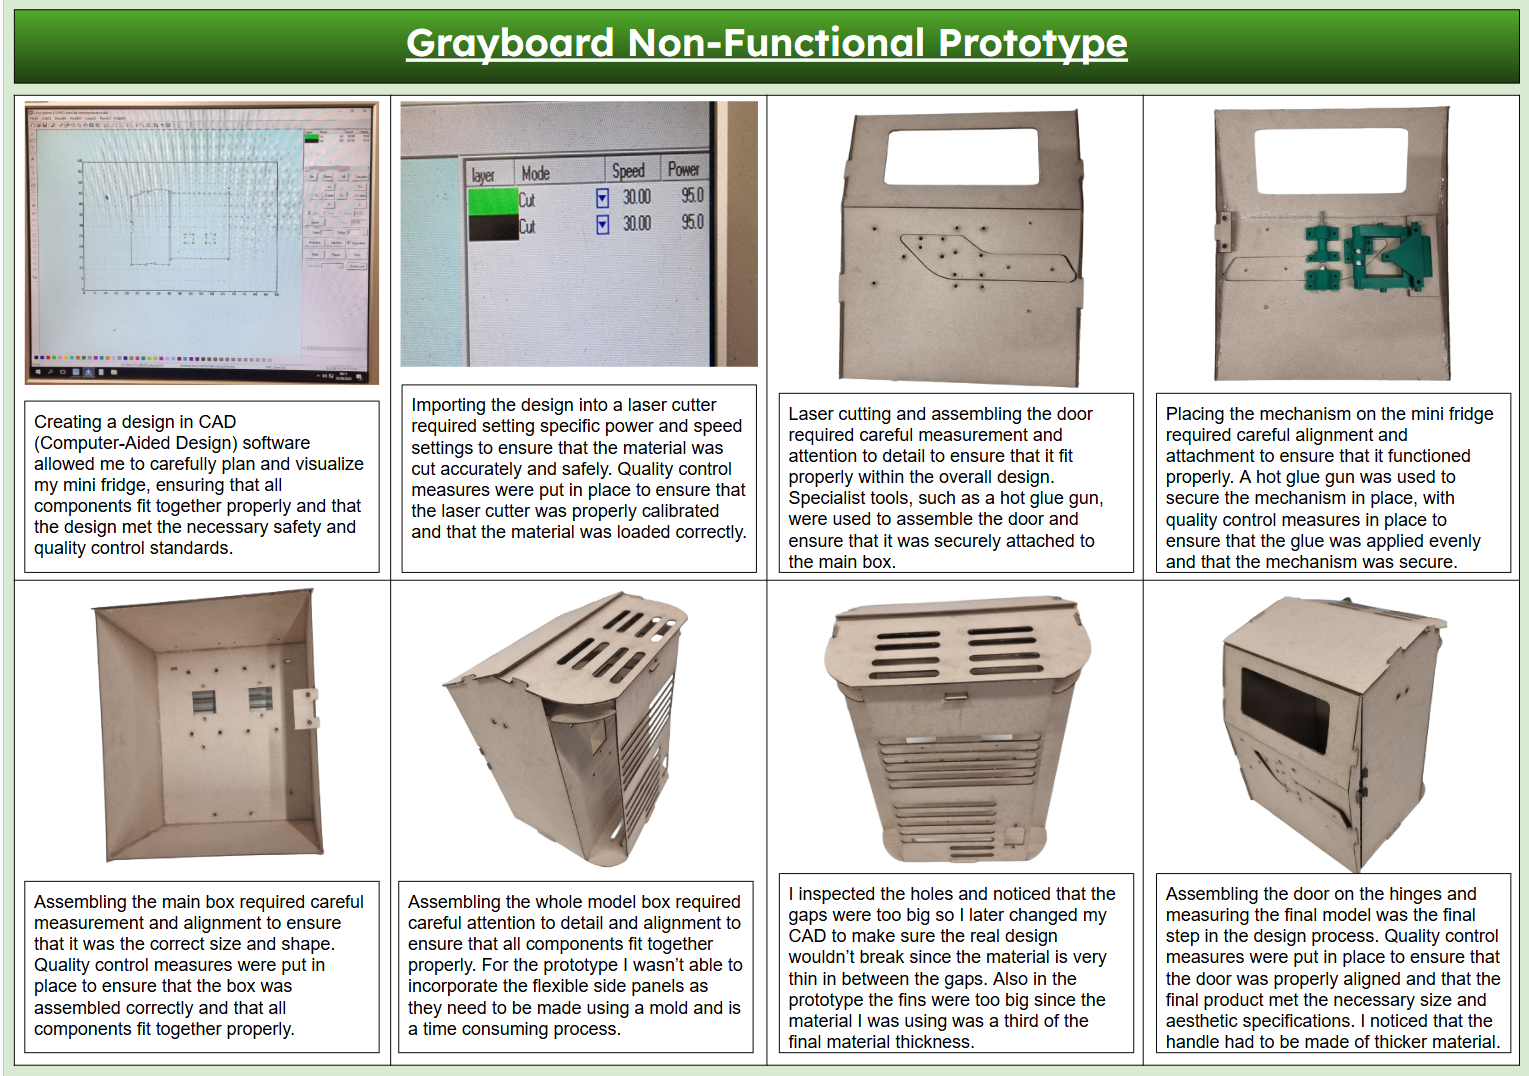
Before making the final version, I made a non-functional prototype from grayboard. This helped me test the size, shape, door mechanism, ventilation layout, and assembly method before using stronger and more expensive materials.
2.1 Make a simple prototype first
Cut the main fridge panels from a cheap material such as grayboard, cardboard, or foam board. Do not start with your final material straight away, because mistakes are much easier and cheaper to fix at this stage.
I used grayboard because it was easy to cut, quick to assemble, and strong enough to show whether the overall shape would work.
2.2 Test the size and proportions
Assemble the main body of the fridge and check the overall size.
Make sure:
- The fridge fits in the space you planned for it
- The door is large enough to access the inside
- The internal space is big enough for drinks and snacks
- The back section has enough room for the cooling system
- The shape does not look too bulky on the desk
At this stage, I checked whether the fridge looked balanced and whether the angular design worked in real life, not just in CAD.
2.3 Check the door opening
Attach the door to the prototype and test how it opens and closes.
Check that:
- The door does not hit the body
- The hinge position works correctly
- The handle is in a comfortable position
- The door opening is large enough
- The door can close properly
This is important because a poor door design can make the fridge annoying to use and can also let cold air escape.
2.4 Test the handle mechanism
Place the handle mechanism on the door and check if it is strong enough and easy to use.
I tested the position of the handle and realised that some parts needed to be made stronger and thicker. Thin parts may look good in CAD, but they can feel weak when tested physically.
If the handle feels too flexible, increase the thickness or add extra support.
2.5 Check the ventilation holes
Inspect the ventilation holes and slots in the prototype.
The Peltier module and fans need good airflow, so the ventilation must not be too small or blocked. However, the material between the holes also needs to be strong enough.
In my prototype, I noticed that some of the gaps were too large and could weaken the panel. I changed the CAD design afterwards so the final version would be stronger and less likely to break.
2.6 Check material thickness problems
Compare the prototype material thickness with the final material thickness.
This is important because the prototype may use thinner material than the final build. In my case, some parts looked correct in grayboard, but I had to adjust the CAD because the final material would be thicker.
Check:
- Slots
- Tabs
- Door gaps
- Hinge positions
- Handle thickness
- Ventilation gaps
- Shelf supports
If the prototype material is thinner than the final material, allow extra clearance in the design.
2.7 Assemble the full prototype
Put all the main parts together to see how the fridge looks as a complete object.
Check the alignment of:
- Front panel
- Back panel
- Side panels
- Top panel
- Door
- Handle
- Ventilation areas
- Internal shelf position
This helped me understand which parts were difficult to assemble and where I needed to simplify the design.
2.8 Identify problems and update the CAD
After testing the prototype, write down every problem you find. Then go back to the CAD file and make changes before building the final version.
From my prototype, I changed:
- Some ventilation gaps because they were too large
- The handle thickness because it needed to be stronger
- Some panel positions for better alignment
- The design of certain cut-outs to reduce weak areas
- The assembly layout to make the final build easier
2.9 Use the prototype as a quality check
The prototype does not need to cool anything yet. Its main job is to test the physical design.
Use it to check:
- Does the design fit together?
- Is the door easy to open?
- Is there enough internal space?
- Are the ventilation holes in the right place?
- Are any parts too thin or weak?
- Will the final material be easy to cut and assemble?
Making this prototype helped me avoid problems before the final build. It also made the final fridge more accurate, stronger, and easier to assemble.
Final Orthographic Drawings and Manufacturing Plan
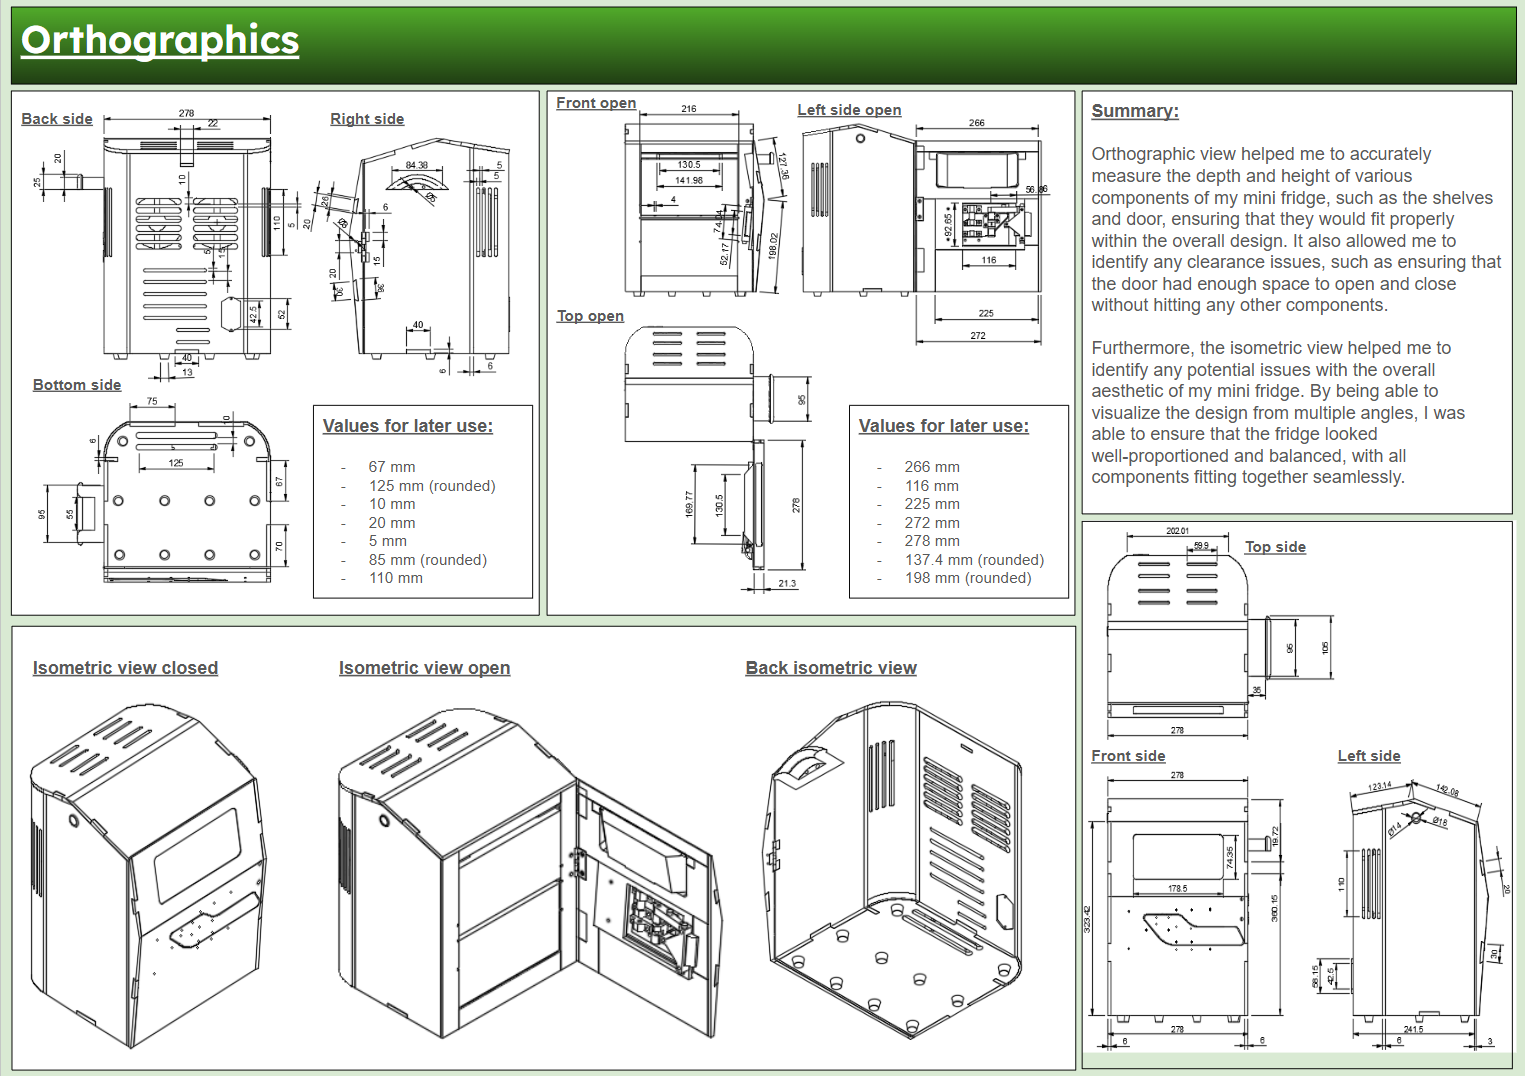
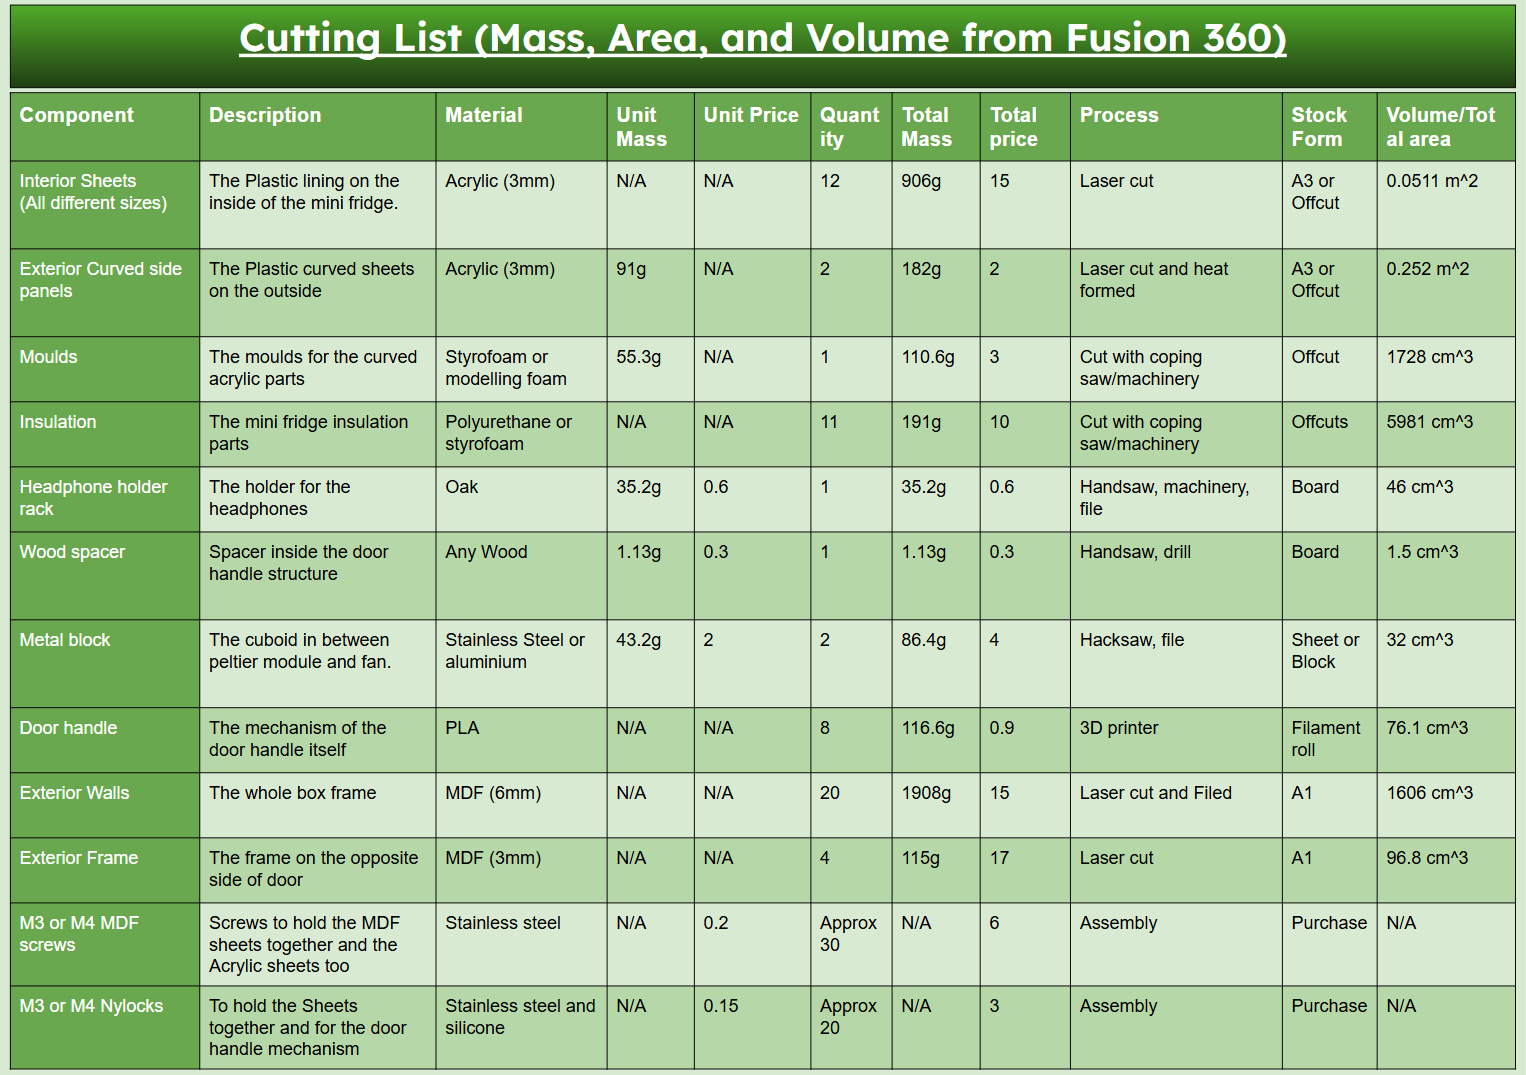
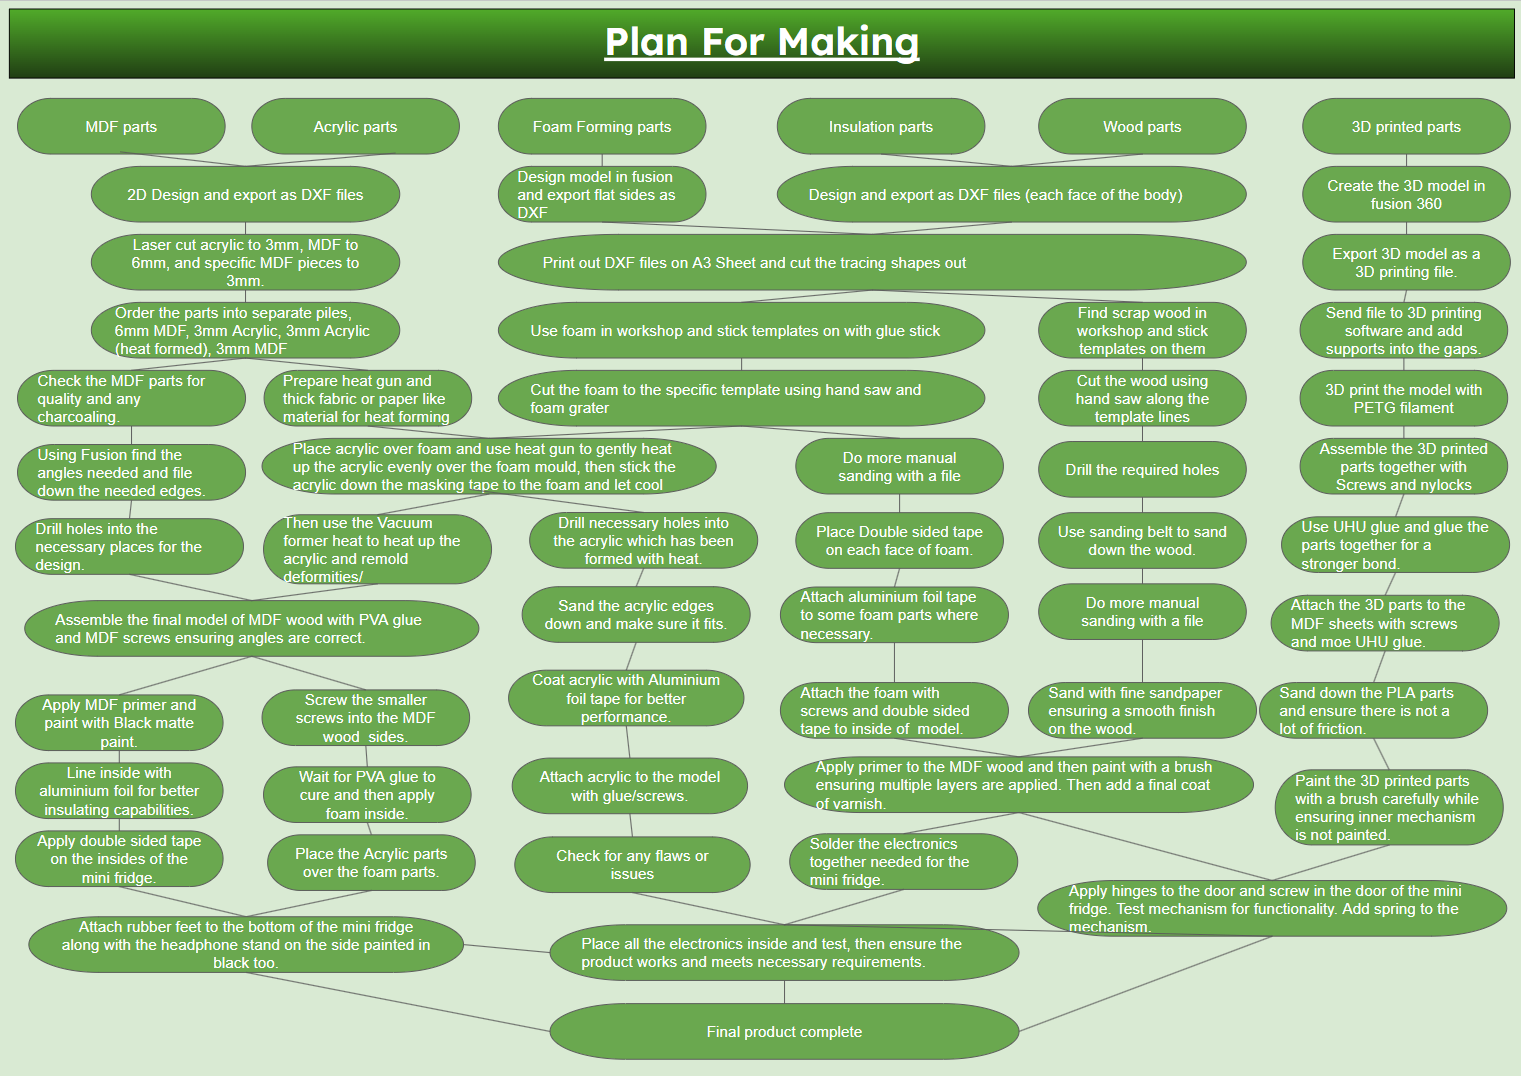
After testing the prototype, create final orthographic drawings before making the finished version. These drawings help you check every measurement, plan the manufacturing process, and make sure all parts will fit together correctly.
Orthographic drawings are useful because they show the design from different views, such as the front, back, side, top, bottom, and open-door positions. This makes it much easier to build accurately than working only from a 3D model.
3.1 Create the main orthographic views
Start by creating clear drawings of the mini fridge from all important angles.
Include:
- Front view
- Back view
- Left side view
- Right side view
- Top view
- Bottom view
- Front view with the door open
- Isometric view closed
- Isometric view open
- Back isometric view
These views helped me understand the exact shape of the fridge and how the door, shelf, handle, ventilation holes, and back cooling section would fit together.
3.2 Add accurate dimensions
Add measurements to every important part of the design. Do not rely only on guessing from the CAD model.
Measure and label:
- Overall width
- Overall depth
- Overall height
- Door size
- Handle position
- Shelf height
- Ventilation slot size
- Fan opening size
- Back panel spacing
- Foot position
- Thickness of panels
- Clearance around the door
For my design, I used these drawings to check that the door had enough space to open and close properly without hitting other parts of the fridge.
3.3 Check the internal layout
Use the open views to plan the inside of the mini fridge.
Check that there is enough space for:
- Drinks and snacks
- A removable shelf
- Insulation
- Inner acrylic lining
- Cooling plate or cold-side heatsink
- Internal wiring
- LED lighting
- Temperature display wires
This is important because insulation and inner lining reduce the final storage space. The outside of the fridge may look large, but the usable inside space becomes smaller once all layers are added.
3.4 Plan the cooling section
Use the back and side views to plan the Peltier cooling system.
Check the position of:
- Peltier module
- Hot-side heatsink
- Cold-side plate or heatsink
- Fans
- Power supply
- Ventilation slots
- Cable holes
- Switch or socket
The hot side of the Peltier module needs good airflow. Make sure there is enough space around the fans so hot air can escape from the back or sides of the fridge.
If the vents are too small, the hot side may overheat and the fridge will not cool properly.
3.5 Check the door and handle
Use the front and open-door drawings to check the door design.
Make sure:
- The door is large enough to access the inside
- The hinge position is correct
- The handle is easy to reach
- The door does not clash with the body
- There is space for a seal or draft stopper
- The handle is thick enough to be strong
I used this stage to make sure the handle and door looked correct before making the final version.
3.6 Check material thickness
Before manufacturing, check that your drawings match the real material thickness.
For example, if you are using:
- 6 mm MDF for the outer body
- 3 mm MDF for smaller panels
- 3 mm acrylic for the inner lining
- 10–20 mm foam for insulation
Make sure the slots, tabs, and panel gaps are designed for those exact thicknesses. If the drawing uses the wrong thickness, the final parts may not slot together properly.
3.7 Create a cutting plan
Once the orthographic drawings are finished, create a cutting plan for your materials.
Group the parts by material:
- MDF outer panels
- Acrylic inner panels
- Foam insulation pieces
- 3D-printed parts
- Wooden headphone holder parts
- Door and handle components
Try to arrange the parts efficiently so you waste as little material as possible. This is especially important if you only have a limited amount of MDF, acrylic, or insulation foam.
3.8 Decide the manufacturing method
Choose how each part will be made.
For my project, the main methods were:
- Laser cutting for flat MDF and acrylic panels
- 3D printing for the handle mechanism
- Hand cutting or shaping for insulation foam
- Drilling for screw holes and mounting points
- Filing and sanding for final fitting
- Gluing and screwing for assembly
If you do not have a laser cutter, you can still make the project by printing the drawings, marking the shapes onto the material, and cutting them carefully by hand.
3.9 Plan the assembly order
Before cutting the final materials, decide the order of assembly.
A good order is:
- Cut the outer MDF panels
- Cut the inner acrylic panels
- Cut the insulation pieces
- Print or make the handle
- Assemble the main body
- Fit the insulation
- Add the inner lining
- Install the door and hinge
- Fit the handle
- Mount the Peltier module, fans, and heatsinks
- Add wiring, switch, display, and lighting
- Test the fridge before sealing everything permanently
Planning the order helps avoid problems where one part blocks access to another part later.
3.10 Use the drawings as a final quality check
Before manufacturing, inspect the drawings one final time.
Check:
- Are all important dimensions included?
- Are the door and hinge positions correct?
- Is there enough clearance for the shelf?
- Are the ventilation slots large enough?
- Is the material thickness correct?
- Is the cooling system positioned properly?
- Can the fridge actually be assembled in the planned order?
This step helped me make the final design more accurate and easier to manufacture. It also reduced the chance of wasting material or discovering a major mistake during assembly.
Manufacture
.jpg)
.jpg)
.jpg)
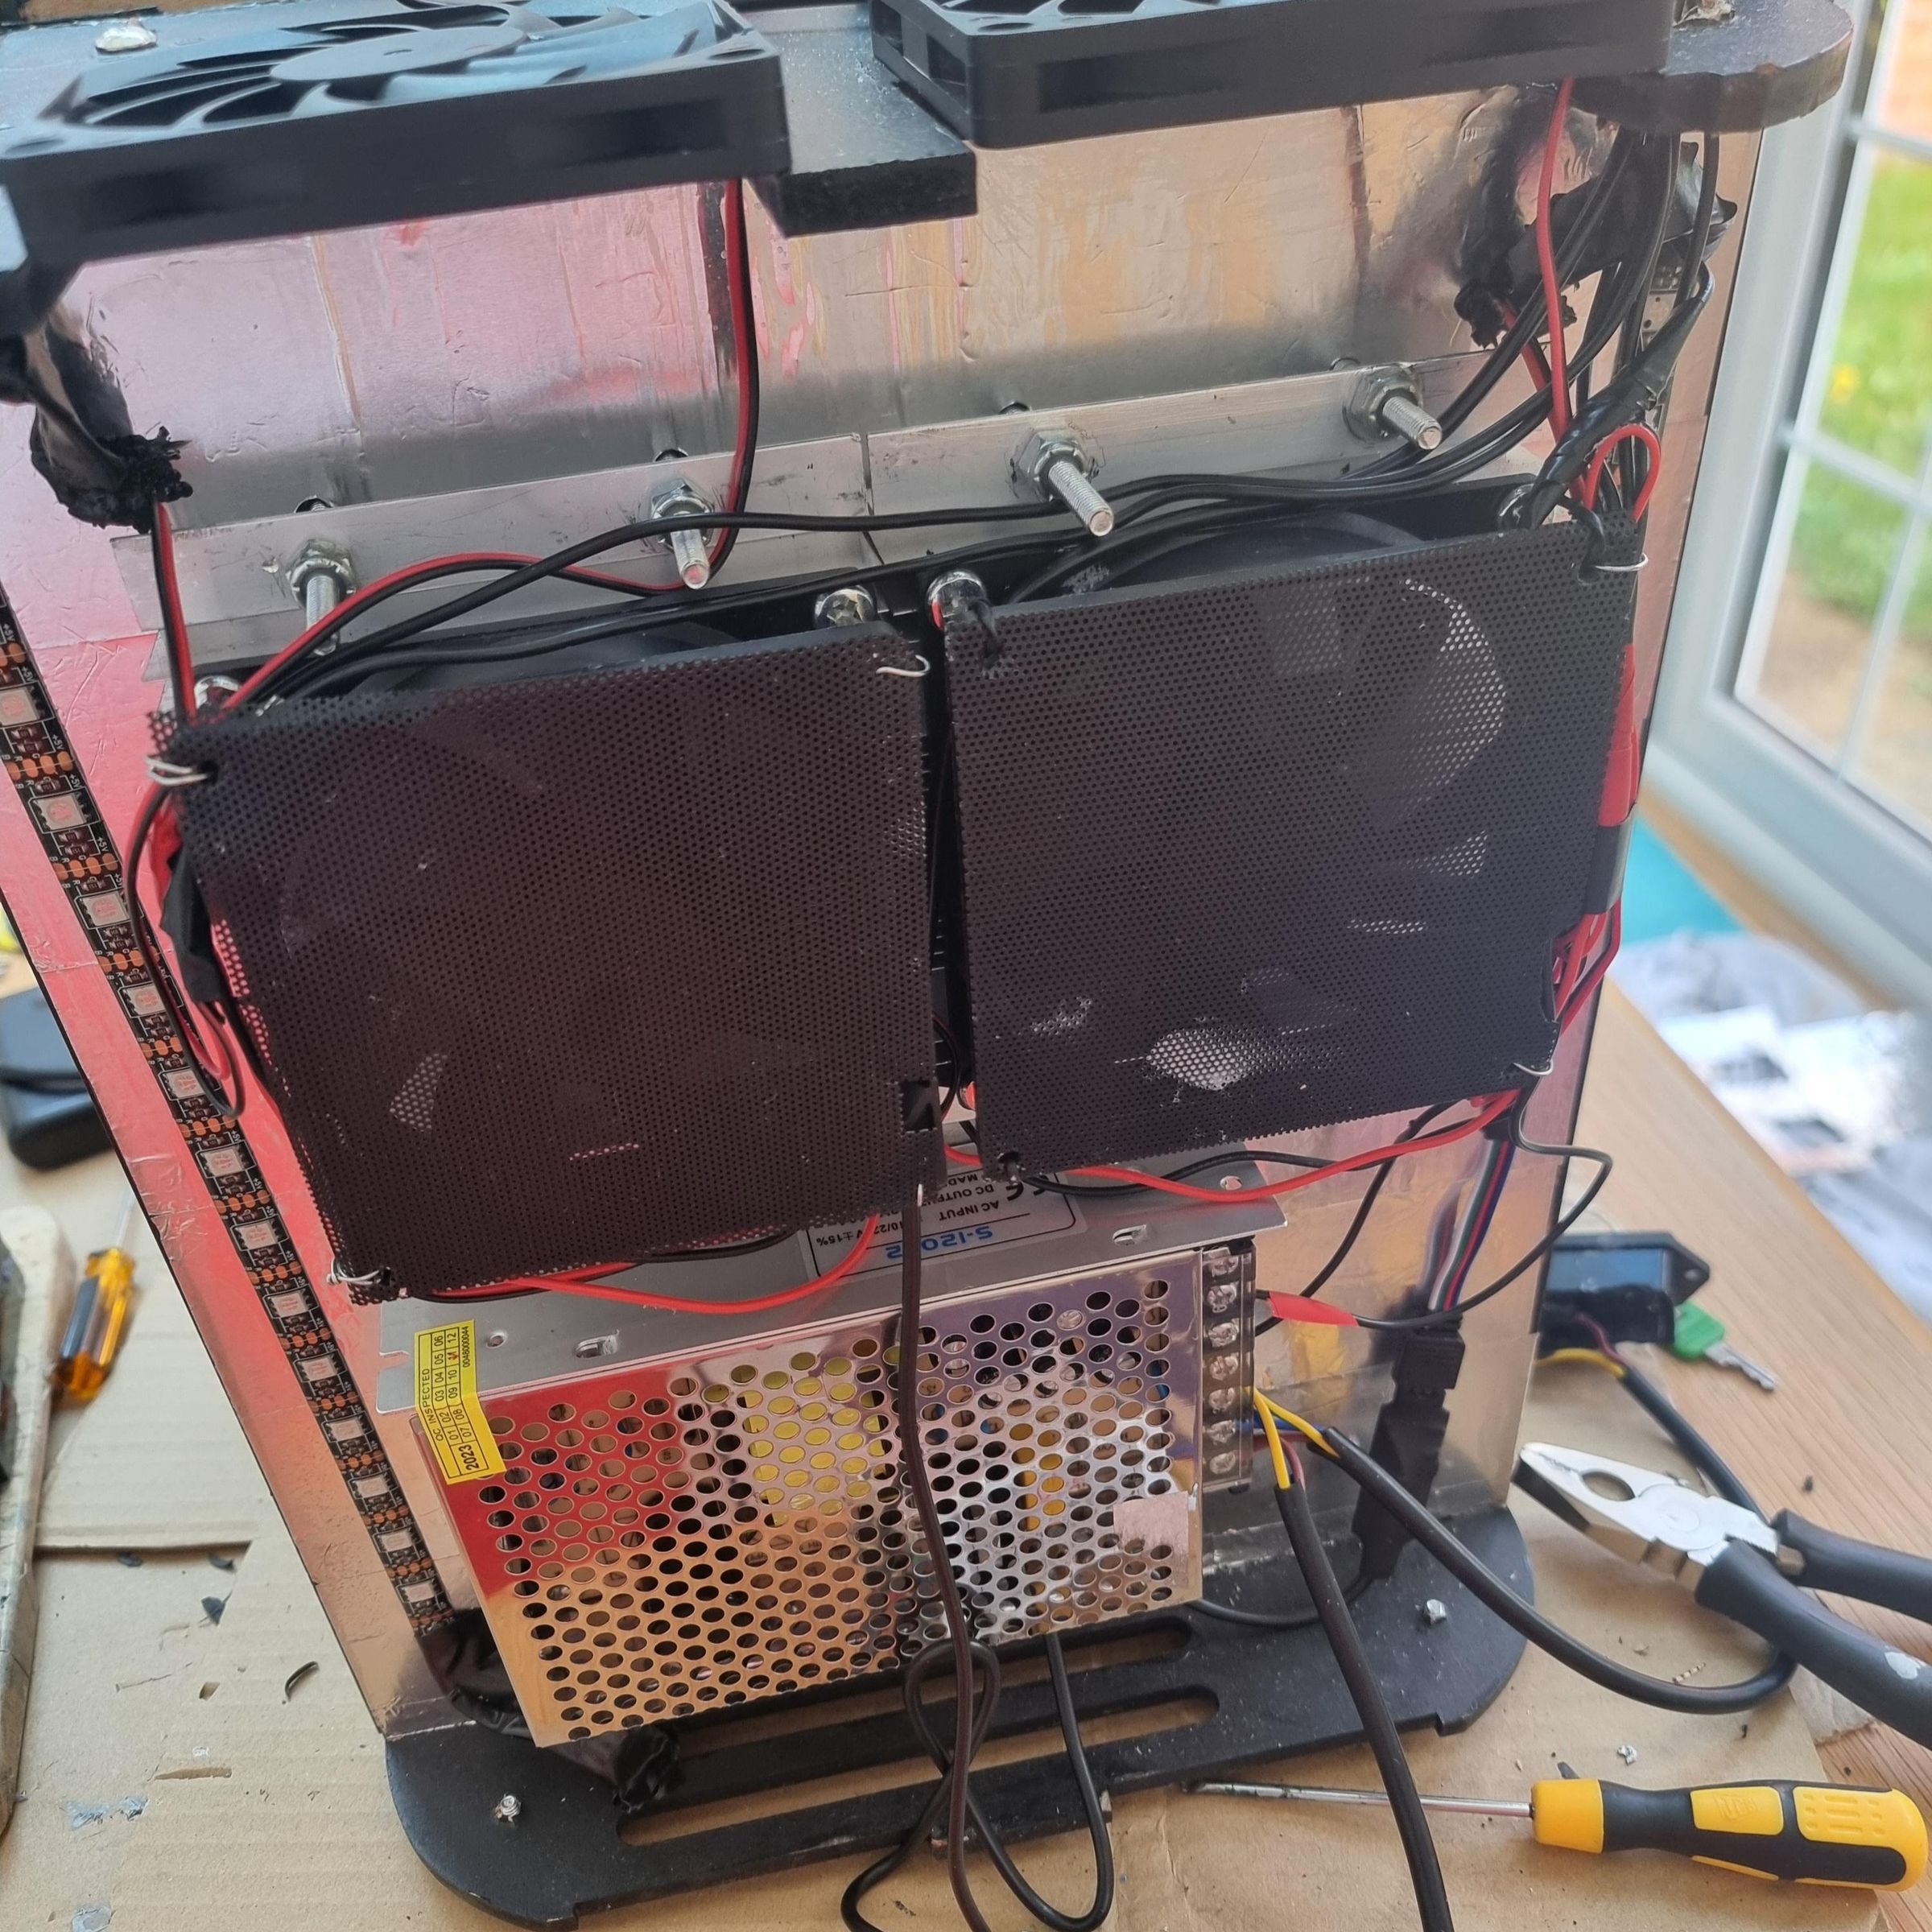
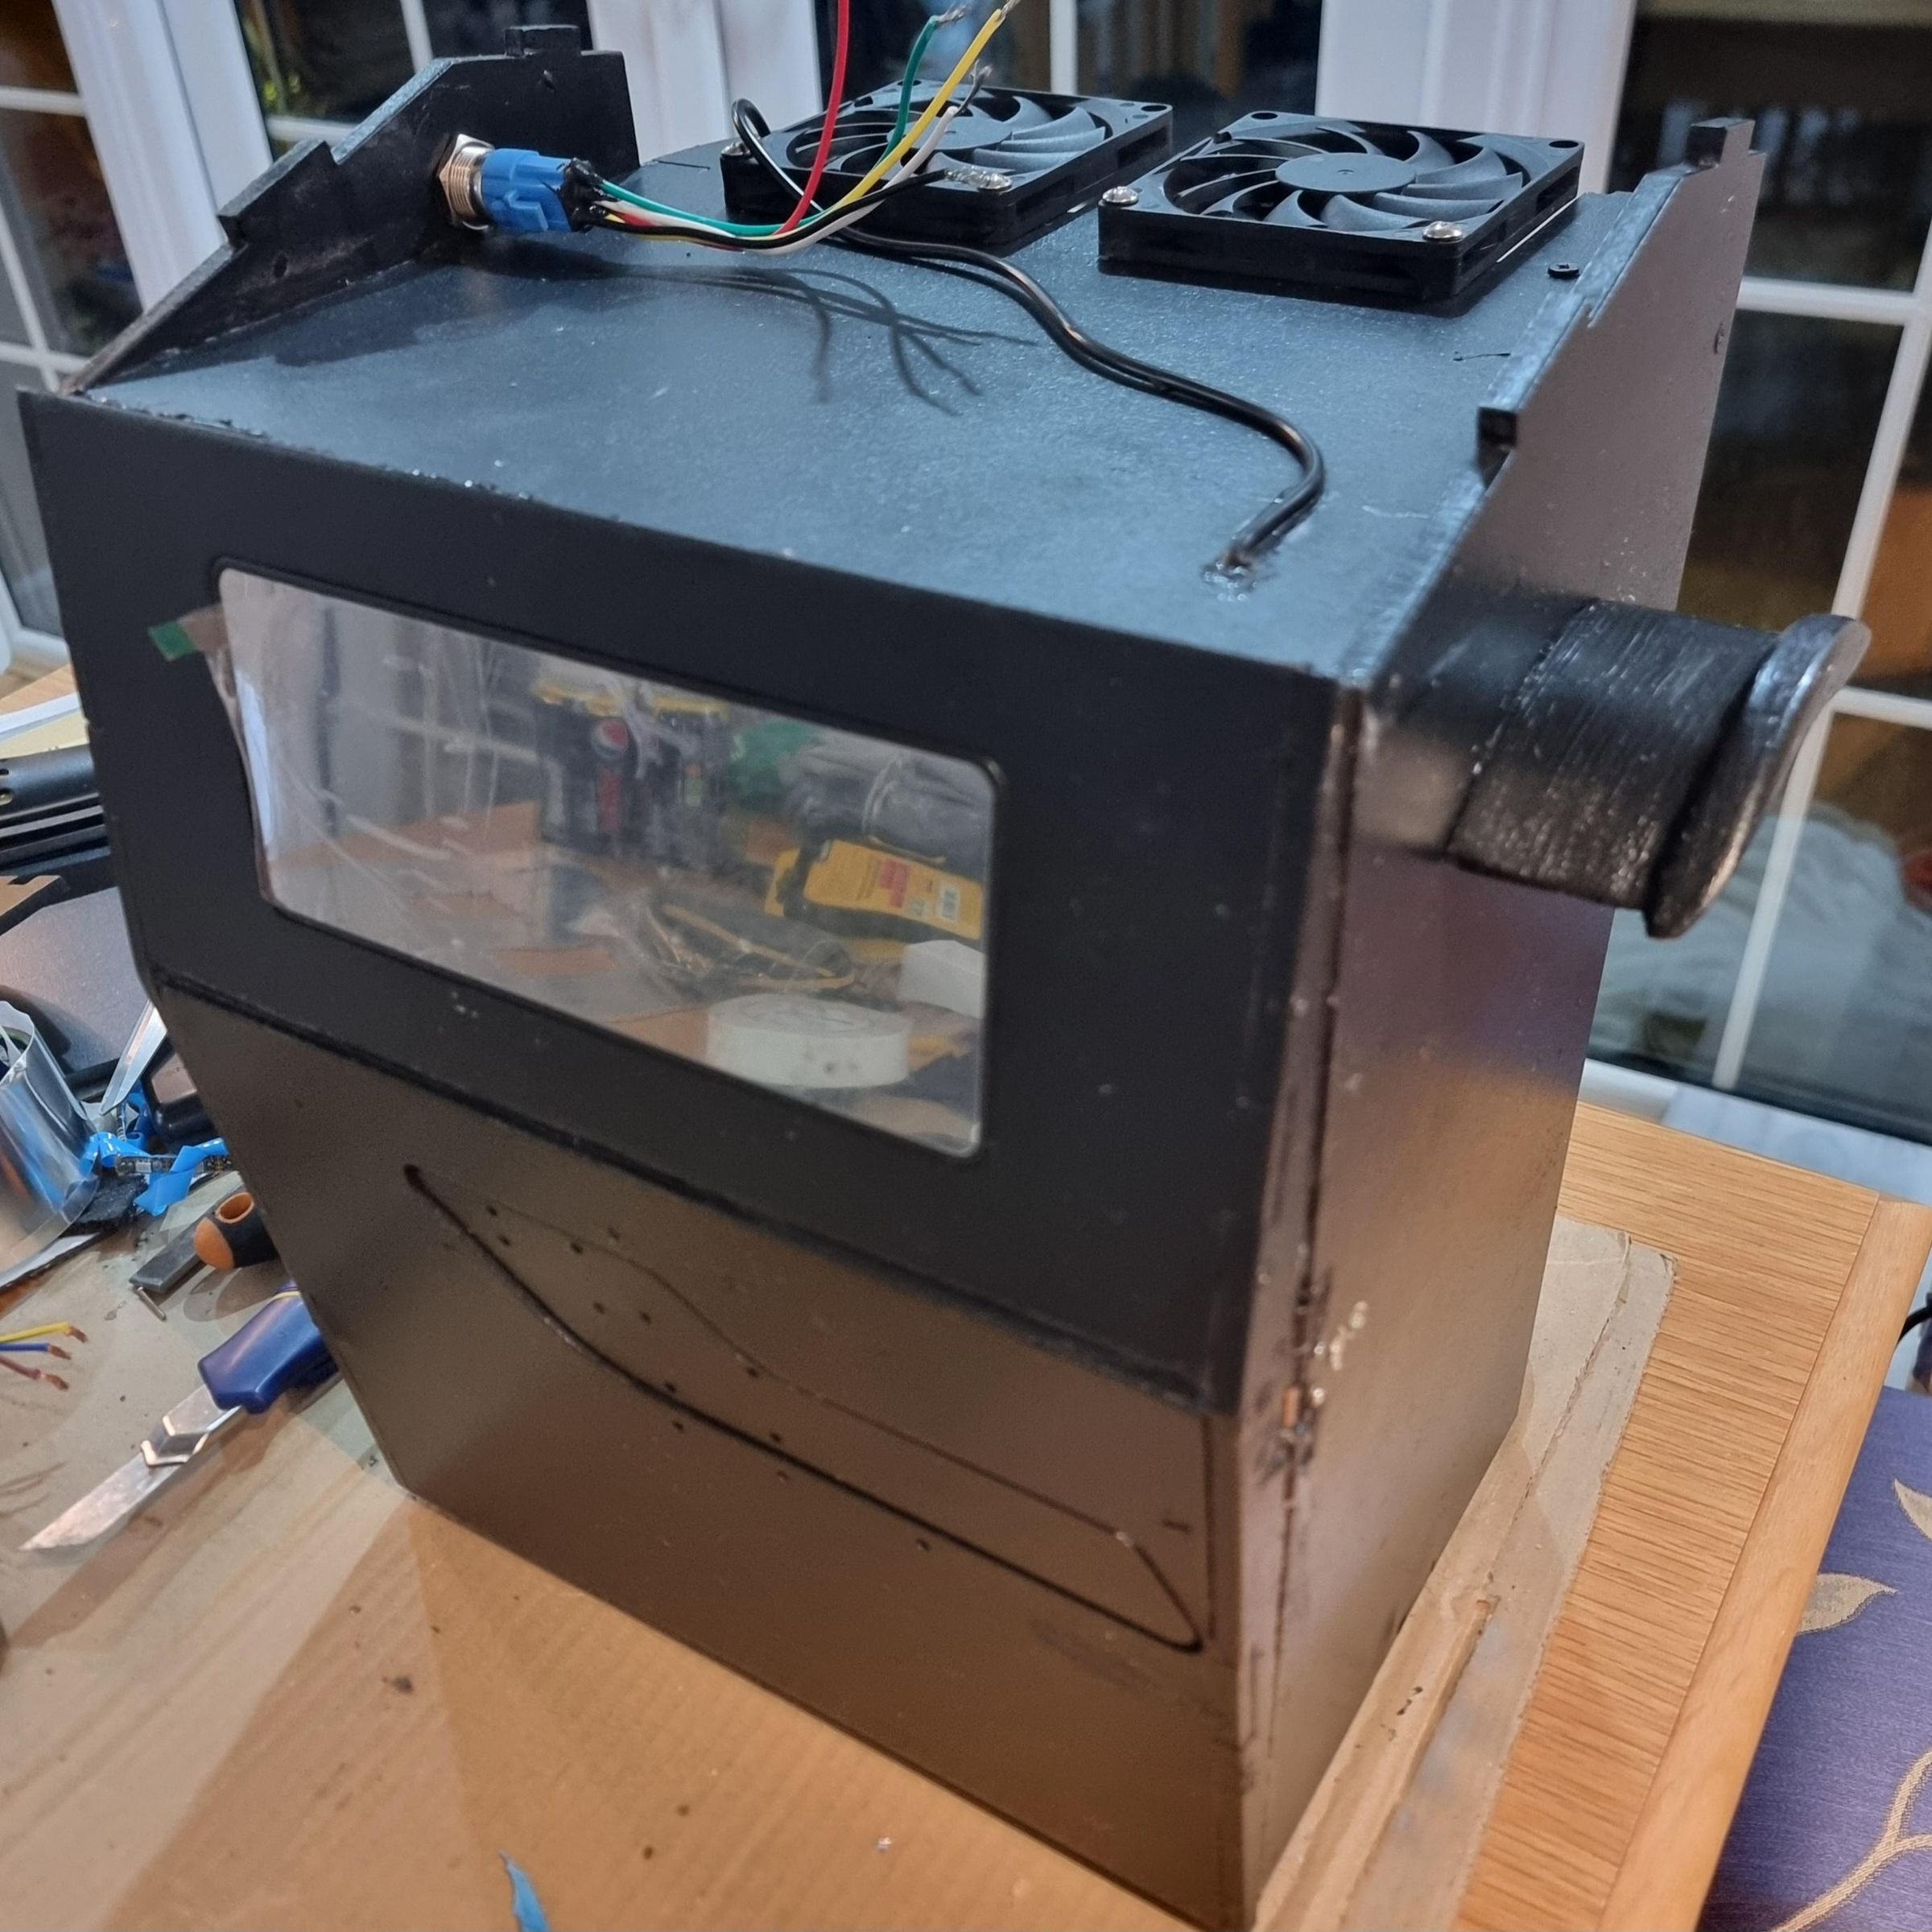
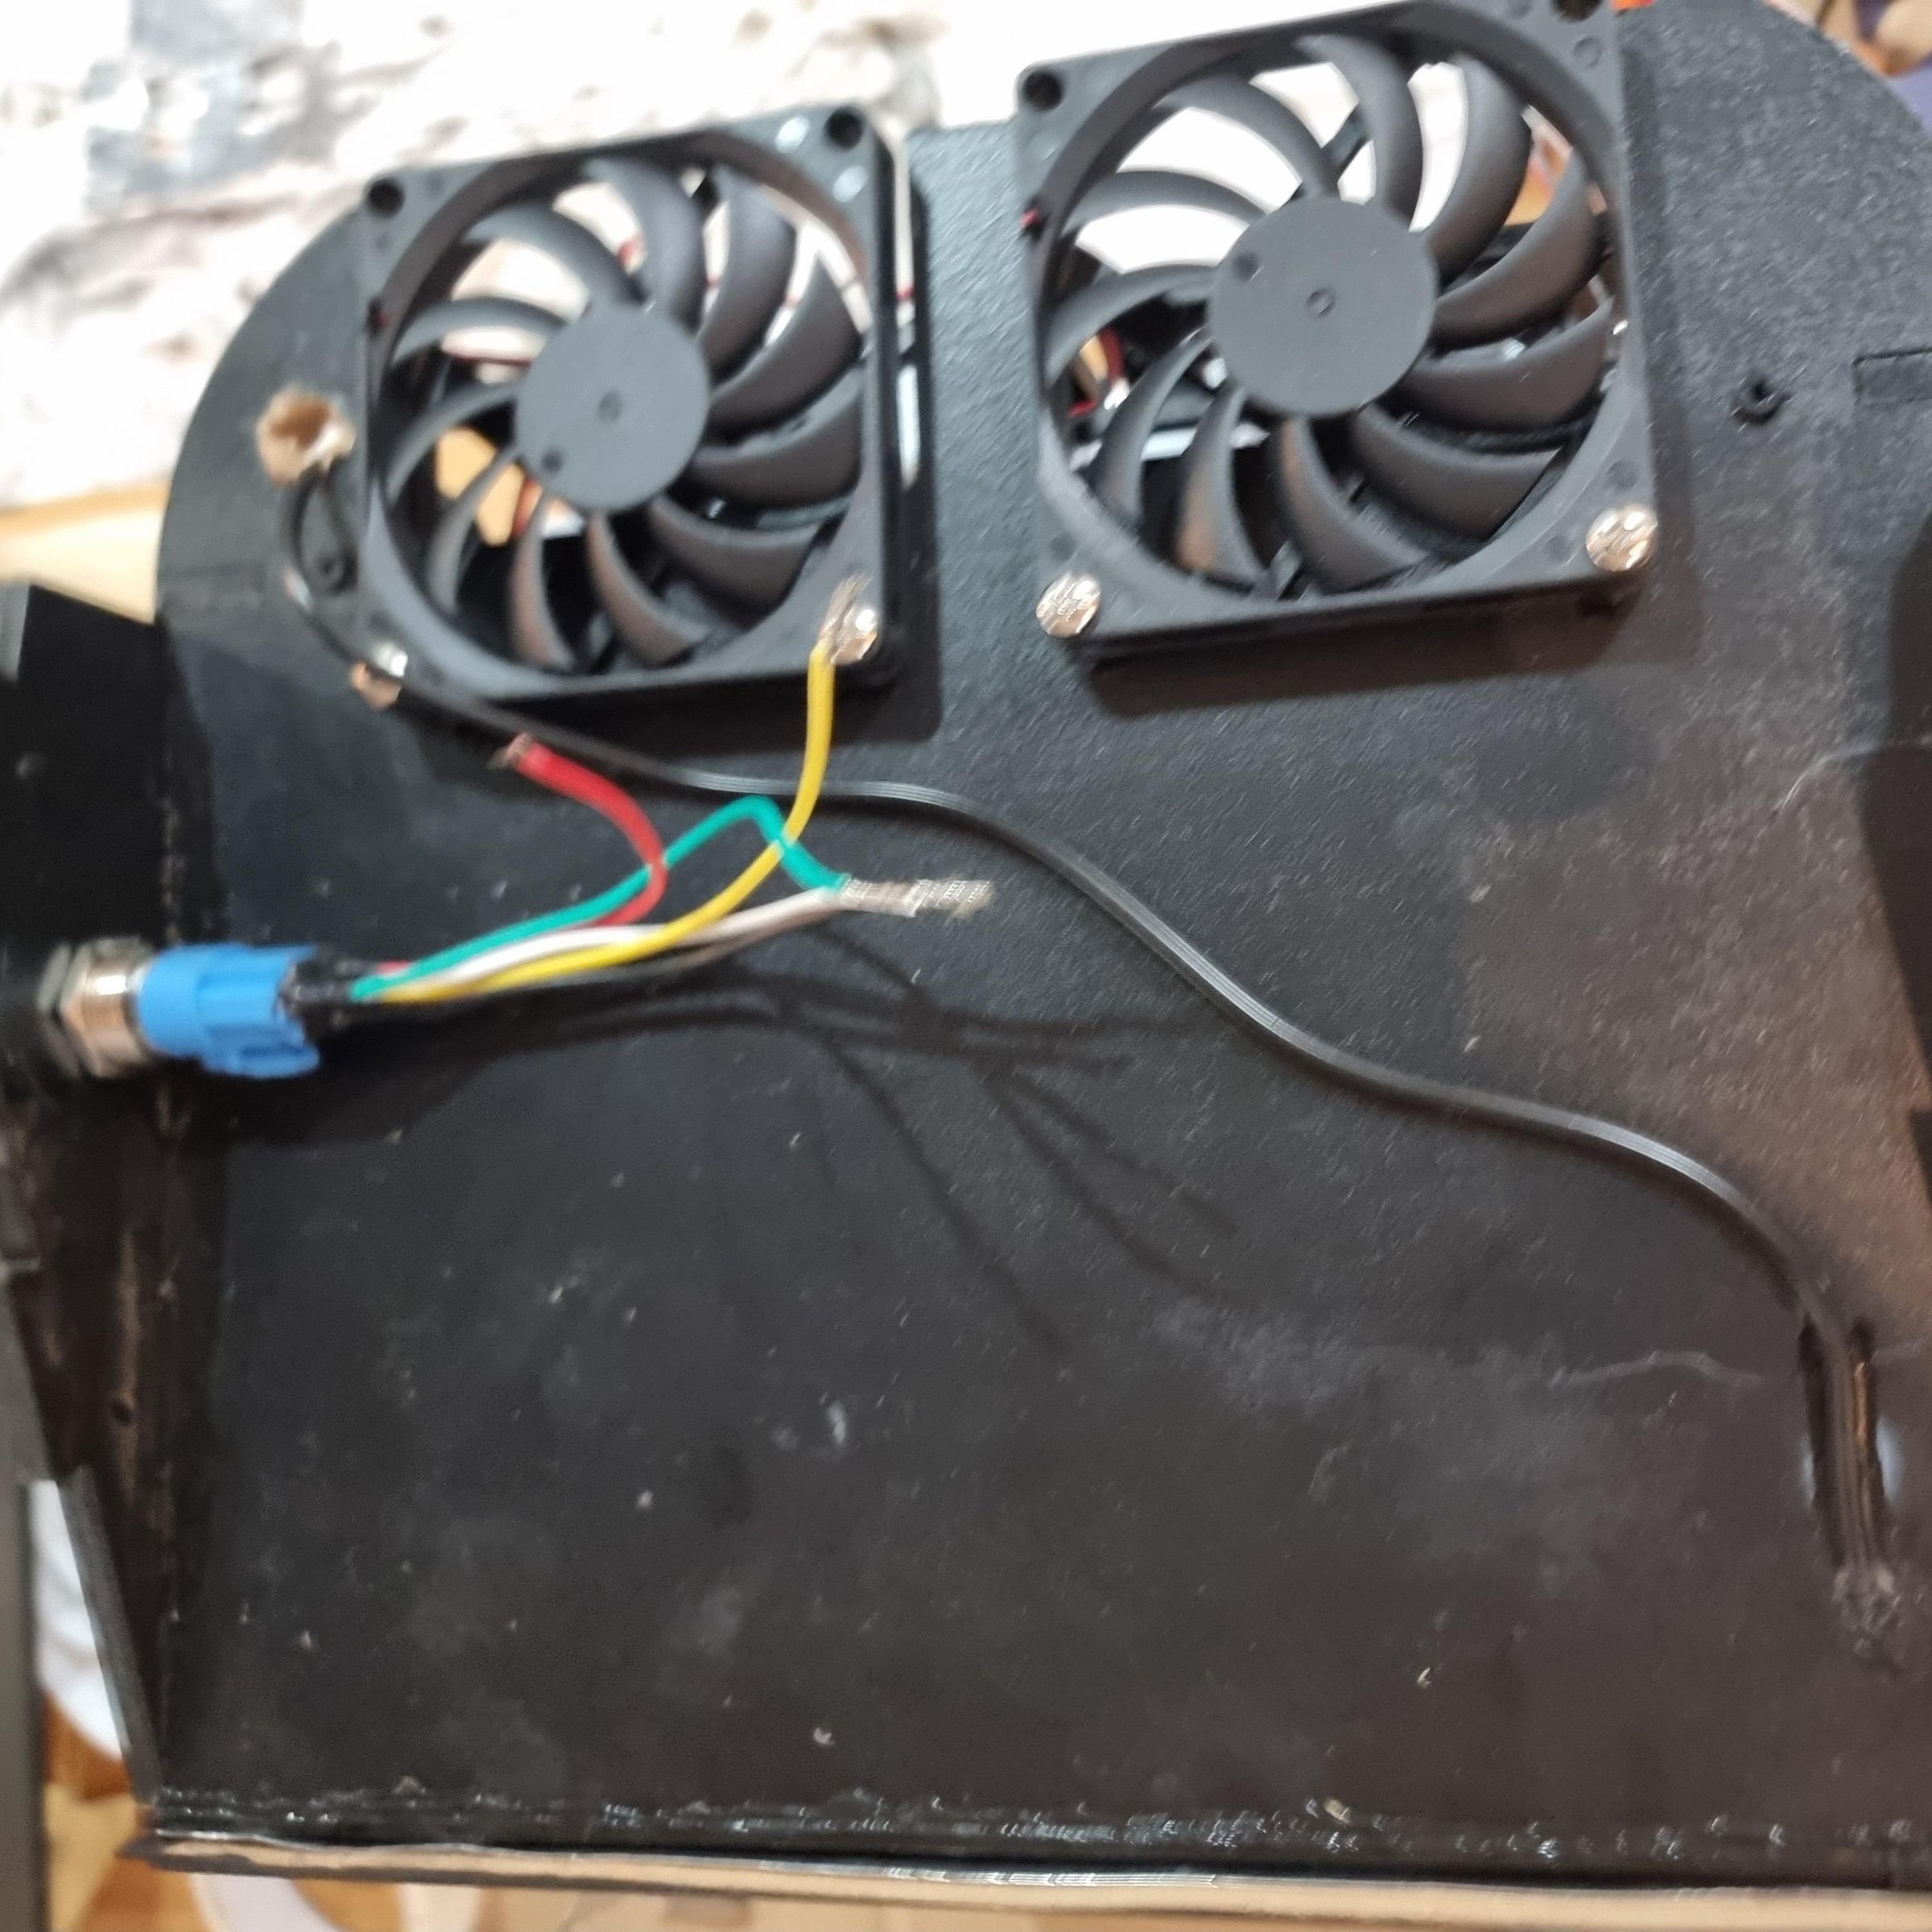
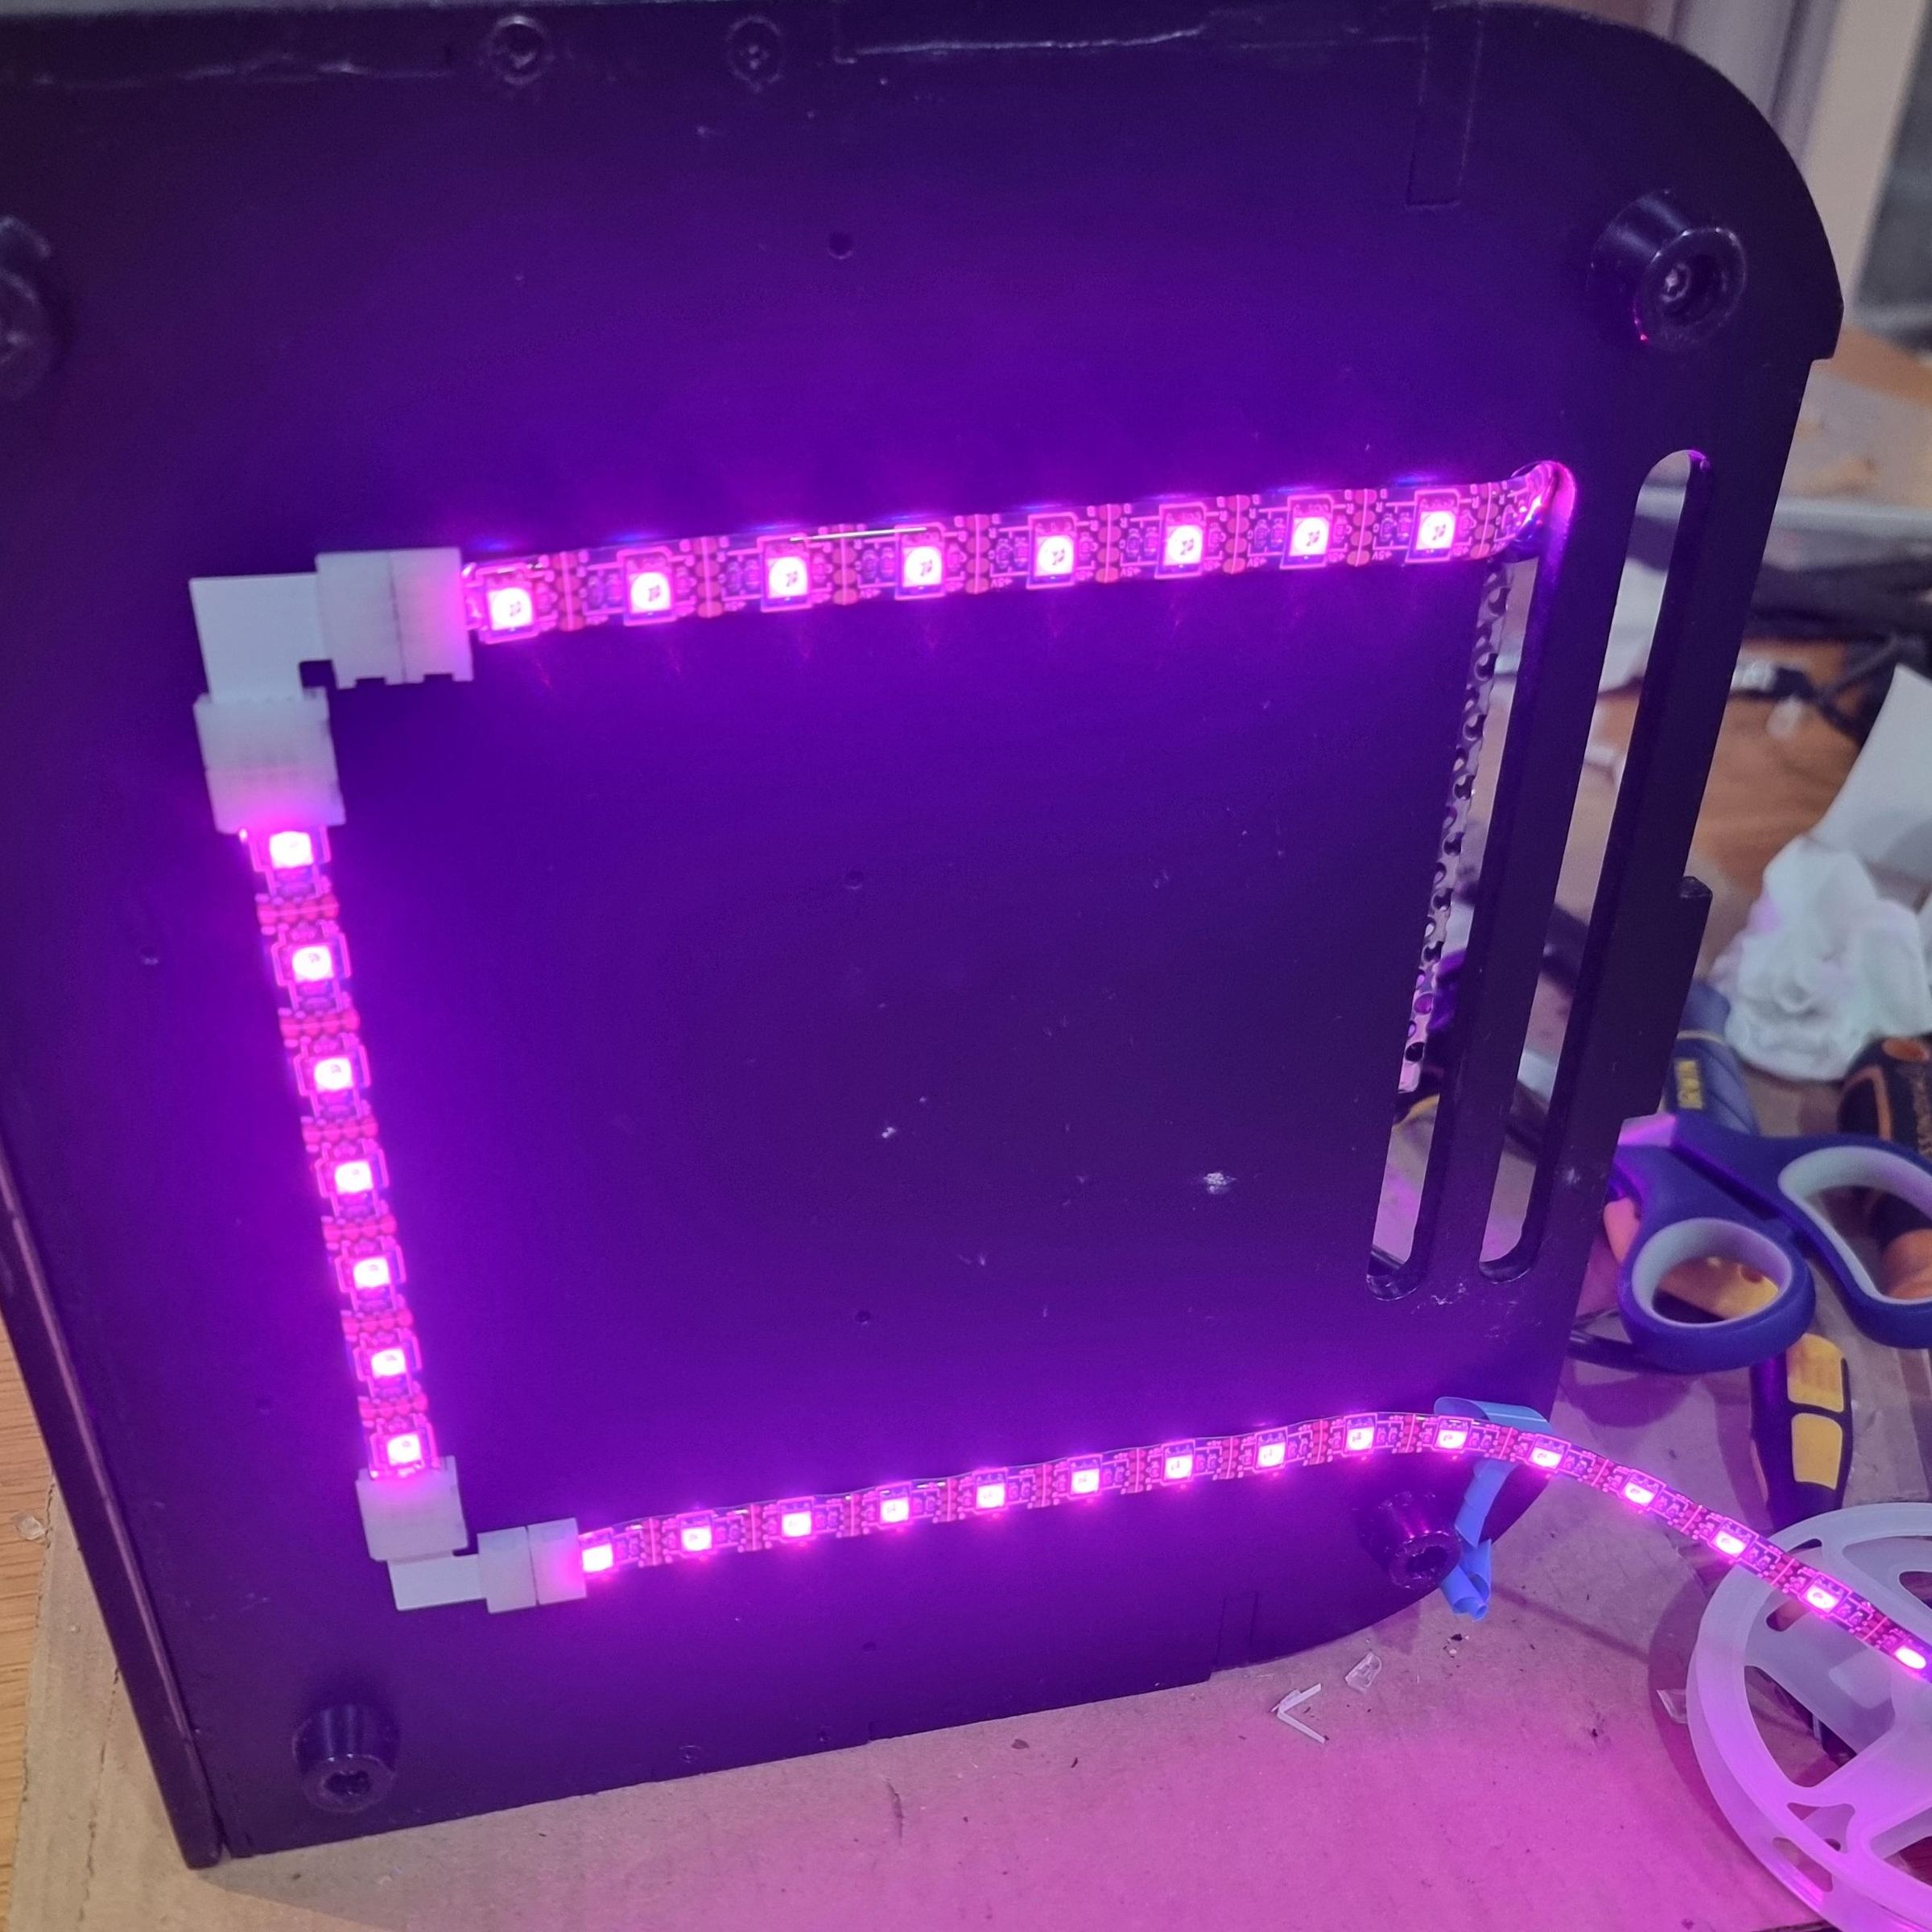
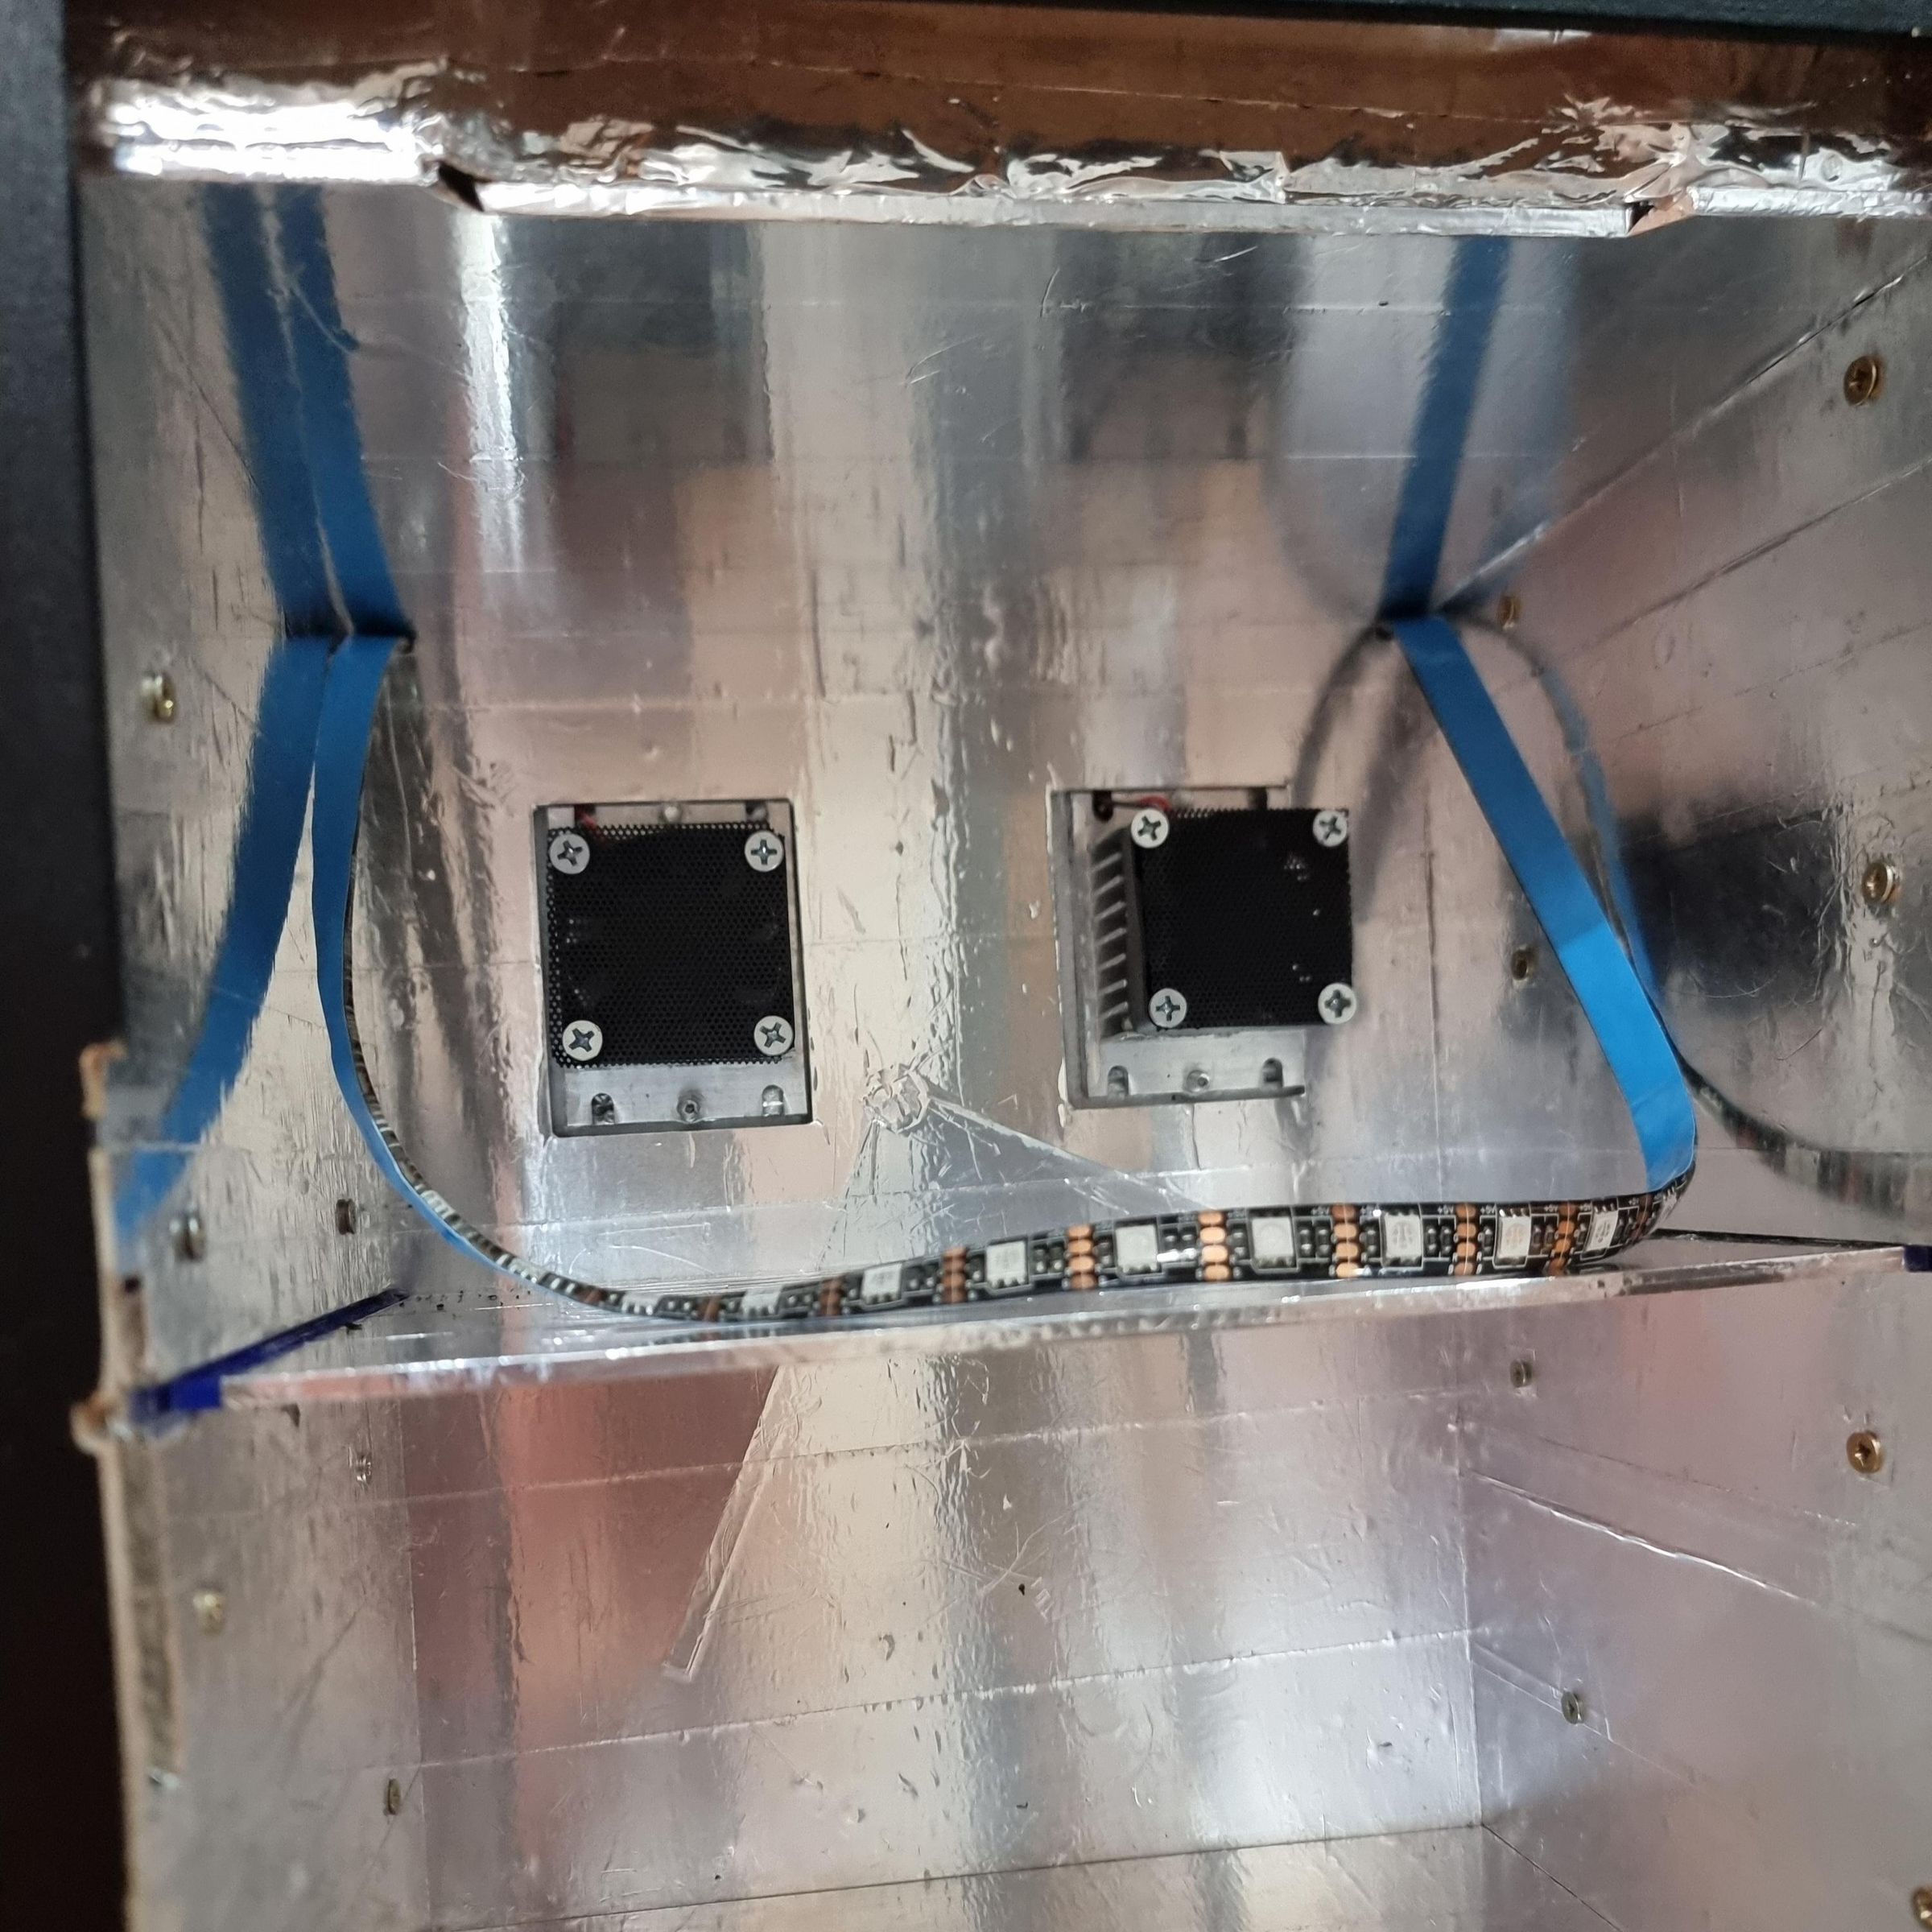
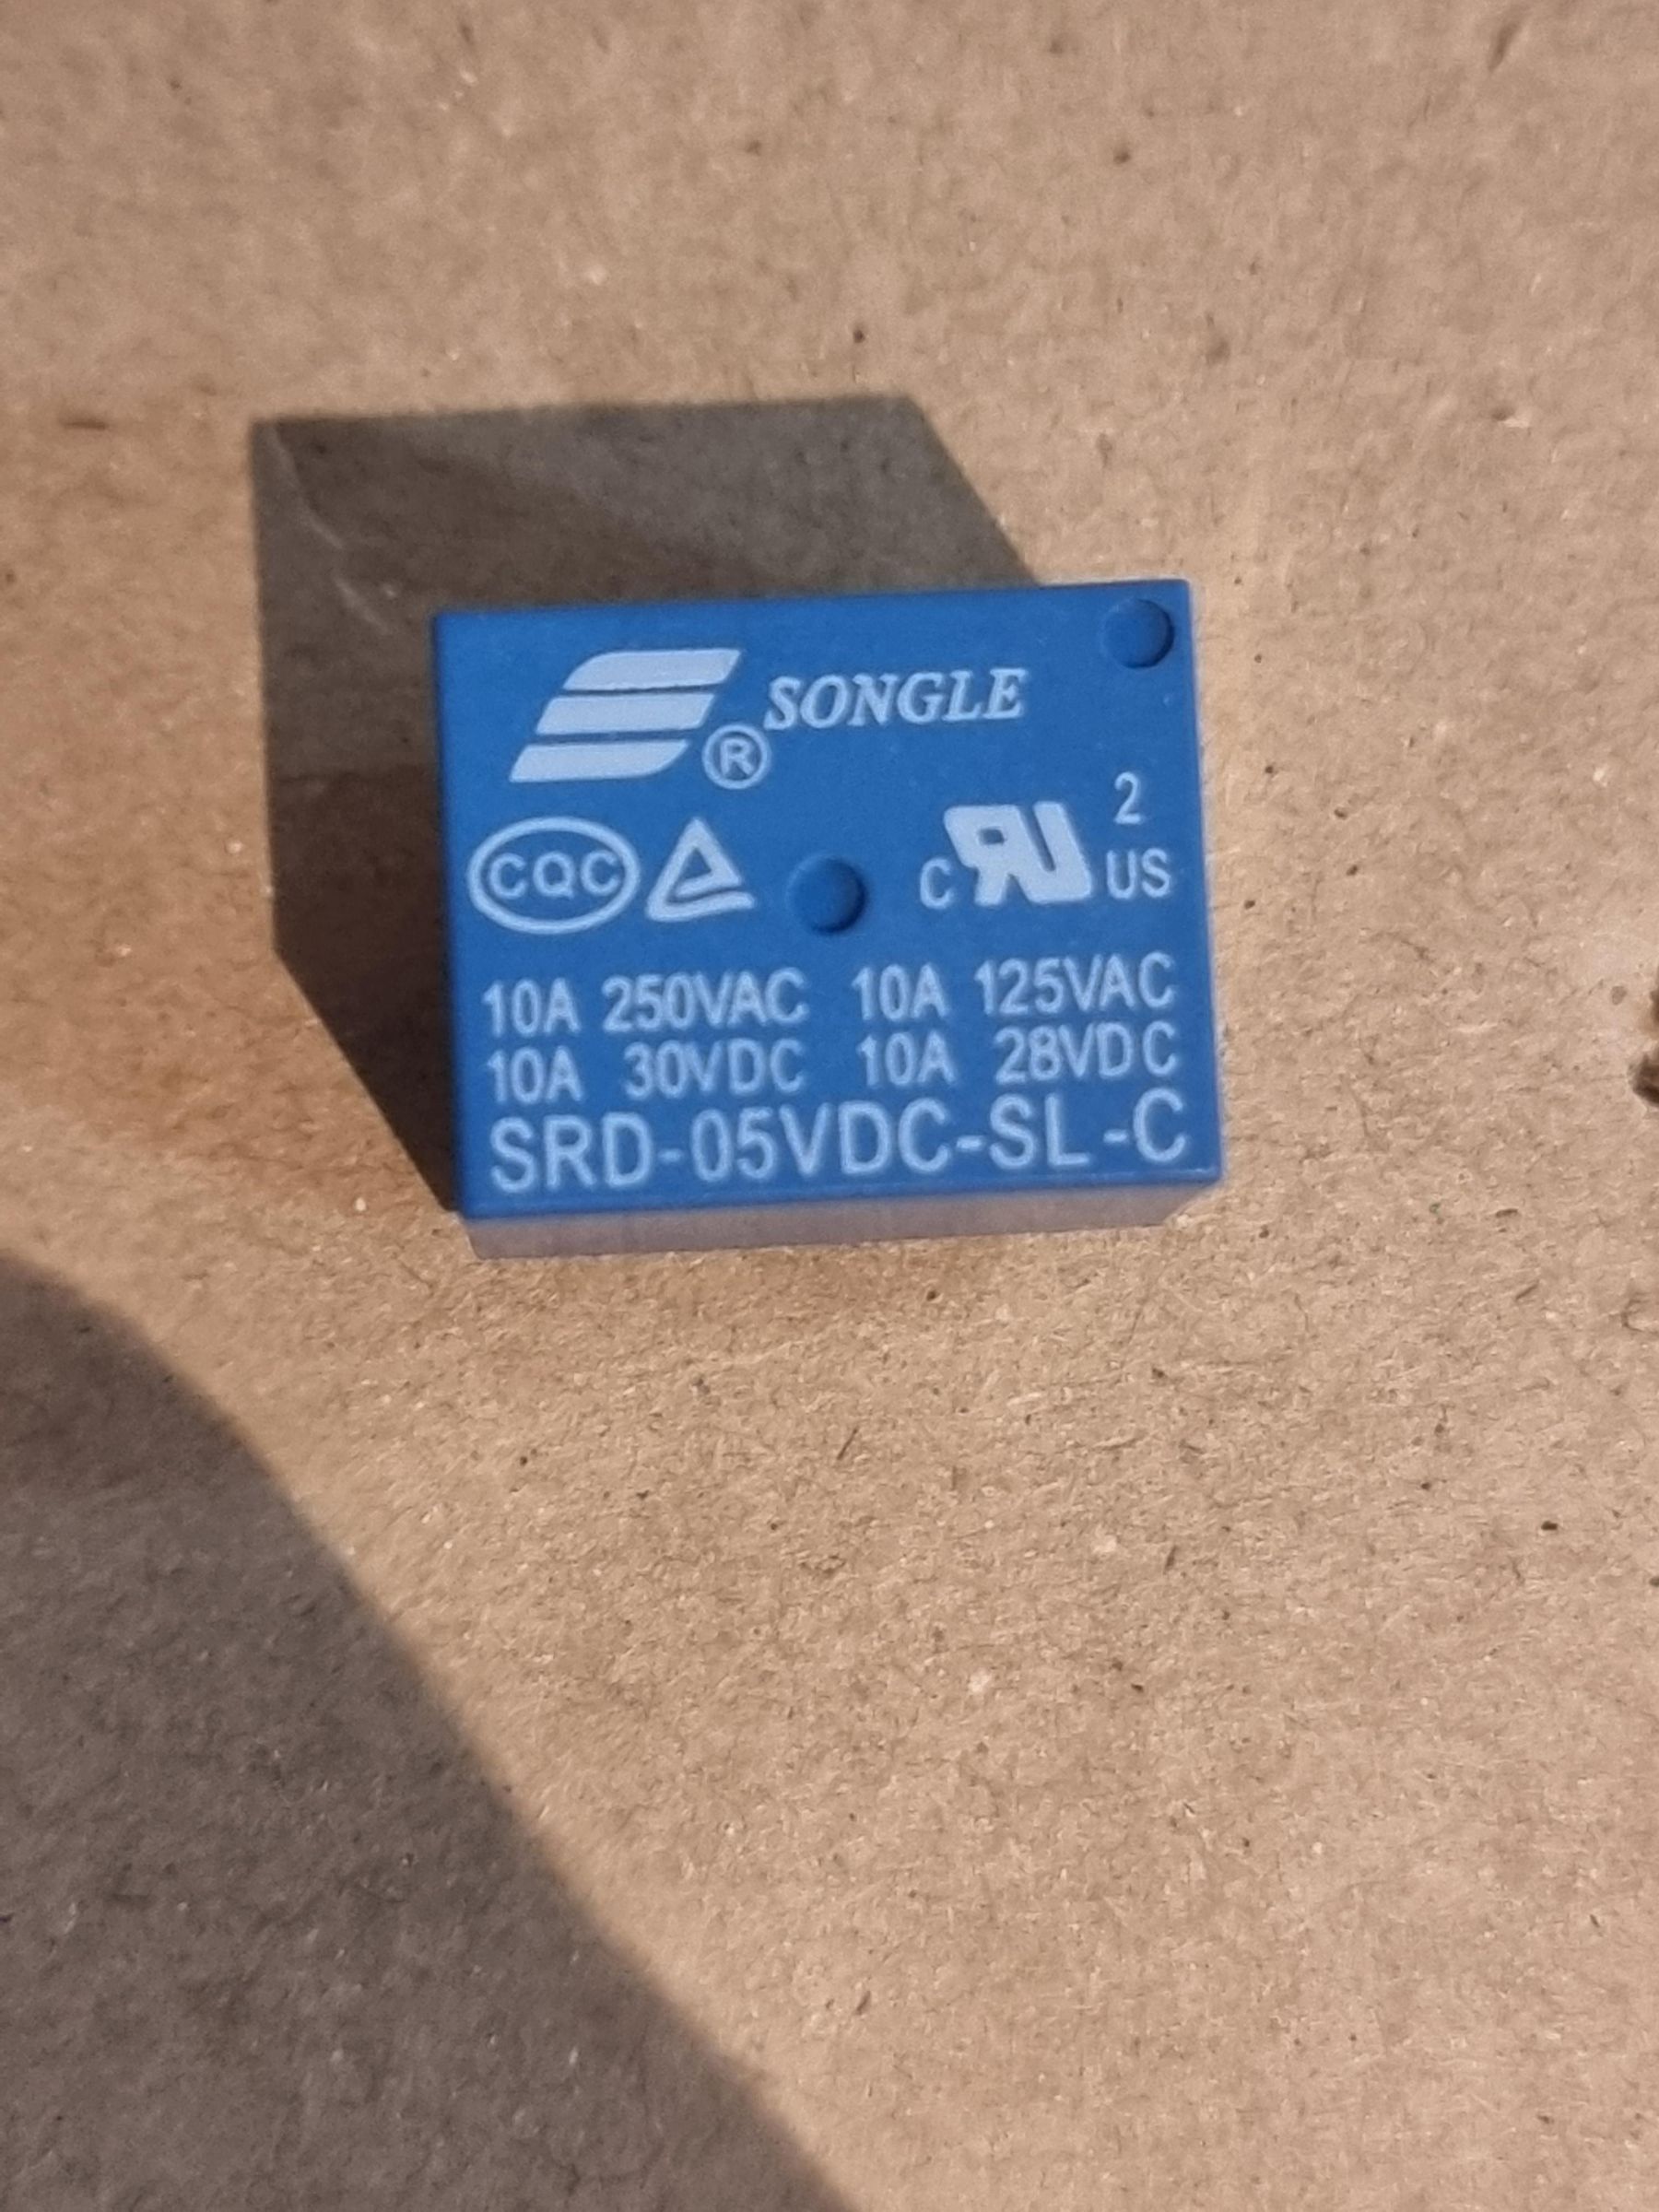
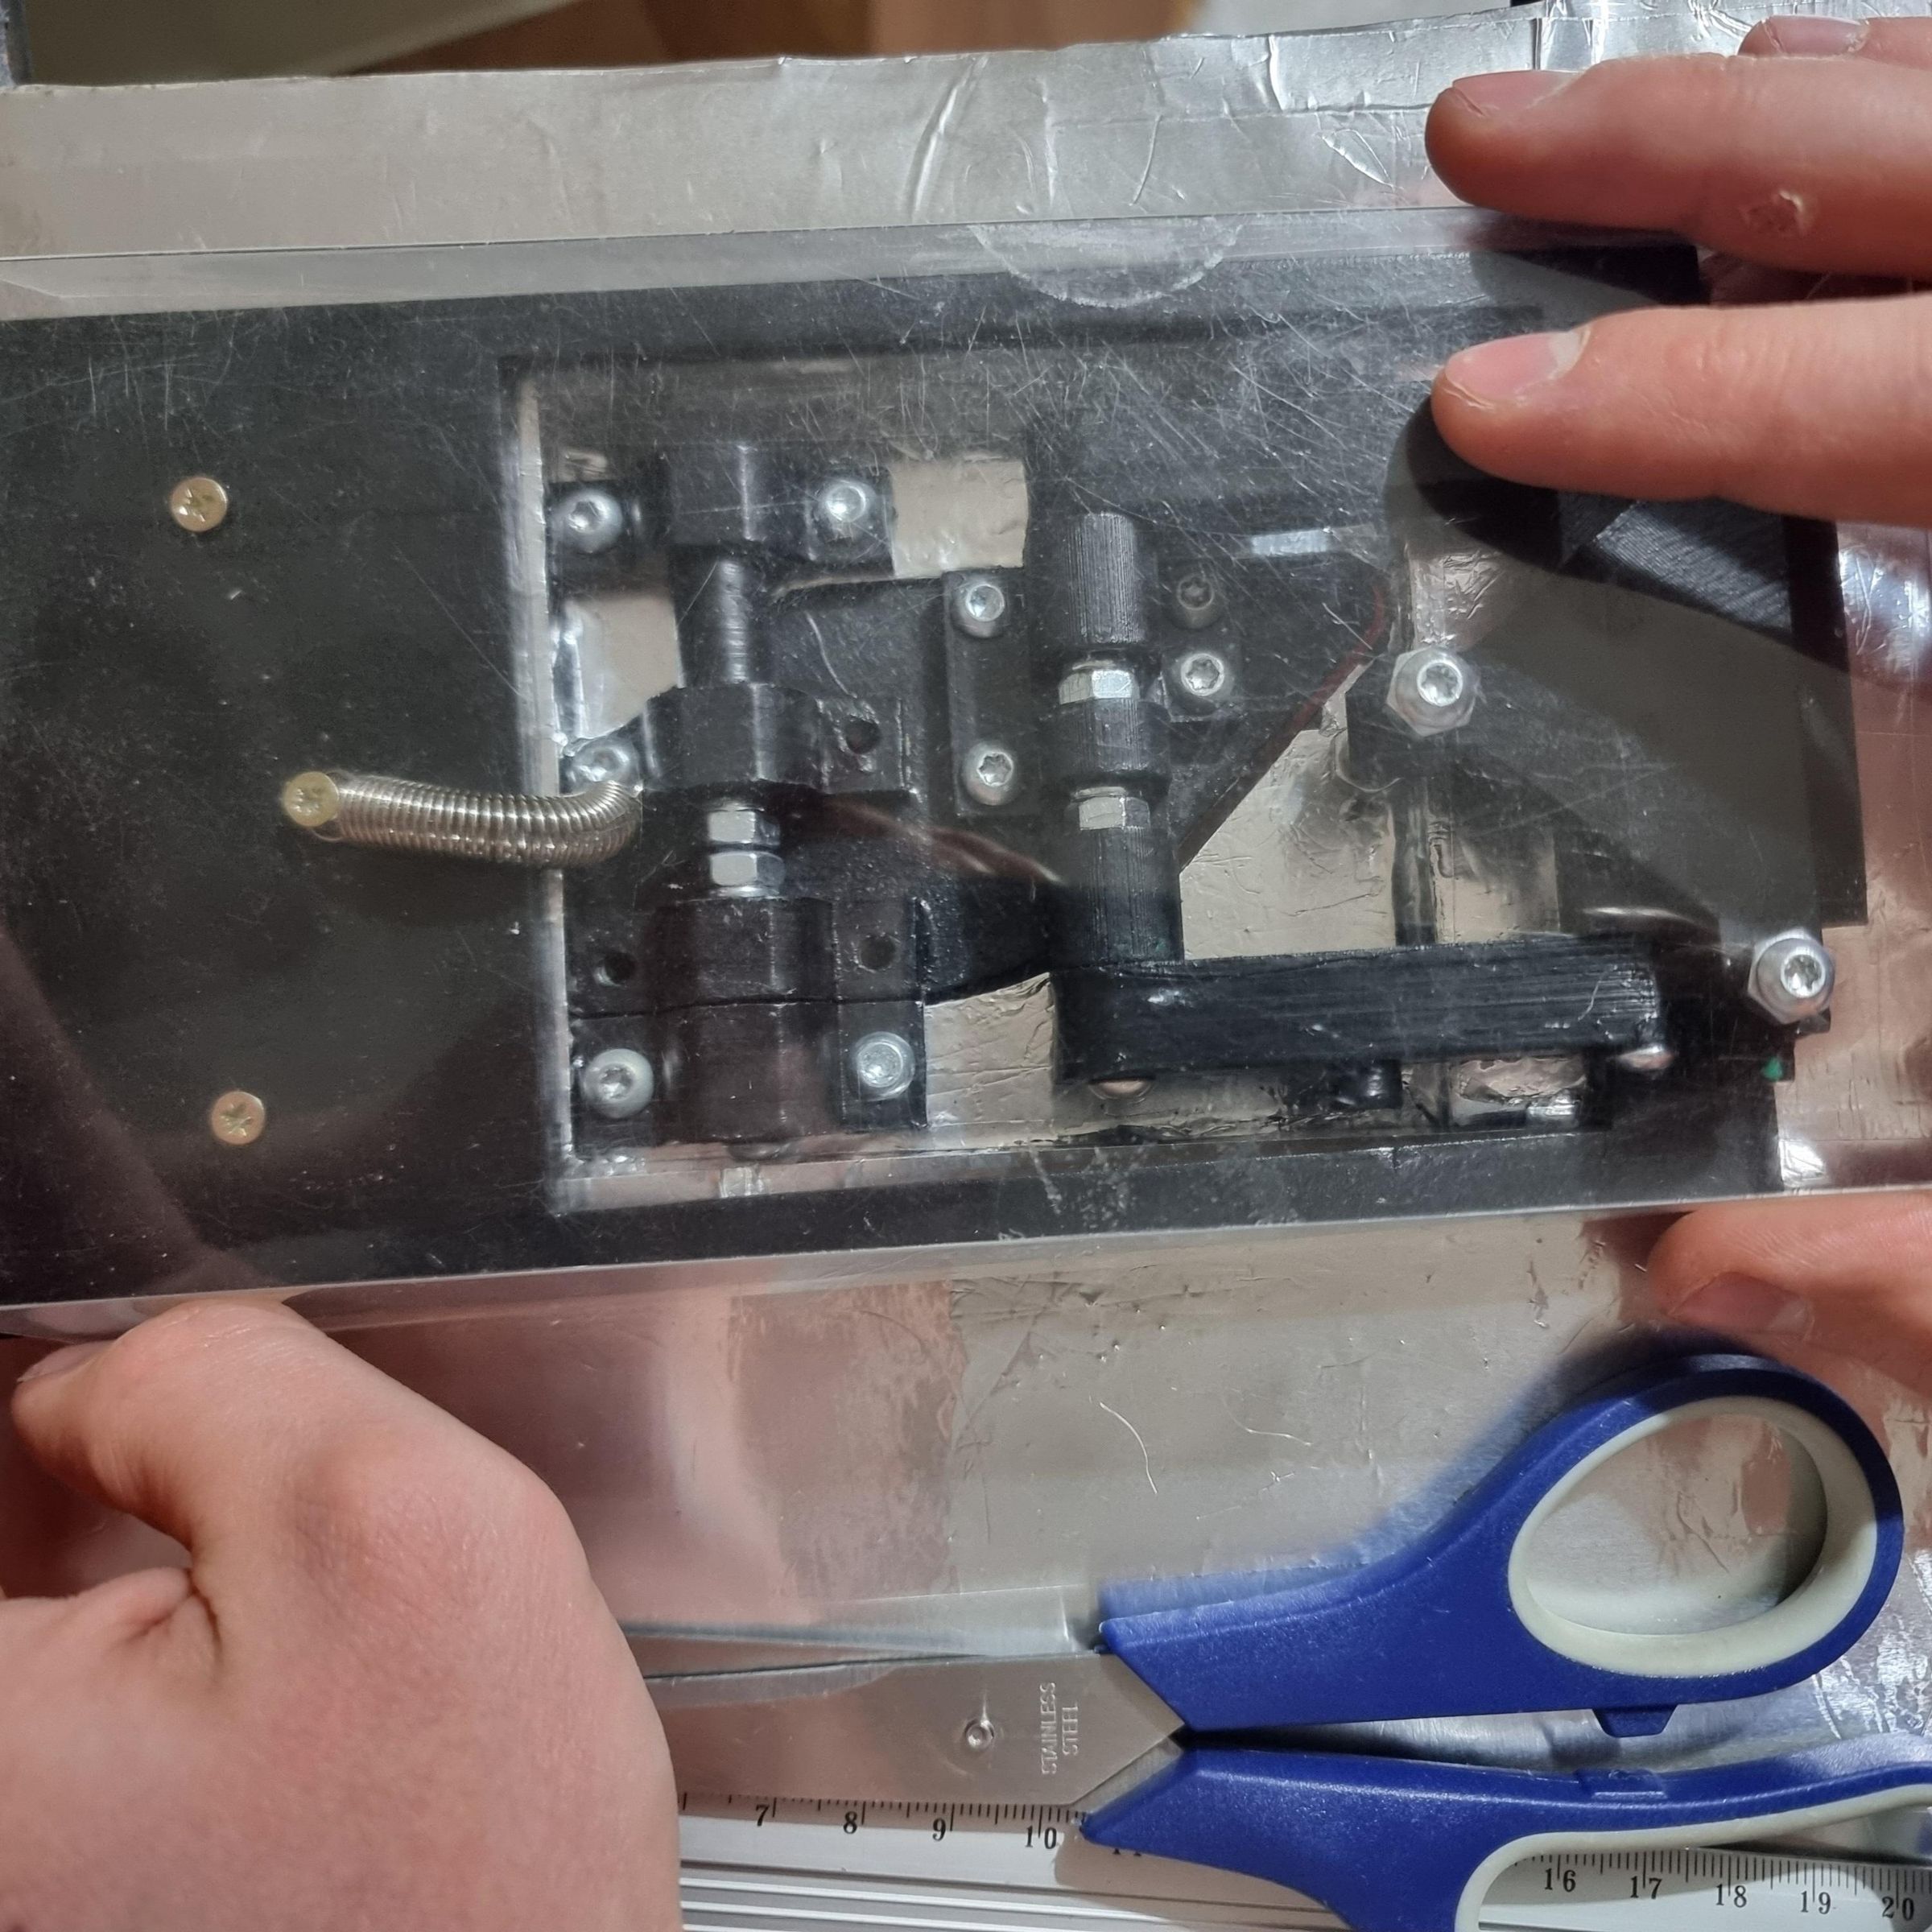
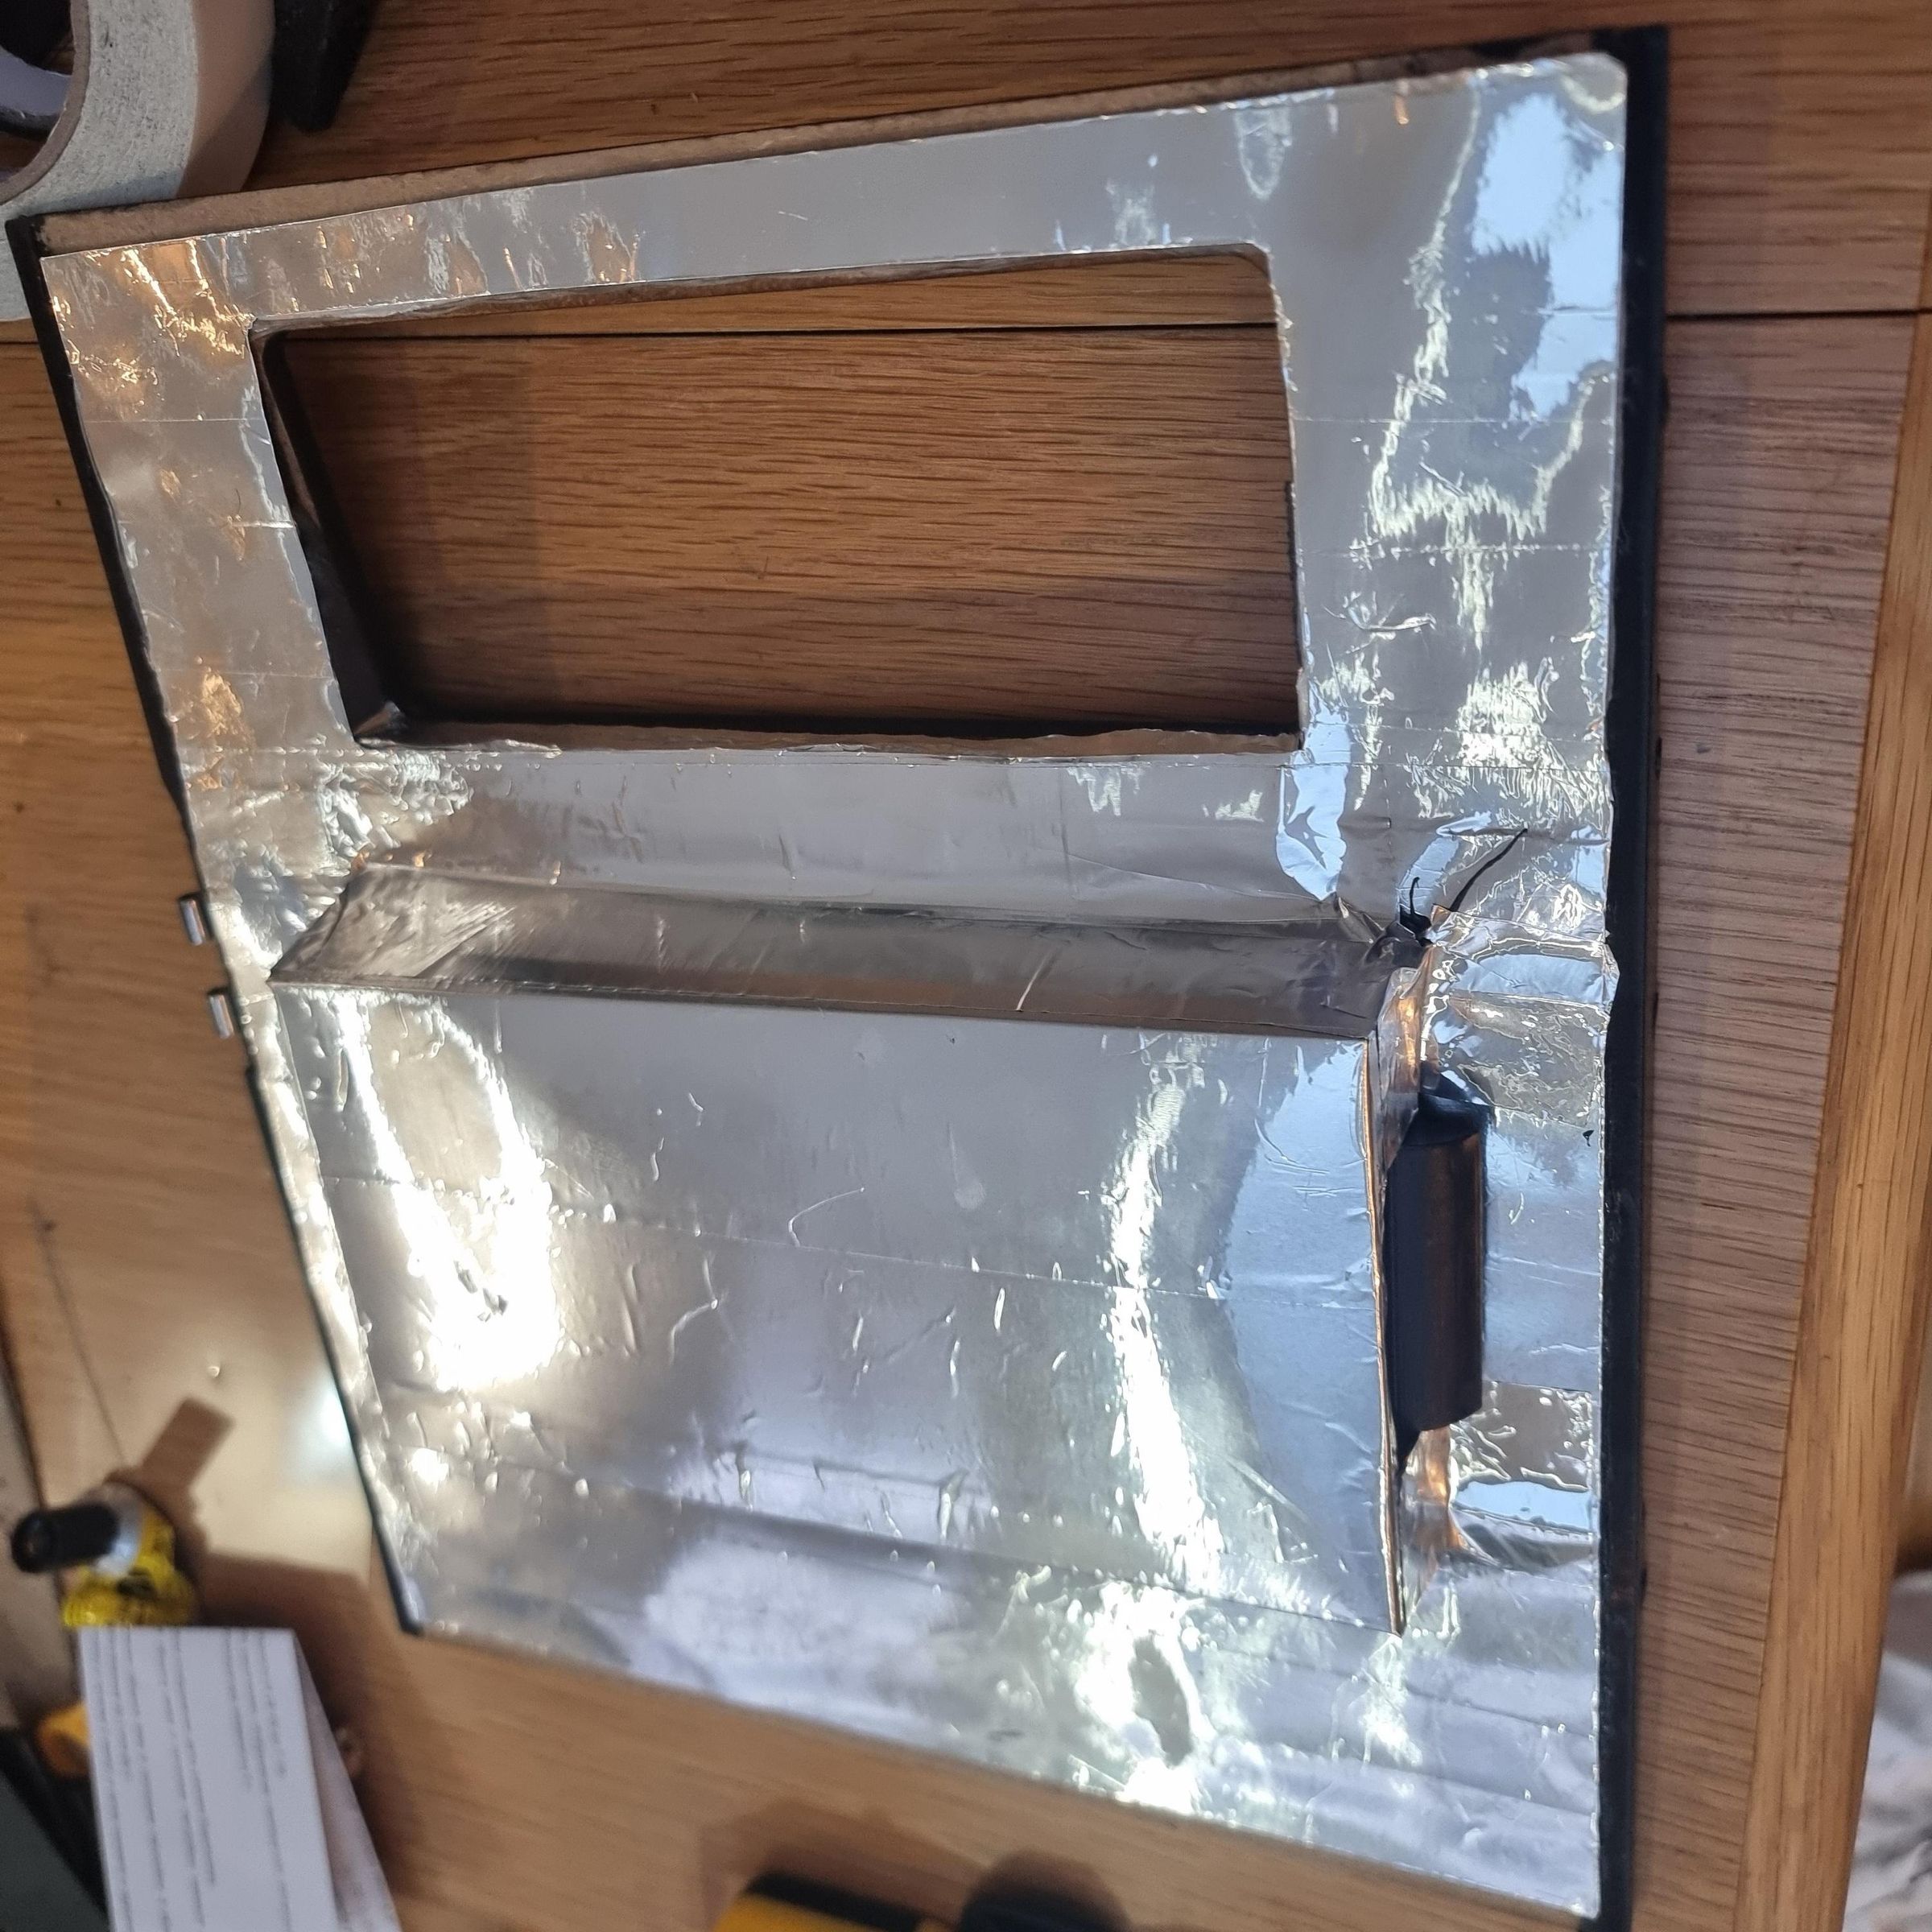
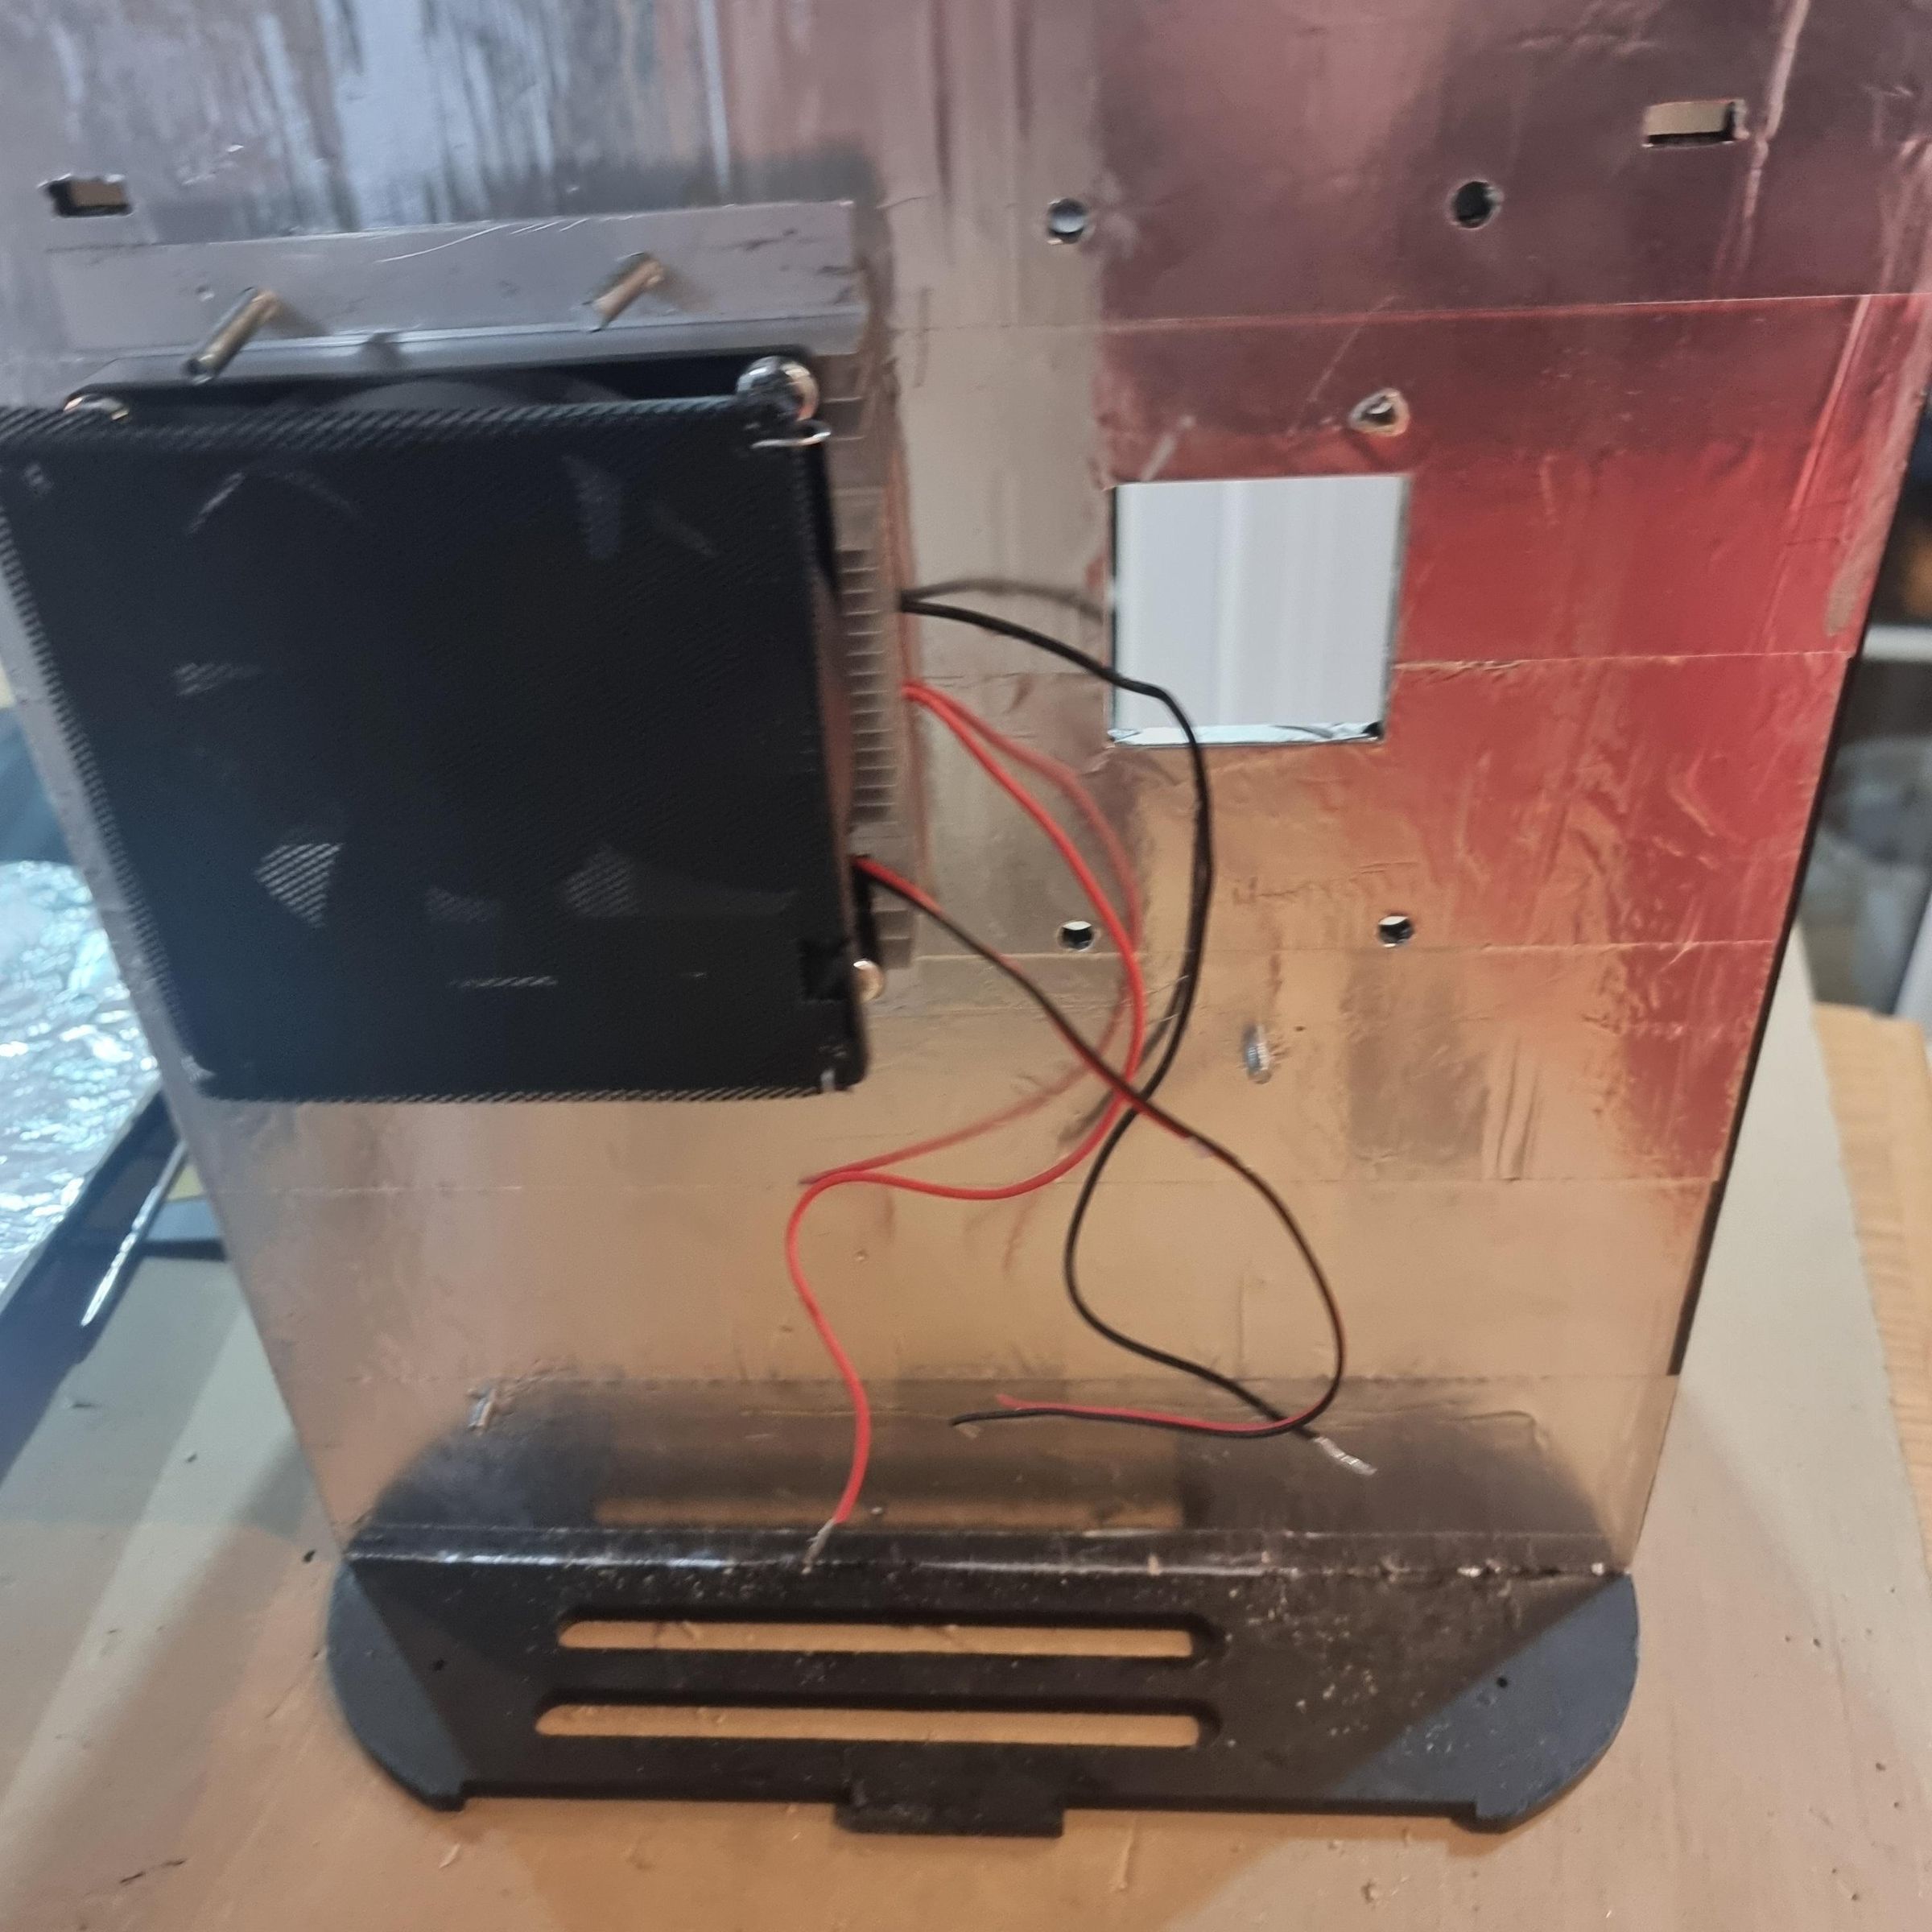
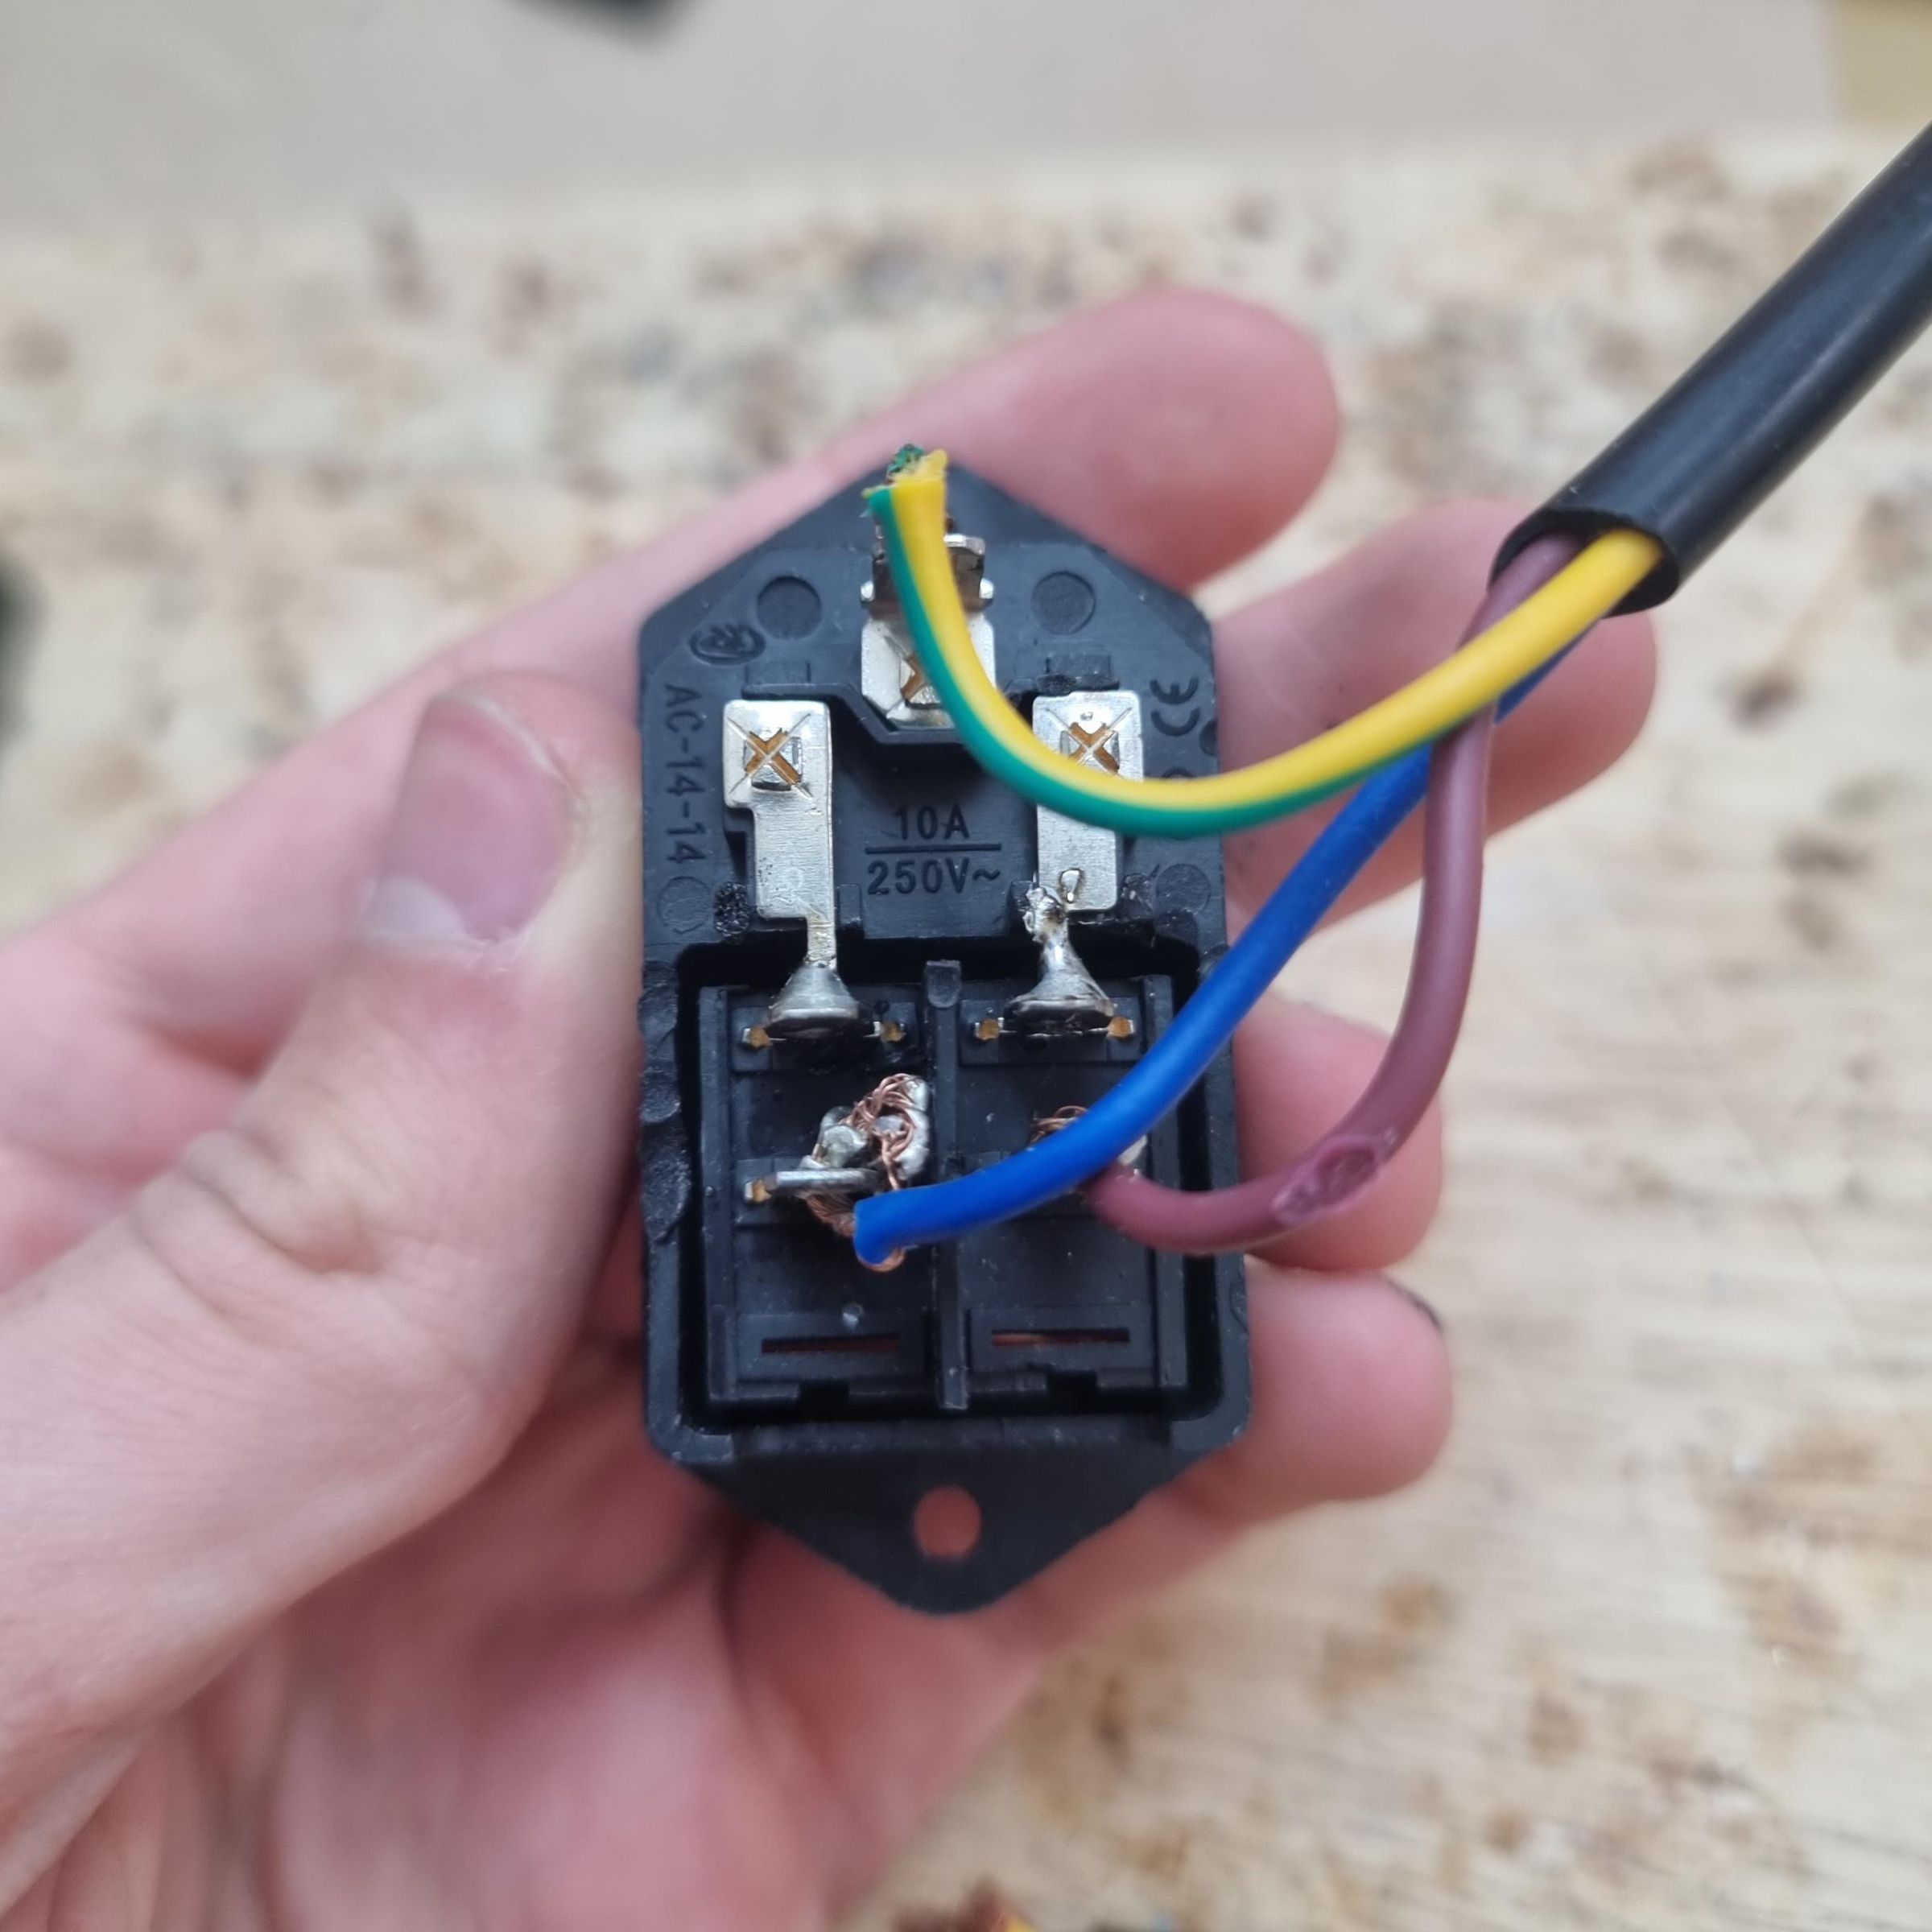
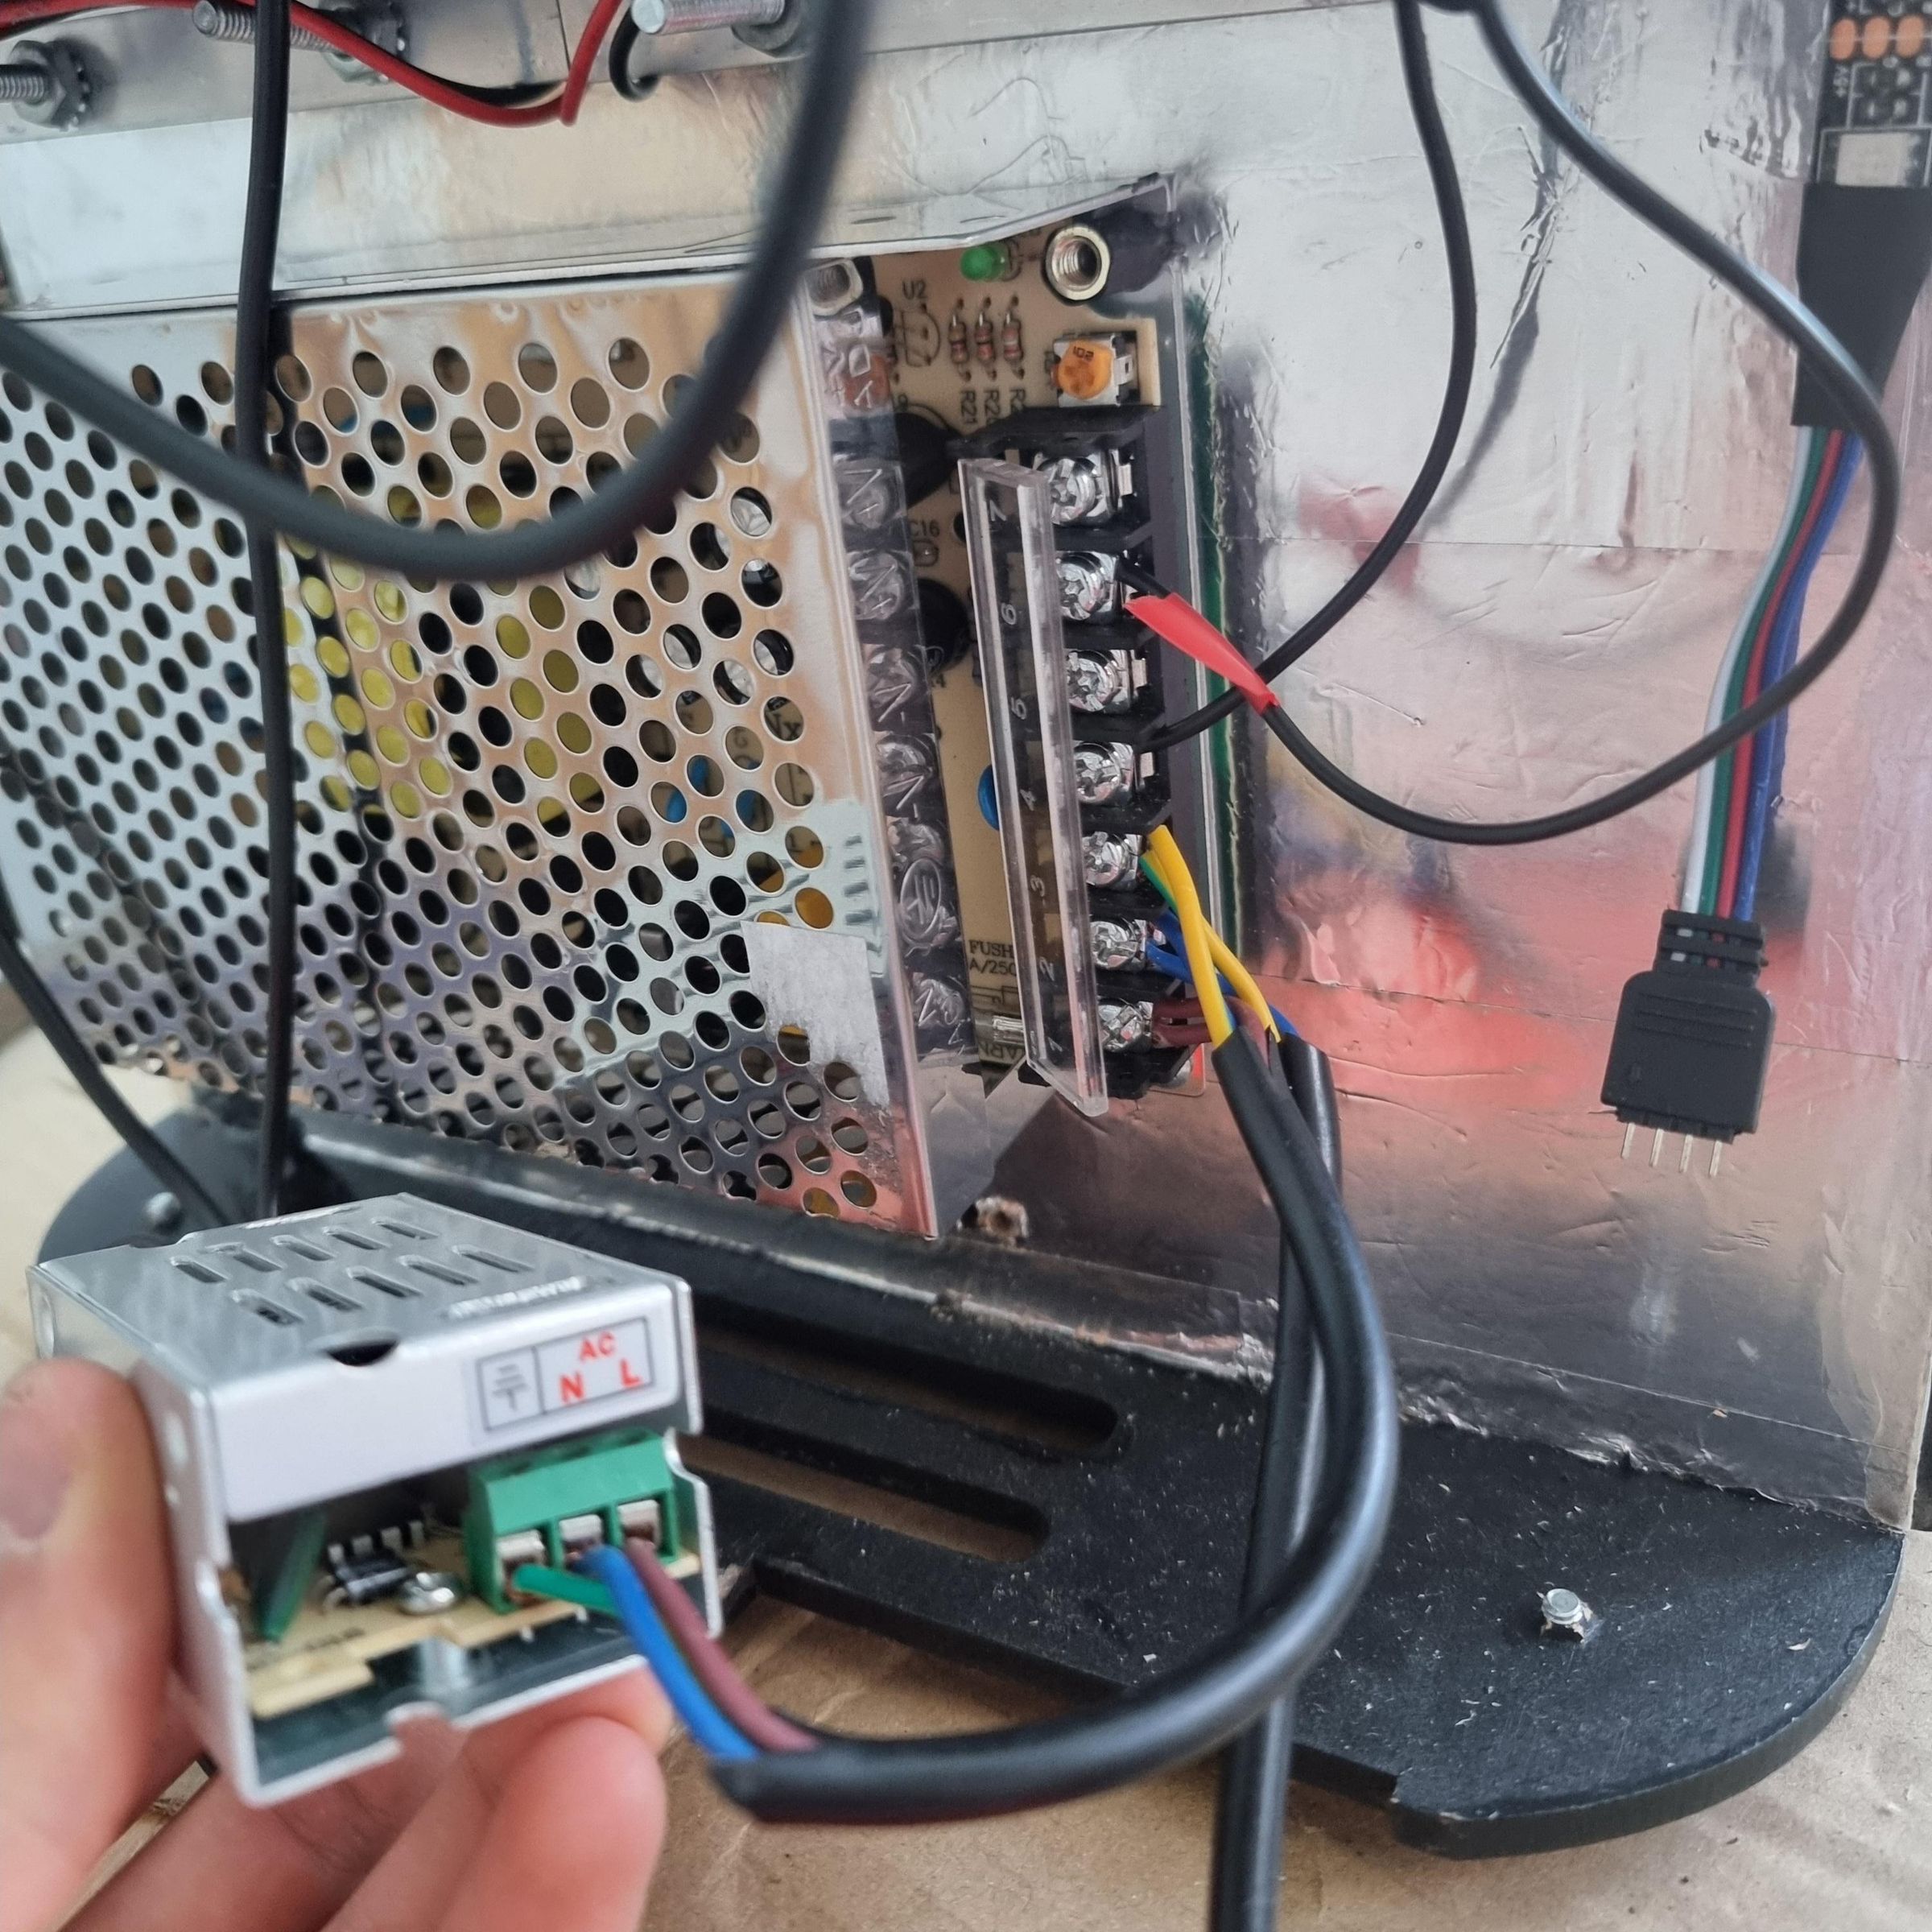
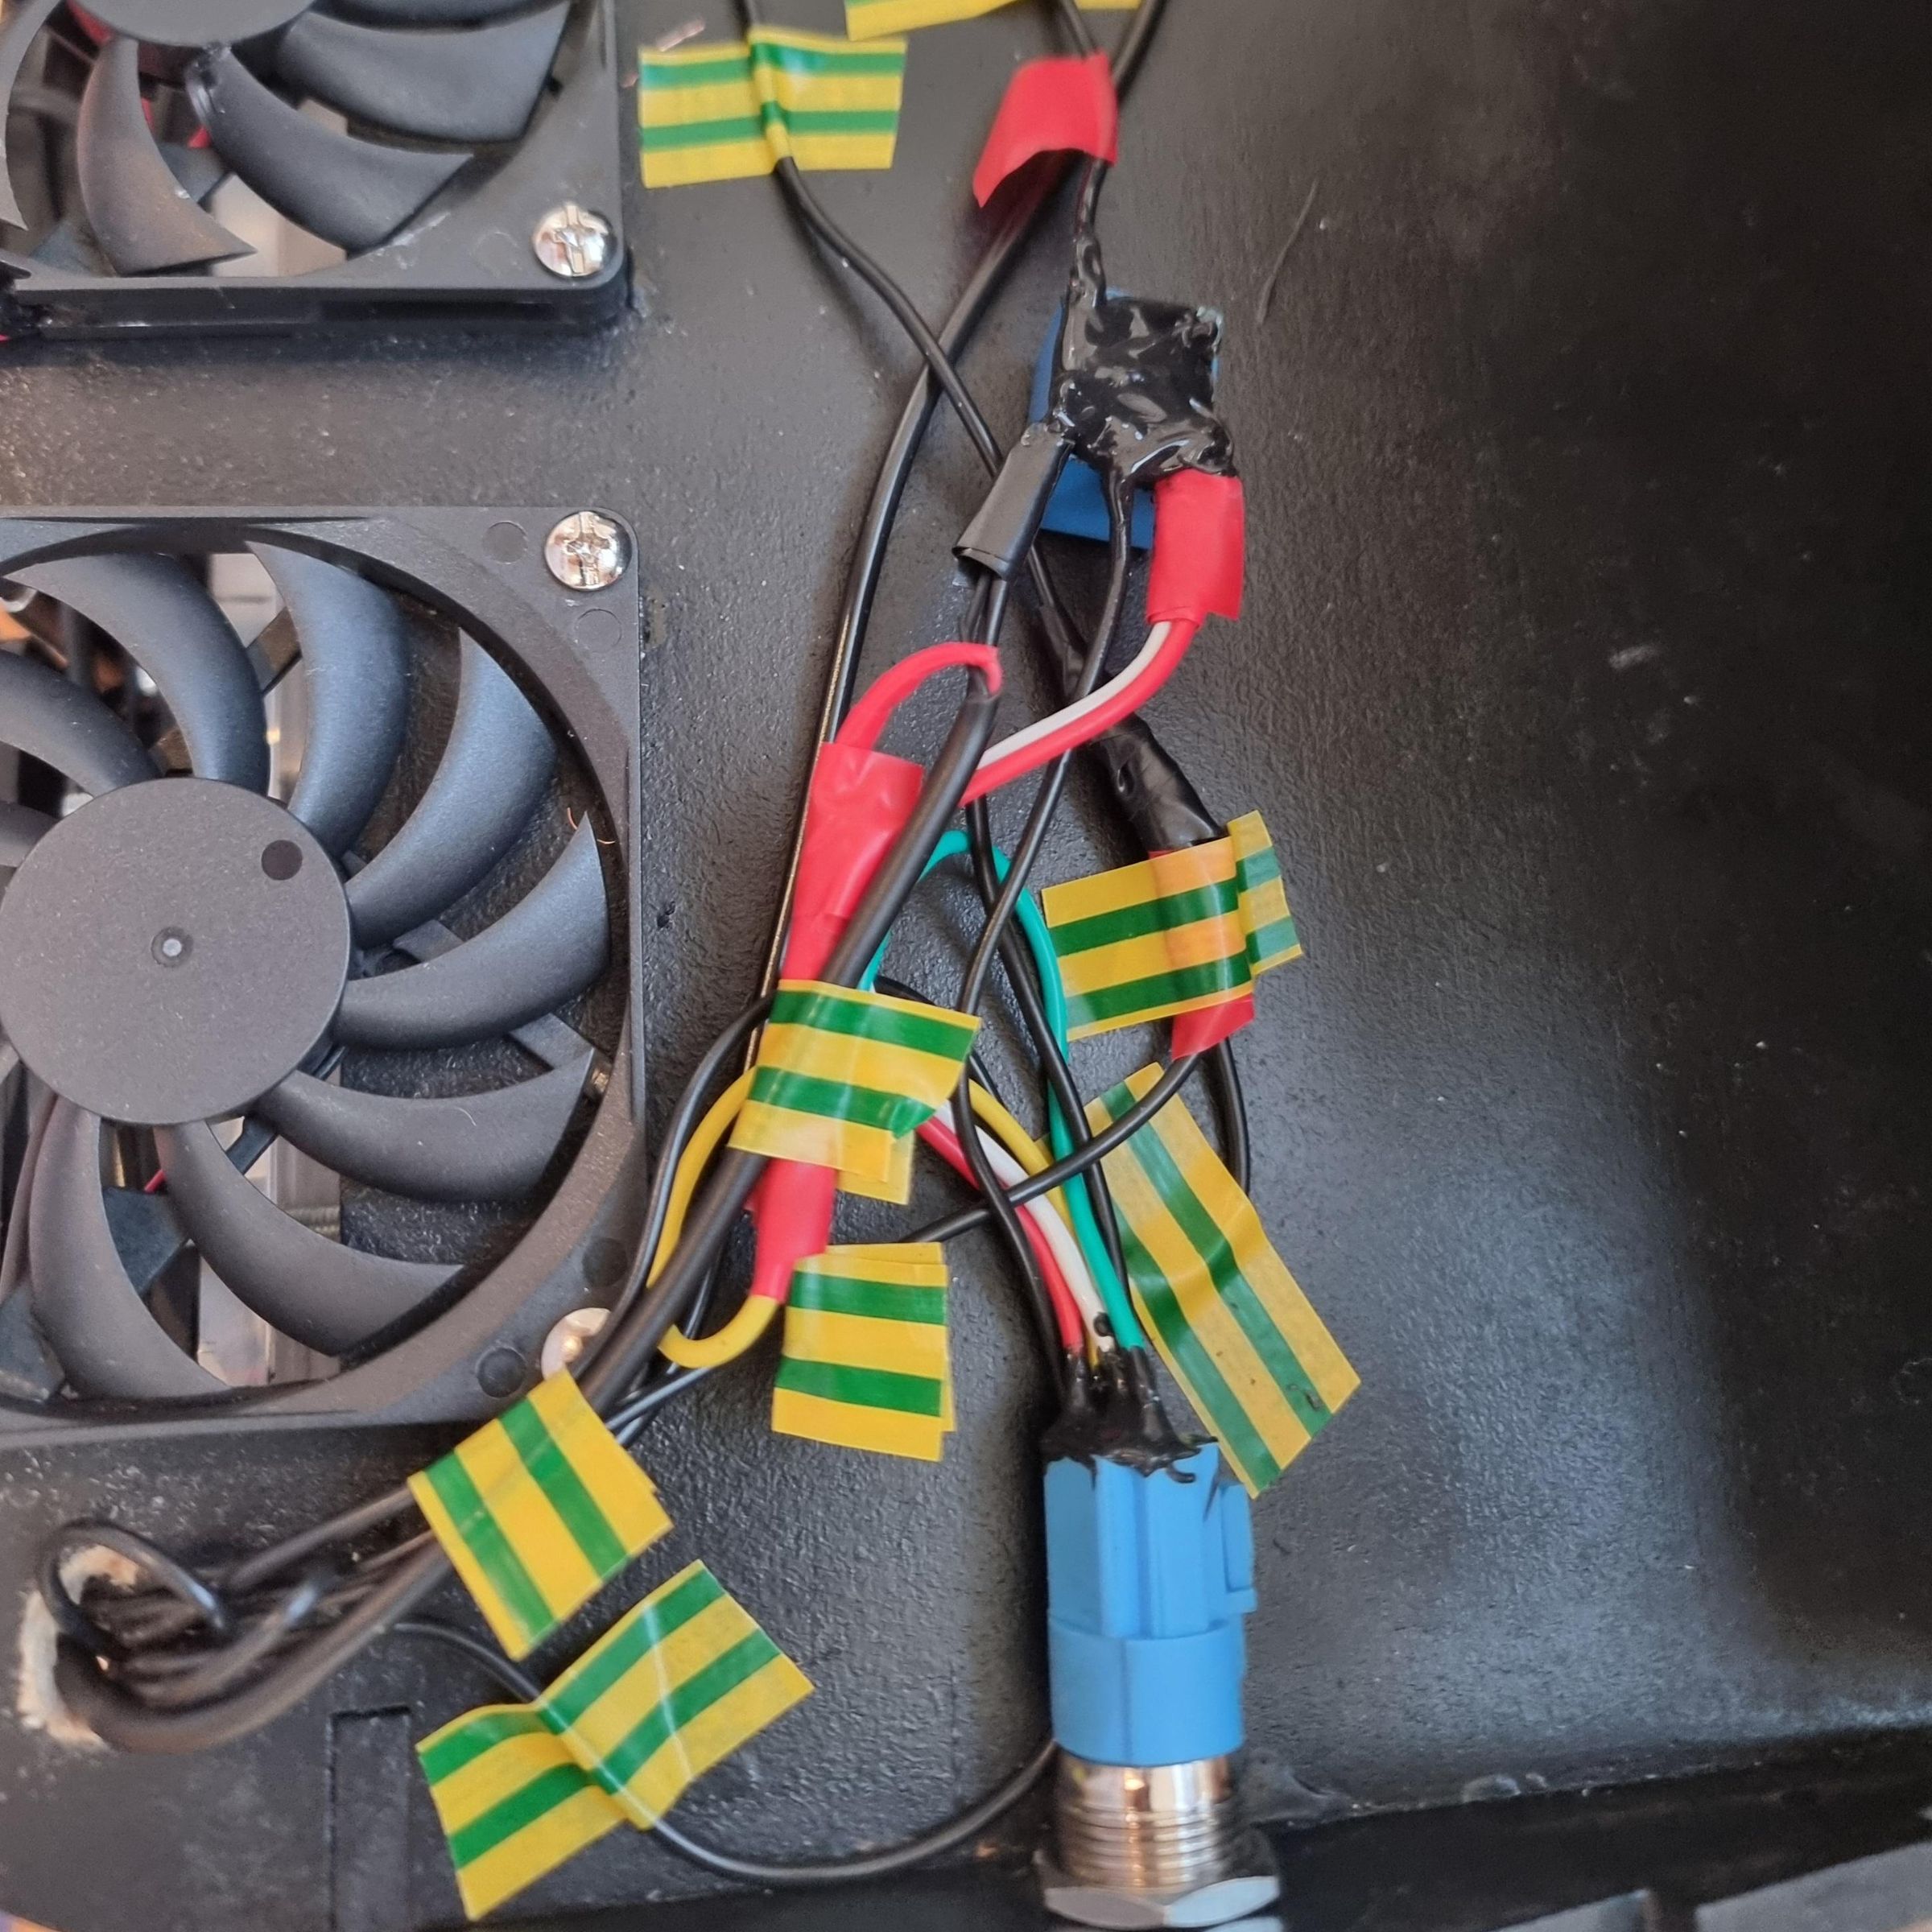
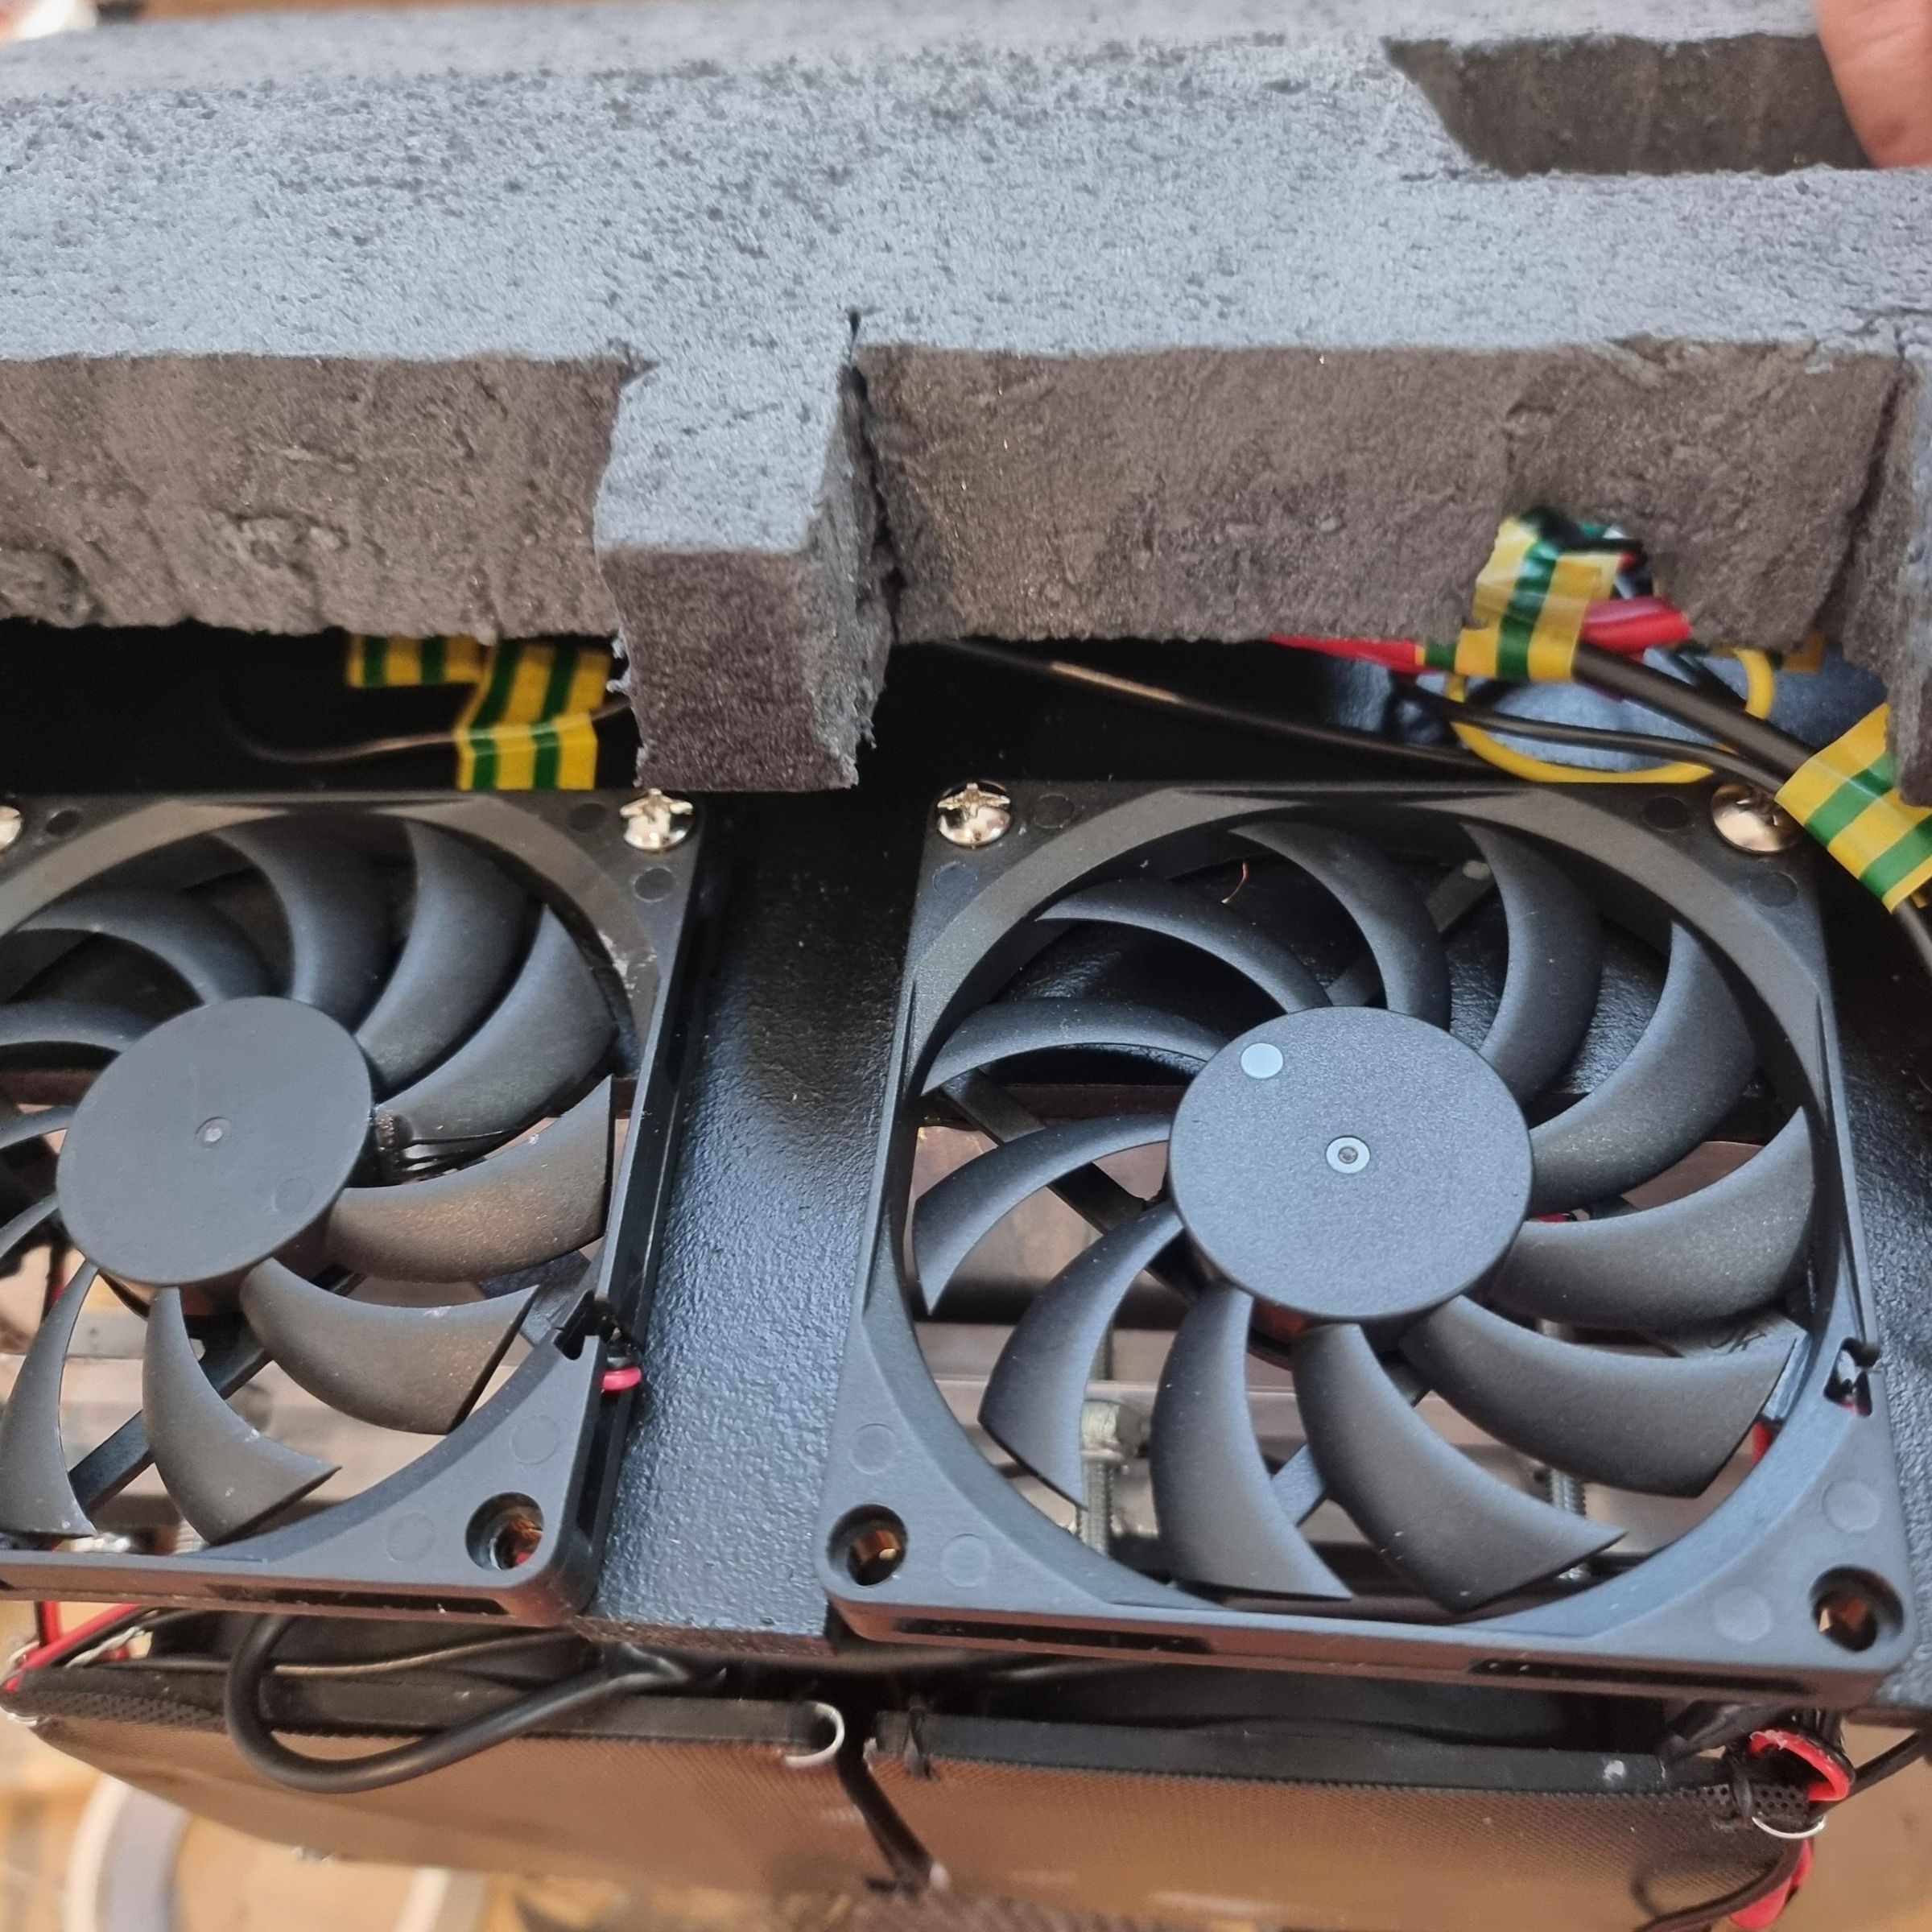
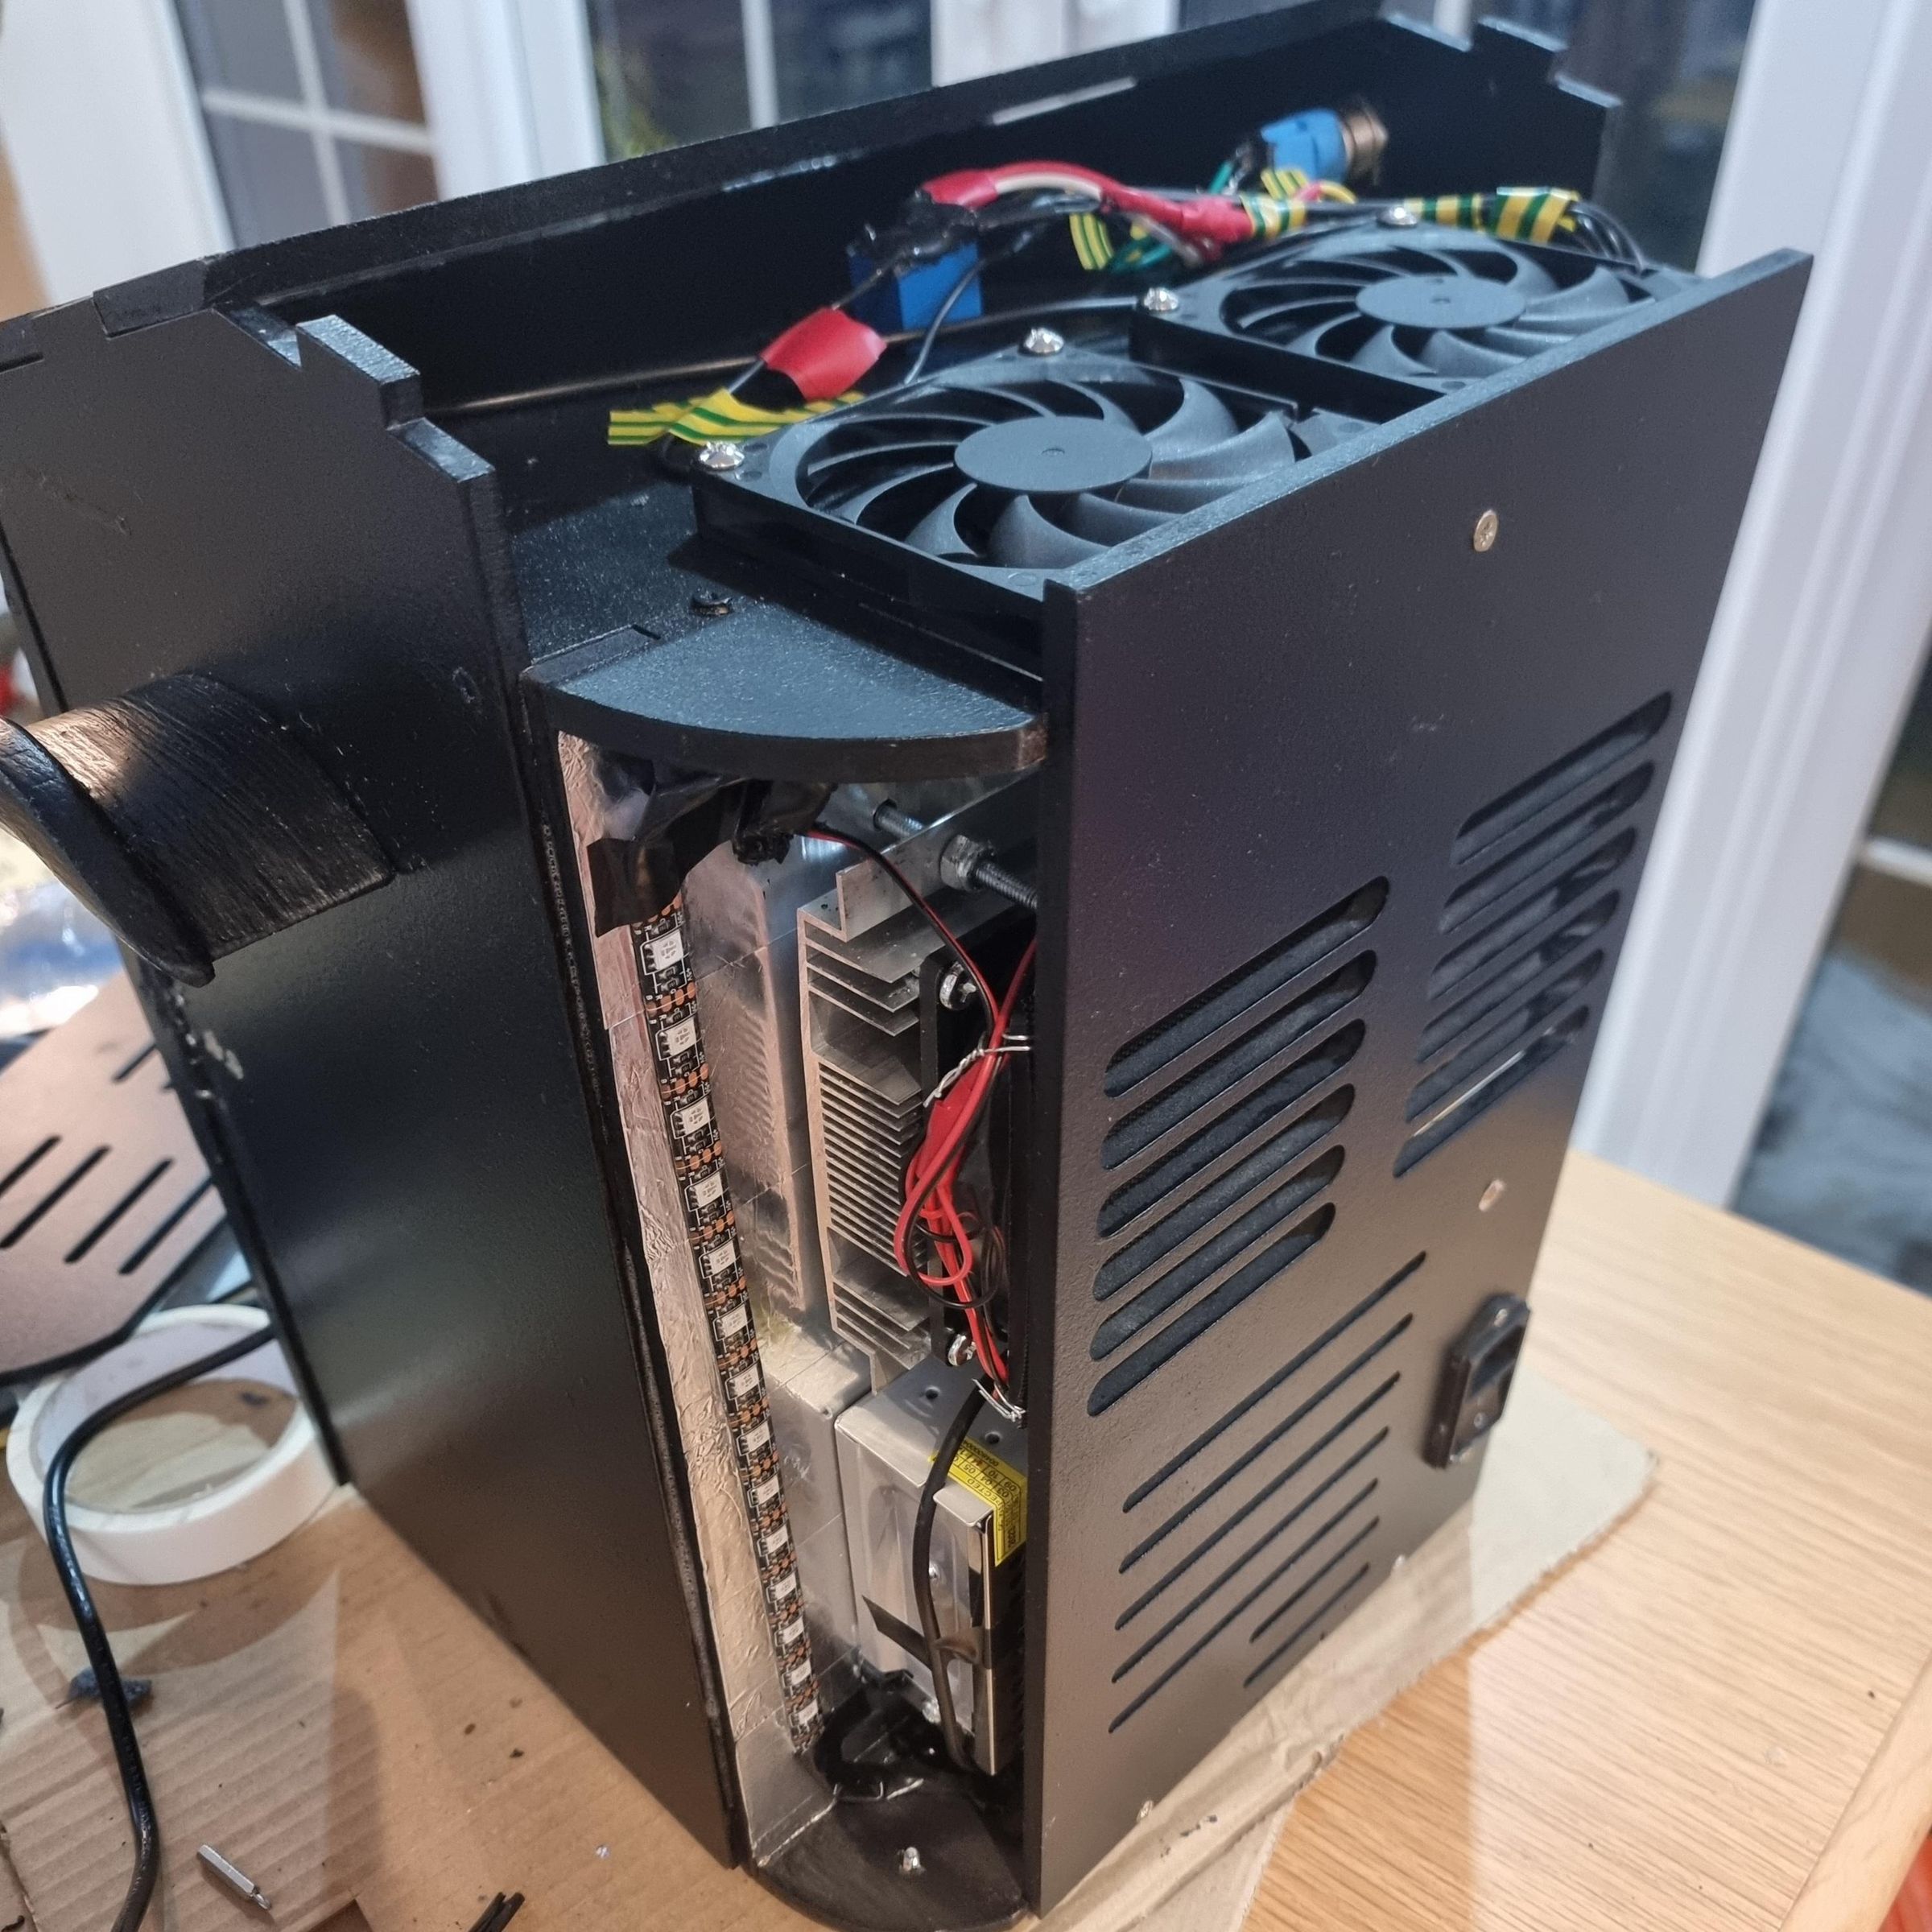
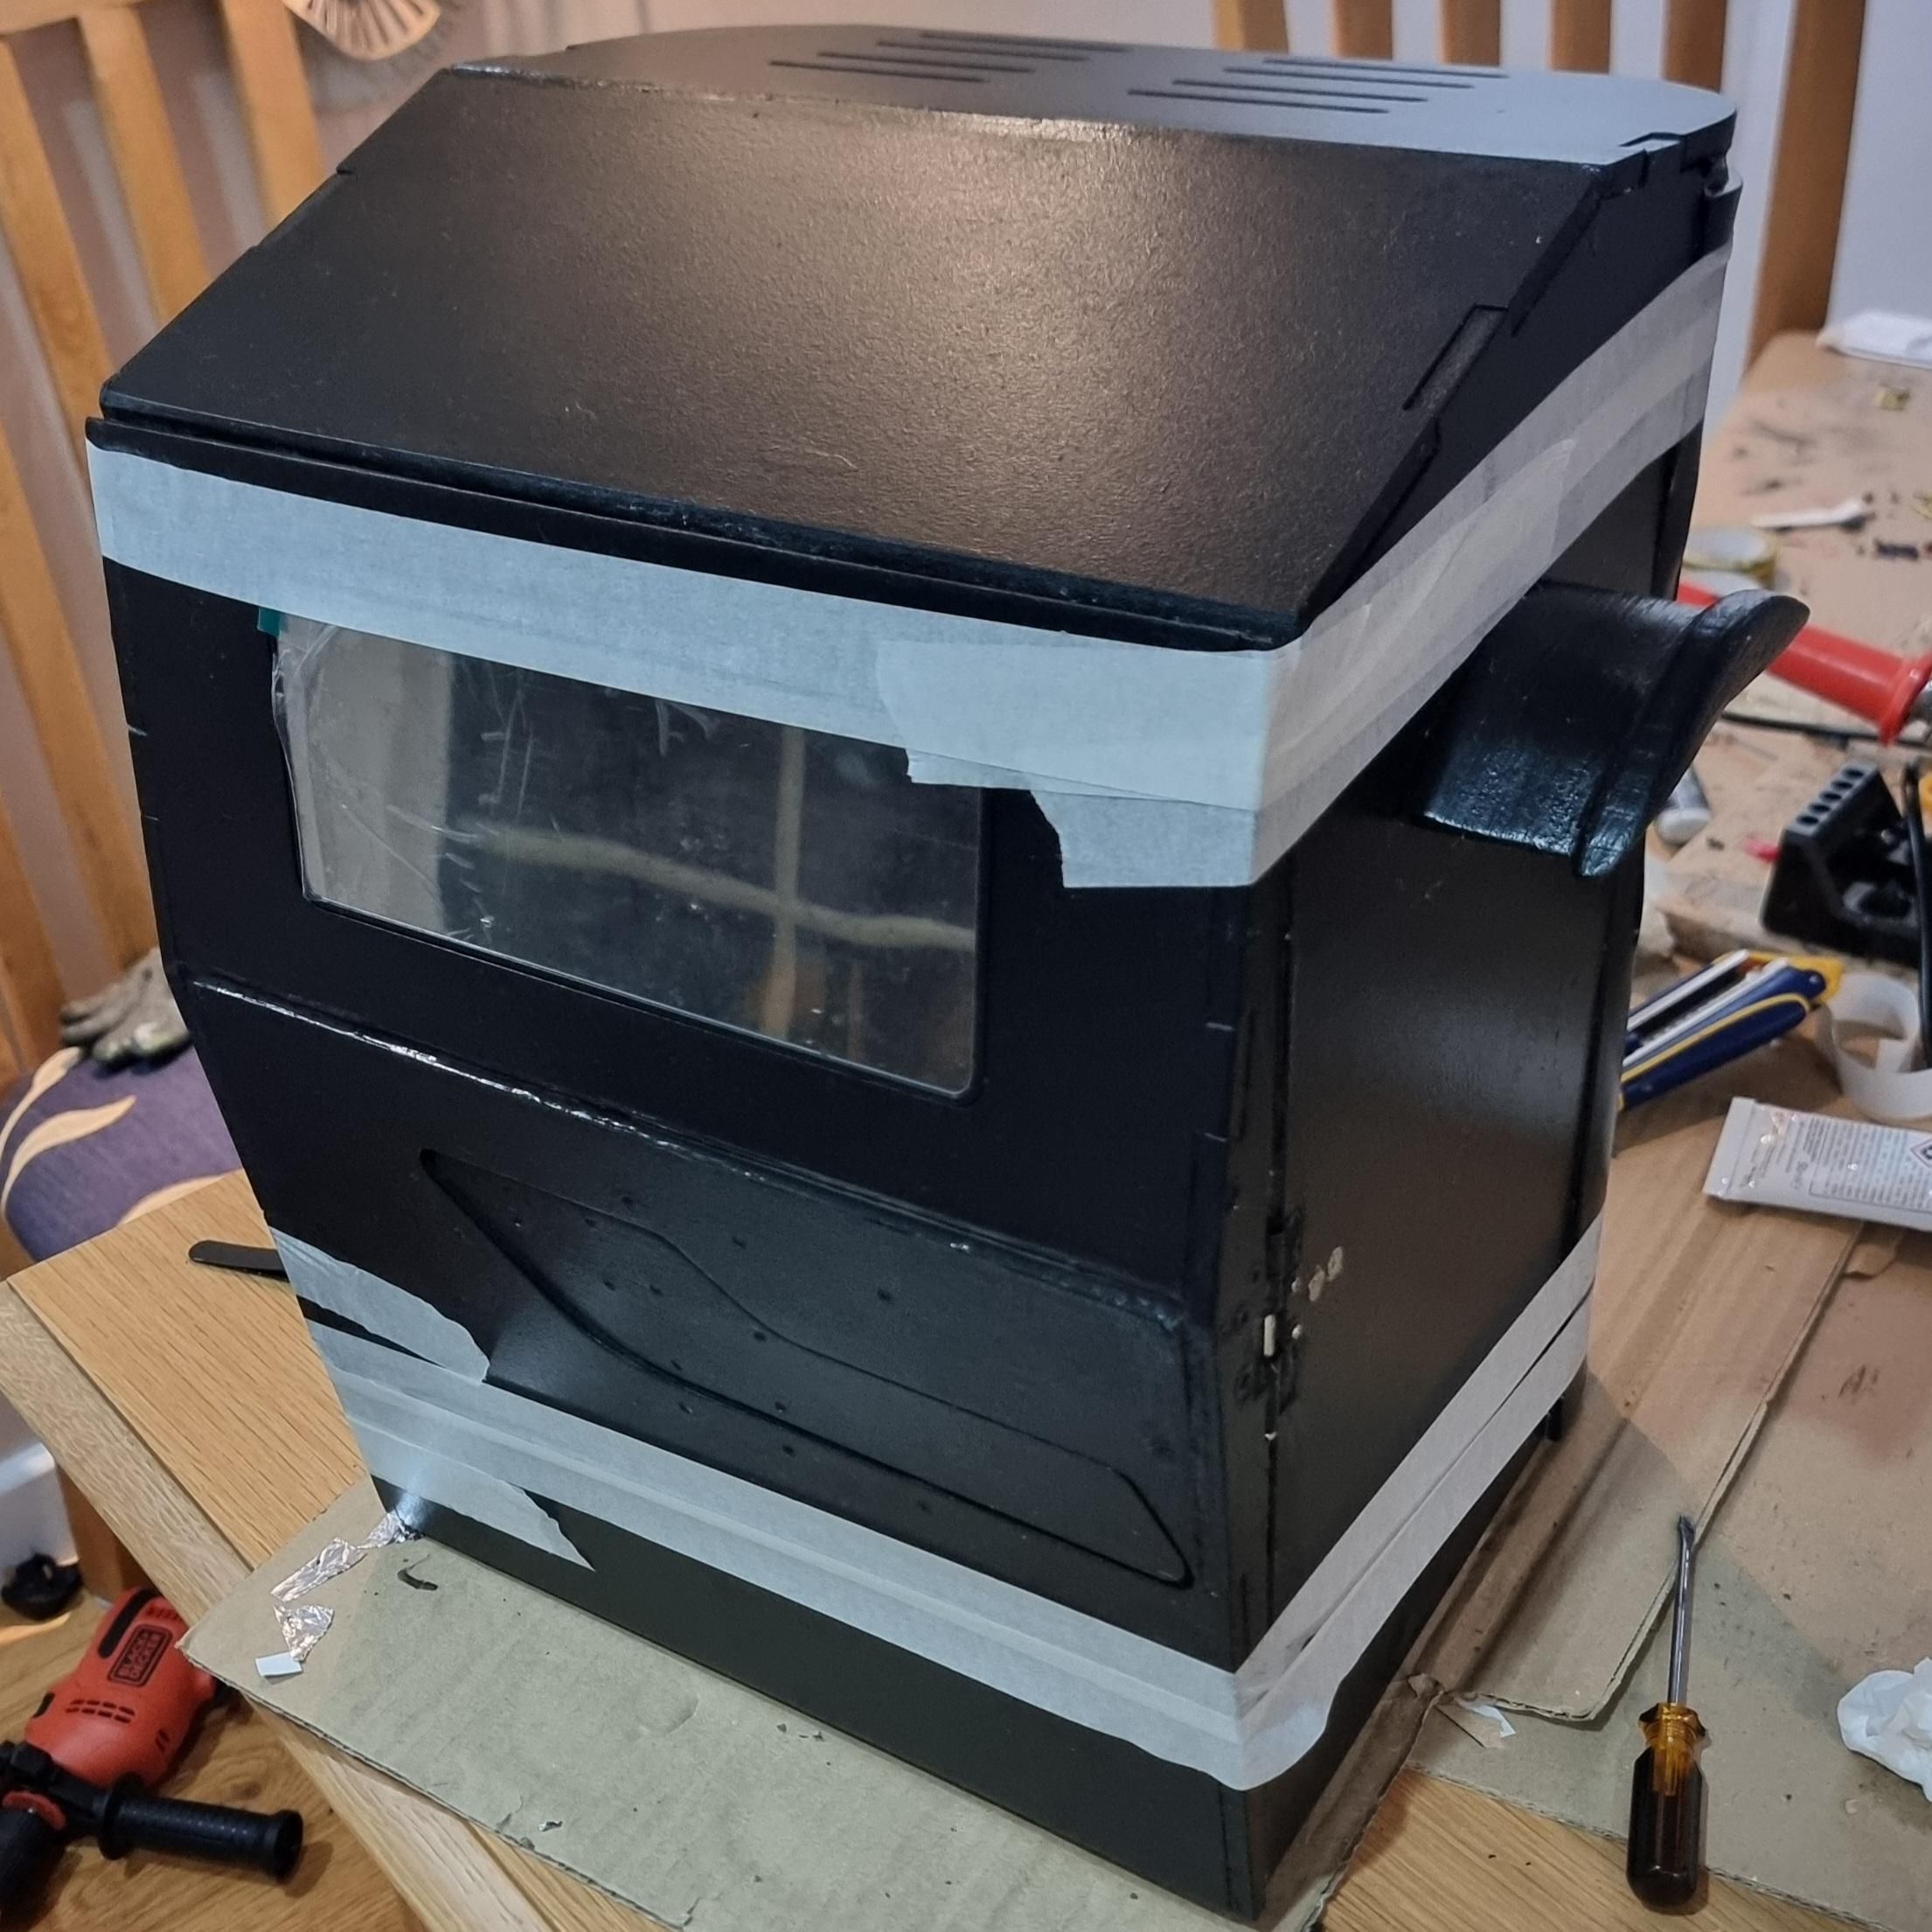
Once the final CAD model and orthographic drawings were complete, I started manufacturing the real parts. This step included 3D printing, laser cutting, sawing, sanding, gluing, soldering, wiring, and final assembly.
Take your time during this stage. Accuracy is very important because small mistakes in cutting, sanding, or wiring can affect the final appearance and cooling performance.
4.1 Prepare the CAD files for manufacturing
Export the parts from your CAD model into the correct file formats.
Use:
- STL files for 3D-printed parts
- DXF files for laser-cut panels
- Orthographic drawings for hand-cut foam, metal, or wooden parts
Before sending anything to a machine, check the scale and dimensions. Make sure the parts have not been imported too large or too small.
4.2 3D print the handle and mechanism parts
Import the STL files into your slicing software and prepare them for 3D printing.
Check:
- Layer height
- Infill percentage
- Support material
- Print orientation
- Nozzle size
- Bed adhesion
I added supports because some parts had overhanging areas. After printing, let the parts cool down before removing them from the print bed. This helps prevent warping or cracking.
Remove the supports carefully using a craft knife, pliers, or side cutters. Wear safety glasses because small pieces of support material can fly off.
4.3 Test-fit the 3D-printed parts
Before gluing or screwing the printed parts into the fridge, test-fit them first.
Check that:
- The handle moves properly
- The screw holes line up
- The mechanism does not jam
- The printed parts are strong enough
- There is enough clearance for movement
If the part is too tight, sand it slightly. If it is too weak, increase the thickness or reprint it with more infill.
4.4 Convert the flat panels for laser cutting
Convert the CAD drawings of the flat MDF and acrylic panels into DXF format for laser cutting.
Before cutting, check:
- Material thickness
- Cut lines
- Engraving lines, if any
- Slot sizes
- Ventilation gaps
- Door opening
- Screw holes
- Kerf allowance
The laser removes a small amount of material as it cuts, so very tight slots may need a small clearance.
4.5 Laser cut the MDF and acrylic panels
Place the material flat inside the laser cutter and use suitable power and speed settings for your material.
For safety:
- Use the machine only with supervision
- Keep the lid closed while cutting
- Make sure the extractor is on
- Pause the cut if there is excessive smoke or flame
- Do not leave the laser cutter unattended
After cutting, check that all parts are complete and remove them carefully from the bed.
4.6 Inspect the laser-cut parts
Inspect each panel before assembly.
Check for:
- Burn marks
- Weak areas between ventilation slots
- Incorrect hole sizes
- Warping
- Misalignment
- Cracked acrylic
- Incomplete cuts
In my build, I noticed that some ventilation gaps were too large during prototyping, so I adjusted the design to make the final material stronger.
4.7 Cut the insulation foam
Use the orthographic drawings or templates to mark the insulation foam.
Cut the foam using a craft knife, coping saw, or hand saw. Work slowly so the edges stay straight.
Make sure the insulation pieces fit between the outer MDF body and inner acrylic lining. Do not make the foam too thick, or you will lose too much internal storage space.
4.8 Sand the foam and MDF edges
Sand the foam and MDF edges so the parts fit cleanly together.
Use:
- Sandpaper
- File
- Belt sander, if available
- Surform tool for foam
Wear a mask when sanding MDF or foam, because the dust is not good to breathe in.
Sand gradually and keep checking the fit. Do not remove too much material at once.
4.9 Cut and prepare the metal cooling pieces
If you are using aluminium or another metal piece to spread the cold from the Peltier module, cut it carefully to size.
Use a hacksaw or suitable saw, then file the edges smooth.
Make sure the metal surface is flat because it needs good contact with the cold side of the Peltier module. Poor contact will reduce cooling performance.
4.10 Paint and finish the panels
Before final assembly, sand the visible panels and prepare them for painting.
For acrylic or painted parts:
- Sand the surface lightly.
- Clean off dust and grease.
- Apply primer, if needed.
- Apply thin coats of paint.
- Let each coat dry properly.
- Add a clear coat for protection, if wanted.
I used black paint and a clear finish to create a cleaner, more finished appearance. Let the paint cure fully before handling the parts.
4.11 Assemble the main body
Start assembling the main box using the outer panels.
Use glue, screws, or both depending on your material. Clamp the parts while the glue dries so the body stays square.
Check:
- The corners are aligned
- The door opening is straight
- The panels are not twisted
- The base is flat
- The back section has enough space for the cooling system
Let the glue dry properly before moving to the next stage.
4.12 Fit the insulation
Place the insulation inside the outer body.
Cut small adjustments if needed so it sits flat against the panels. Gaps in the insulation will let warm air enter and reduce cooling performance.
Do not block the ventilation area, fan holes, or cable openings.
4.13 Install the inner acrylic lining
Fit the acrylic panels inside the fridge to create a cleaner internal surface.
Use screws, double-sided tape, silicone, or suitable adhesive. Make sure the inside is smooth and easy to wipe clean.
Seal the gaps around the corners with silicone to reduce air leaks.
4.14 Add aluminium foil tape inside
Apply aluminium foil tape to the inside of the fridge where you want to spread the cooling effect.
Smooth it down carefully so there are no large wrinkles. This helps reflect and spread cold across the internal surfaces.
Do not place foil tape where it could touch exposed electrical connections.
4.15 Install the door and hinge
Attach the hinge to the door and body.
Open and close the door several times to check the movement.
Make sure:
- The door opens smoothly
- The door closes properly
- The hinge is secure
- The handle lines up correctly
- The seal touches the body evenly
If the door does not close flat, adjust the hinge position before final tightening.
4.16 Attach the handle mechanism
Fit the 3D-printed handle mechanism to the door.
Use screws, nuts, or glue depending on your design. I used screws to make the mechanism stronger and more secure.
Check that the handle can be pulled comfortably and that it does not feel too fragile.
4.17 Seal the door edges
Add a soft seal, draft stopper, foam strip, or silicone edge around the door opening.
This is important because cold air escapes easily through gaps. A better seal improves cooling performance and helps the fridge hold its temperature for longer.
Test the seal by closing the door and checking for visible gaps.
4.18 Solder the electrical connections
Solder the wires for the Peltier module, fans, switch, display, and lighting.
Use heat-shrink tubing, electrical tape, or silicone covering to protect exposed joints.
Work carefully and check the wiring before powering anything.
Basic safety checks:
- Positive and negative wires are correct
- No exposed wires are touching
- The power supply matches the voltage required
- The Peltier module has enough current available
- The fans spin in the correct direction
- The switch controls the correct circuit
4.19 Mount the Peltier module, heatsinks, and fans
Install the Peltier module between the cold side and hot side.
Make sure:
- The cold side faces the inside of the fridge
- The hot side faces the heatsink and fans
- The Peltier module has firm contact on both sides
- The heatsink is securely mounted
- The fans have enough space for airflow
- Hot air can escape through the ventilation slots
For better cooling, you can use thermal paste between the Peltier module and the metal surfaces.
4.20 Install the LED strip and display
Add the internal LED strip and temperature display.
Place the LED strip where it lights the inside clearly but does not block the shelf or door.
Mount the temperature display where it is easy to read. Route the sensor wire inside the fridge and keep the display wiring tidy.
4.21 Attach the back panel
Attach the back panel after the cooling system and wiring are in place.
Do not glue the back permanently if you may need access for repairs. Screws are better for the back panel because they allow you to open it later.
Check that:
- Wires are not trapped
- Fans can still spin freely
- Ventilation holes are not blocked
- The power socket is accessible
- The back panel sits flush
4.22 Add the feet
Attach rubber or silicone feet to the bottom of the fridge.
The feet help with:
- Grip on the desk
- Stability
- Airflow underneath
- Preventing scratches
Make sure the fridge sits level and does not wobble.
4.23 Final seal and finishing
Once the main assembly is complete, seal any visible air gaps with silicone or glue.
Let the fridge dry fully before testing. This is important because adhesives and silicone need time to cure properly.
After drying, sand any rough corners and touch up the paint where needed.
4.24 Do a final inspection before testing
Before switching the fridge on, check the whole build carefully.
Check:
- The door opens and closes properly
- The handle works
- The shelf fits
- The fans spin freely
- The wires are insulated
- The vents are open
- The Peltier module is mounted firmly
- The power supply is secure
- There are no loose screws or sharp edges
Only power the fridge once everything is secure and safe.
This manufacturing stage took the most time because each part had to be cut, adjusted, finished, and assembled carefully. The more accurate the manufacturing is, the better the final fridge looks and the better the cooling system performs.
Test and Enjoy!

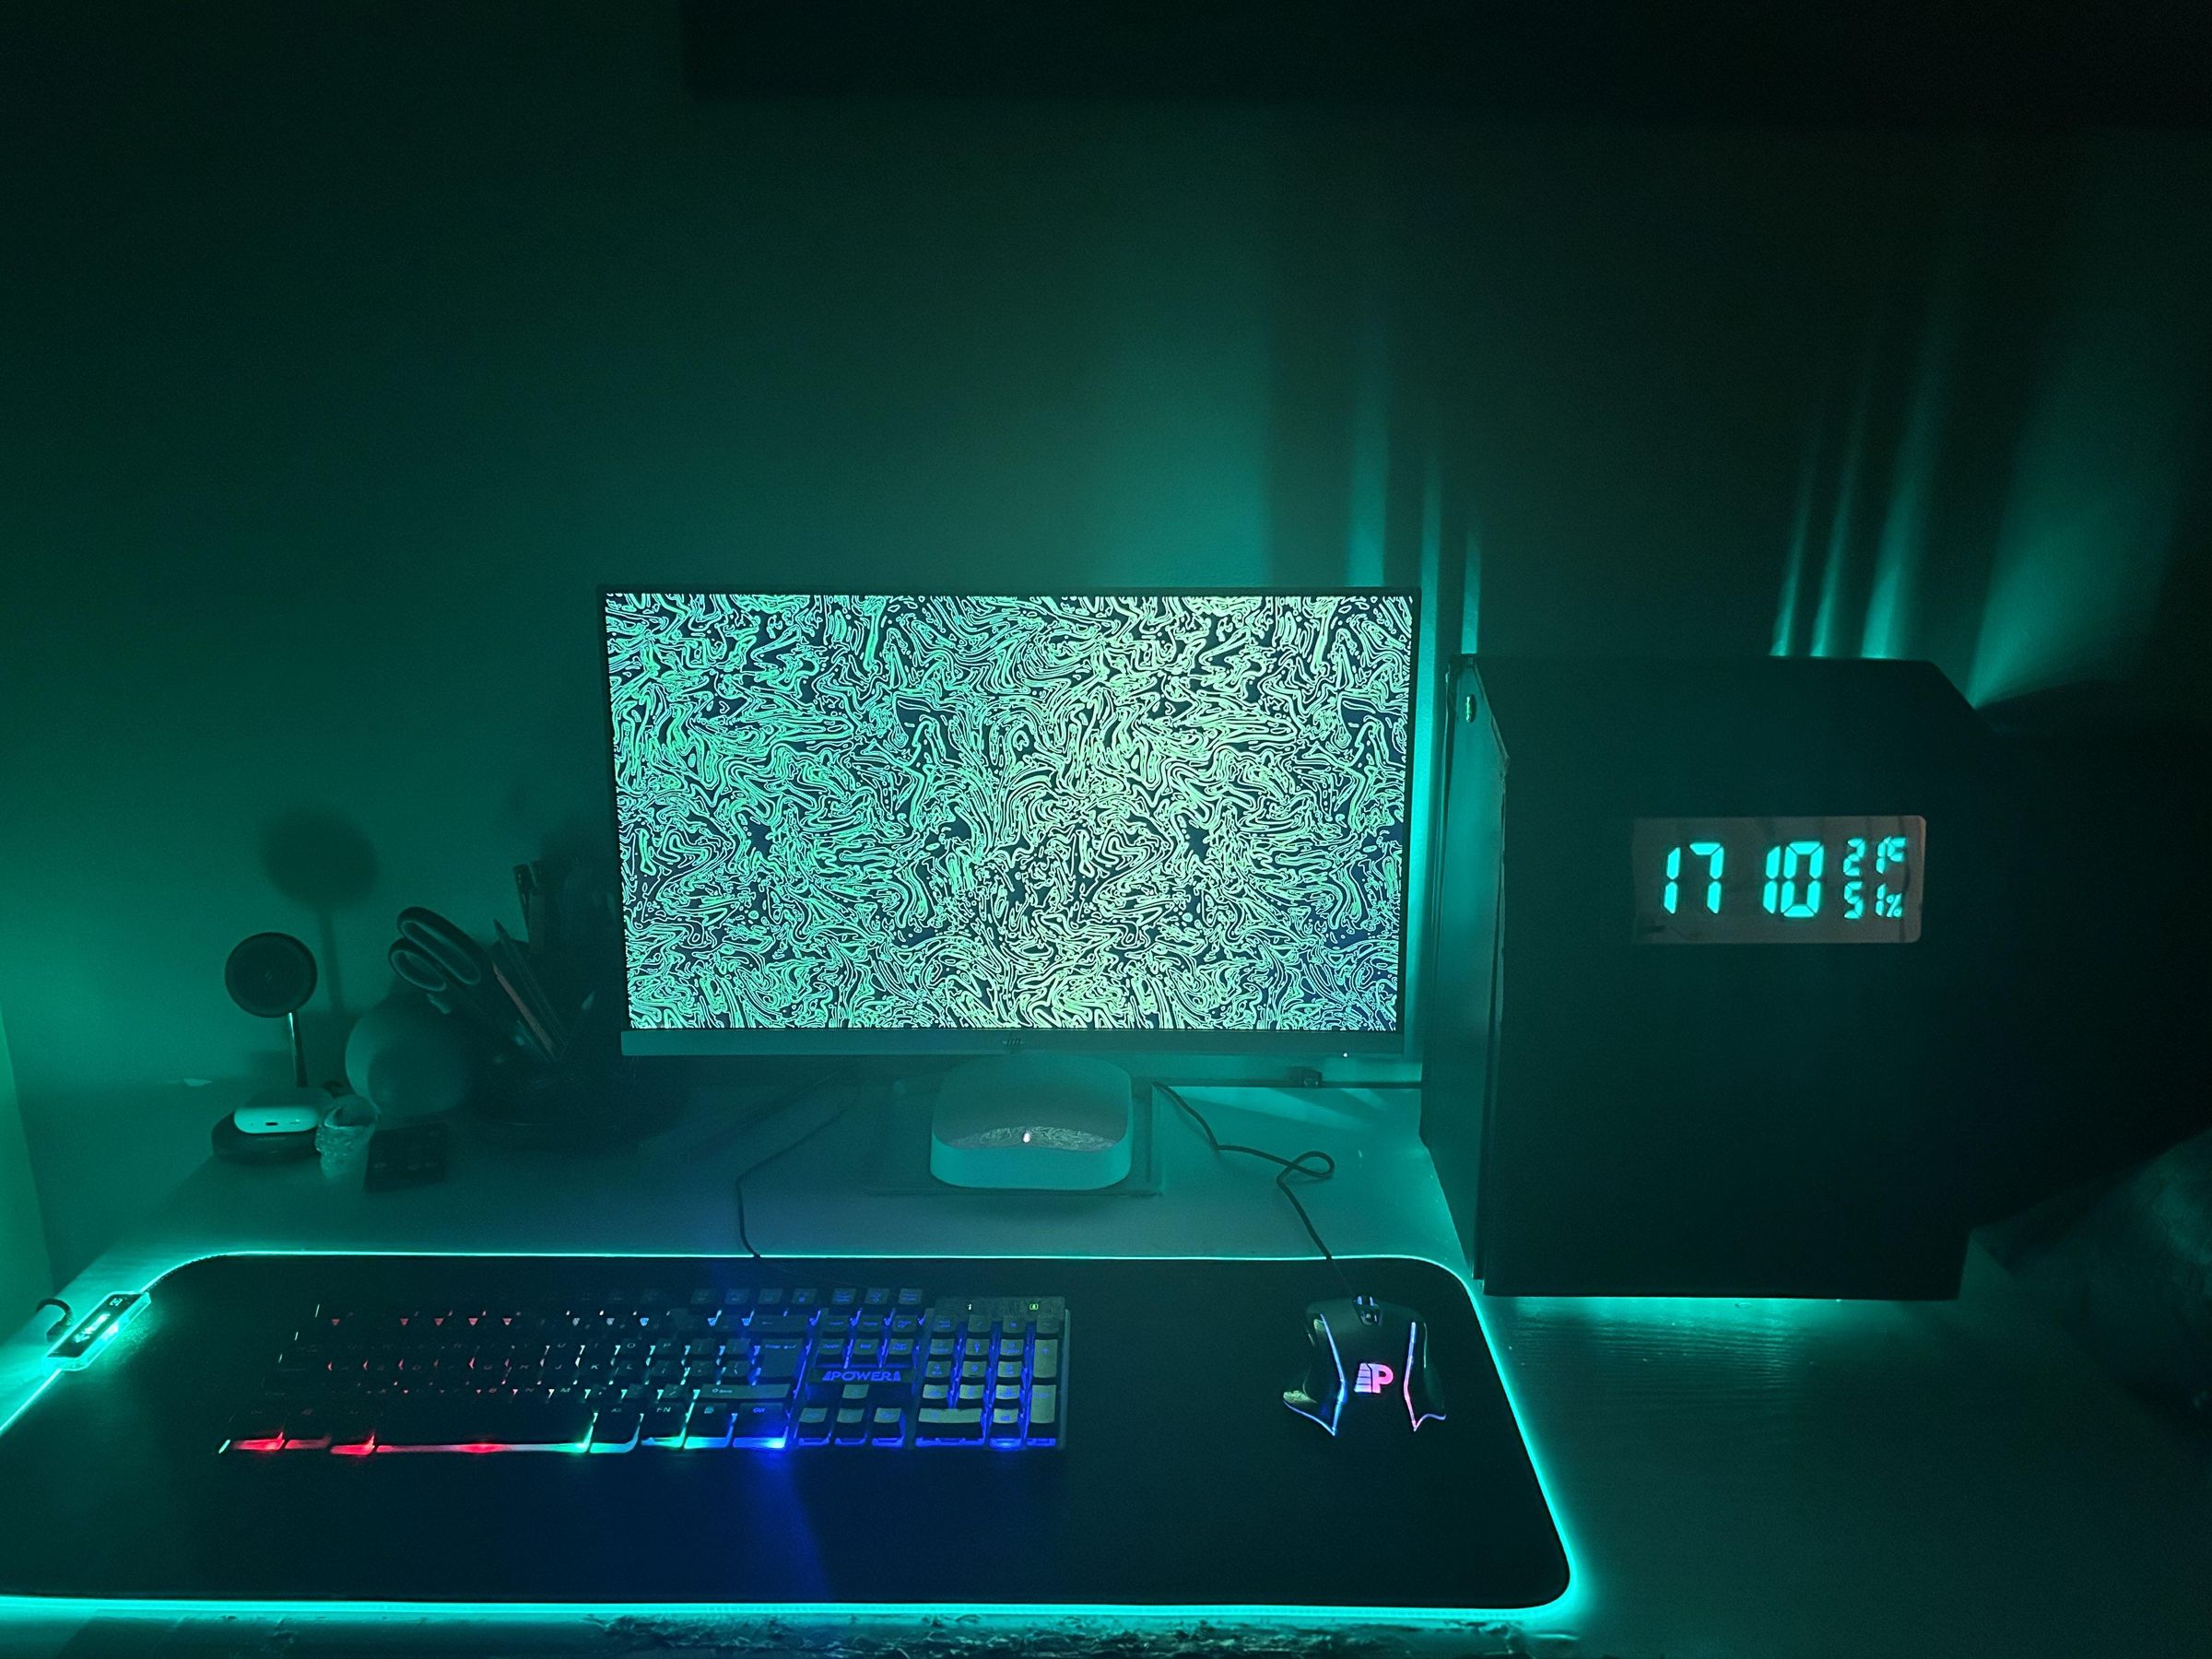
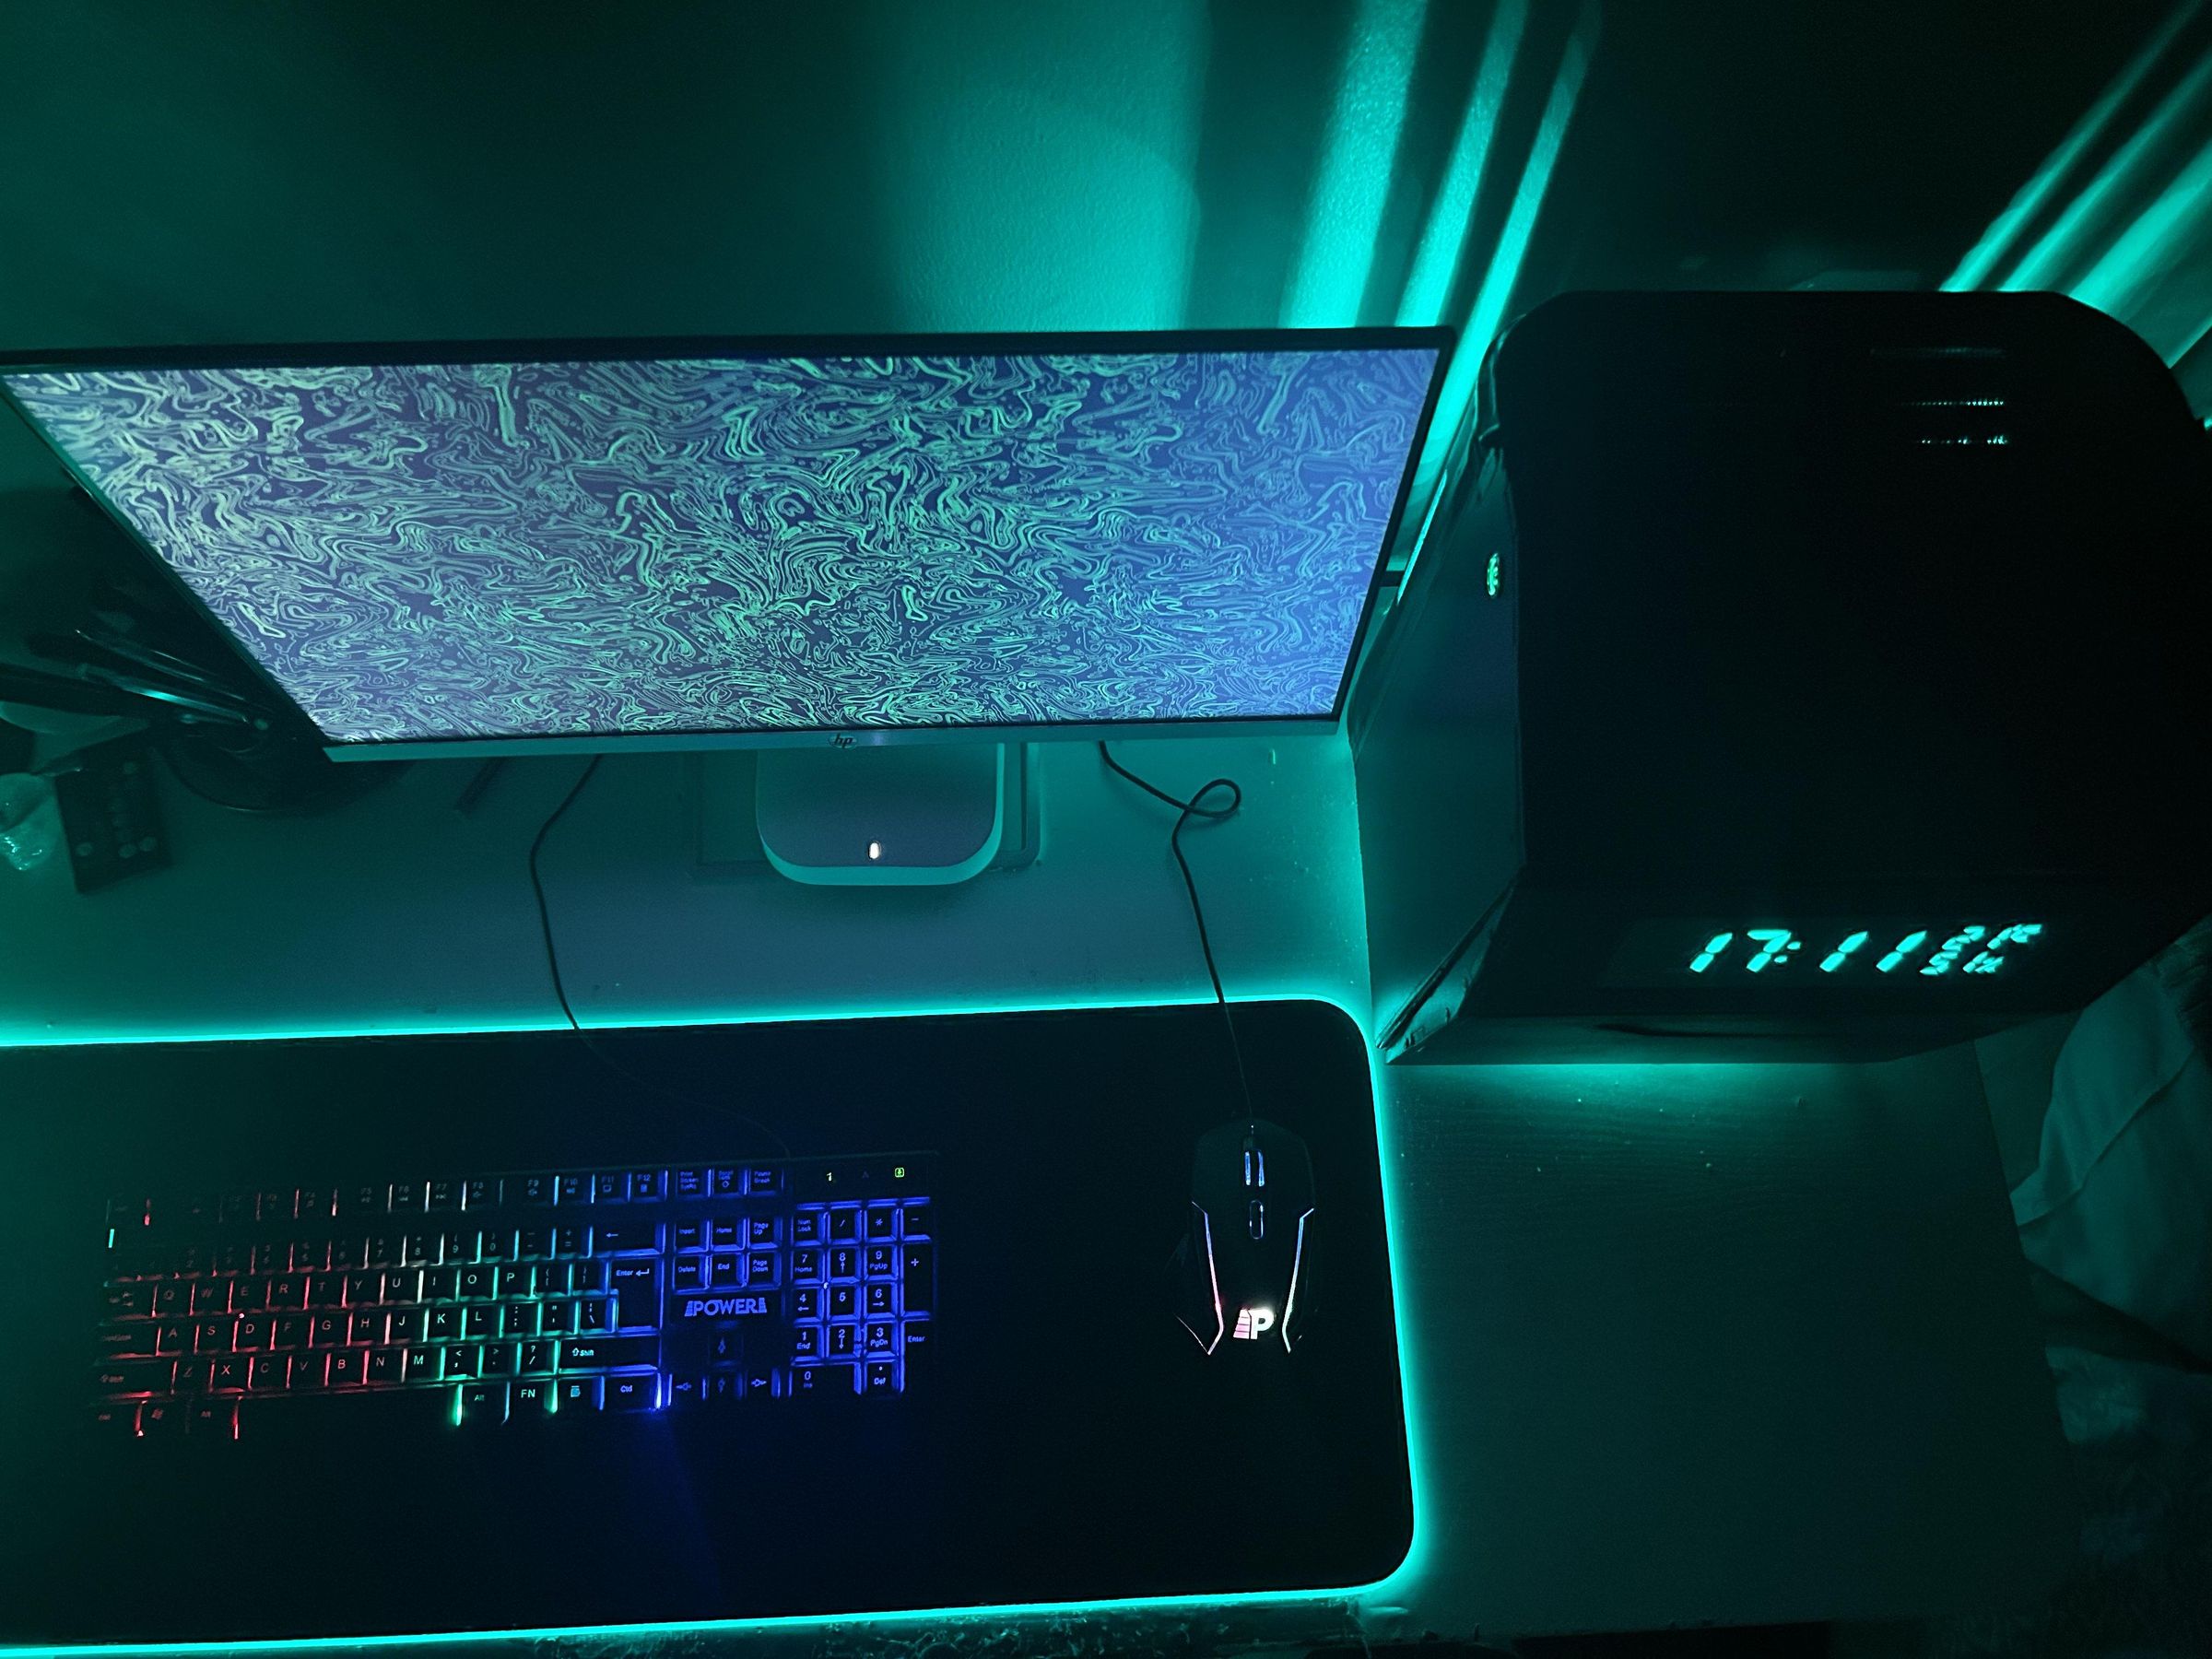
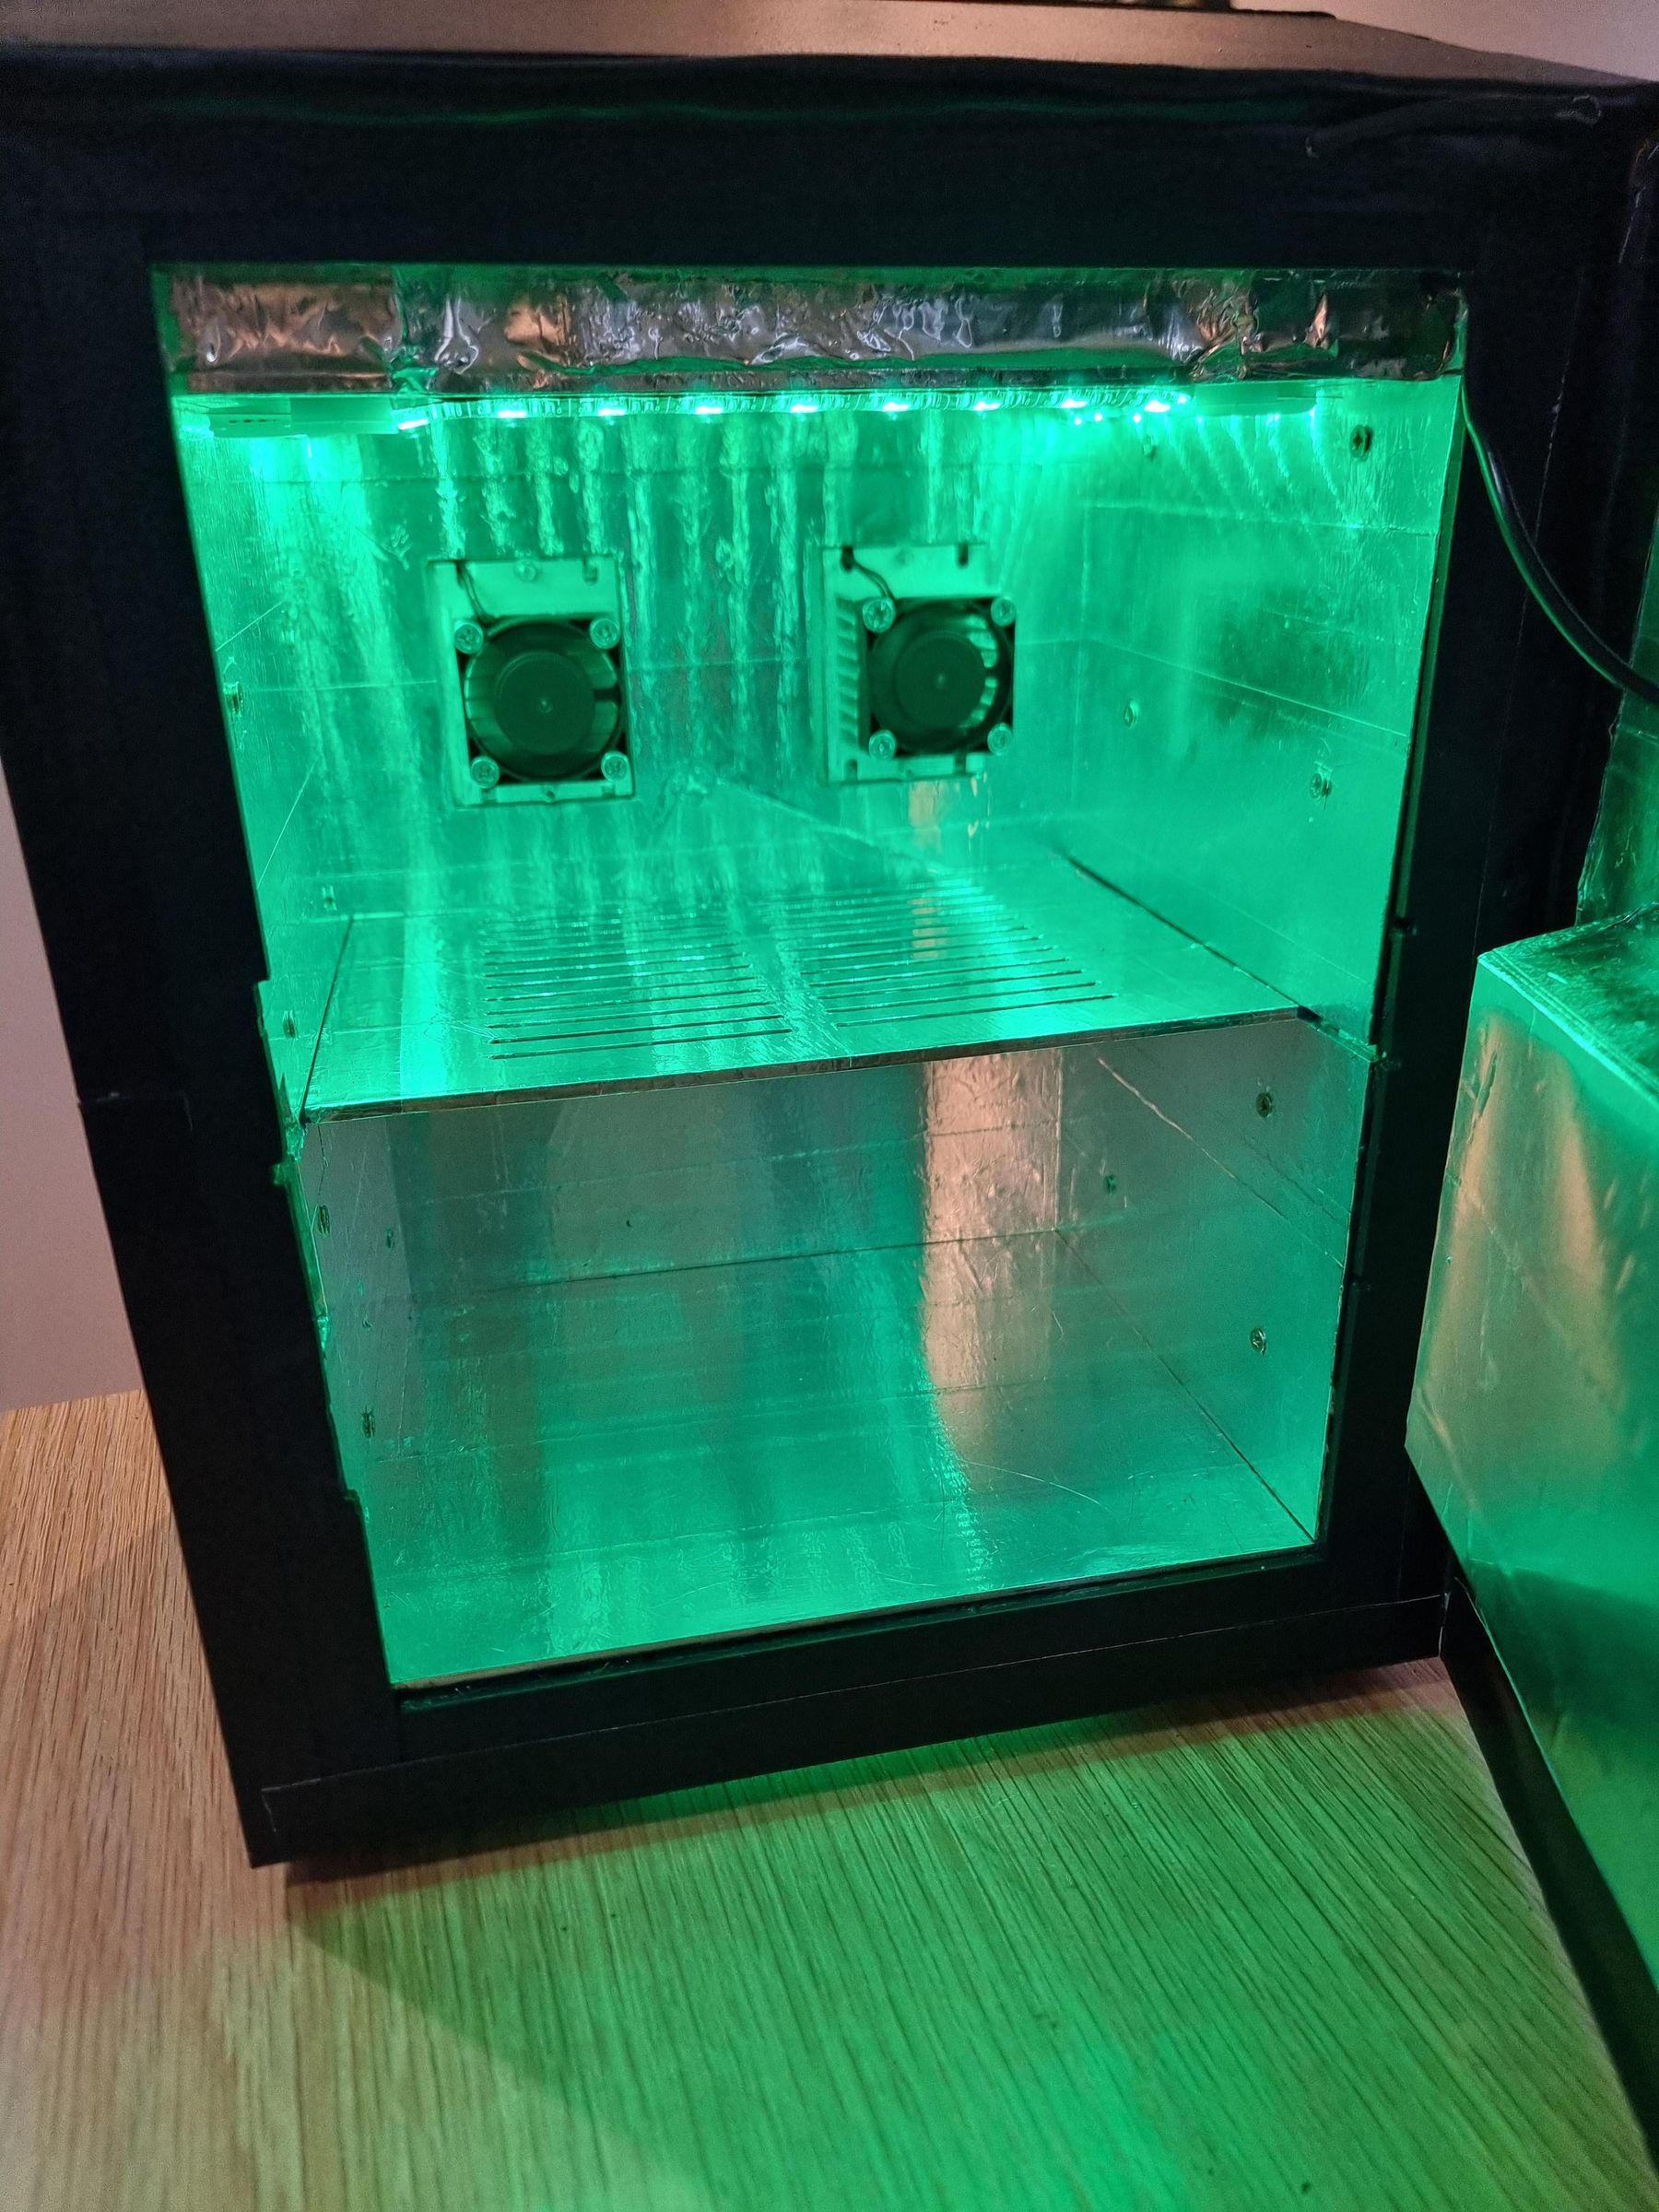
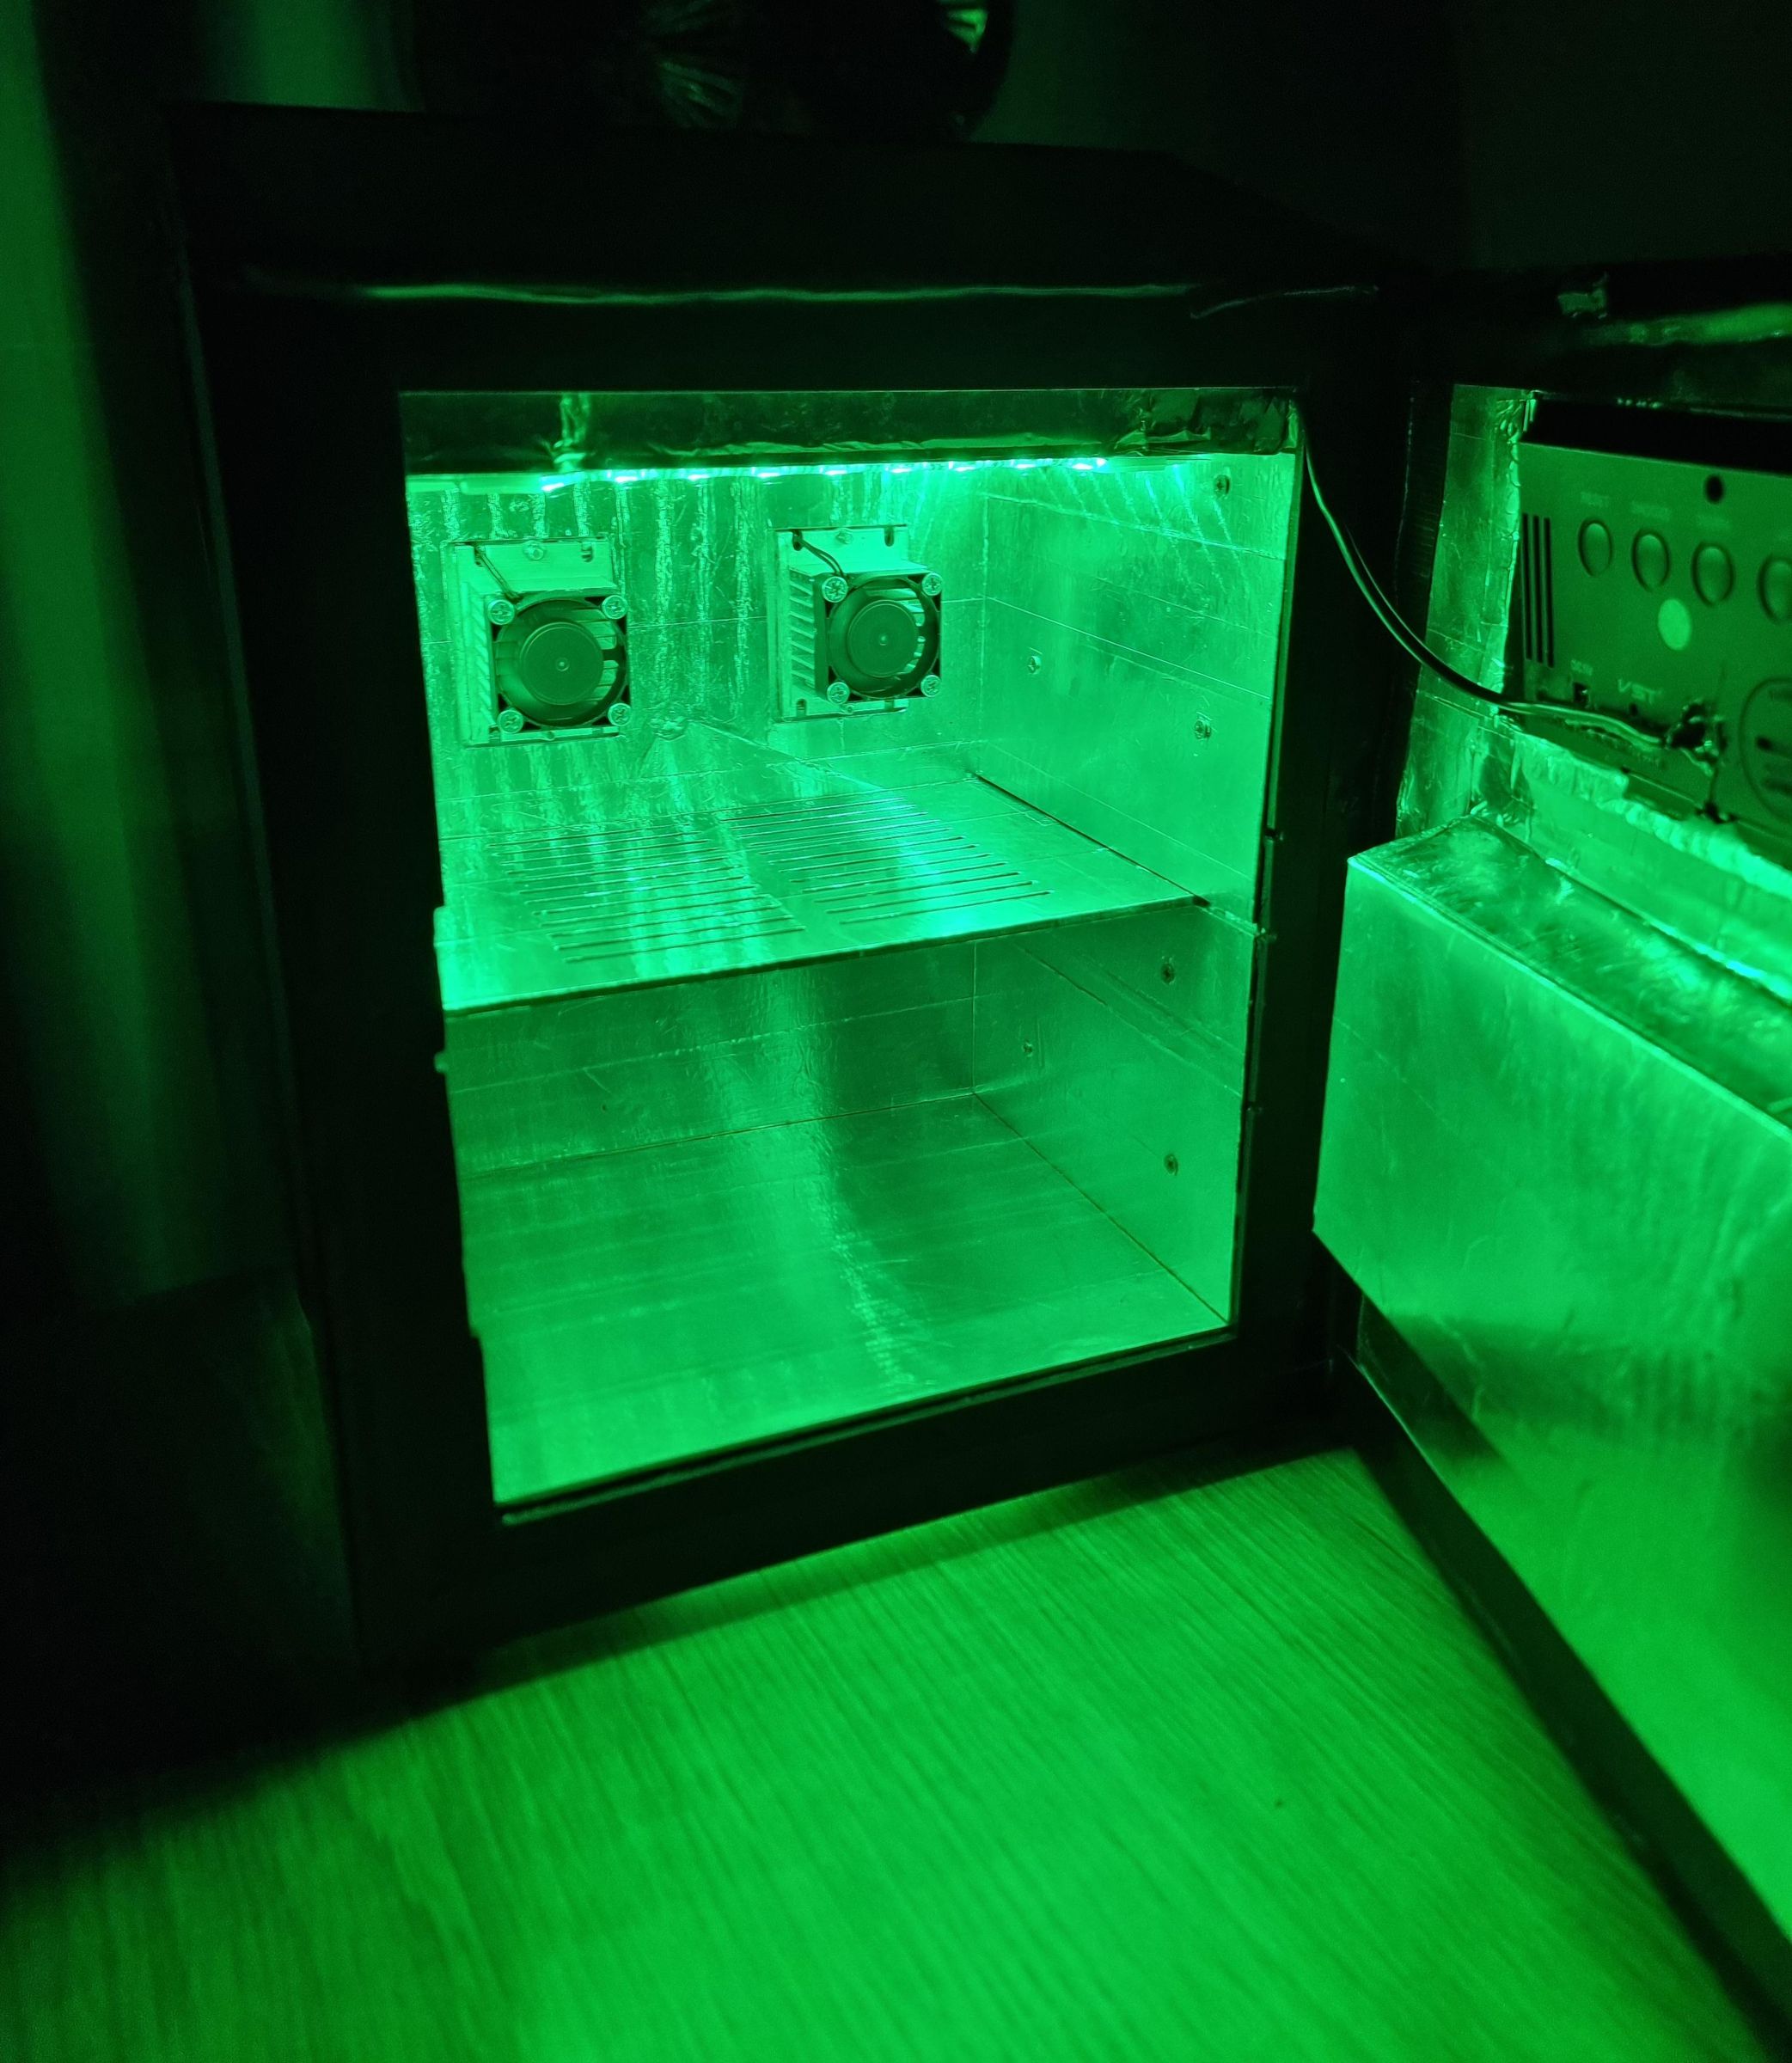
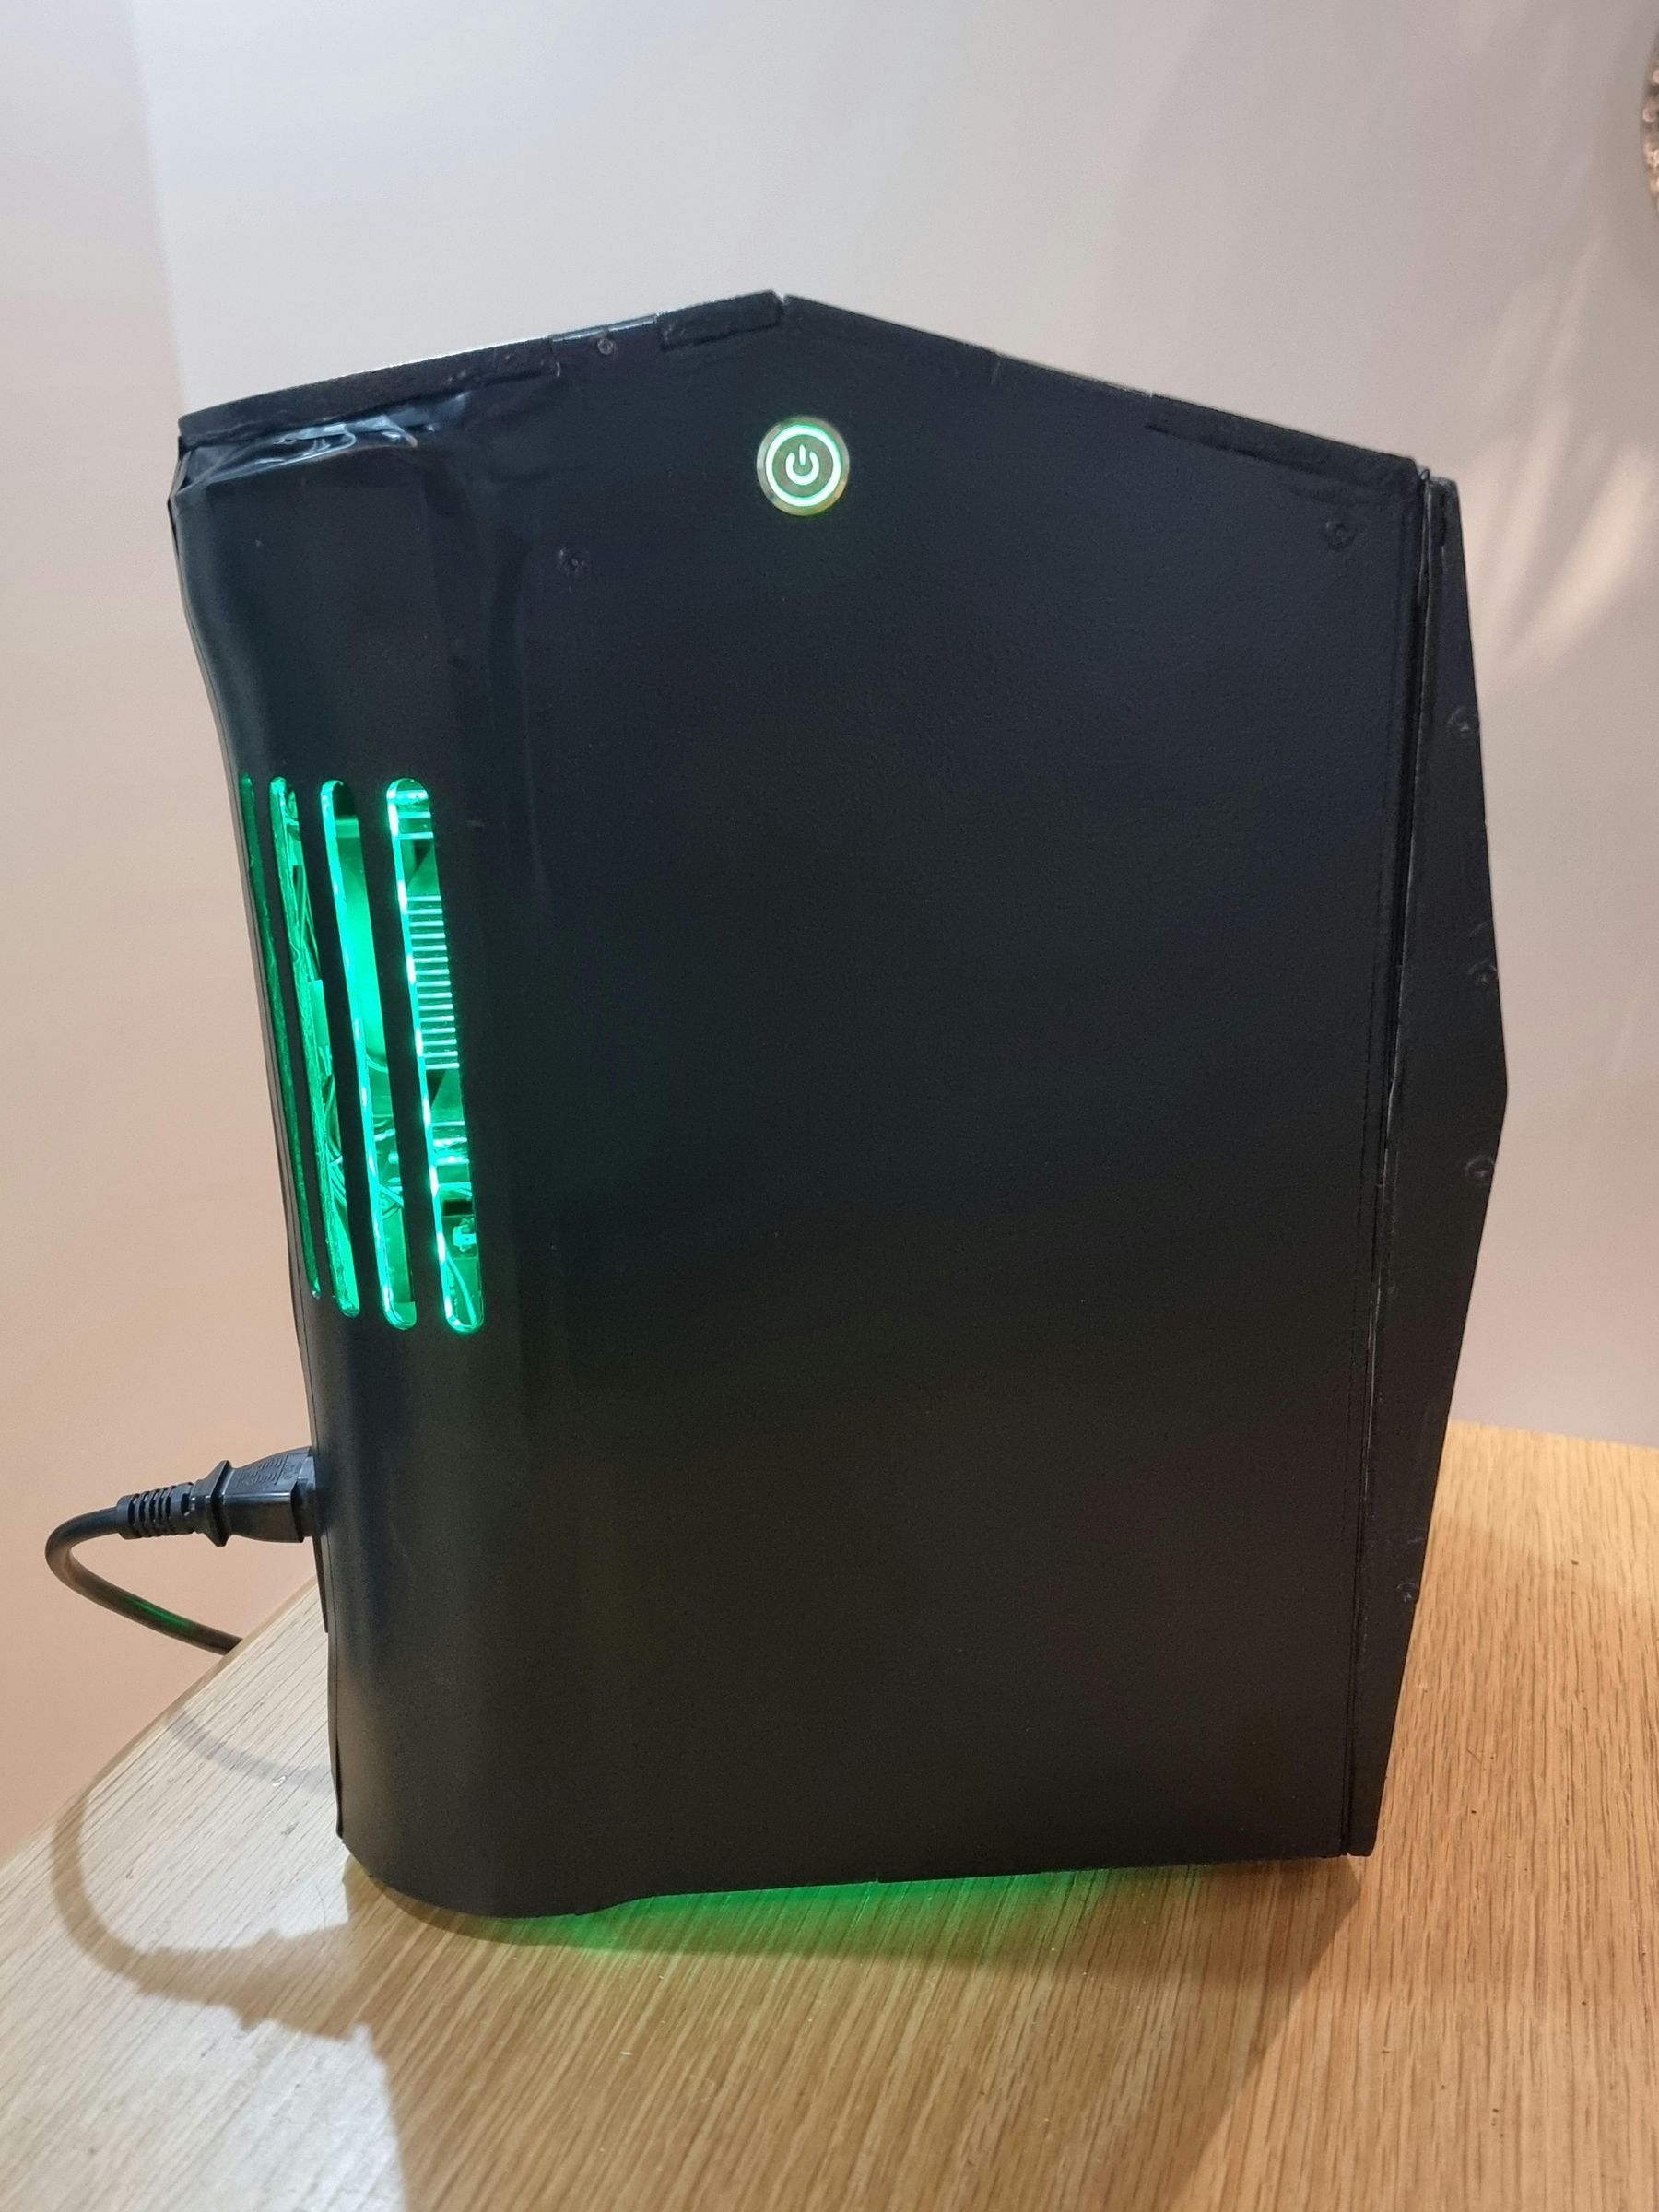
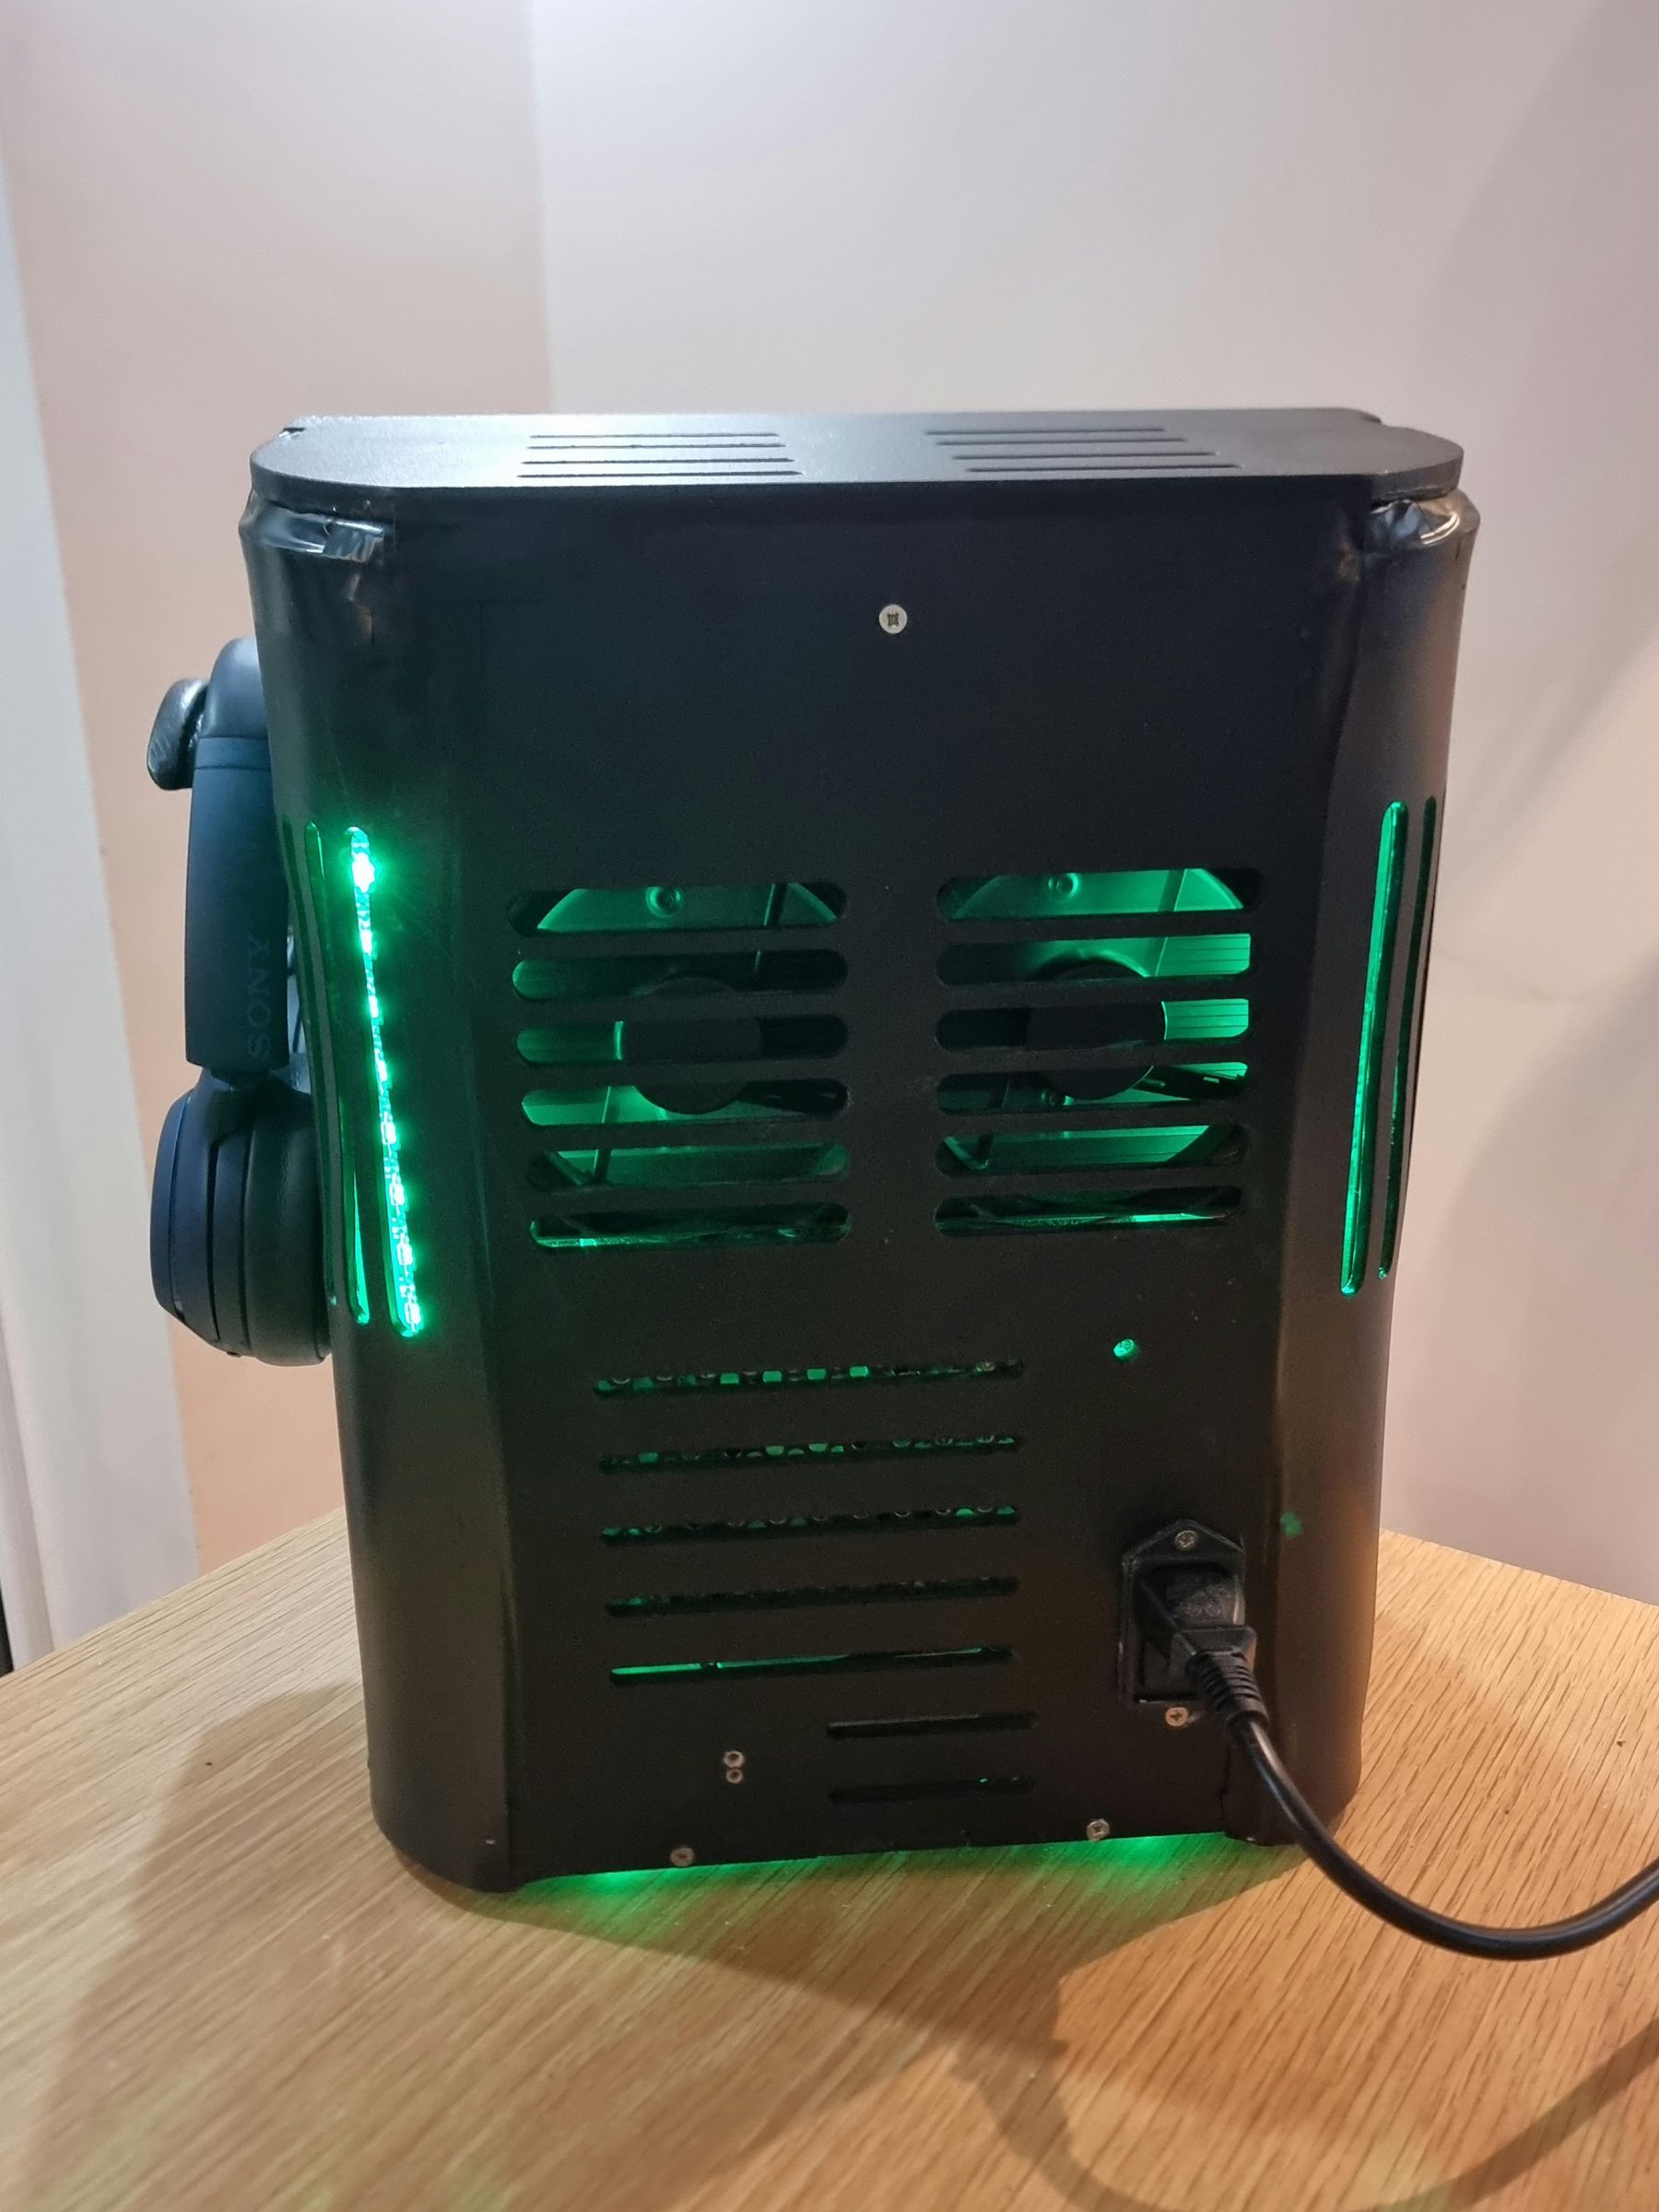
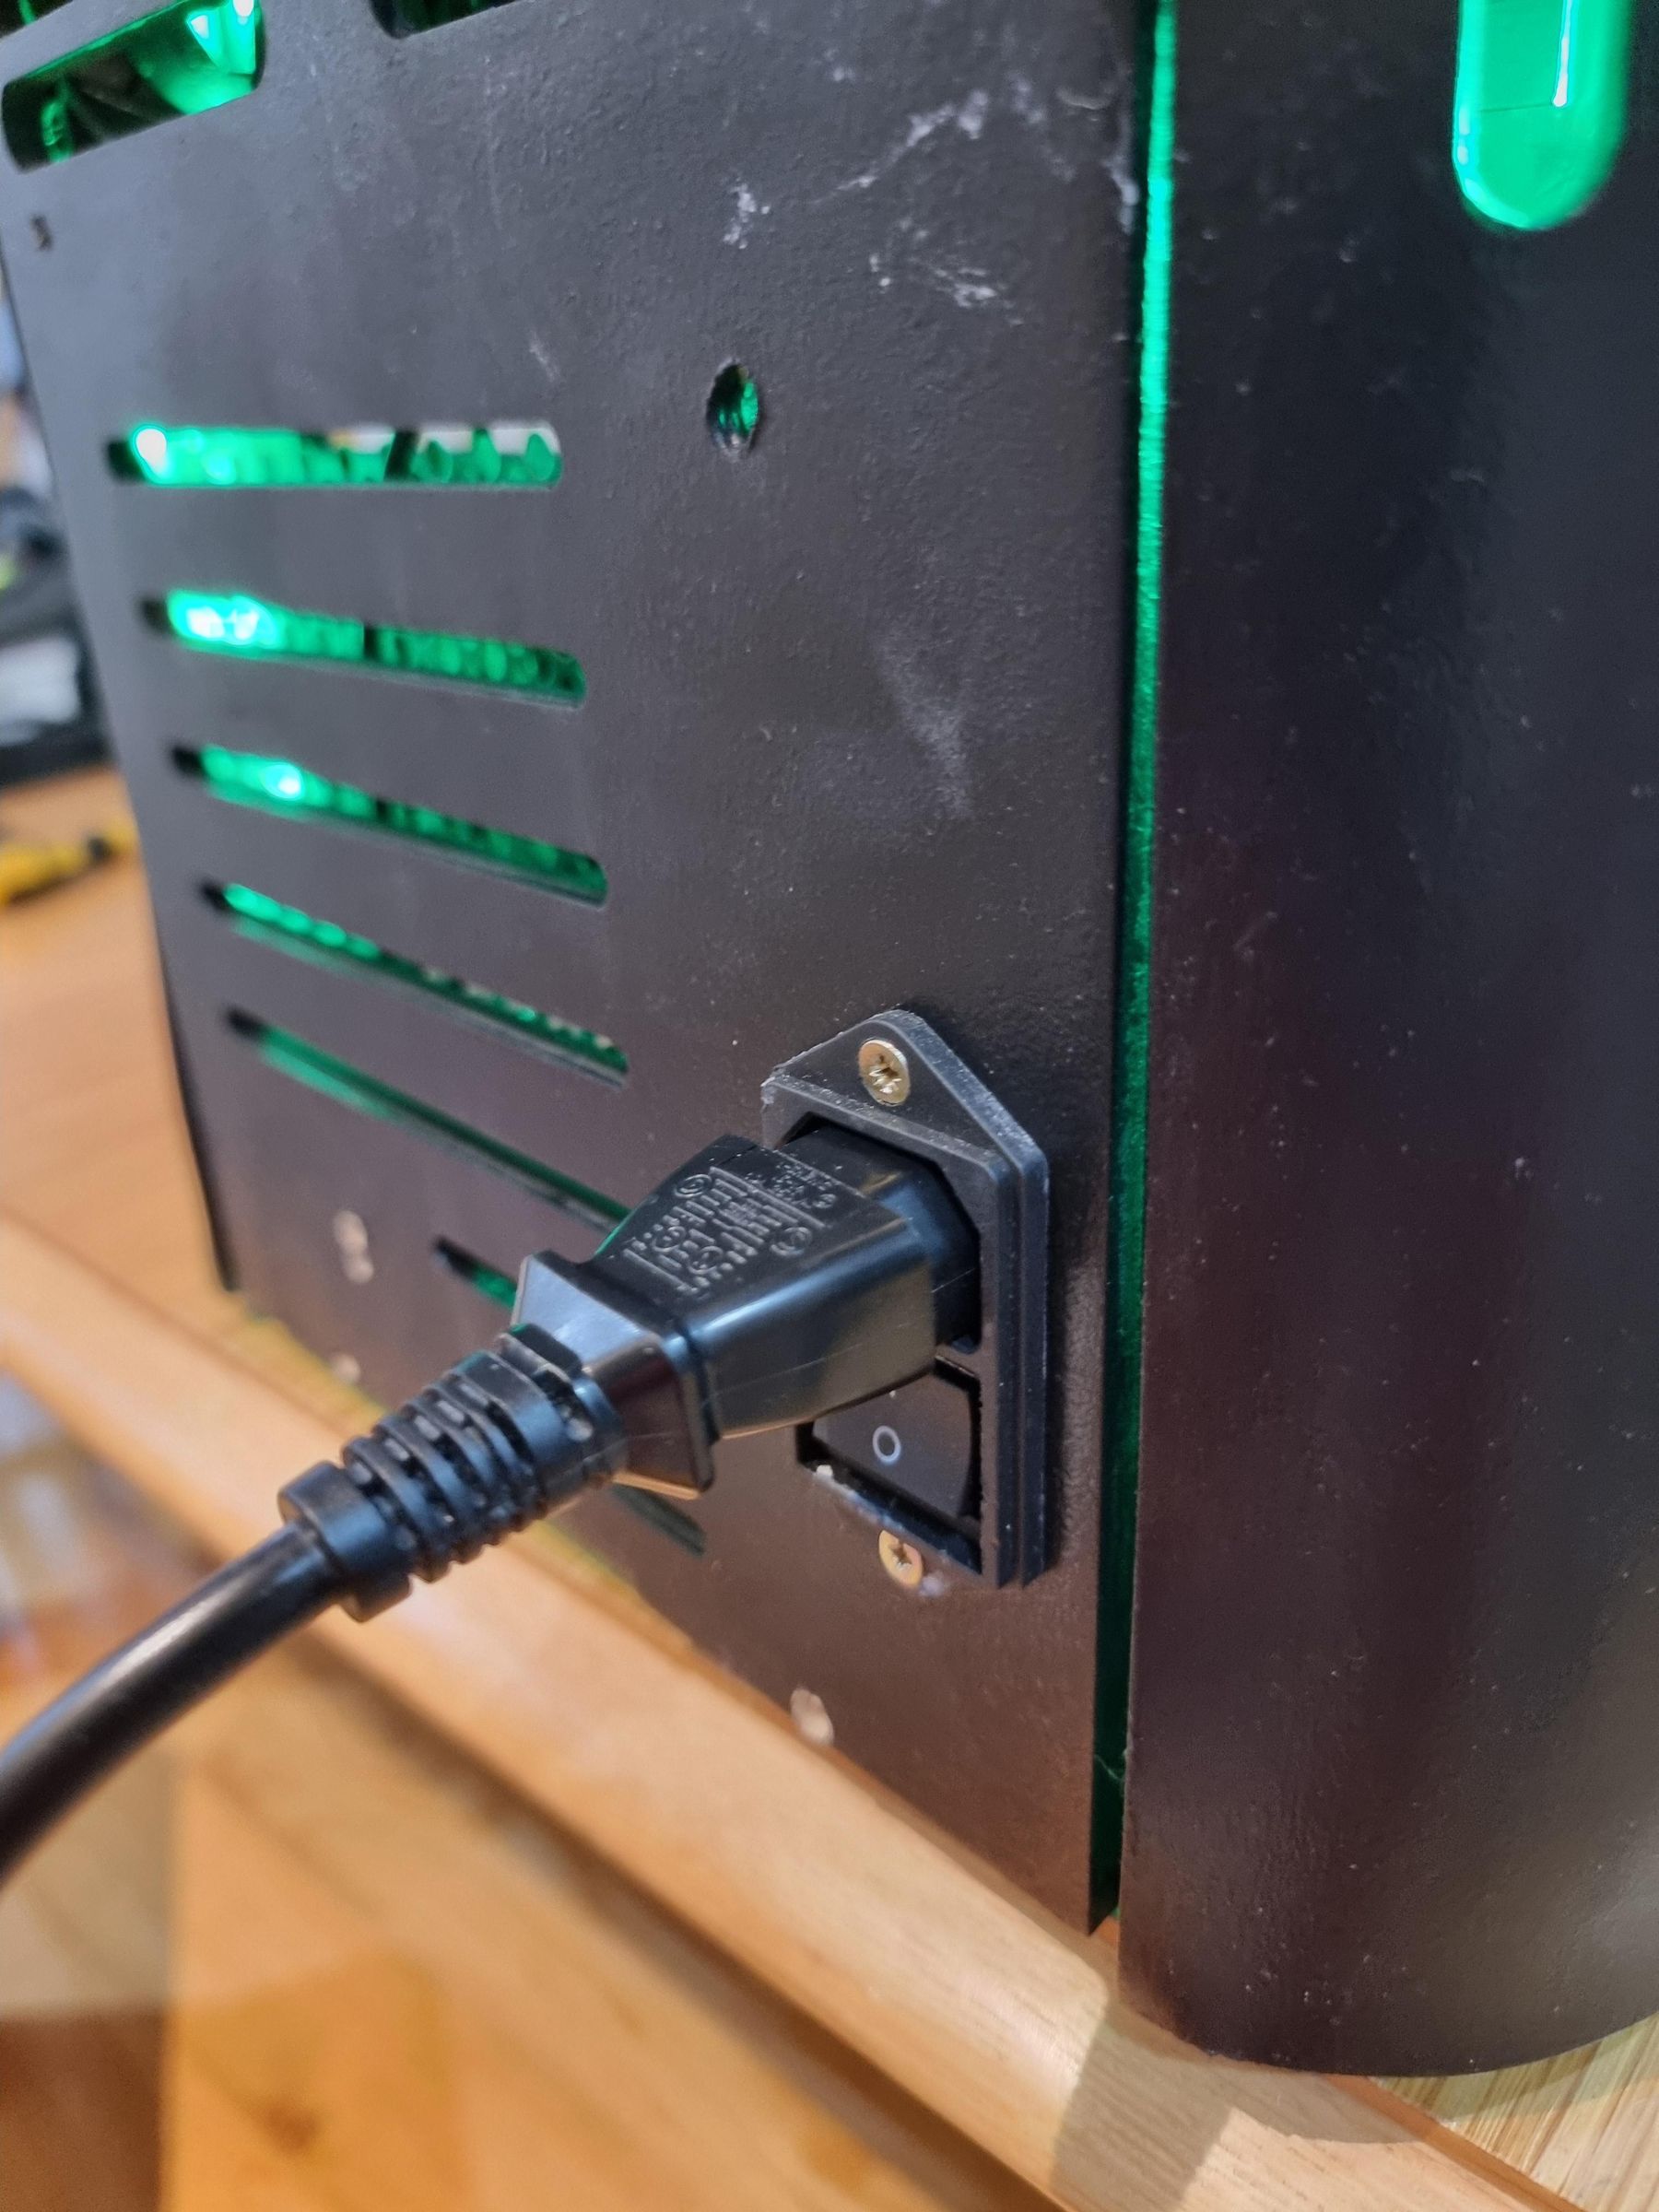
After the mini fridge was fully assembled, I tested it to check the cooling performance, usability, noise level, lighting, and overall appearance. This step is important because a DIY fridge should not only look good, but also work safely and effectively.
5.1 Place the fridge in its final position
Put the mini fridge where you plan to use it, such as on a desk, shelf, or gaming setup.
Make sure there is enough space around the back and side ventilation areas. Do not push the fridge directly against a wall, because the hot air from the Peltier system needs somewhere to escape.
Leave space around:
- The back fans
- Side vents
- Power cable
- Door opening
- Headphone holder
Good airflow will improve cooling performance.
5.2 Check the wiring before switching it on
Before turning the fridge on, inspect the wiring one final time.
Check that:
- No wires are loose
- No exposed solder joints are touching
- The fans can spin freely
- The Peltier module is connected correctly
- The power supply matches the required voltage
- The switch works properly
- The LED strip and temperature display are secure
Do not switch it on if anything looks loose, damaged, or unsafe.
5.3 Turn the fridge on
Switch the fridge on and check that all the electronic parts work.
You should see:
- The fans spinning
- The temperature display turning on
- The internal LED lighting working
- The Peltier module starting to cool
- Hot air being pushed out through the vents
After a few minutes, carefully check that the hot side is releasing heat and the inside of the fridge is beginning to cool.
5.4 Test the temperature drop
Place a thermometer or temperature sensor inside the fridge and record the temperature over time.
I tested the fridge over several hours and recorded how the internal temperature changed. This helped me see how well the insulation, airflow, and Peltier cooling system were working.
For the best results, keep the door closed during testing. Opening the door too often lets warm air in and makes the test less accurate.
5.5 Test the fridge with drinks inside
After testing it empty, add a few cans or bottles and test it again.
This is useful because a fridge cools differently when it is full. Drinks take longer to cool than air, but they also help the temperature stay more stable once they are cold.
Try testing:
- Empty fridge
- Half-full fridge
- Full fridge
- Different power levels, if your power supply allows it
In my testing, I recorded the temperature drop with different loading conditions so I could compare performance.
5.6 Check the door seal
Close the door and check for air gaps around the edges.
If cold air is escaping, improve the seal using:
- Foam strip
- Draft stopper
- Silicone
- Rubber seal
- Extra insulation around the door frame
A better seal will help the fridge cool faster and maintain a lower internal temperature.
5.7 Measure the noise level
Since this fridge is designed for a desk or gaming setup, noise is important.
The fridge was loudest when sitting close to it, mainly because of the fans. If you want a quieter version, use better quality low-noise fans or reduce fan speed, but make sure the hot side still has enough cooling.
5.8 Test the lighting and display
Open the door and check that the internal LED lighting makes the inside easy to see.
Also check that the temperature display is readable from the front. I chose green lighting because it matched the futuristic style of the mini fridge and made the inside look more interesting.
Make sure the lights do not heat the inside too much or interfere with the stored items.
5.9 Test the headphone holder
Place headphones on the side holder and check that it supports them properly.
Check that:
- The holder does not bend
- The headphones do not slide off
- The fridge does not tip over
- The holder is positioned conveniently
- The holder does not block the door or vents
This feature helped the fridge work as both a cooler and a desk organiser.
5.10 Use it during a real session
Finally, test the fridge during a real gaming, studying, or desk session.
Fill it with drinks and snacks, switch it on before you start, and check whether it makes the setup more comfortable. This is the best way to see whether the project actually solves the problem.
During use, check:
- Are the drinks easy to reach?
- Does the fridge keep them cool enough?
- Is the fan noise acceptable?
- Is the door easy to open?
- Does it fit well on the desk?
- Does it make the setup more organised?
5.11 Final result
The finished mini fridge worked as a compact desktop cooler for drinks and snacks. It also added internal lighting, a temperature display, a futuristic angular shape, and a headphone holder, making it fit well into a gaming setup.
The main things I learned were that insulation, airflow, and sealing are just as important as the Peltier module itself. If I improved the project further, I would focus on making the door seal better, reducing fan noise, and improving heat dissipation on the hot side.
Now the mini fridge is ready to use. Fill it with drinks, switch it on, let it cool down, and enjoy having cold drinks just within your reach!
**There is a video attached where you can view the door mechanism!**