How to Build a Gaming Computer
by atabuhalimeh in Circuits > Computers
159 Views, 2 Favorites, 0 Comments
How to Build a Gaming Computer
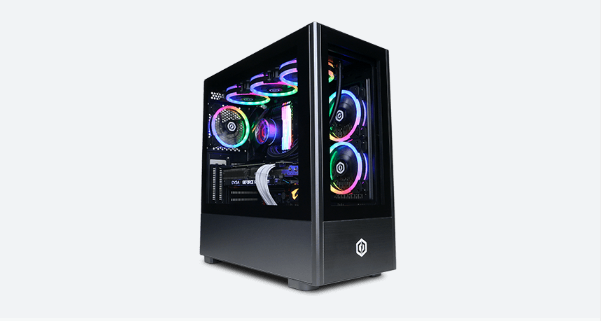
These multi-step instructions will show you step by-step on how to build a computer, starting from the simplest tasks to the ones that look the hardest. As someone who has built many computers in the past, they are simple to do and really easy to learn, but it looks complex to people who have not attempted it.
Supplies

The supplies are:
A Case: The case is just the storage unit for all the supplies.
A motherboard: the motherboard is what will hold all of the components together, and will be the component that gives everything power
A CPU (Central Processing Unit): The CPU is known as the heart of the computer, if the computer does not have a running CPU, the computer will not turn on.
A CPU Cooler (If your CPU did not come with one): This is used to cool down the CPU. As the computer is running, heat will be generated from the amount of things processing at once.
A GPU (Graphics Processing Unit): The GPU is what gives the computer sufficient speeds to run multiple games, programs, and servers. The better GPU you have, the better performance you will have.
RAM (Random Access Memory): RAM is known as the veins of the computer. RAM allows the computer to run multiple things at once without having any lag issues or to have your computer crashing.
An SSD (Solid State Drive ): An SSD is the storage of the computer, it allows you to store things such as files or games.
A PSU (Power Supply Unit): The PSU is the battery of the whole computer. Some wires are connected to the power supply that must be connected to the motherboard for it to have power.
A Windows Flash Drive: Since it will be a completely new build for a gaming computer, there will be no Windows preinstalled in your SSD or HD. That would have to be done manually.
Case Fans (Optional): Case fans are extra fans that you put on the case that allows better airflow, but as cases come pre-installed with fans, it is not needed.
TOOLS NEEDED:
A Screwdriver: A screwdriver is all that is needed to build a computer, as every screw that is used are all Phillips screws.
Clear Everything From the Desk
Ensure that the desk is static-free and not around anything that is metal or can give any of your components a random shock that could short-circuit your pc parts.
Take Motherboard Out of Box
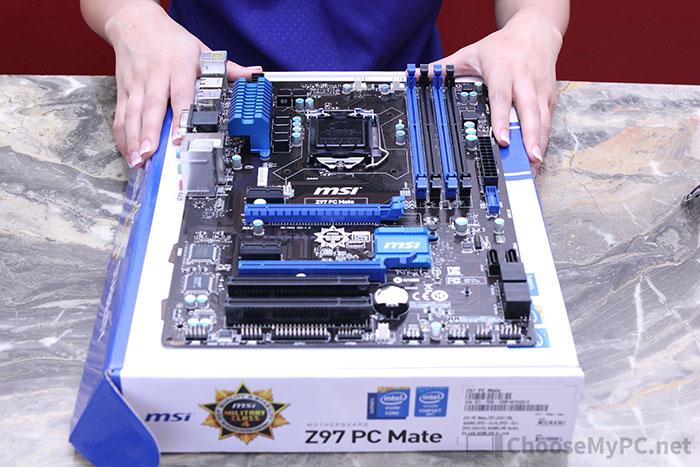
- take out the motherboard from its box, and place it right on top of the box. The reason being for doing that is that the back of the motherboard is very easy to break, and having it on top of the box ensures that there is nothing hard or anything to scratch the back.
2.Remove all visual plastic that is around the motherboard. As later on if the computer is running, the plastic can melt onto the motherboard and ruin it.
Put CPU in Motherboard Slot
.png)

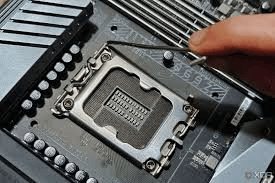
- When taking out the CPU from its box, please make sure you do not grab the bottom of the CPU. The way to hold your CPU is from its sides, though it is a weird grip, that is the correct way to hold it.
- To know which way is the correct way to put down your CPU by the edges and corners. In every CPU, there will be a triangle on the top right corner, and a curve on the top and bottom middle.
- The lift opens the CPU slot, there is a lever that must be pushed towards you and pulled upwards. It seems scary when removing it as it requires some force to push down and pull to you, but make sure you keep your finger on the lever, as letting go of it will fling the lever, which could break it.
- When removing the cover, line up the CPU with the steps mentioned above, and slowly drop it in.
- now the scariest part is closing the cover back with the CPU in. Have no fear, the pressure may seem difficult but it is just like opening the latch as you did before. Simply press your finger down on the lever push until its down to its placeholder, and slide it to its side. Just like that, that's your step one!
ADDING YOUR THERMAL PASTE
.png)
- inside of the box of your CPU, there should either be a little tube of thermal paste, or a pad of paste that you are able to use. Simply take it out the box and remove the cap or rip an opening.
- there are different ways you can apply thermal paste, but the main reminder is to make sure you to do not use the whole thing, as the CPU only needs a small drop.
- the ways you can place it on the CPU is making an X shape, putting dots in every corner of the CPU, or putting a bigger dot in the middle.
Putting the CPU Cooler
.png)
- putting the CPU cooler is one of the many simple things to do on a computer build. All it is that you place it on top of the CPU and line it up on the holes on each corner, then screw it on.
Installing the RAM
.png)
.png)
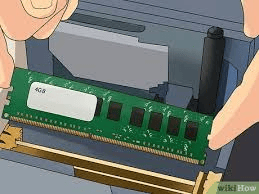
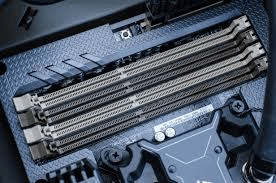
- installing the ram is one of the easiest things to do on a computer build. To install the RAM, there will be clips in each end of the stick holder that must be pushed down in order for the ram to be placed in.
- when both clips are open, simply line up the RAM with the line of the holder. Once inside the slot, just push down until you hear two clicks.
- When you hear the two clicks, you will know that the ram is locked into the slot and has been successfully installed.
Installing the SSD
.png)
- When installing the SSD, there will be a cover that is blocking the SSD holder. The cover is the heat sync that protects the SSD from high temperatures and makes sure that the SSD does not burn.
- when you remove the cover, you would want to angle the SSD 45 degrees and slide it into the holder. Once you hear a click, then you will know the SSD is being held.
- After the SSD has clicked on the holder, you would need to put the cover back on and use your screwdriver to screw it in place.
Putting the Motherboard in the Case
.png)
.png)
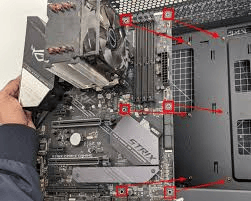
- after doing the small steps, you are now ready to place the motherboard into the case.
- to grab the motherboard without breaking it, the best way to have a grip to it would be holding it by the CPU cooler, since it is already screwed on and will not damage the motherboard in any way.
- make sure that the ports are aligned with the open space of the case, then you will see the open holes of the case are aligned with the motherboard. Then get the screws that you are given from the case and screw them onto the case using your screwdriver.
Installing the GPU
.png)
.png)
- Installing the GPU is just like installing the ram, with one small difference.
- there will be a clip on the far right side of the GPU holder, simply push on it to open up the clip. Once it is open, simply put the GPU into the slot and push on it until you hear a click, that way you know the GPU has been locked and installed.
Installing the PSU

.png)
- installing the PSU will be done from behind the case. To install the PSU, you would need to remove the back cover of your case.
- Every case has its own way to remove the back panel, but most of them are one simple screw and sliding it across. Once the back panel has been removed, you will notice a small box space that is made for any type of power supply. simply place the power supply inside and make sure that the power cord outlet is facing the outside of the case, as that is how you will turn on the computer and plug it into your outlet.
- Once successfully placed in the case, there will be four screws that are supplied in the box that you would use to screw it onto the case.
Doing the Wiring for the Computer


- Now the wiring of the computers seems like the scariest part of the whole build, but in reality it is just all listed for you, and all you do is follow the cords.
- As an example, in the case wires, there will be a wire called "USB," and all you need to do is find the spot that says "USB" and put the wire in until you hear a click. and you repeat with every other wire.
Installing Windows
.png)
- you are now at the final step of a computer setup, and all you need to do now is install Windows.
- when you turn on your computer for the first time, put the USB flash drive that has Windows pre installed into the computer. That way the computer can recognize that Windows needs to be installed and would read the flash drive.
- it will take you to a blue screen that will ask you to install Windows, and you will click the flash drive and make sure that it installs to your SSD. Since the SSD is the only storage inside the computer, it will automatically read it and go in there.
Step Back and Give Yourself a Pat on the Back

Step back and look at the creation that you have just made. the lights coming from the computer, everything turned on and working perfectly. Take a good deep breath and clap for yourself, as you just built your very first gaming computer.