How to Build a Professional 36-Inch Frameless Base Cabinet From One Sheet of Plywood
by Hank2026 in Workshop > Woodworking
82 Views, 0 Favorites, 0 Comments
How to Build a Professional 36-Inch Frameless Base Cabinet From One Sheet of Plywood
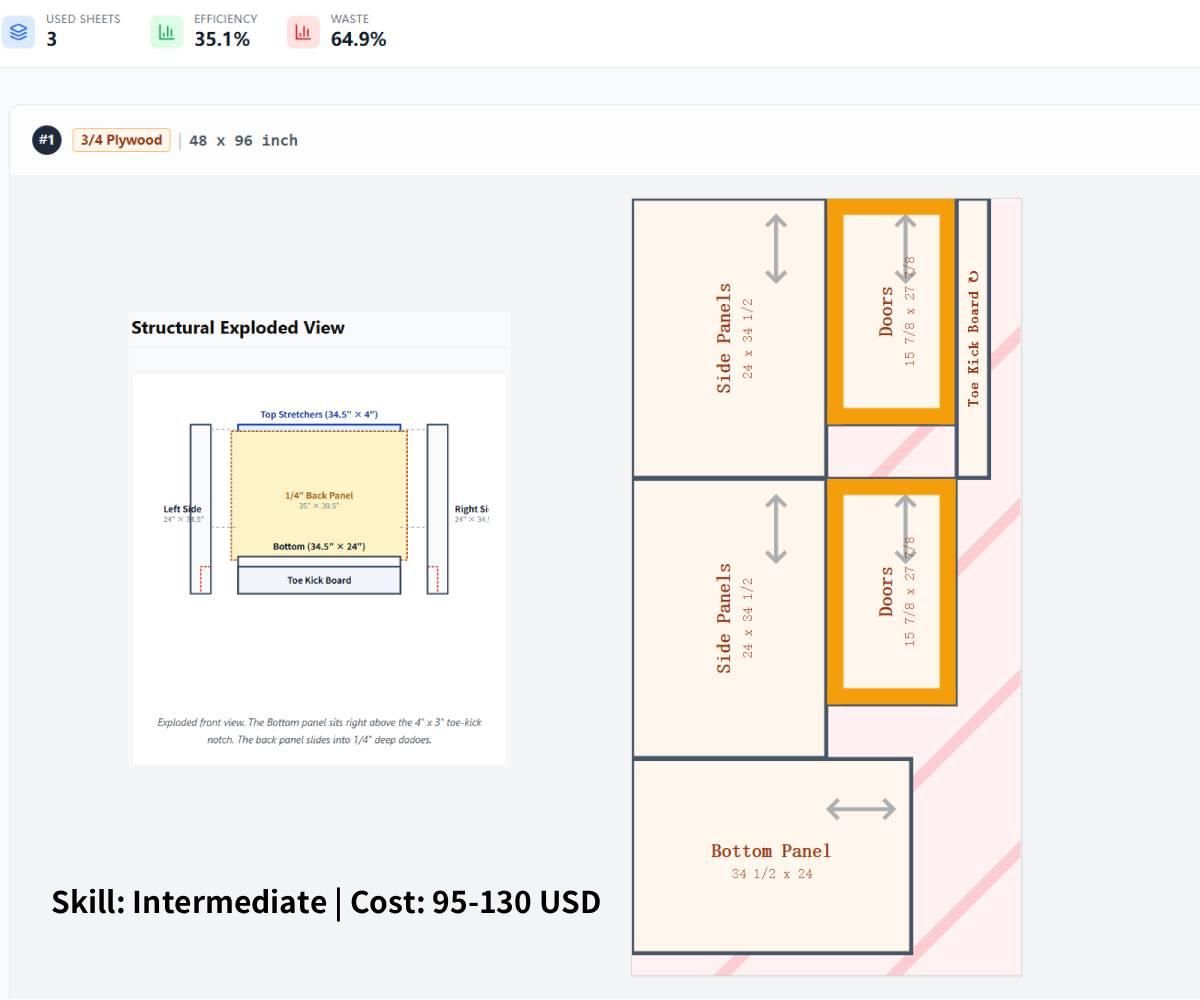
Building your own kitchen or workshop cabinets can save you thousands of dollars, but the most intimidating part is the math. How do you fit all those large panels onto a single 4x8 sheet of plywood without running out of material?
In this guide, I will show you how to build a standard 36-inch European-style (frameless) base cabinet. We will focus on professional joinery, toe-kick geometry, and most importantly, maximizing material yield.
Supplies
- Materials:
- (1) 4' x 8' Sheet of 3/4" Plywood (Cabinet Grade)
- (1) 1/4" Plywood Backing (approx. 36" x 31")
- Pocket Hole Screws (1-1/4" Coarse Thread)
- Wood Glue (Titebond II or III)
- Edge Banding (7/8" Birch or Maple)
- (4) Concealed Hinges (Full Overlay)
- Tools:
- Table Saw or Track Saw
- Pocket Hole Jig
- Drill & Impact Driver
- 35mm Forstner Bit (for hinge cups)
- Edge Banding Iron or Household Iron
- 90-degree Corner Clamps (Optional but helpful)
- The Layout (Crucial Step):
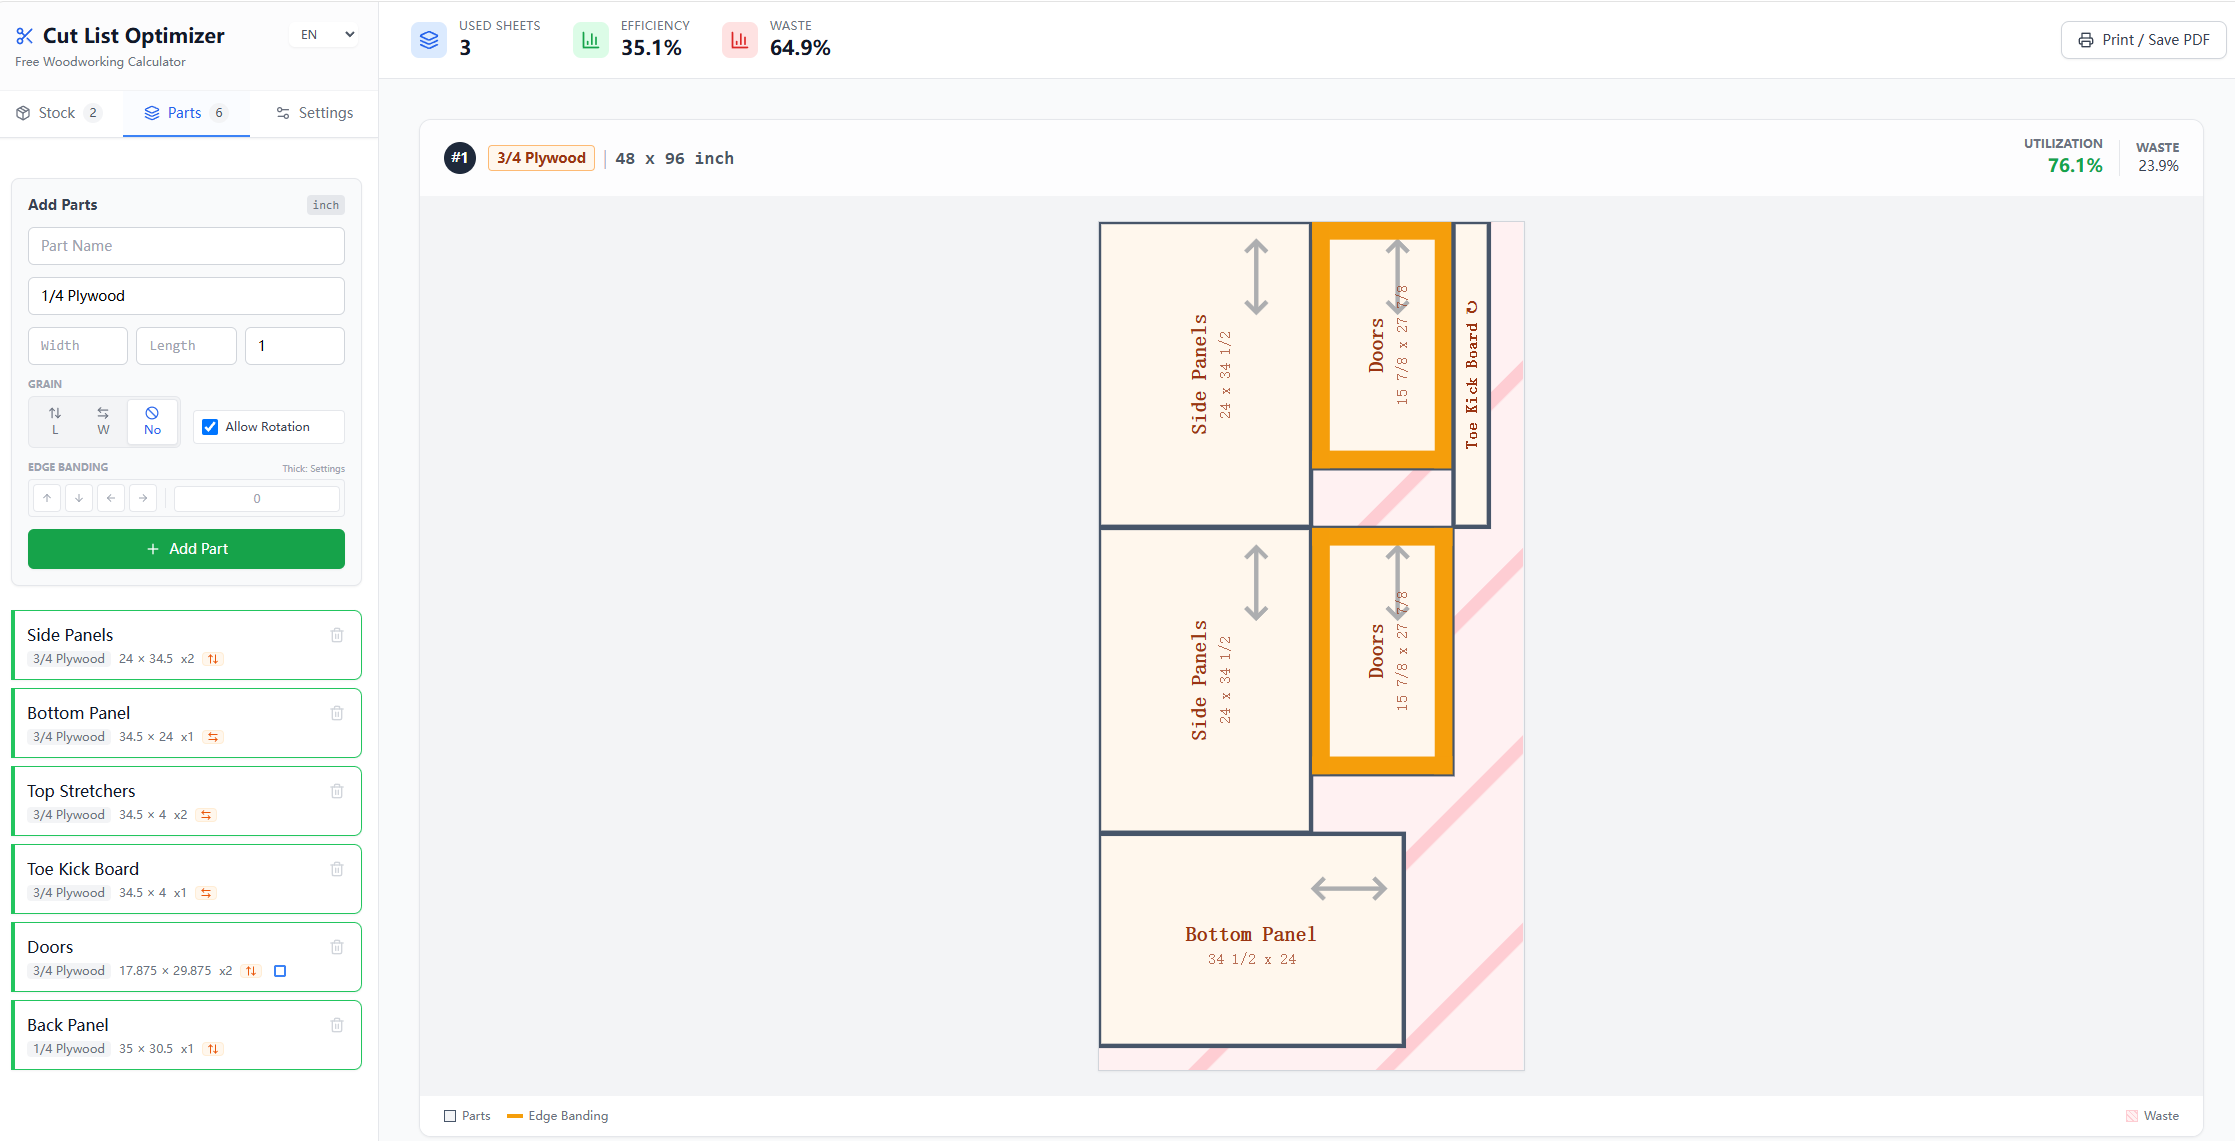
"To minimize waste and ensure every part fits, I used this Interactive 36-Inch Cabinet Cut List Tool. It pre-calculates the 1/8-inch saw kerf, accounts for grain direction, and lets you adjust dimensions on the fly if you need a custom width."
Master the Grain and the Math
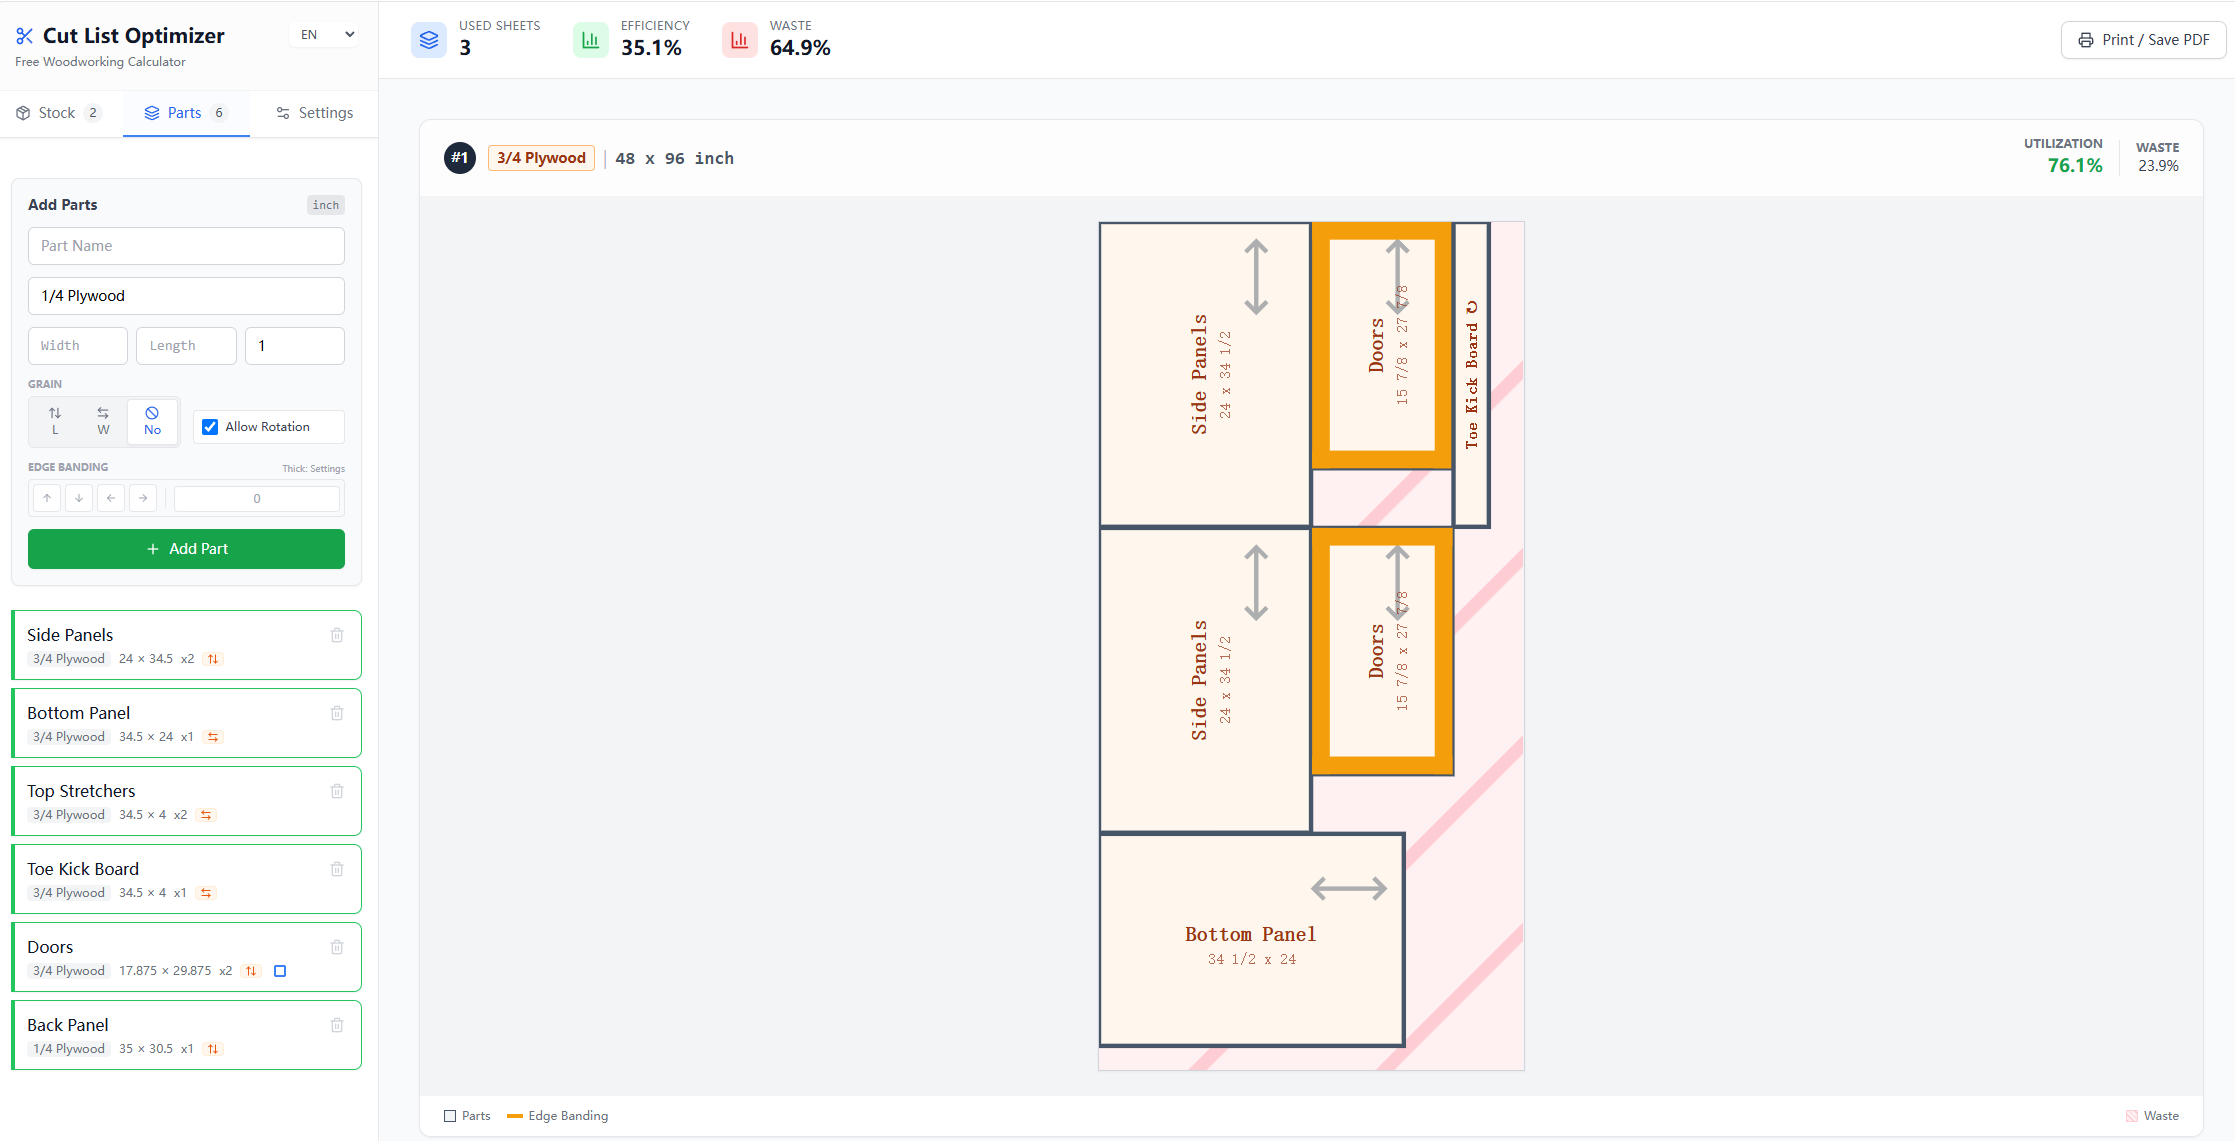
Digital Layout & Material Prep
Before sawdust flies, you must plan. For a 36" frameless cabinet, grain direction is key for the doors and side panels to look professional. I used the Free Cut List Optimizer to snap everything to a 1/8" kerf.
Primary Cuts (The Box Components)
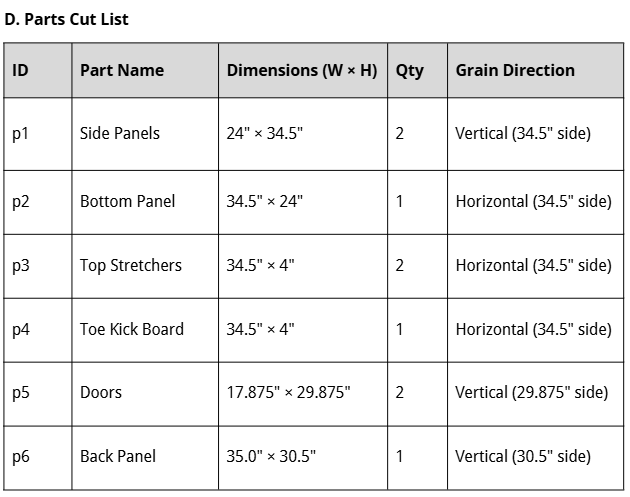
Breaking Down the Plywood
Follow the cut list to rip your 3/4" plywood into Side Panels (p1), Bottom Panel (p2), and Stretchers (p3). Keep your table saw fence calibrated; for frameless cabinets, a 1/32" error can ruin your door reveals later.
Precision Drilling for Maximum Strength
.png)
Pocket Hole Joinery
Set your pocket hole jig for 3/4" stock. Drill 10 holes in the Bottom Panel (p2) and 4 holes in each Stretcher (p3). Pro Tip: Position holes at least 2" from edges to avoid splitting the plywood plies.
Don't Skip the Sanding

Pre-Assembly Prep (Sanding & Edge Banding)
It’s much easier to sand parts now than when the box is assembled. Sand the interior faces to 180 grit. Apply your 7/8" pre-glued edge banding to the front edges of the side panels and all four edges of the doors.
Squaring the Carcass
Assembling the Cabinet Box
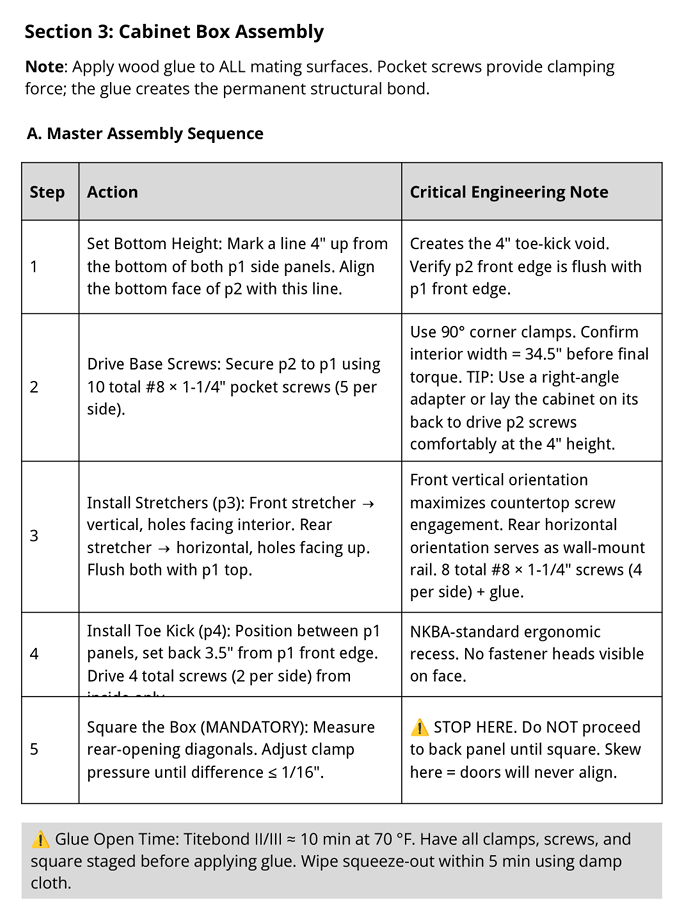
Use 90-degree corner clamps. Join p2 to p1s first. The 4" toe-kick height is critical. Once the box is together, measure the diagonals. If the diagonal difference is > 1/16", the box is "racked" and your doors will never align.
The Final Lockdown
 Installation.png)
Installing the Back Panel & Doors
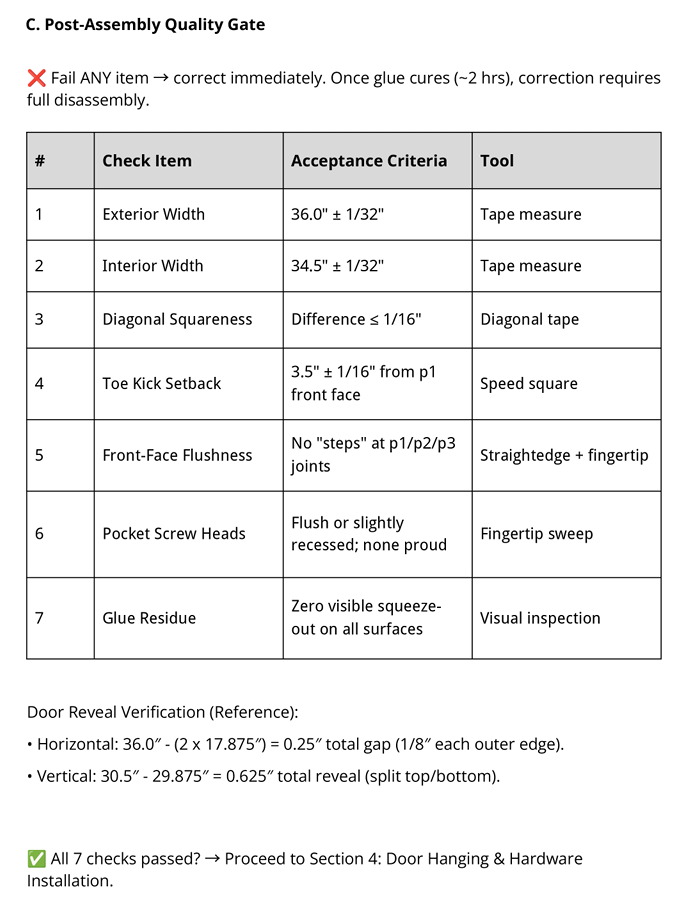
The 1/4" back panel (p6) isn't just for looks—it locks the cabinet in square. Use a 1/8" reveal template to mark your nailing lines to avoid "shiners" (nails blowing through the side). Finally, drill your 35mm hinge cups and hang the doors.