How to Decorate Golf Glubs With Laser Marking
by thunderlaser-nolan in Workshop > Laser Cutting
21 Views, 2 Favorites, 0 Comments
How to Decorate Golf Glubs With Laser Marking

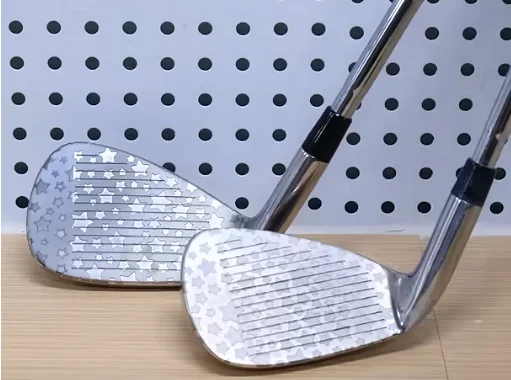
Laser marking on golf clubs makes your gear truly stand out! With clean, precise laser marking, you can add custom star patterns that reflect personality and style—whether you’re marking your own favorite club or designing a unique set for someone special.
Ready to bring character and clarity to every swing? Personalize your golf club with laser marking and hit the green with confidence and flair!
Supplies
Machine Used
Aurora Lite
Material Needed
Stainless Steel Golf Clubs
Settings
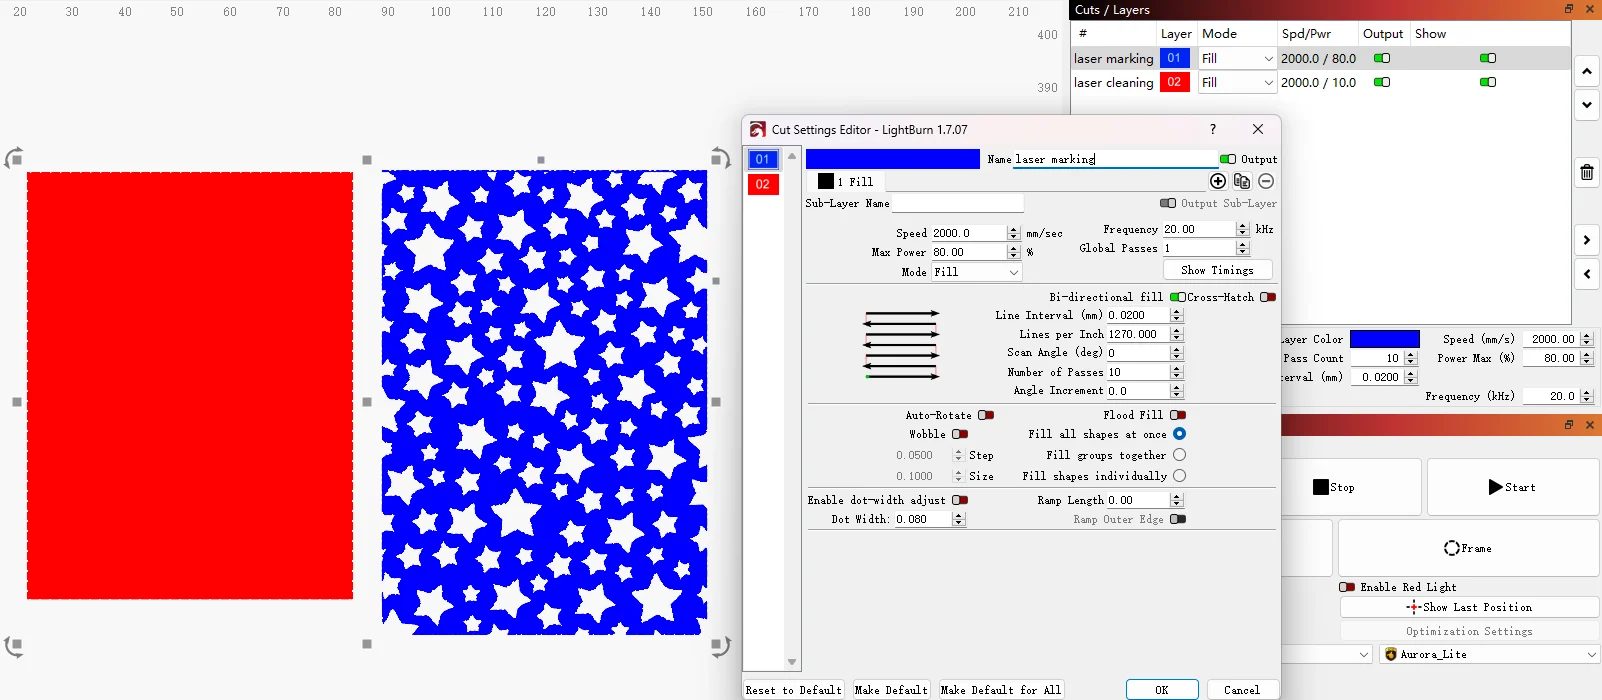
- Laser Marking
- Speed: 2000mm/s
- Power: 80%
- Frequency: 20kHz
- Line interval: 0.02
- Bi-directional: on
- Number of Passes: 10 passes
- Laser Cleaning
- Speed: 2000mm/s
- Power: 10%
- Frequency: 20kHz
- Line interval: 0.02
- Bi-directional: off
- Number of Passes: 1 pass
Downloads
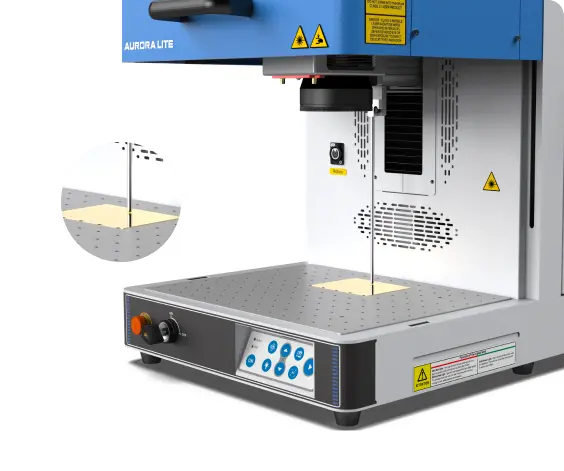
Place the Stainless Steel Golf Clubs
Choose a keycap of your favorite color, and put the stainless steel golf clubs on the laser bed.
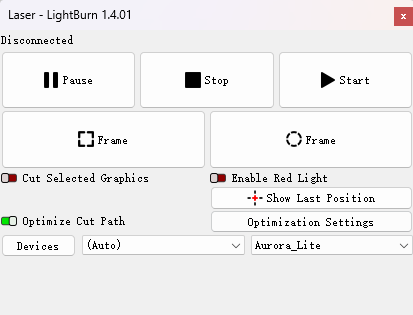
Import Laser Marking File and Check Out
Load your design into LightBurn software, adjusting its size and position to fit youstainless steel golf clubs. We set up a laser cleaning layer for creating white contrast on them. We recommend cleaning them once before and after laser marking to get the recommended results. The two layers have different parameters, so make sure the laser marking parameters are set correctly.
Don't Miss the Focus
Missing the focus is one of the biggest reasons for laser marking failure. So don’t forget to click the AF button for auto focus. Of course, manual focus is also effective.
When two red dots are displayed on the stainless steel golf clubs, it is out of focus. When the two light dots overlap each other, it means in focus.
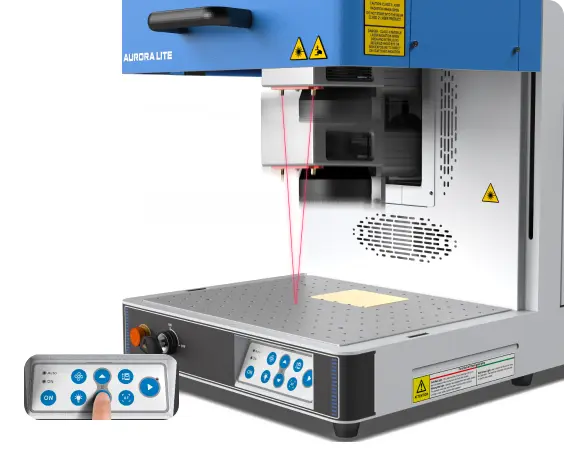
Auto focus
Manual focus
Ready to Start Laser Marking
Press the frame button and check if the visual red light indicate the right area to be marked. The frame should be located in the middle of the stainless steel golf clubs. If not, move the pattern positions until they align.
After checking, close the laser door and begin Aurora Lite’s operation.
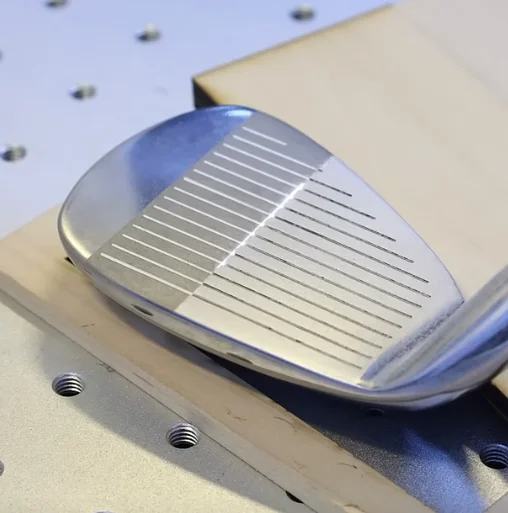
Monitor the Stainless Steel Golf Clubs Marking Process
Stay near the machine throughout operation to monitor for any unusual sounds or alarms. This vigilance ensures safety during laser marking, as the energy is potent. Avoid looking directly at the laser beam, even with protective measures in place.
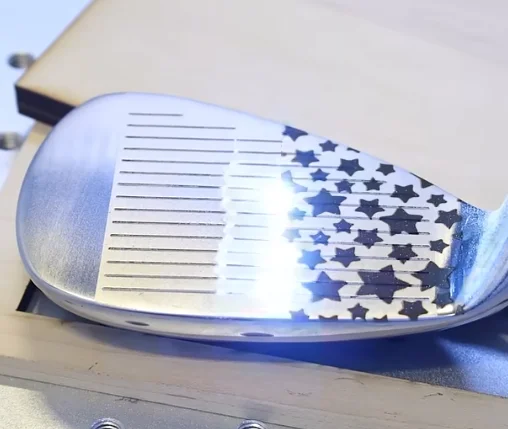

Complete the Laser Marking
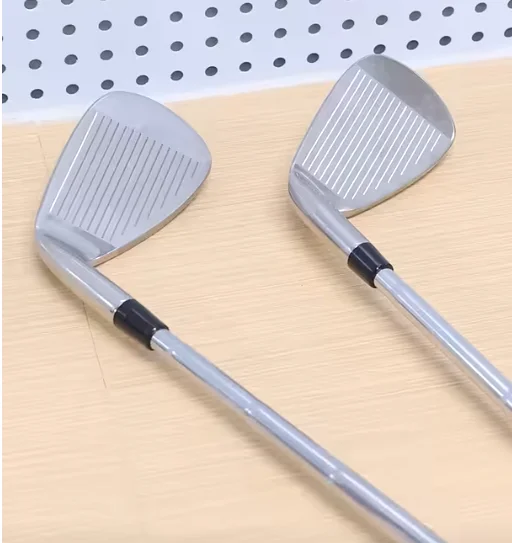
Once laser marking is complete, carefully open the door and get your personalized stainless steel golf clubs. Laser marking does not produce toxic substances, and you can use it after a simple cleaning!
Come and Try!
Perfect for golf lovers, tournament organizers, thoughtful gift-givers, or sports accessory brands, laser marking golf clubs is simple to personalize, quick to produce, and made to endure every swing—making them a standout option for small creative shops and premium custom retailers alike. With endless marking options from sleek initials to playful star patterns, these clubs add a personal edge to the game and arrive ready to impress on or off the green.