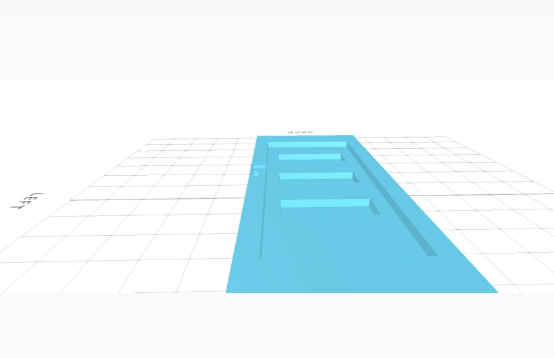
How to Design a Door Using 3D CAD Software
by Julie80 in Design > 3D Design
95 Views, 0 Favorites, 0 Comments
How to Design a Door Using 3D CAD Software

Learn How to Design a Door using 3D CAD Software with the help of this article
How to Design a Door using 3D CAD Software
Designing functional and aesthetically pleasing objects has always been an essential aspect of architecture and engineering. Among these, doors serve as more than just a functional necessity; they are gateways that connect spaces and communicate style, security, and purpose. With advancements in technology, digital design tools like SelfCAD have revolutionized how we approach such creations, making the design process more accessible and precise.
This article explores the step-by-step process of designing a door using SelfCAD, a versatile and user-friendly 3D modeling software. It will delve into the fundamental features of SelfCAD that facilitate creative design, including its intuitive interface, powerful modeling tools, and customization options. By the end of this guide, you will understand how SelfCAD can empower users to transform their ideas into detailed 3D door models, suitable for real-world applications or artistic projects
To access the interactive tutorial to this article, check out https://www.selfcad.com/tutorials/6s5i13he5e255g3xi323m2r5i1g6g1c2fc3s
Once you’ve launched the editor;
From the 3D Shapes category on the toolbar choose cube, set width to 200, height to 30, depth to 500, width segment to 10, depth segment to 10.
Click to finalize cube
Click solid+wireframe button to set rendering mode; click to activate edge selection, click on highlighted region to select it
From the modify category on the toolbar choose fillet; set intensity to 4, level to 4.
Click to finalize fillet
Click to activate face selection; click on highlighted region to select it
Click move on the toolbar, set y to 20.
Click on highlighted region to deselect it, click ‘x’ to close transformation panel
Click on highlighted region to select it
From the modify category on the toolbar choose fillet; set intensity to 4, level to 4.
Click to finalize fillet
Click to activate face selection; click on highlighted region to select it
Click move on the toolbar, set y to 10.
Click ‘x’ to close transformation panel, click on highlighted region to deselect it
Click highlighted part on selection cube to turn off region selection
From the 3D Shapes category on the toolbar choose cylinder; set top radius to 6, Bottom radius to 6, height to 6, position x to -92, position y to 29, position z to -15
Click to finalize cylinder
Click to activate polygon selection; click on highlighted region to select it
From the modify category on the toolbar choose inset; set inset amount to 3
Click add option to add next macro step; set operation to scale, set x to 5, y to 5, z to 5
Click to finalize inset
From the modify category on the toolbar choose extrusion.
Click to finalize extrusion, click on highlighted region to deselect it
Click on highlighted region to select it
From the modify category on the toolbar choose extrusion, set extrusion amount to 11.55
Click to finalize extrusion, click on highlighted region to deselect it
Click on mesh 4 to select it; Click stitch & scoop on the toolbar; from the tool panel choose union.
Click to finalize union
Click solid button to set rendering mode
As you continue honing your design skills, remember that SelfCAD offers a wealth of resources to support your learning journey. To deepen your understanding and explore more advanced features, consider checking out the interactive tutorials (https://www.selfcad.com/tutorials) available on the SelfCAD website. The tutorials page provides a treasure trove of guides, tips, and tricks that cater to designers of all levels.
More structured learning experience can also be accessed at the SelfCAD Academy (https://www.selfcad.com/academy/curriculum/), https://www.youtube.com/@3dmodeling101, and 3D Modeling 101 series (https://www.youtube.com/playlist?list=PL74nFNT8yS9DcE1UlUUdiR1wFGv9DDfTB). This comprehensive resource offers in-depth courses taught by industry experts, allowing you to master the intricacies of SelfCAD at your own pace