How to Fold a Book Into a Word - the Original Tuto
by Faitmain-Faitcoeur in Craft > Paper
516296 Views, 338 Favorites, 0 Comments
How to Fold a Book Into a Word - the Original Tuto
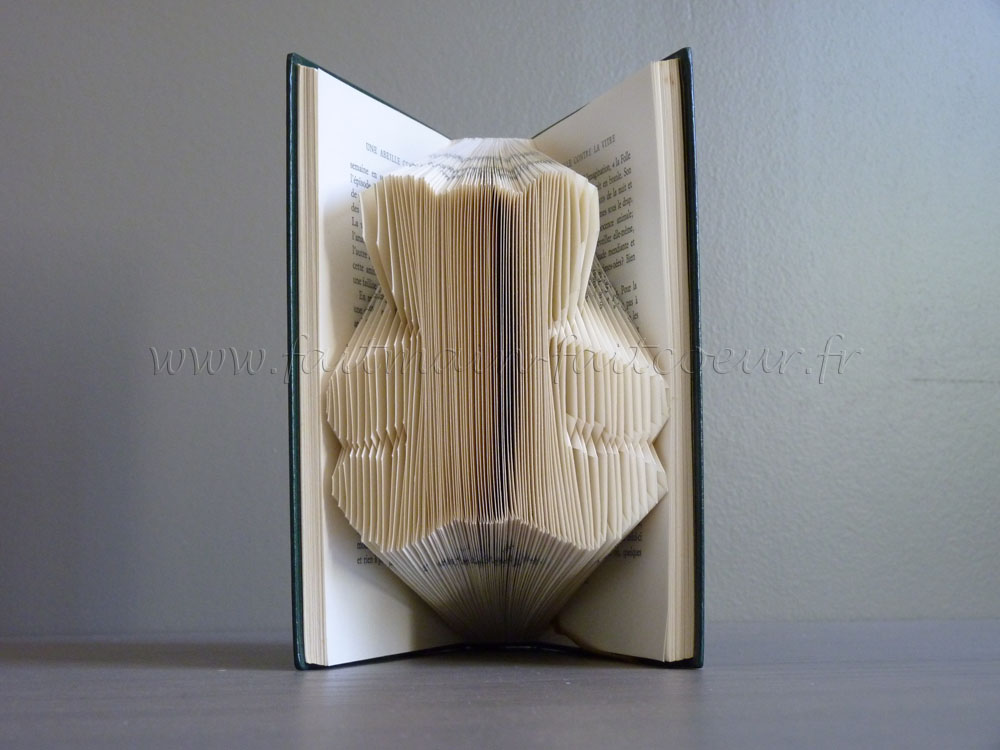
Here it is : the tuto to make yourself a folded book.
Whatever you want to write or make a shape.
WARNING : this is the original tuto, with all the steps
With this one you will make really detailed altered books.
Whatever you want to write or make a shape.
WARNING : this is the original tuto, with all the steps
With this one you will make really detailed altered books.
Download Photoshop

This tuto is made with Photoshop (you can find a free trial version on the web).
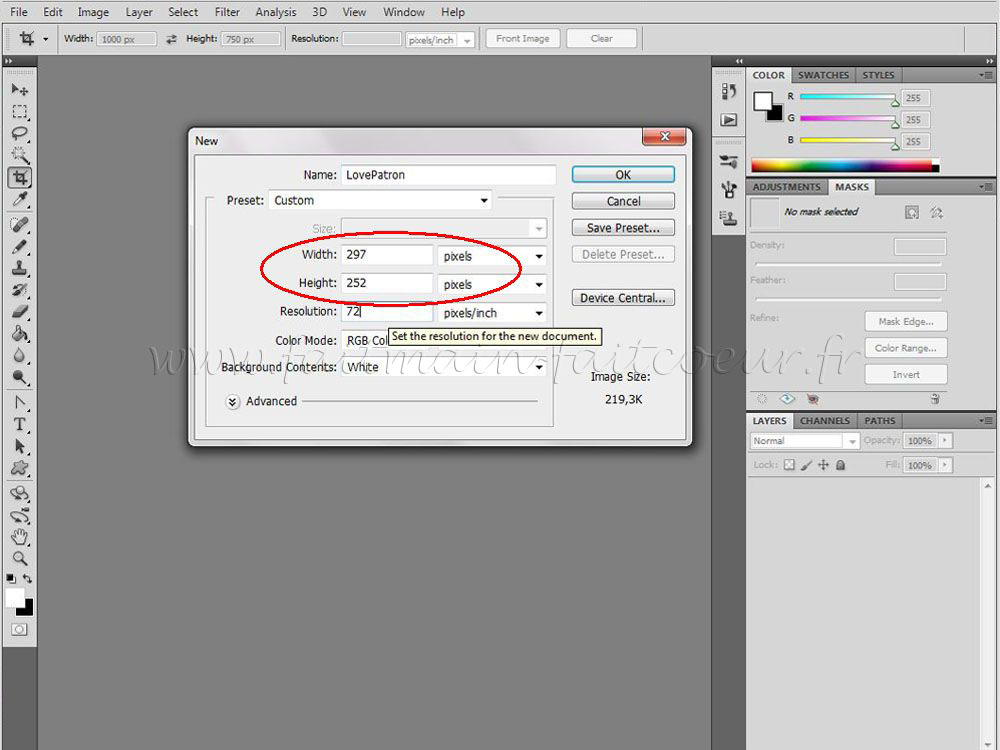
Open a new file, pixel scale.
Width is the number of sheets.
WARNING : I said “sheets” and not pages !!
For the height : height of your sheets in cm (be careful, the cover can be higher) multiplied x12.
This increase is for the final distorsion (folded sheets take up more space).
Width is the number of sheets.
WARNING : I said “sheets” and not pages !!
For the height : height of your sheets in cm (be careful, the cover can be higher) multiplied x12.
This increase is for the final distorsion (folded sheets take up more space).

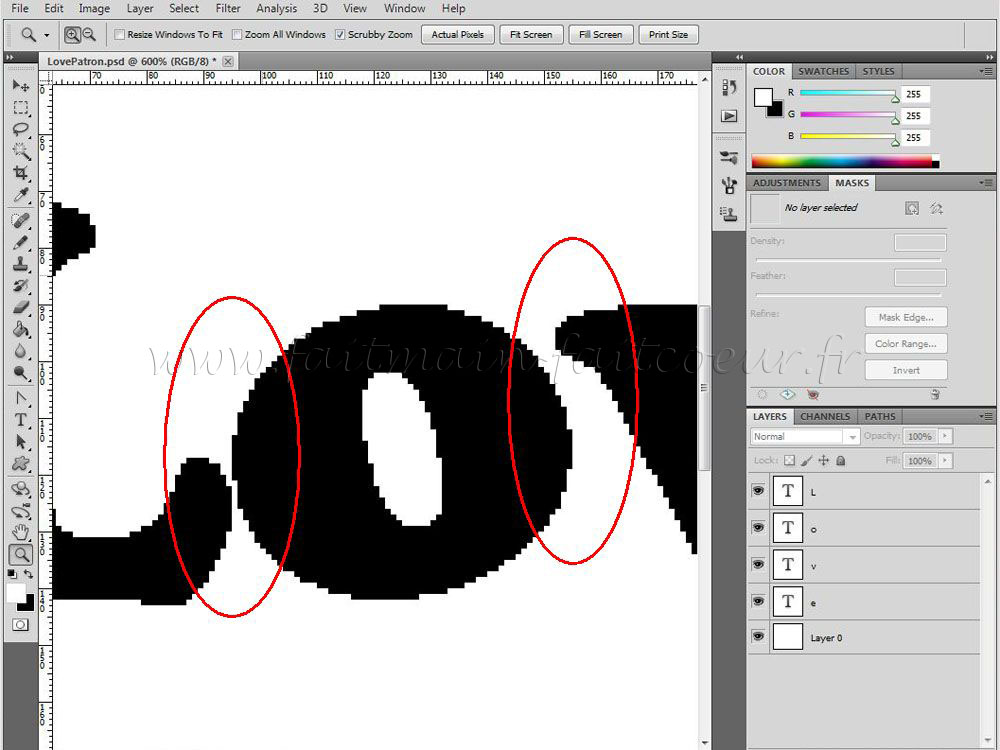
Choose the custom shape tool or the text tool.
If it is a word, choose your font and create a layer for each letter.
WARNING : if it’s a word don’t leave space between each letter (each column must have a black area).
If it is a word, choose your font and create a layer for each letter.
WARNING : if it’s a word don’t leave space between each letter (each column must have a black area).
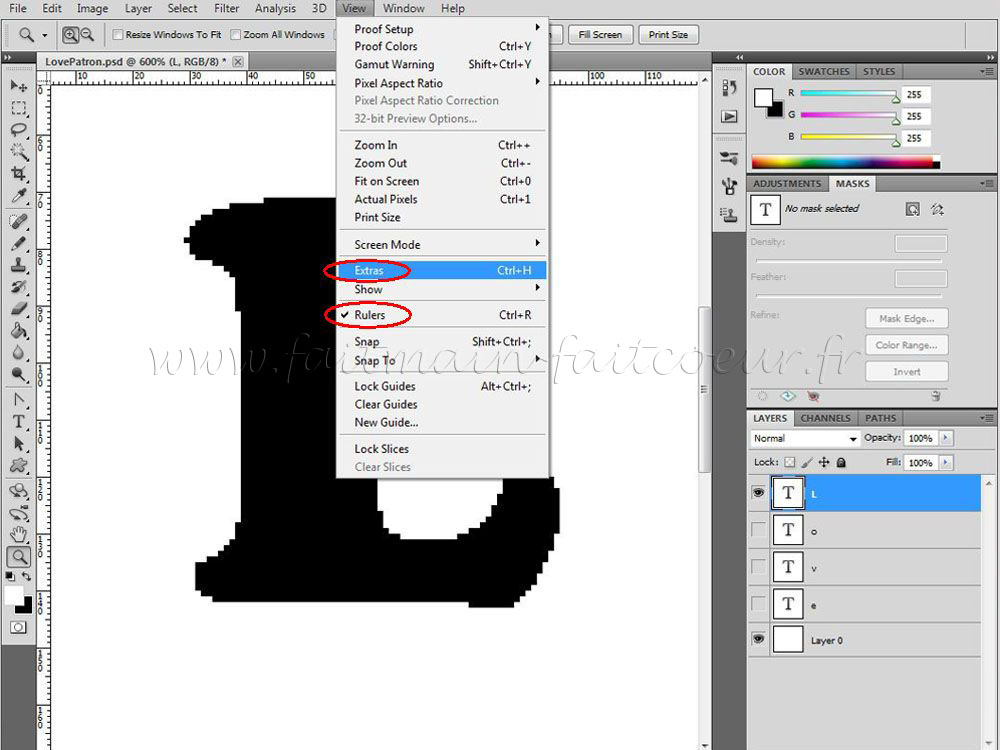
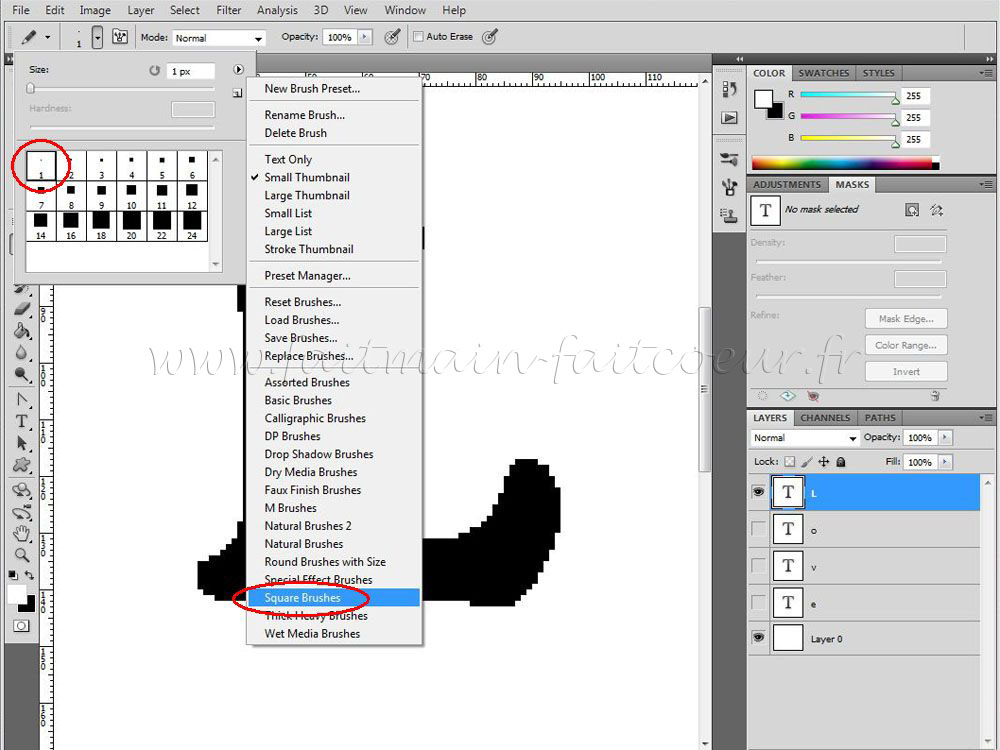
In the “view” menu, check “rulers” and “extras“.
Use the “pencil tool“, “square brushes“, size 1 pixel.
Use the “pencil tool“, “square brushes“, size 1 pixel.


Rasterize layer.
Zoom until the ruler shows each pixel.
We’re going to modify areas where the text (or the shape) has two parts on the same column.
For the “L“, the grey areas won’t be changed (vertical lines are not broken).
Zoom until the ruler shows each pixel.
We’re going to modify areas where the text (or the shape) has two parts on the same column.
For the “L“, the grey areas won’t be changed (vertical lines are not broken).

Keep in mind that each column is a sheet of your book.
With the “pencil tool” (square brushe, size 1 px, white color) erase one column out of two in the upper area.
Then erase one column out of two in the lower area shifting the deletion from the upper area.
At the folding time, you will have :
- first sheet for the upper part,
- second sheet for the lower part,
- third sheet for the upper part…. and so on, until complete columns.


Do the same for letters “o” and “v“.
The “e” is special, because you don’t have 2 areas on the same column but 3 !!
The “e” is special, because you don’t have 2 areas on the same column but 3 !!

First part ⇒ nothing to change (except if there is a letter before).
Second part ⇒ Erase two columns out of three, shifting the deletion :
- first sheet for the upper part,
- second sheet for the middle part,
- third sheet for the lower part… and so on.
Third part ⇒ erase one column out of two
Fourth part ⇒ nothing to erase (this part is thin… I admit, I am fussy).
Second part ⇒ Erase two columns out of three, shifting the deletion :
- first sheet for the upper part,
- second sheet for the middle part,
- third sheet for the lower part… and so on.
Third part ⇒ erase one column out of two
Fourth part ⇒ nothing to erase (this part is thin… I admit, I am fussy).

Let’s have a look to the full pattern.
Now, we have to calculate all the folds….
Now, we have to calculate all the folds….
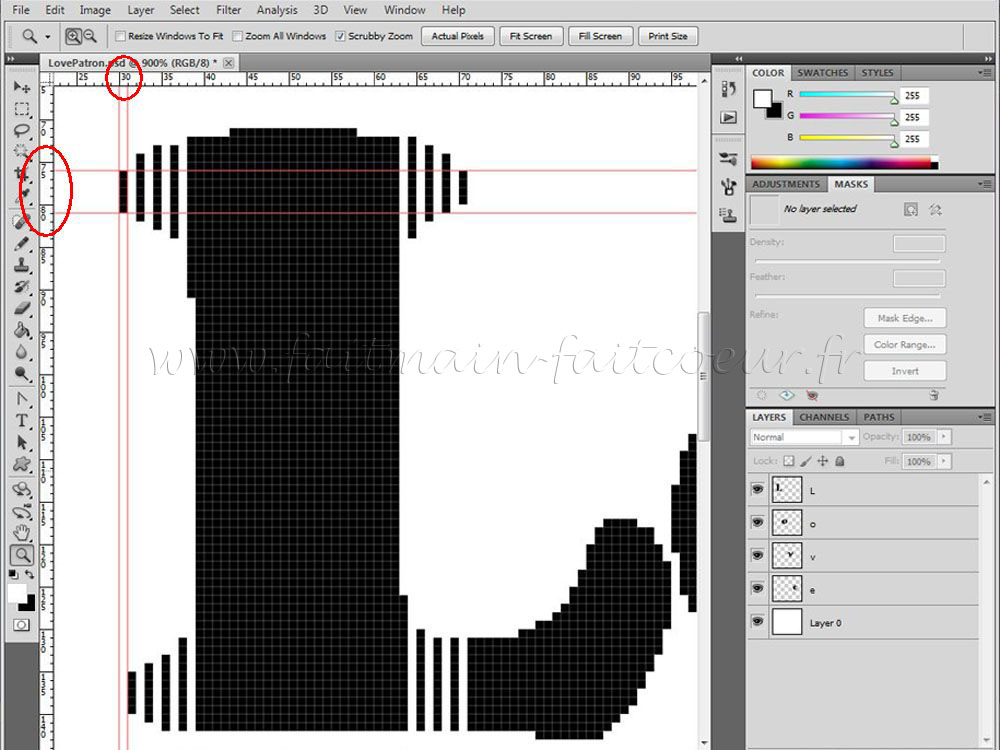
Keep your Photoshop document opened, grab your book, your ruler, a pencil… and a calculator !
On this pattern the 30 first sheets are not folded.
Zoom until the ruler show each pixel.
Place guides just before and after the first sheet (1st black column).
The vertical ruler displays 76 px and 81 px…. we have to divide them all by 12 !!
So, folds are at 6.35 cm and 6.75 cm (starting from the top of the sheet).

For the following sheet, move vertical guides.
The vertical ruler displays 135 px and 140 px : folds are at 11.25 cm and 11.65 cm.
For a nice rendering, I recommend to round up two numbers after the point (2 decimals).
The vertical ruler displays 135 px and 140 px : folds are at 11.25 cm and 11.65 cm.
For a nice rendering, I recommend to round up two numbers after the point (2 decimals).
For those who don’t want to use a software, you can make your pattern onto a squared paper or a graph paper.
You will have to run all these steps.
If you don’t want (or could not), here is the pdf patter.
All the calculations are done, but notice :
- sheets are 21 cm height,
- “Love” is made with 236 sheets.
ADD ON :
On my website you can find patterns for free and my online shop is HERE.