How to Hand Sew a Gadget Case
by jessyratfink in Craft > Sewing
27885 Views, 98 Favorites, 0 Comments
How to Hand Sew a Gadget Case

I'm going to show you how to make a custom gadget case for your phone, laptop or tablet. This case is great for keeping your gadget safe from scratches in a suitcase or bag, but it doesn't include any serious padding because we're sewing by hand.
Once you've learned how to make a case, it's easy to make another version on a sewing machine with batting or felt between the lining and outer fabrics to make the case padded. :)
If you're REALLY new to sewing, I'd suggest sticking with a small case at first and working your way up to a laptop sleeve. Larger versions of these cases can take quite a while to sew by hand, and I'd hate for you to get frustrated!
Tools and Materials

Materials:
- 1/2 yard quilting cotton for outside
- 1/2 yard quilting cotton for lining
- 4 inches of 1/16 inch round elastic cord in black or white
- All purpose thread to match fabric
- Button to match fabric
Typically 1/4 yard of fabric is the smallest amount you can buy, but that may be too little fabric if you're making a larger gadget case! Get 1/2 yard of fabric, and then you'll have extra to sew up some other things!
If you'd like to only make a phone or tablet case, you can try looking for precut fabric called "fat quarters" - they're typically 18x22 inches and lovely for small projects.
Tools:
- Sewing needle
- Sewing pins
- Fabric measuring tape
- Clear sewing ruler
- Scissors (a rotary cutter + cutting mat is nice too!)
- Pinking shears
- Water soluble pen
- Iron + ironing board
- Chopstick, crochet hook or knitting needle for pressing out corners
- Sewing gauge (optional but super helpful!)
Making a Custom Pattern

For this step, you'll need whatever gadget you'd like to make a case for and a fabric measuring tape. In this case I'm using my phone! If you often have your phone in a case, leave it in the case for the most accurate measurements.
This is possibly the most basic version of patternmaking out there, and it's an easy way to go for first timers. :)


Use your measuring tape to measure the case both vertically and horizontally as shown - you want to factor in how thick your gadget is, too!
To take the horizontal measurements, place the metal end of your tape measure against the middle right side of your phone as shown above on the left. Bring the tape measure across the phone and press it down and around the opposite side of the phone with your fingers so it touches the work surface you're measuring on. Take the measurement where the gadget meets the work surface.
To take the vertical measurements, place the metal end of the tape measure against the top edge of your phone. Make sure the metal end is resting on the surface the gadget is sitting on. Press the measuring tape down and around the bottom edge of the phone with your other hand. Pinch the measuring tape against the surface you're measuring on and take the measurement where the gadget edge meets the work surface.
It's better to round up if you're unsure about the numbers - just use 1/4 inch increments.

Add 1/2 inch to each of those measurements. The 1/2 inch we add will allow us to use 1/4 inch seam allowances as we sew.

Once you've got your measurements ready, we'll move on to cutting out the pieces.
Pressing Your Fabric and Cutting Out the Pattern


Once you have the dimensions for the case, press your fabric so it is free of any major wrinkles. Then, draw out the pattern and cut out the pieces. (To learn more about this process, check out my FREE Hand Sewing Class!)
You'll need one pair of fabric pieces for the inside lining, and another pair for the outside of the case.
Pinning Your Pattern Pieces

The pattern pieces are pinned together with the right sides facing each other. The "right" side is the side of the fabric that you want on the outside at the end.
For solid colored fabric, you don't need to worry too much about it. For patterned fabrics, the "right" side will be the one that's more colorful.

When I pin for hand sewing, I like to pin vertically along the seam. (Or parallel to the seam, if that's easier to understand!) This holds your fabric more rigidly, so it's easy to hold and sew. Try to make sure as much of the pin as possible is in the fabric - that will leave less pin to snag on!
Plus, if you pin horizontally along the seam, that's just a lot of extra things for your thread to get snagged on. ;)
Sewing the Edges
Grab one pair of pinned pieces. We're going to sew each pair together. I'm going to be sewing one pair with marked seam allowances, and on one I'm going to wing it to show the difference.
We'll be using a 1/4 inch seam allowance.

When I'm sewing a straight line and I want to be super accurate, I like to mark my sewing line with a water soluble marker. This will allow you to learn to sew in a straight line, so I recommend you do it too!

Mark the bottom of the pinned piece and both sides. We will not be sewing the top edge.
Double thread a needle and knot the thread.

Starting at the upper left or upper right corner, bring your needle through the fabric from back to front and make a stitch. Make one more stitch in the same spot, but further into the seam allowance. This really locks your stitches in place!
(Because we're going to be turning these pieces of fabric right side out after they're sewn, you want the stitches to be VERY strong so they don't pop! The top of the seam is going to take all the stress when it's turned right side out.)


Now you can begin to backstitch. Try to keep your stitches as small as you can and uniform in size.

You'll find out your preferred way of sewing as you go, but here's a photo of the way I hold my fabric while sewing. By pinching the fabric between two sets of fingers, I can hold it taut for easier sewing. This position may tire your hands fast if you don't sew often, but I really love it!


At the corners, make sure you don't carry the thread ACROSS the corner, so that you retain a 90 degree angle in your stitch line. You may have to slightly change up your stitching to get a nice line that goes around the corner and that's okay. Put a running stitch in there and keep sewing!


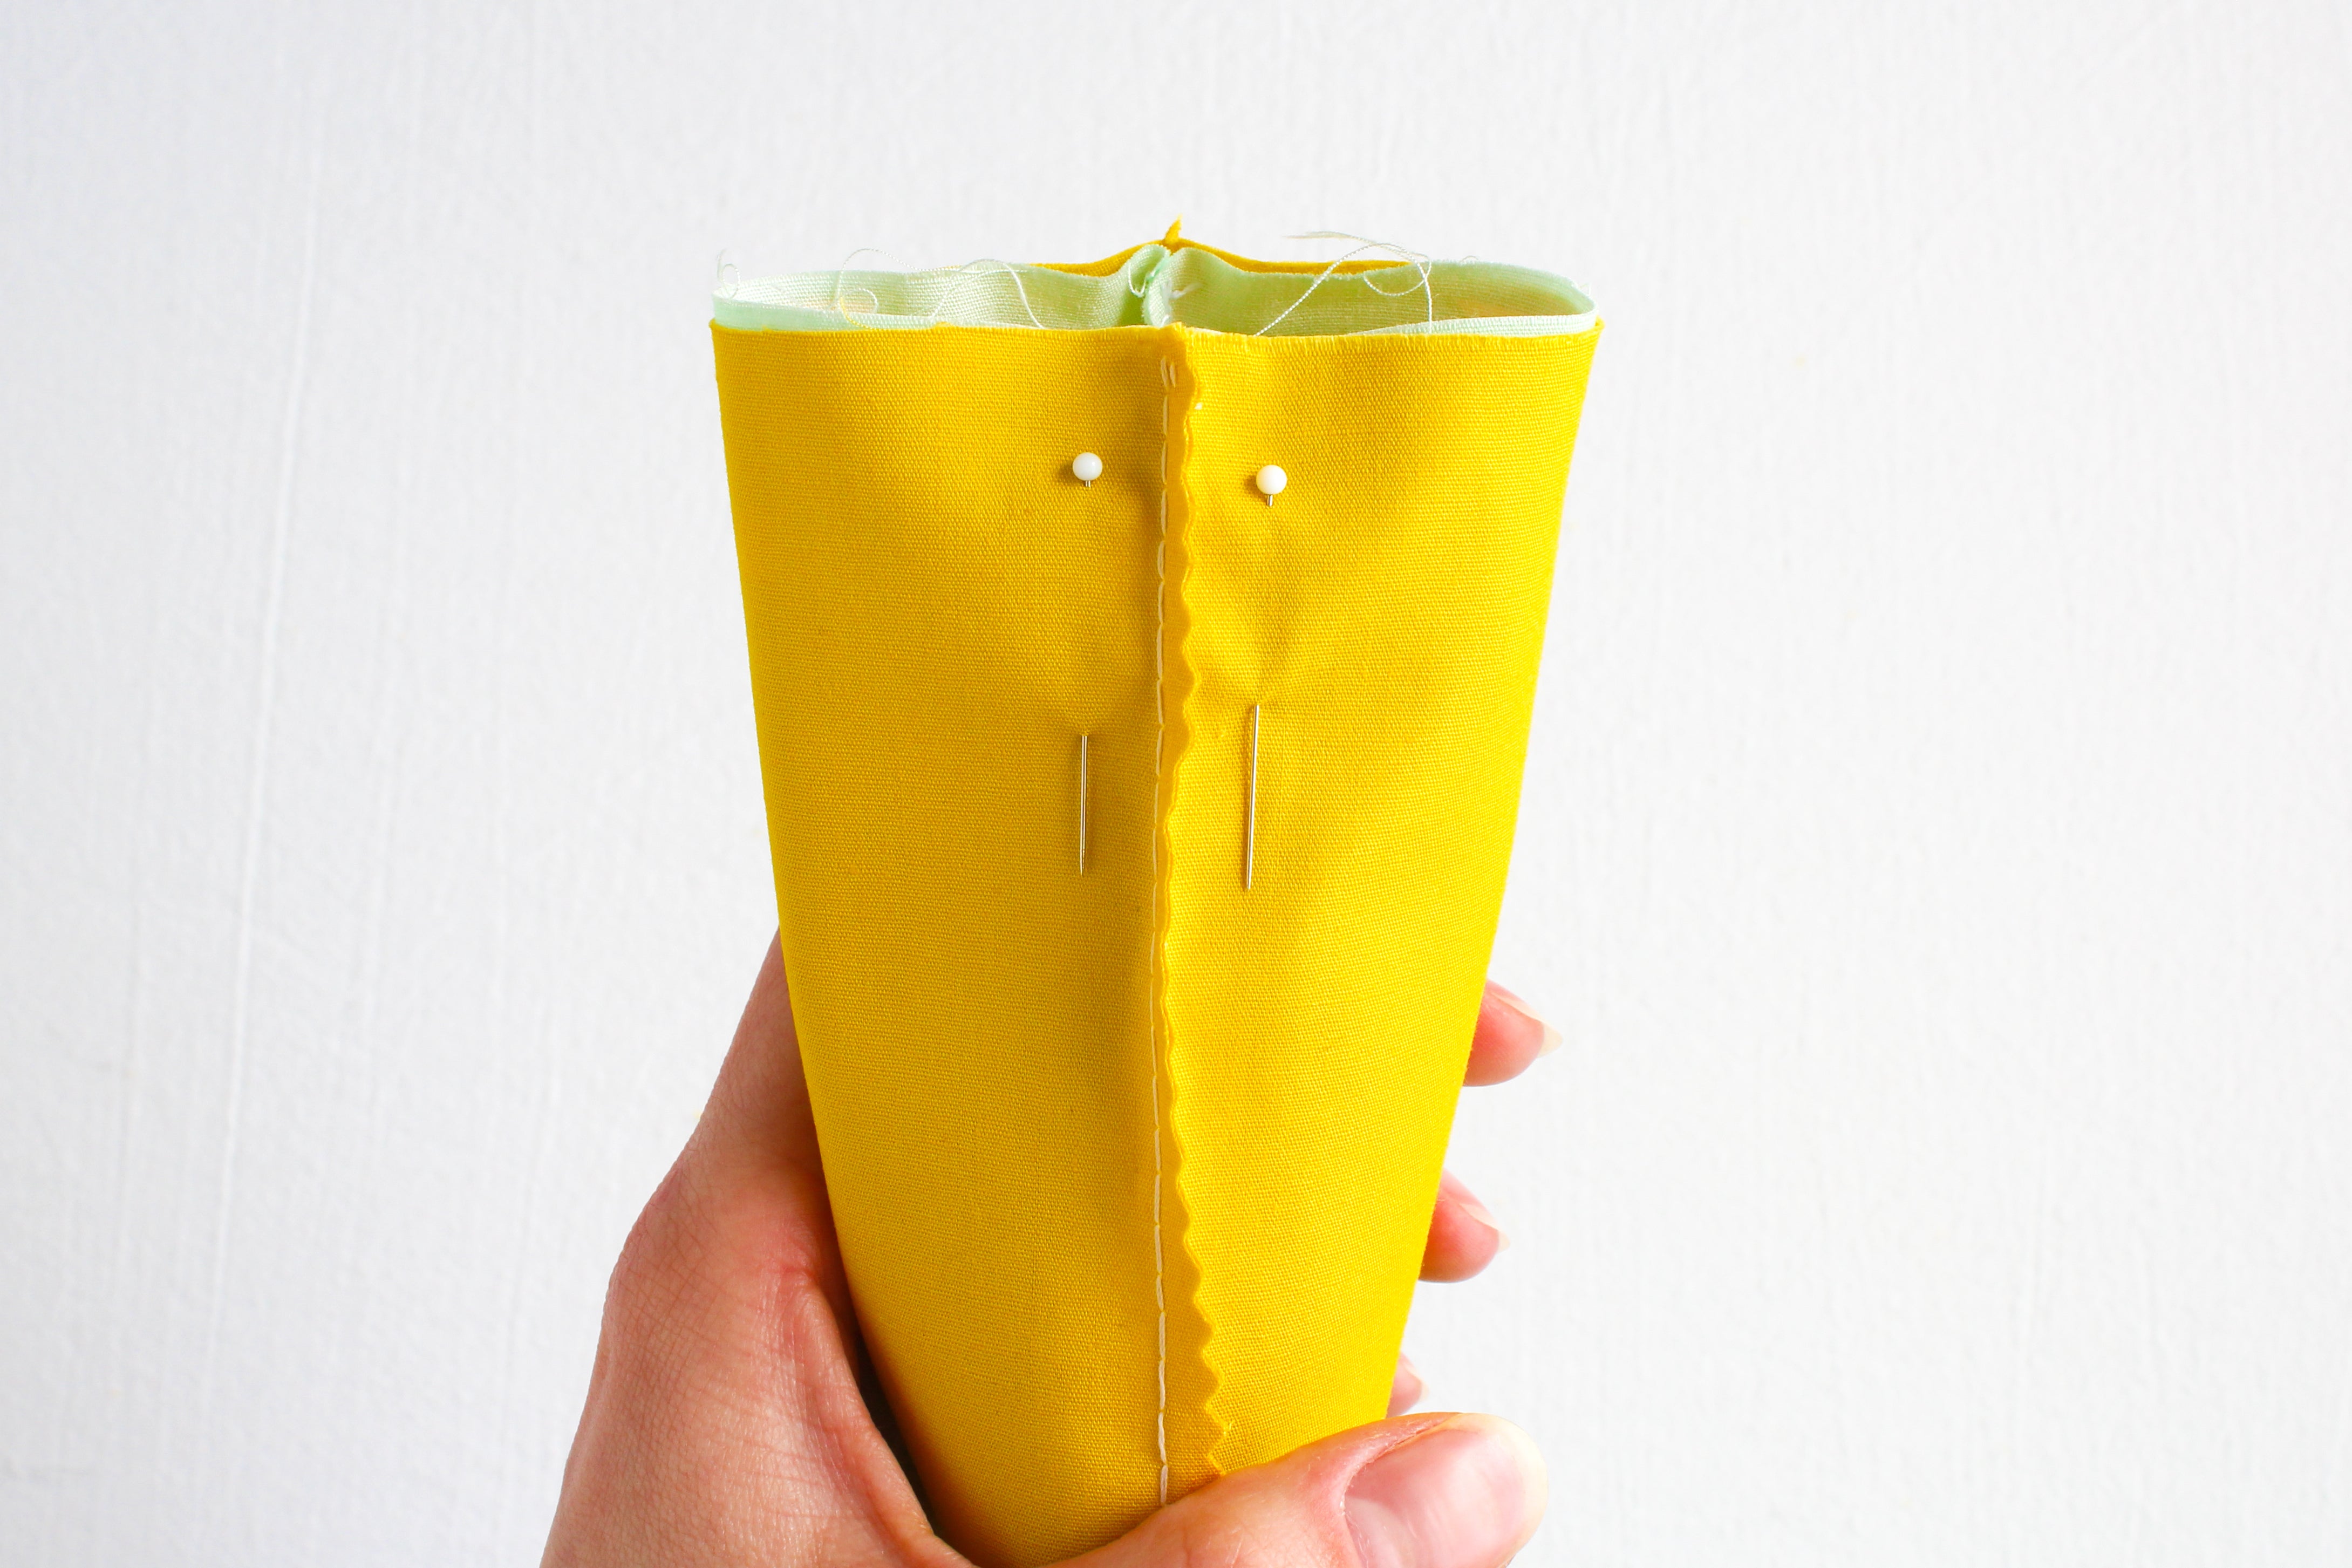
Sew all the way down that side, across the bottom, and up to the top again. As you sew past your pins, remove them. Finish your seam with two stitches just like you began it.

Here's the back of lining so you can see how the stitching looks. As you can see, it took four lengths of thread to sew this together.

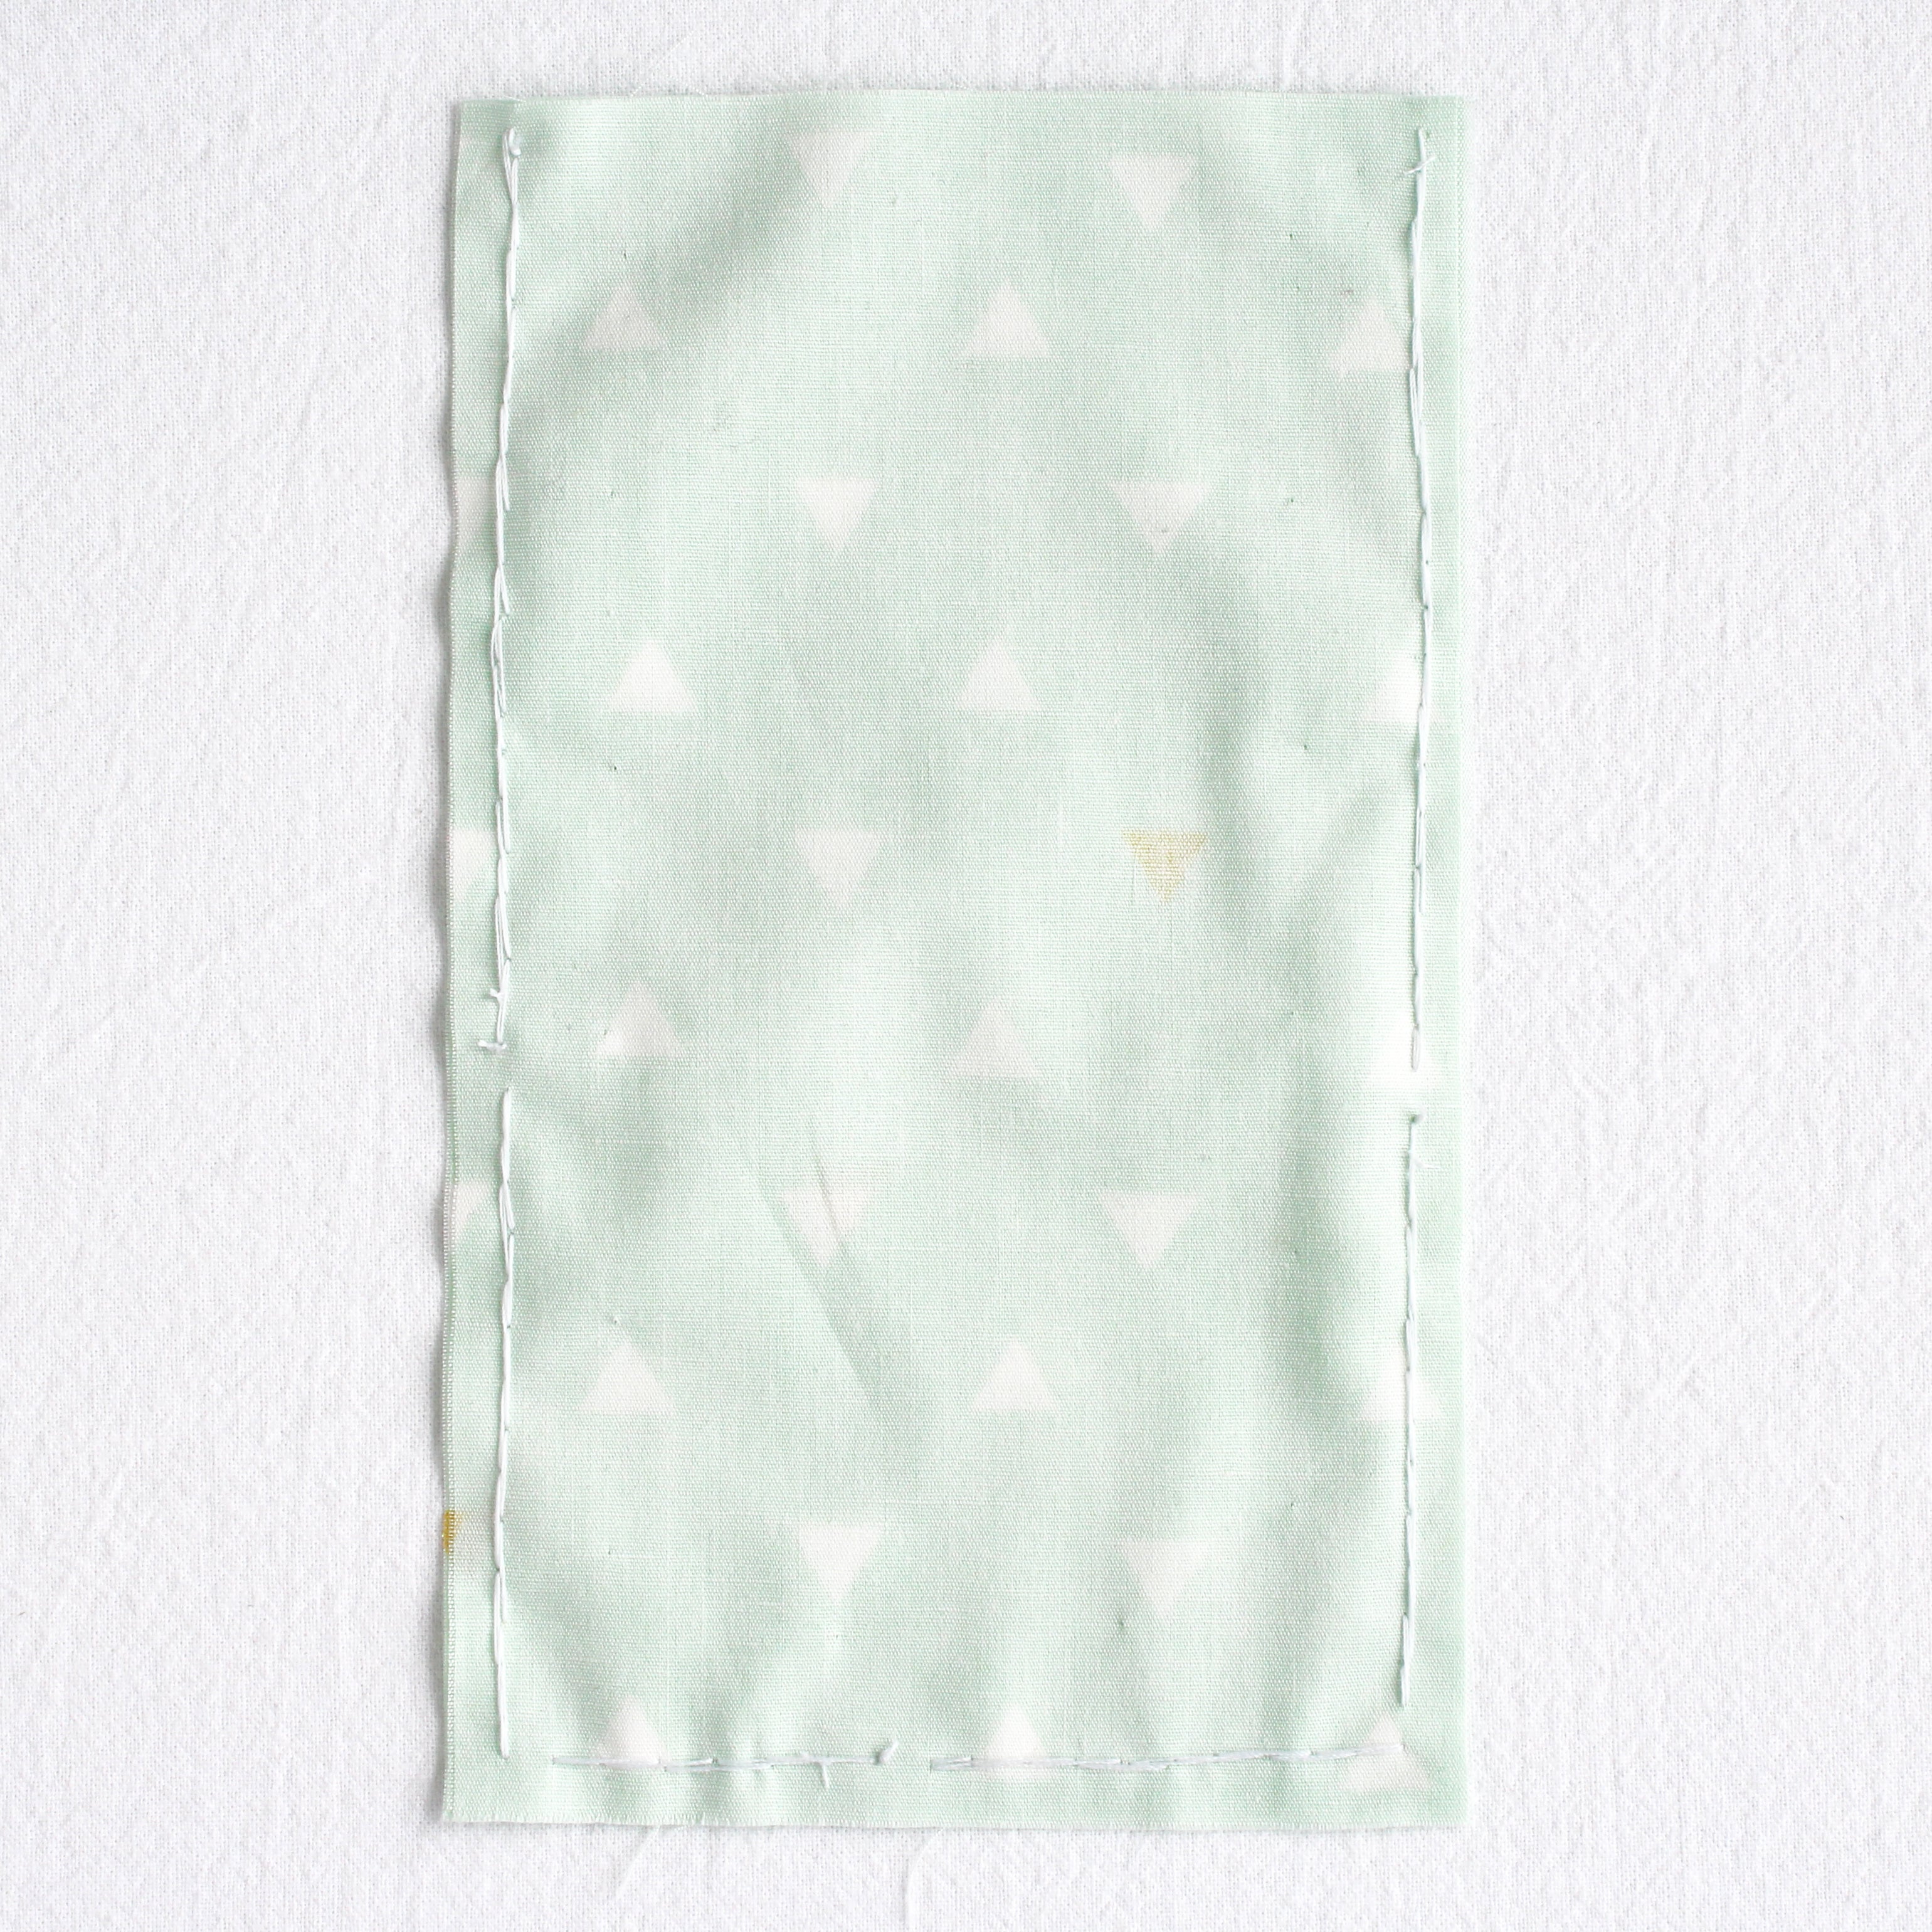
Repeat with the other pair of pinned pieces. (Above is the one I sewed with no marked lines!)
Pressing and Finishing the Seams
Important: if you used a water soluble marker anywhere on your case, you'll need to wash the ink out and let the fabric dry before ironing. Otherwise, the marks will be permanent!
Pressing the Seams
Now we'll want to press the lining and outside pieces of the case. Pressing will slightly tighten the seams. It will also make the next step of turning the fabric right side out to keep sewing.


Here's what the back and front of the case looks like after a good press. :)
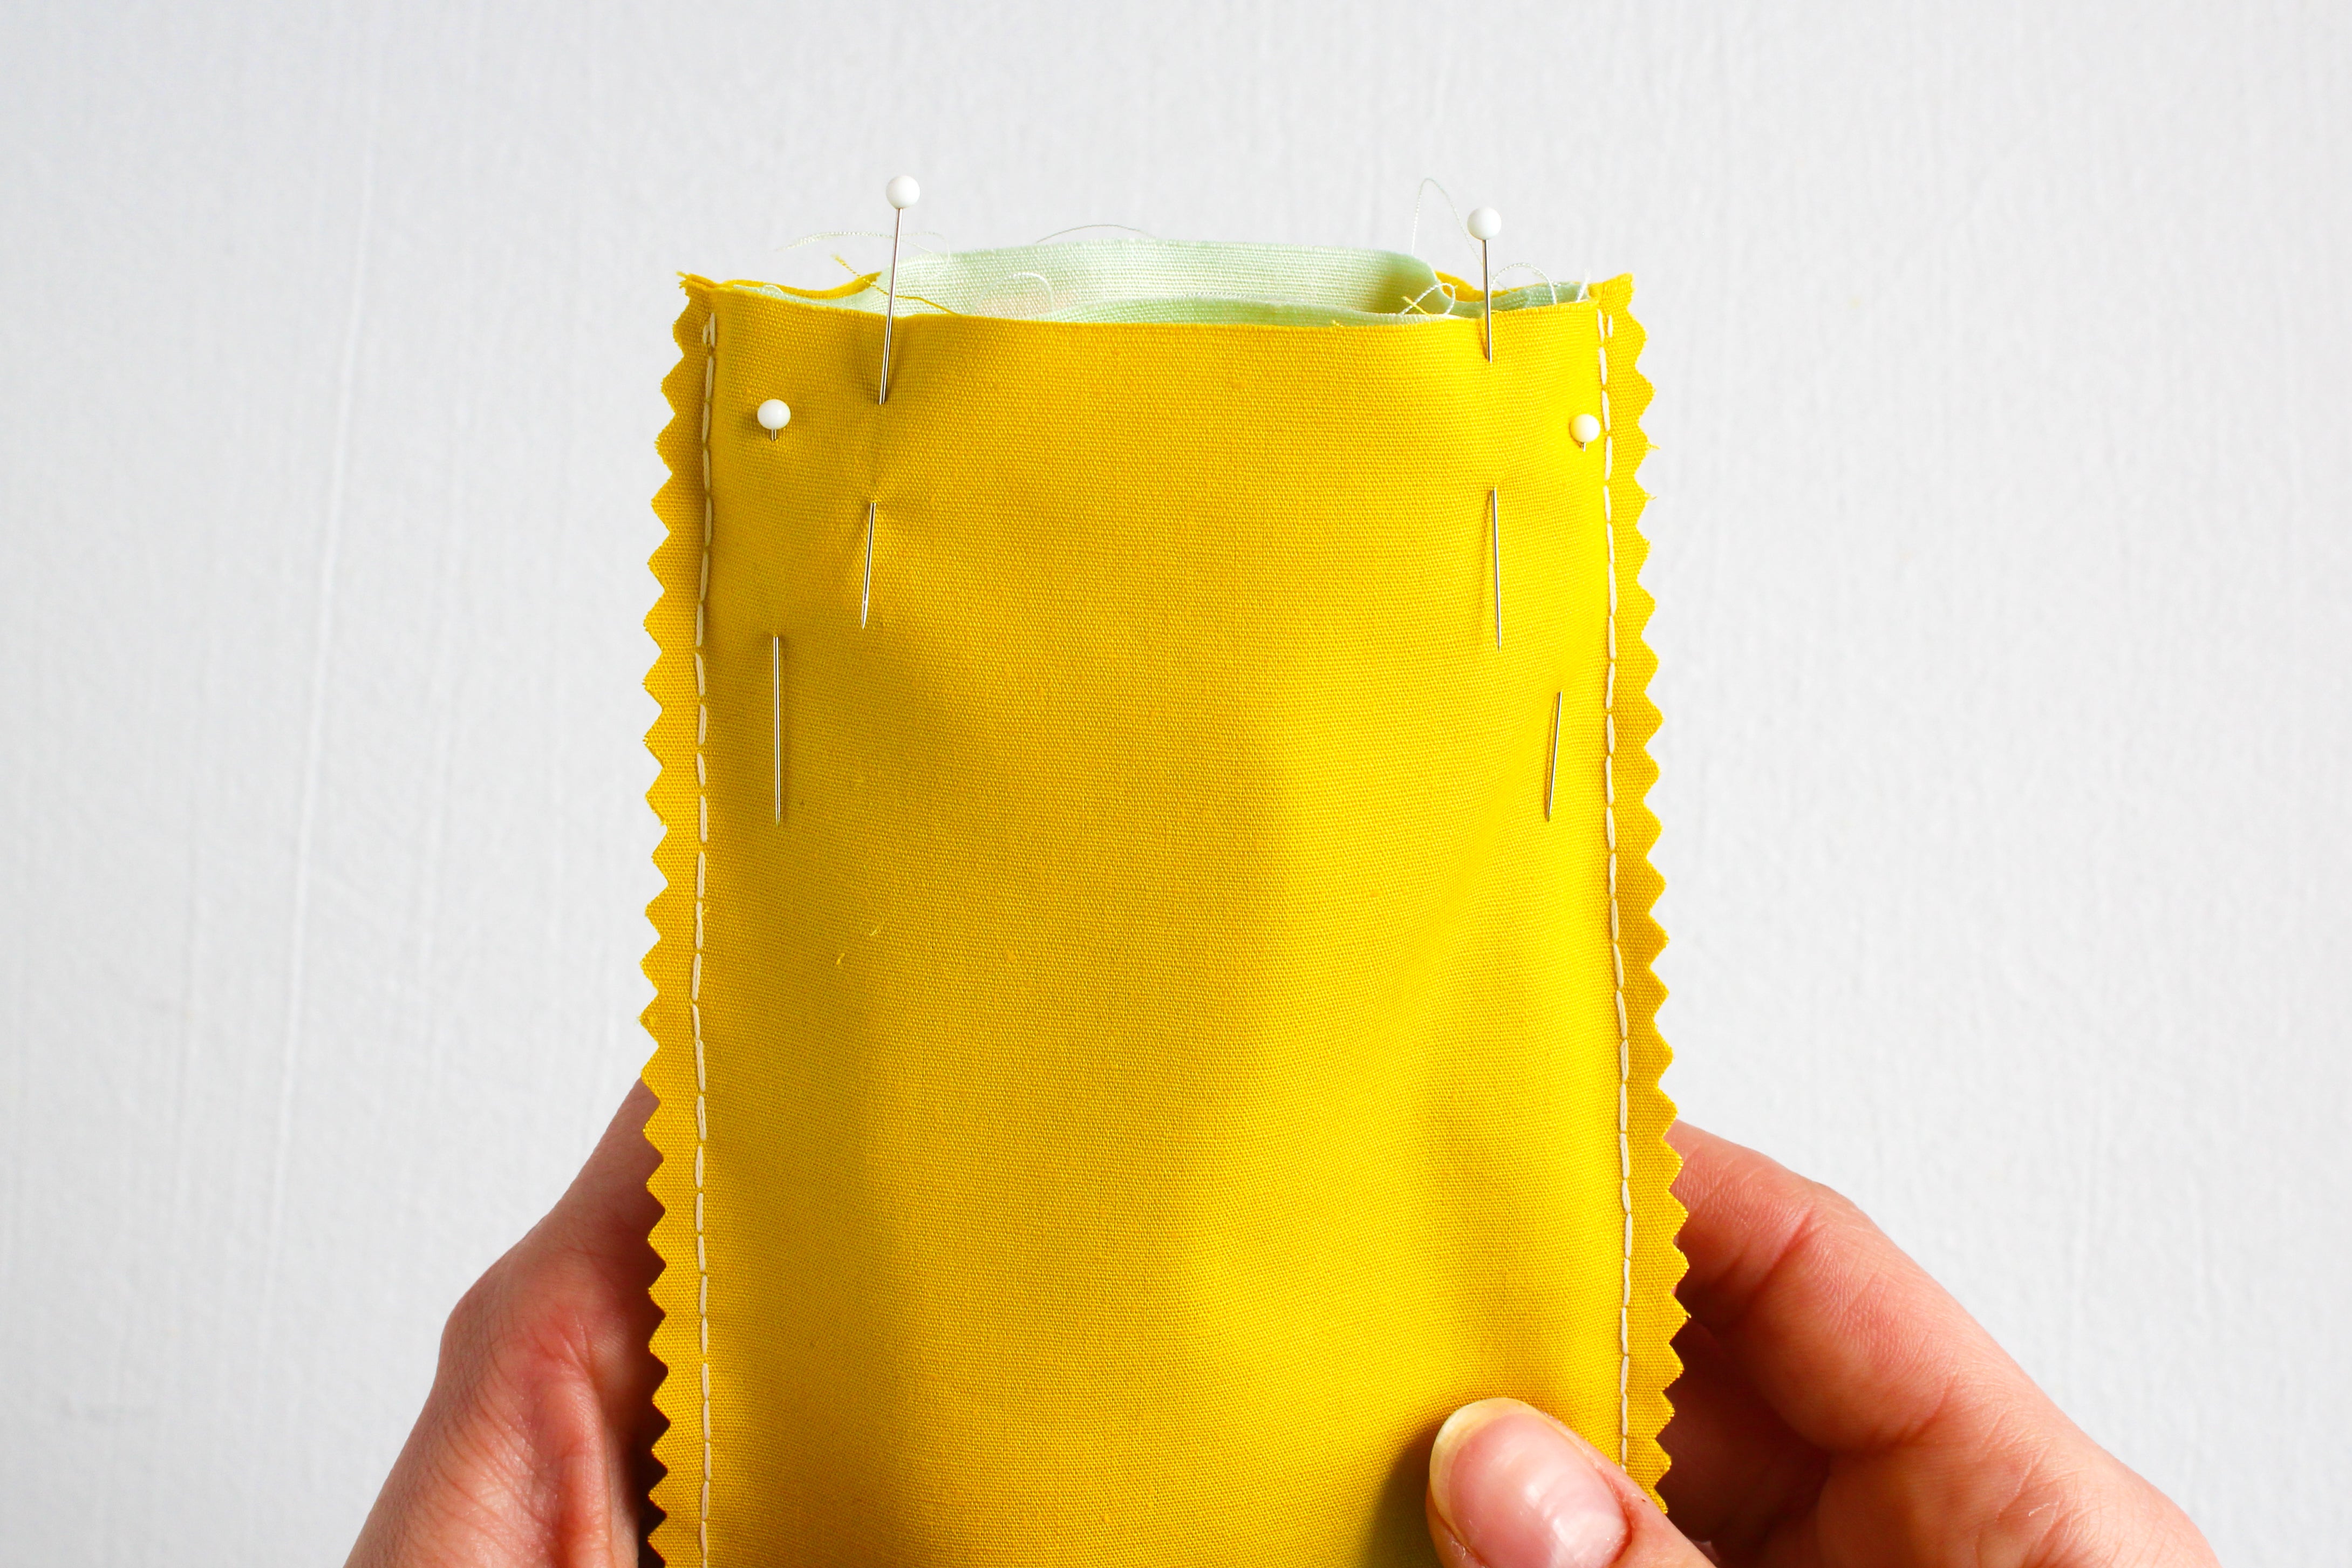
Trimming the Seam Allowance
We could leave our seam allowances the way they were, but trimming them down helps reduce bulk in the final project. It'll look much nicer without extra lumps and bumps.

First, let's clip the bottom corners! Use dressmaking shears and cut each bottom corner off as shown. This will allow the corners to be nice and sharp.
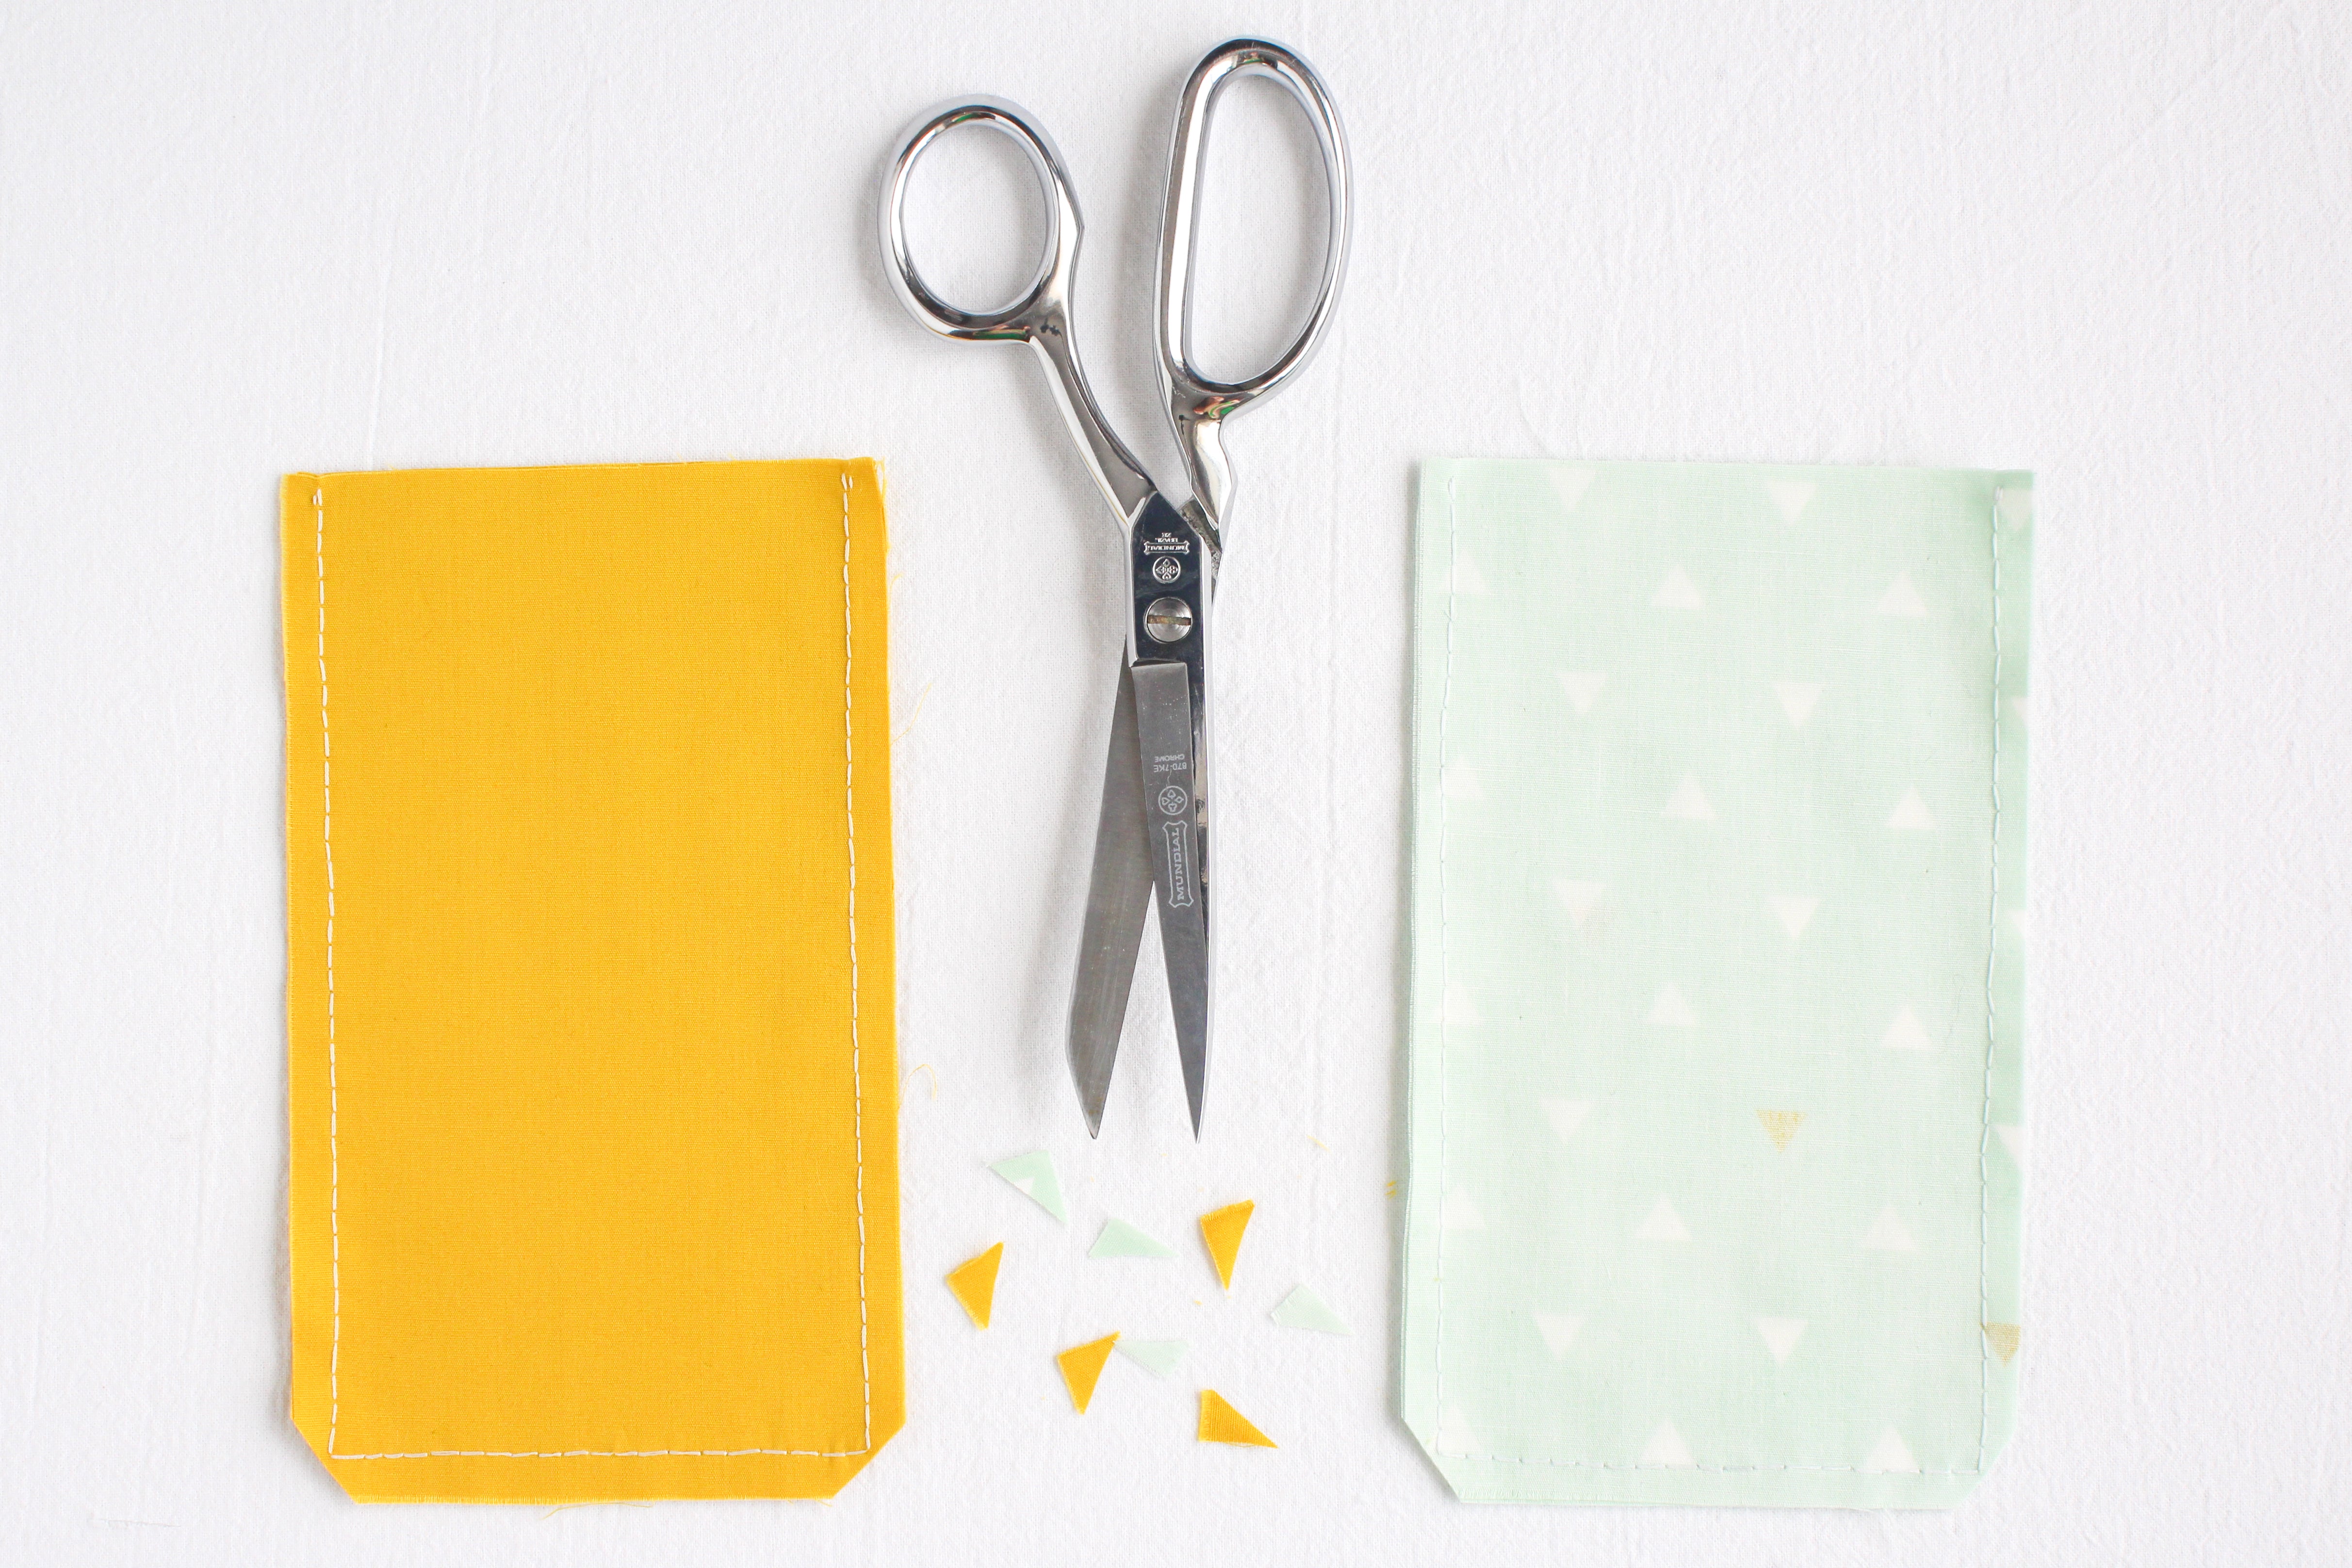
With the extra fabric in there, they're harder to shape when you turn them right side out!

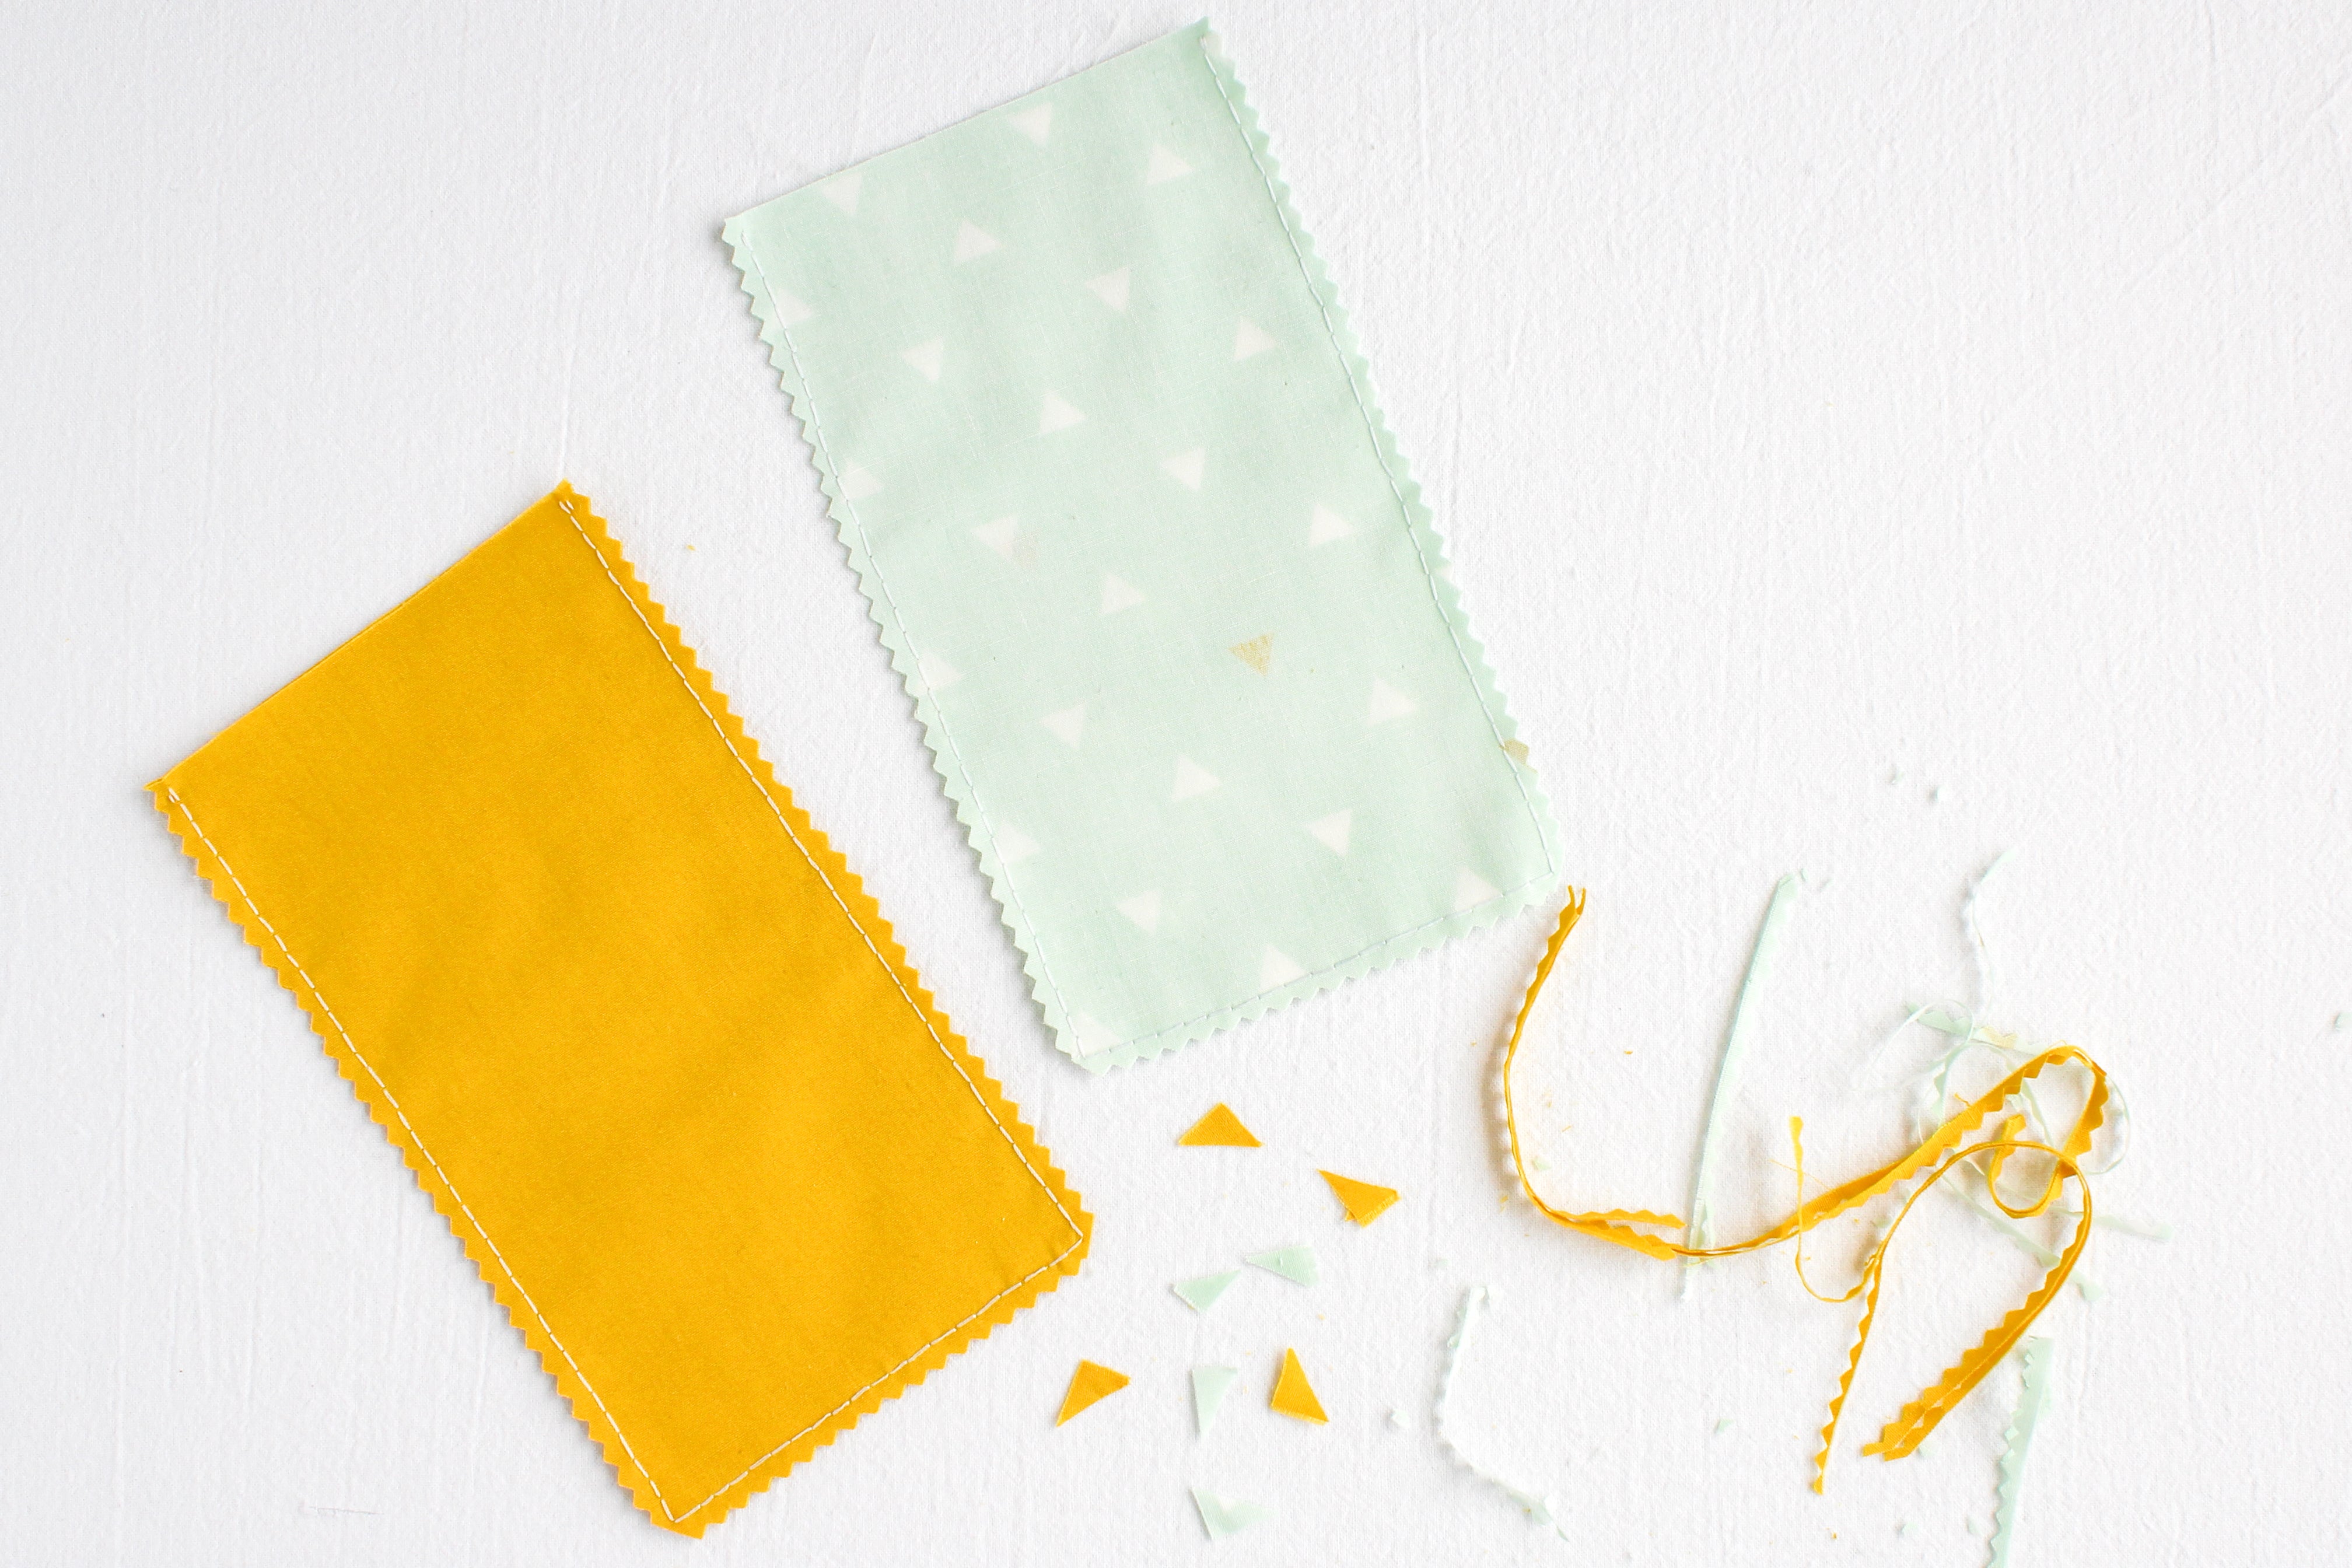
Now, grab your pinking shears! (If you don't have any, use your shears.) We're going to cut the seam allowances down by half. Trim them as shown above.
If this is done with pinking shears, it will increase the durability of your project as well!
Turn the Outer Fabric Right Side Out
Turn the outer fabric right side out. Be gentle while turning! Even with the extra stitch for reinforcement at the top of the seam, it's still possible to pop the stitches with too much force.

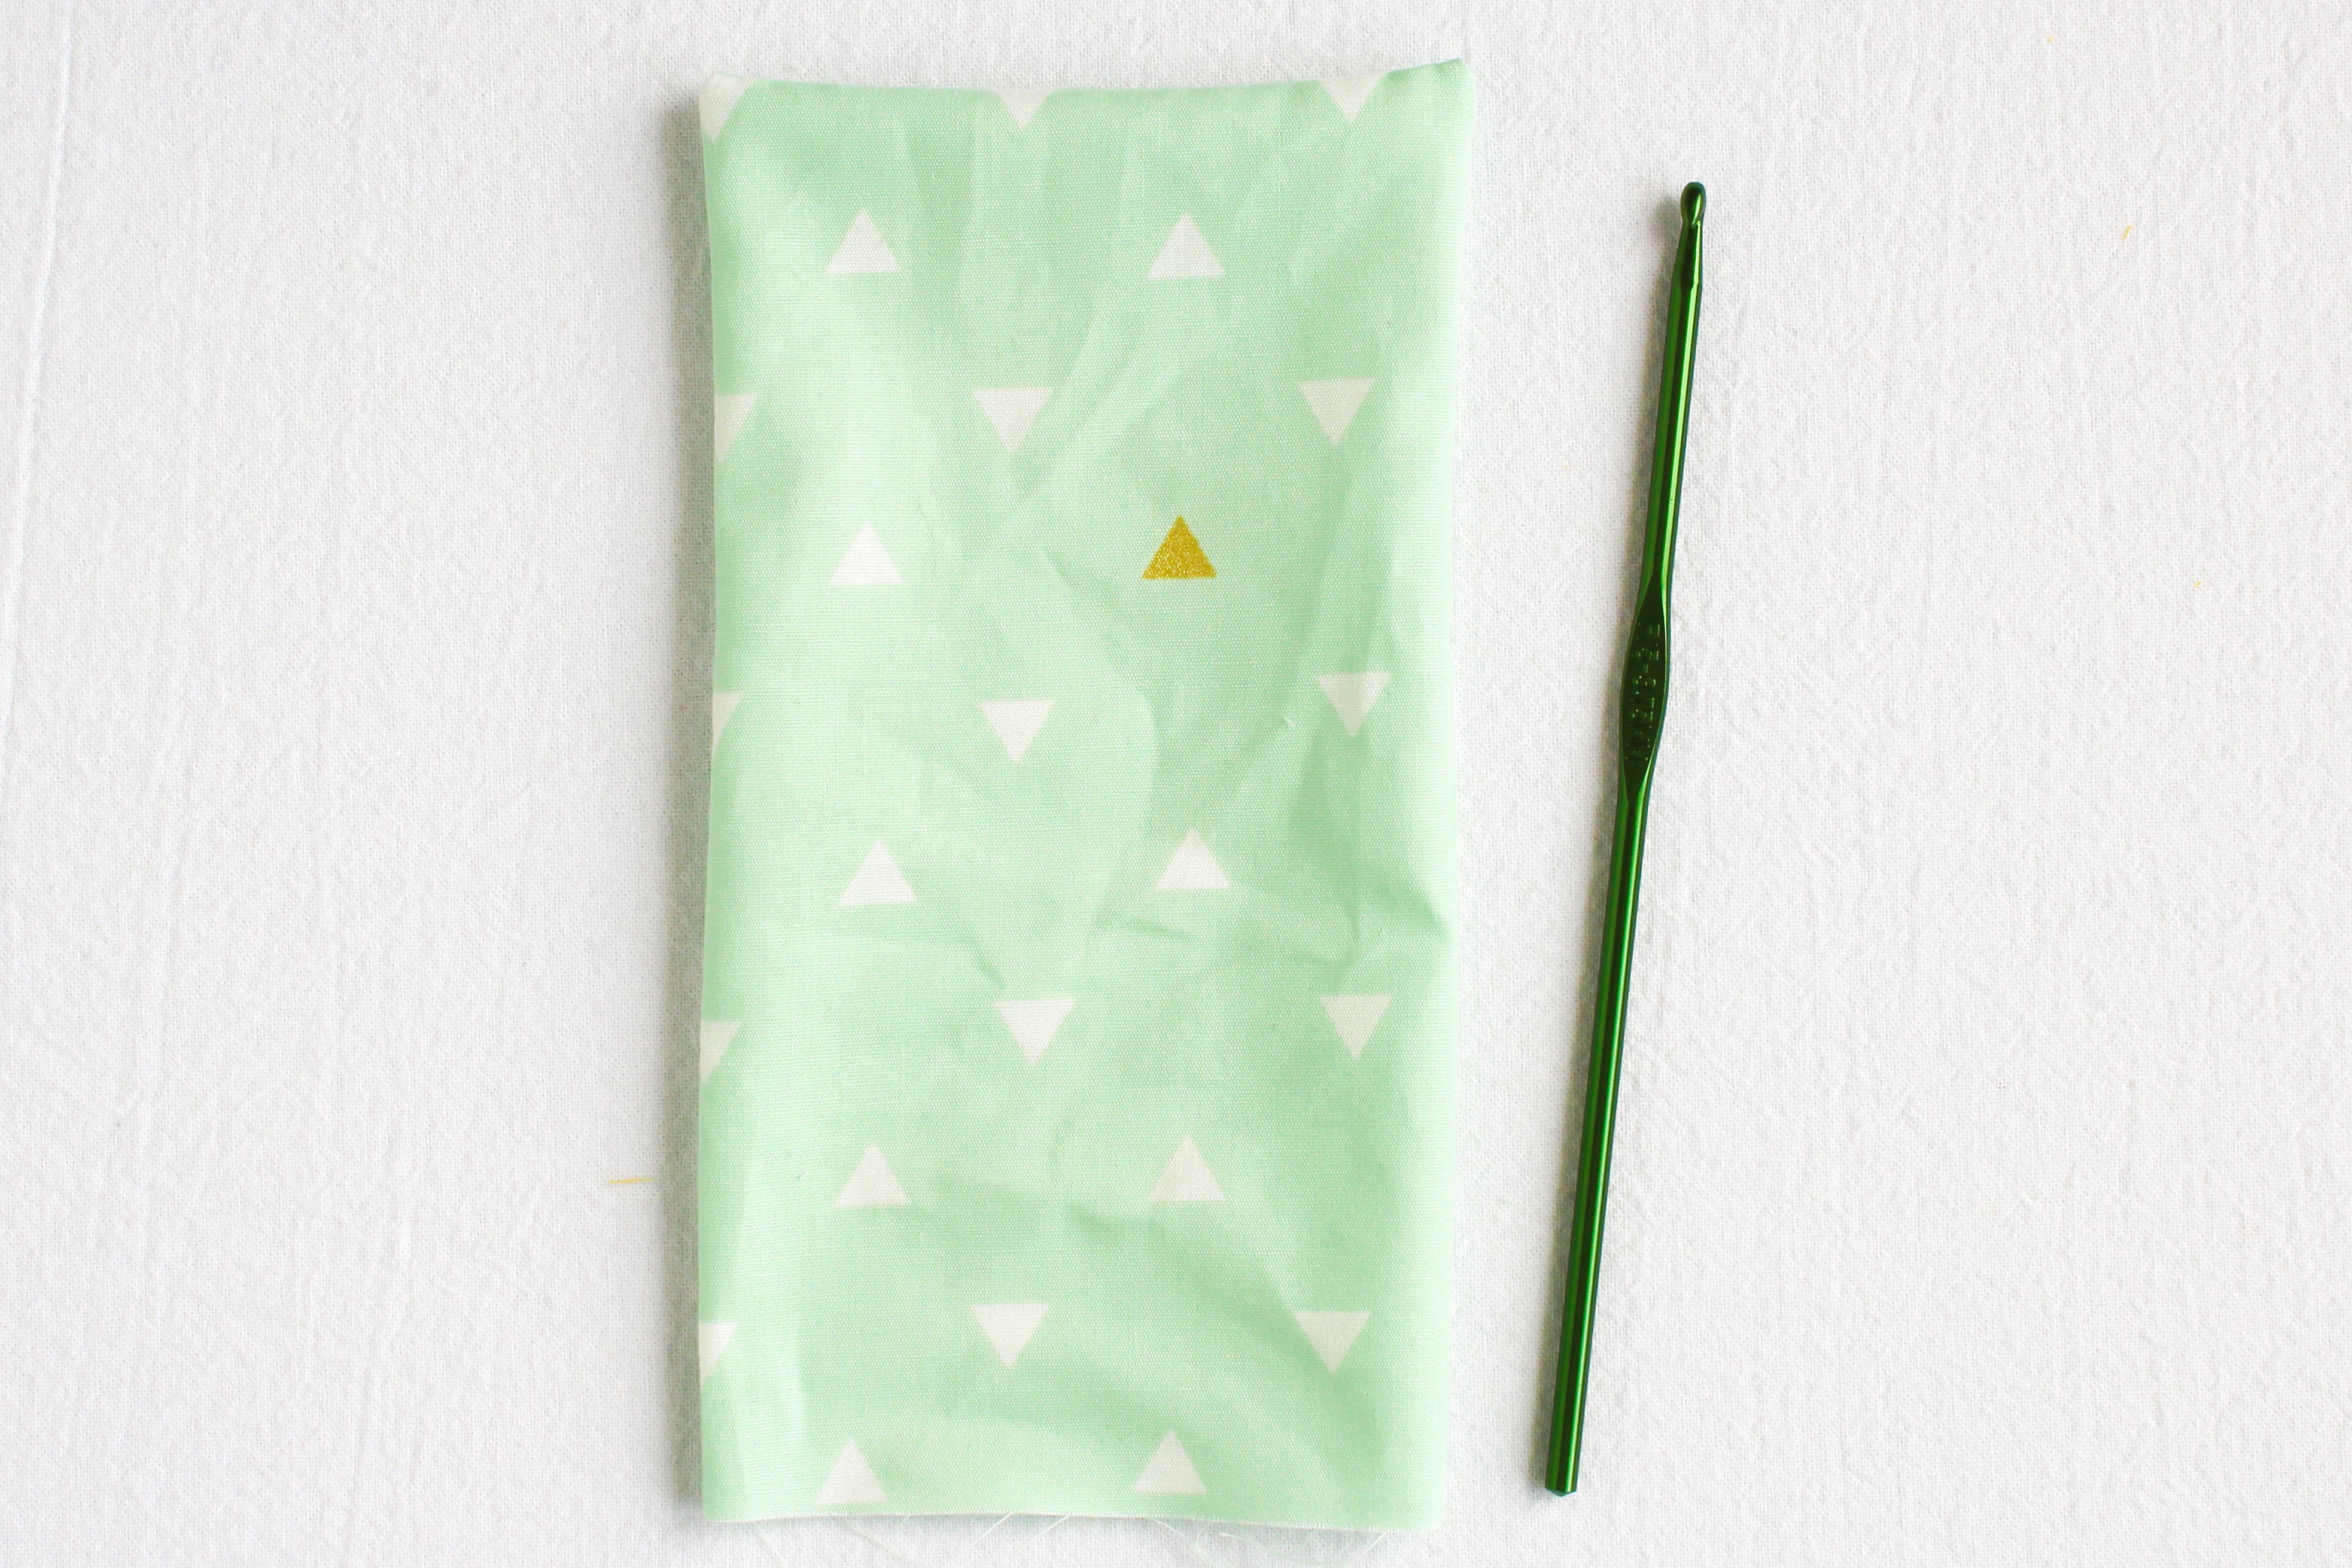
Use whatever tool you've got to push the corners out. Be gentle - you don't want to push right through the stitches.
Insert the Outer Into the Lining


Once the outer fabric is turned right side out, insert it into the lining fabric. I like to use the eraser end of a pencil to push the outer fabric into to lining if the case is too small for my hand to fit in there. :)

Another shot of how to use the pencil! Just keep using it to push the outer fabric into the lining while you pull the lining fabric towards you.

This is what it should look like when you're done. Now we'll start pinning!
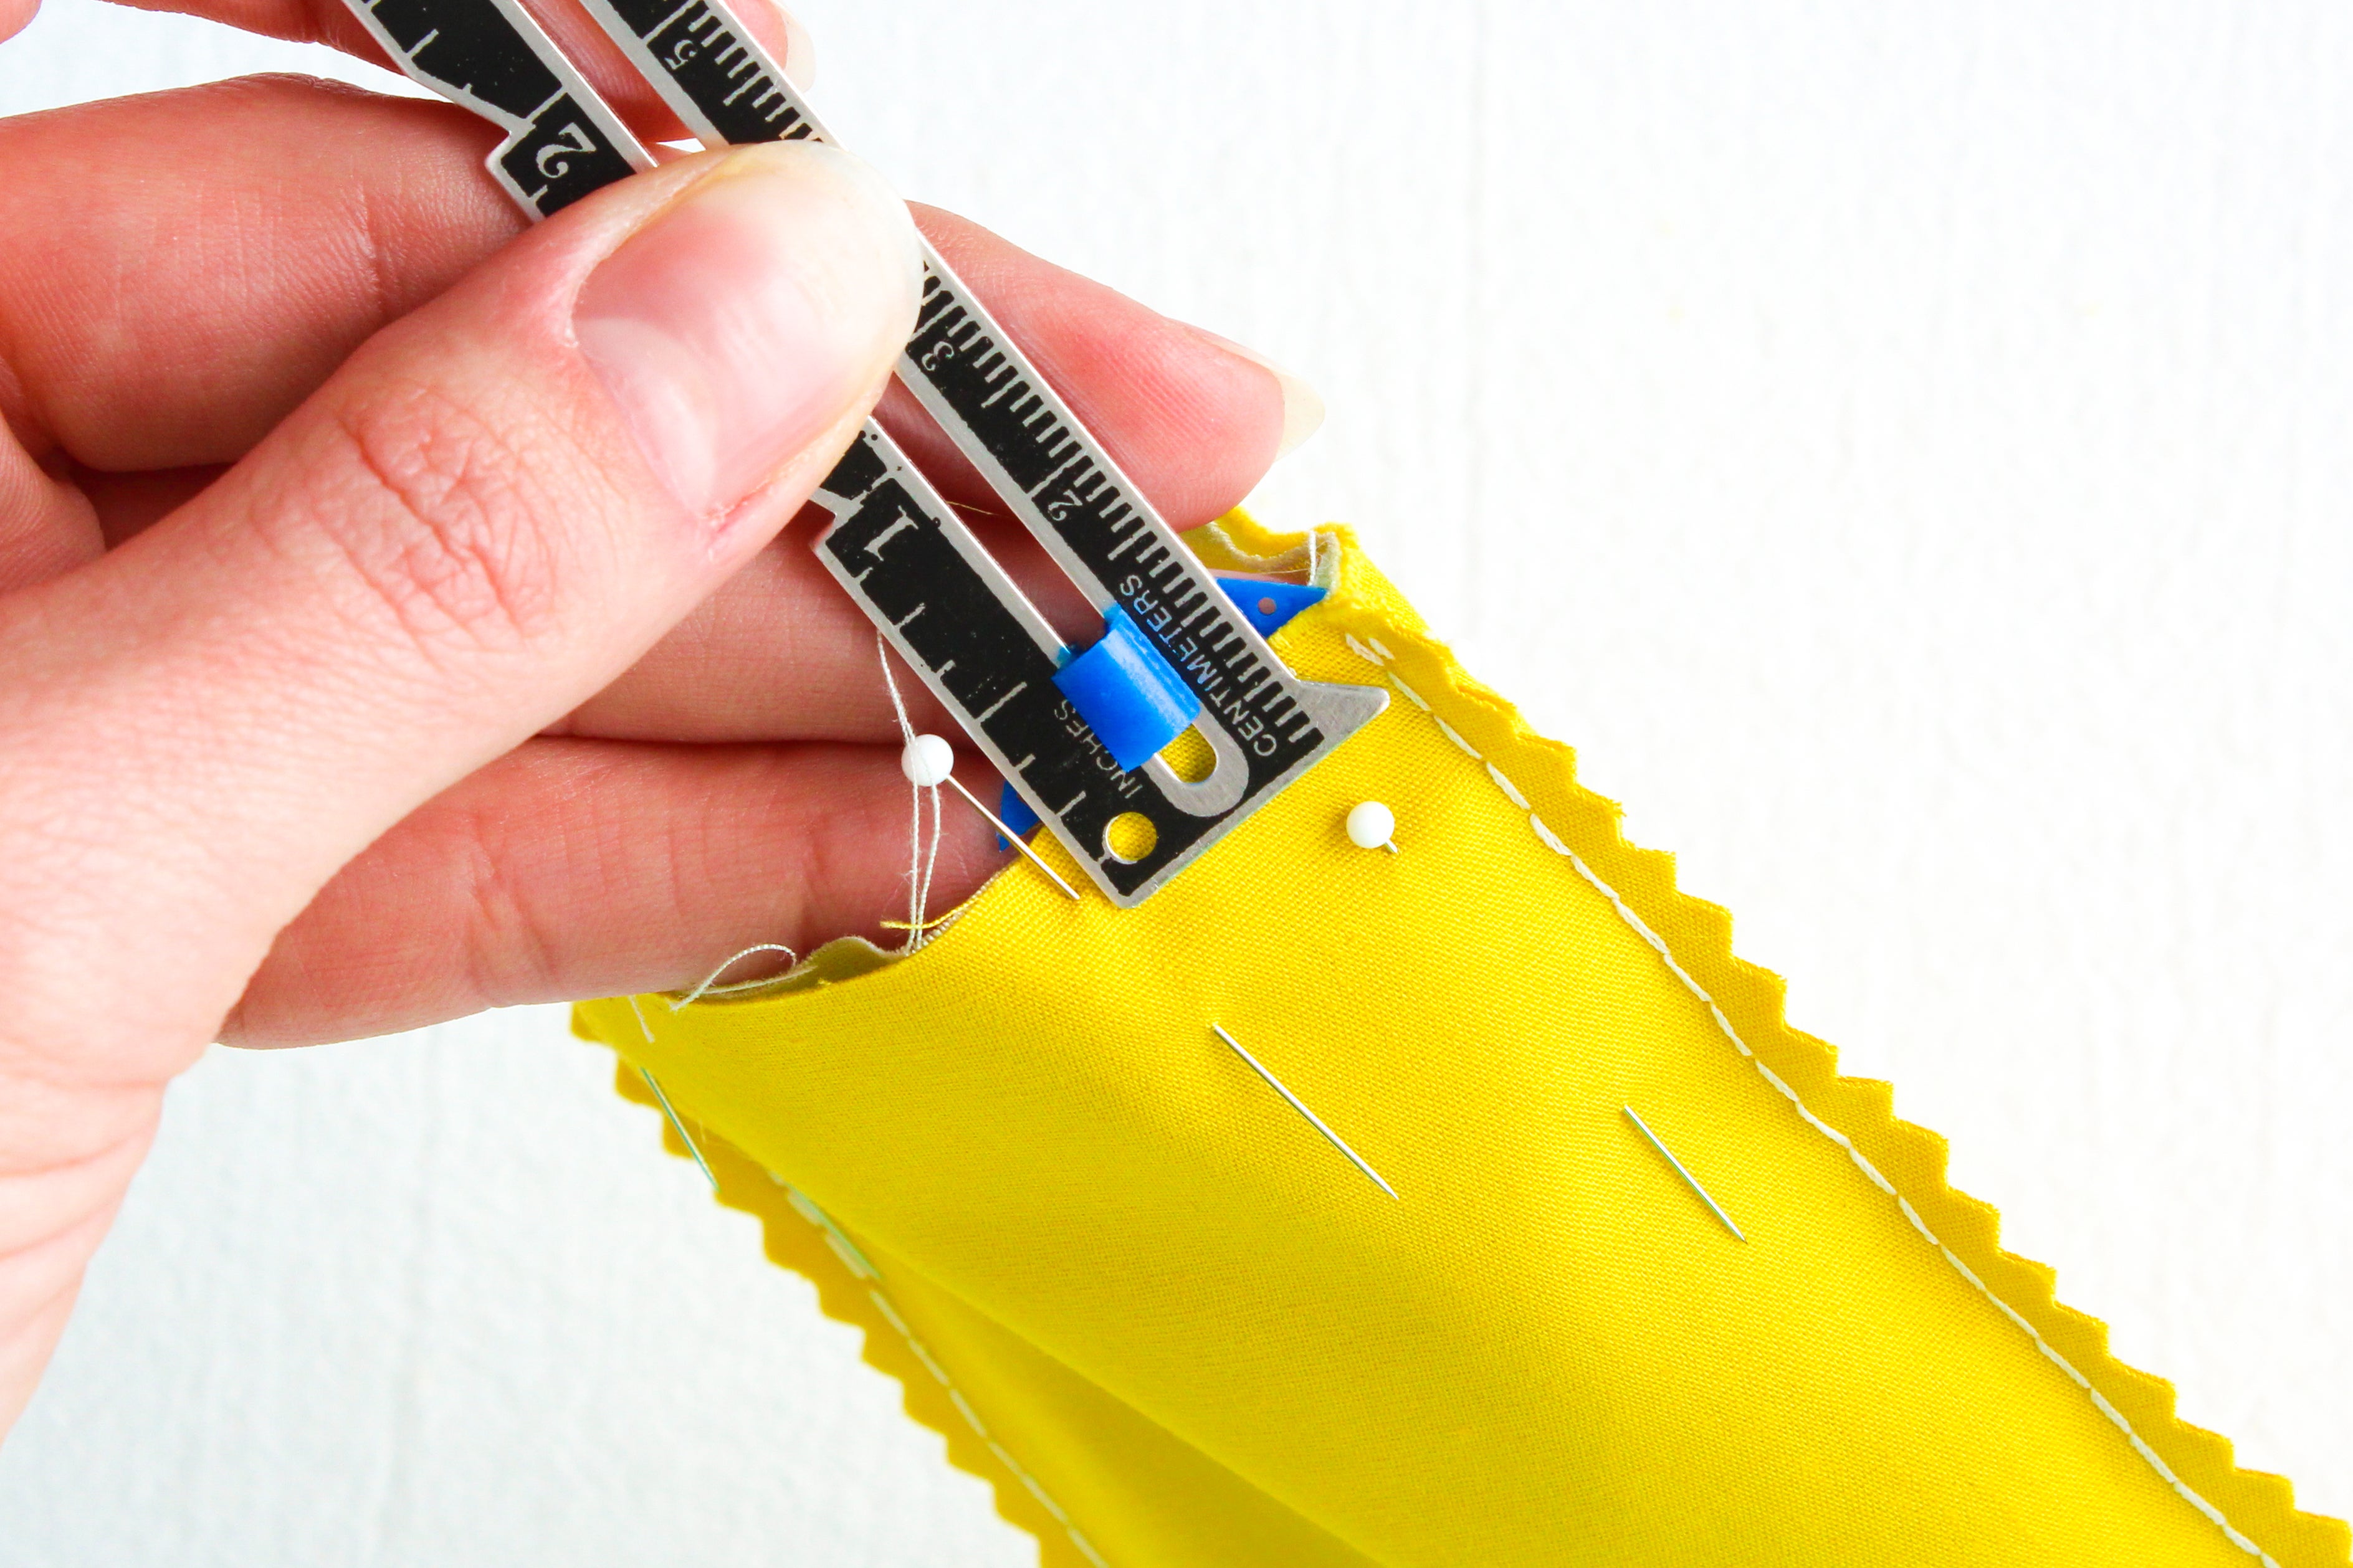
Marking and Pinning the Case Opening
If you would like to mark a sewing line for the top of the case you'll need to do that now! We're using a 1/4 inch seam allowance here too! It's easiest to mark the line before you pin.
I'm not going to worry about it here and instead use a sewing gauge to make sure my stitching is in the right place. :)

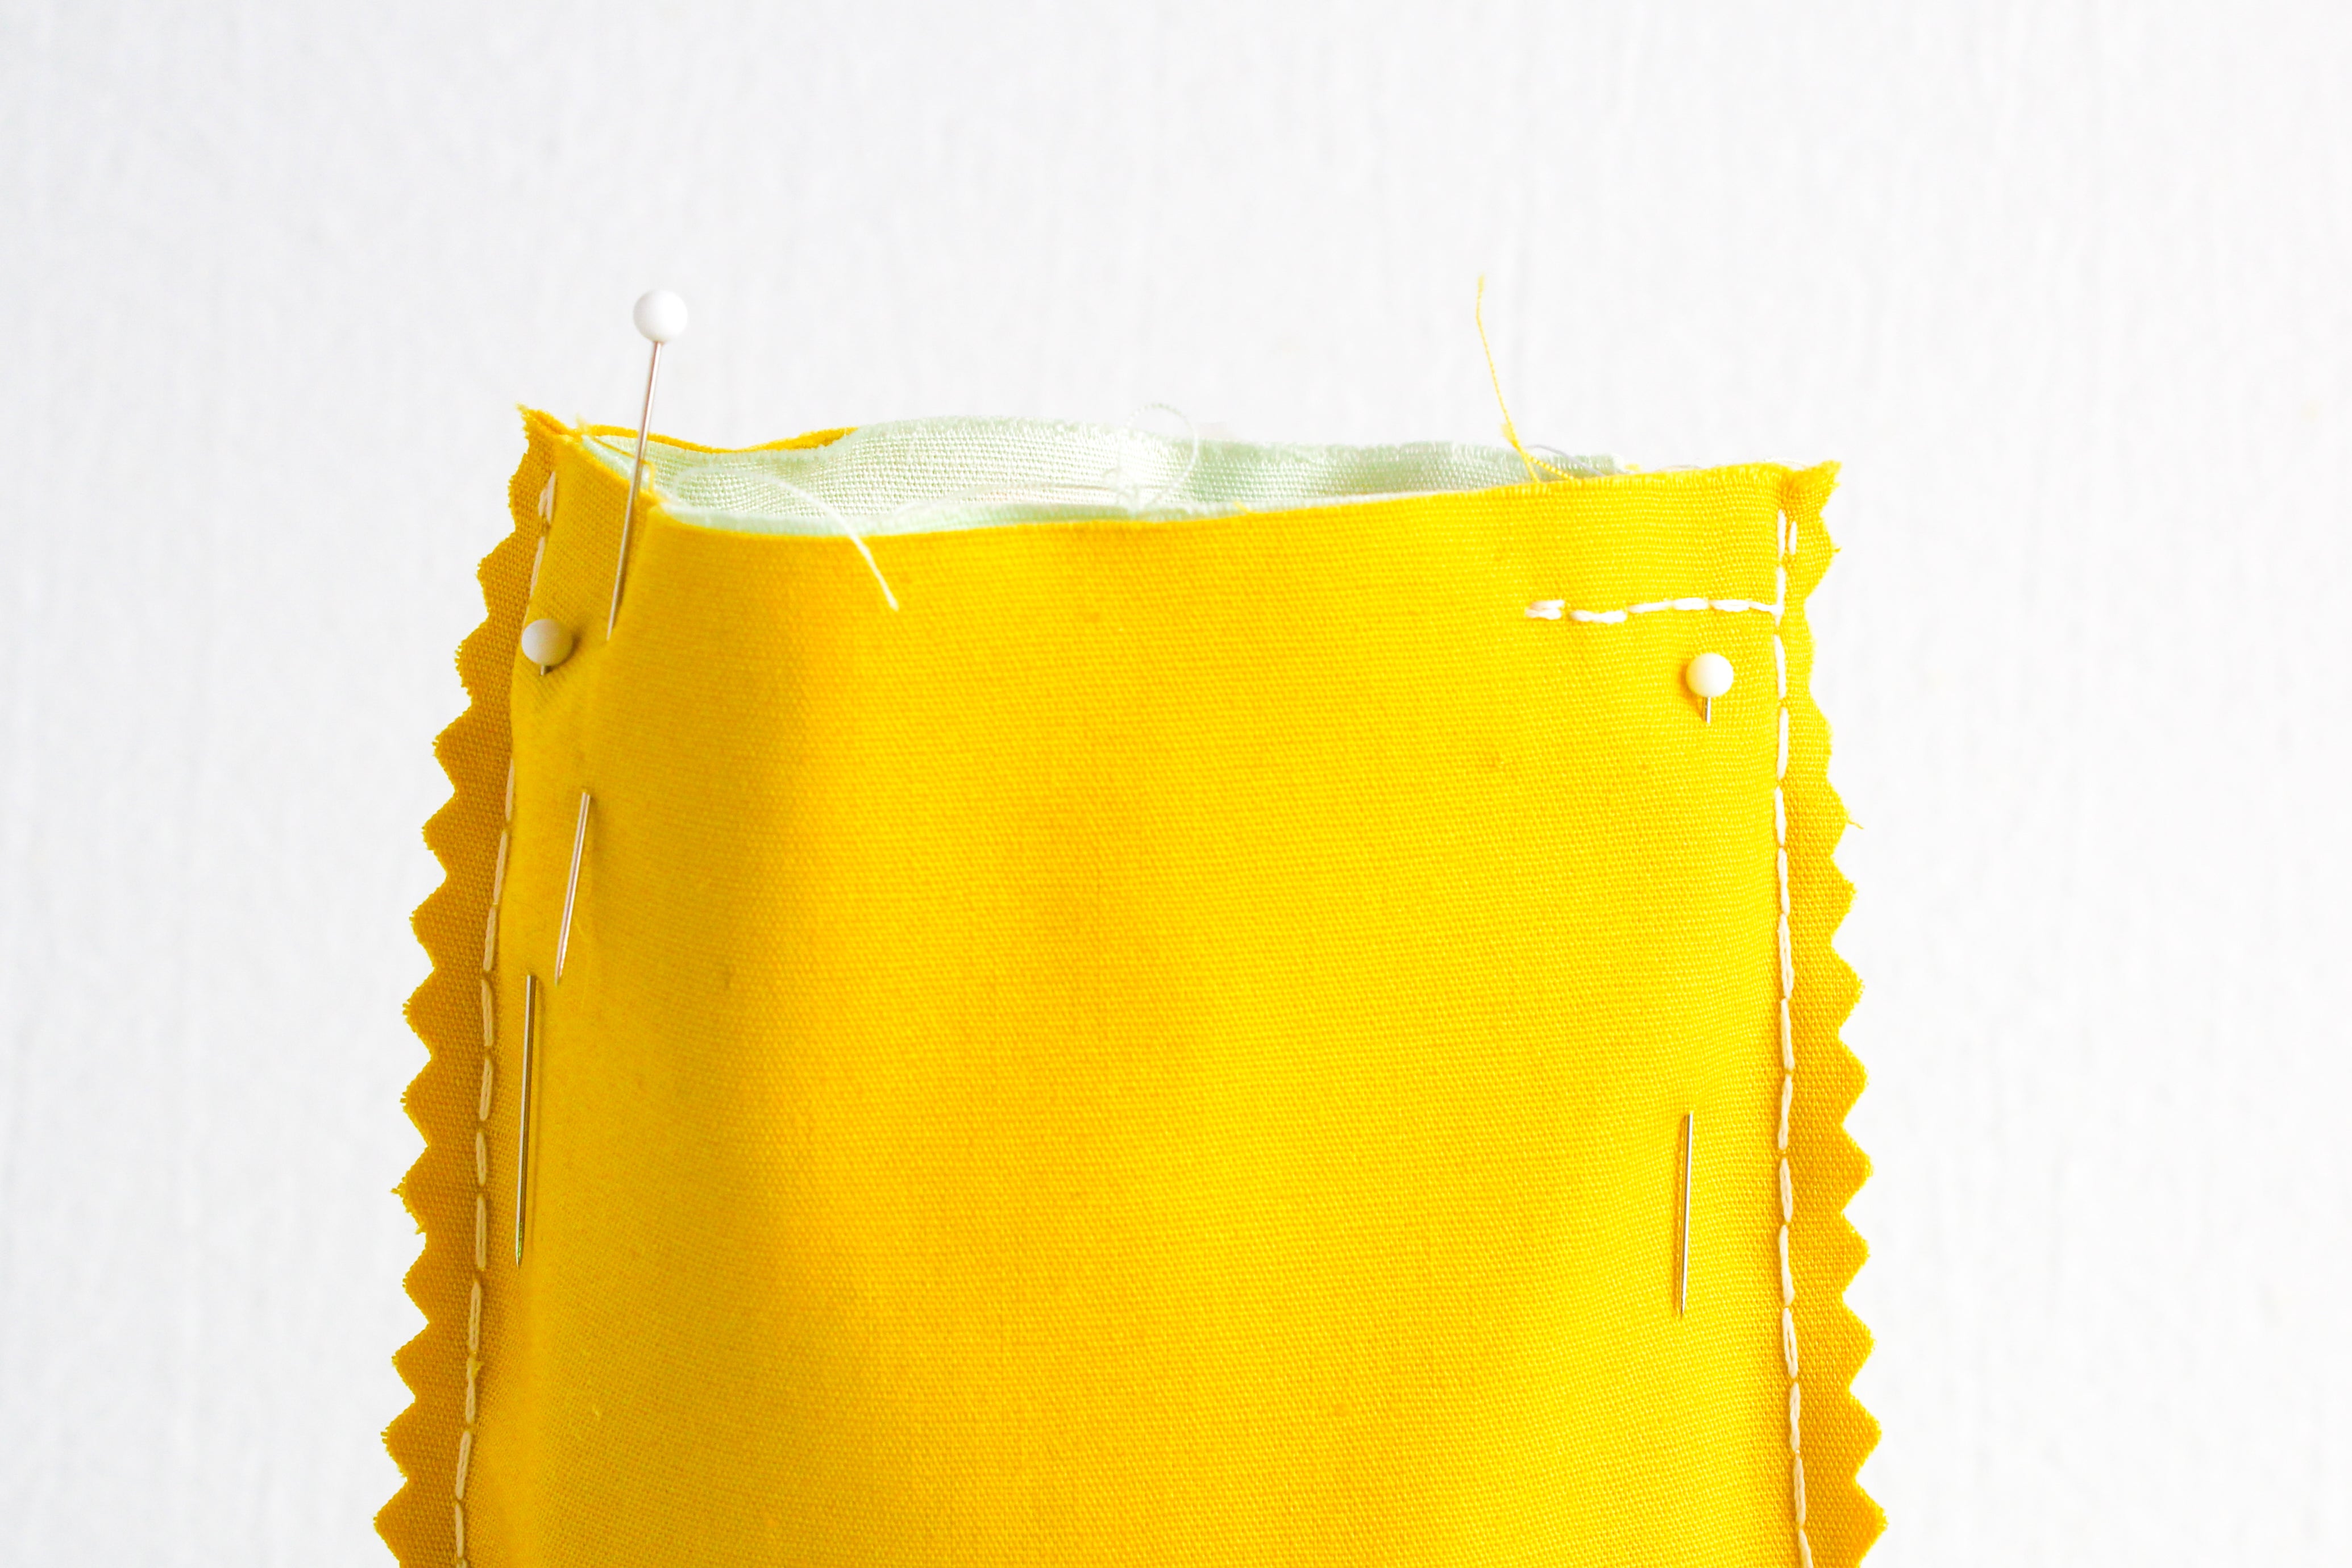
Line up the seams on the sides of the case and pin them into place about 1/2 inch from the top. You'll need four pins for this - two for each side seam! These pins are important because they'll keep your seams from moving while you sew.
On one side of the top of the case, place two vertical pins about 2-3 inches apart. This marks where we will start and end our sewing.
Now we'll do the other side of the case!
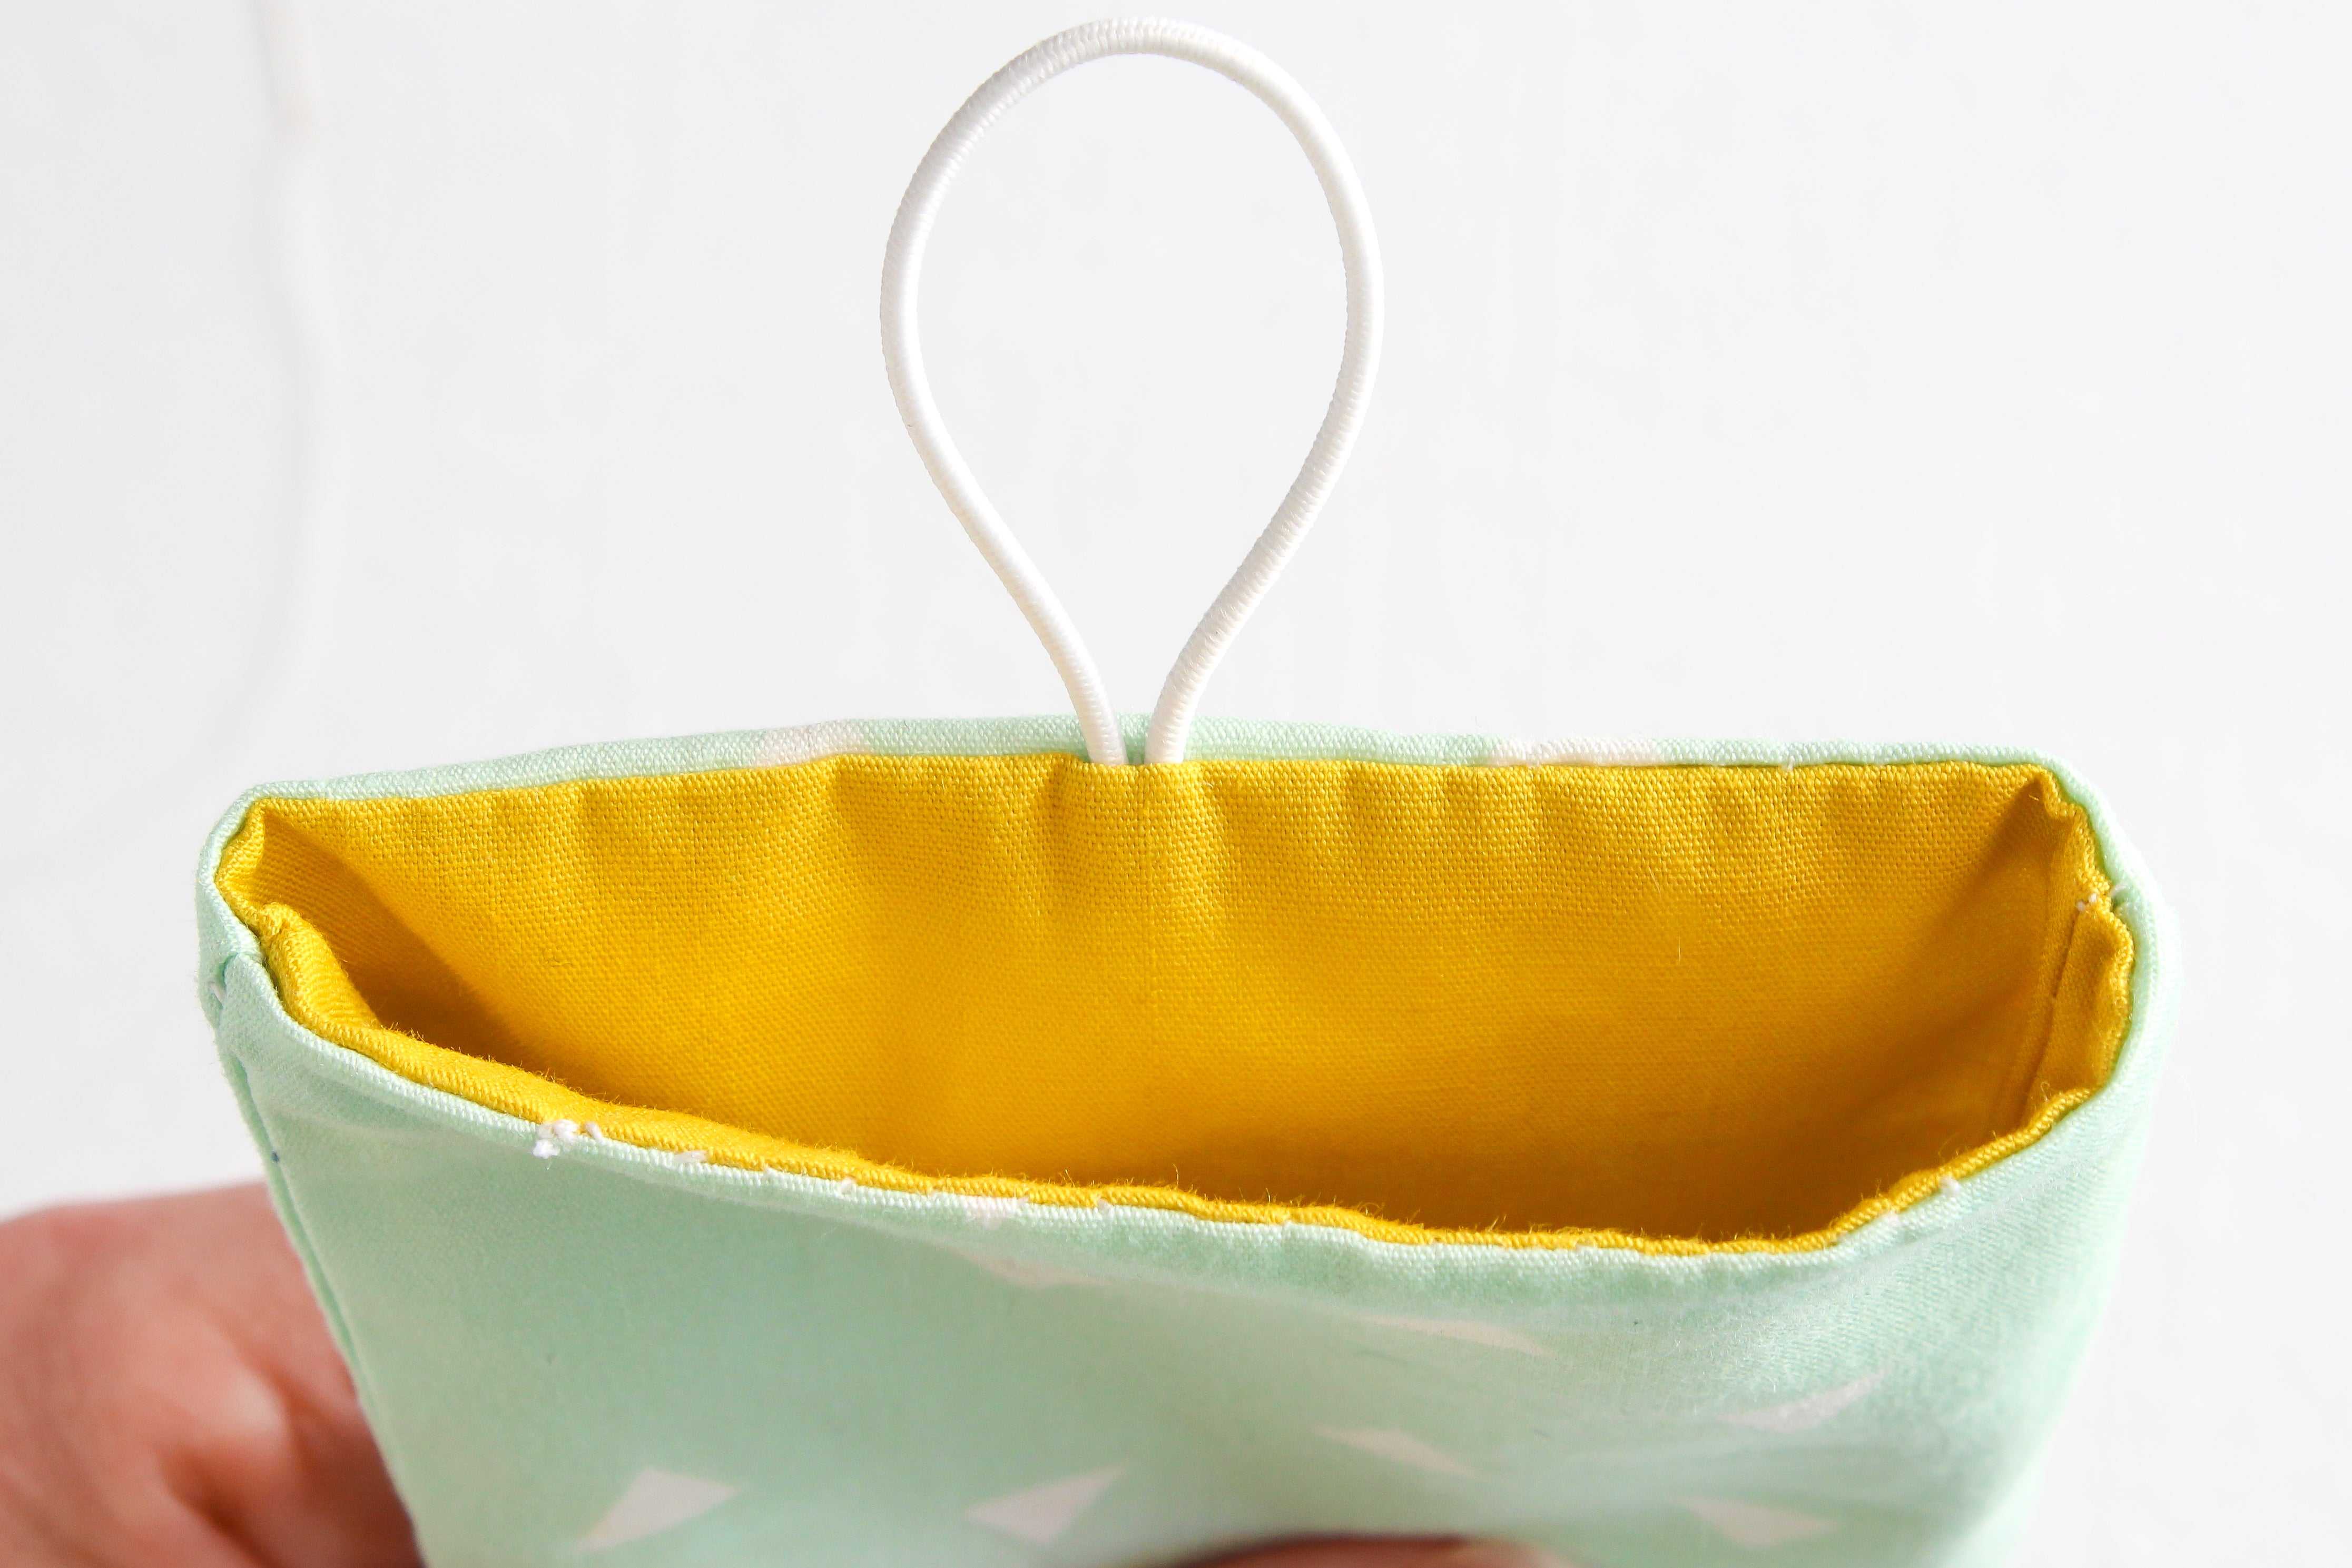
Inserting the Elastic
Cut a piece of round elastic 4 inches long.
If this is your first time working with elastic, I recommend using a small piece of tape to secure the ends together. We'll remove it after it's sewn into place!

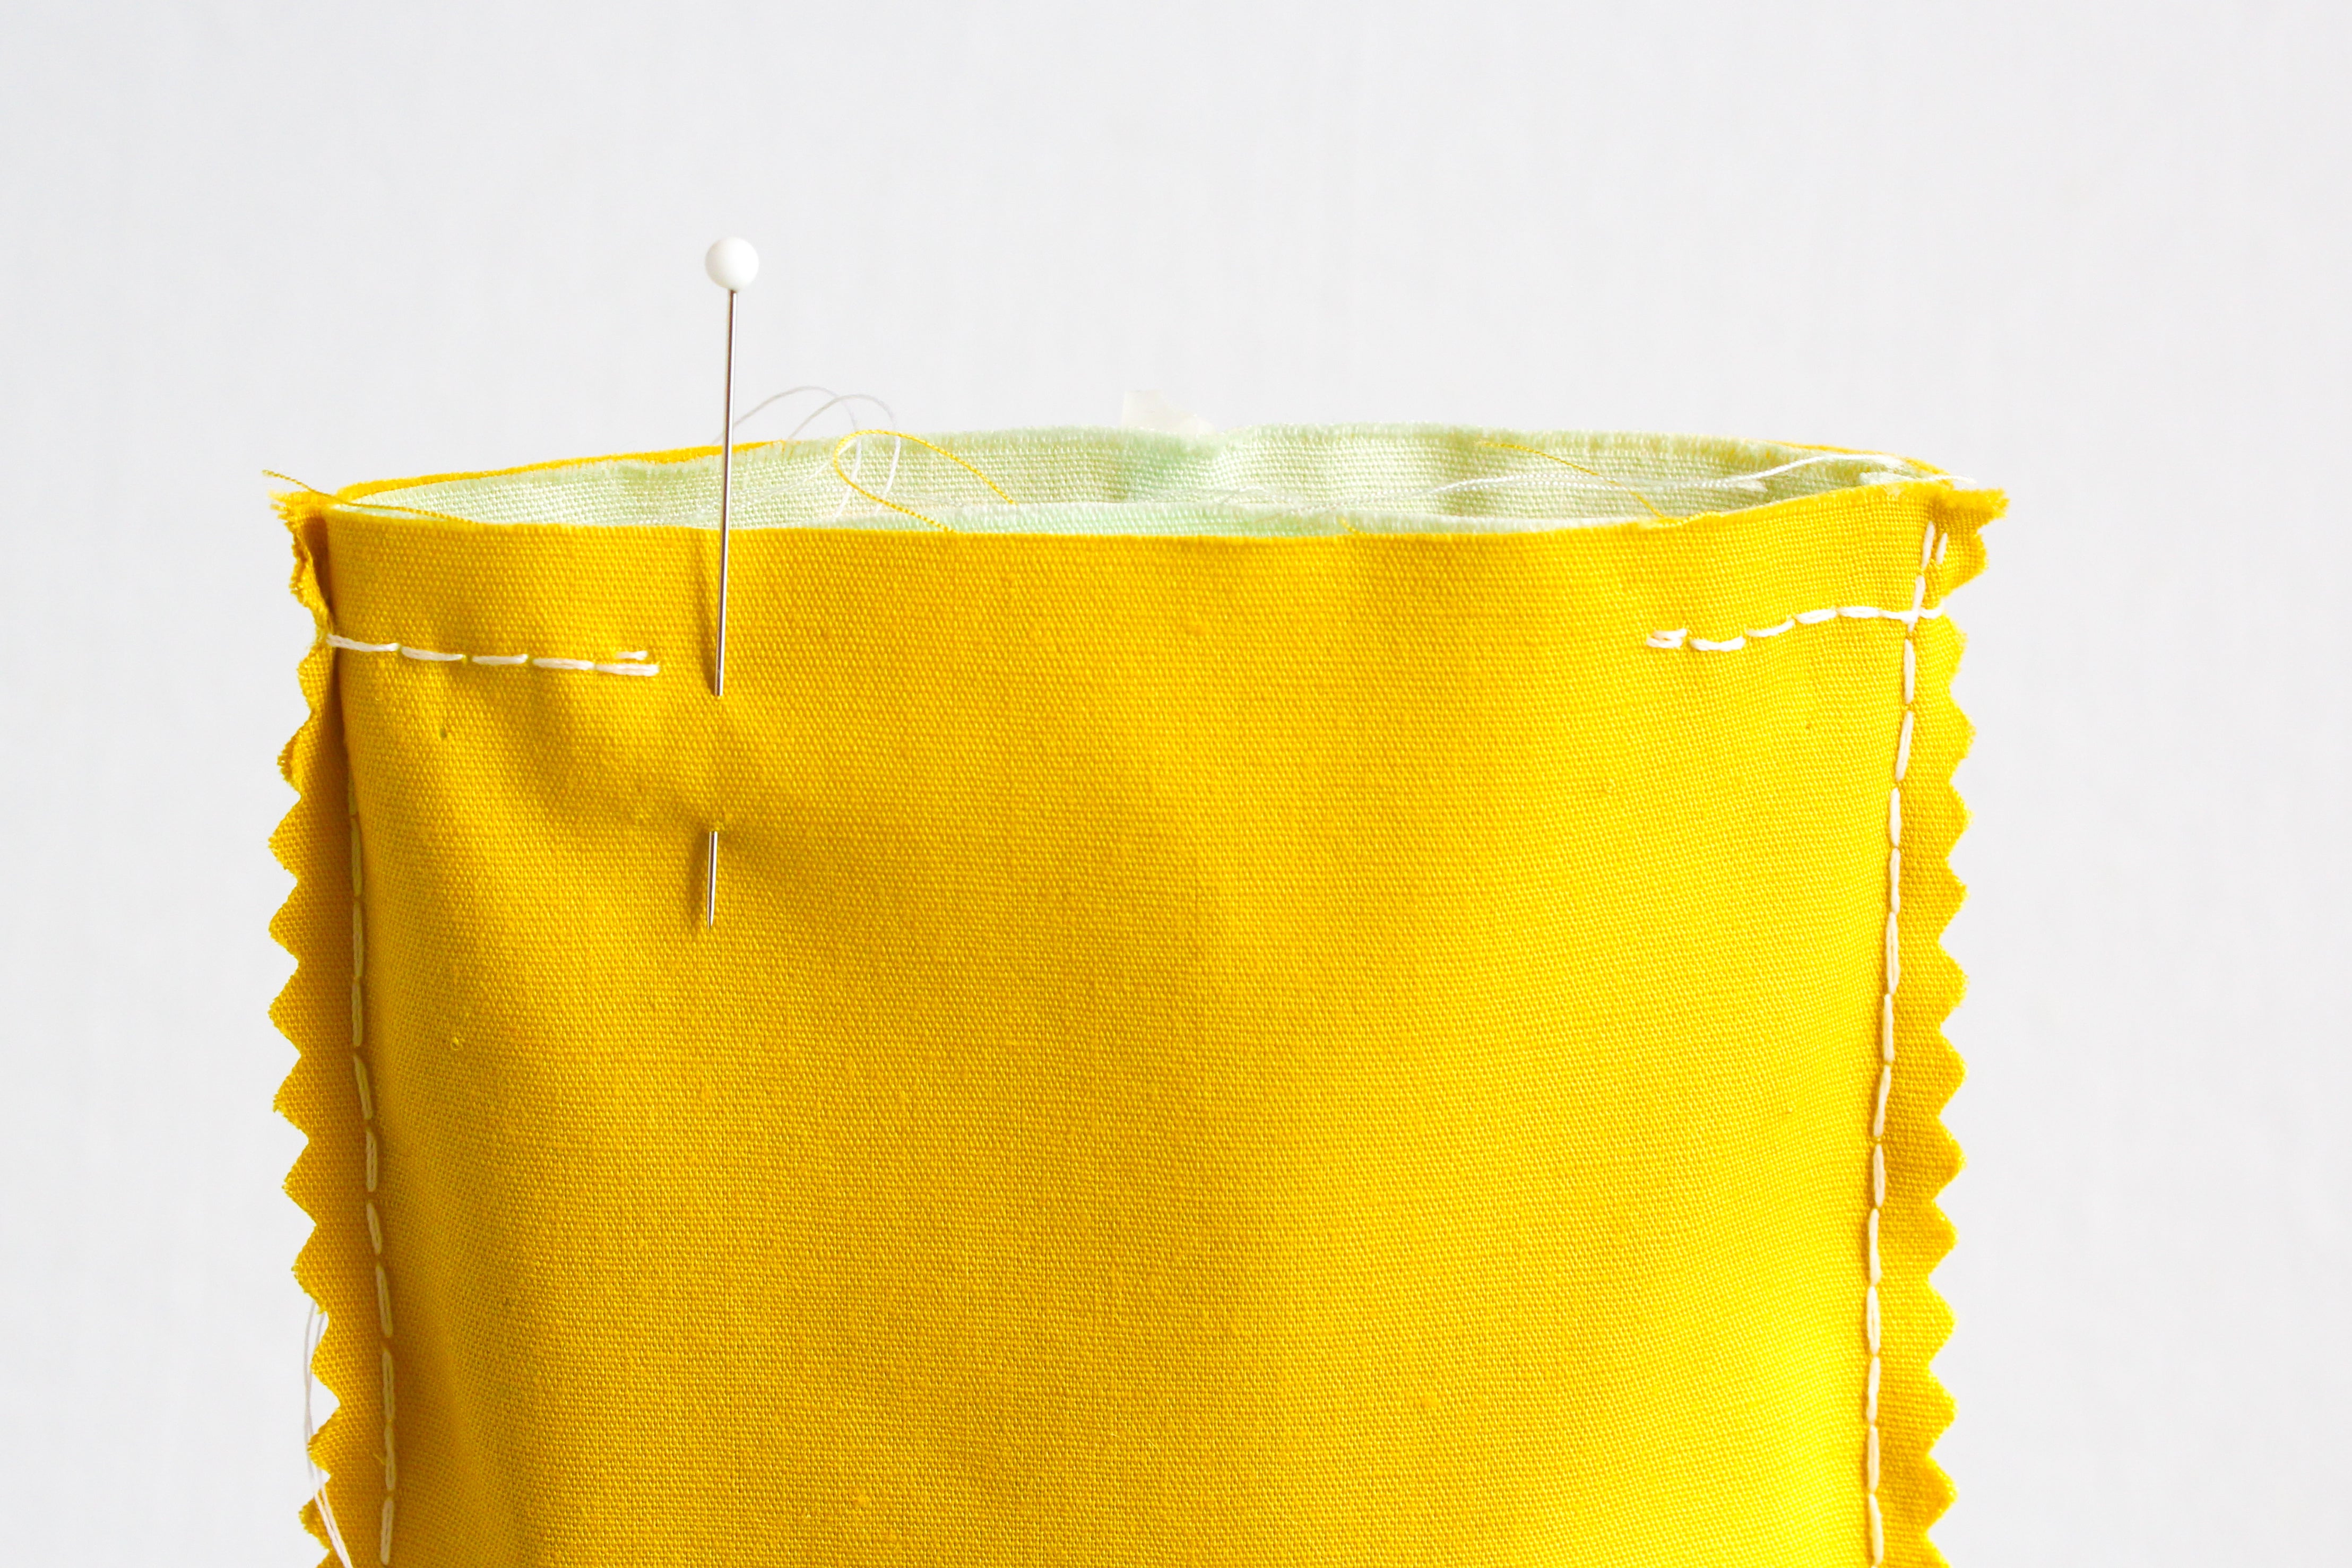
Place the elastic in the middle of the other side of the opening, wedged between the outer and lining fabrics. (You can measure to find the exact middle and mark it - I am eyeballing it yet again!)

Carefully pin the elastic in place horizontally with the top of the elastic meeting the top of the case. Make sure that the top of the lining and outer fabrics are lined up.
Sewing the Opening of the Case
Let's begin sewing! Double thread a needle and knot your thread.
We're going to use a 1/4 inch seam allowance here as well. Feel free to mark your sewing line as we did before or wing it this time! I am winging it, so I use a sewing gauge to make sure I have my stitches in the right place to start.
Start sewing at one of the vertical pins marking the opening and sew around to the other, leaving an opening in between. Make two tiny stitches at the beginning of the seam like we did before. We need to help protect the seam from the stress of it being turned right side out. :)
Remember to pull out the sewing pins as you sew past them!
When you get to the side seams, make sure that you sew over them in such a way that they're being sew down flat. Their orientation is not important, but it is important that they are nice and flat so you don't have big bumps in the seam allowance. (Take a look at the photos below - see how the left side seam is sewn down?)


When you come around to the elastic, make many tiny stitches over each half of the elastic. Wrap the thread all the way around the elastic, too. If you can push the needle THROUGH the elastic or the casing on the elastic, that's even better! You will probably need to use a thimble if you choose to go that route. (Please don't use your teeth to pull the needle through! If you have some pliers around those are a good tool for this.)
You want to be sure the elastic is staying in place, so tug on the ends of the elastic to test it when you're done. If it shifts at all, sew it down some more.
If you do a bad job of sewing the elastic down, you won't be able to mess with it again until the case is right side out. It's pretty hard to fix it then!
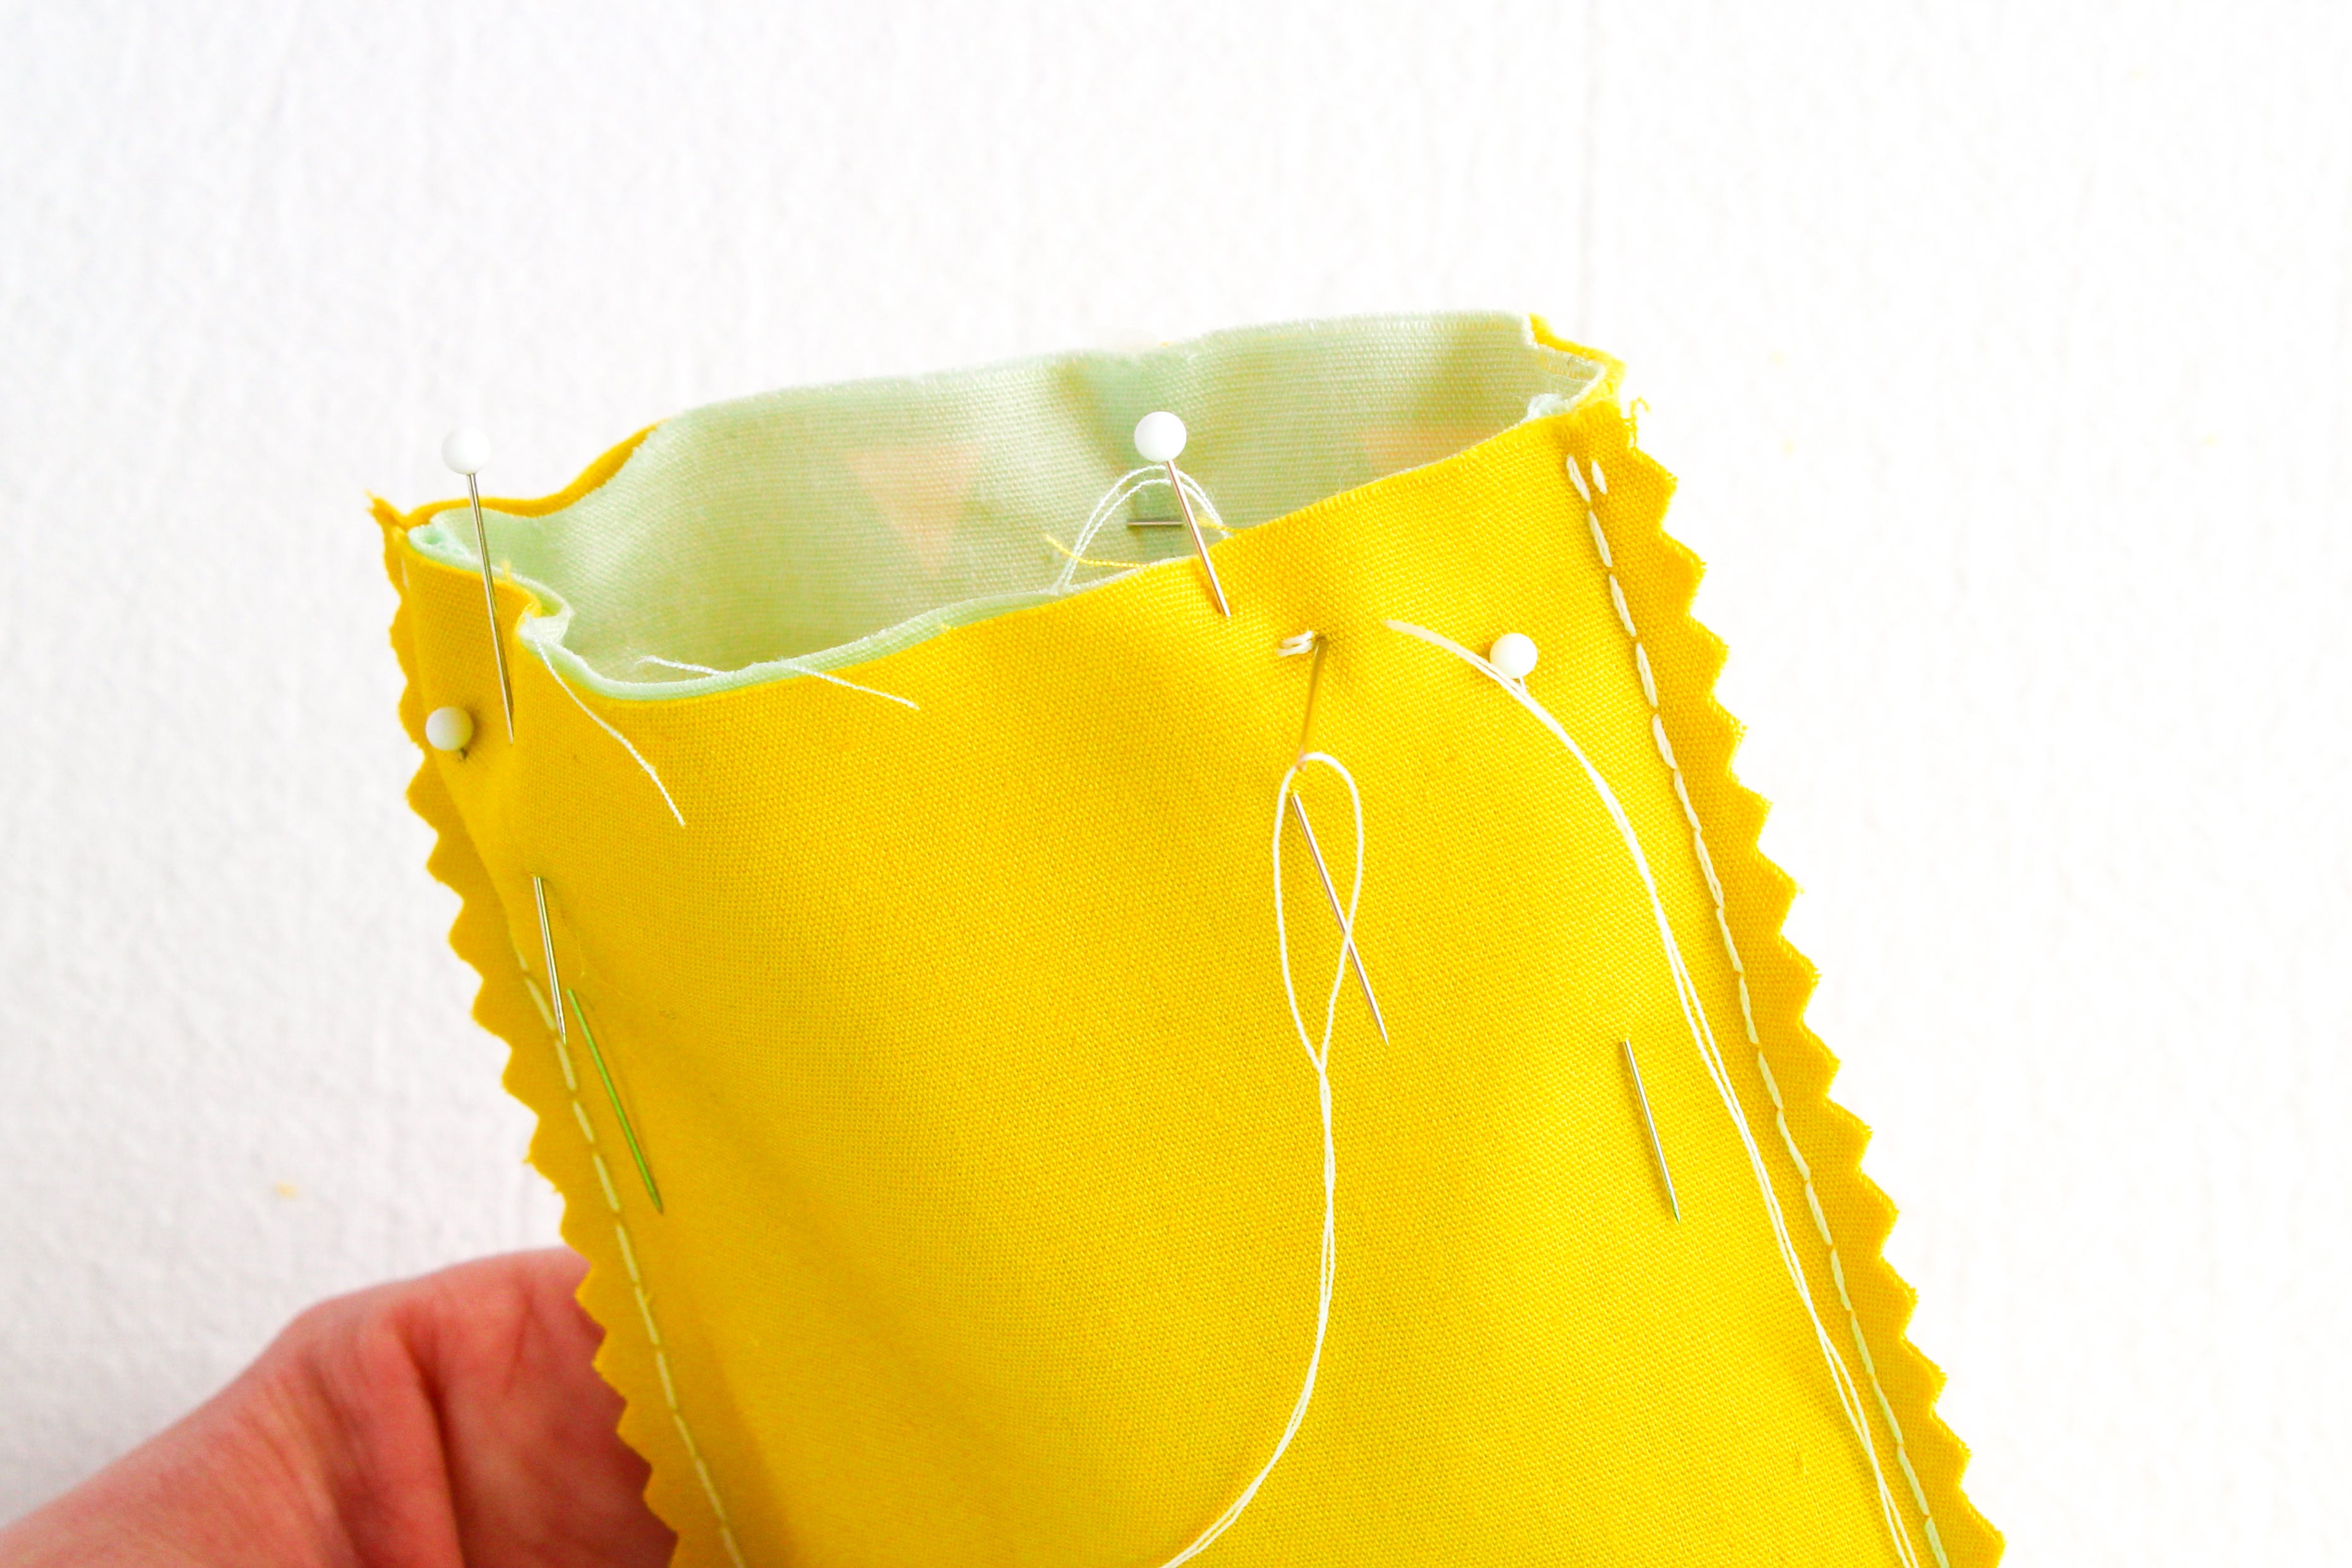
Keep on sewing past the elastic and use two stitches at the end of your sewing. Remove any pins left in the fabric.


This is how your case should look at the end.
Important: if you marked any sewing lines, make sure to remove them with cool water before proceeding. :)
Turning the Case Right Sides Out
You're probably wondering why in the world we left such a tiny opening to do this! I promise it's not going to be as hard as it seems.


The first thing you'll want to do is trim the elastic down by half. Use a pair of nice sharp scissors. Remove any tape that's left on the elastic.


We'll want to pull the outer fabric through first. Use your fingers (or even a pair of tweezers!) to grab the outer fabric and start to pull it through. Ease it through the opening little by little.


Now, we'll need to flip the lining fabric. I like to push one of the top corners through the opening for a good start!

Once the lining is flipped, stick a pencil or chopstick into the opening to push out the corners of the outer and lining fabrics.
Pressing the Case and Tucking the Lining In
Now we'll press the the outer and lining pieces when the case is open and flat.

Pay special attention to the hole left for turning - you want to press the lining fabric down nice and flat. It should be folded over in a nice straight line.

Line up the opening and make sure all the corners are poked out, and then press the case.


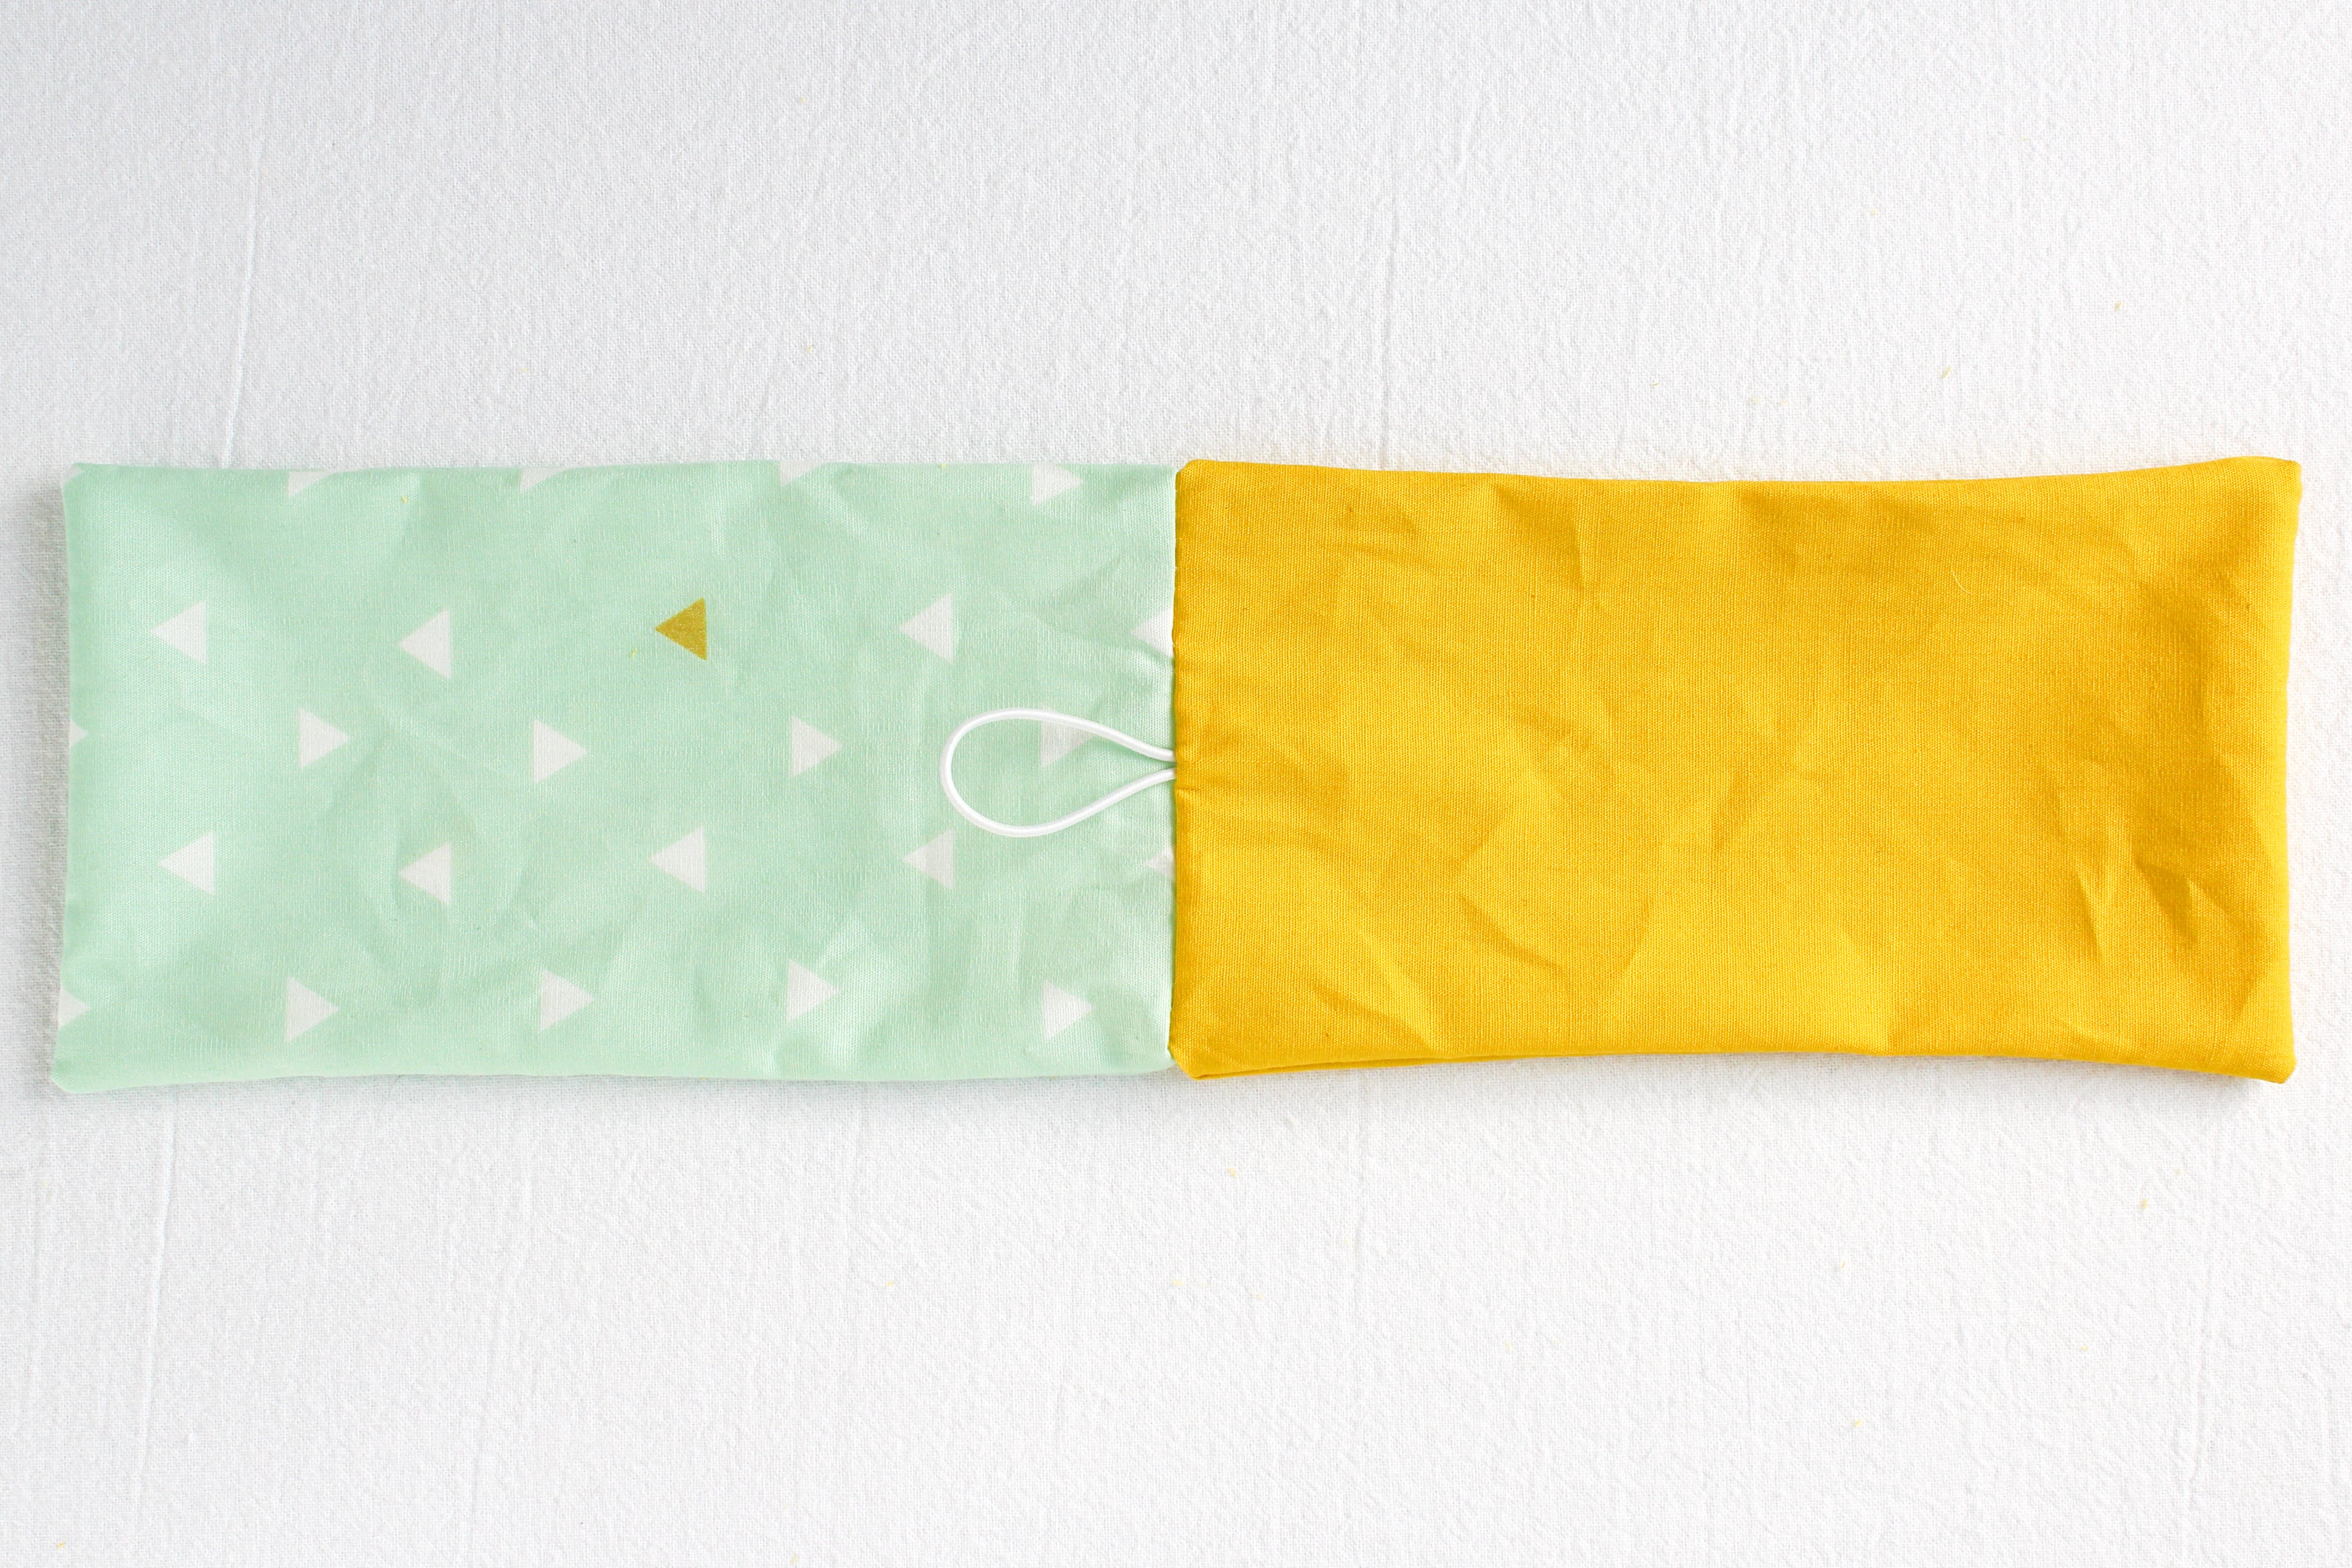
Now you'll tuck the lining into the outer fabric. Your elastic button loop should be standing up nice and straight and feel well anchored.

Now we'll sew the opening closed!
Slipstitching the Top of the Case Closed
Slip stitching is one of the most addictive stitches for me. I use it every time I can! It's fairly easy and you get amazing results from it!
You'll use a slip stitch anywhere you need to close a seam cleanly from the outside.


Start by lining up the opening edges so the lining fabric and outer fabric are both straight and meet right at the edge.

Double thread a needle and knot your thread. You want to start the slip stitch right before the last stitch - see how I'm inserting my needle to the left before it? This will keep your stitching nice and tight.
Insert your needle under one of the folded edges of the opening so it comes out right through the top fold of the opening. It may take you a second to get it into the right position - that's the trickiest part of slip stitching! It's a breeze from here on out.

Make your first stitch on the opposite edge of the opening directly across from where your thread exited on the other edge. Push the needle right through the top edge. Stitches should be about 1/8 inch.

Here's what it looks like with the thread pulled through.

Make your next stitch in just the same way!

Keep on stitching across the the other side. When you get to the end of your stitching, insert your needle through both sides of the opening, right at the top edge.
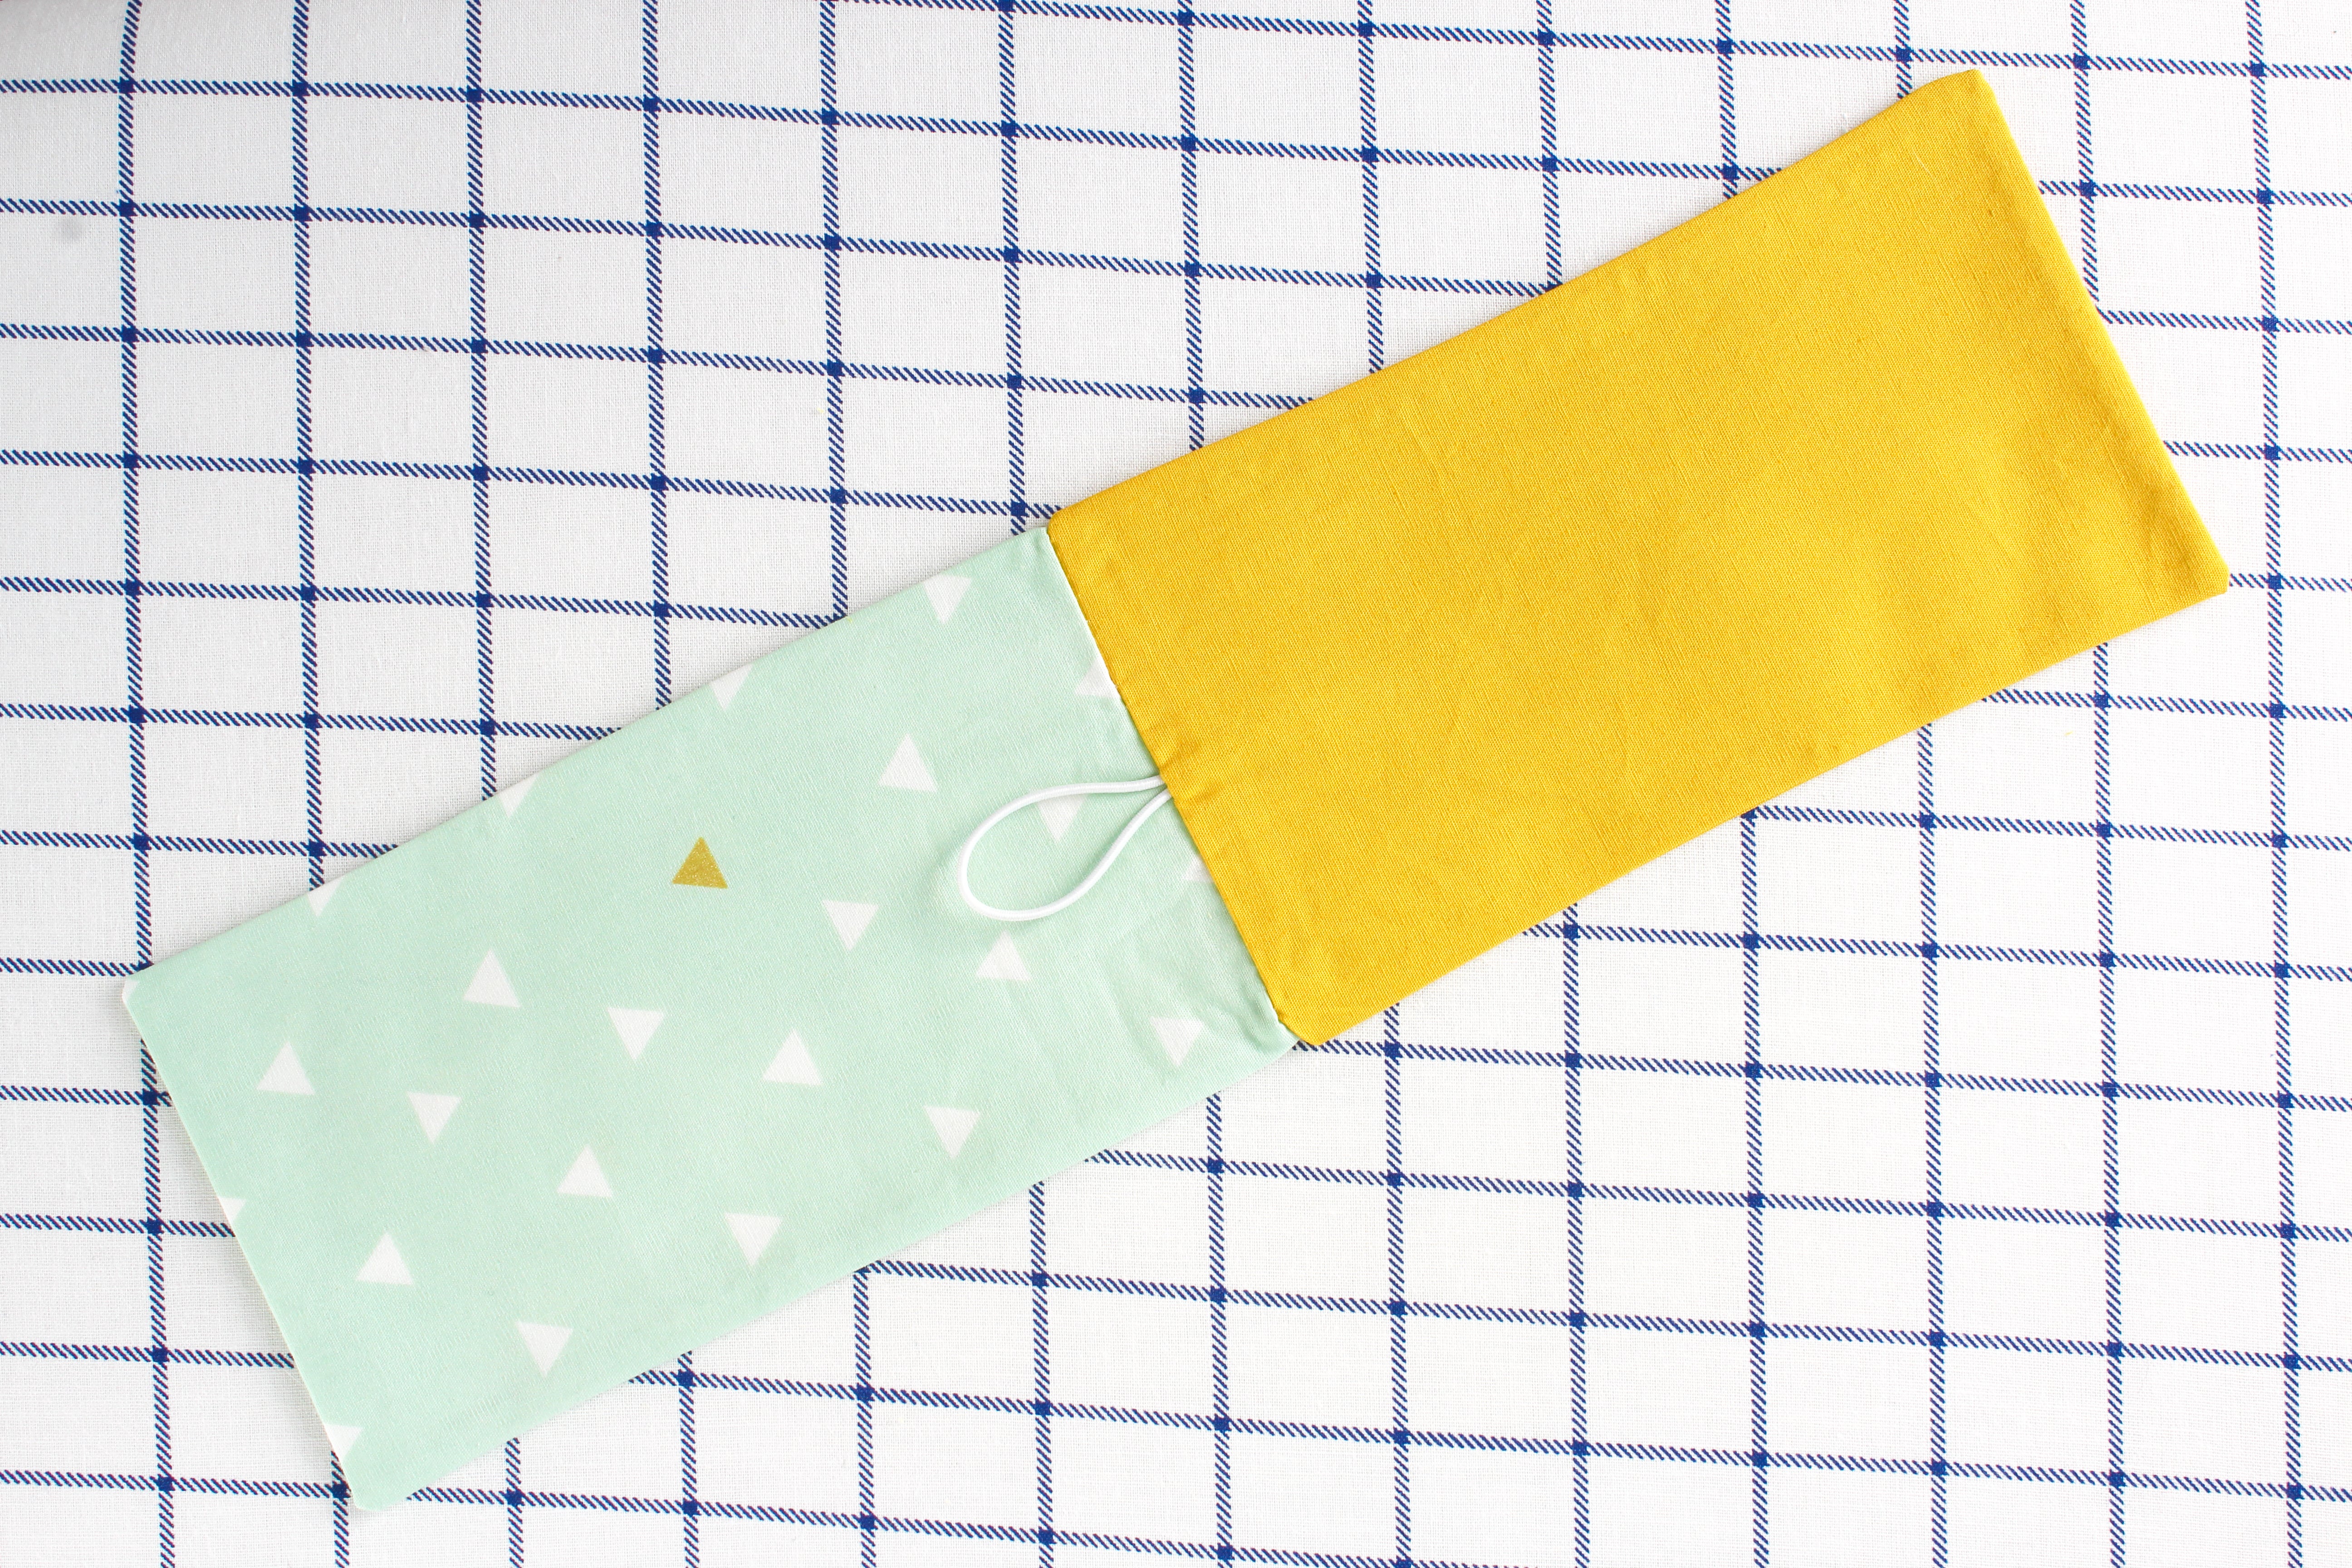
Tie off using a knotless knot or whichever technique you prefer. Now we'll sew on the button and be done!
Sew on a Button and Enjoy!

Get out all the things you'll need for the type of button you're sewing on. :)
If you've never sewn on a button before, check out the "Sewing on a Button" lesson of my Hand Sewing Class.


Place your case on a flat surface with the elastic loop on the bottom. Bend the loop over the top of the case without stretching it. Use your water soluble pen to mark right above the very bottom of the elastic loop.


Sew the button on and enjoy your awesome new gadget case. :D