Installing ESP8266 Into Arduino IDE Tutorial
by mybotic in Circuits > Arduino
36480 Views, 34 Favorites, 0 Comments
Installing ESP8266 Into Arduino IDE Tutorial
In this tutorial, we will show you on how to install ESP8266 into your Arduino IDE.
Open Arduino IDE

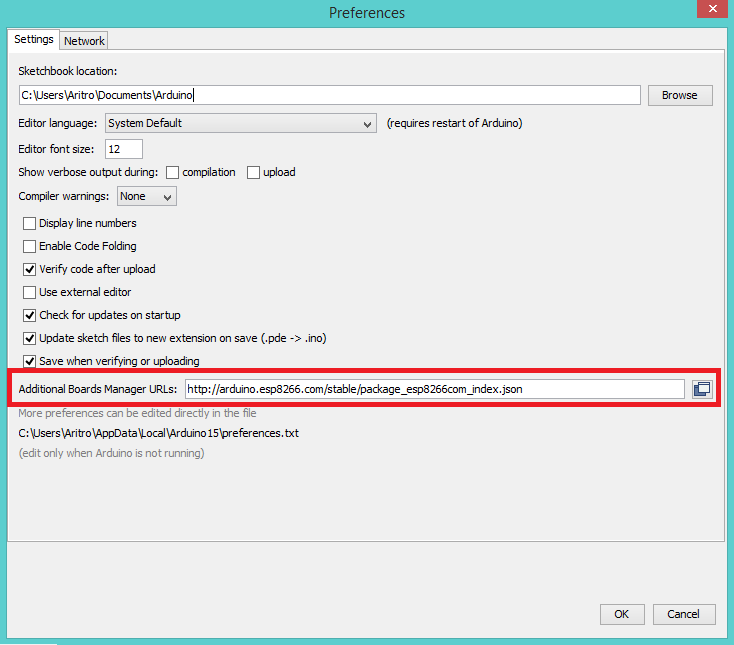
Open ArduinoIDE, you need to set up the preferences by going to File and then click Preferences and then paste "http://arduino.esp8266.com/versions/2.3.0/package_esp8266com_index.json" in the Additional Boards Manager URLs option, click ok.
Installing ESP8266 by ESP8266 Community

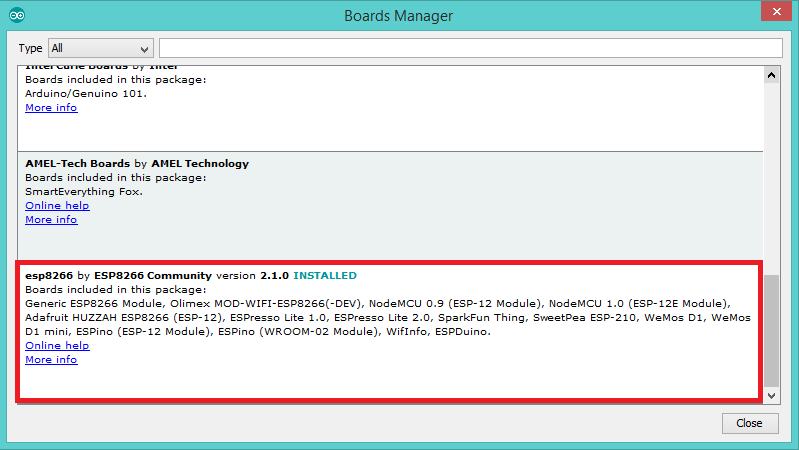
Next, you have to go to tools > Board > Board Manager and search for esp8266 by ESP8266 Community and install it.
Choose Your Board and Port

Now, go to Tools > Board > ESP8266 Modules and you can see many option for ESP8266. For ESP8266 ModeMCU lua Wifi, it is recommended toselect "NodeMCU 1.0 (ESP-12E Module). Next, select your port. If you cant recognize your port, go to the Control Panel > System > Device Manager > Port and update your USB driver.
Now, you can succesfully upload your coding into your ESP8266 ModeMCU Lua WiFi