How to Make Coasters Using Hueforge
by Penolopy Bulnick in Design > 3D Design
4756 Views, 72 Favorites, 0 Comments
How to Make Coasters Using Hueforge

When I started using Hueforge to generate 3D printable images, I knew I'd want to find some practical uses for it besides just the images themselves. I've done a variety of earring designs as well as some light switch covers, but I also decided to try out some coasters! I started with a set of Camping/Cabin coasters, then went on to Fine Art pieces that are in the public domain, and lastly did some simple frames. I'll talk about some of the techniques I used to make each of these and how you can take any Hueforge 3D printable image to make a coaster.
Instructable 393
Supplies

I tried to make a video, what do you think!
- Hueforge to generate your printable file
- I generated images from Craiyon.com but you can use your source of choice
- Photo editing software can be helpful, I use it a lot for my Hueforge prints
- Slicer - I do some work inside the Bambu slicer itself, but if you have a CAD software that can handle loading Hueforge images, you can do the work there
- 3D printer
- Tinkercad - I used it for basic border design
Picking Images


I'll start where I started, which is the camping coasters.
Now, when you generate a square 3D printable image with Hueforge, you can just print it and call it a coaster, but I think adding a little something extra can go a long way.
If you want to make a set, you need to generate your images. I was playing around on Craiyon when I generated a cabin image. I liked the idea of making some cabin coasters so I kept playing around with prompts until I got a cabin I like. I knew I would want a set, so I decided to work generate 4 different images to make a clean set. I went with:
- Cabin
- Campfire
- Dock
- Boat
It feels like strongly contrasting images work best with Hueforge, so I sought out images that looked like Linocuts.
Another thing you can do with your images right now is crop them so they are a square (or whatever shape you want them to be). Then you don't have to worry about cropping them in the slicer with fancy meddling.
Photoshop and Hueforge


.png)

Now it was time to run the design through Hueforge.
I decided I wanted to stick with Black - Dark Grey - Light Grey - White which is actually the default in the program.
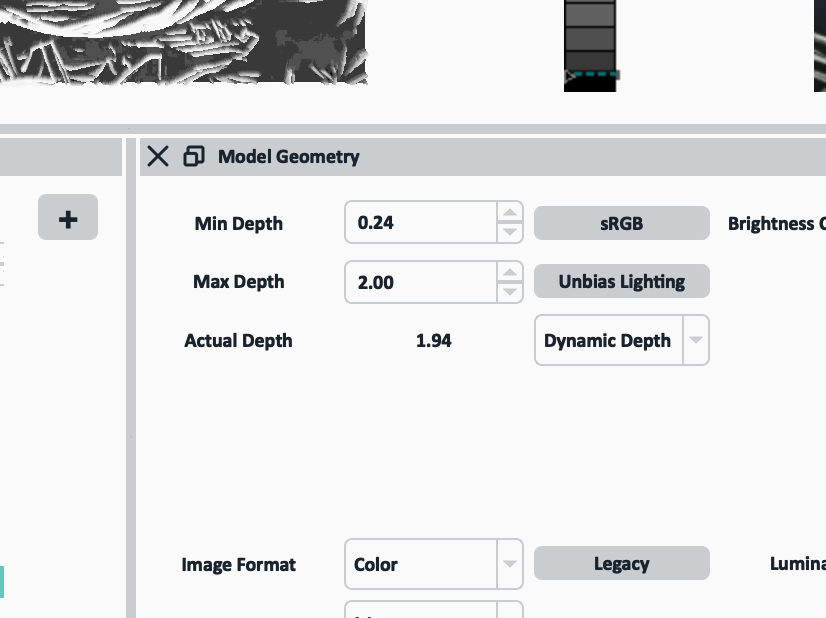
One thing I did right away in Hueforge was increase the Min Depth and Max Depth to 1mm and 2.6mm. I did this so that the base color would be at the minimum, 1mm thick and by default it would only be .24mm which is just too thin for a coaster and if only only increase the max depth, you'll just get thicker details which won't help the stability of the coaster.
Then I played around with the colors until I liked how they were distributed on the image.
When I went to do the other coaster images, you can just do them individually, or you can do what I did and bring them into Hueforge using the exact same settings as the first, and if you don't like how they looked, head to a program like Photoshop and alter the different shades in the image until it works with the same settings as the first in Hueforge. Check out the gif of the dock for an example of how I altered it to fit the same colors of the first coaster I did. I did this by using the Select Color Range option under Select in Photoshop, then I would select the area/color I wanted to alter, then I would either Dodge or Burn that section since the whole image was black and white. I dragged it back into Hueforge to see how it was, then would continue to go back and forth between Photoshop and Hueforge until it was the way I liked it. You can see this in the gif above of the dock in the lake.
I repeated this with all the images until I was happy with them.
Border or No Border


You can print these as is and be happy or you can go one step further and add a border.
As I mentioned, if you have a CAD program you like to use that can load the Hueforge STL, you can do the work there, but I did the work right in the Slicer.
I started by creating a curved corner border in Tinkercad.com that was 4" squared. The thickness isn't as important now as you can just change that (and the length and width really) in the Slicer.
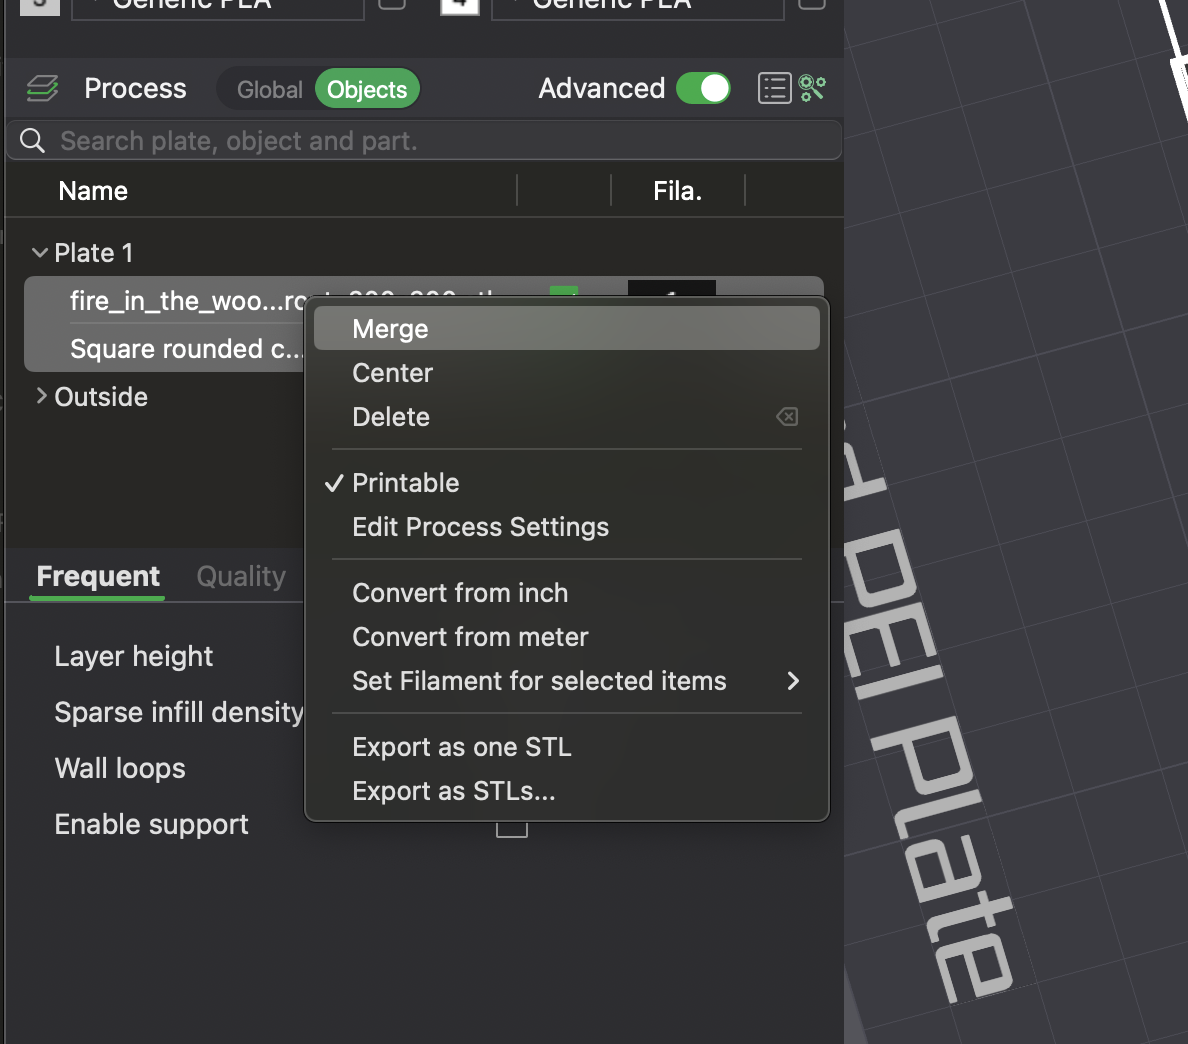
Then I brought it into the Slicer and there are two ways to do that. 1) Drag it into the slicer and then take the coaster image and frame in the left side and choose to Merge them. 2) Right click on the coaster image and click to Add Part and select the border in your Finder.
Make sure to get everything lined up so that there isn't a gap between the coaster and frame and so that the coaster doesn't go out beyond the frame. Make sure to keep the thickness of the coaster the same as it was in Hueforge no matter all the X and Y resizing you do.
I decided to make the frame just 2 layers thicker than the coaster because that is enough for the black border to cover the colors below it. You can make it thicker if you want.
Make sure you have all the color changes in there from Hueforge as well as your additional one for the frame.
You can now print!
***IMPORTANT! If you do any resizing of your Hueforge image in the Slicer, make sure you set the Z to 100% or that the amount matches what was in Hueforge so that you don't loose your detail.
Fancy Border Option


For the Fine Art coasters I did, I used Hueforge to make a more unique border instead of a solid line.
I took a frame I generated in Craiyon, and in Photoshop made it much thinner. I then ran this through Hueforge and made sure the Min Depth was just above the thickness of the coaster and then I made it so it was only going to be about 4 layers thick.
Once I had my Fine Art coaster images and my frame image, I combined them in the same way as Step 3 and did the color changes appropriately.
Coaster Frames


I'll just share about my last design.
After making my Gothic Cameo light switch cover, I liked the idea of using an ornate frame as a coaster because it seems like it is perfect for it as it is decorative and has a place to set the cup right in the middle.
I found an image I liked on Craiyon. I went to Photoshop and did some edits. In Hueforge I got the base thickness the way I wanted it and then made sure I had enough of the details around the frame.
Then I just needed to slice with the color changes and print!
Coaster Holder


If you are going to have a set of coasters, why not have a coaster holder?
I went over to Tinkercad to design a basic design for this. I took the size of the coasters from the Slicer and mimicked that in Tinkercad to make sure they would fit in the holder.
I designed it to originally fit the curved corner coasters, but it also fits the regular square ones too which is great.
Then you just need to make sure it is tall enough to fit all the coasters you have so make sure you test the thickness.
I did the same for the Frame coasters and did a round holder.
Enjoy


Now you can enjoy your coasters!