How to Make WiFi Robot Car ESP8266 Nodemcu Wemos
by bluino_electronics in Circuits > Robots
19710 Views, 36 Favorites, 0 Comments
How to Make WiFi Robot Car ESP8266 Nodemcu Wemos

This article is proudly sponsored by PCBWAY.
PCBWAY make high quality prototyping PCBs for people all over the world. Try it for your self and get 10 PCBs for just $5 at PCBWAY with very great quality, Thanks PCBWAY. The Motor Shield for Arduino Uno that I developed for use in this project uses PCBWAY PCB services. In this instructable, I will show you how to build WiFi Robot Car ESP8266 NodeMCU/Wemos. Let's get started!
Part List

- 1x PCB Nodemcu Motor Shield
- 1x IC L293D + Socket 16P
- 1x IC REG. 5V AMS1117
- 2x Transistor BC527 NPN
- 1x LED 3mm Red
- 2x LED 3mm Super Bright White
- 1x R 100 ohm 1/4W
- 2x R 1K ohm 1/4W
- 5x R 10K ohm 1/4W
- 1x C 100uF/16V
- 1x Active Buzzer 5V
- 1x Switch SPDT SS12D00G3
- 3x Screw Terminal Bock 5mm 2P
- 4x Male Header 1x40 Pin
- 1x Female Header 1x40 Pin
- 1x Ultrasonic sensor HC-SR04
- 4x TT Geared Motor + Wheel
- 1x Acrylic 134mm x 76mm
- 8x Cable AWG24 10cm
- 2x Rechargeable Battery 18650 3.7V
- 1x Battery Holder 2x18650
- 1x USB OTG Adapter
- 1x Micro USB Cable
Solder Wires to Motors


Preparation before soldering you can putting some flux to terminal of motors and wires, then solder a 10cm cable to the each terminal of motor.
After soldering, tie the two cables to the motor body using a cable tie so that the cable does not easily come off from motor terminals.
Attach 4 Motors to Acrylic


Attach the motor to the acrylic using hot glue gun on all four sides of the acrylic as shown in the picture.
Pass the motor cable to the back through the acrylic hole.
Order PCB on PCBWAY
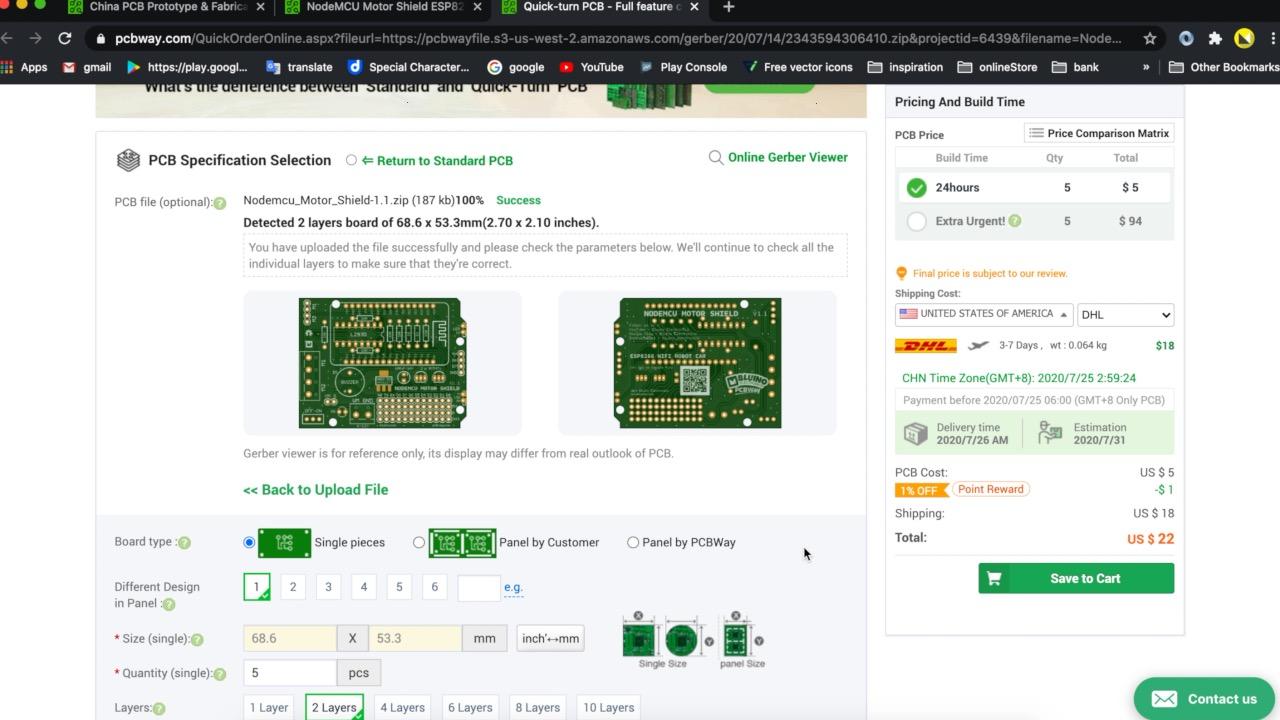
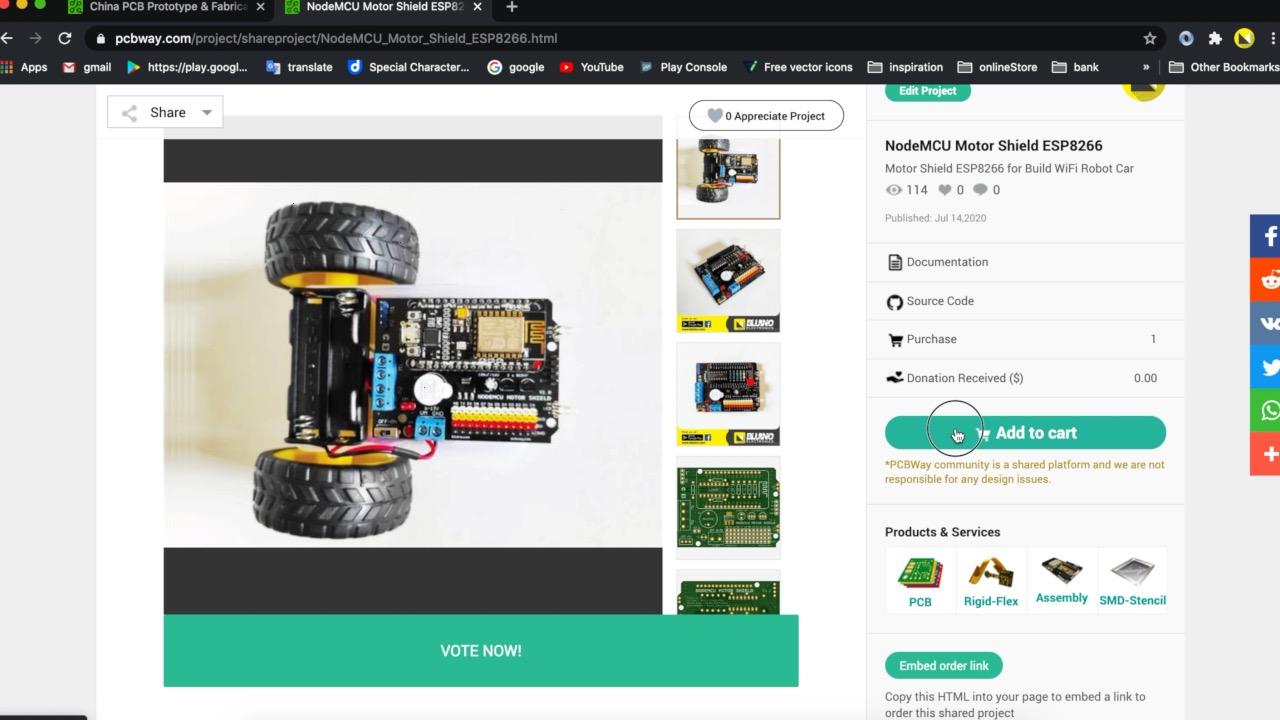
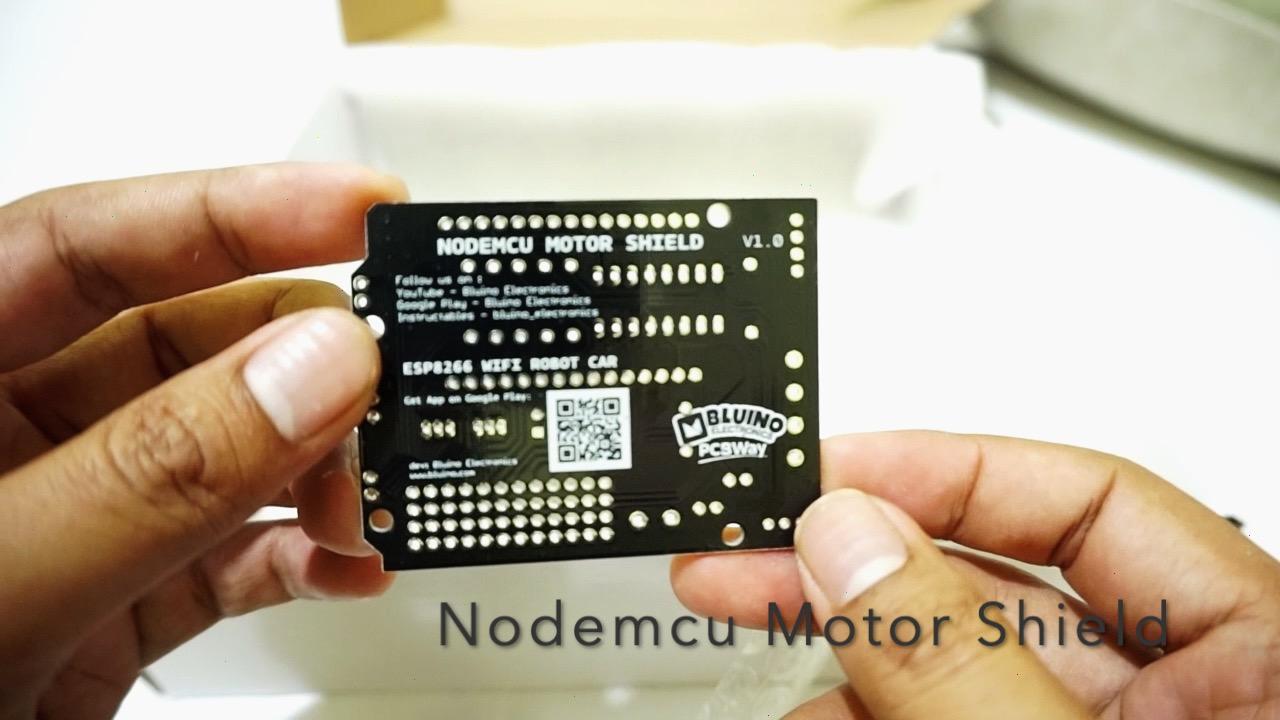
To make this project you need to order a prototype PCB on PCBWAY. How to order is very easy and you will get 10 Pcs PCB for $5 with very great PCB quality.
Step to Order:
1. SignUp/Log in on pcbway.com
2. Open this PCB project link Nodemcu Motor Shield or Wemos Motor Shield
3. Click Add to cart.
4. Wait moment for PCB review, then Click Check Out.
Solder All Part Component

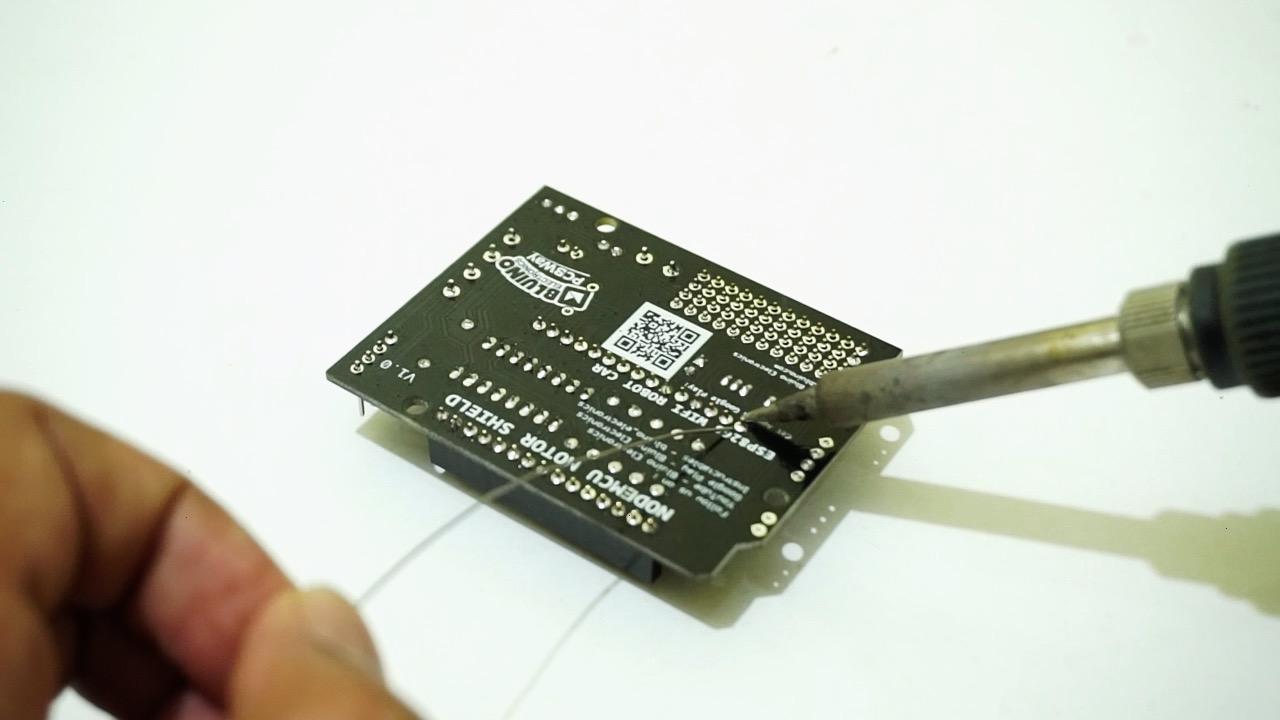
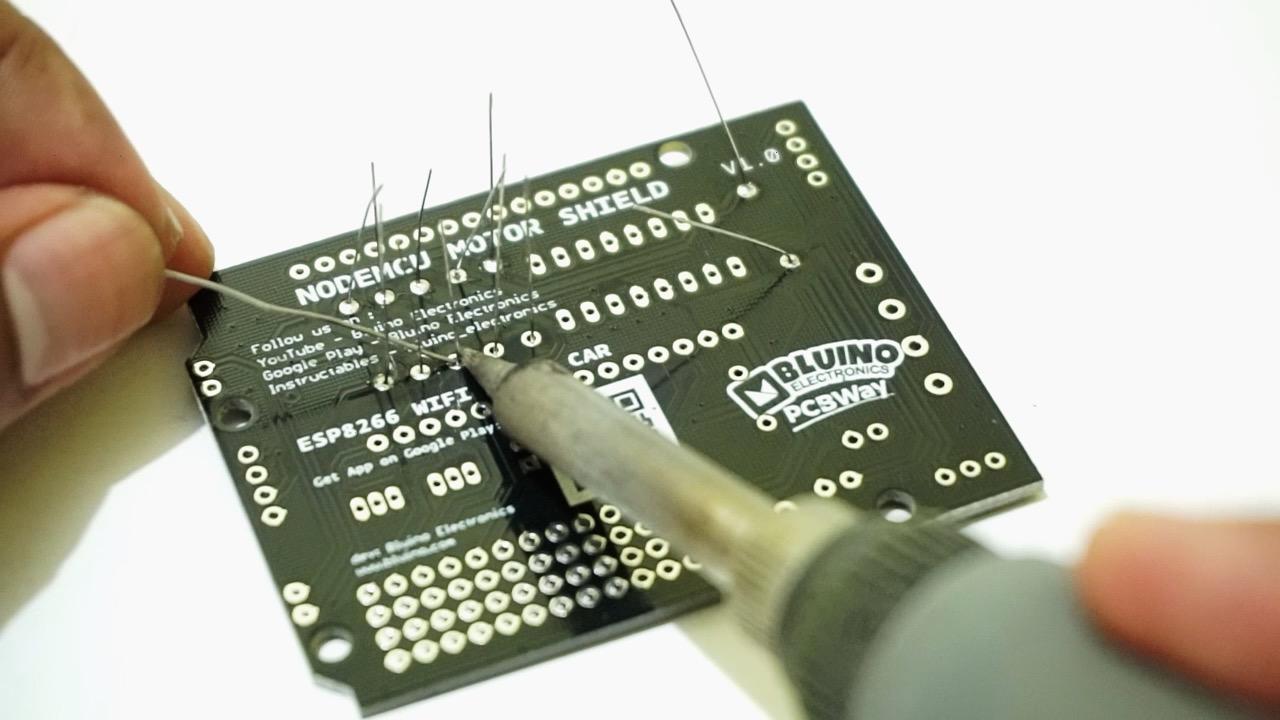
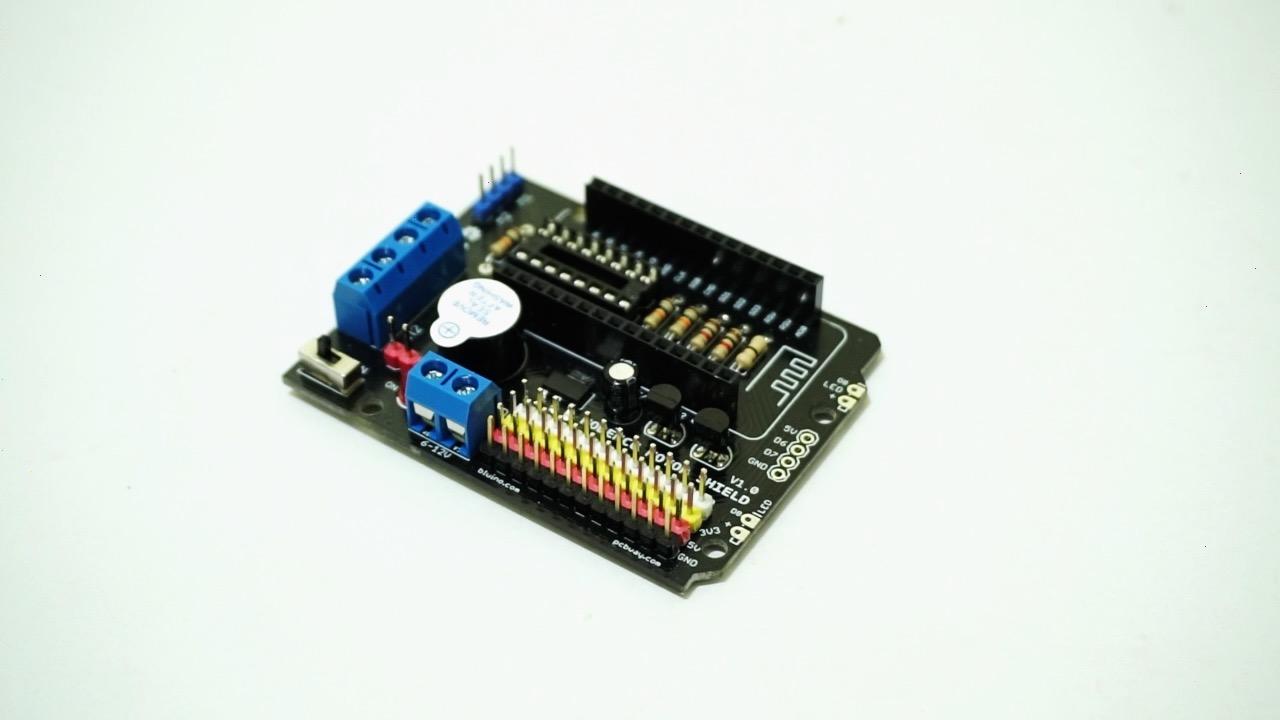

Solder all components on the PCB, for details you can follow step by step in the following video.
Attach Motor Shield


Attach the Motor Shield into front of body acrylic use double side tape or use hot glue gun, position so as not to block the hole from the cable exit.
Connect Cable to the Nodemcu Motor Shield

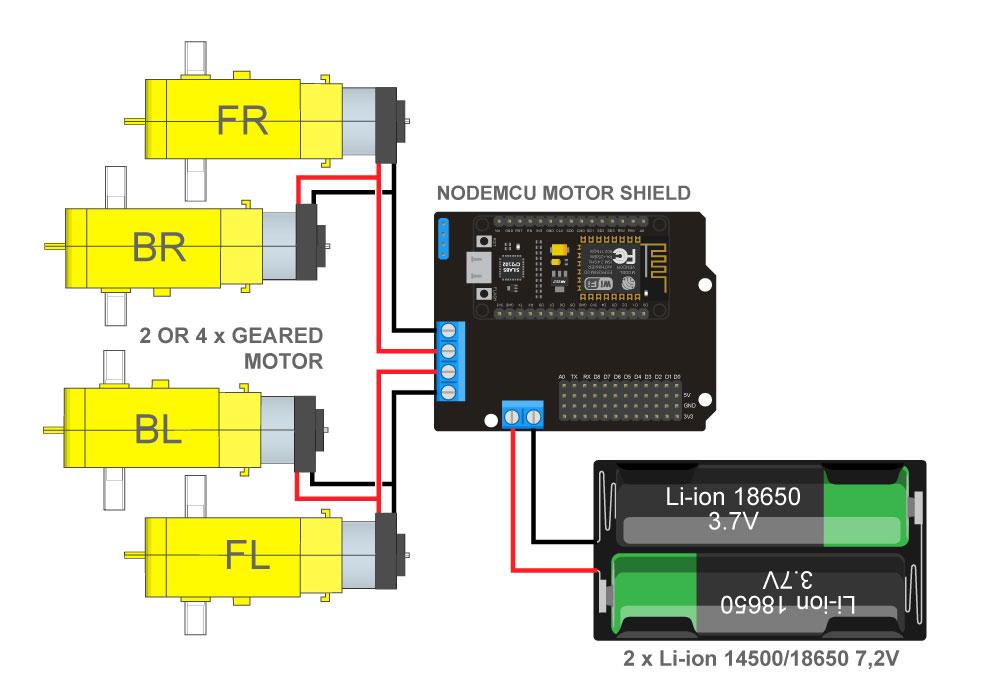
Insert and tighten the power wires into the terminal block on motor shield, and the motor wires into the respective terminal.
You do not connect the a motor to the two terminals M1 and M2. The correct is the "left motor front and back" connect to M1 and the "right motor front and back" connect to M2.
Attach Battery Holder
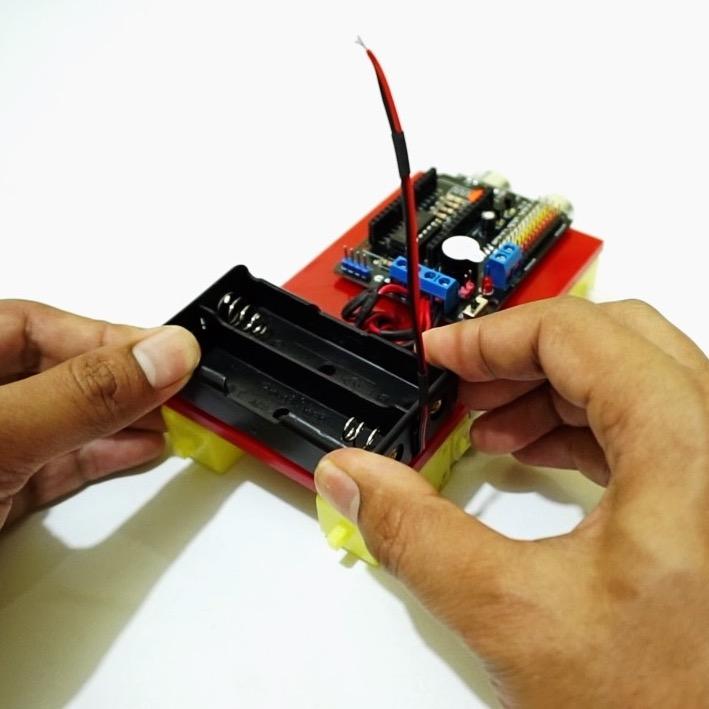

Attach the battery holder to rear of body acrylic use hot glue gun, then connect the cable to terminal power.
Attach Wheels
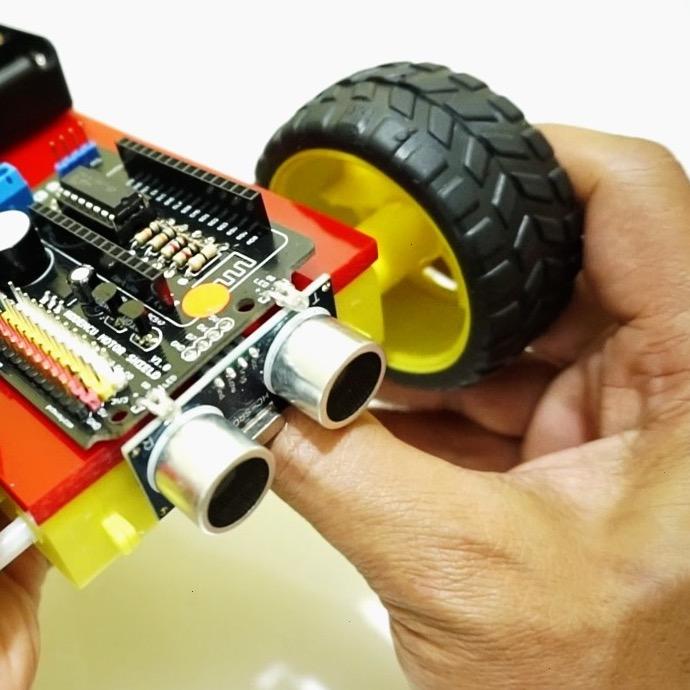
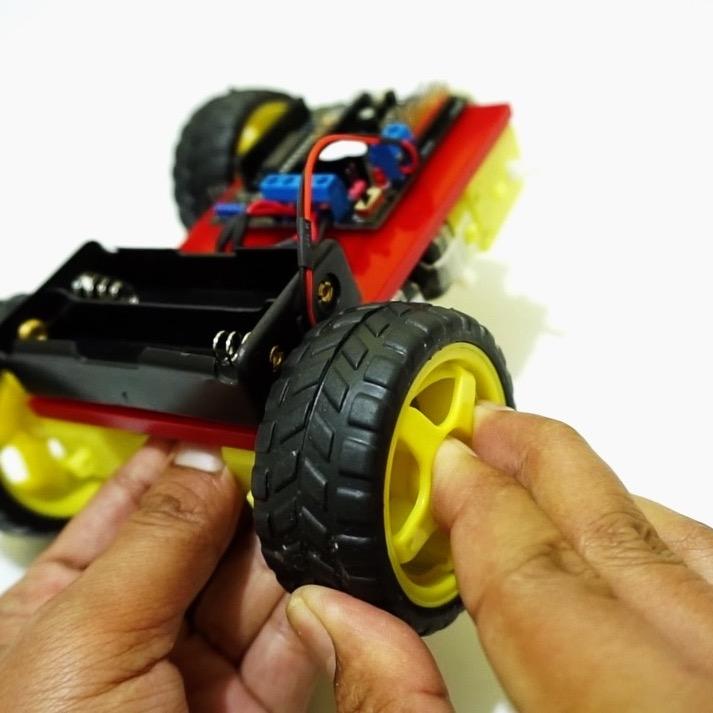

Insert four wheels, push into the shaft of motor, hold body motor by hand to prevent more force.
Program the Nodemcu Board

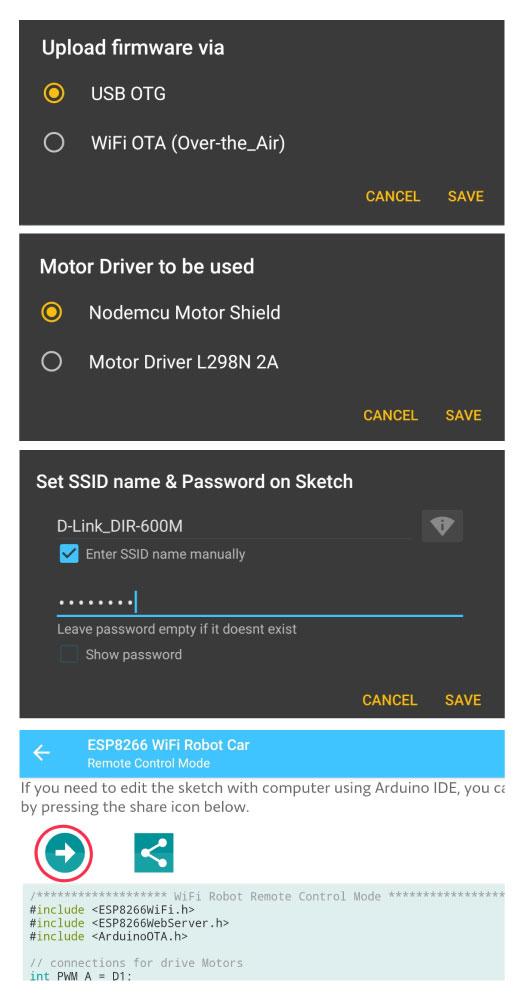


To make WiFi robot Car can controlled by smartphone Android, you have to program Nodemcu ESP8266 first. The easy way to program Nodemcu that you can use this Android App follow this step:
- Install ESP8266 WiFi Robot Car from Google Playstore
- Open app, on menu bar select Circuit diagram & Code icon
- On menu select Remote Control Mode
- Select menu settings, on option Motor Driver to be Used select Nodemcu Motor Shield, on option Upload Firmware Via select USB OTG, if you want to connect the WiFi Car with network of router you can set SSID name & Password.
- Connect Nodemcu board to your smartphone use USB OTG adapter.
- The last step click icon upload, and wait moment until completed.
Otherwise, you can program Arduino Uno board through a computer using the Arduino IDE software use this sketch:
Note: First, your Arduino IDE must be setup to be able use to programming ESP8266 board
/******************* WiFi Robot Remote Control Mode ********************/
#include <ESP8266WiFi.h>
#include <ESP8266WebServer.h>
#include <ArduinoOTA.h>

// connections for drive Motors
int PWM_A = D1;
int PWM_B = D2;
int DIR_A = D3;
int DIR_B = D4;

const int buzPin = D5;      // set digital pin D5 as buzzer pin (use active buzzer)
const int ledPin = D8;      // set digital pin D8 as LED pin (use super bright LED)
const int wifiLedPin = D0;  // set digital pin D0 as indication, the LED turn on if NodeMCU connected to WiFi as STA mode

String command;          // String to store app command state.
int SPEED = 1023;        // 330 - 1023.
int speed_Coeff = 3;

ESP8266WebServer server(80);      // Create a webserver object that listens for HTTP request on port 80

unsigned long previousMillis = 0;

//String sta_ssid = "$your_ssid_maximum_32_characters";      // set Wifi networks you want to connect to
//String sta_password = "$your_pswd_maximum_32_characters";  // set password for Wifi networks

String sta_ssid = "D-Link_DIR-600M";      // set Wifi networks you want to connect to
String sta_password = "56781234";  // set password for Wifi networks


void setup(){
  Serial.begin(115200);    // set up Serial library at 115200 bps
  Serial.println();
  Serial.println("*WiFi Robot Remote Control Mode*");
  Serial.println("--------------------------------------");

  pinMode(buzPin, OUTPUT);      // sets the buzzer pin as an Output
  pinMode(ledPin, OUTPUT);      // sets the LED pin as an Output
  pinMode(wifiLedPin, OUTPUT);  // sets the Wifi LED pin as an Output
  digitalWrite(buzPin, LOW);
  digitalWrite(ledPin, LOW);
  digitalWrite(wifiLedPin, HIGH);

  // Set all the motor control pins to outputs
  pinMode(PWM_A, OUTPUT);
  pinMode(PWM_B, OUTPUT);
  pinMode(DIR_A, OUTPUT);
  pinMode(DIR_B, OUTPUT);

  // Turn off motors - Initial state
  digitalWrite(DIR_A, LOW);
  digitalWrite(DIR_B, LOW);
  analogWrite(PWM_A, 0);
  analogWrite(PWM_B, 0);

  // set NodeMCU Wifi hostname based on chip mac address
  String chip_id = String(ESP.getChipId(), HEX);
  int i = chip_id.length()-4;
  chip_id = chip_id.substring(i);
  chip_id = "wificar-" + chip_id;
  String hostname(chip_id);

  Serial.println();
  Serial.println("Hostname: "+hostname);

  // first, set NodeMCU as STA mode to connect with a Wifi network
  WiFi.mode(WIFI_STA);
  WiFi.begin(sta_ssid.c_str(), sta_password.c_str());
  Serial.println("");
  Serial.print("Connecting to: ");
  Serial.println(sta_ssid);
  Serial.print("Password: ");
  Serial.println(sta_password);

  // try to connect with Wifi network about 10 seconds
  unsigned long currentMillis = millis();
  previousMillis = currentMillis;
  while (WiFi.status() != WL_CONNECTED && currentMillis - previousMillis <= 10000) {
    delay(500);
    Serial.print(".");
    currentMillis = millis();
  }

  // if failed to connect with Wifi network set NodeMCU as AP mode
  if (WiFi.status() == WL_CONNECTED) {
    Serial.println("");
    Serial.println("*WiFi-STA-Mode*");
    Serial.print("IP: ");
    Serial.println(WiFi.localIP());
    digitalWrite(wifiLedPin, LOW);    // Wifi LED on when connected to Wifi as STA mode
    delay(3000);
  } else {
    WiFi.mode(WIFI_AP);
    WiFi.softAP(hostname.c_str());
    IPAddress myIP = WiFi.softAPIP();
    Serial.println("");
    Serial.println("WiFi failed connected to " + sta_ssid);
    Serial.println("");
    Serial.println("*WiFi-AP-Mode*");
    Serial.print("AP IP address: ");
    Serial.println(myIP);
    digitalWrite(wifiLedPin, HIGH);   // Wifi LED off when status as AP mode
    delay(3000);
  }


  server.on ( "/", HTTP_handleRoot );       // call the 'handleRoot' function when a client requests URI "/"
  server.onNotFound ( HTTP_handleRoot );    // when a client requests an unknown URI (i.e. something other than "/"), call function "handleNotFound"
  server.begin();                           // actually start the server

  ArduinoOTA.begin();                       // enable to receive update/uploade firmware via Wifi OTA
}


void loop() {
    ArduinoOTA.handle();          // listen for update OTA request from clients
    server.handleClient();        // listen for HTTP requests from clients

      command = server.arg("State");          // check HTPP request, if has arguments "State" then saved the value
      if (command == "F") Forward();          // check string then call a function or set a value
      else if (command == "B") Backward();
      else if (command == "R") TurnRight();
      else if (command == "L") TurnLeft();
      else if (command == "G") ForwardLeft();
      else if (command == "H") BackwardLeft();
      else if (command == "I") ForwardRight();
      else if (command == "J") BackwardRight();
      else if (command == "S") Stop();
      else if (command == "V") BeepHorn();
      else if (command == "W") TurnLightOn();
      else if (command == "w") TurnLightOff();
      else if (command == "0") SPEED = 330;
      else if (command == "1") SPEED = 400;
      else if (command == "2") SPEED = 470;
      else if (command == "3") SPEED = 540;
      else if (command == "4") SPEED = 610;
      else if (command == "5") SPEED = 680;
      else if (command == "6") SPEED = 750;
      else if (command == "7") SPEED = 820;
      else if (command == "8") SPEED = 890;
      else if (command == "9") SPEED = 960;
      else if (command == "q") SPEED = 1023;
}

// function prototypes for HTTP handlers
void HTTP_handleRoot(void){
  server.send ( 200, "text/html", "" );       // Send HTTP status 200 (Ok) and send some text to the browser/client

  if( server.hasArg("State") ){
     Serial.println(server.arg("State"));
  }
}

void handleNotFound(){
  server.send(404, "text/plain", "404: Not found"); // Send HTTP status 404 (Not Found) when there's no handler for the URI in the request
}

// function to move forward
void Forward(){
  digitalWrite(DIR_A, HIGH);
  digitalWrite(DIR_B, HIGH);
  analogWrite(PWM_A, SPEED);
  analogWrite(PWM_B, SPEED);
}

// function to move backward
void Backward(){
  digitalWrite(DIR_A, LOW);
  digitalWrite(DIR_B, LOW);
  analogWrite(PWM_A, SPEED);
  analogWrite(PWM_B, SPEED);
}

// function to turn right
void TurnRight(){
  digitalWrite(DIR_A, LOW);
  digitalWrite(DIR_B, HIGH);
  analogWrite(PWM_A, SPEED);
  analogWrite(PWM_B, SPEED);
}

// function to turn left
void TurnLeft(){
  digitalWrite(DIR_A, HIGH);
  digitalWrite(DIR_B, LOW);
  analogWrite(PWM_A, SPEED);
  analogWrite(PWM_B, SPEED);
}

// function to move forward left
void ForwardLeft(){
  digitalWrite(DIR_A, HIGH);
  digitalWrite(DIR_B, HIGH);
  analogWrite(PWM_A, SPEED);
  analogWrite(PWM_B, SPEED/speed_Coeff);
}

// function to move backward left
void BackwardLeft(){
  digitalWrite(DIR_A, LOW);
  digitalWrite(DIR_B, LOW);
  analogWrite(PWM_A, SPEED);
  analogWrite(PWM_B, SPEED/speed_Coeff);
}

// function to move forward right
void ForwardRight(){
  digitalWrite(DIR_A, HIGH);
  digitalWrite(DIR_B, HIGH);
  analogWrite(PWM_A, SPEED/speed_Coeff);
  analogWrite(PWM_B, SPEED);
}

// function to move backward left
void BackwardRight(){
  digitalWrite(DIR_A, LOW);
  digitalWrite(DIR_B, LOW);
  analogWrite(PWM_A, SPEED/speed_Coeff);
  analogWrite(PWM_B, SPEED);
}

// function to stop motors
void Stop(){
  digitalWrite(DIR_A, LOW);
  digitalWrite(DIR_B, LOW);
  analogWrite(PWM_A, 0);
  analogWrite(PWM_B, 0);
}

// function to beep a buzzer
void BeepHorn(){
  digitalWrite(buzPin, HIGH);
  delay(150);
  digitalWrite(buzPin, LOW);
  delay(80);
}

// function to turn on LED
void TurnLightOn(){
  digitalWrite(ledPin, HIGH);
}

// function to turn off LED
void TurnLightOff(){
  digitalWrite(ledPin, LOW);
}
You can try other mode of WiFi Robot Car, please follow instruction and code inside the app:
- Remote Control Mode
- Obstacle Avoidance Mode
- Object Follower Mode
- Line Follower Mode
Attach Nodemcu Board
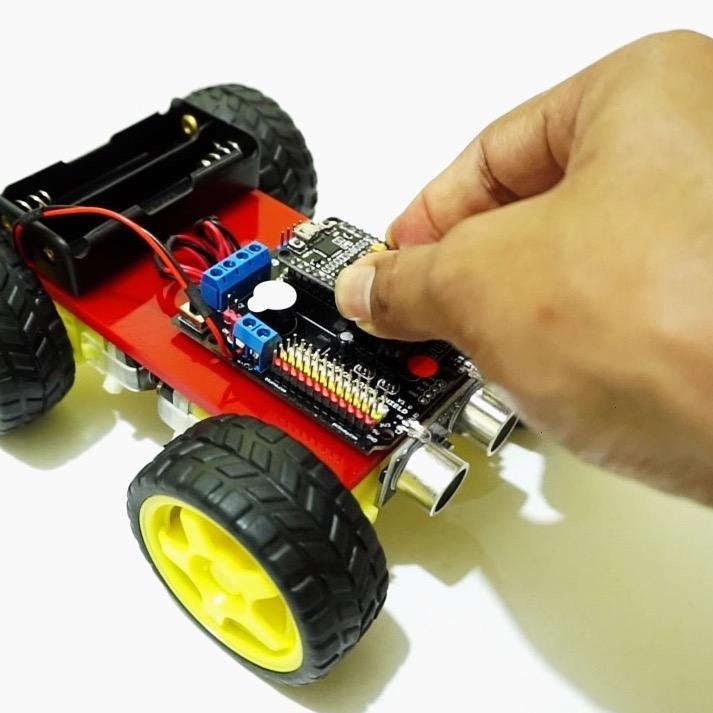
Attach the programmed Nodemcu to the socket on the motor shield, check the direction not to reverse.
Power on the WiFi Car


Attach two battery 18650 to holder battery, then switch on the WiFi Robot Car.
Let's Play

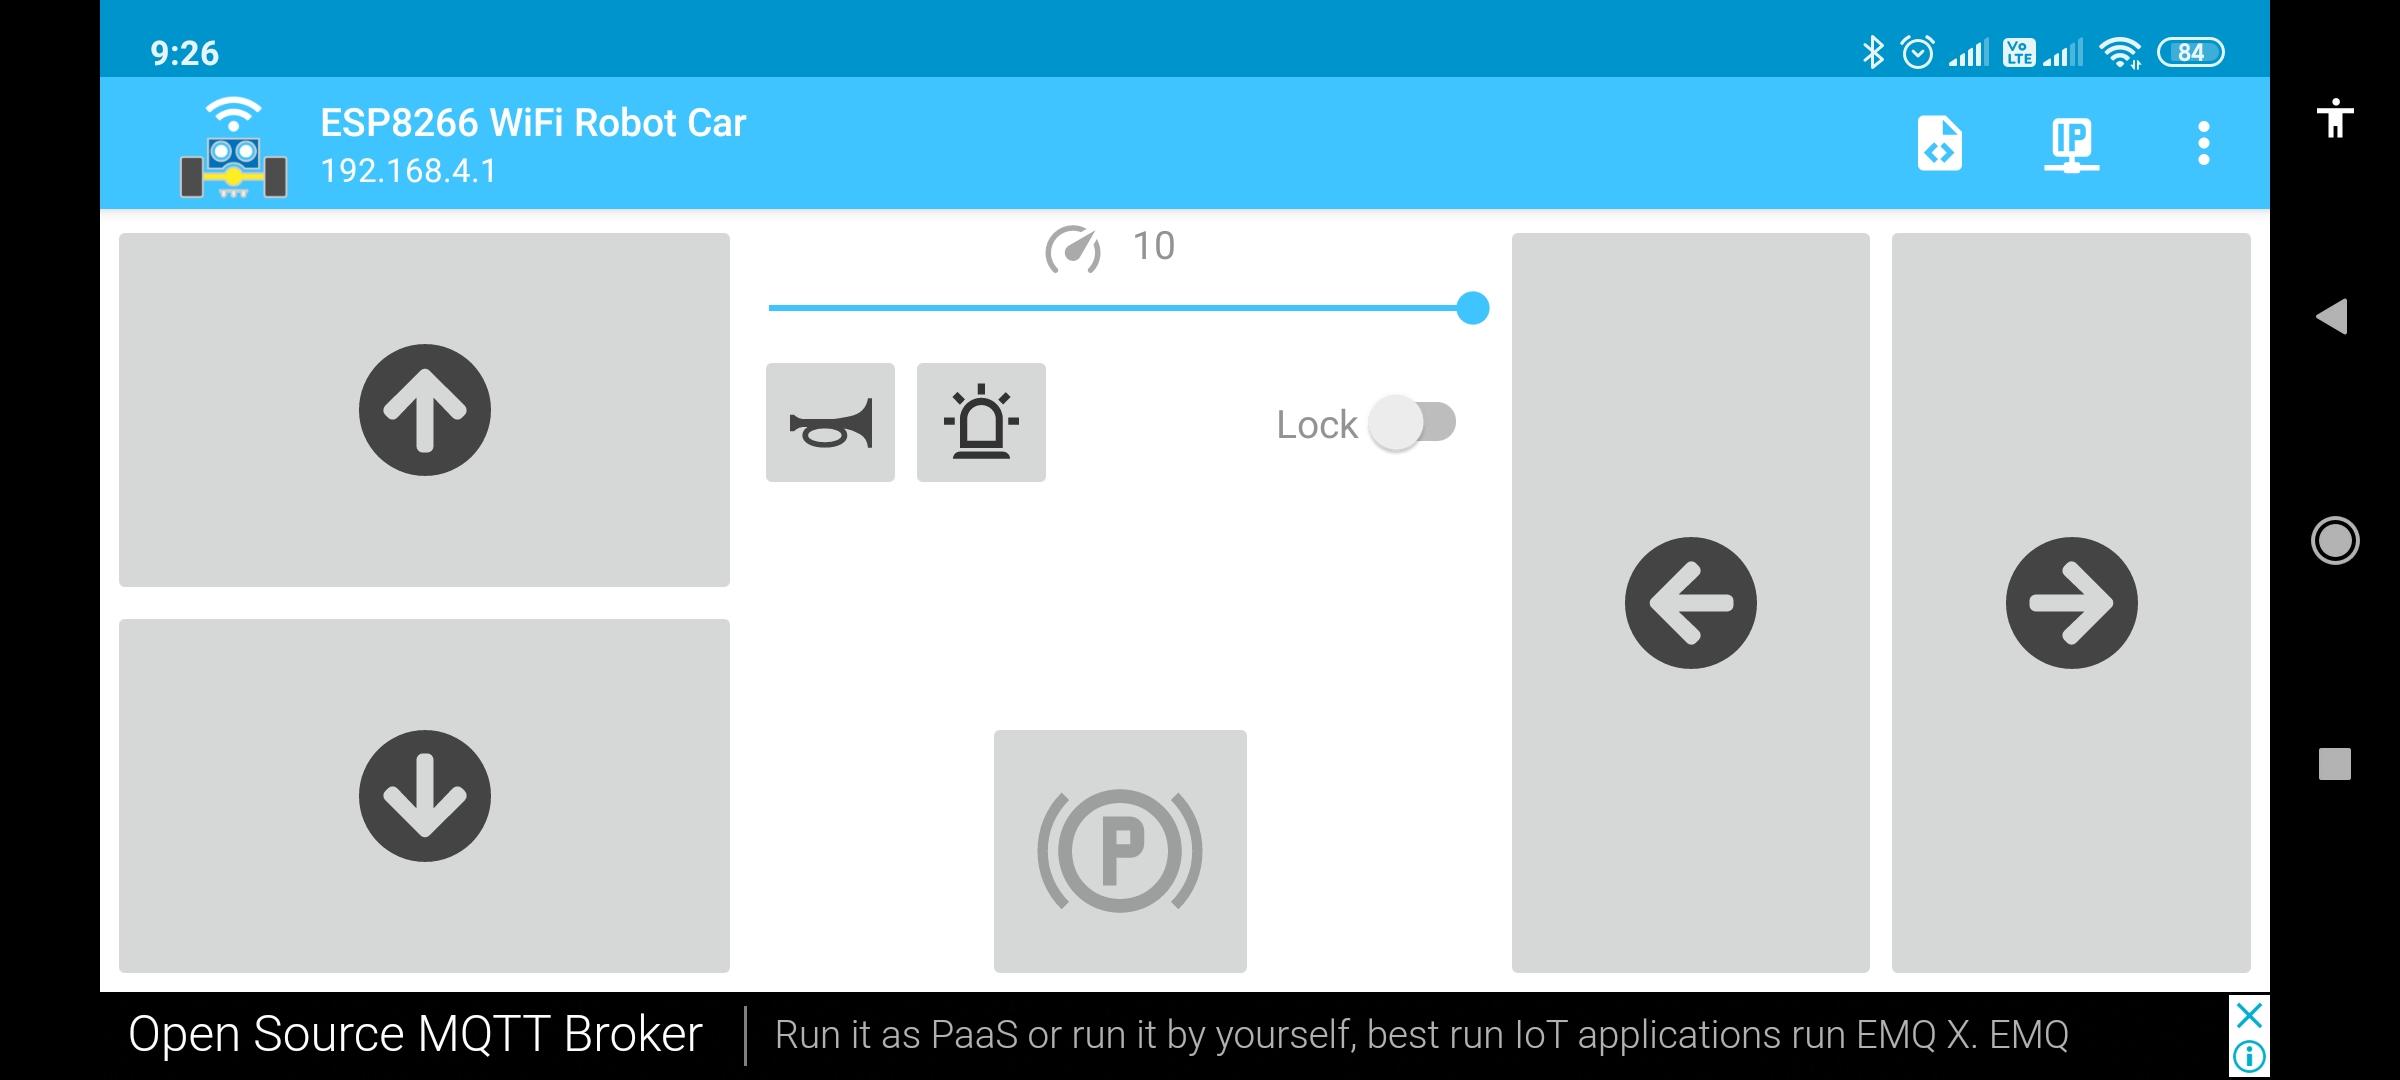
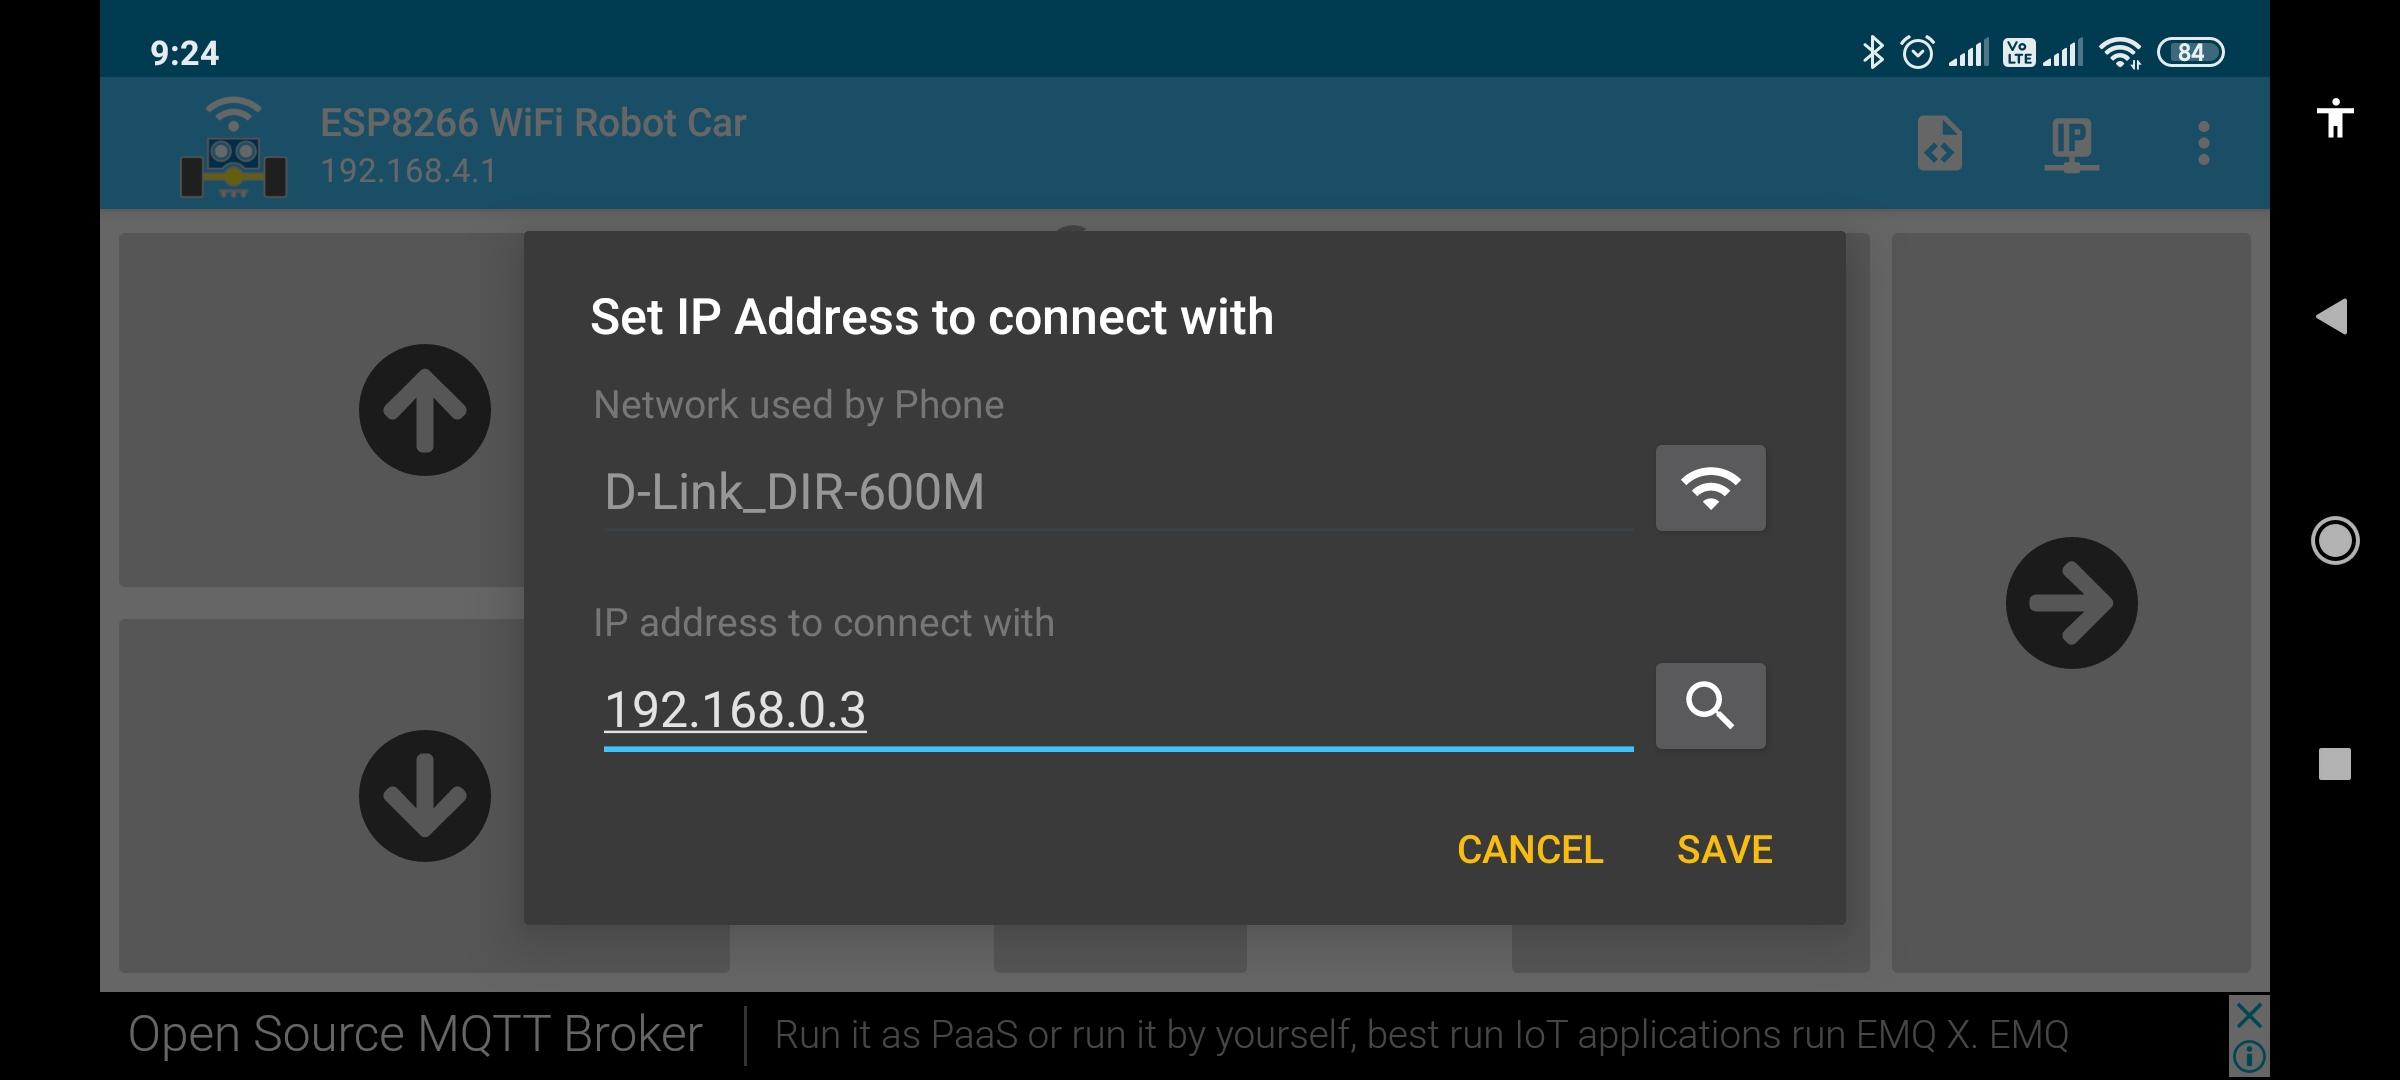
The WiFi robot can be controlled via the Android app in two ways, controlled directly from android to Nodemcu (AP mode), connect android to SSID of Nodemcu then set ip address on app 192.168.4.1.
Other way is Nodemcu (STA mode) and android is connected to the same router network then set the ip address on app according to the ip address that is owned by Nodemcu (i.e. 192.168.0.2).