How to Make a Custom Light-Up Sign With WLED
by taste_the_code in Living > Decorating
678 Views, 7 Favorites, 0 Comments
How to Make a Custom Light-Up Sign With WLED

I love personalizing my workspace, and what better way to do that than with a custom, professional-looking sign? I built this light-up sign for my basement workshop, and I'm going to show you how you can make one too.
We'll create a layered box sign with a laser-cut acrylic face, a see-through back to show off some cool internal details, and bright LED strips to make it all glow.
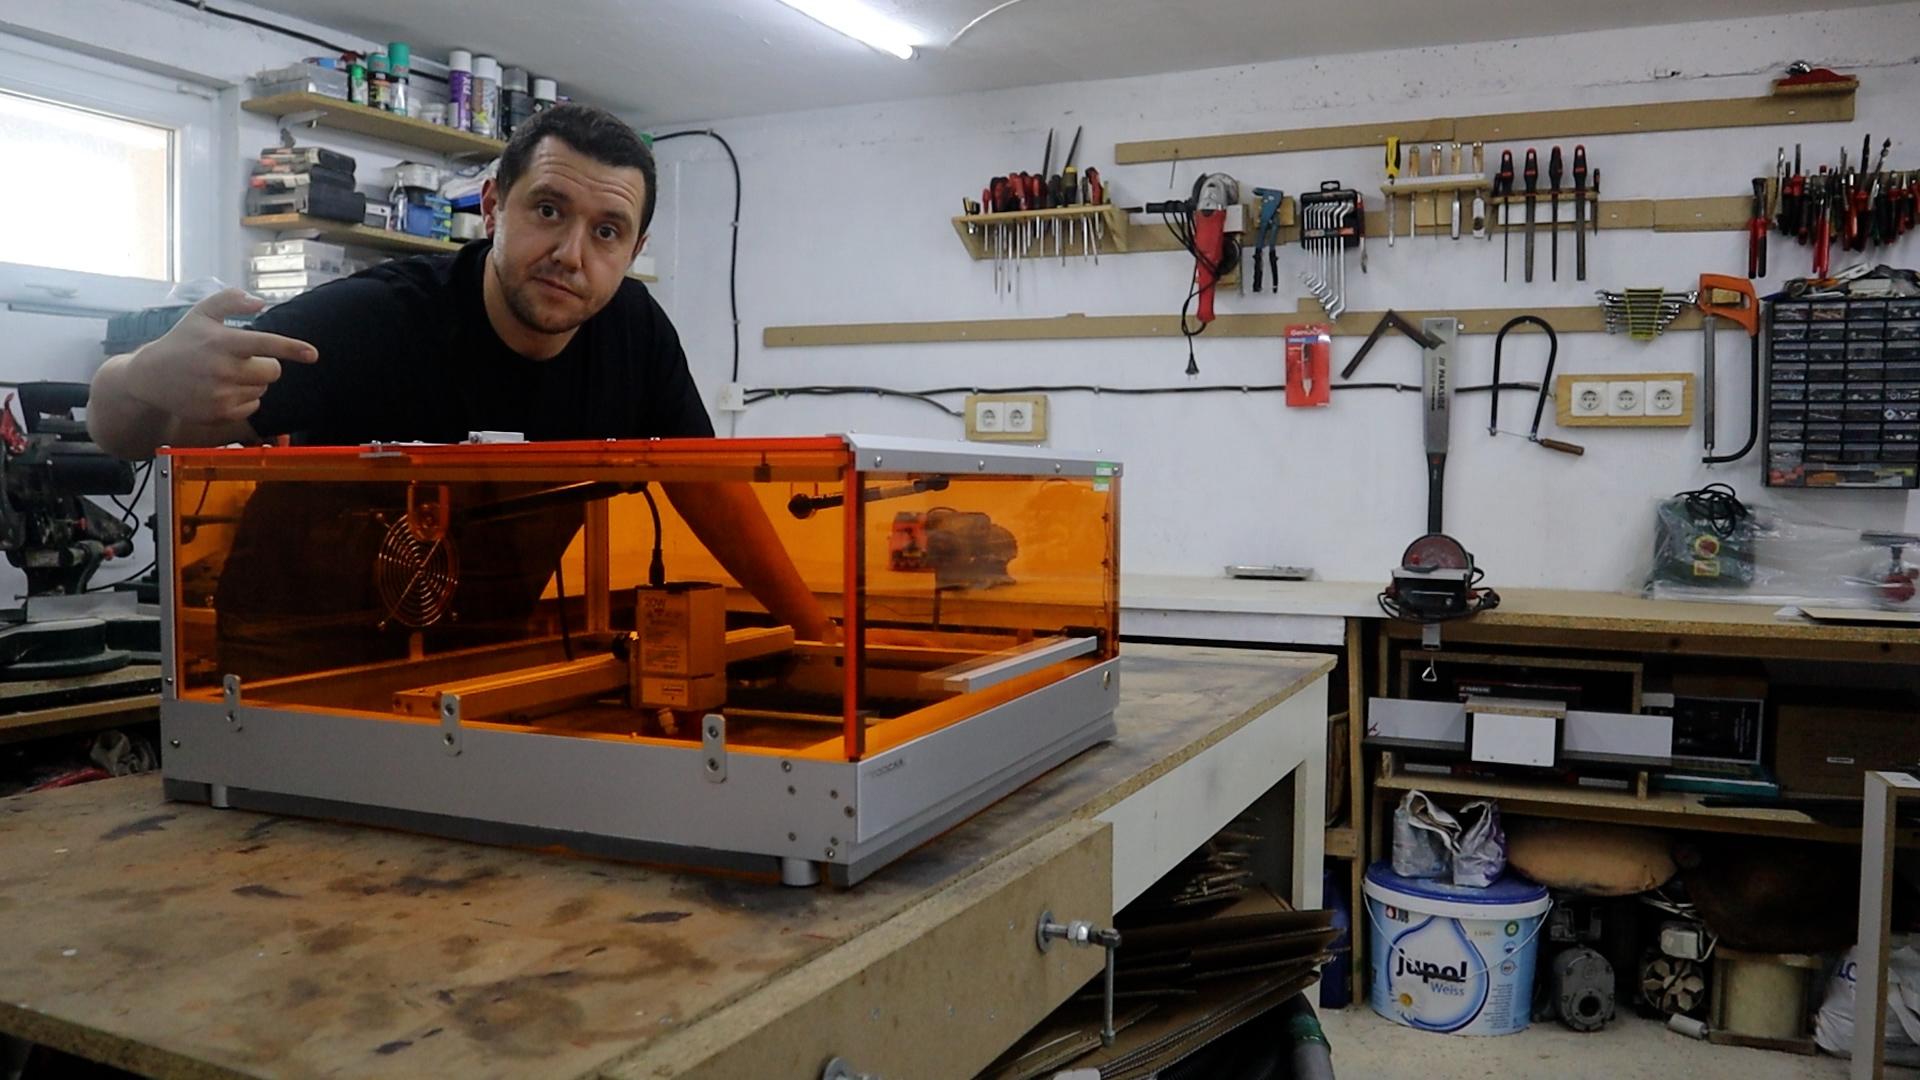
I did this project as a test for my new TOOCAA L2 laser engraver so I can see what it can do.
Supplies
Tools and materials used in the video:
NodeMCU development Board - https://s.click.aliexpress.com/e/_c36SLxyr
ESP8266 - https://s.click.aliexpress.com/e/_c4388zEj
WS2812 RGB Strip Controller - https://s.click.aliexpress.com/e/_c35rASkT
WLED Controller with microphone - https://s.click.aliexpress.com/e/_c2xMqYQP
SK6812 LED Strip - https://s.click.aliexpress.com/e/_c3SLxG2f
https://s.click.aliexpress.com/e/_c4ND8AMT
WS2812 LED Strip - https://s.click.aliexpress.com/e/_c45DhkuF
Black Acrylic - https://s.click.aliexpress.com/e/_c30quoOn
Design and Cut the Acrylic Faceplate

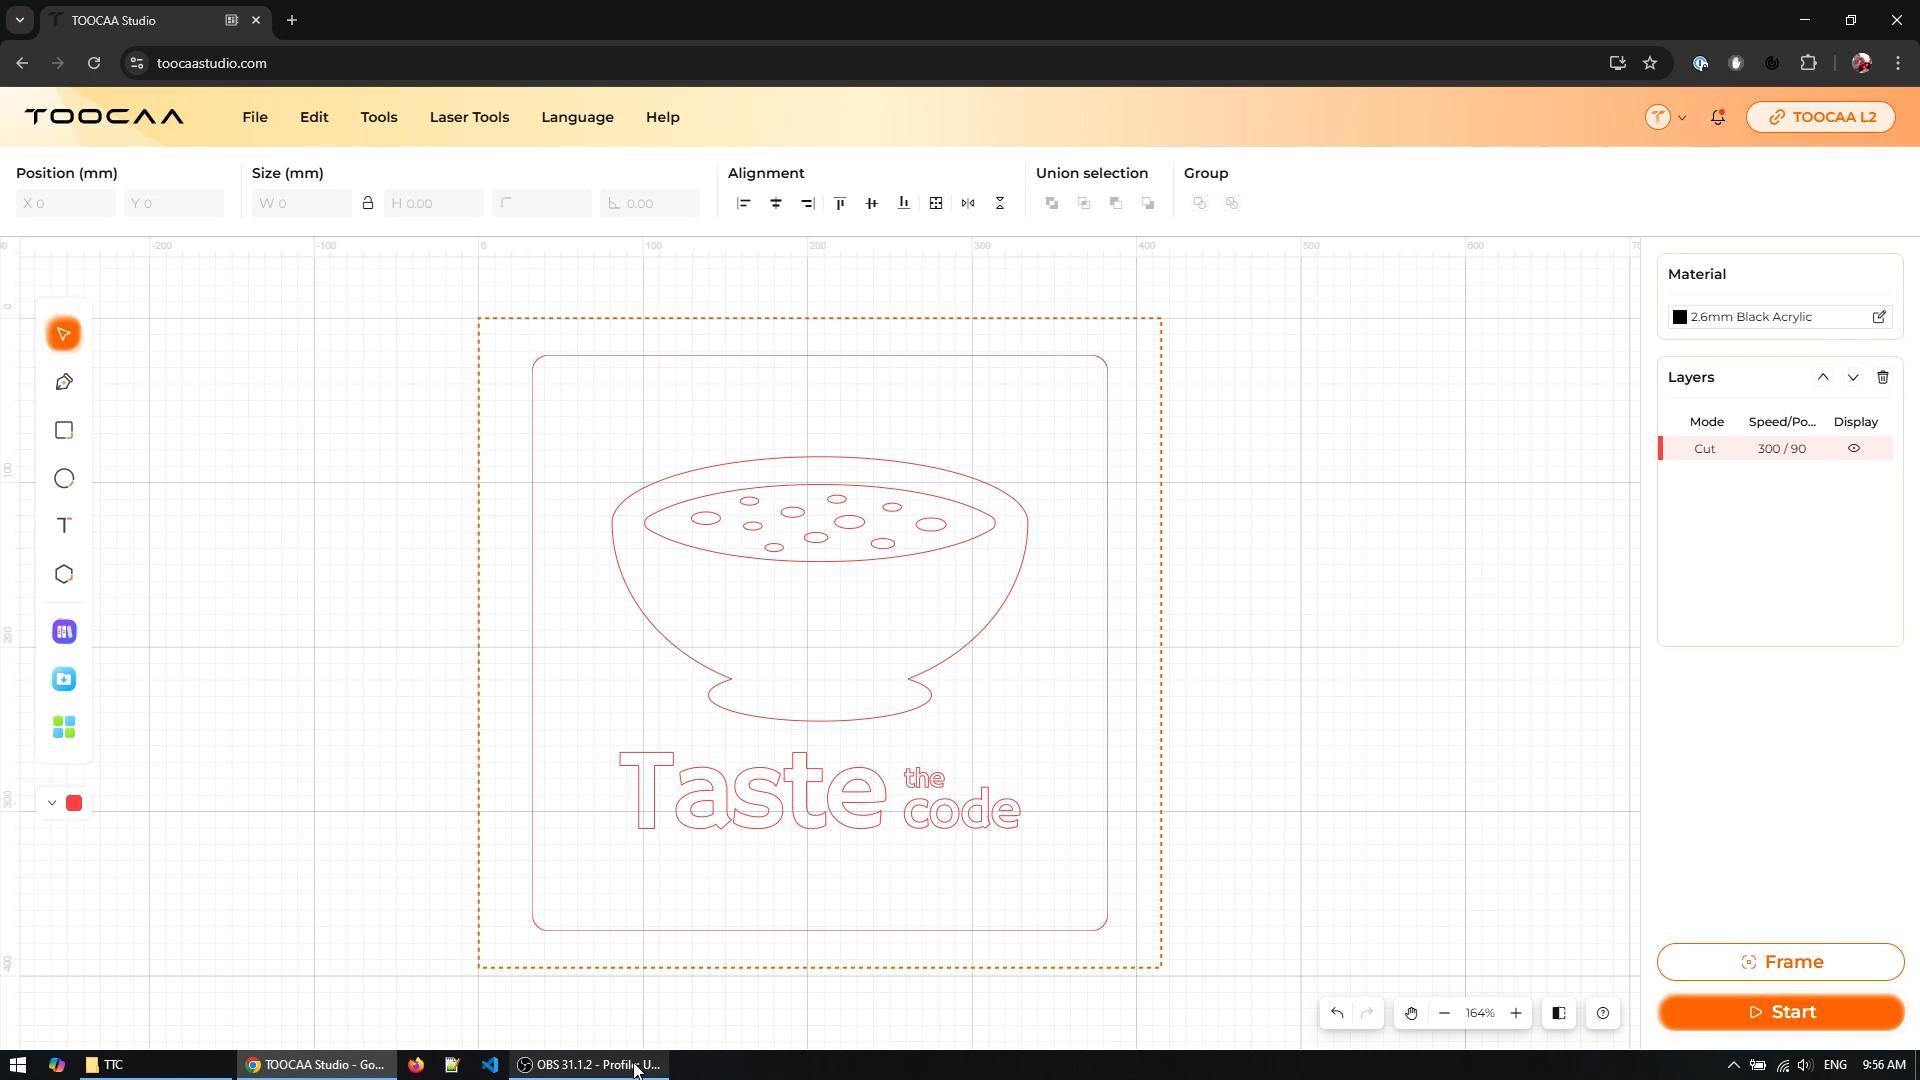
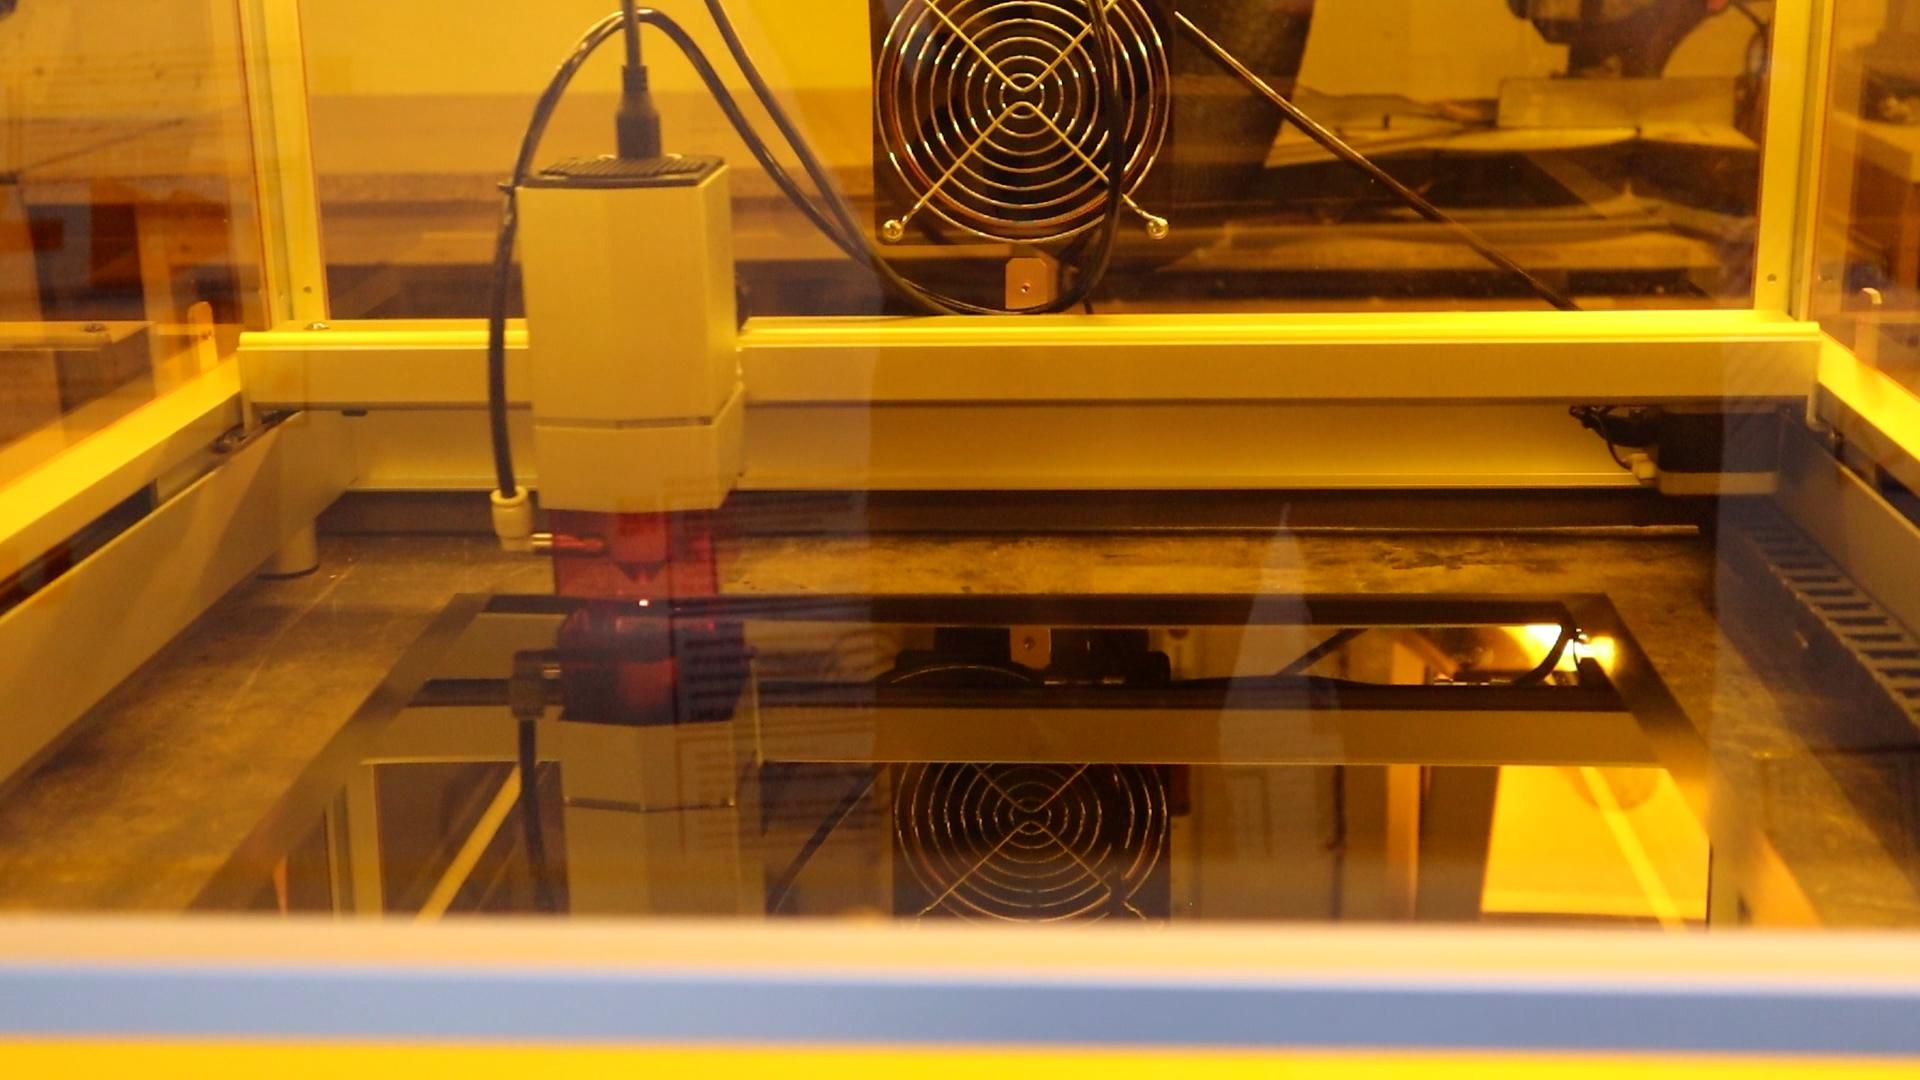
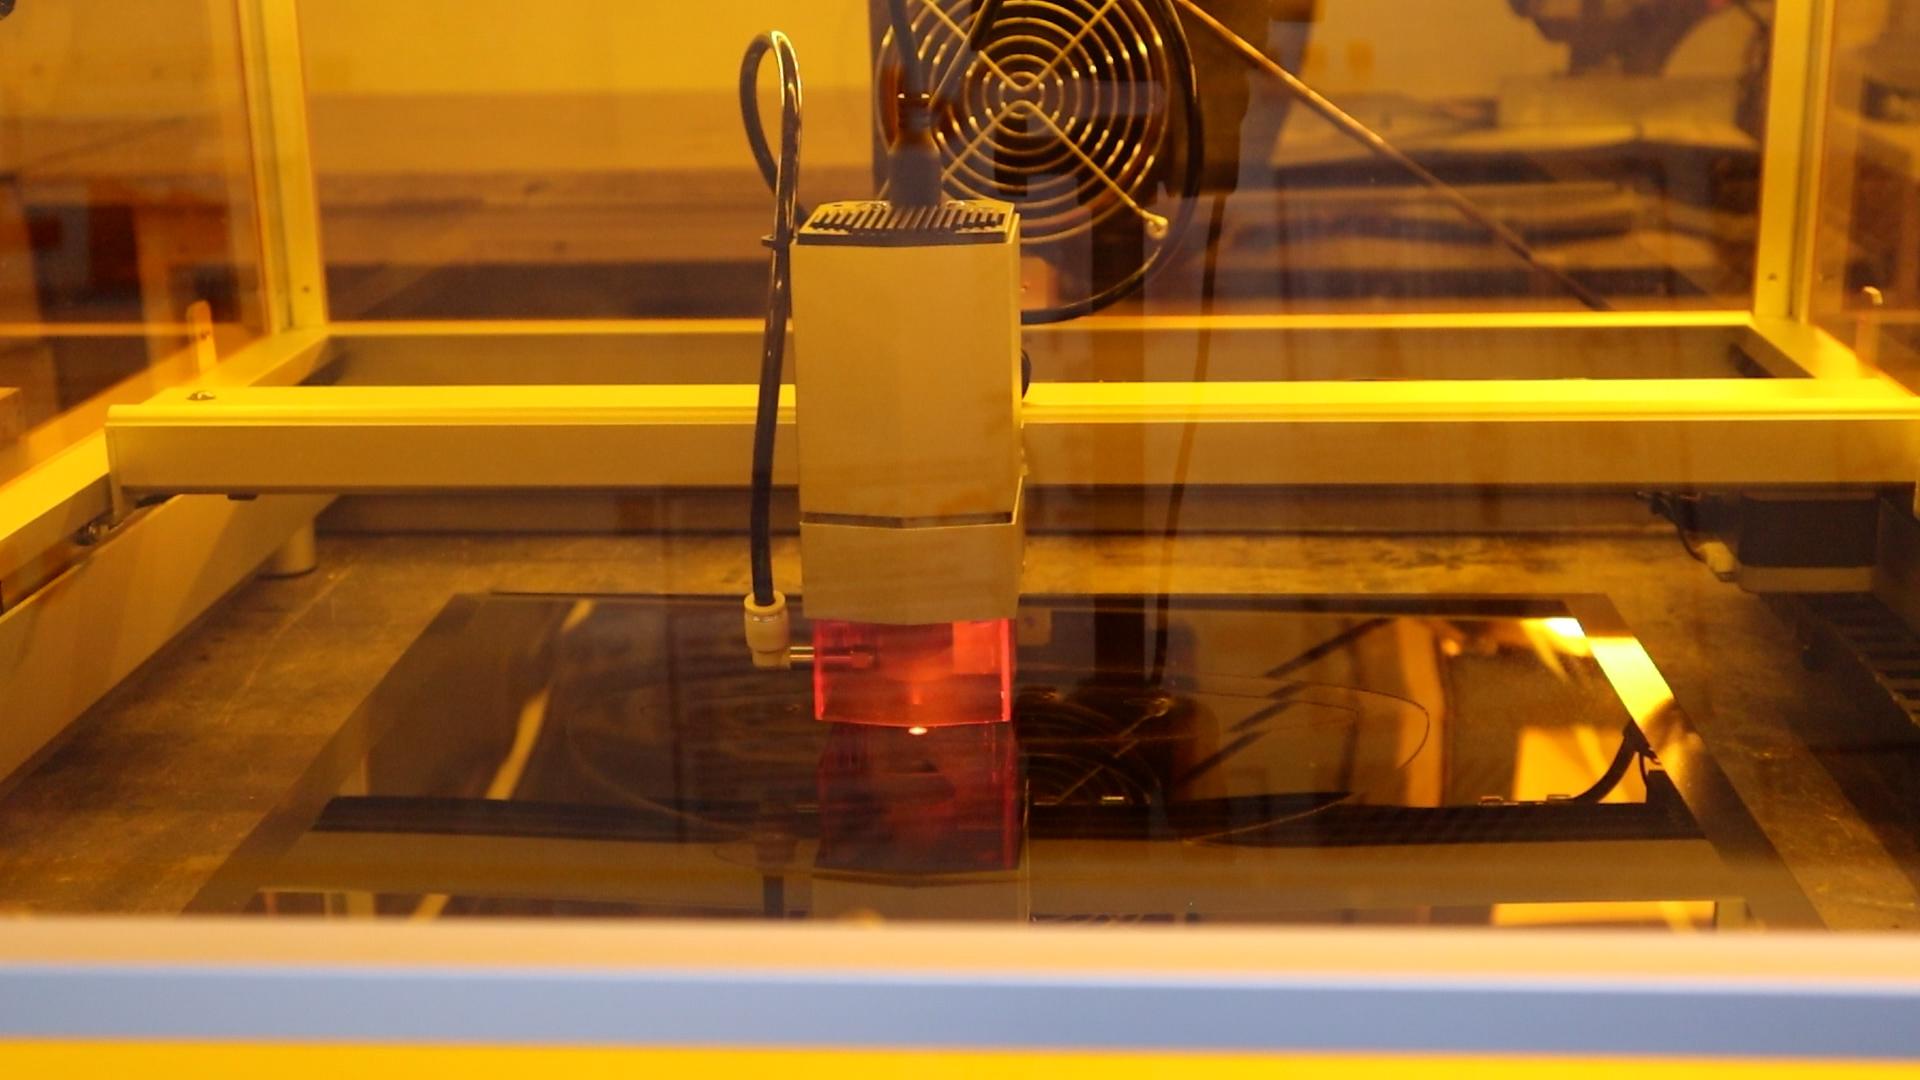

The most important part of the sign is the front panel, which I cut from a sheet of black acrylic using my laser cutter.
First, I designed the layout on my computer, creating the text and logo I wanted for my workshop. Once the design was ready, I placed the acrylic sheet flat on the laser bed. The first thing I always do is run a 'framing' command, which moves the laser head around the outline of my design without cutting. This lets me double-check that the entire design is positioned correctly on the material.
When I was happy with the placement, I started the cutting process. I had to run the laser over the intricate lettering twice to make sure every piece was completely freed from the sheet.
A crucial step I learned is to always set the laser's focus correctly using the levers on the side of the head to this ensures a clean, sharp cut and prevents burnt edges.
Assemble the Sign Box Frame


With the acrylic faceplate ready, I started building the box that would house everything.
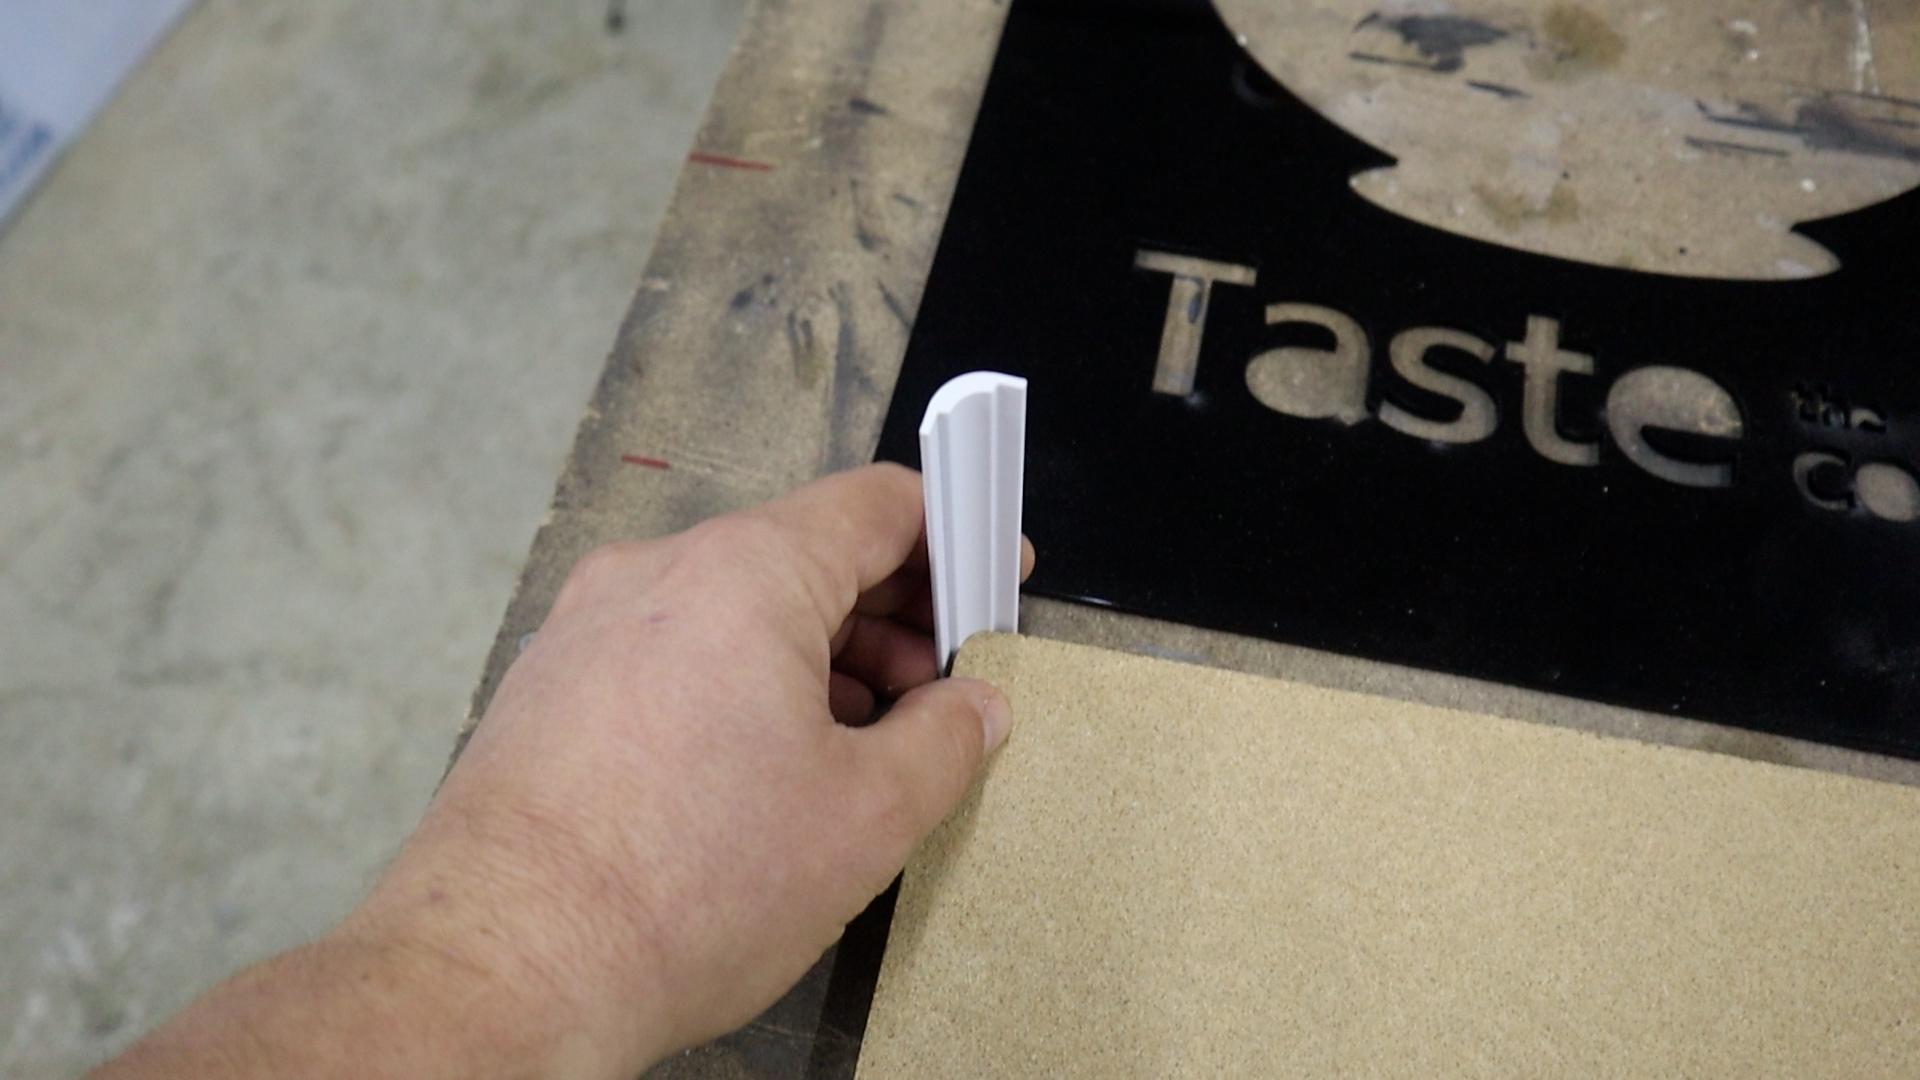
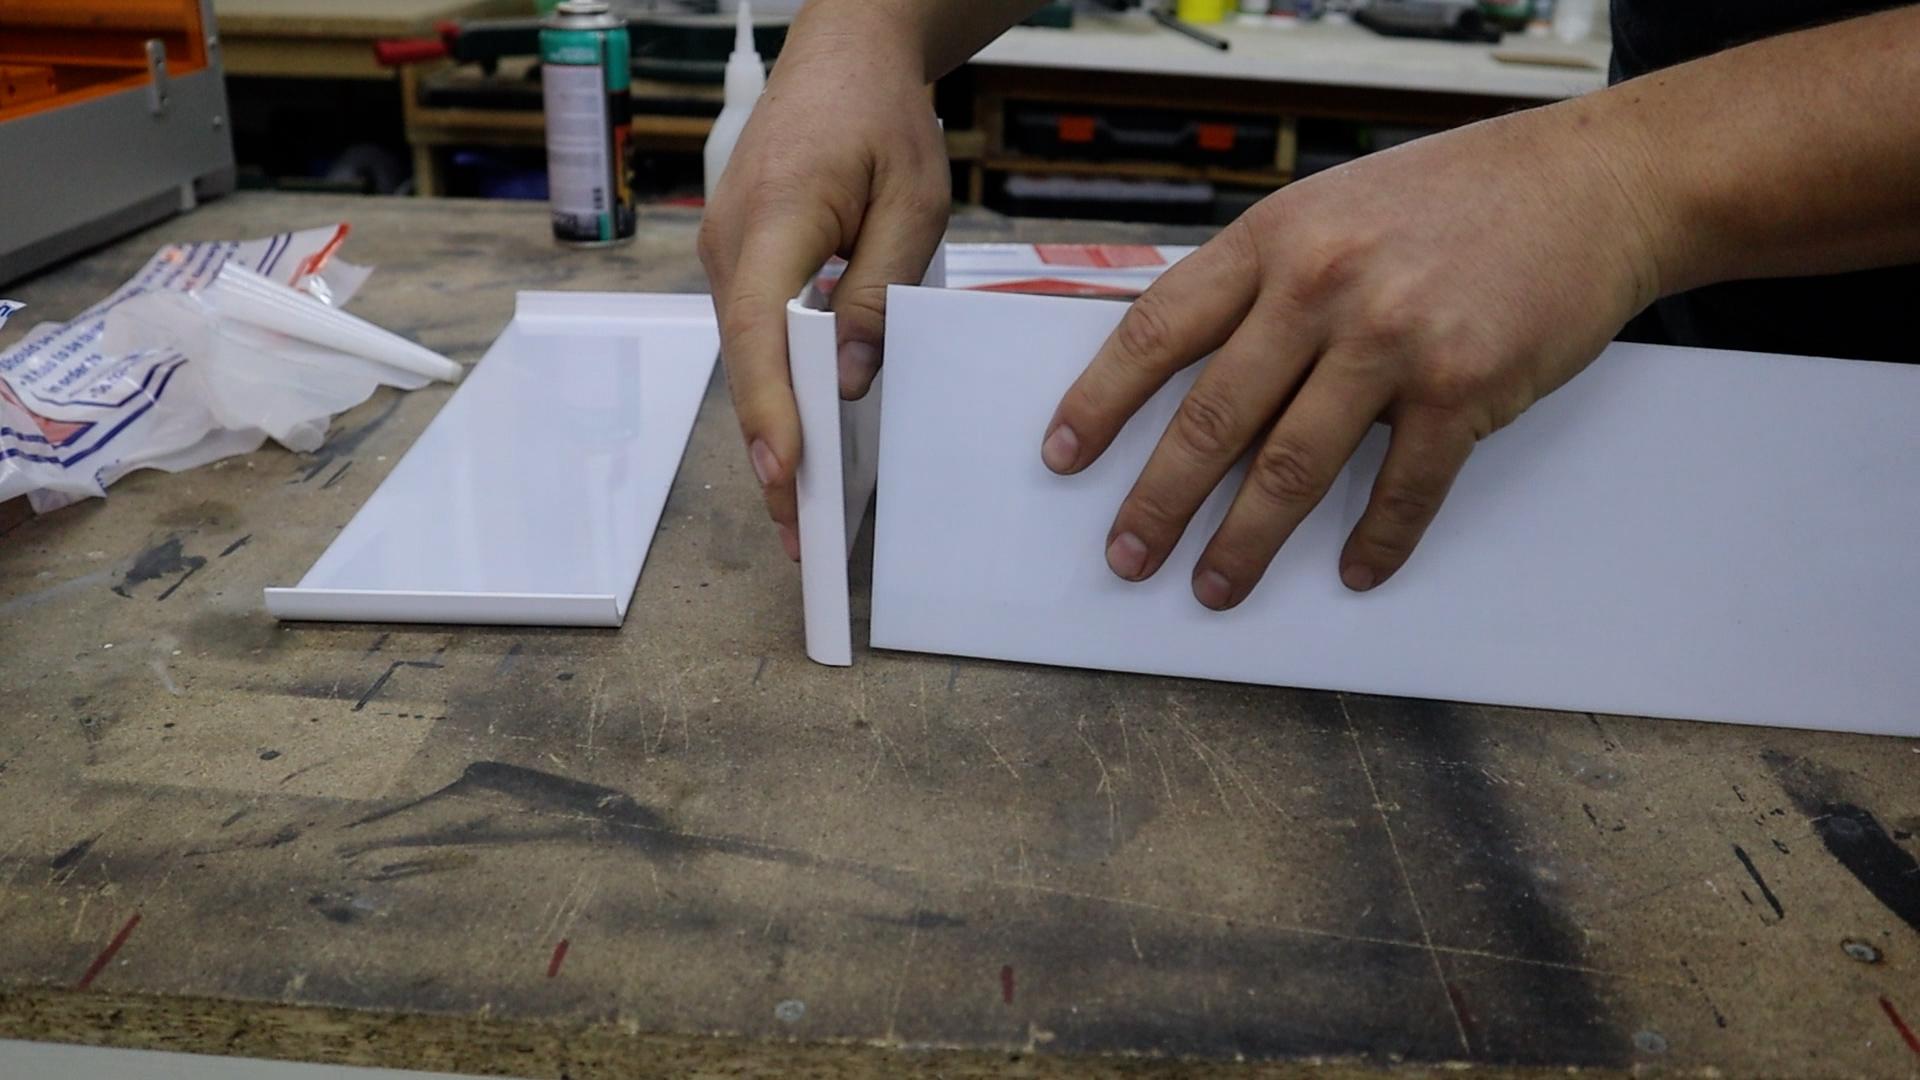
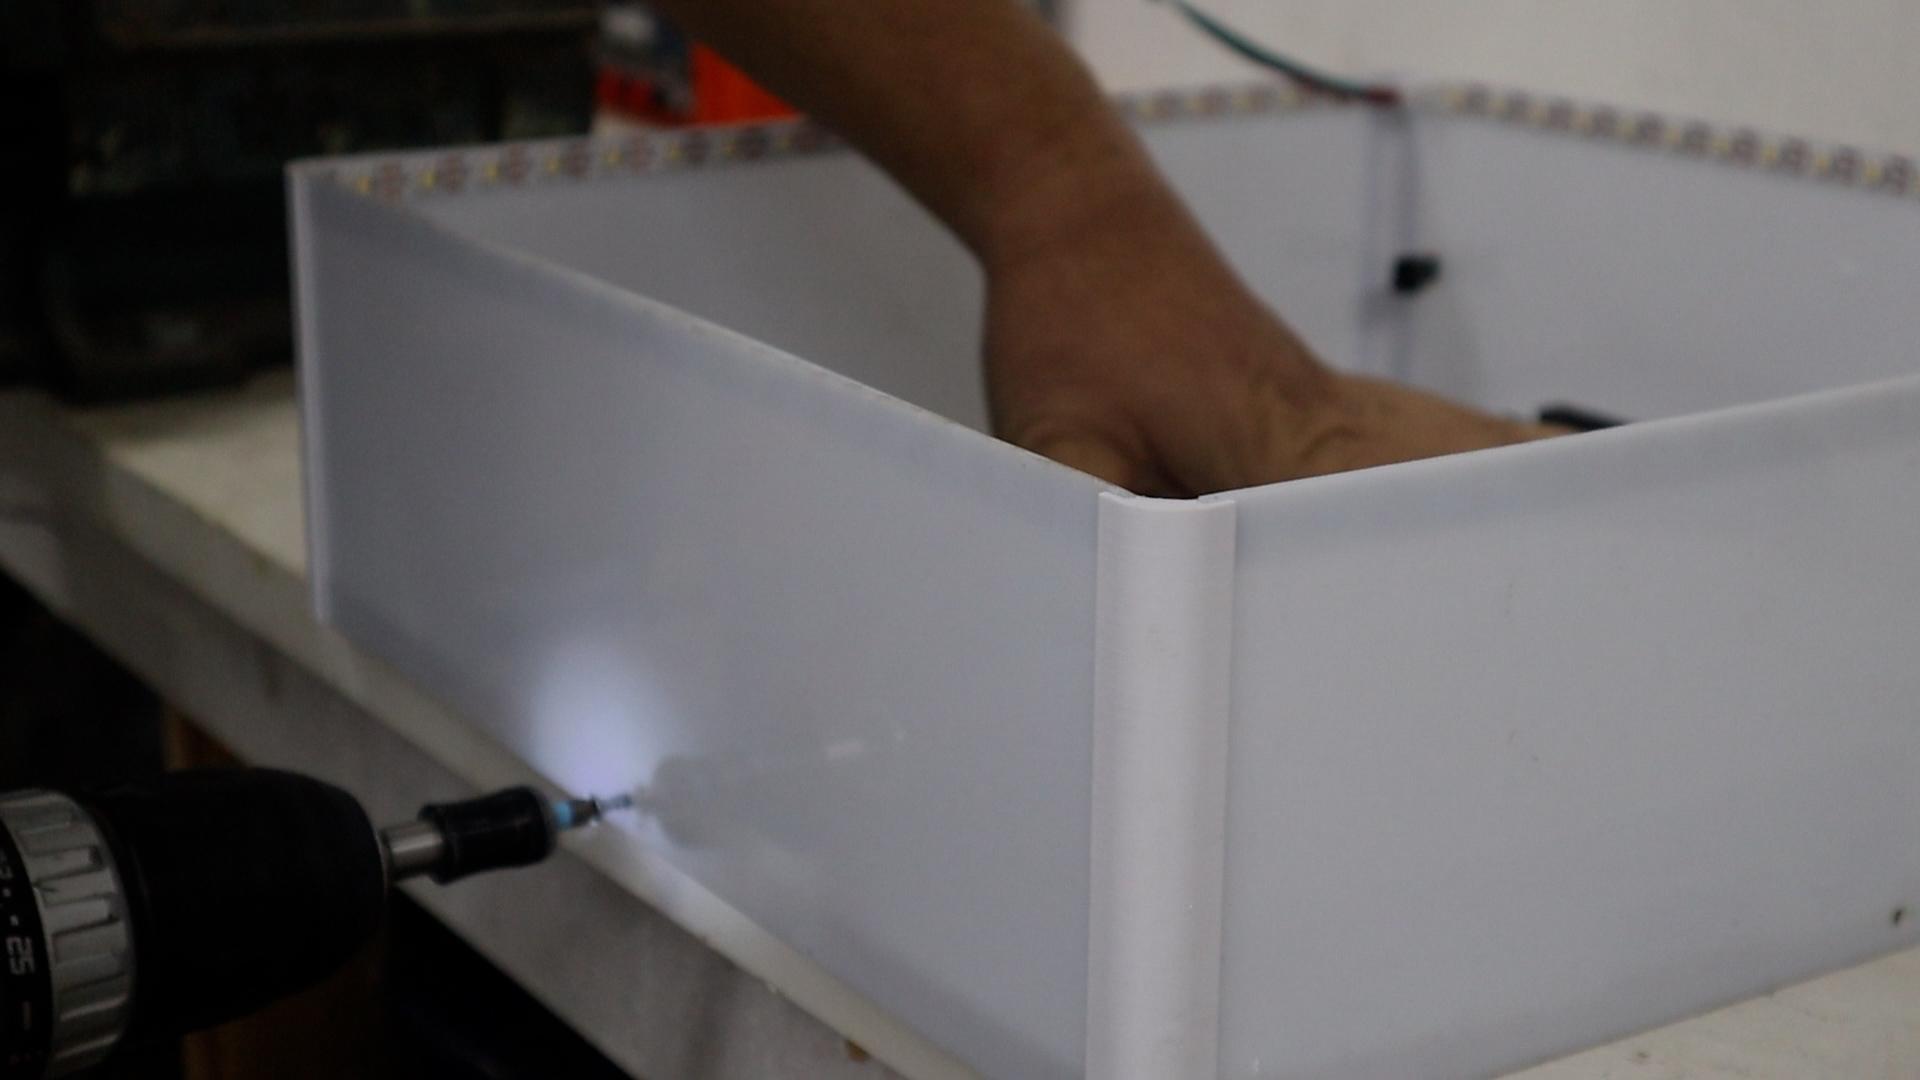
I used white acrylic for the sides and 3D-printed some simple corner brackets to hold the frame together securely.
I began by gluing the side pieces into these corner brackets, building a simple but sturdy rectangular frame. This method makes the assembly very straightforward and ensures all your corners are perfectly square.
Next, I prepared the backing for the front cover. I wanted the inside of the sign to be visible, so I used a piece of transparent acrylic. I glued this clear sheet on the back of the front piece, which gives the backing some rigidity and a place where I can later glue in the floating pieces from my logo.
Add the Decorative Internal Backing
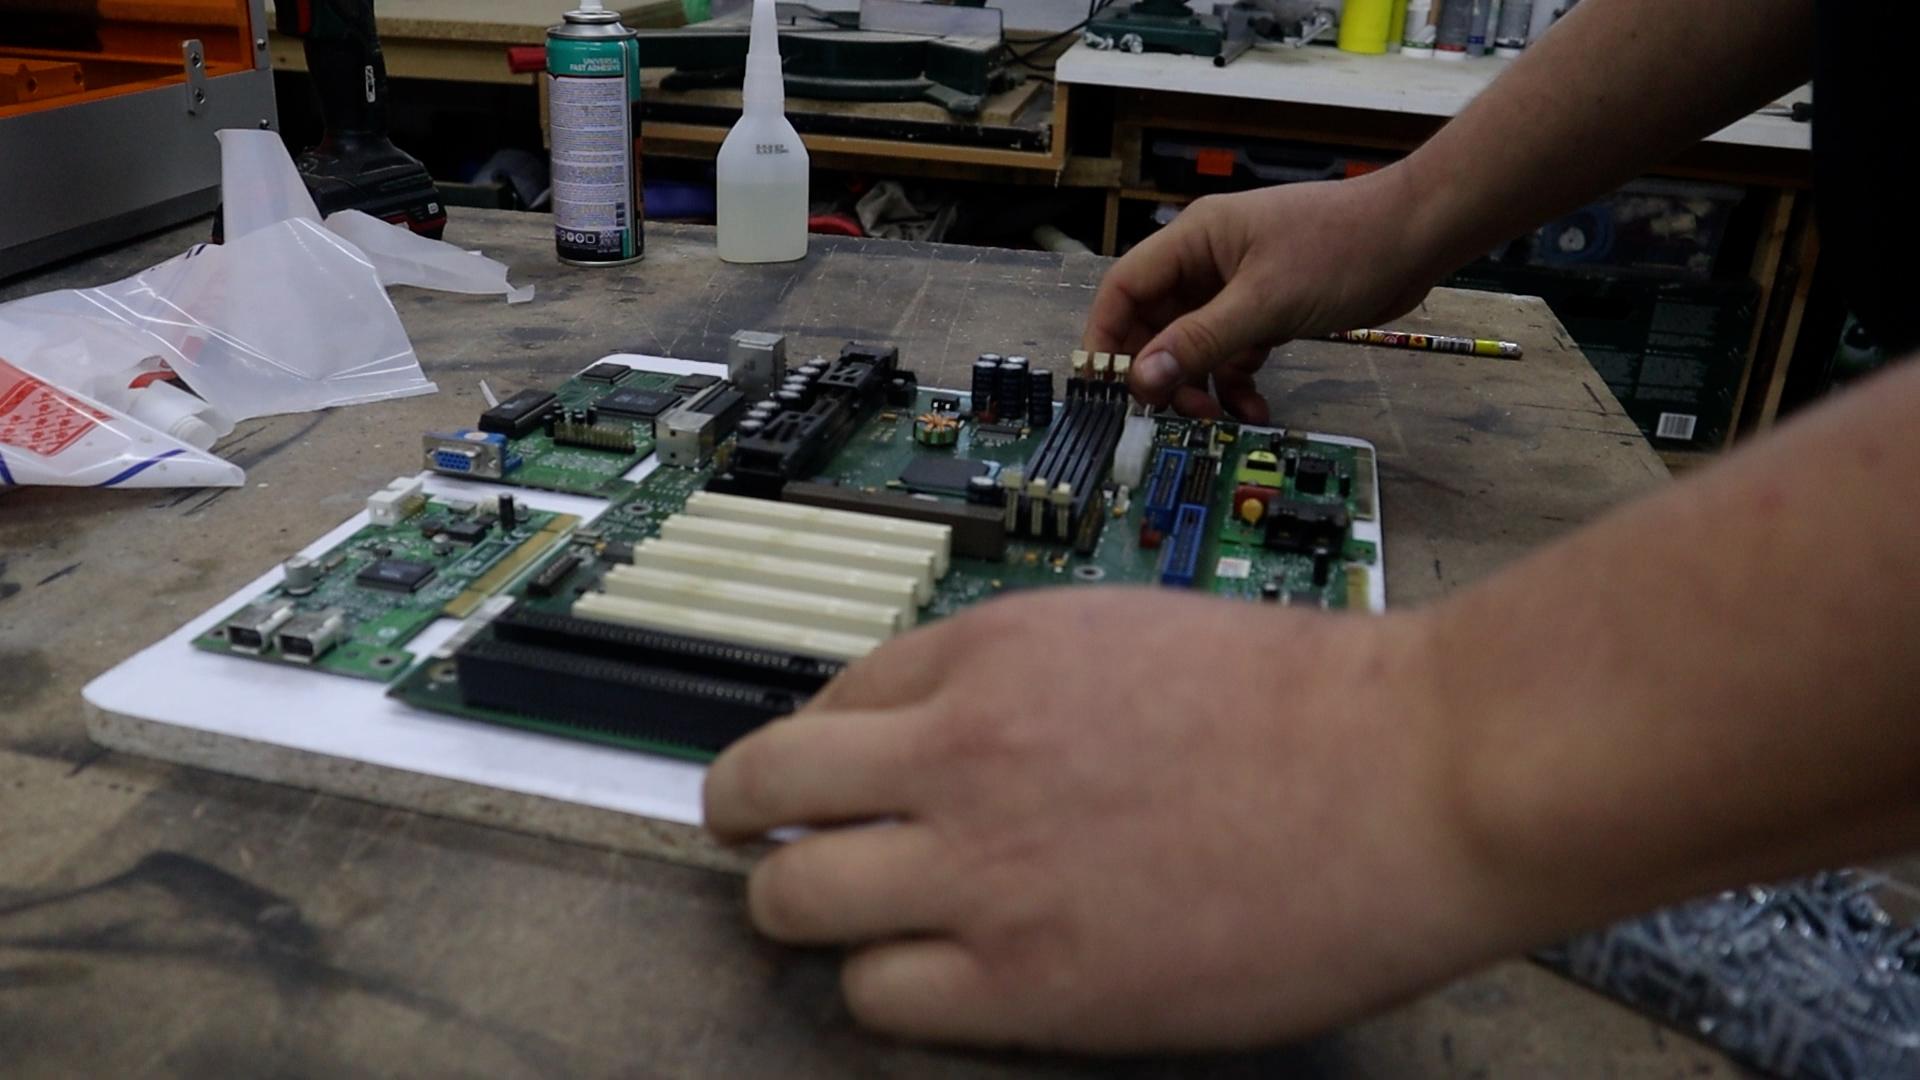

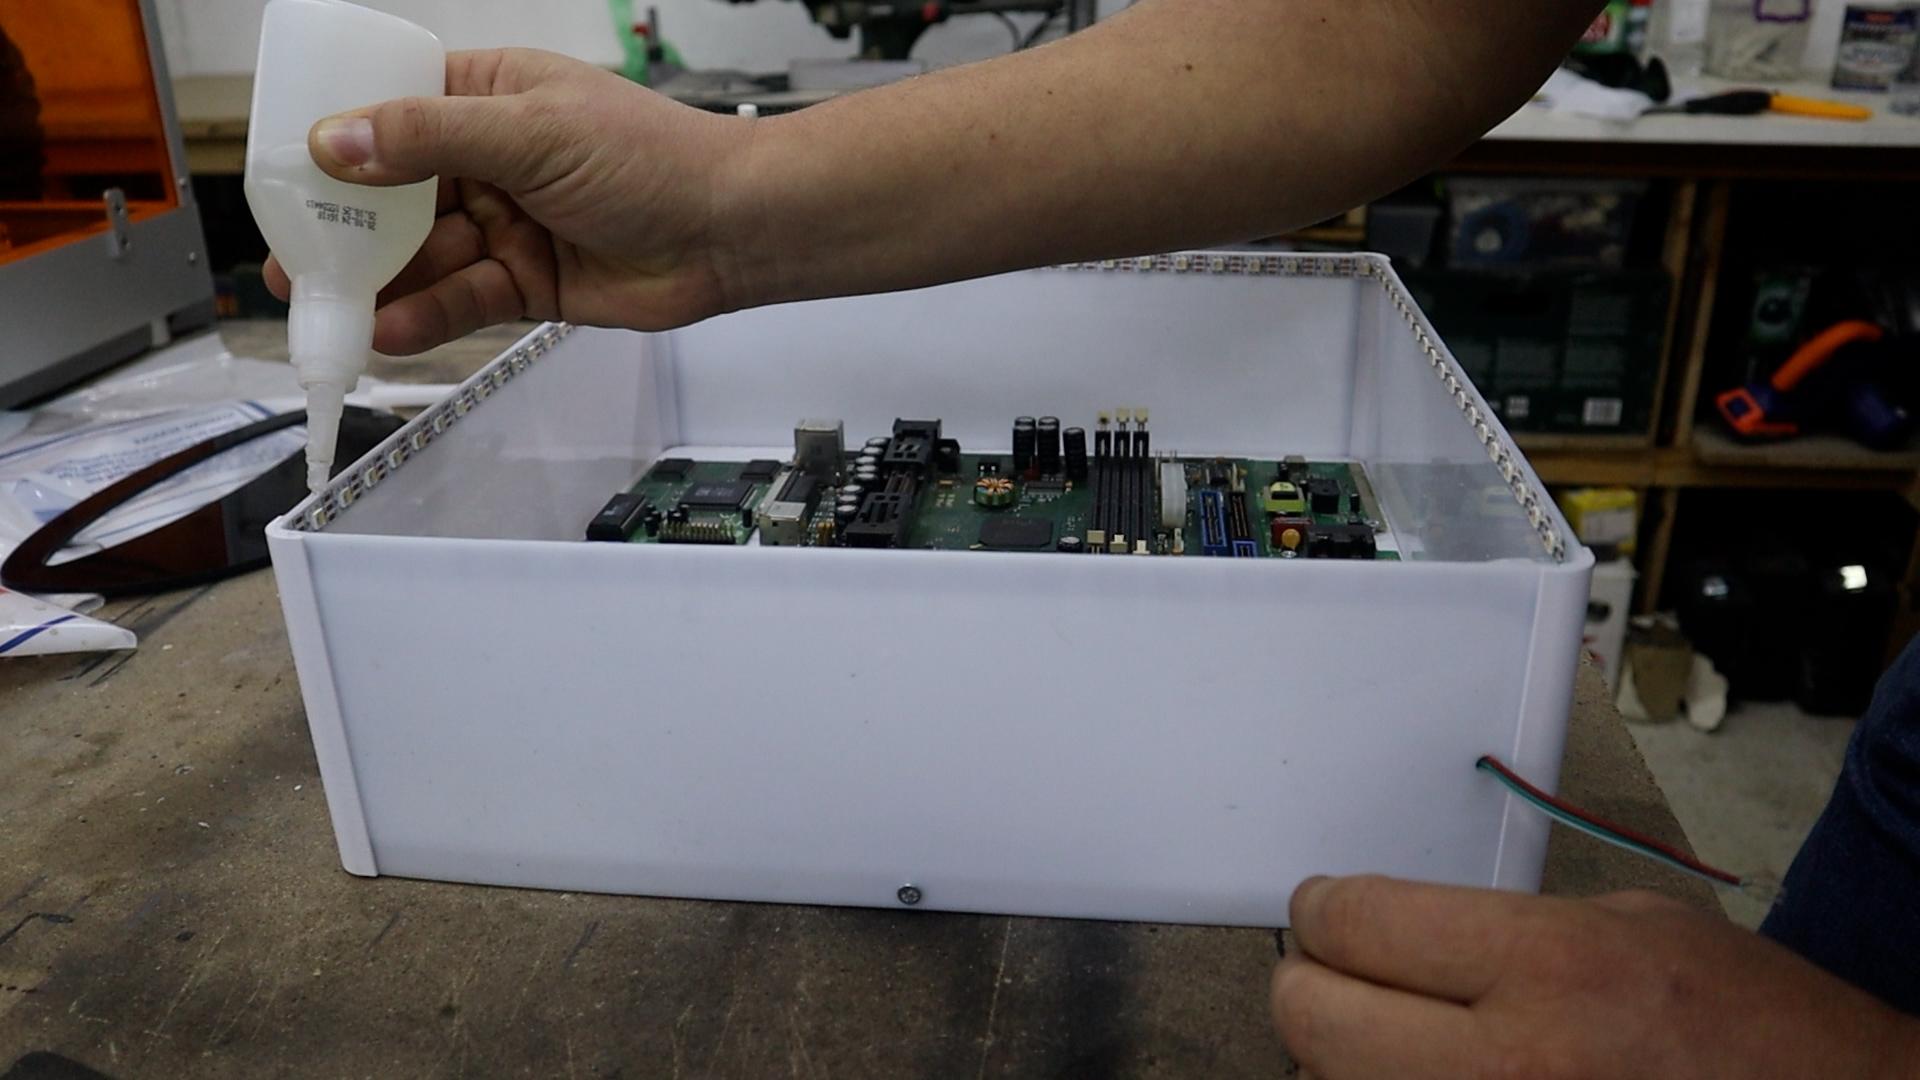
With the box frame assembled, the next step was to create the visual interest inside the sign.
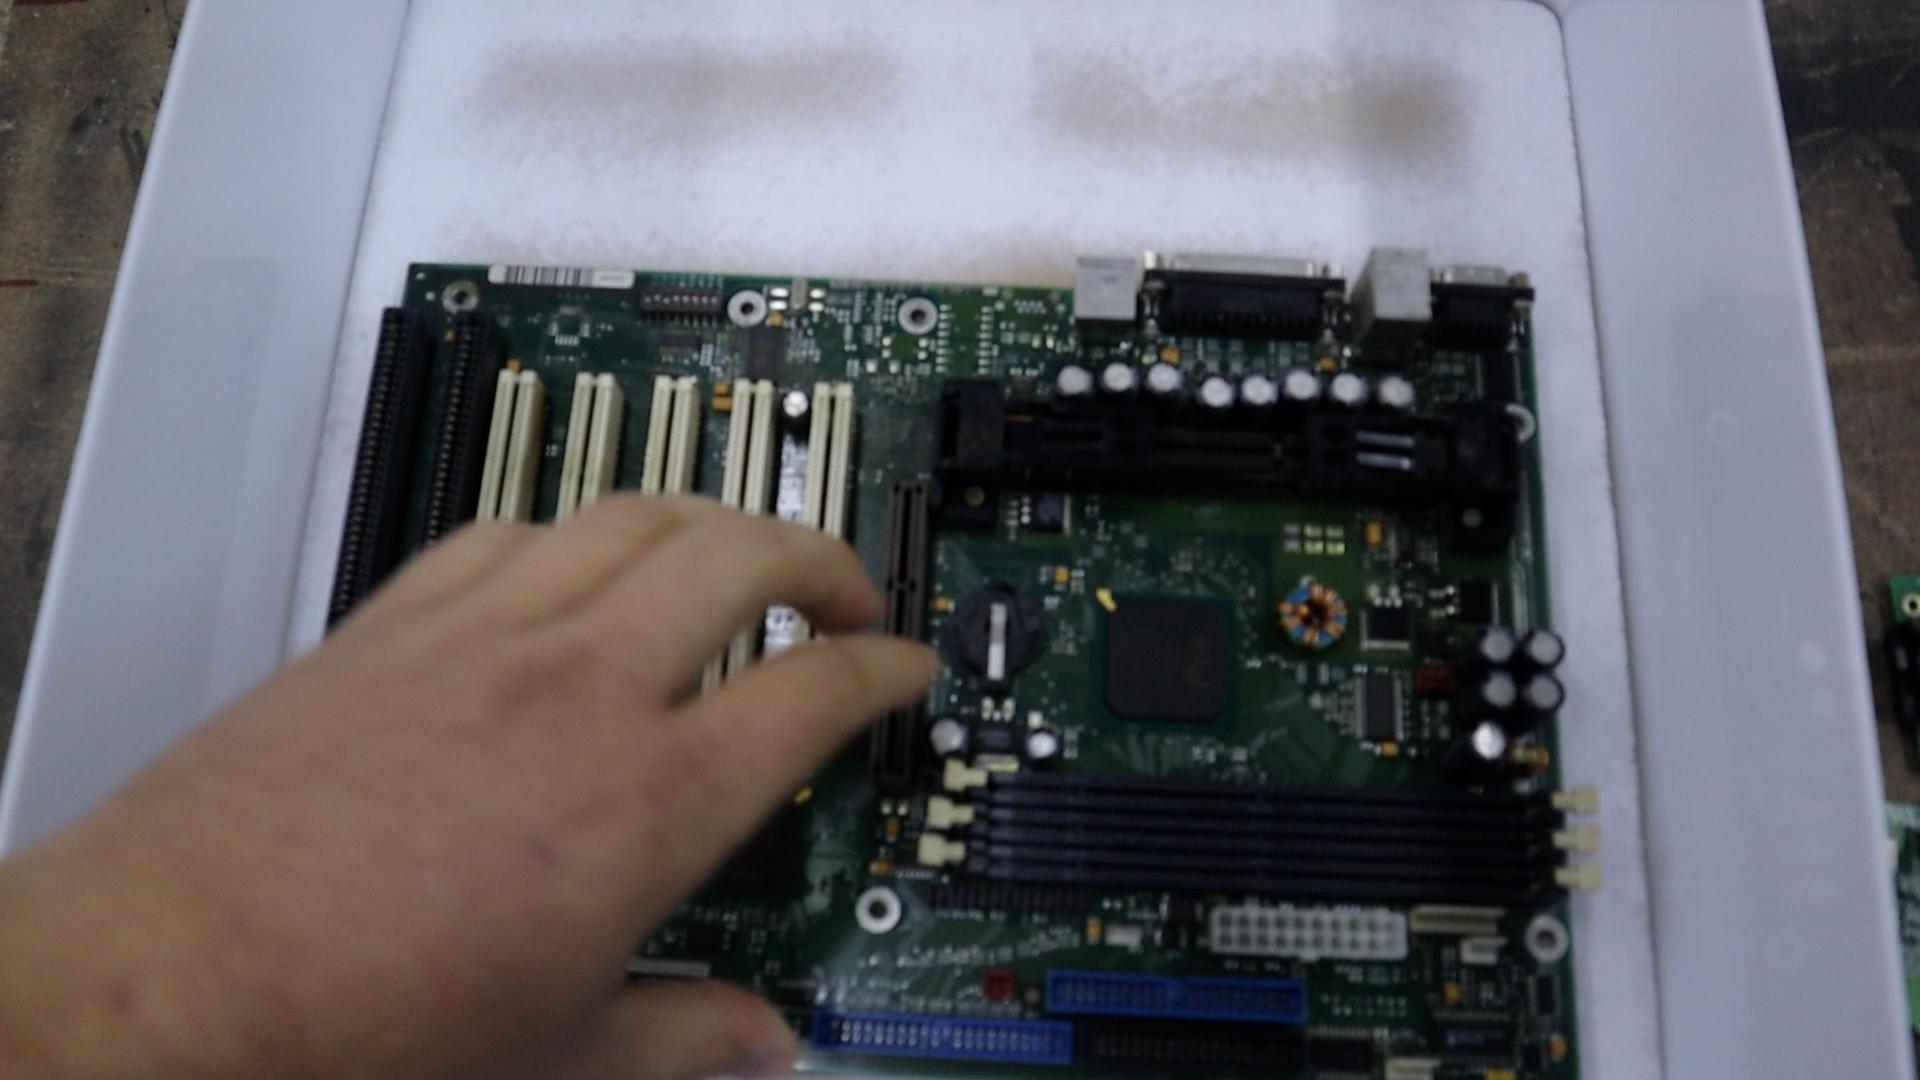
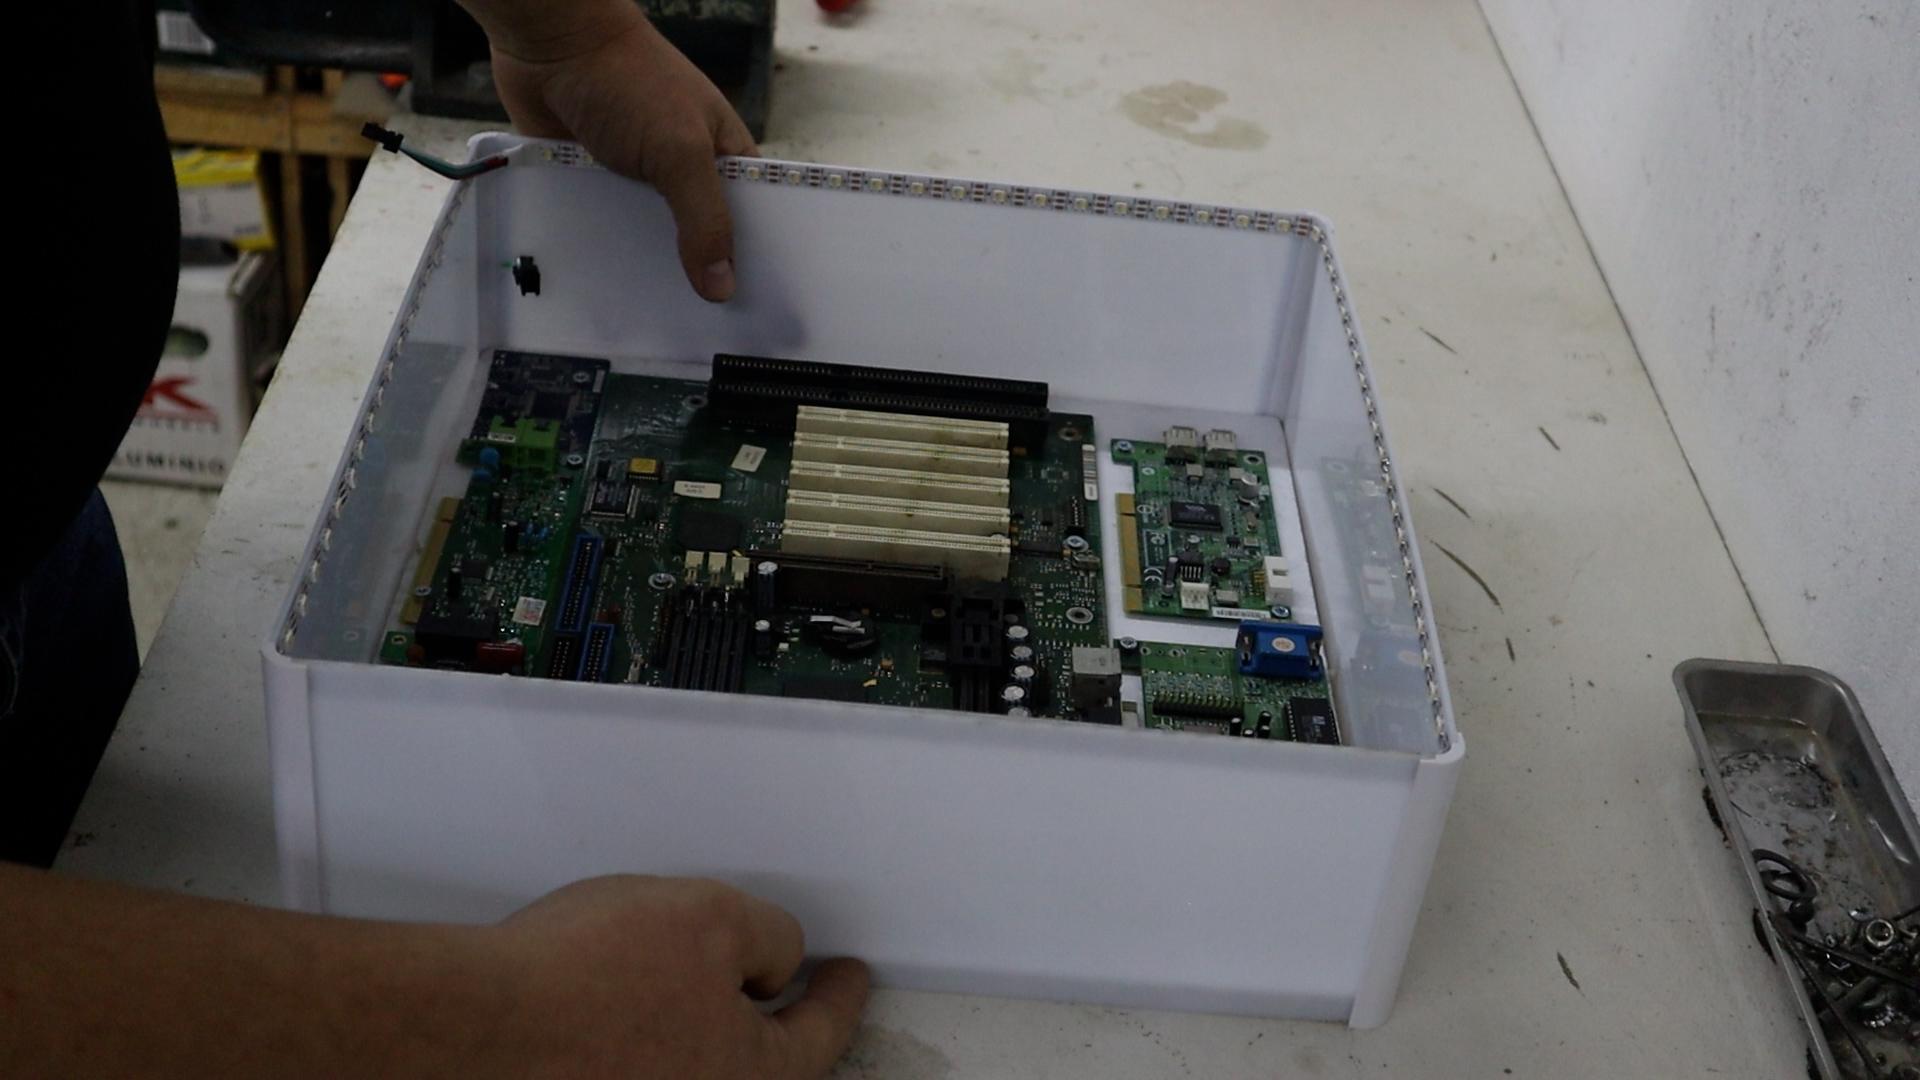
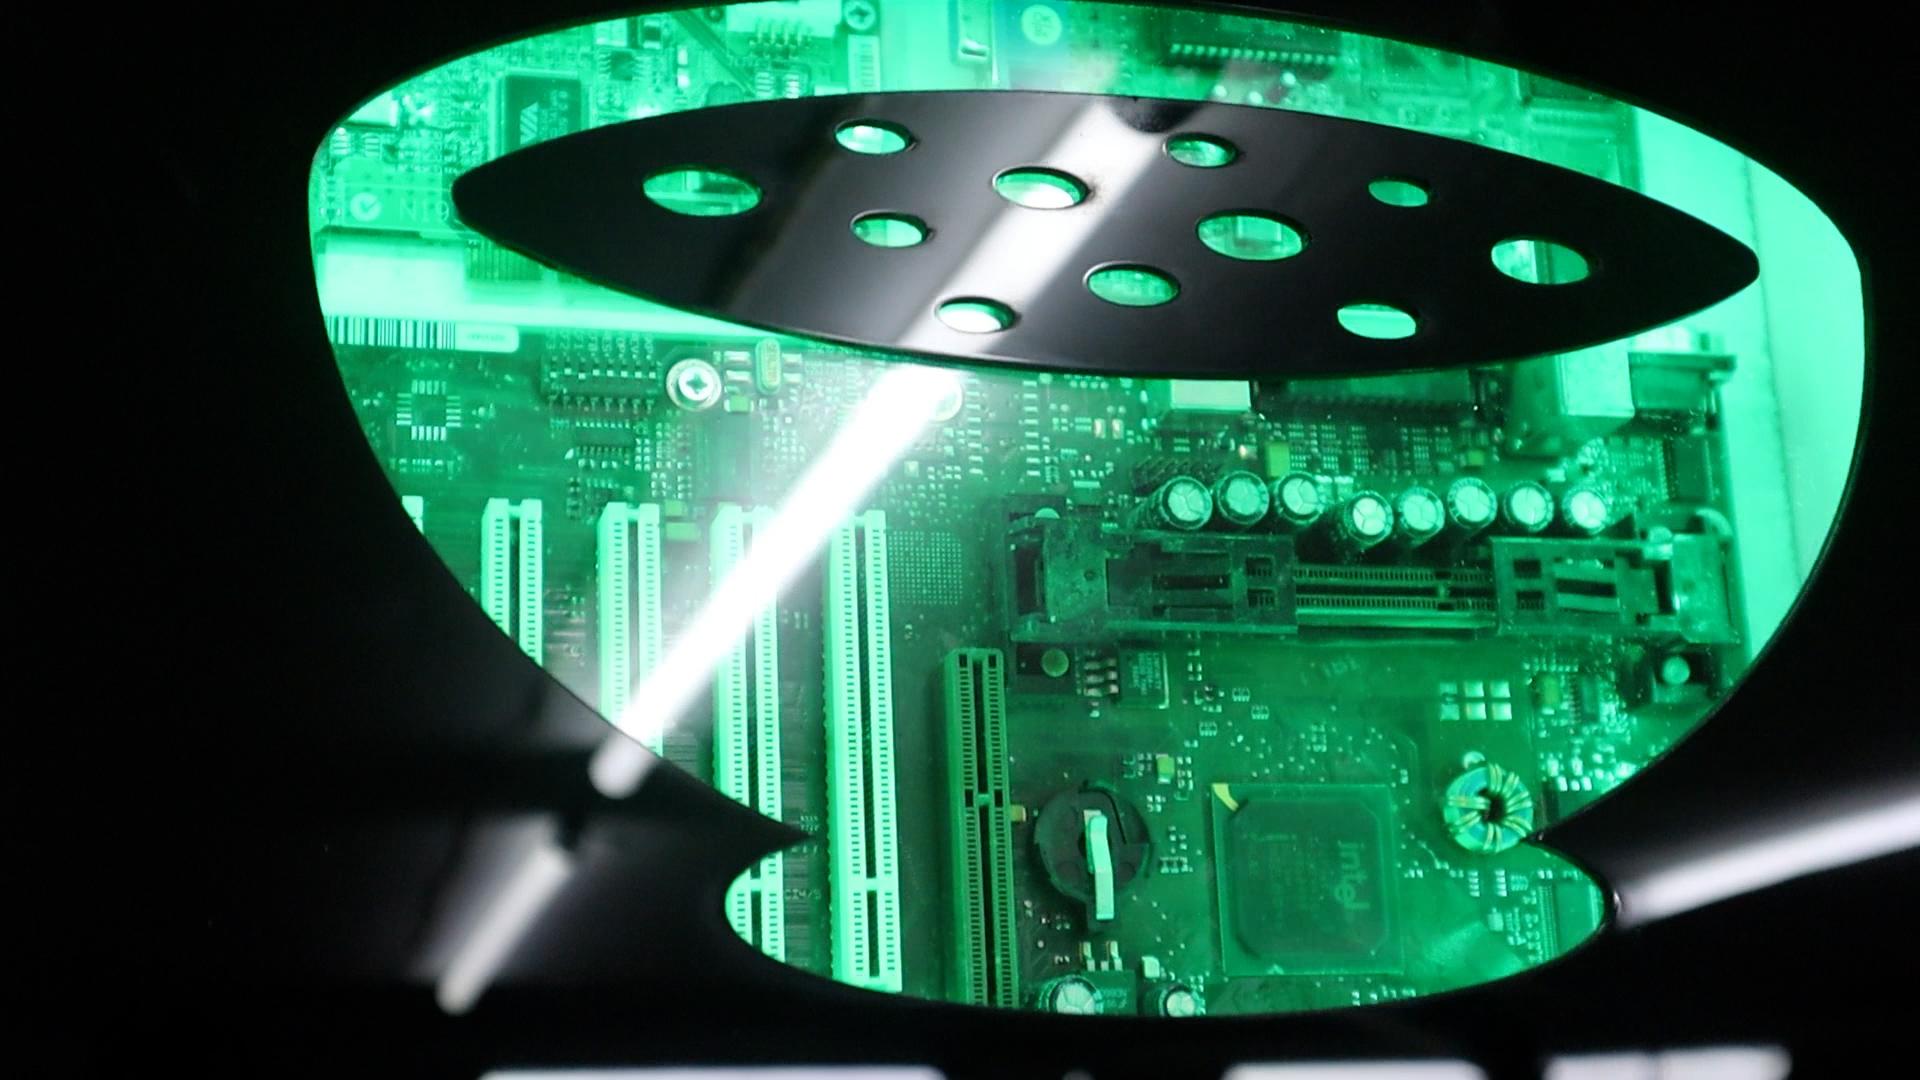
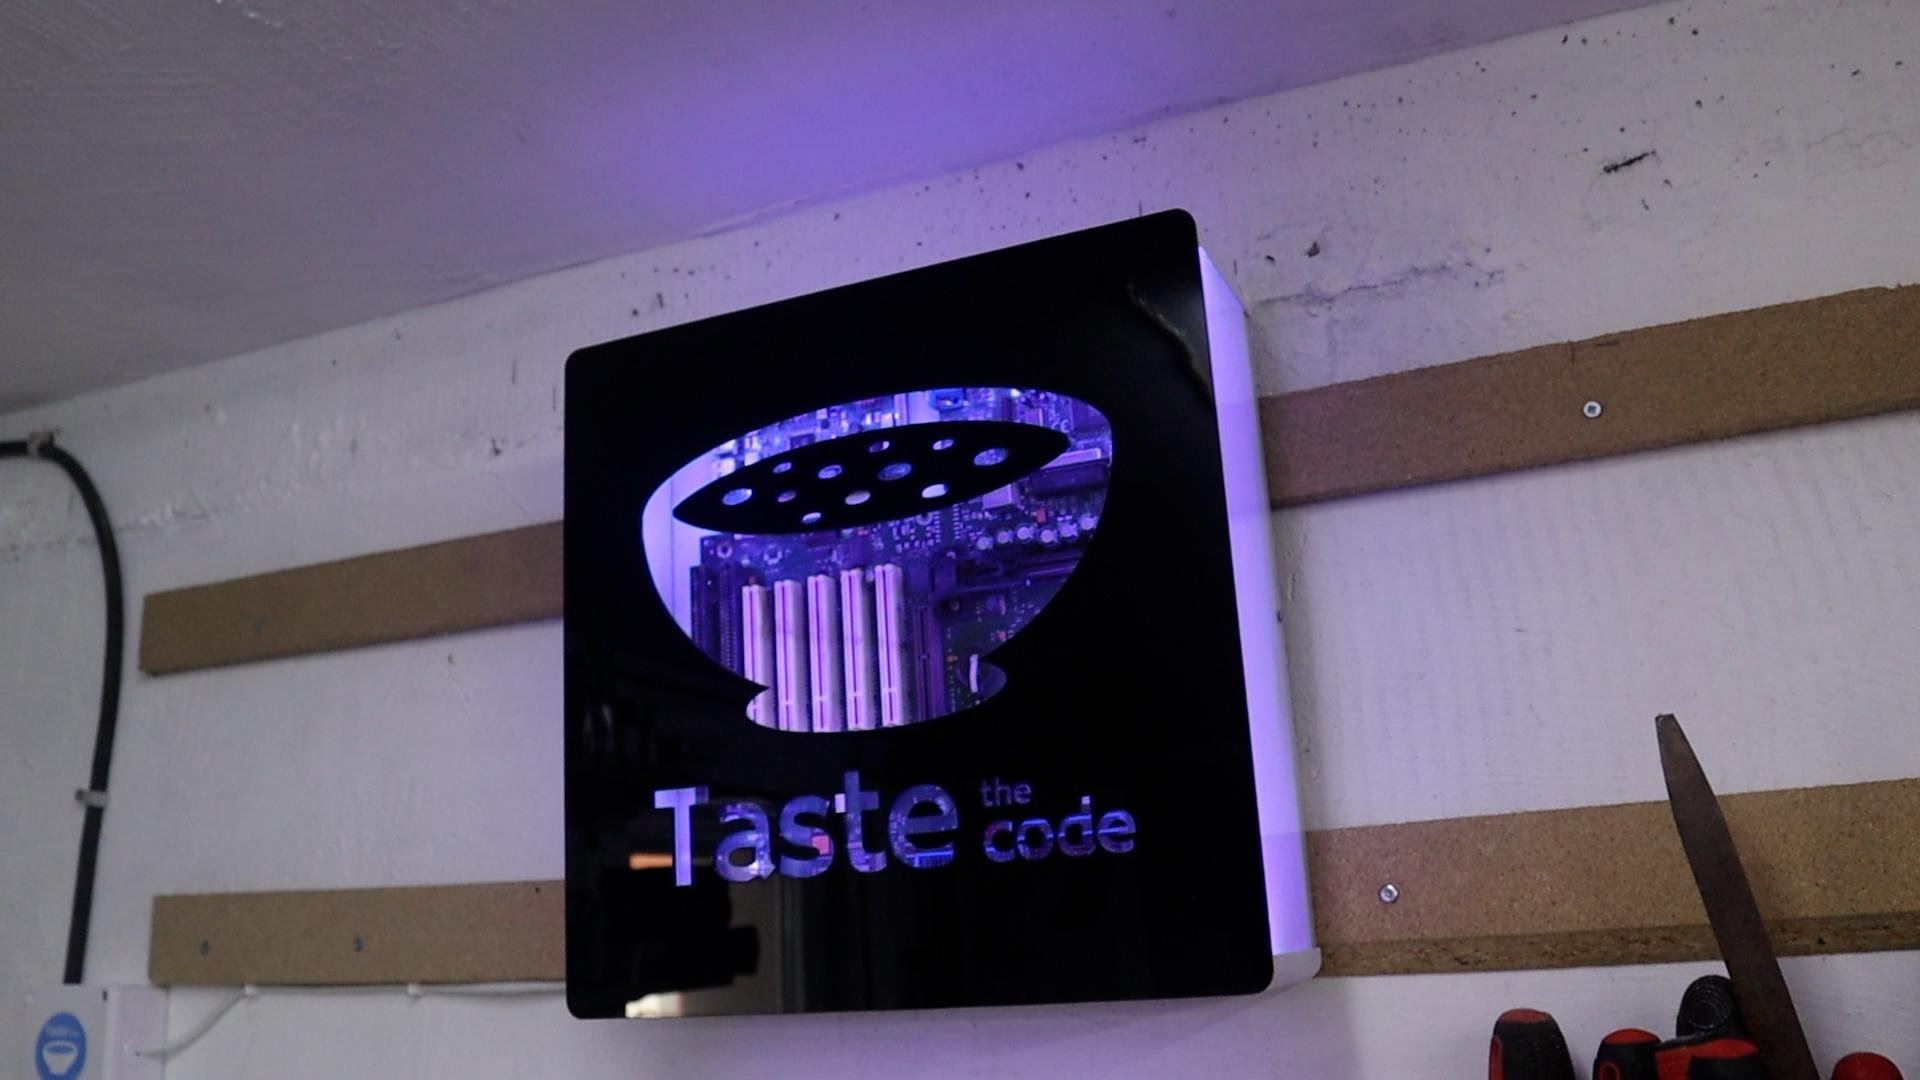
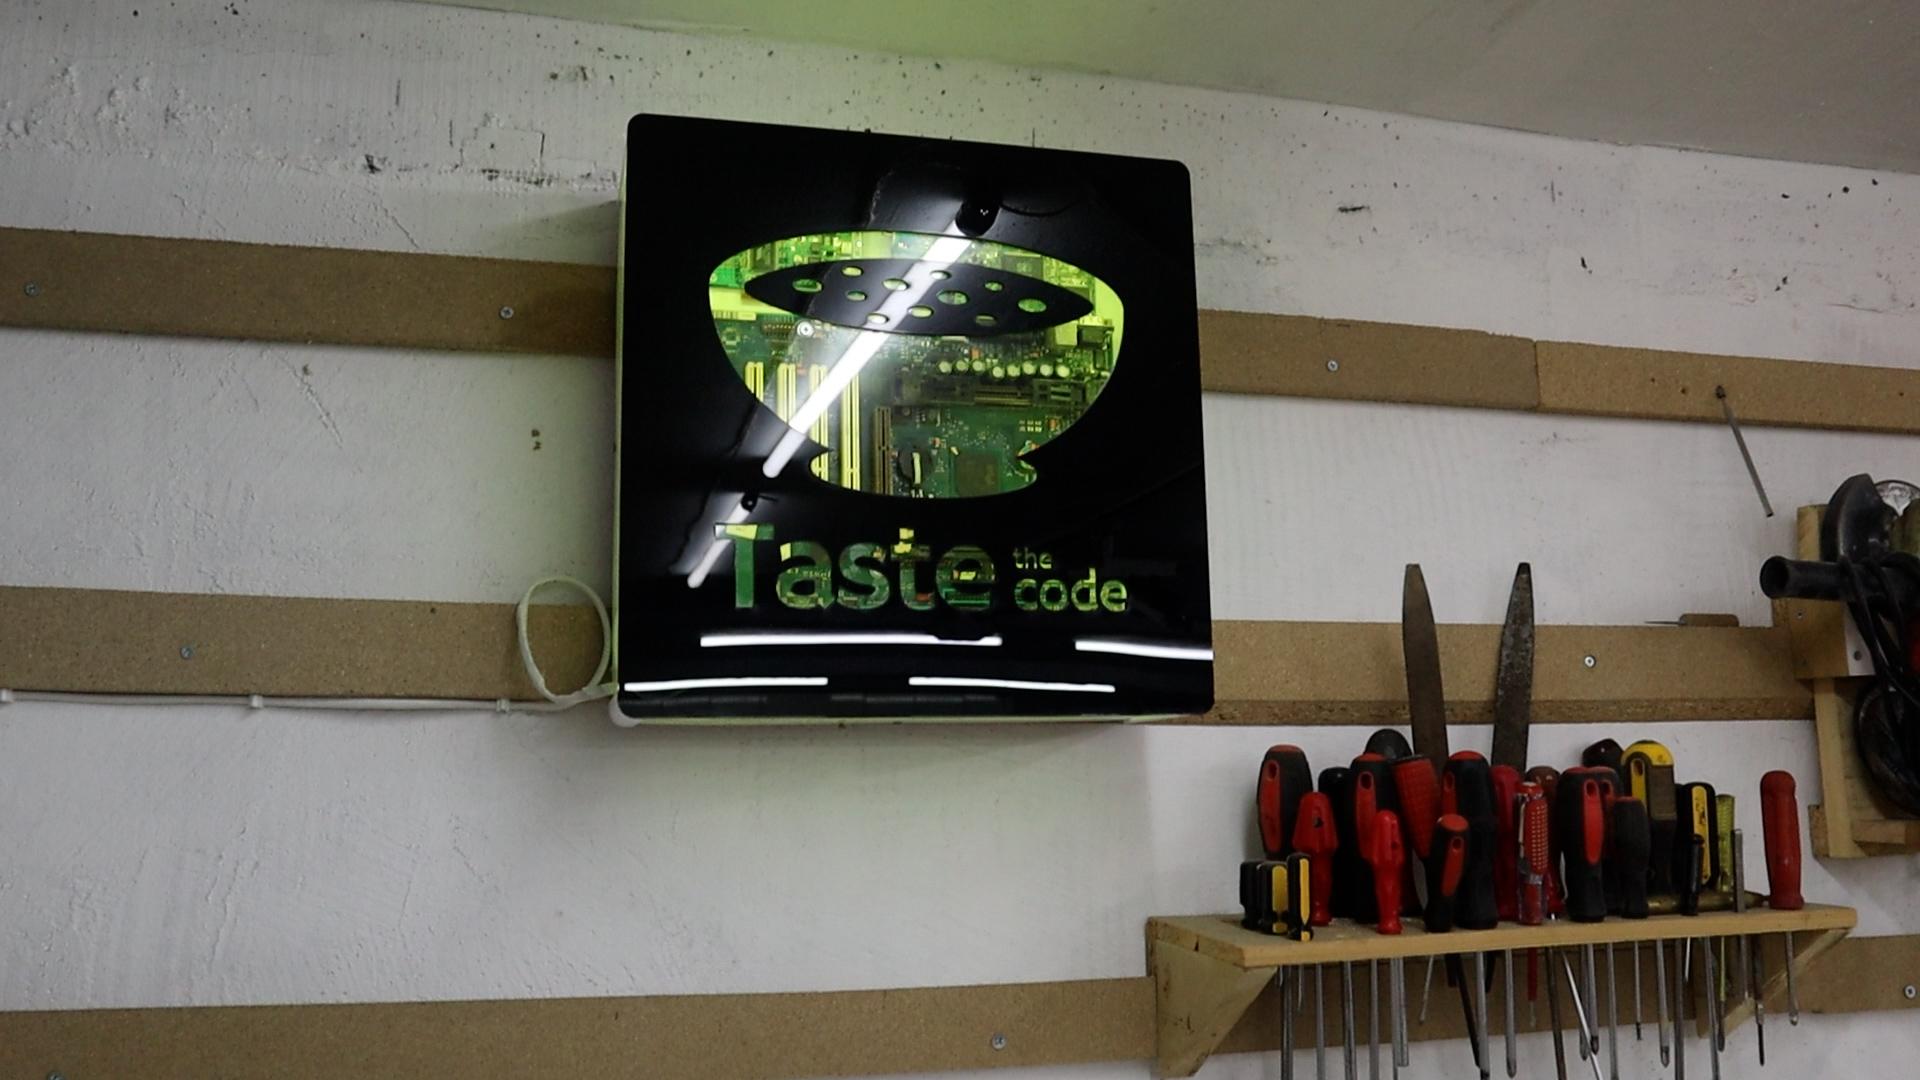
I wanted to give it a personal, techy feel, so I decided to use some old computer circuit boards (PCBs) as my decorative elements. I carefully arranged these PCBs against the particle board backing that will be the back of the box. This way, when the light shines through later, you'll be able to see all the intricate details of the electronics.
To make the view from the front even cleaner, I had previously spray-painted the outer edges of the particle board backing white.
This creates a nice white border around the electronics when you look through the transparent acrylic window. Once I was happy with the layout of the boards, I secured them in place using some small screws, making sure they were firmly attached and wouldn't move around during the final assembly.
Prepare the Acrylic Face
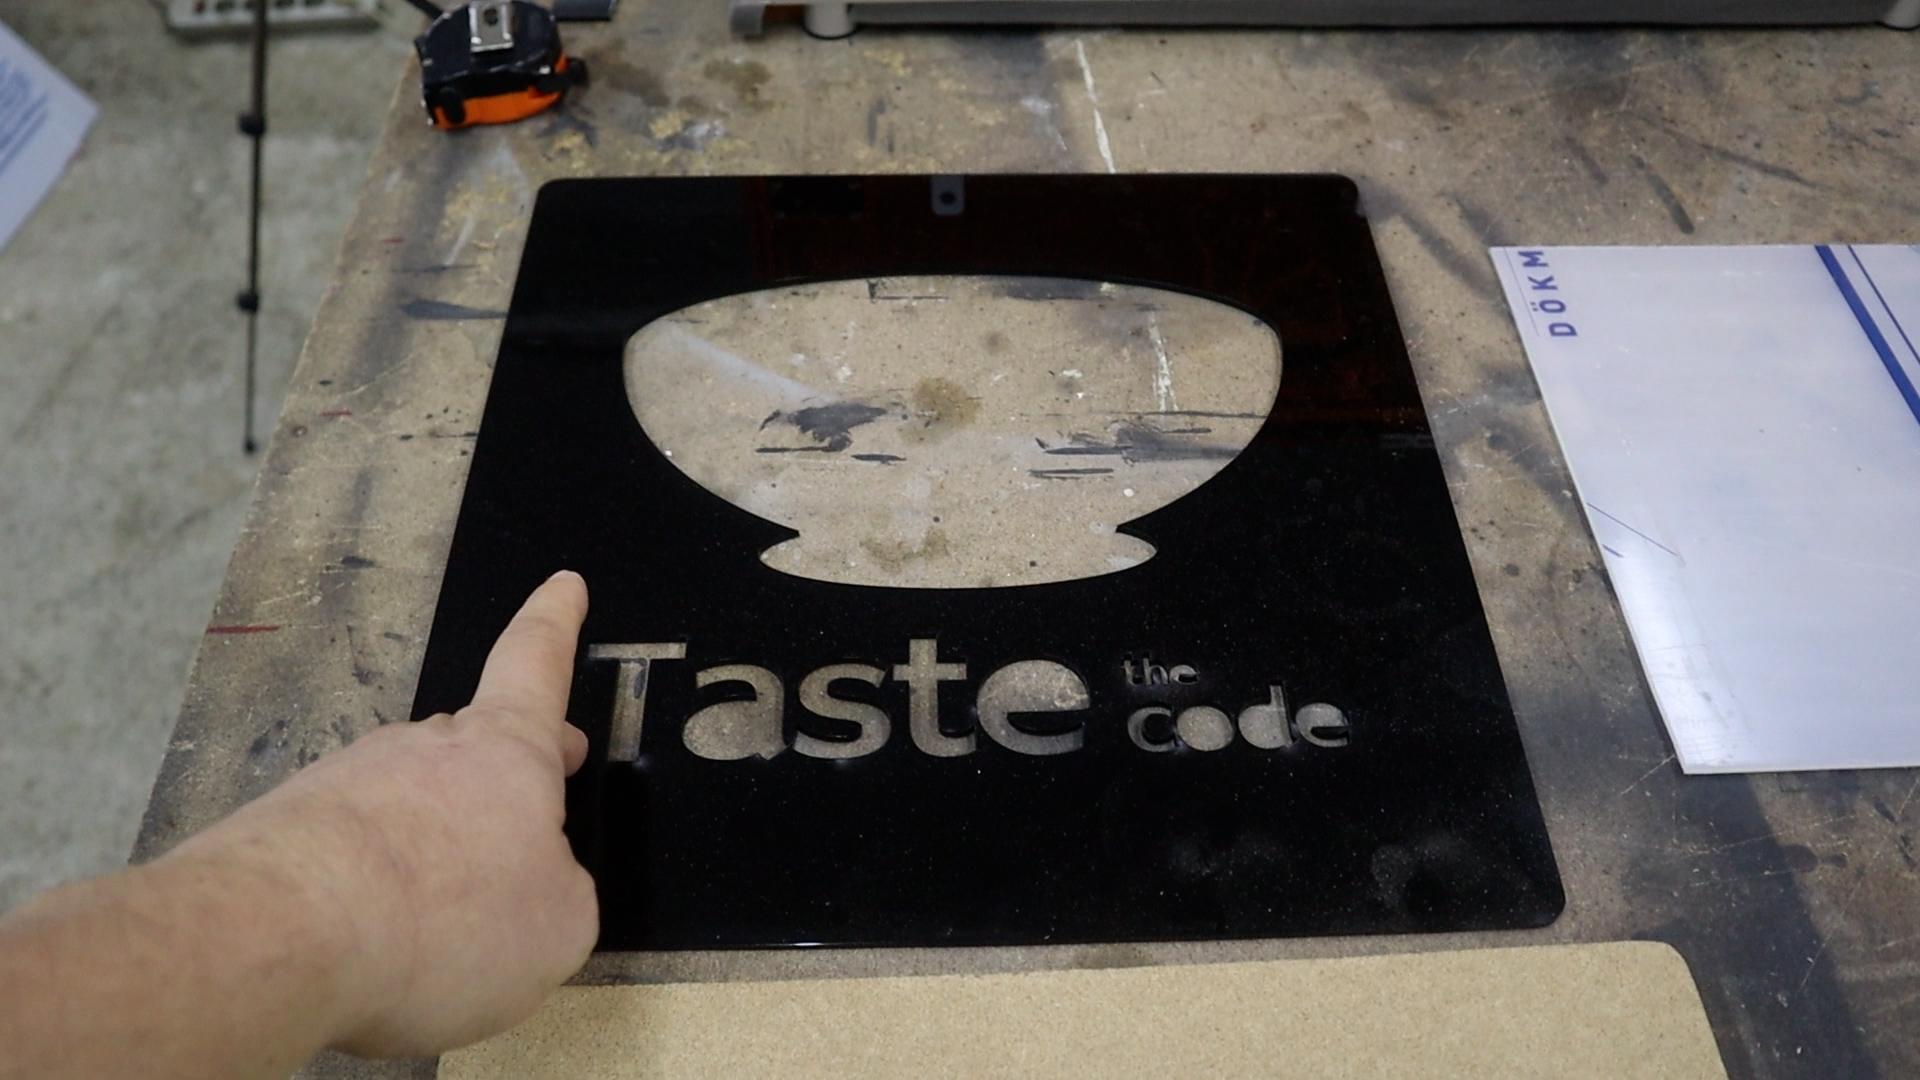
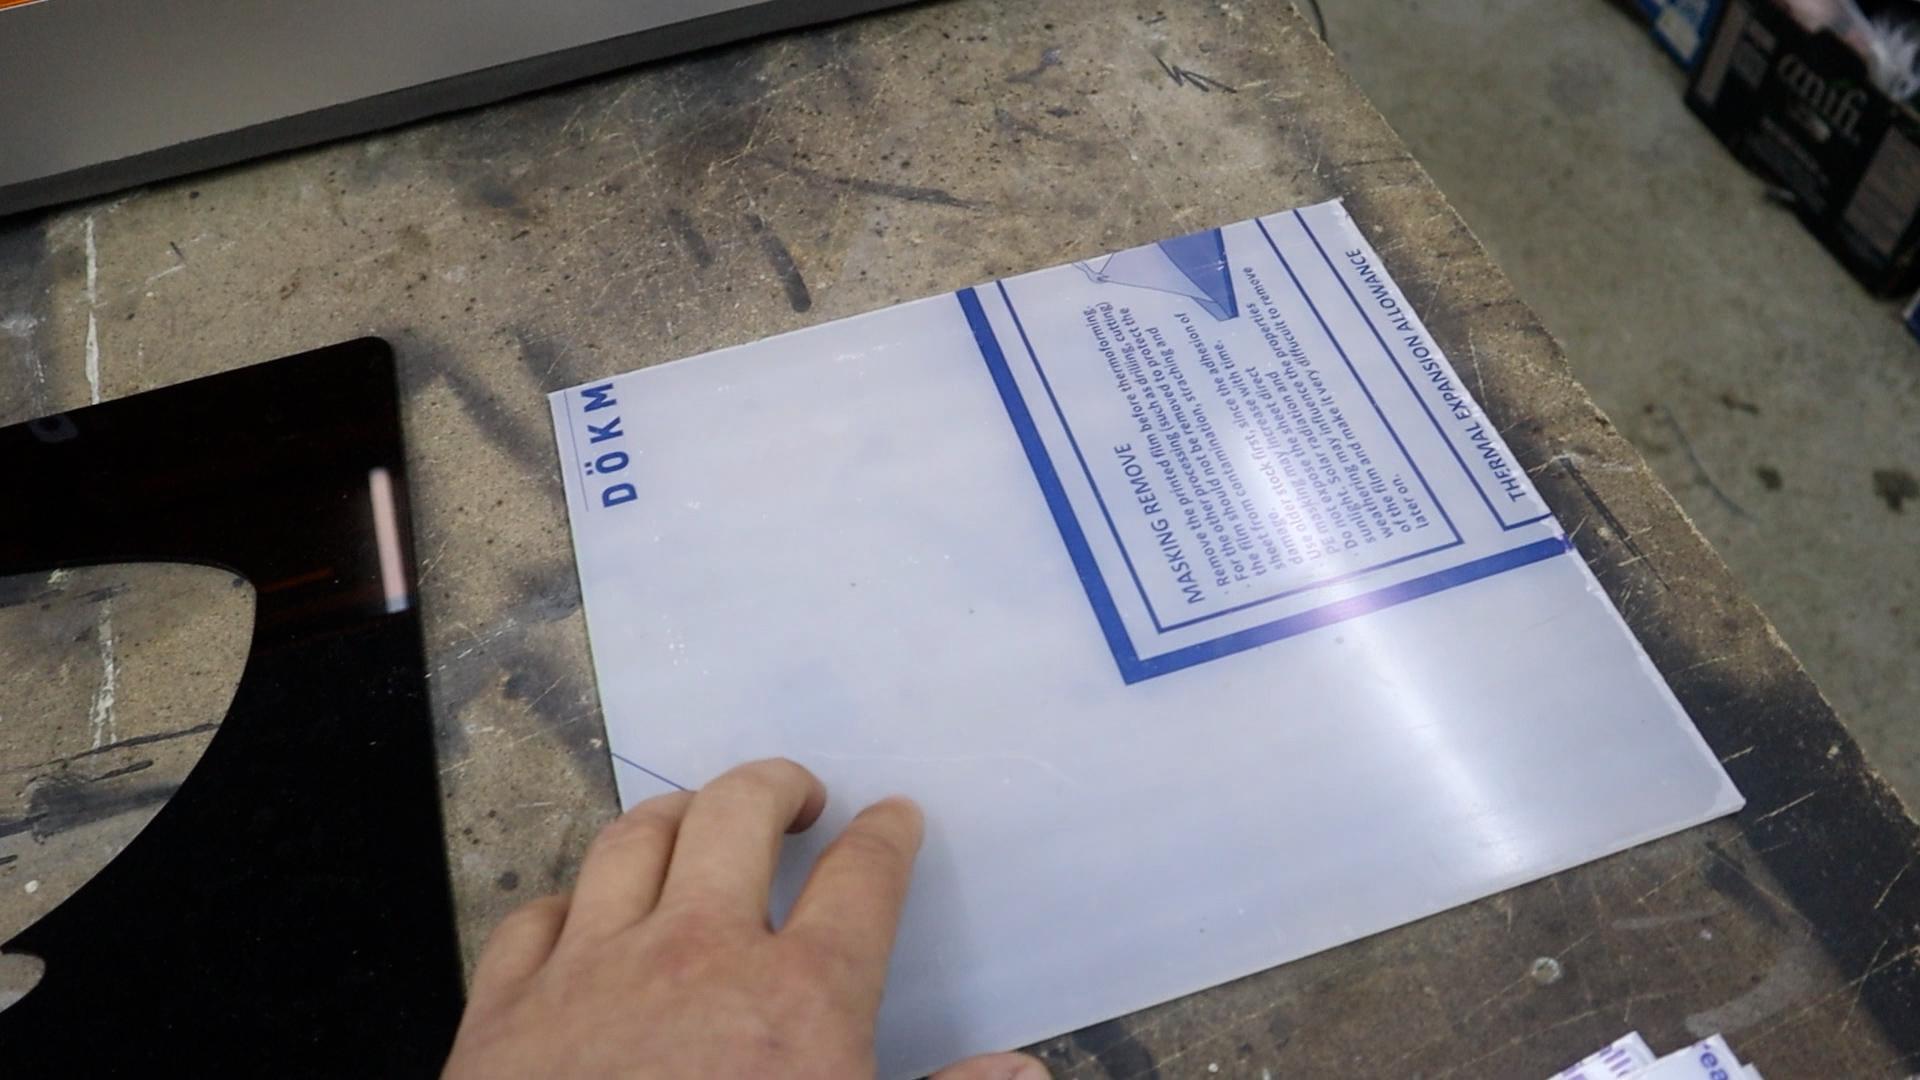
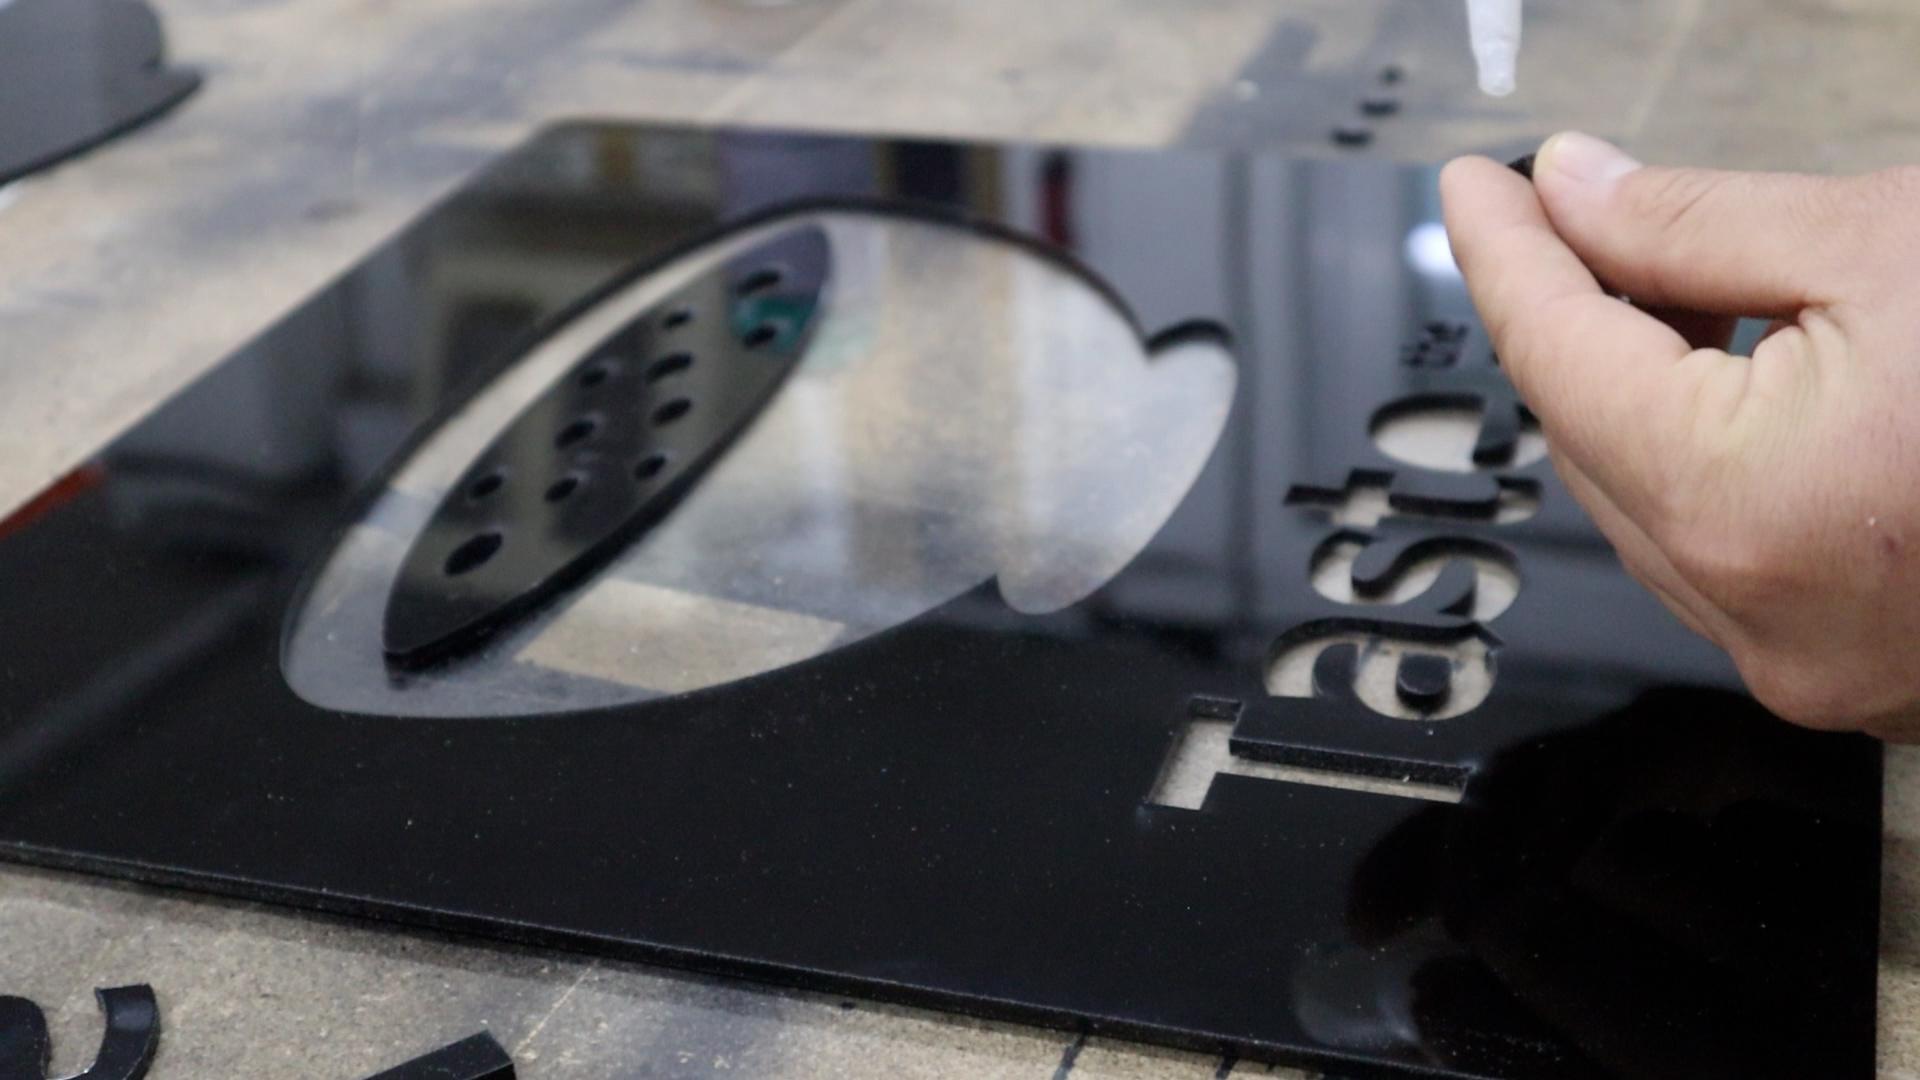
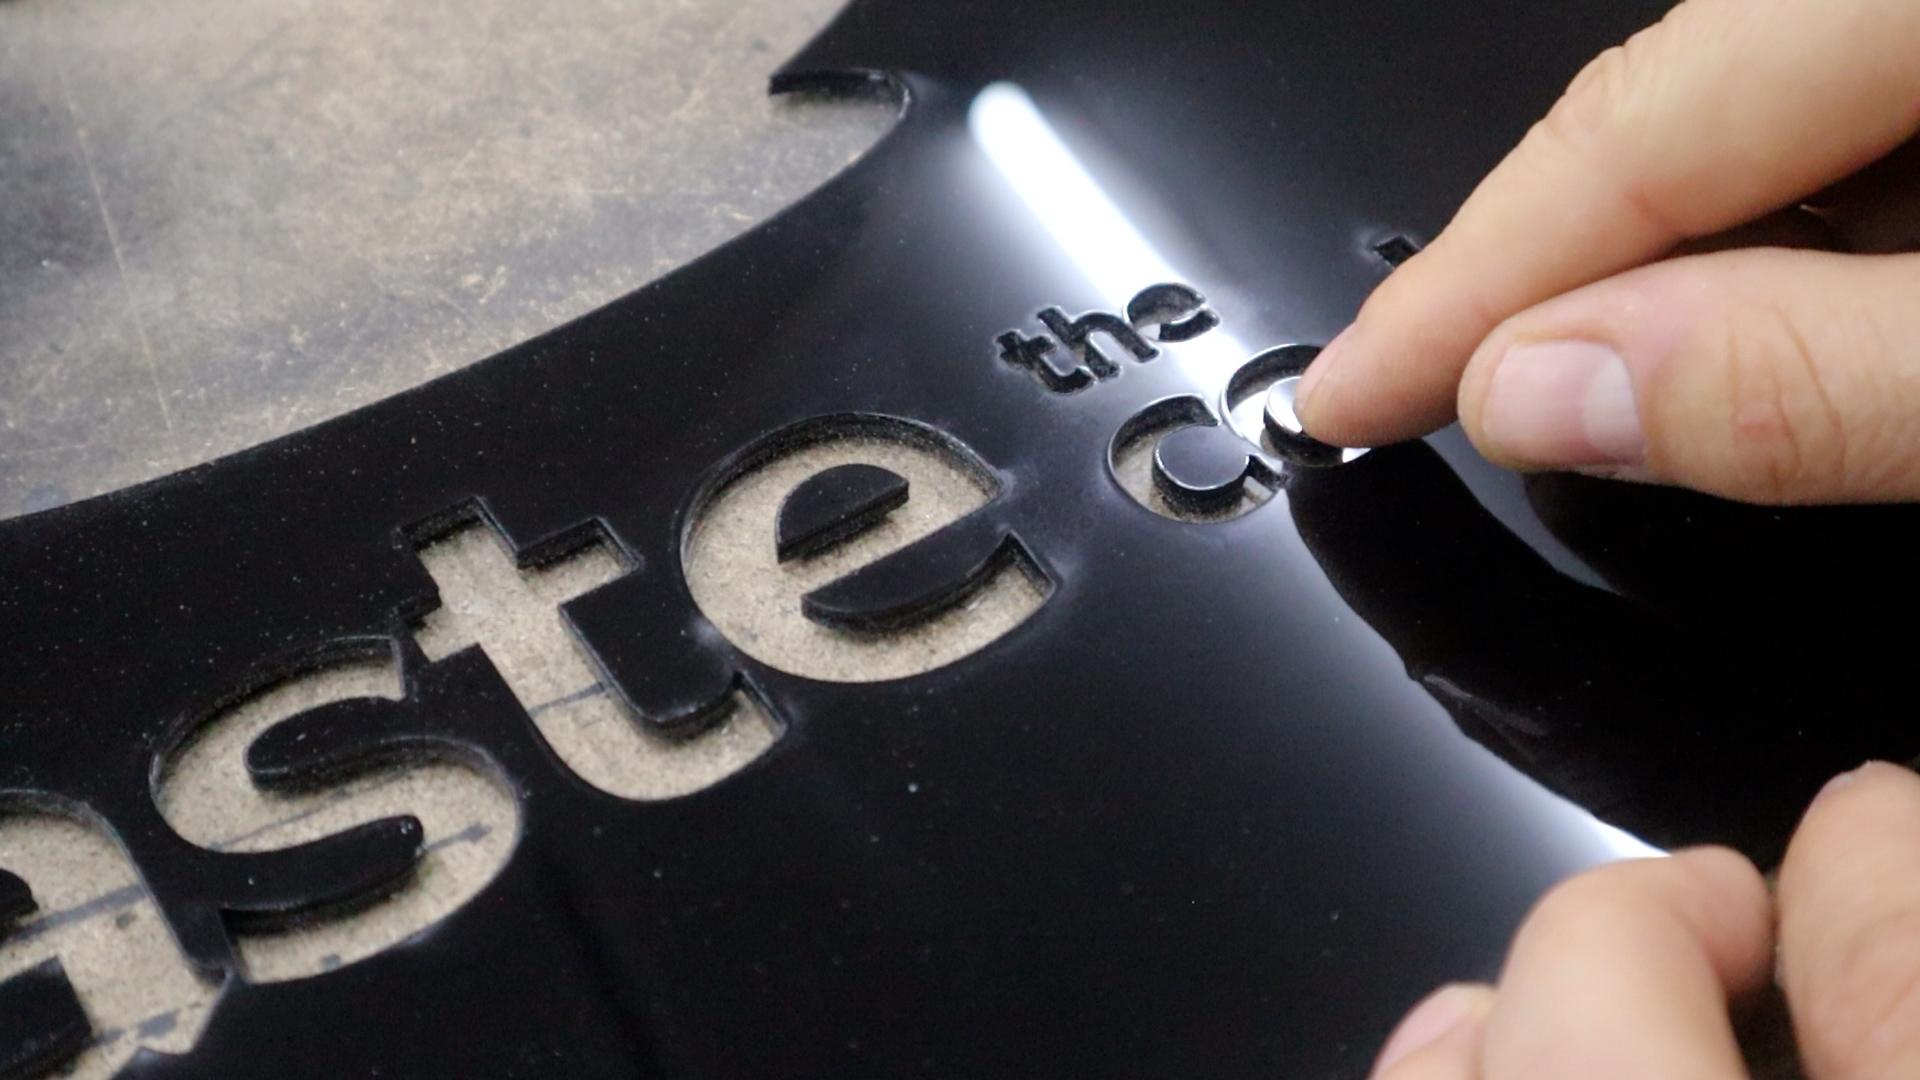
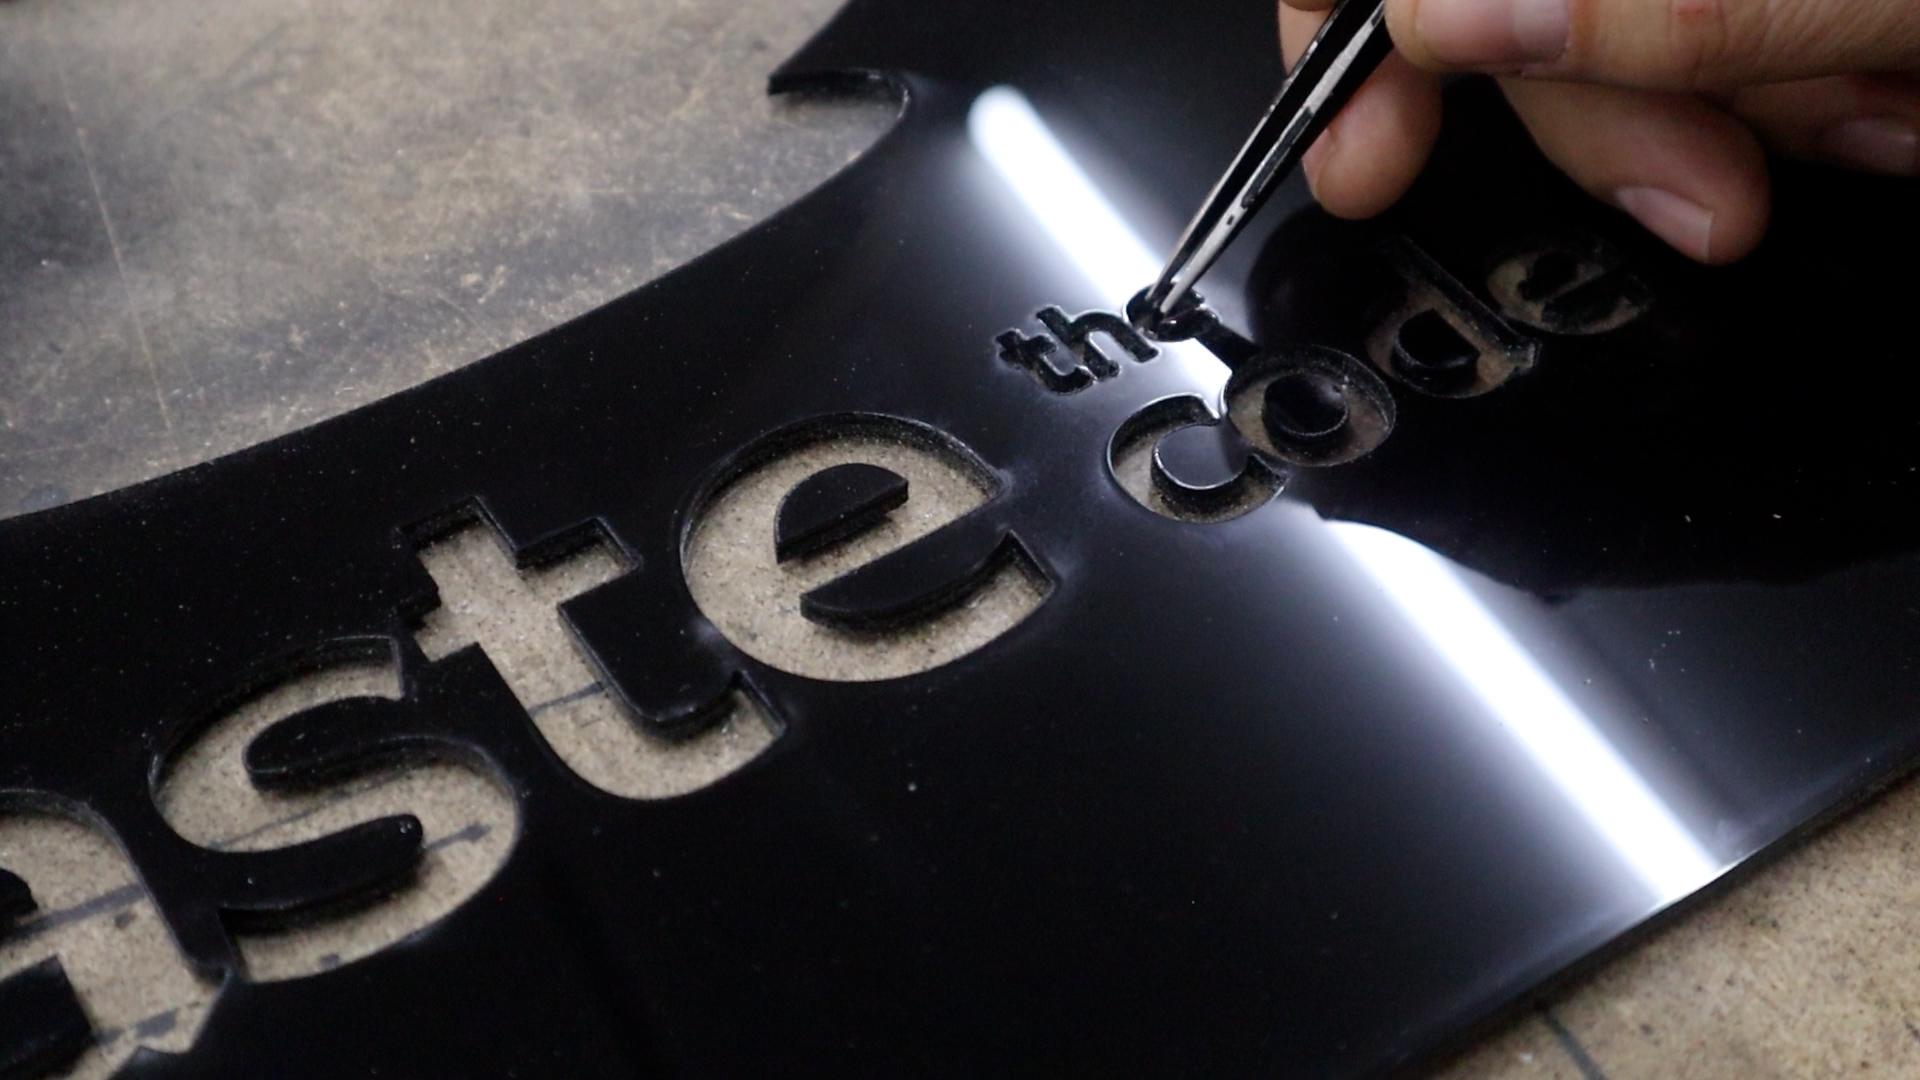
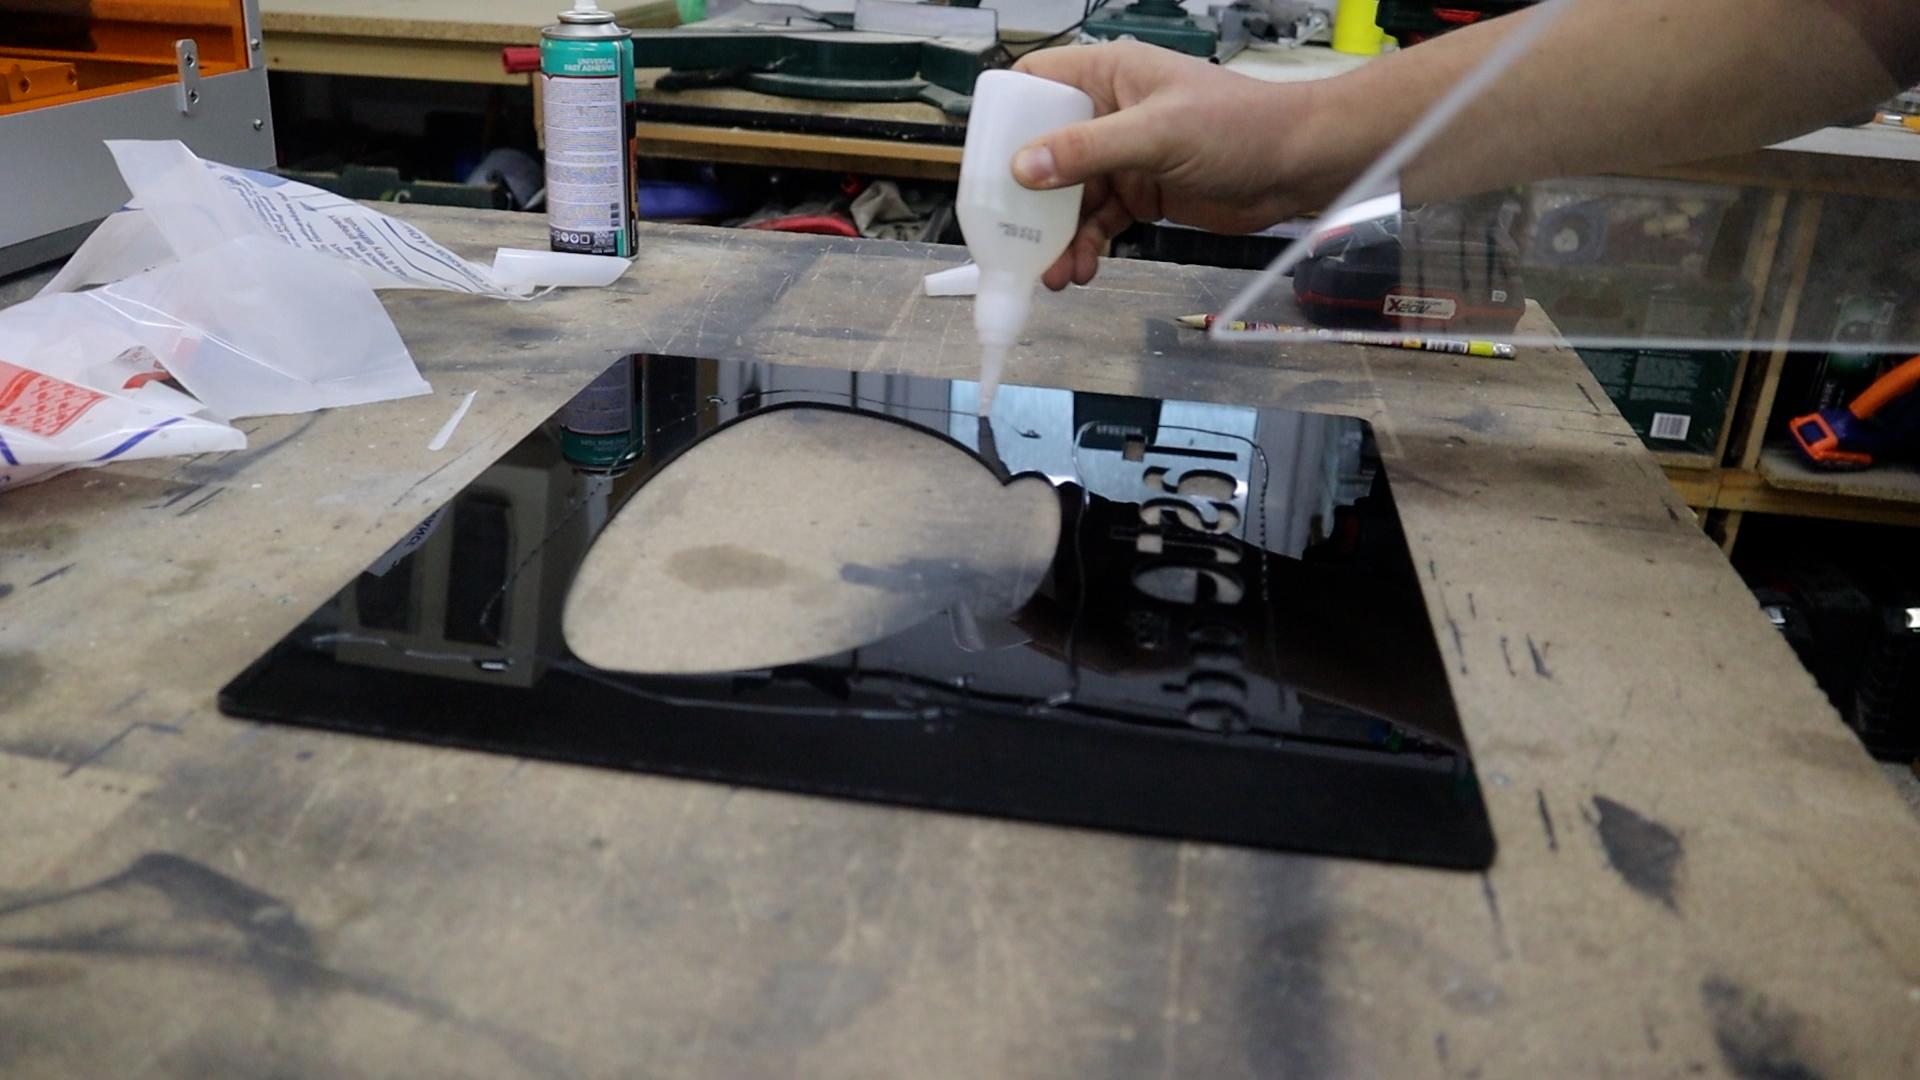
Now I need to get the laser-cut acrylic faceplate ready to be mounted. The laser cutting process left me with the main sign face and all the individual letters and logo pieces loose.
To put them back in their correct places, I use the main faceplate itself as a perfect stencil. I apply a strong glue carefully just to the central parts of the back of each small piece, making sure I don't accidentally glue the stencil down to the work surface.
I then place each letter and the logo piece back into their precise cutouts on the main panel.
I use a little activator to speed up the drying process for this delicate work. Once all the pieces are securely glued in place and the adhesive has set, I gently lift the entire, now complete, front panel away from the work surface.
The faceplate is now one solid piece, with all its details perfectly aligned, and it's ready to be attached to the box.
Install the LED Lighting
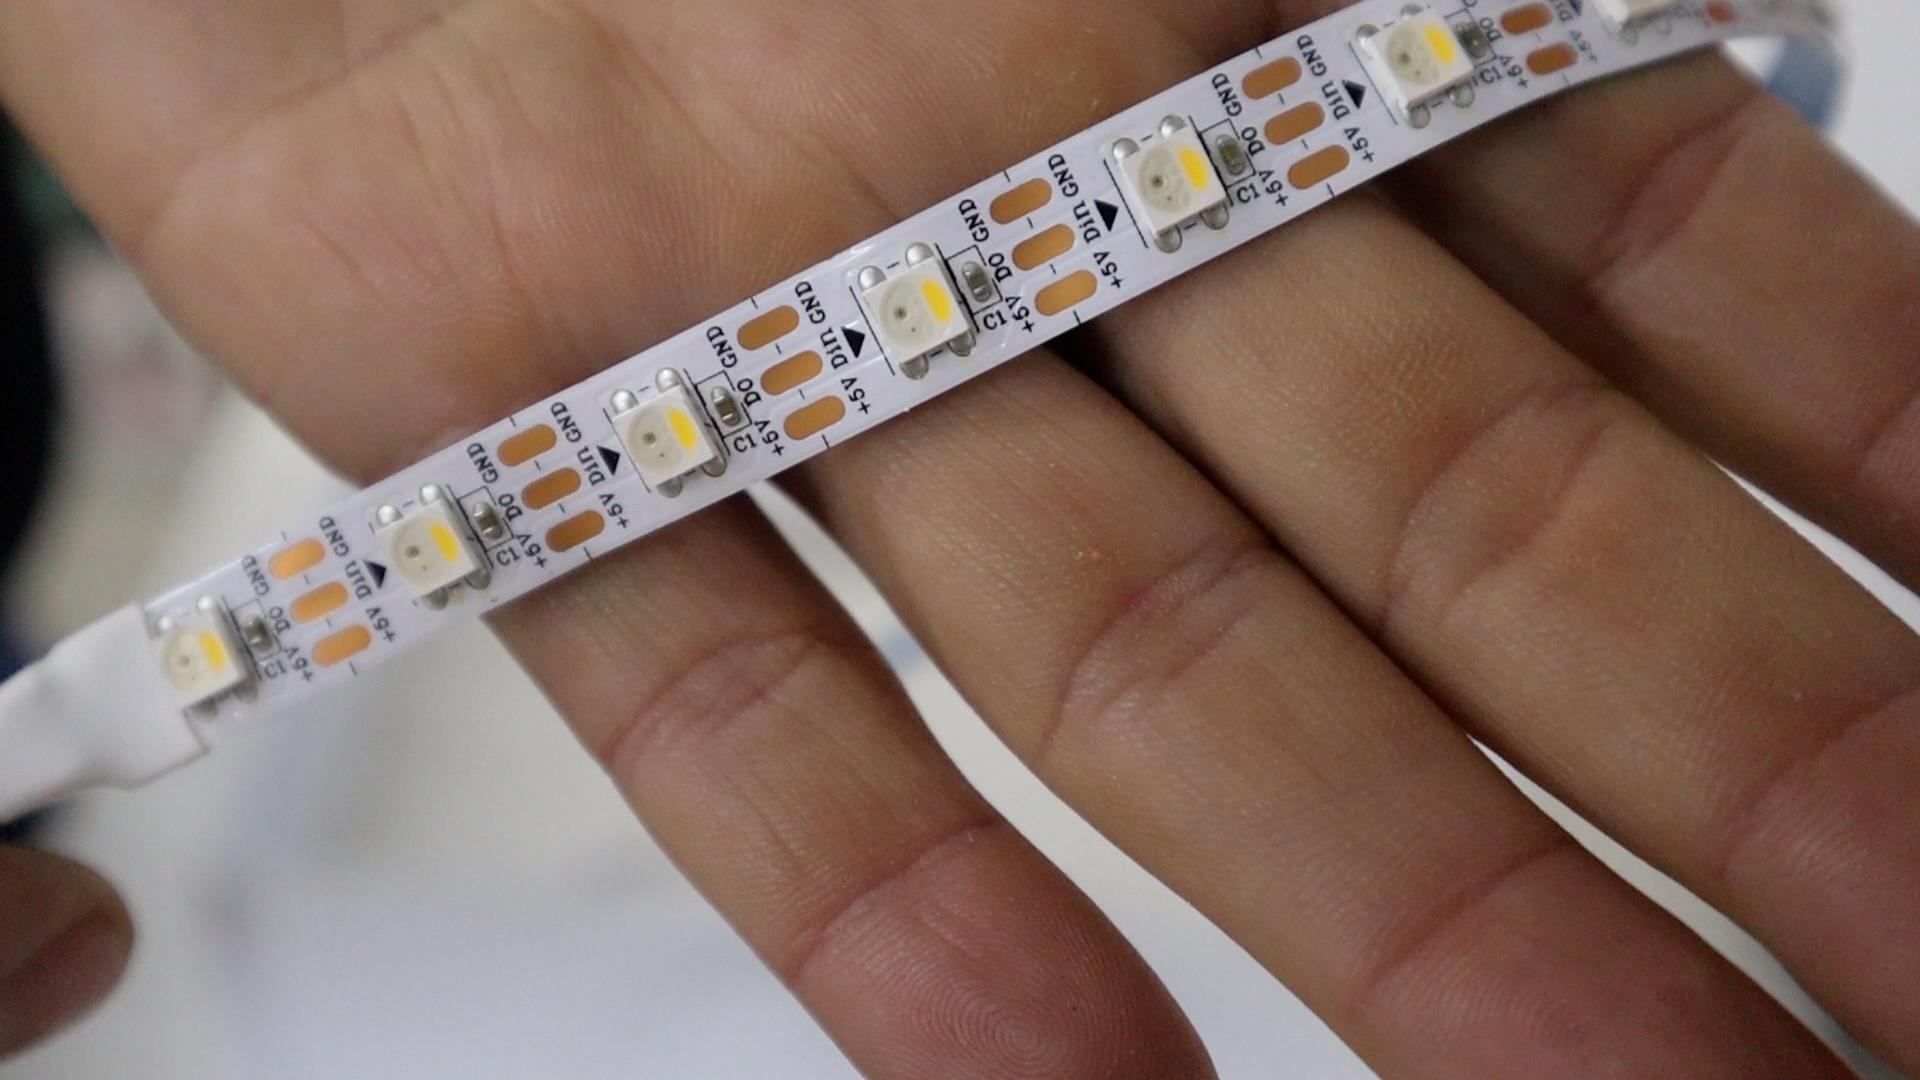
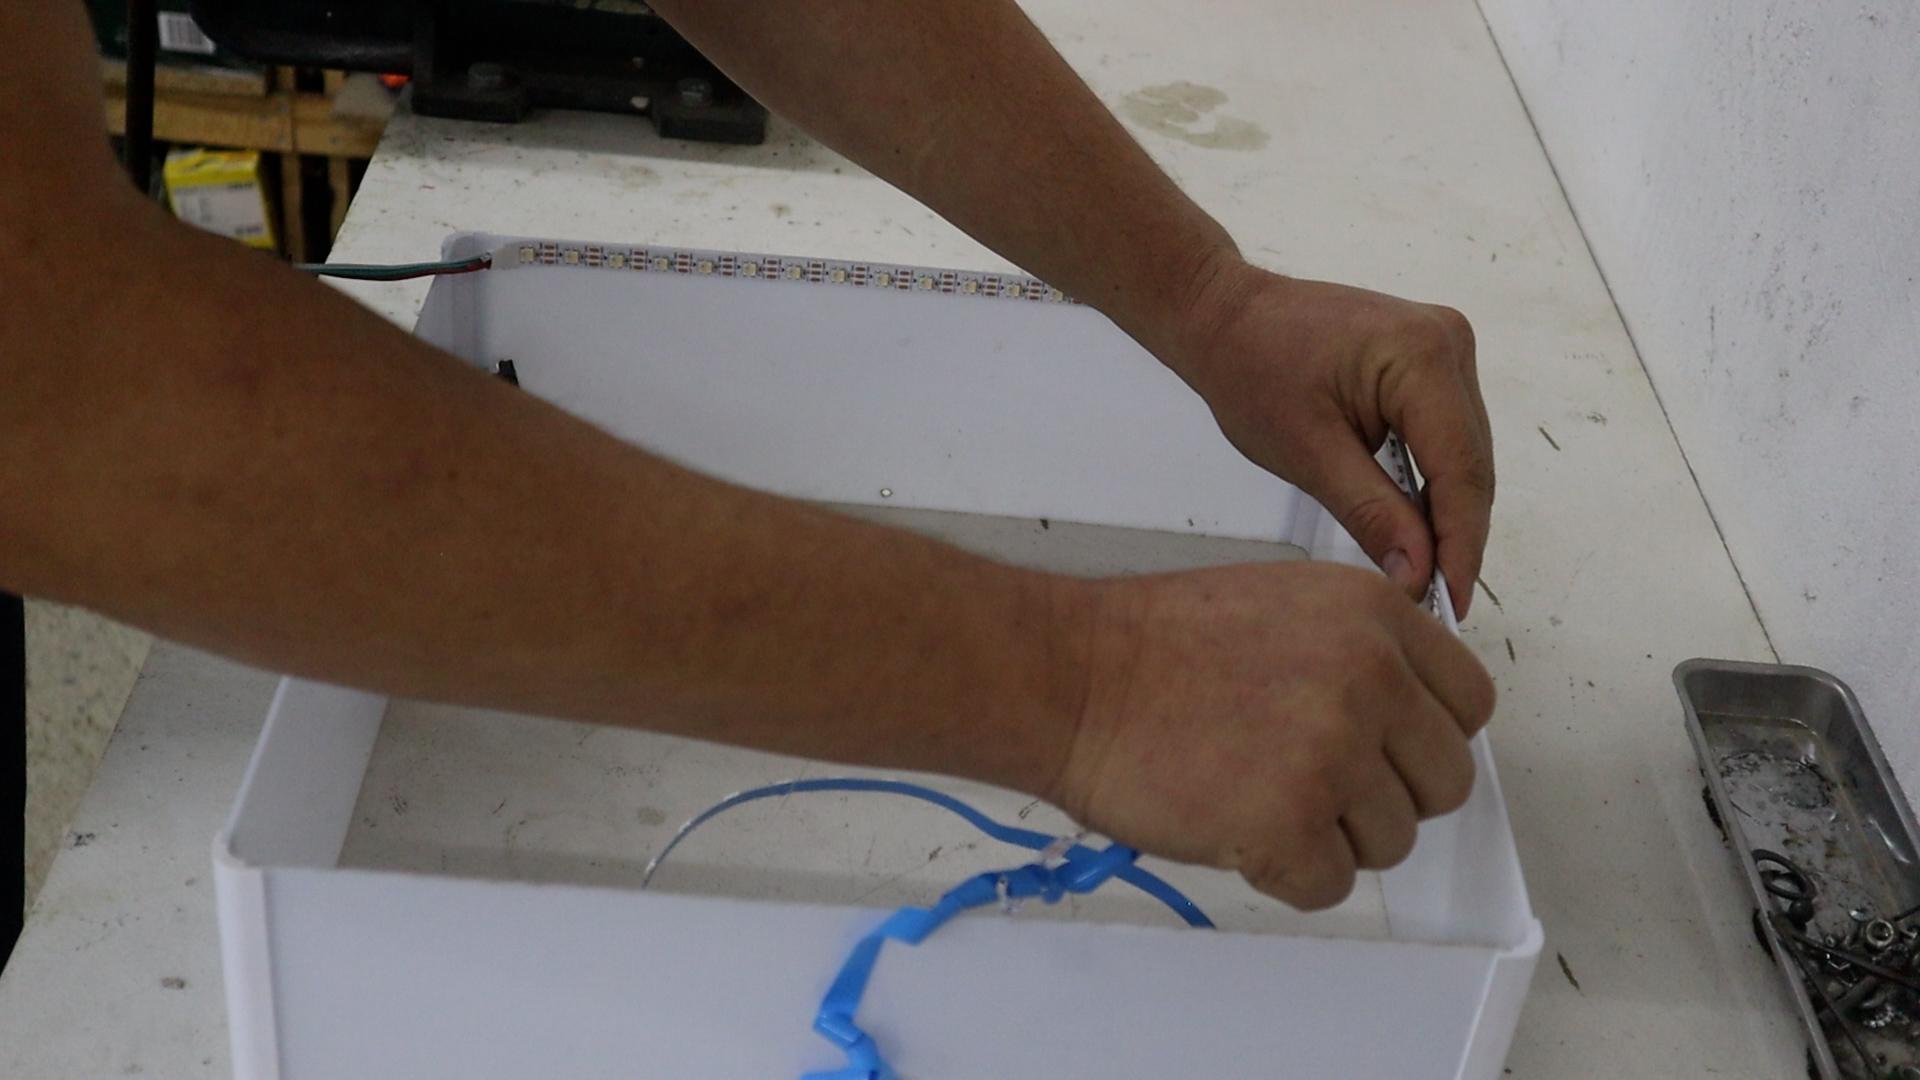
With the main box assembled and the front panel ready, it's time to add the lights. I'm using a strip of RGBW LEDs (SK6812), which I'm installing around the top edge of the box frame, facing inwards.
This placement means the light will shine through the box to illuminate the old circuit boards and also glow out through the edges of the white acrylic sides and the front lettering.
I peel off the adhesive backing and carefully press the LED strip into place all around the interior of the frame, making sure it's stuck on firmly.
To power the lights, I drill a small hole in the side of the box.
I feed the LED strip's connector through this hole so it's accessible on the outside. This is where I'll later connect it to the power supply and controller, keeping all the electronics neatly contained outside the main sign.
Wire Up the Power and Controller
Now I need to handle all the electronics that will bring the sign to life. On the outside of the sign, I mounted a small distribution box. Inside this box, I placed a power supply suitable for the length of LEDs I used and an ESP8266 microcontroller, which is the small circuit board that will send data to the RGBW LEDs.
The ESP8266 microcontroller is running a WLED firmware that allows me to control the color of the LEDs as well as running effects through my phone with the dedicated app.
You can check out WLED at: https://kno.wled.ge/
The Final Assembly and Mounting
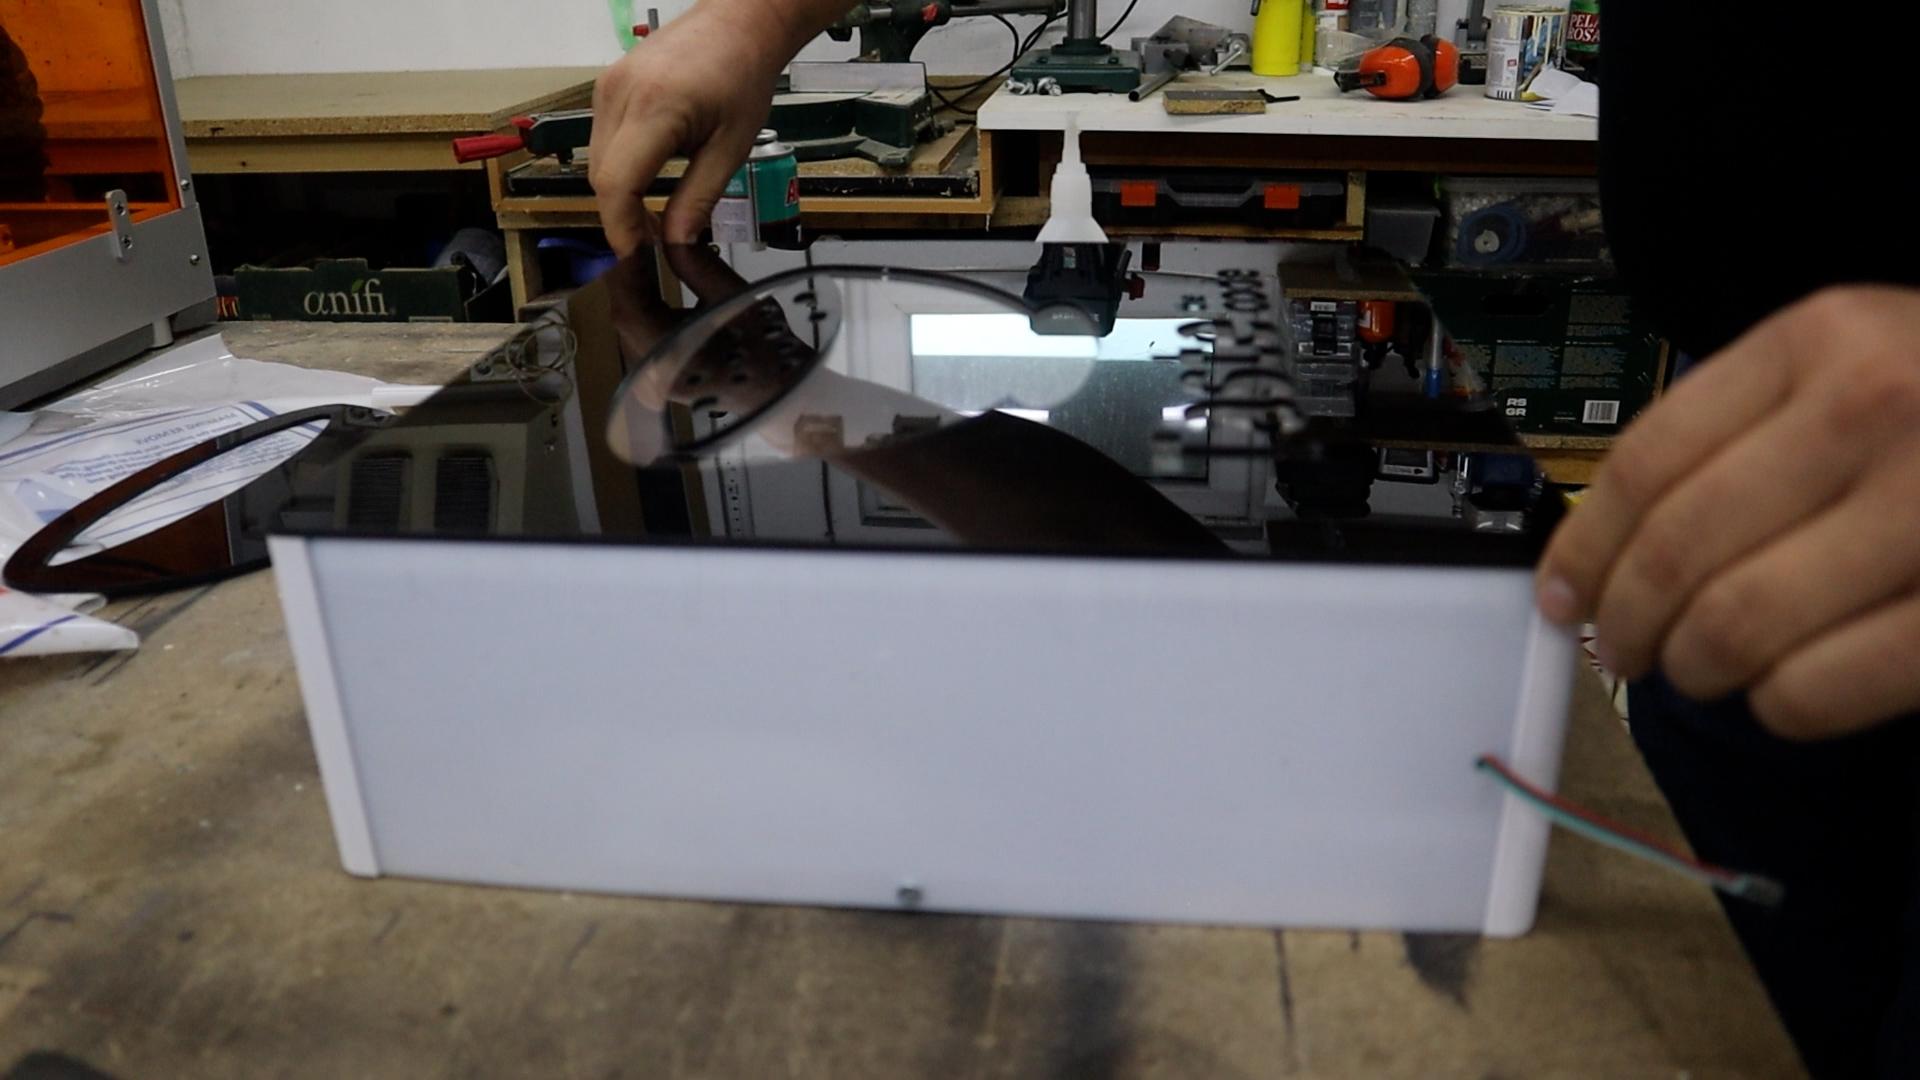
The last step is to permanently attach the front panel. I apply a strong glue all the way around the edge of the box frame I assembled earlier. Then, I carefully align the completed acrylic faceplate with the corners and press it firmly into place, making sure it sits evenly on the frame.
I let the adhesive cure completely according to the instructions, which creates one solid, seamless unit.
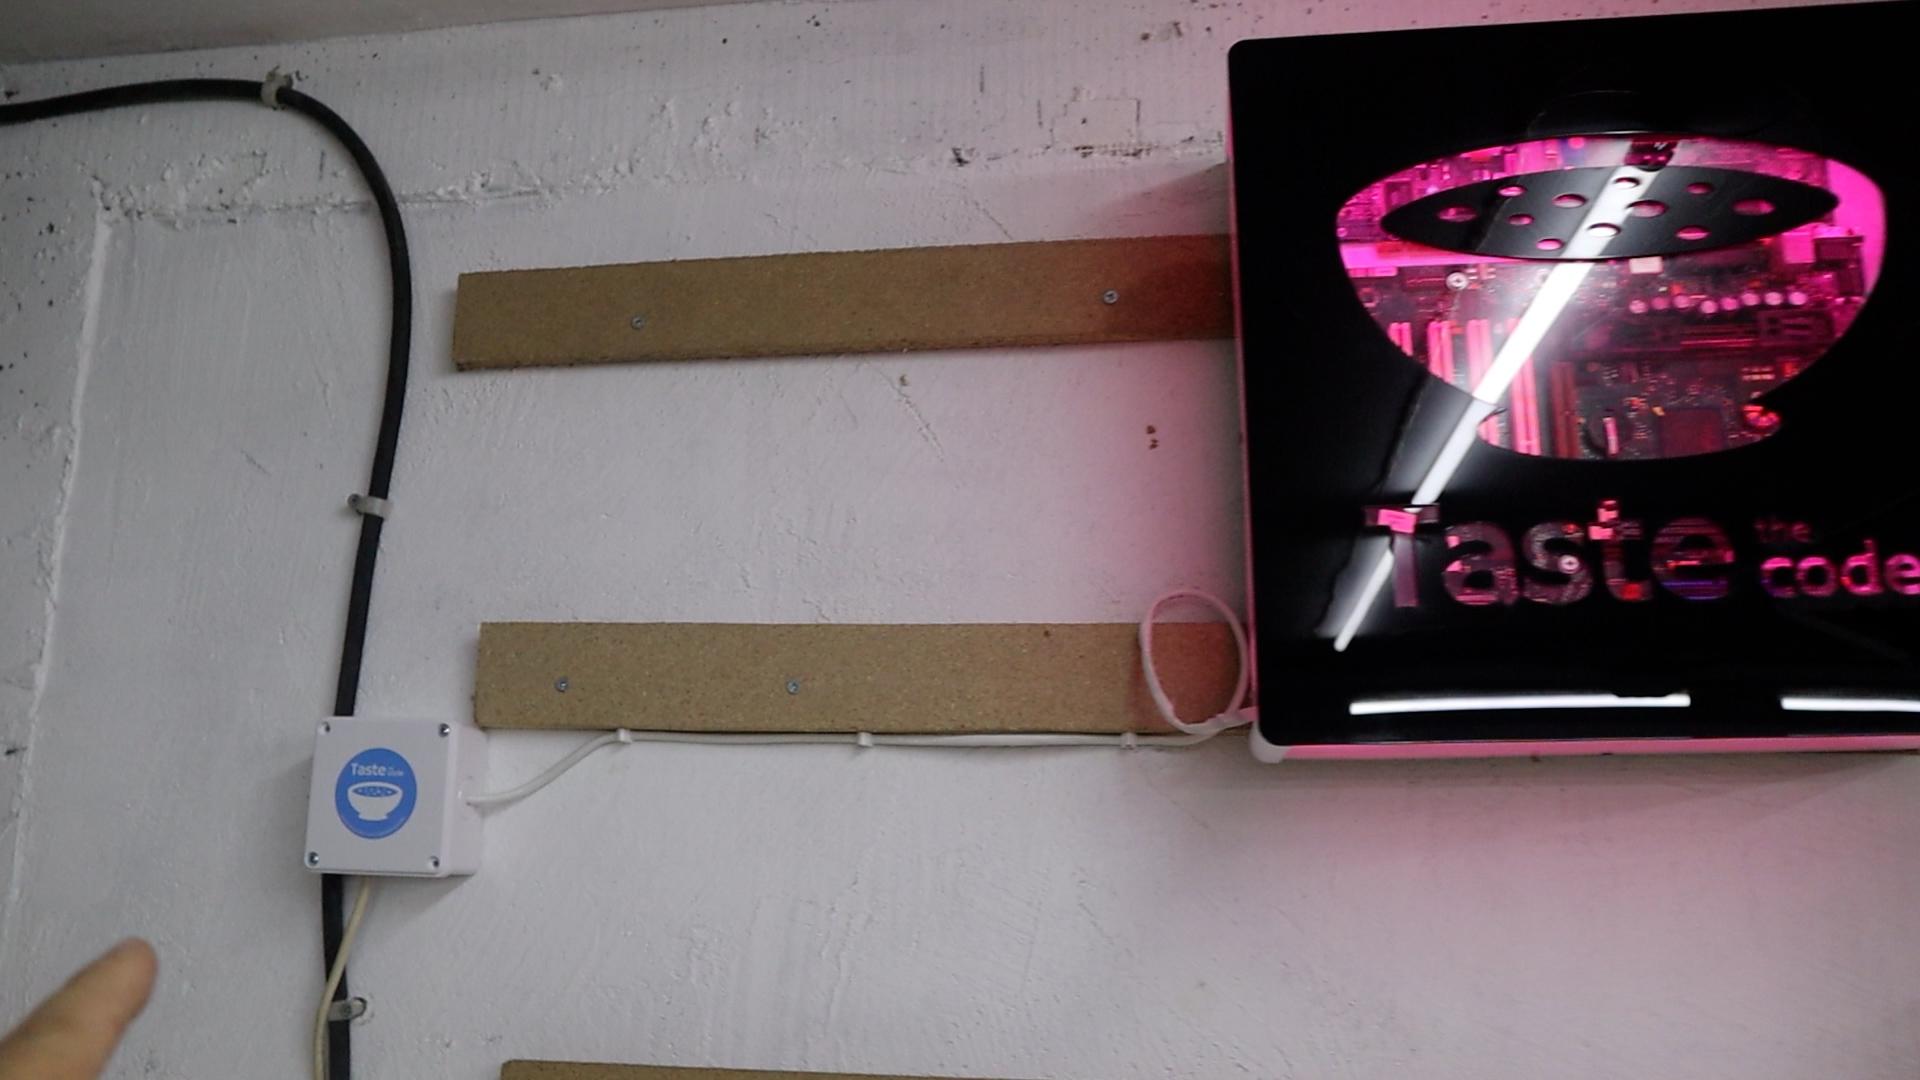
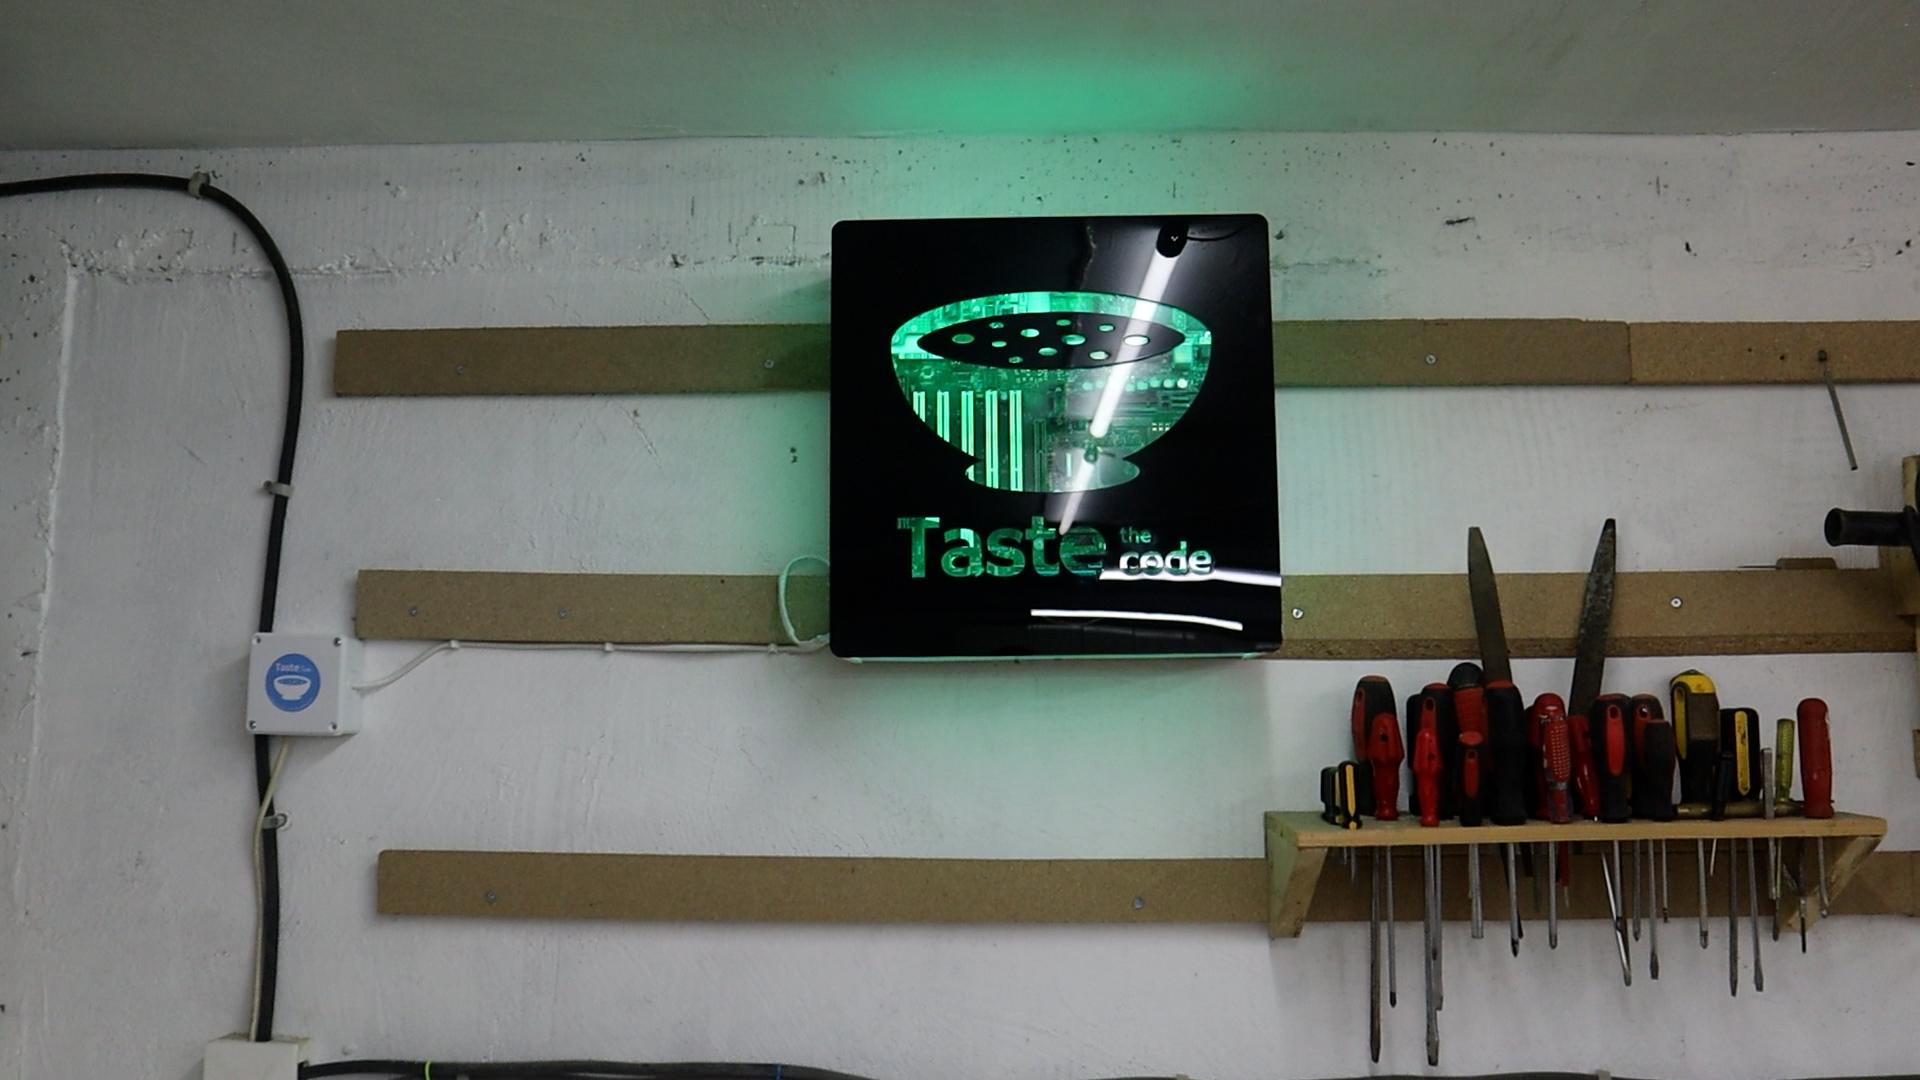
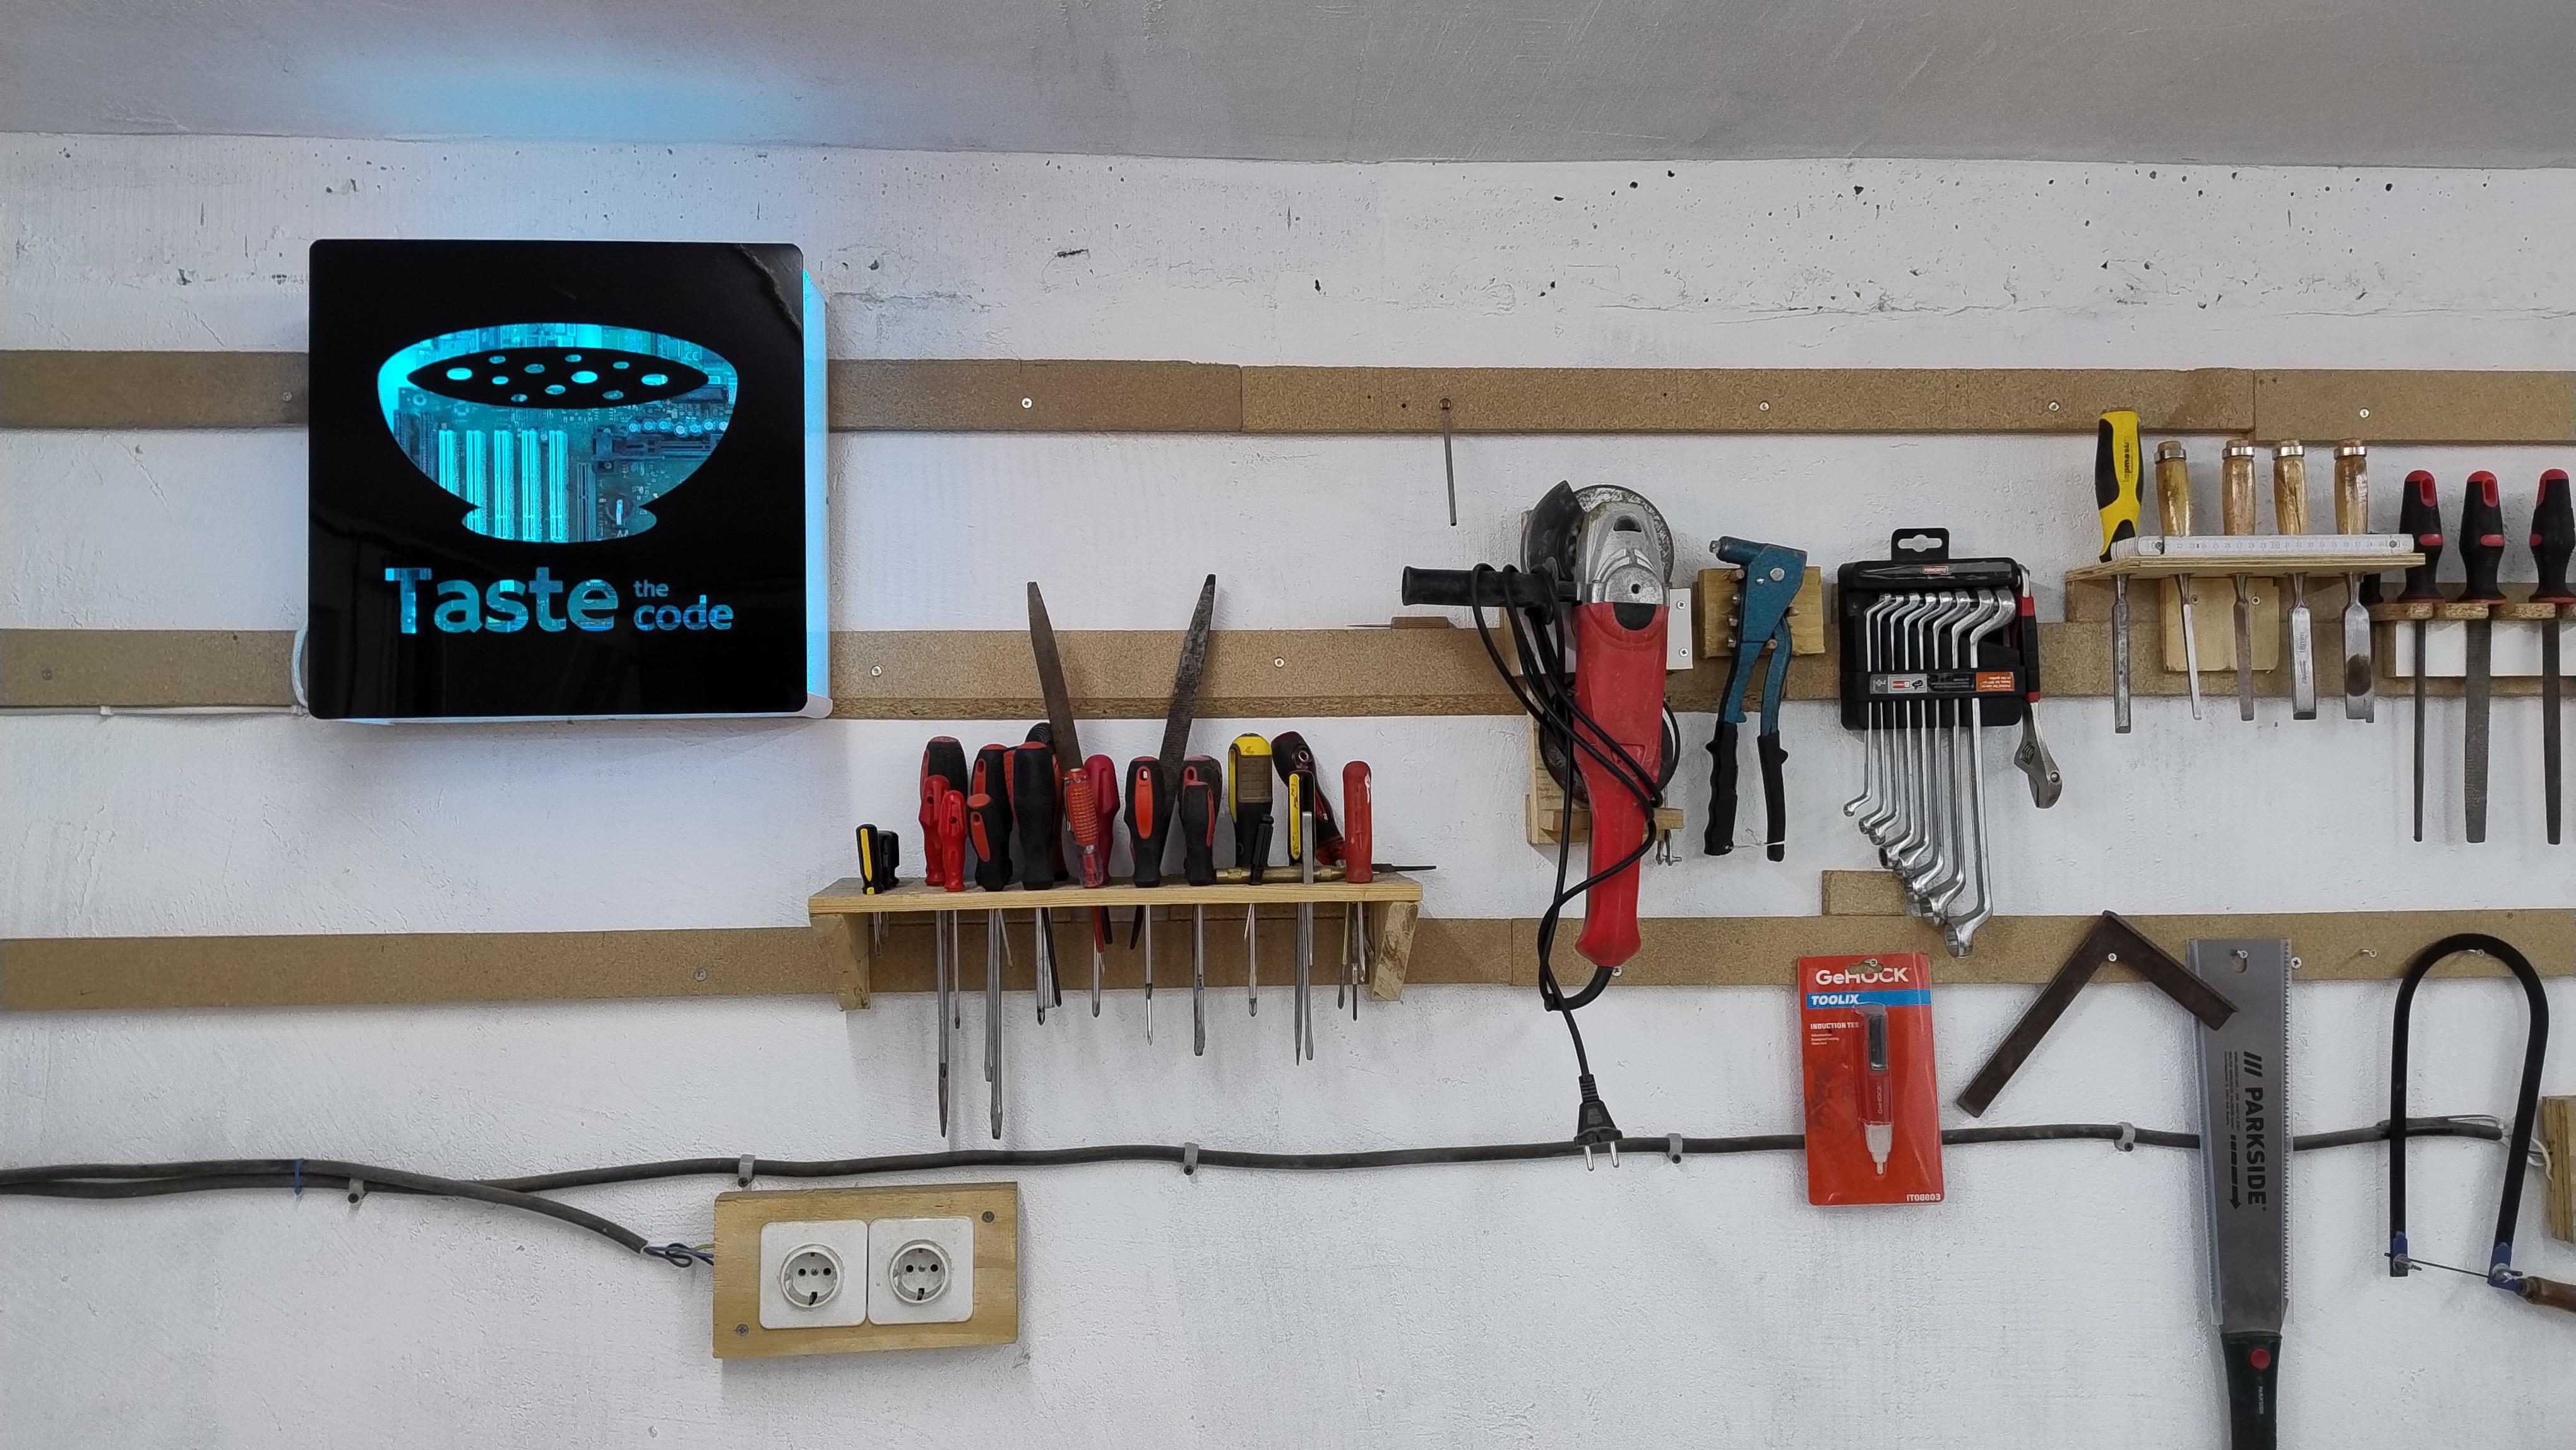
With the sign fully assembled, I'm ready to mount it. I decided to hang it on a cleat system attached to my basement wall, which is a simple and very strong method.
I attach one part of the cleat to the back of the sign and the matching piece to the wall. Then, I just lift the sign and slide it onto the wall mount. It holds securely, but I can still lift it off easily if I ever need to.
I plug in the power cord, switch it on, and the sign lights up, casting a cool glow and showing off all the internal details.
Next Steps

Now that your custom light-up sign is complete and mounted, the journey doesn't have to end here. You can use this same process to create signs with different designs, colors, or even incorporate sensors to make the lighting interactive.
If you have any questions about the build or want to share your own creation, I encourage you to post them in the comments section below.
For more project ideas and tutorials like this one, be sure to follow my profile here on Instructables. You can also find more of my work, including other workshop builds and electronics projects, on my YouTube channel.
I'm always working on something new, and I'd love to have you along for the next project.