How to Make a Magnetic Bookmark With LOKLiK ICraft
by quinzyvarira in Craft > Books & Journals
883 Views, 12 Favorites, 0 Comments
How to Make a Magnetic Bookmark With LOKLiK ICraft

Bookmarks are essential tools for every book lover, and making your own adds a personal touch to your reading experience. This tutorial will guide you through the process of creating beautiful and functional magnetic bookmarks using the versatile LOKLiK iCraft cutting machine. Whether you’re crafting for fun, as a gift, or even for sale, this step-by-step guide will help you design, print, and assemble your bookmarks with ease.
Supplies
- Art paper or photo paper (260 gsm)
- Inkjet printer
- LOKLiK iCraft machine
- Magnetic strip
- Cold lamination sheet (optional)
Machine Calibration
If you’ve never used the Print Then Cut feature with your LOKLiK iCraft, you’ll need to calibrate the machine. Calibration ensures precise cuts, so don’t skip this step! Watch the tutorial
Prepare the Design
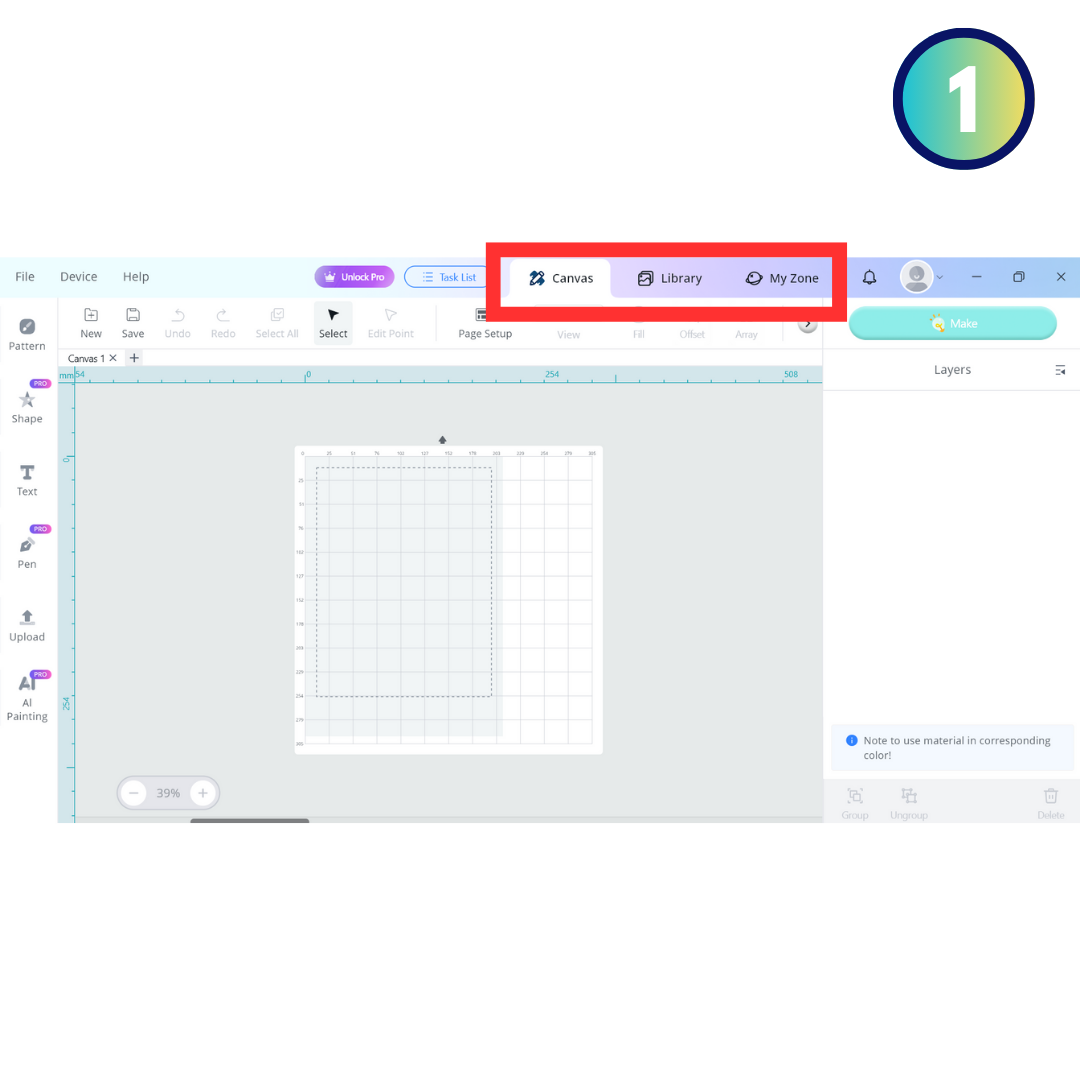








You can create your design using Canva, CorelDraw, Adobe Illustrator, or directly in the LOKLiK IdeaStudio. For this tutorial, we will use LOKLiK IdeaStudio, which is user-friendly and integrates seamlessly with the iCraft machine.
- Open IdeaStudio
- From the top menu, select Library [pict. 1].
- Use the search bar to find a suitable image. For a bookmark, try typing “book.” Once you’ve selected an image, click “Add to Canvas” [pict. 3]
- Edit the Image
- Resize the image or remove unwanted parts by opening the Group in the Layers panel on the right side [pict. 4]. The size of my bookmark was about 4 cm in width.
- Add Text
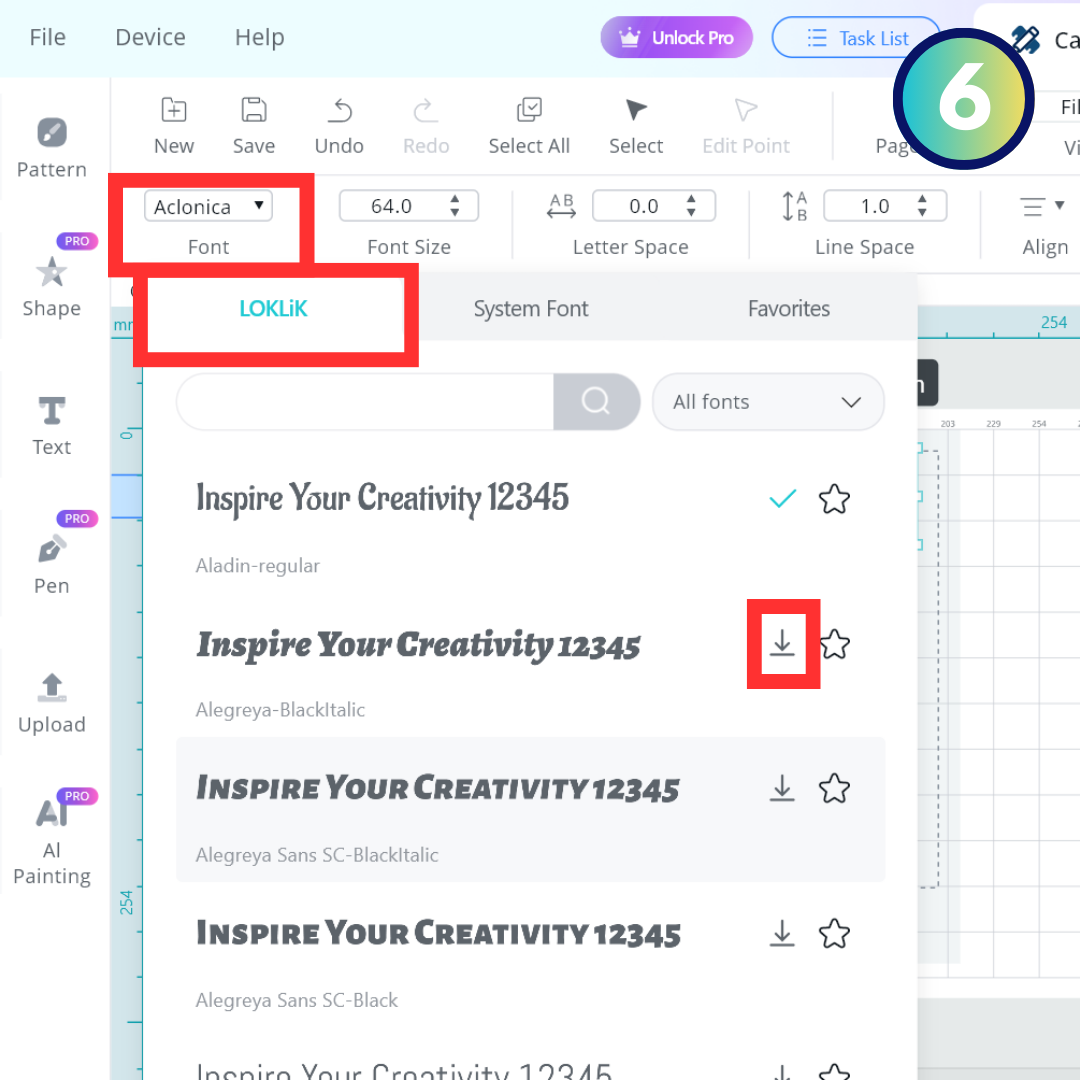
- Click Text on the left toolbar, type your desired text, and choose a font. You can select from LOKLiK fonts (download them first) [pict. 6] or your system’s fonts.
- Change the text color via the Fill menu [pict. 8].
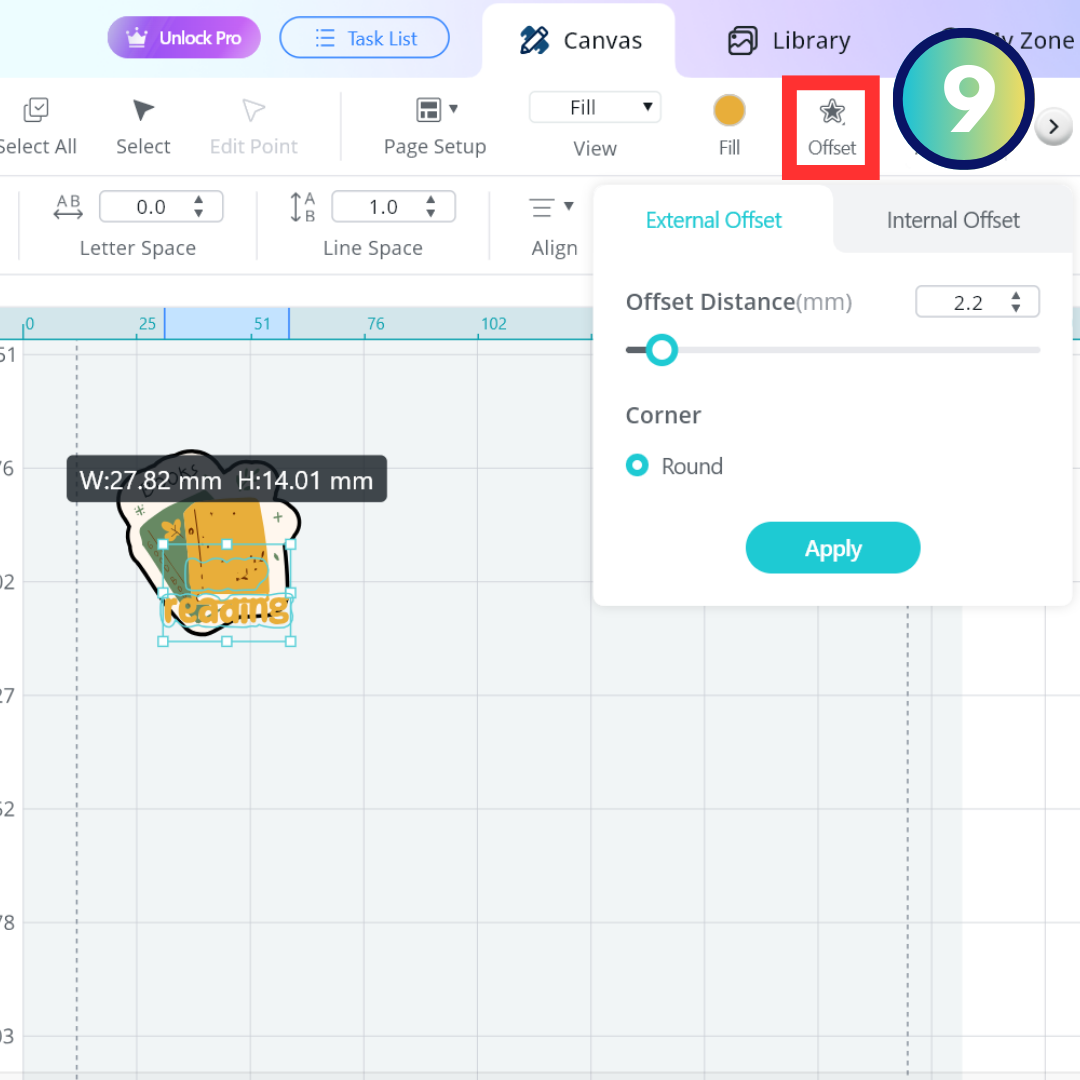
- Add an outline using the Offset menu and click Apply [pict. 9].
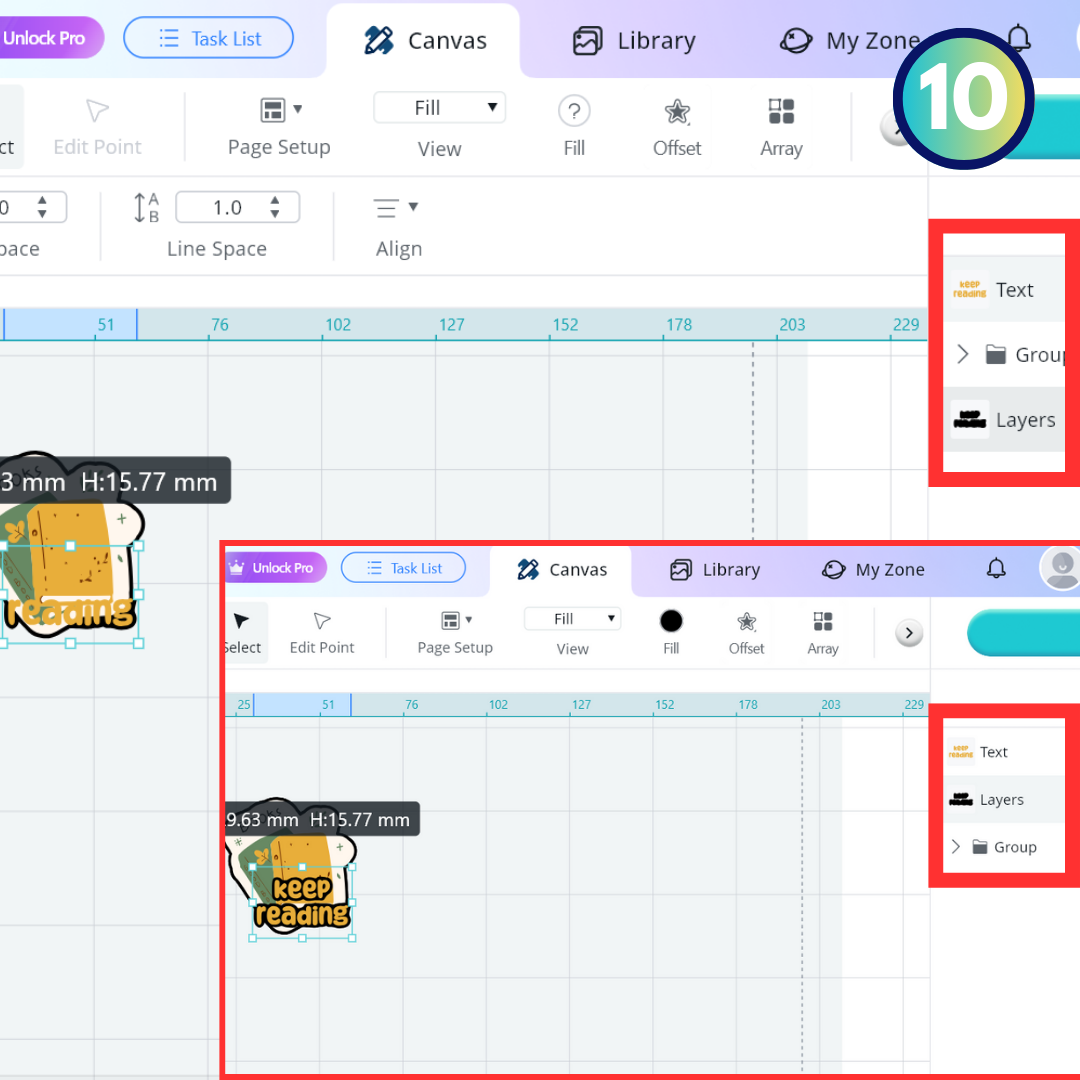
- The offset will create a new layer beneath the text. Drag this layer directly below the text layer for proper alignment [pict. 10].
- Duplicate and Flip
- Select all objects (image and text) and copy-paste them. Flip the duplicated design vertically, and if there’s text, flip it horizontally to ensure it remains readable [pict. 11 & 12].
- Add a Connector
- Use the Pattern menu to draw a rectangle as a connector between the two halves of the bookmark [pict. 13].
- Move the rectangle layer to the bottom in the Layers panel Arrange > Send to Back.
- Create the Cutting Line
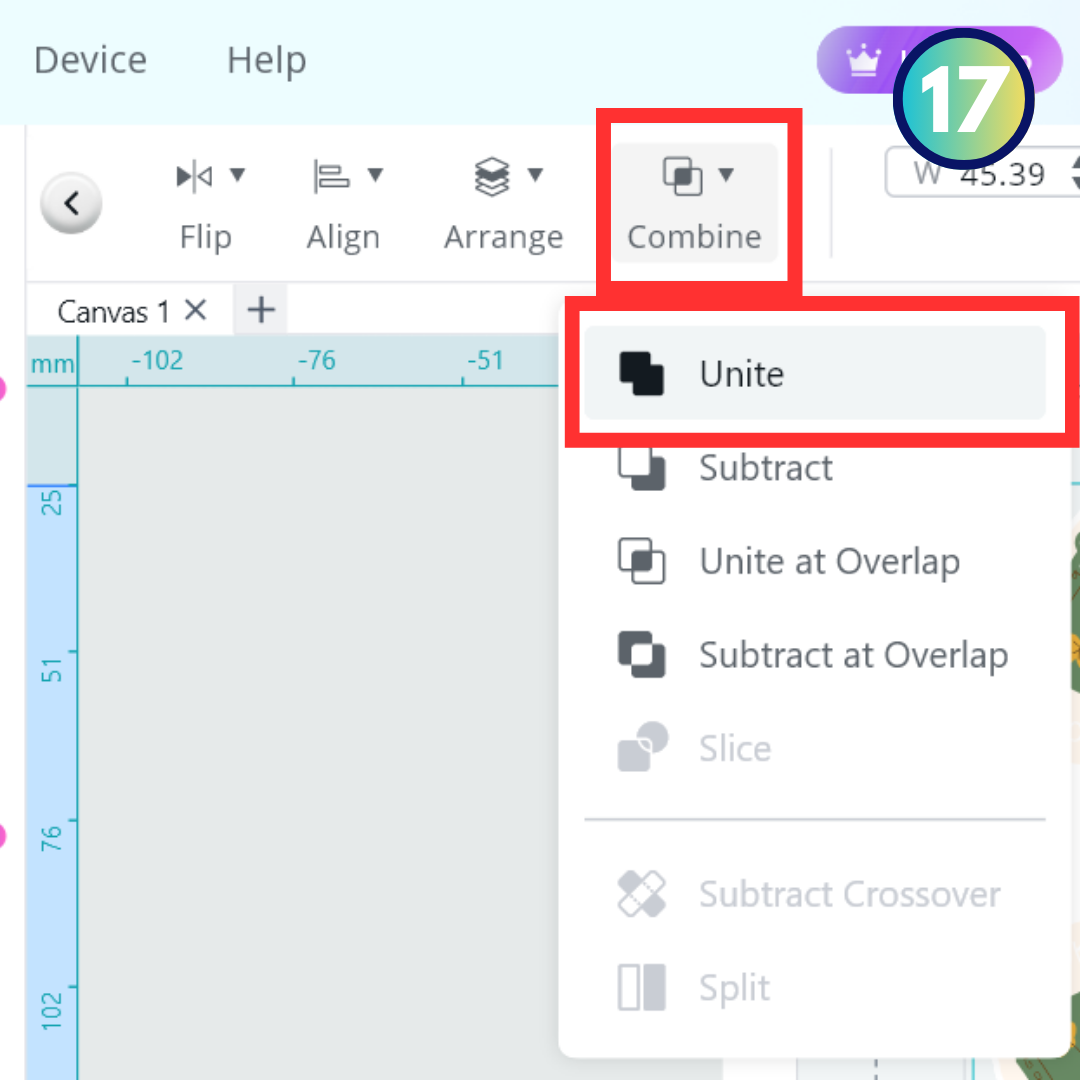
- Select the rectangle and offset layers. Combine them by clicking Combine > Unite. Move the new layer to the bottom using Arrange > Send to Back [pict. 18].
- Duplicate the Design
- Select all objects and click the Array menu to duplicate them on the Y and X axes. Ensure duplicates fit within the print border [pict. 19].
- To view the print border, go to Page Setup and enable the Print Border option.
- Finalize the Layout
- Resize and rearrange designs if they exceed the print border. When satisfied, select all objects and click Make [pict. 21].
Print and Cut




- Print the Design
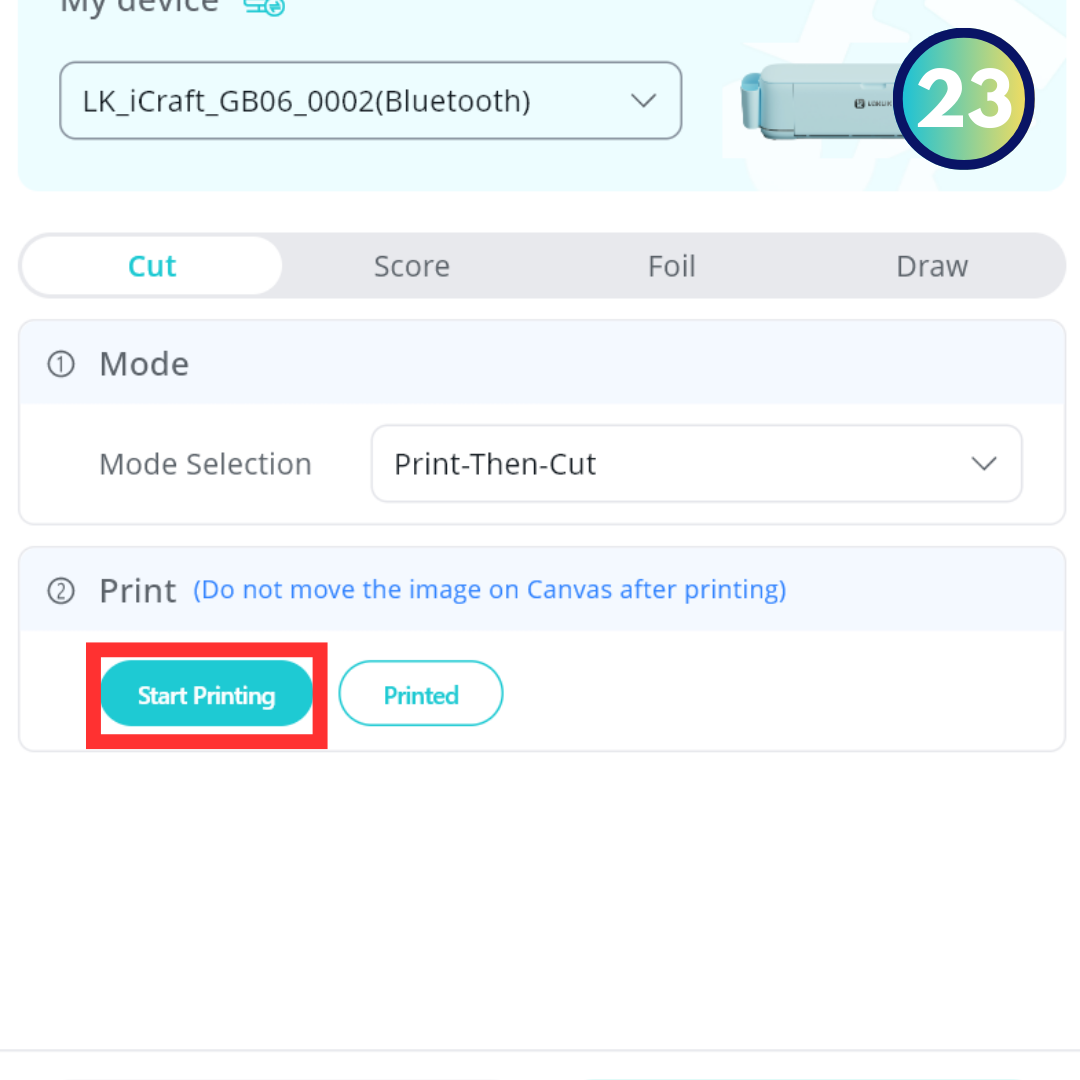
- In the Mode Selection screen, choose “Print-Then-Cut” and click “Start Printing.” Send the file to your printer. Use high-quality settings for best results.
- Lamination (Optional)
- Apply a cold lamination sheet to make the bookmark more durable or shiny.
- Prepare for Cutting
- Place the printed sheet onto the cutting mat, aligning it with the top left corner as shown on the Cut Screen.
- Set the white silicone ring to align with the black marking line on the mat.
- Set Cutting Parameters
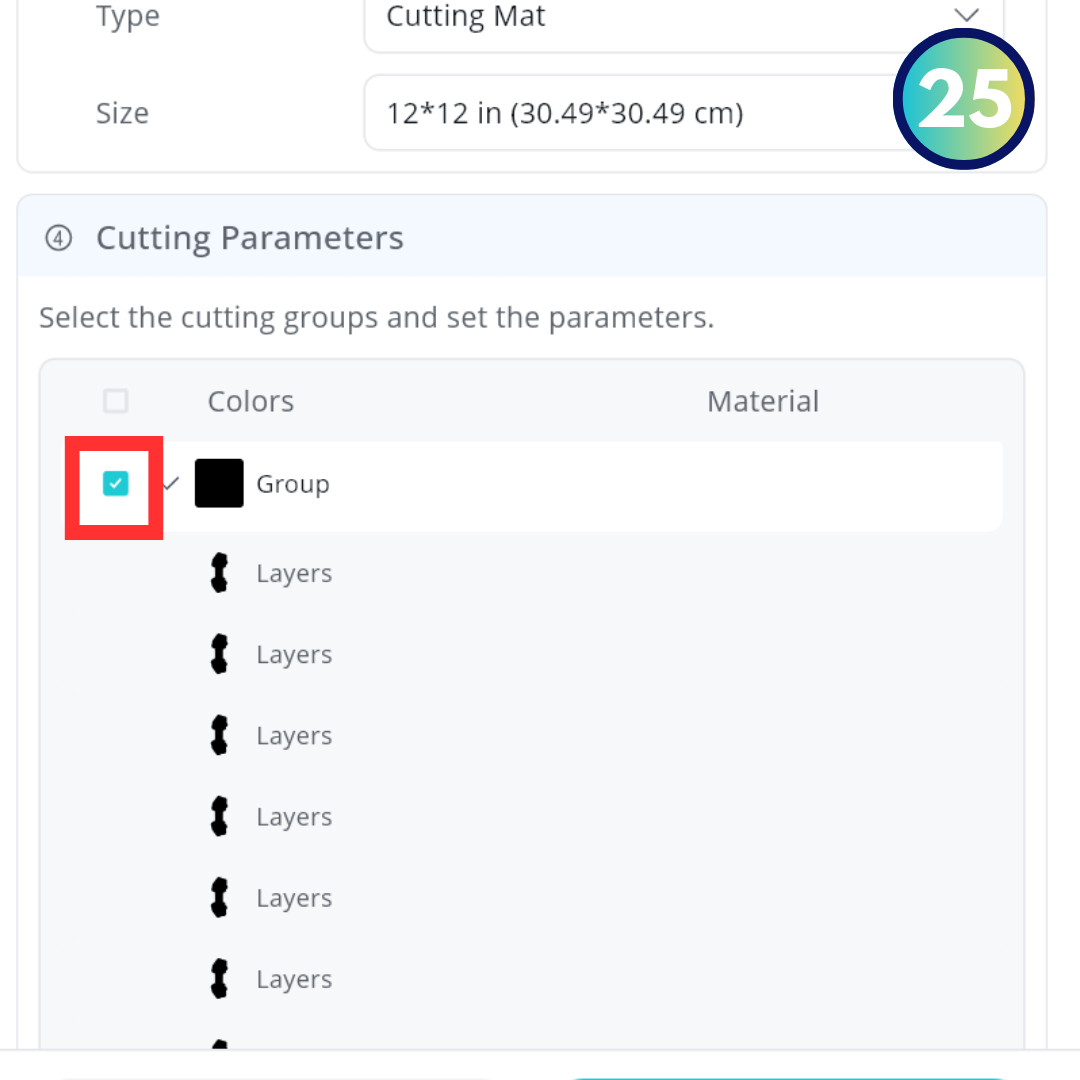
- Check the cutline color (I changed the color of the cutting line from white to black to make it recognizable for this tutorial). Ensure no other objects share this color [pict. 25].
- Choose the material type in the app or customize the parameters. For 260 gsm art paper, I used pressure: 8, speed: 5, and pass: 2 [pict. 27].
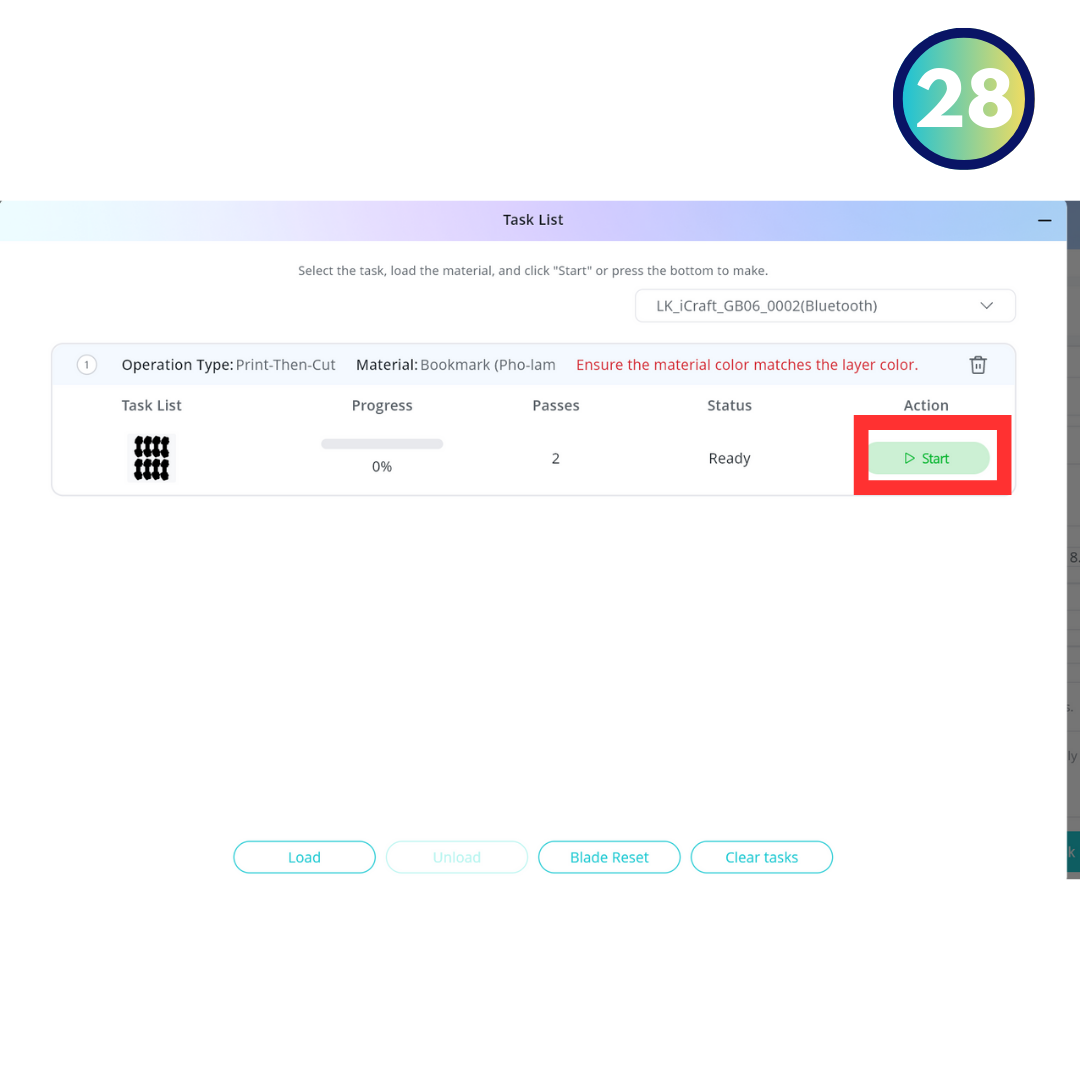
- Add the crafting task and click Start to begin cutting. If cuts are misaligned, recalibrate the Print Then Cut function.
Add the Magnet


- Fold the cut bookmark in half.
- Attach magnetic strips to the backside of each half.
Final Thoughts

This was my first time using the LOKLiK iCraft machine, and making a magnetic bookmark was a fantastic trial project. The machine’s ease of use, precise cutting, and quieter operation stood out compared to others I’ve encountered. Additionally, its size and affordability make it an excellent choice for crafters. Thank you, LOKLiK, for the opportunity to explore this versatile tool. I’m excited for more creative projects ahead!