How to Make a Pocket Solar System AR – Explore the Solar System in Your Space
by NextGenHorizon in Teachers > 3
161 Views, 0 Favorites, 0 Comments
How to Make a Pocket Solar System AR – Explore the Solar System in Your Space

.png)
Bring the cosmos to your desk! This project uses Autodesk Tinkercad to design a solar system model that you can explore in Augmented Reality (AR) on your phone or tablet. It’s easy to make, requires no 3D printer, and can be shared online so others can “walk around” your planets.
I wanted to capture the wonder of space exploration in a way anyone could access — no telescope or printer needed. By combining creativity with Autodesk tools, this project turns your digital design into an interactive AR experience.
Supplies
Everything you need to build and share the Pocket Solar System AR project
Materials
- Tinkercad account (free)
- Sketchfab account for hosting AR models
- Reference for planet sizes/colors (NASA page or similar)
Tools
- Computer with a modern web browser (Chrome, Edge, or Safari)
- Smartphone or tablet that supports AR view
- Stable internet connection
- Screenshot or screen-record tool (to document steps)
- (Optional) Simple image editor for the cover photo
Researching Planet Data

Before designing the model, I wanted to make sure each planet in my solar system had accurate, real-world proportions. I started by visiting official NASA sources to gather information about the planets’ diameters, colors, moons, and rings.
I used NASA's website for references:
- NASA Planetary Guide — for diameters, number of moons and visual references and colors
After collecting the data, I simplified everything into a manageable scale model so it would fit inside my Tinkercad workspace.
For this project, I used the scale:
1 mm = 1,000 km
That means:
- Earth’s 12,756 km diameter becomes 12.8 mm
- Jupiter’s 142,984 km diameter becomes 143 mm
- Mercury’s 4,879 km diameter becomes 4.9 mm
This kept the planets’ size differences realistic without making the scene too large.
I also noted each planet’s general color based on NASA imagery (for example, Earth = blue, Mars = reddish, Jupiter = tan with bands). These colors would help me make the final AR model look instantly recognizable.
Finally, I logged all this information into a planet data table in my Monday.com workspace to keep things organized for the modeling phase. Feel free to use Google Sheets or a notes app to log your data. Each row included the planet name, scaled diameter, number of moons, rings, and its approximate color.
Designing the Solar System in Tinkercad


With all the planet measurements and colors ready, I moved into Autodesk Tinkercad to begin building the 3-D model of my solar system. Tinkercad is simple, web-based, and perfect for turning scientific data into creative digital design.
I started by creating a new design and naming it Pocket Solar System. From the Basic Shapes menu, I dragged spheres onto the workplane—one for each planet and one larger sphere for the Sun. Using the Scale tool, I adjusted each planet’s size based on my 1 mm = 1,000 km scale.
For example:
- Earth ≈ 12.8 mm
- Mars ≈ 6.8 mm
- Jupiter ≈ 143 mm
Once the sizes looked right, I added color to match NASA’s real-world imagery:
Mercury = gray | Venus = pale yellow | Earth = blue and white | Mars = reddish orange | Jupiter = tan with bands | Saturn = pale gold | Uranus = cyan | Neptune = deep blue.
To represent each planet’s orbit, I used the Torus shape. Flattening the ring created a thin orbital path, and scaling each copy outward formed concentric circles around the Sun. I placed every planet along its own orbit and kept the Sun centered to maintain balance.
After aligning everything, I added simple text labels for the planet names and grouped each planet with its orbit. The result was a clean, well-organized solar system layout ready for AR viewing.
Pro Tip #1: Don’t worry if every planet’s distance or diameter isn’t perfectly to scale—this project is about learning and creativity. As long as each planet looks recognizable and your layout feels balanced, your solar system will still look amazing in AR!
When the model looked complete, I exported it as a GLTF (.glb) file—this format keeps the colors and proportions intact and is perfect for use in augmented-reality platforms.
Finishing and Exporting in Autodesk Fusion 360


Once the base solar system was complete in Tinkercad, I used the “Send to Fusion 360” option to refine the model and prepare it for AR viewing. This is one of the easiest ways to bridge design and visualization within Autodesk’s ecosystem — everything transfers smoothly and stays in proportion.
Inside Fusion 360, all of the planets and orbit rings appeared as individual solid bodies, which made them much easier to edit. Using the Appearance tool, I applied new colors to match NASA imagery more closely. Fusion’s material system allowed me to fine-tune each hue and gloss level until the planets looked right.
Here’s the color palette I used:
Sun – golden yellow | Mercury – gray | Venus – pale yellow | Earth – blue and green | Mars – red-orange | Jupiter – tan | Saturn – pale gold | Uranus – light cyan | Neptune – blue
Once the colors felt balanced, I adjusted the scale slightly so the whole model fit comfortably in view while still showing the size differences between planets. The Sun stayed at the center while each orbit ring kept its spacing.
When everything looked good, I exported the project by going to File → Export → USDZ (.usdz). This format keeps all colors and materials intact and can be opened directly on an iPhone or iPad with AR Quick Look. I AirDropped the file to my phone, tapped it, and instantly saw my solar system appear on the desk — a full 3-D scene ready to explore in real space.
Pro Tip #2: The goal isn’t to make every detail scientifically perfect — it’s to capture the sense of scale and wonder. As long as each planet looks distinct and the layout feels balanced, your solar system will look amazing in AR.
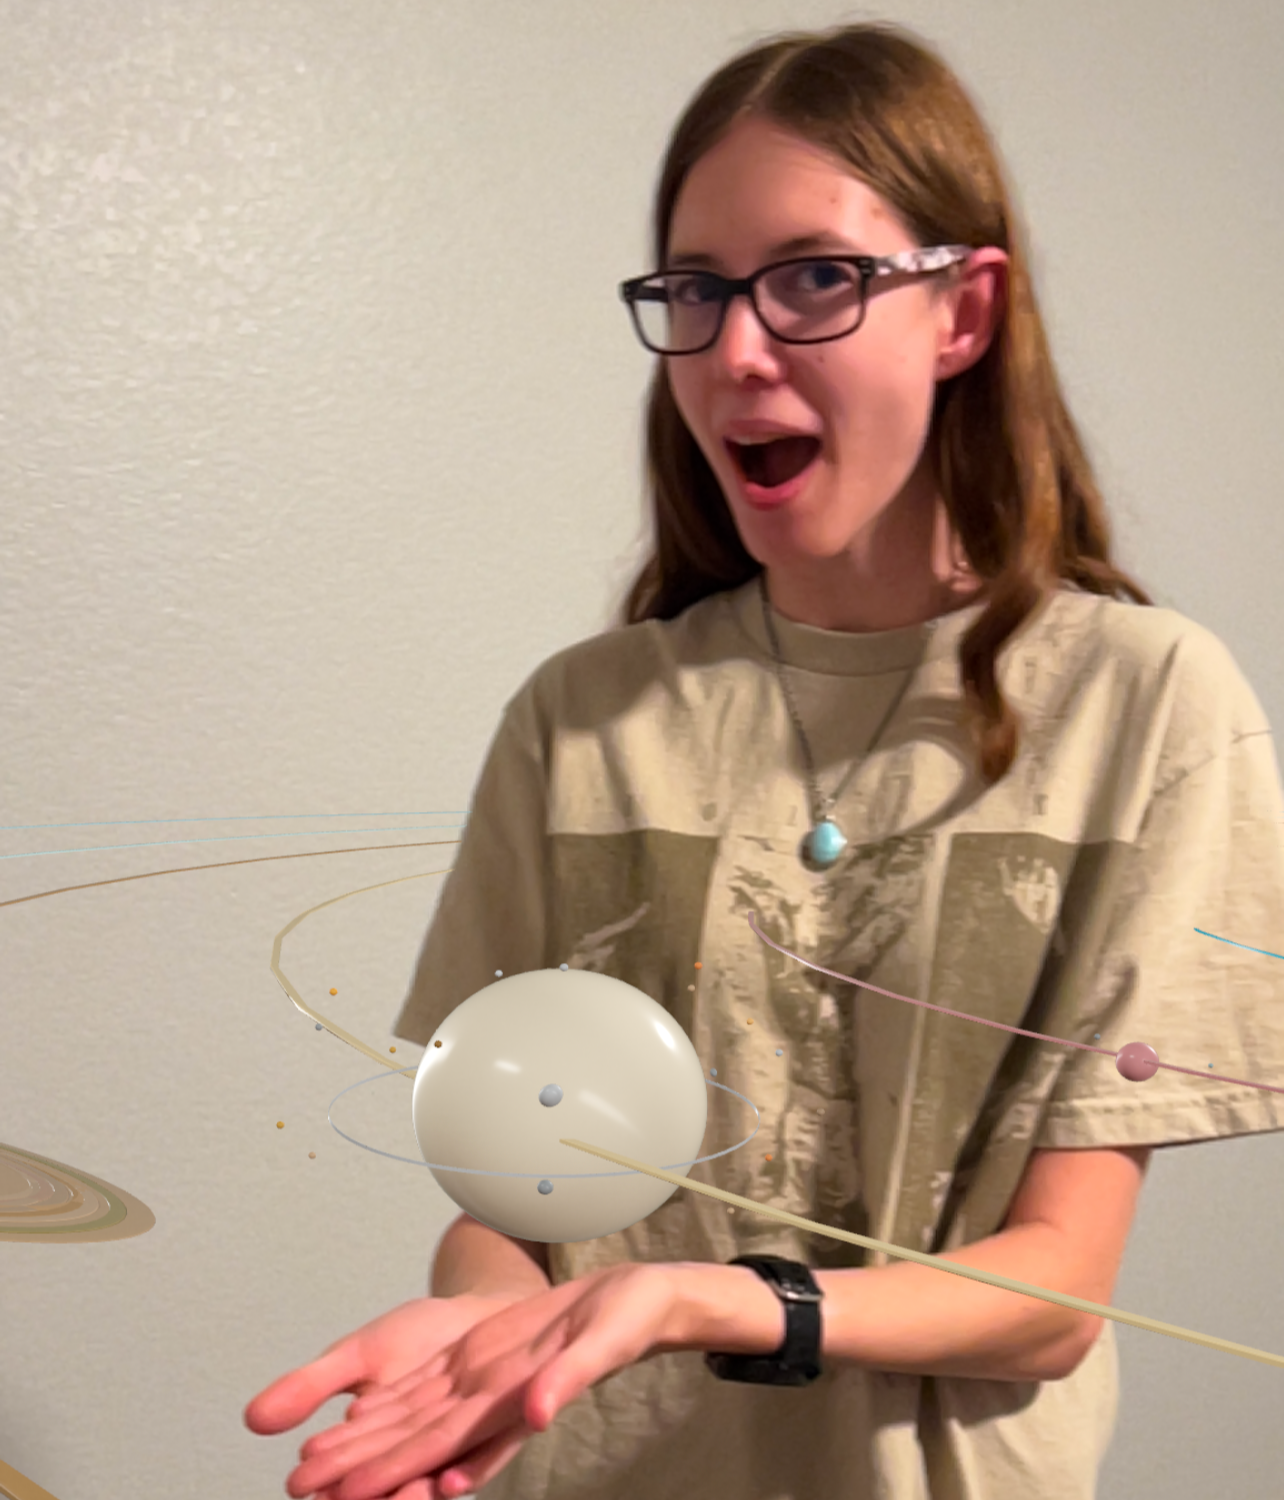
Capturing and Enjoying Your Solar System in AR
.png)
.png)
After exporting the final model as a USDZ file and opening it in AR Quick Look, I could finally see my Solar System come to life. Placing it on the floor made it feel like a tiny universe floating right in front of me.
I used my iPhone’s camera tools to record and explore:
- Screenshots to capture wide views of all the planets.
- Screen recording to walk around the model and show the 3-D depth.
- Close-ups to highlight the colors I added in Fusion 360.
- Dancing for a bit more fun.
If the model feels too big or small, pinch to resize it. You can even walk between the planets or tilt your phone to look “through space.” It’s a fun, hands-on way to experience what you built instead of just viewing it on-screen.
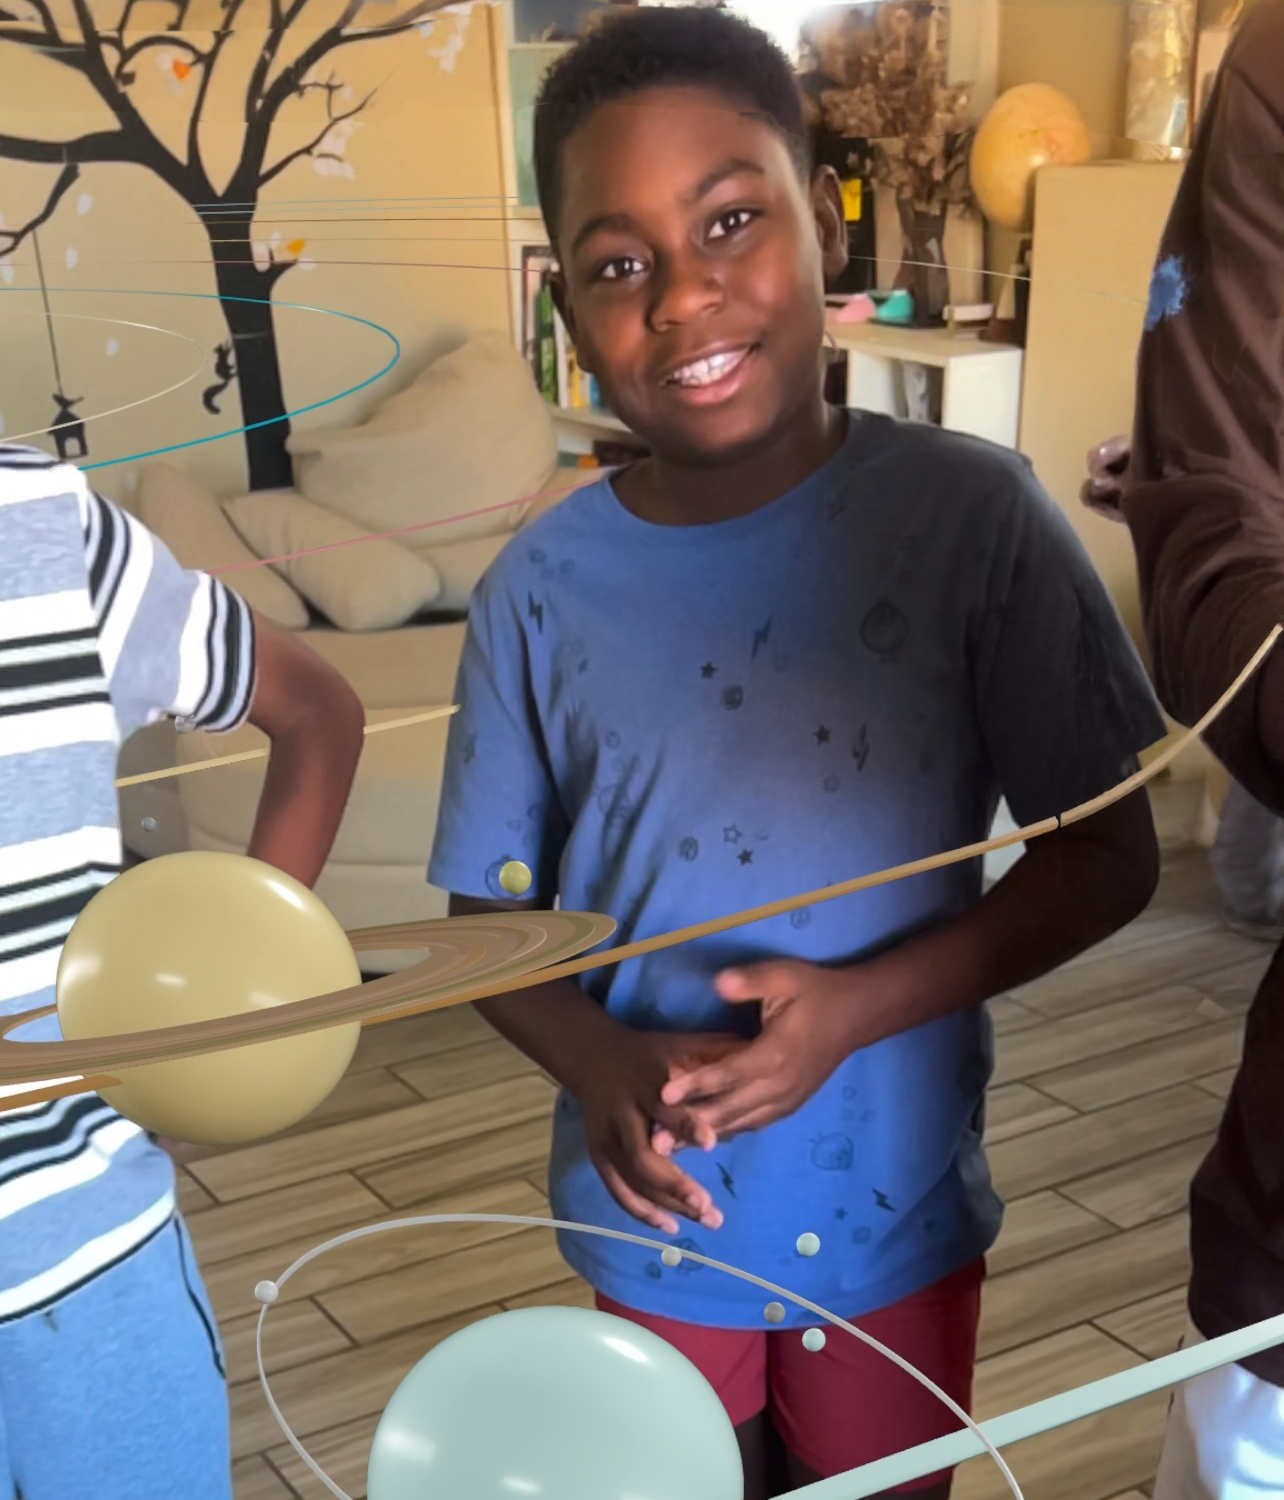
Have Fun With a Solar System Dance Party

Once everything was finished, we turned this project into something even better — a dance party in space! With the Solar System floating right in the room through AR, my students started moving around the planets and even dancing inside the Sun. It was the perfect way to celebrate all the work that went into creating this tiny universe.
The best part about Augmented Reality is that it doesn’t just show your design — it lets you interact with it. Whether you’re walking between orbits, reaching out to “touch” Saturn’s rings, or spinning around the planets to the rhythm of music, it brings your imagination to life.
Turn on some space-themed music (or your favorite playlist), invite friends or classmates, and have fun exploring your creation together. Every new movement changes how you see your Solar System — and every laugh makes the project even more memorable.