How to Make a Ribbon Rose Bouquet
by melaniereyes06 in Craft > Parties & Weddings
407 Views, 2 Favorites, 0 Comments
How to Make a Ribbon Rose Bouquet
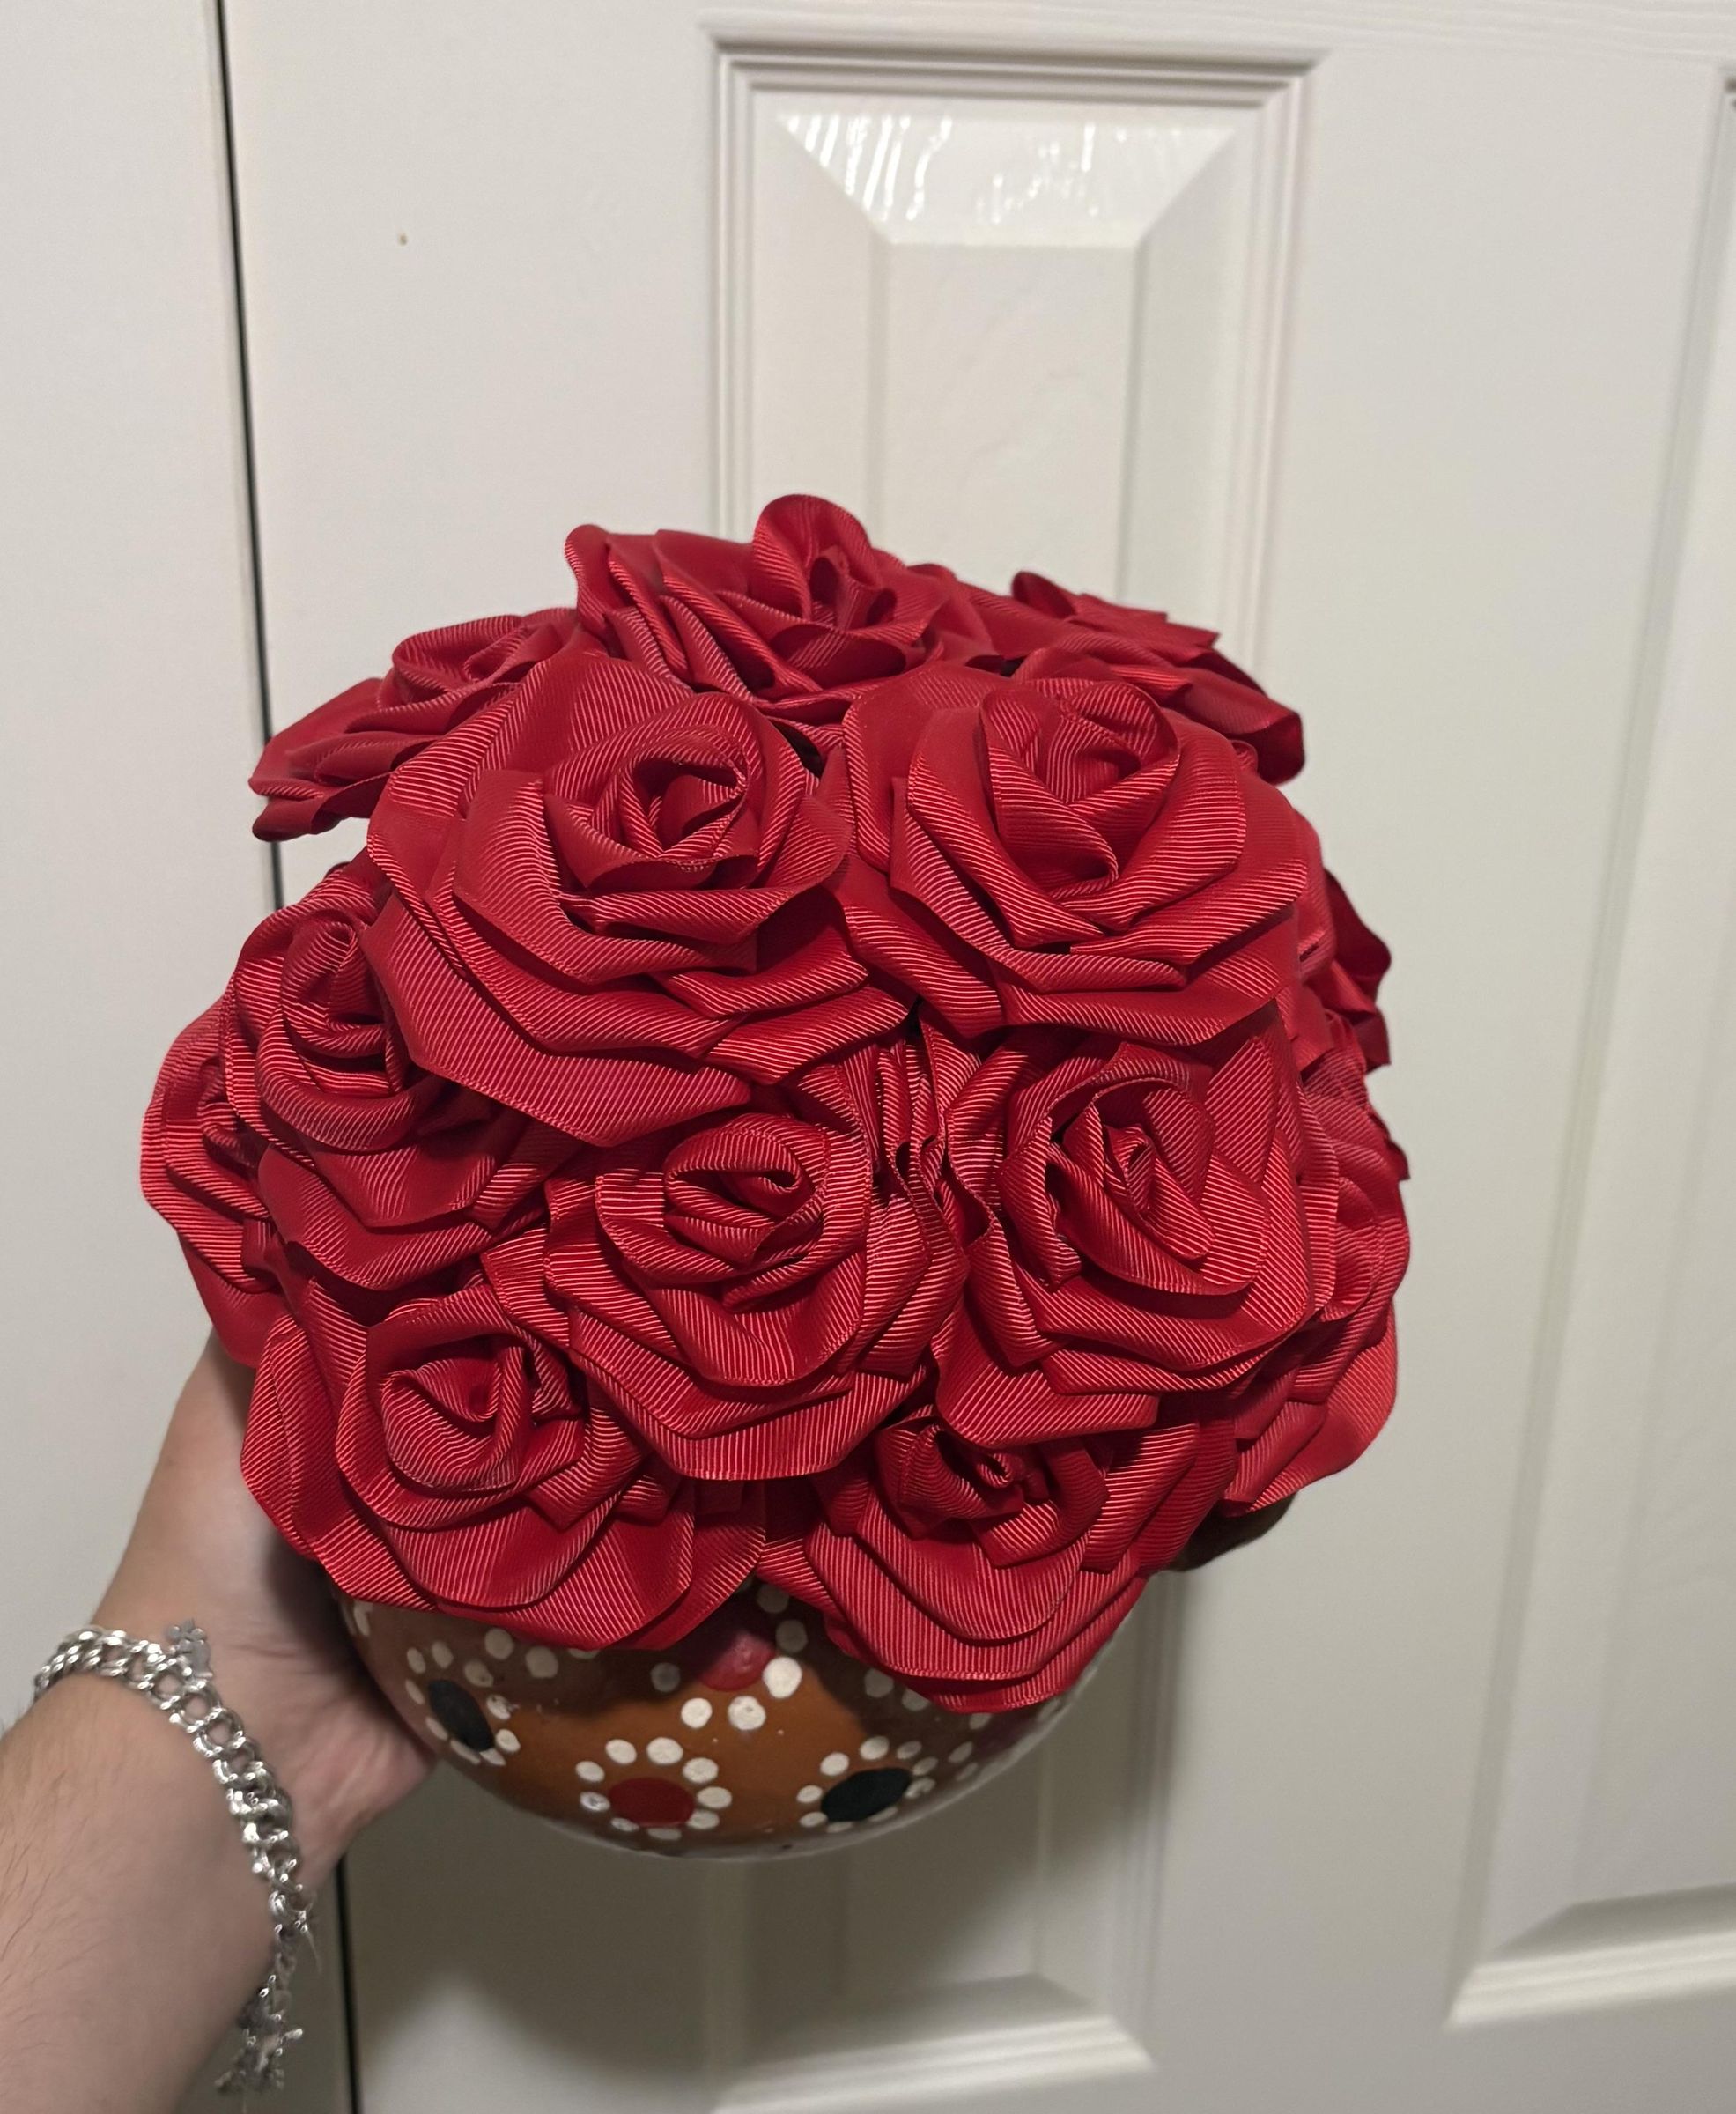
Creating a ribbon rose bouquet is a fun and creative way to make a handmade flower arrangement that can be used as a gift, decoration, or keepsake. Unlike real flowers, ribbon roses can last a long time and can be personalized by choosing different colors and designs. Making ribbon roses may seem difficult at first because the petals require careful folding, layering, and shaping, but this guide will break the process into simple steps. This guide will show how to turn basic materials like ribbon, sticks, and floral tape into a complete rose bouquet by explaining how to create each petal, build the layers of the rose, and arrange the flowers together. This guide will help beginners create their own handmade ribbon rose bouquet.
Supplies
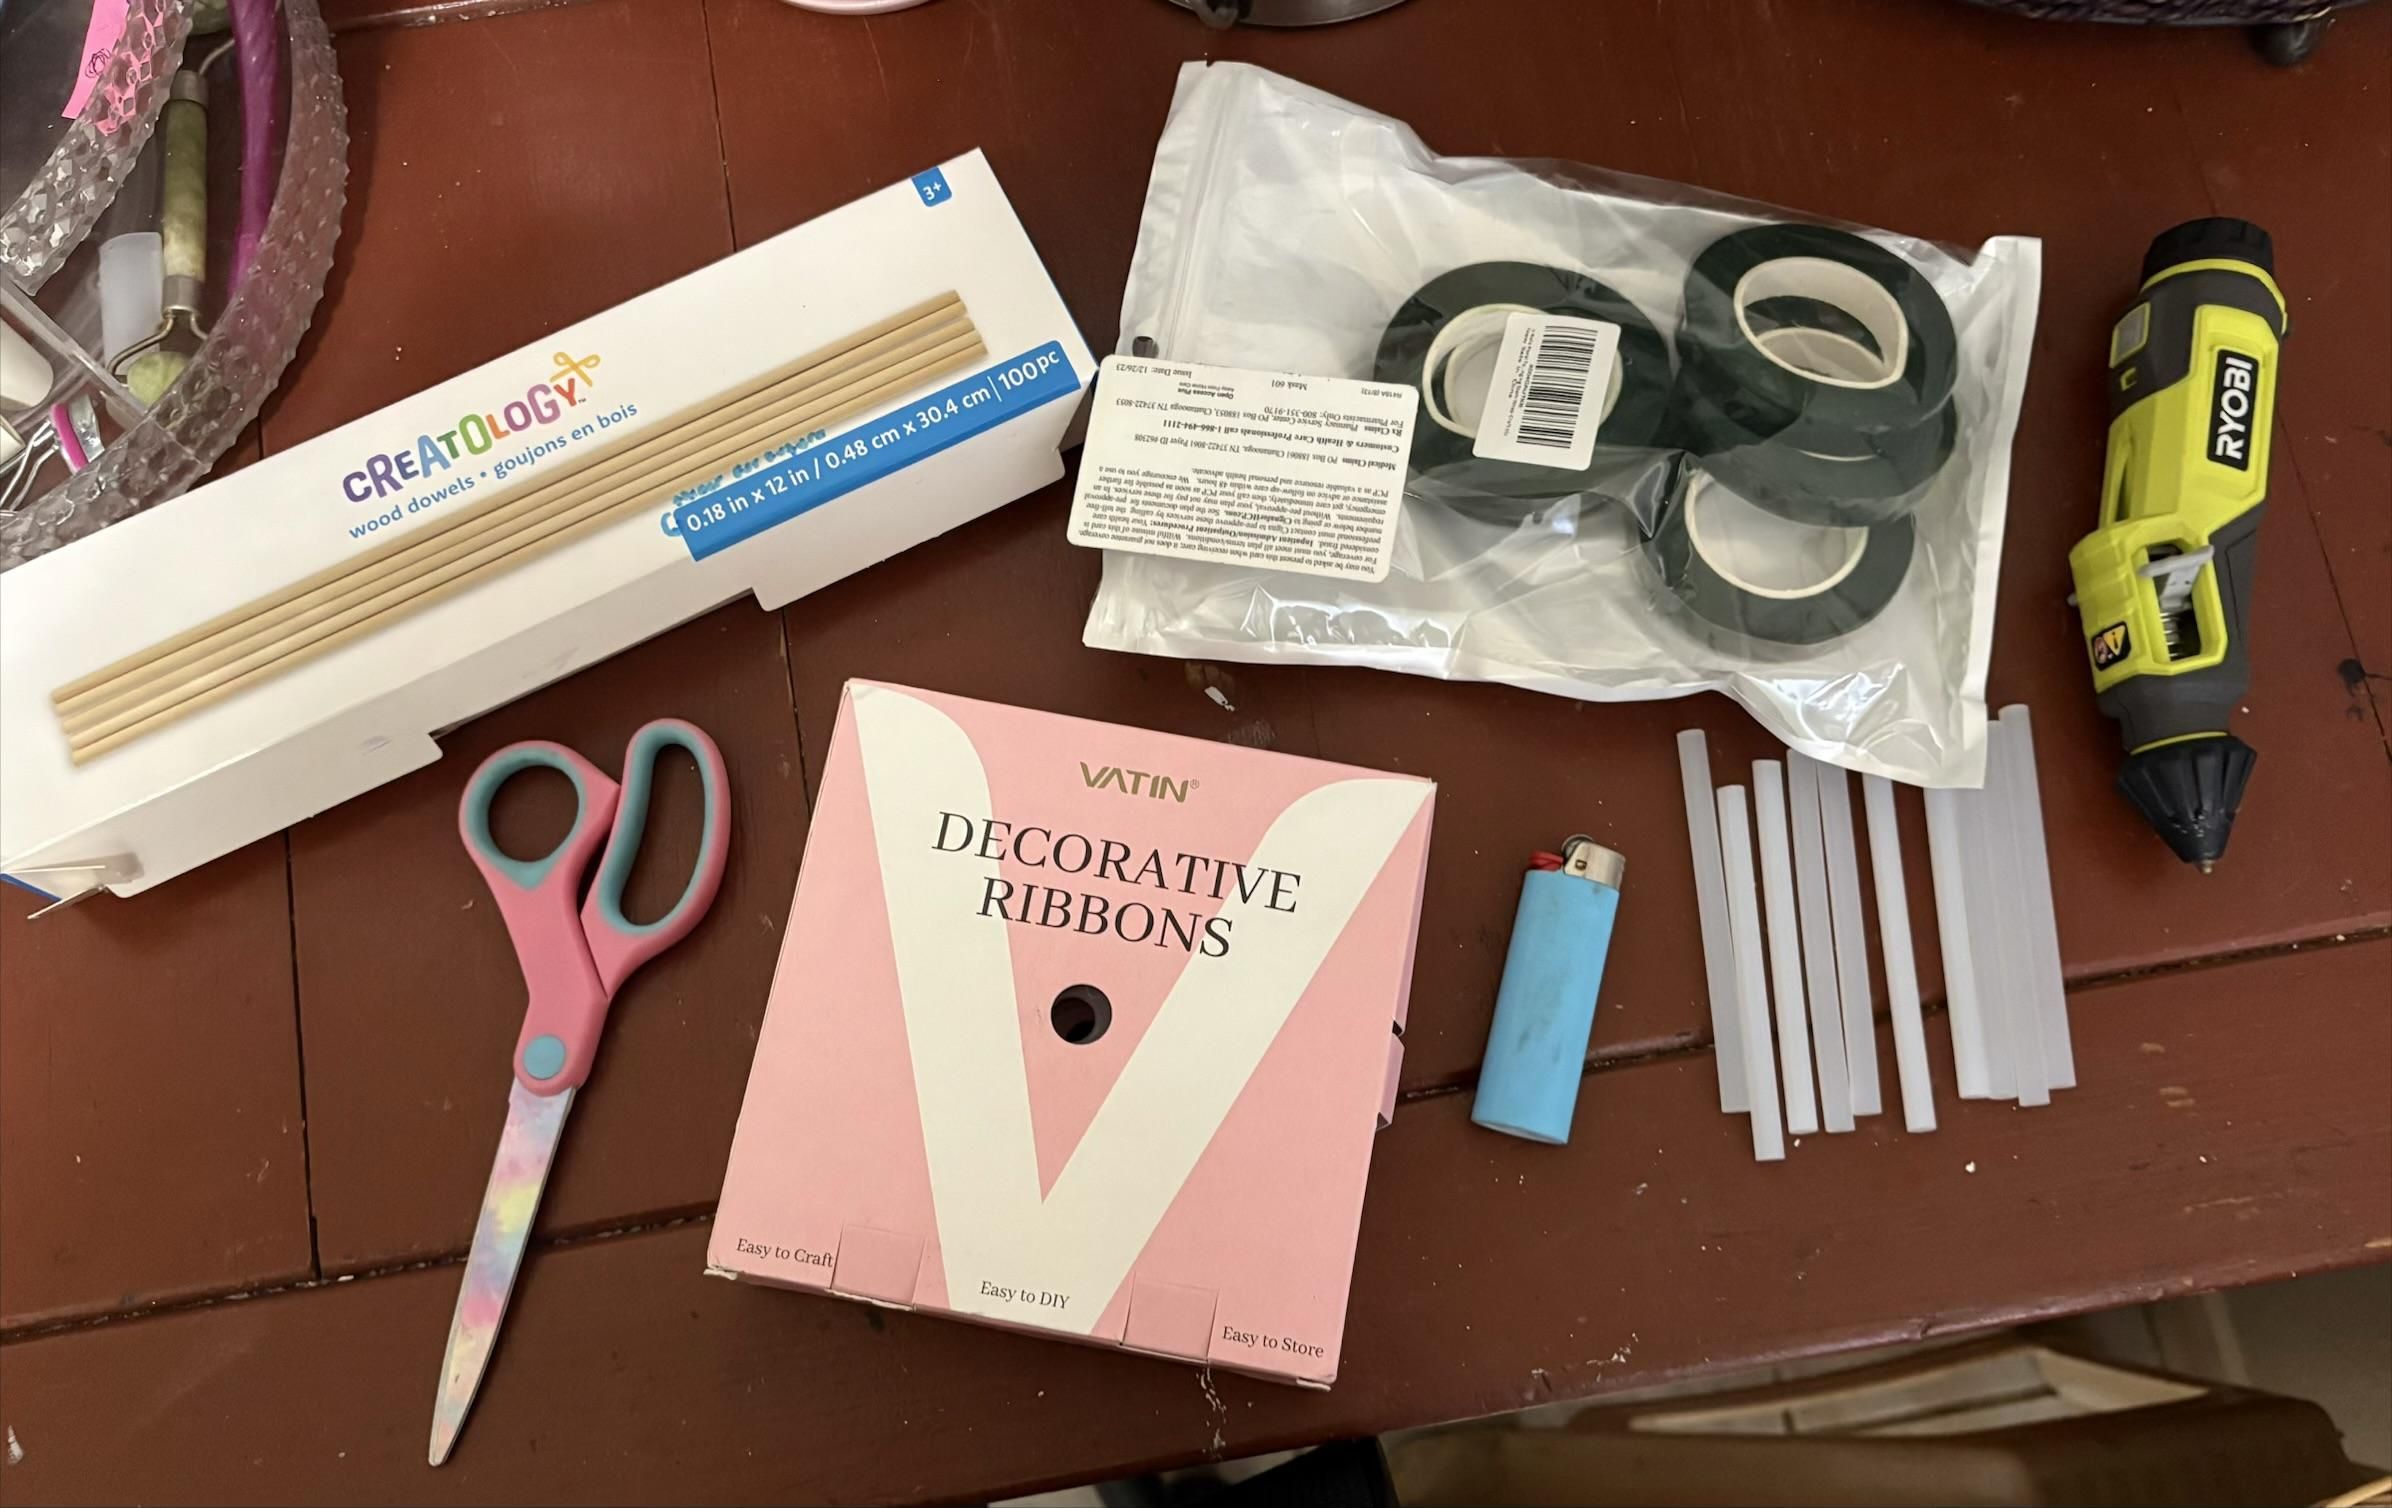
- Satin Ribbon (1.5” x 3 yd)
- Wood dowels/sticks (0.18 in x 12 in)
- Scissors
- Hot glue gun and glue sticks
- Floral tape
- Card
- Lighter or candle
Note: One roll of ribbon creates approximately three roses. Before beginning, ensure you have enough ribbon for your bouquets.
Note: The stem length can be customized by using a longer or shorter stick depending on the desired bouquet size.
Cut the Ribbon
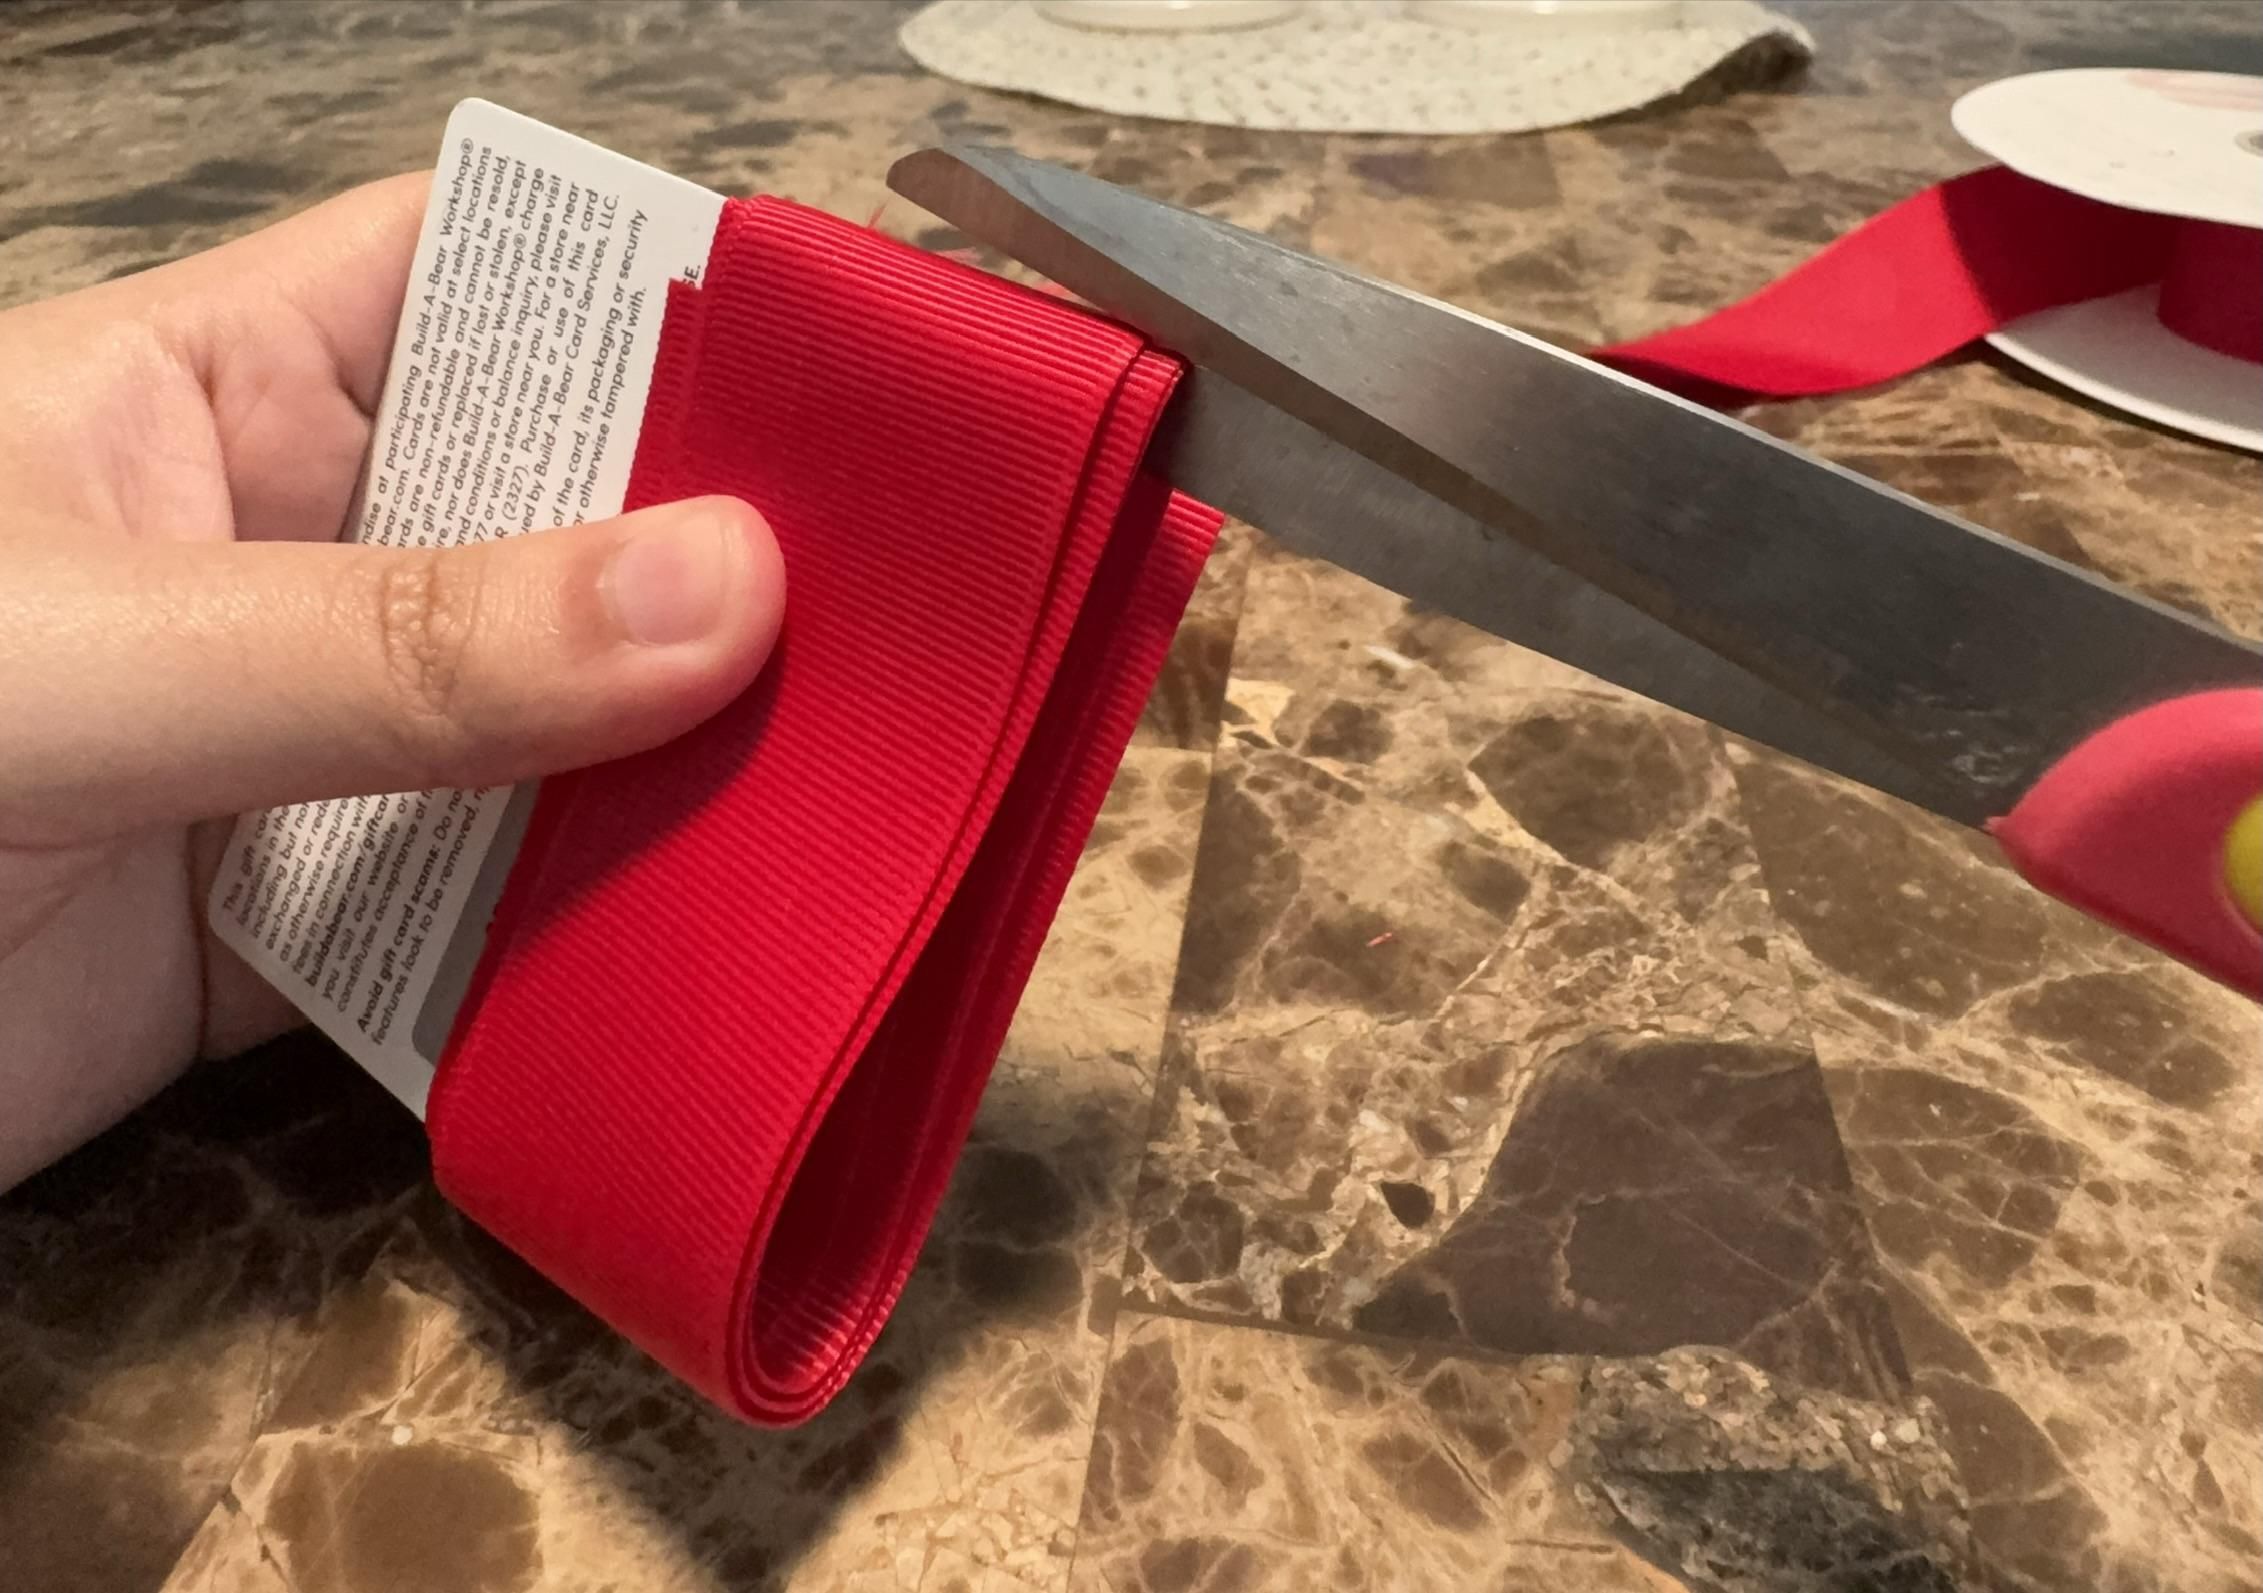
Wrap the ribbon around a card 13 times, then cut across the top and bottom folds.
Organize the Petal Layers
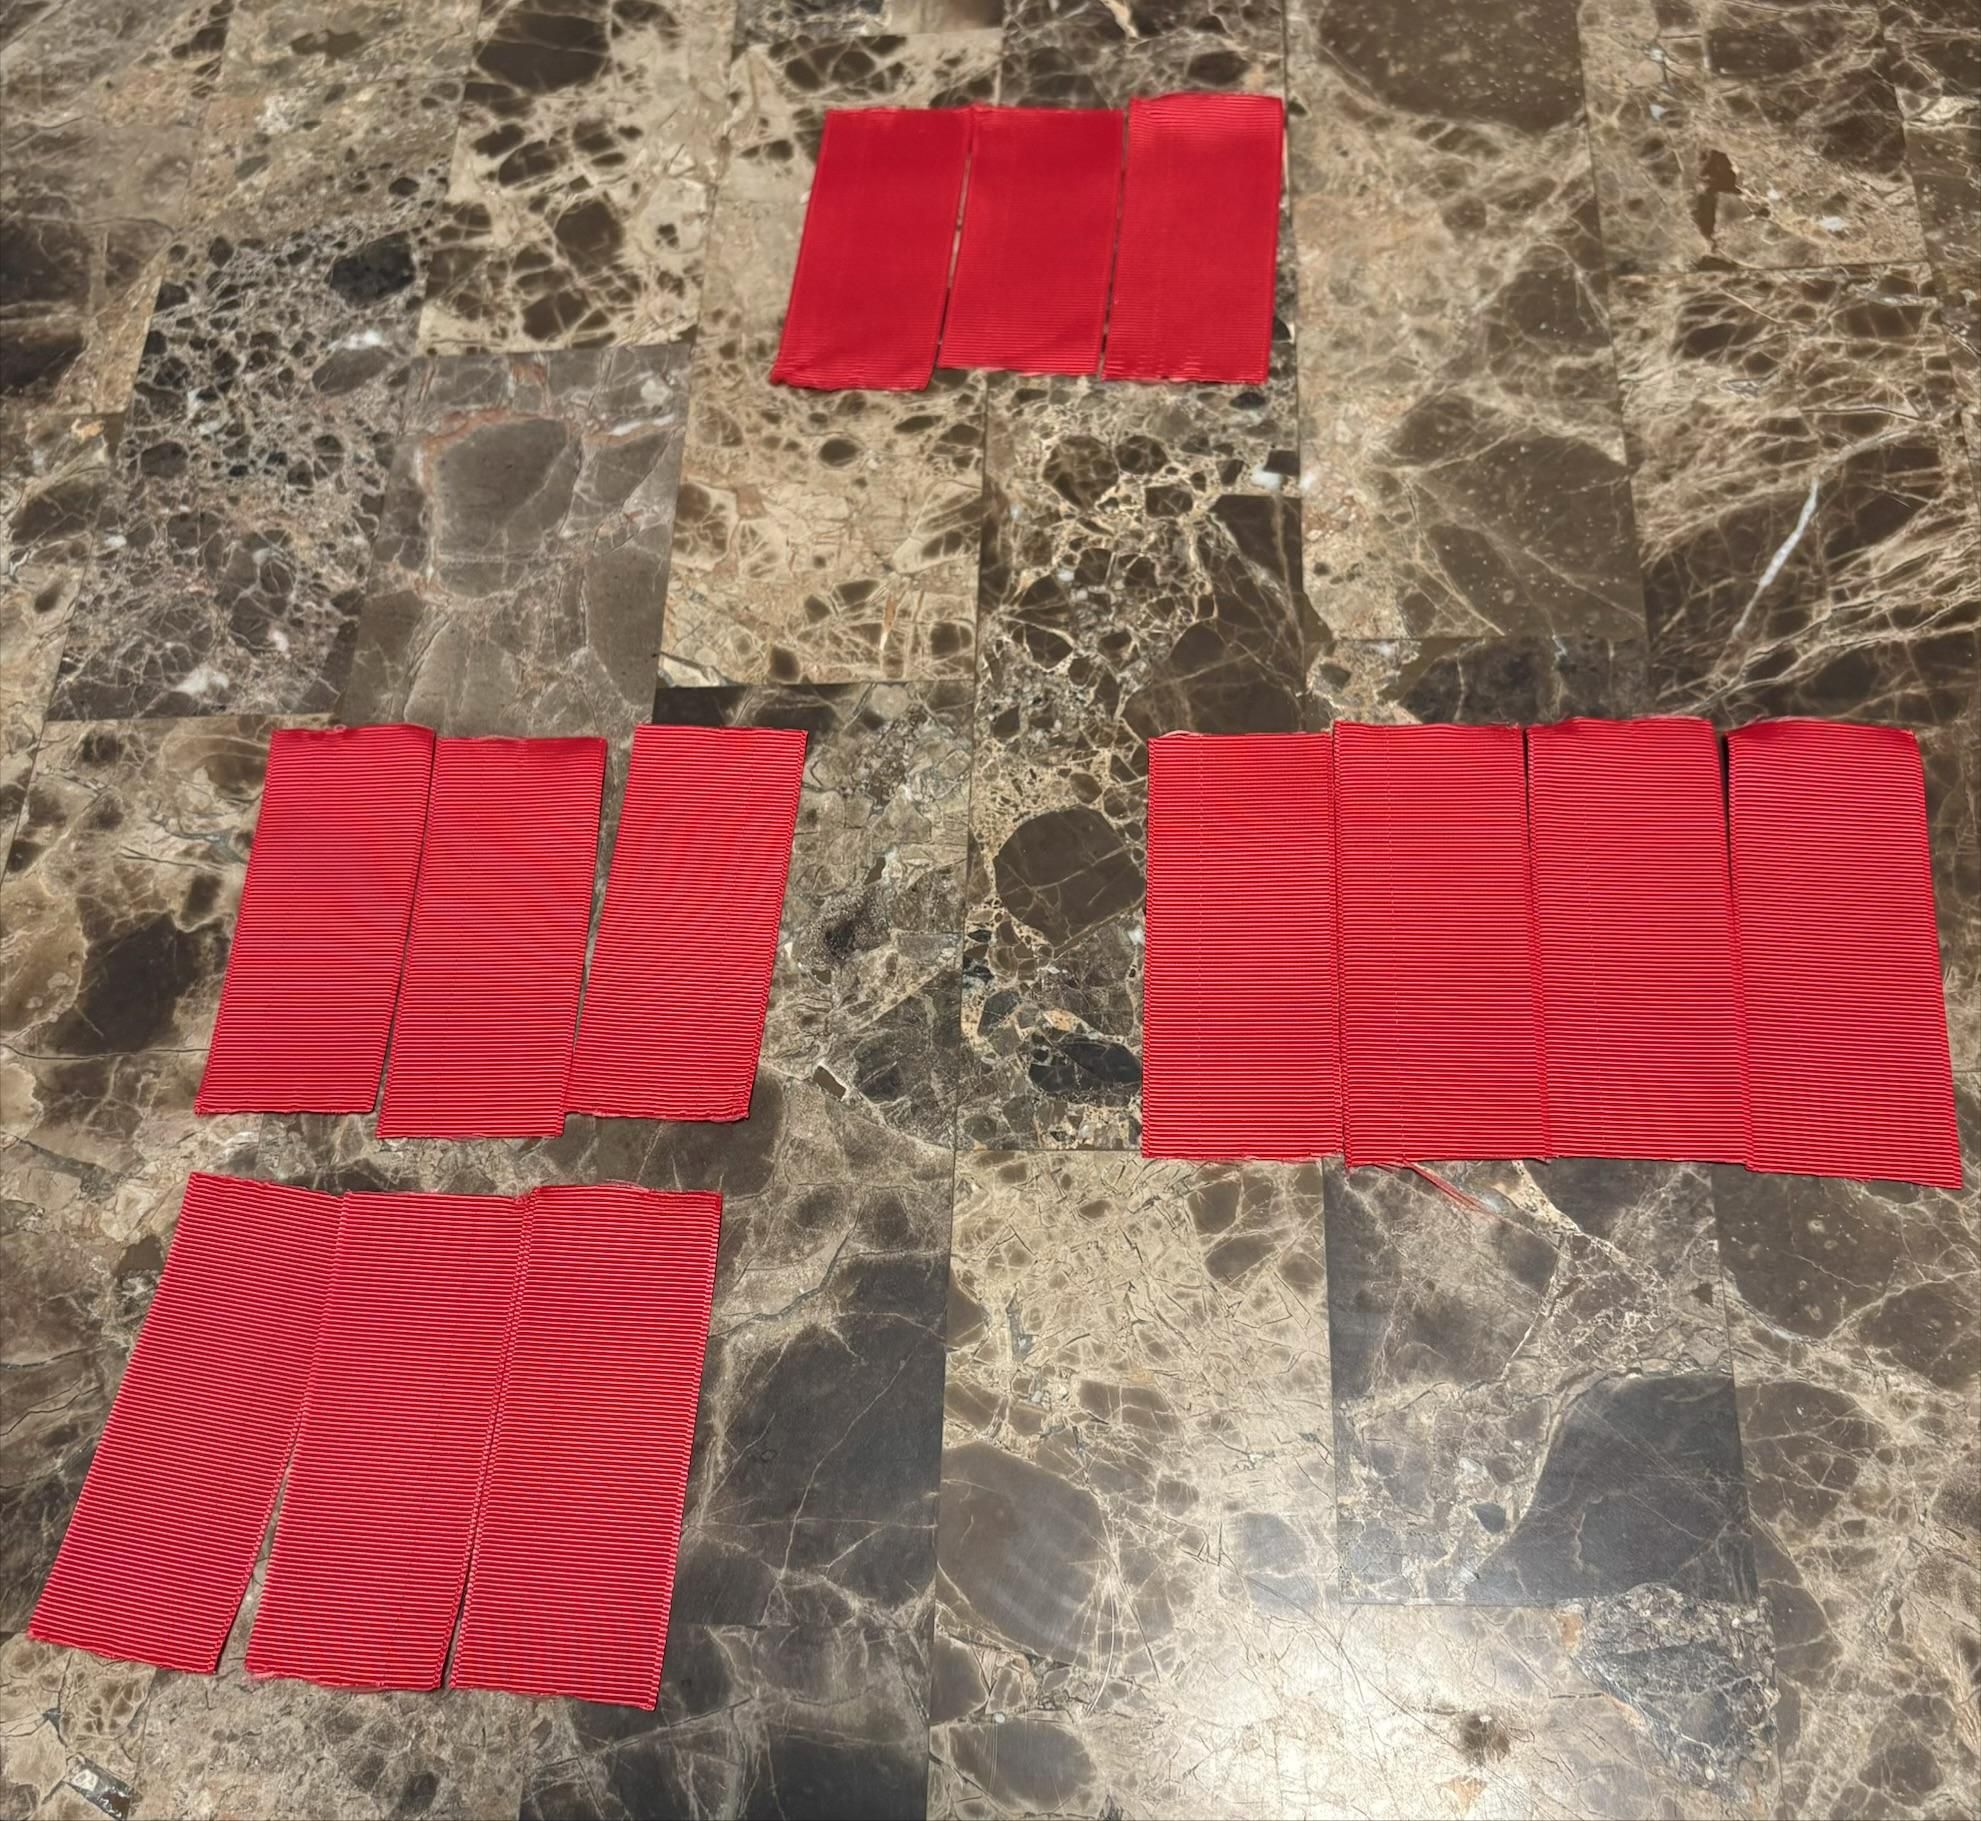
Separate the cut ribbon pieces into three groups.
This will create the different layers of the roses: 3 pieces for the center, 6 pieces for the middle layer, and 4 pieces for the outer layer.
Seal the Ribbon Edges
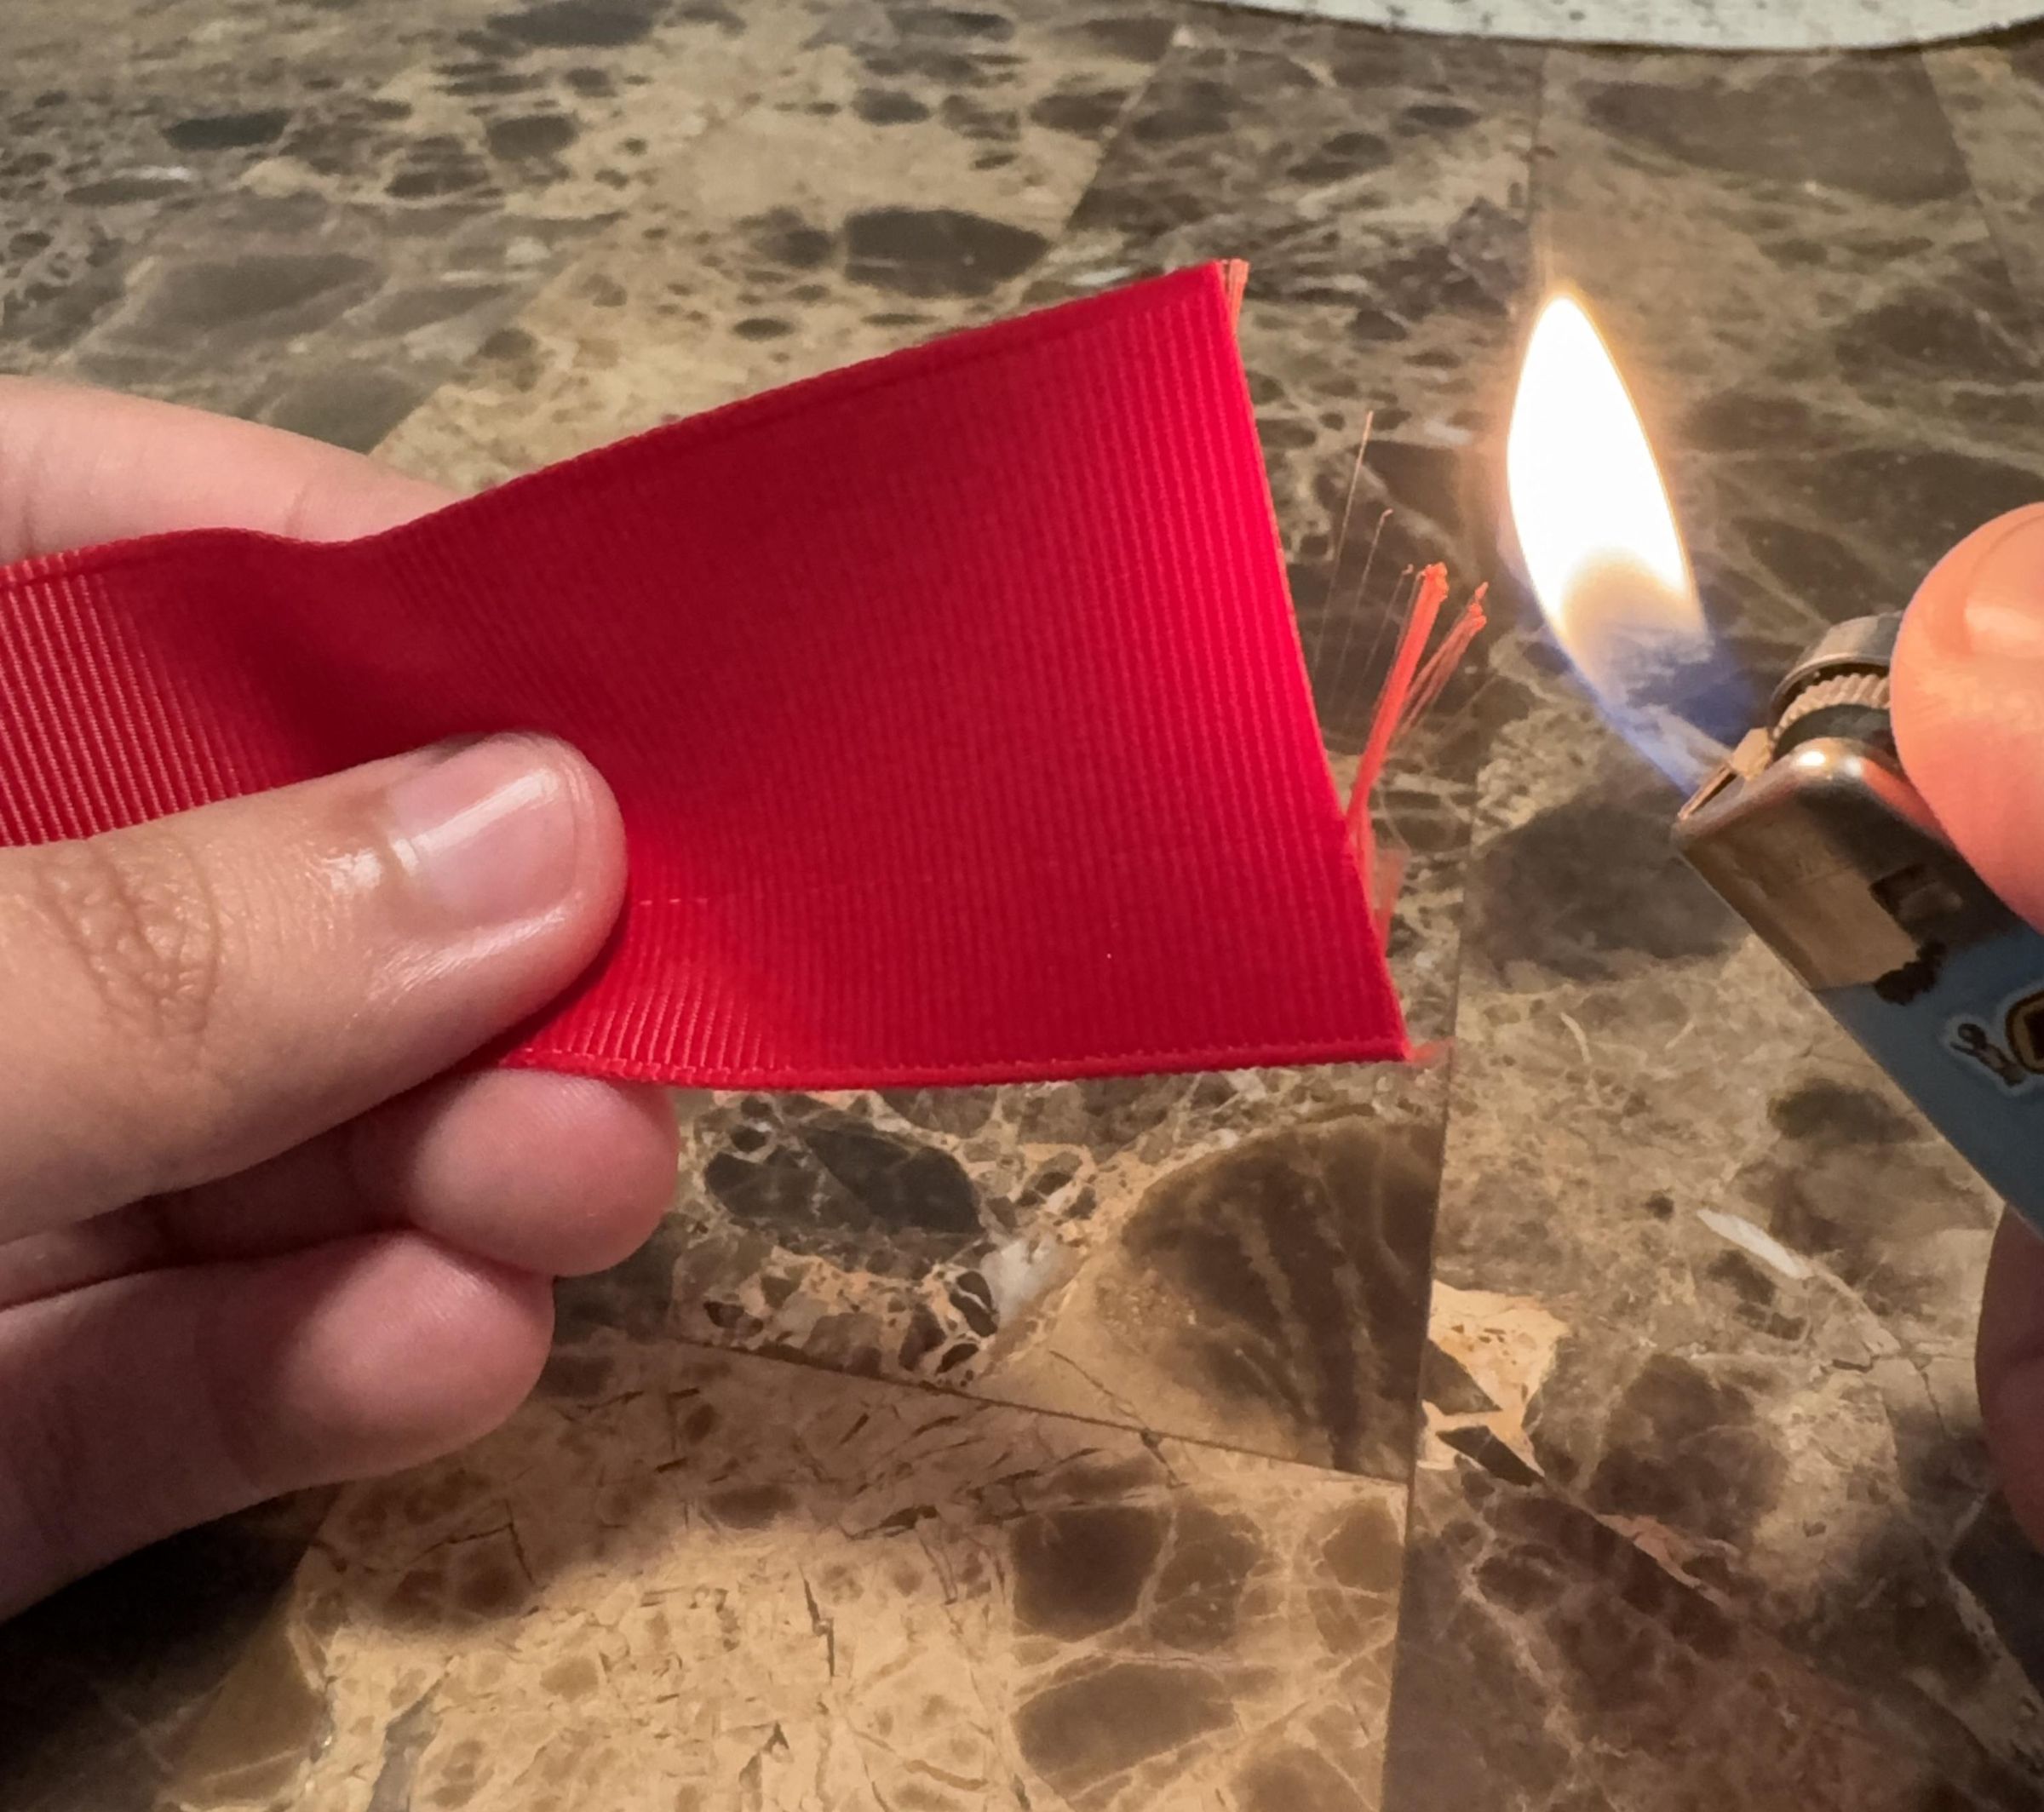
Carefully heat the edges of each ribbon piece to remove the frayed ends.
Warning: Caution when heating the ribbon edges. Keep a good distance between the ribbon and the flame to prevent burning.
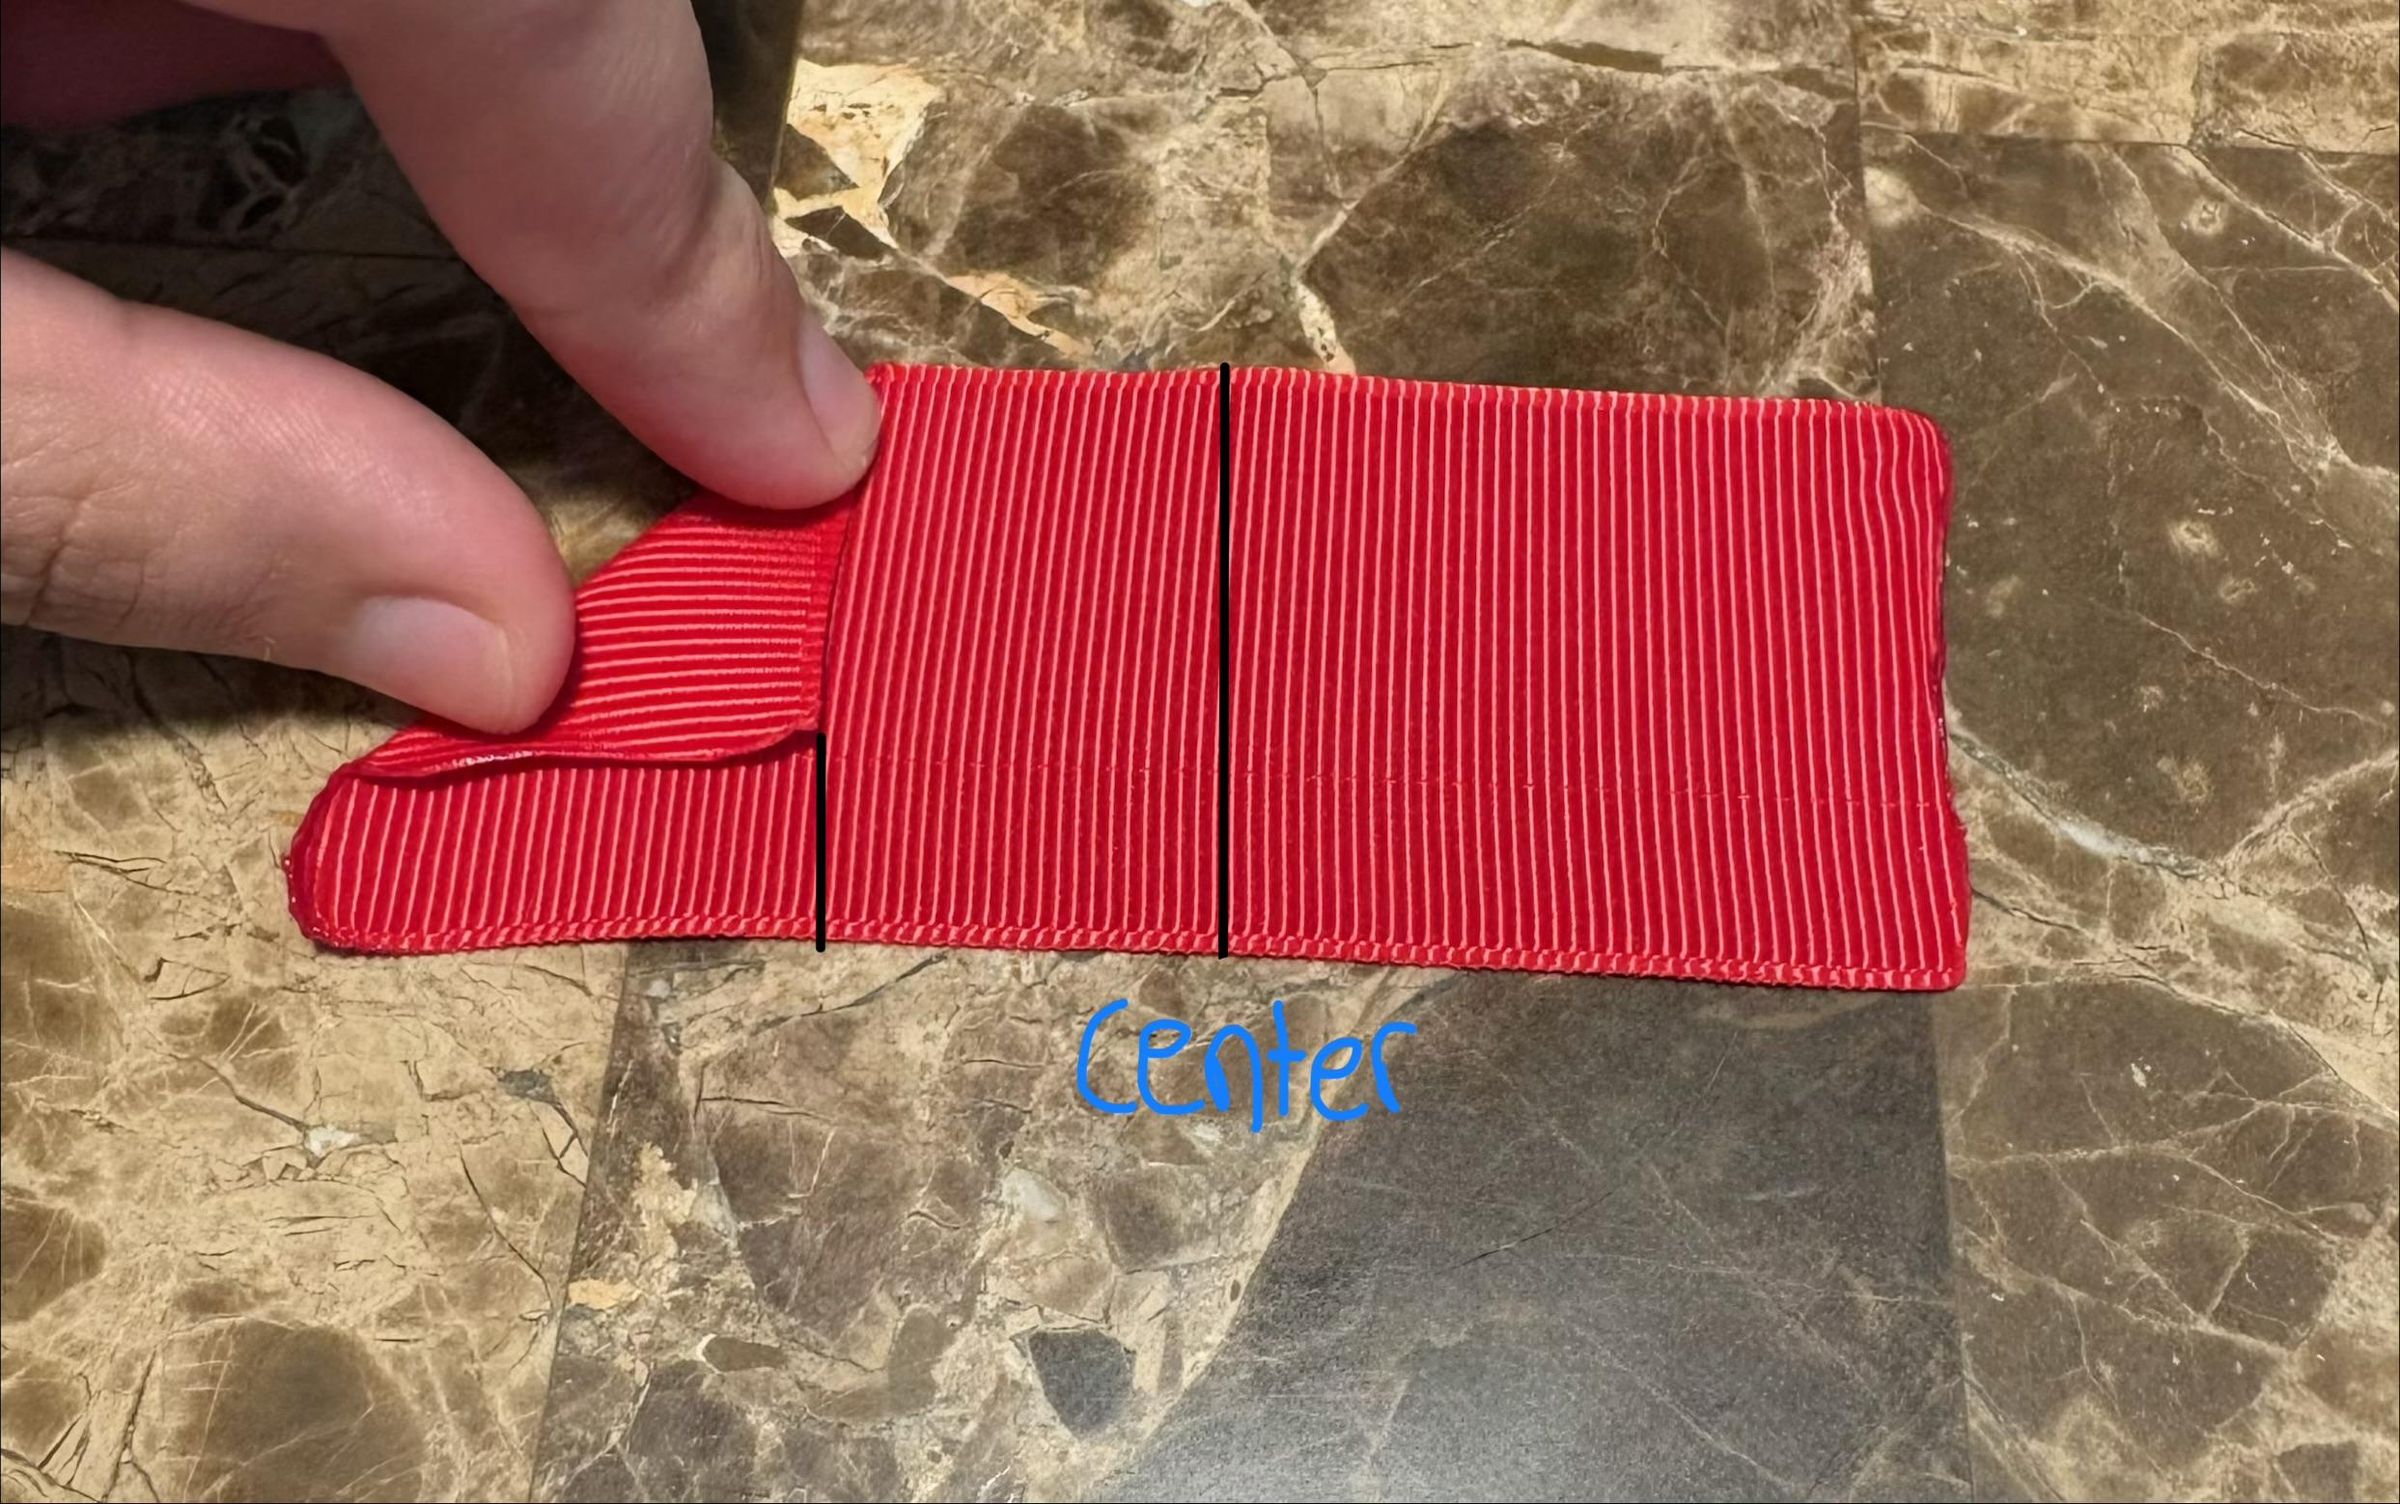
Foldthe First Petal
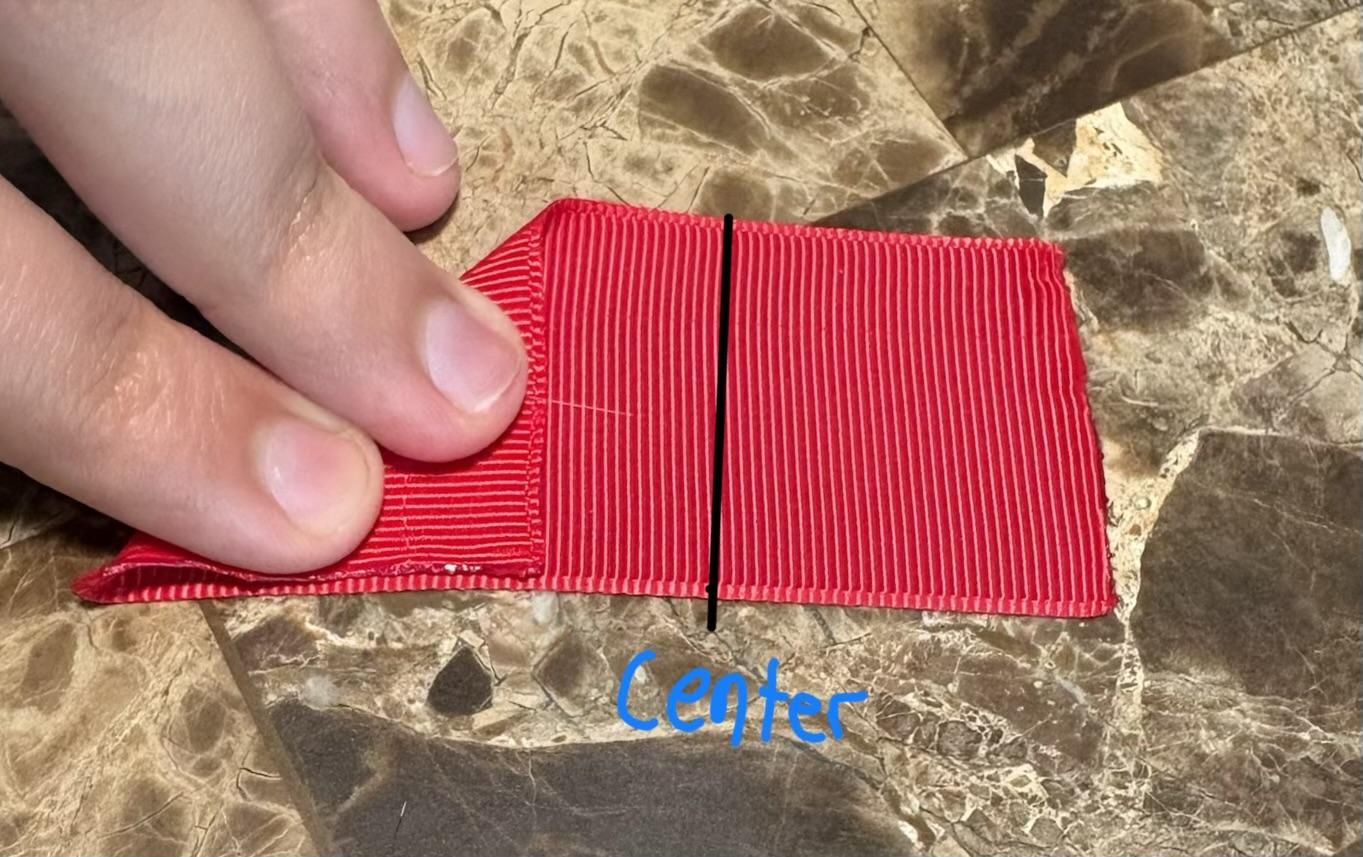
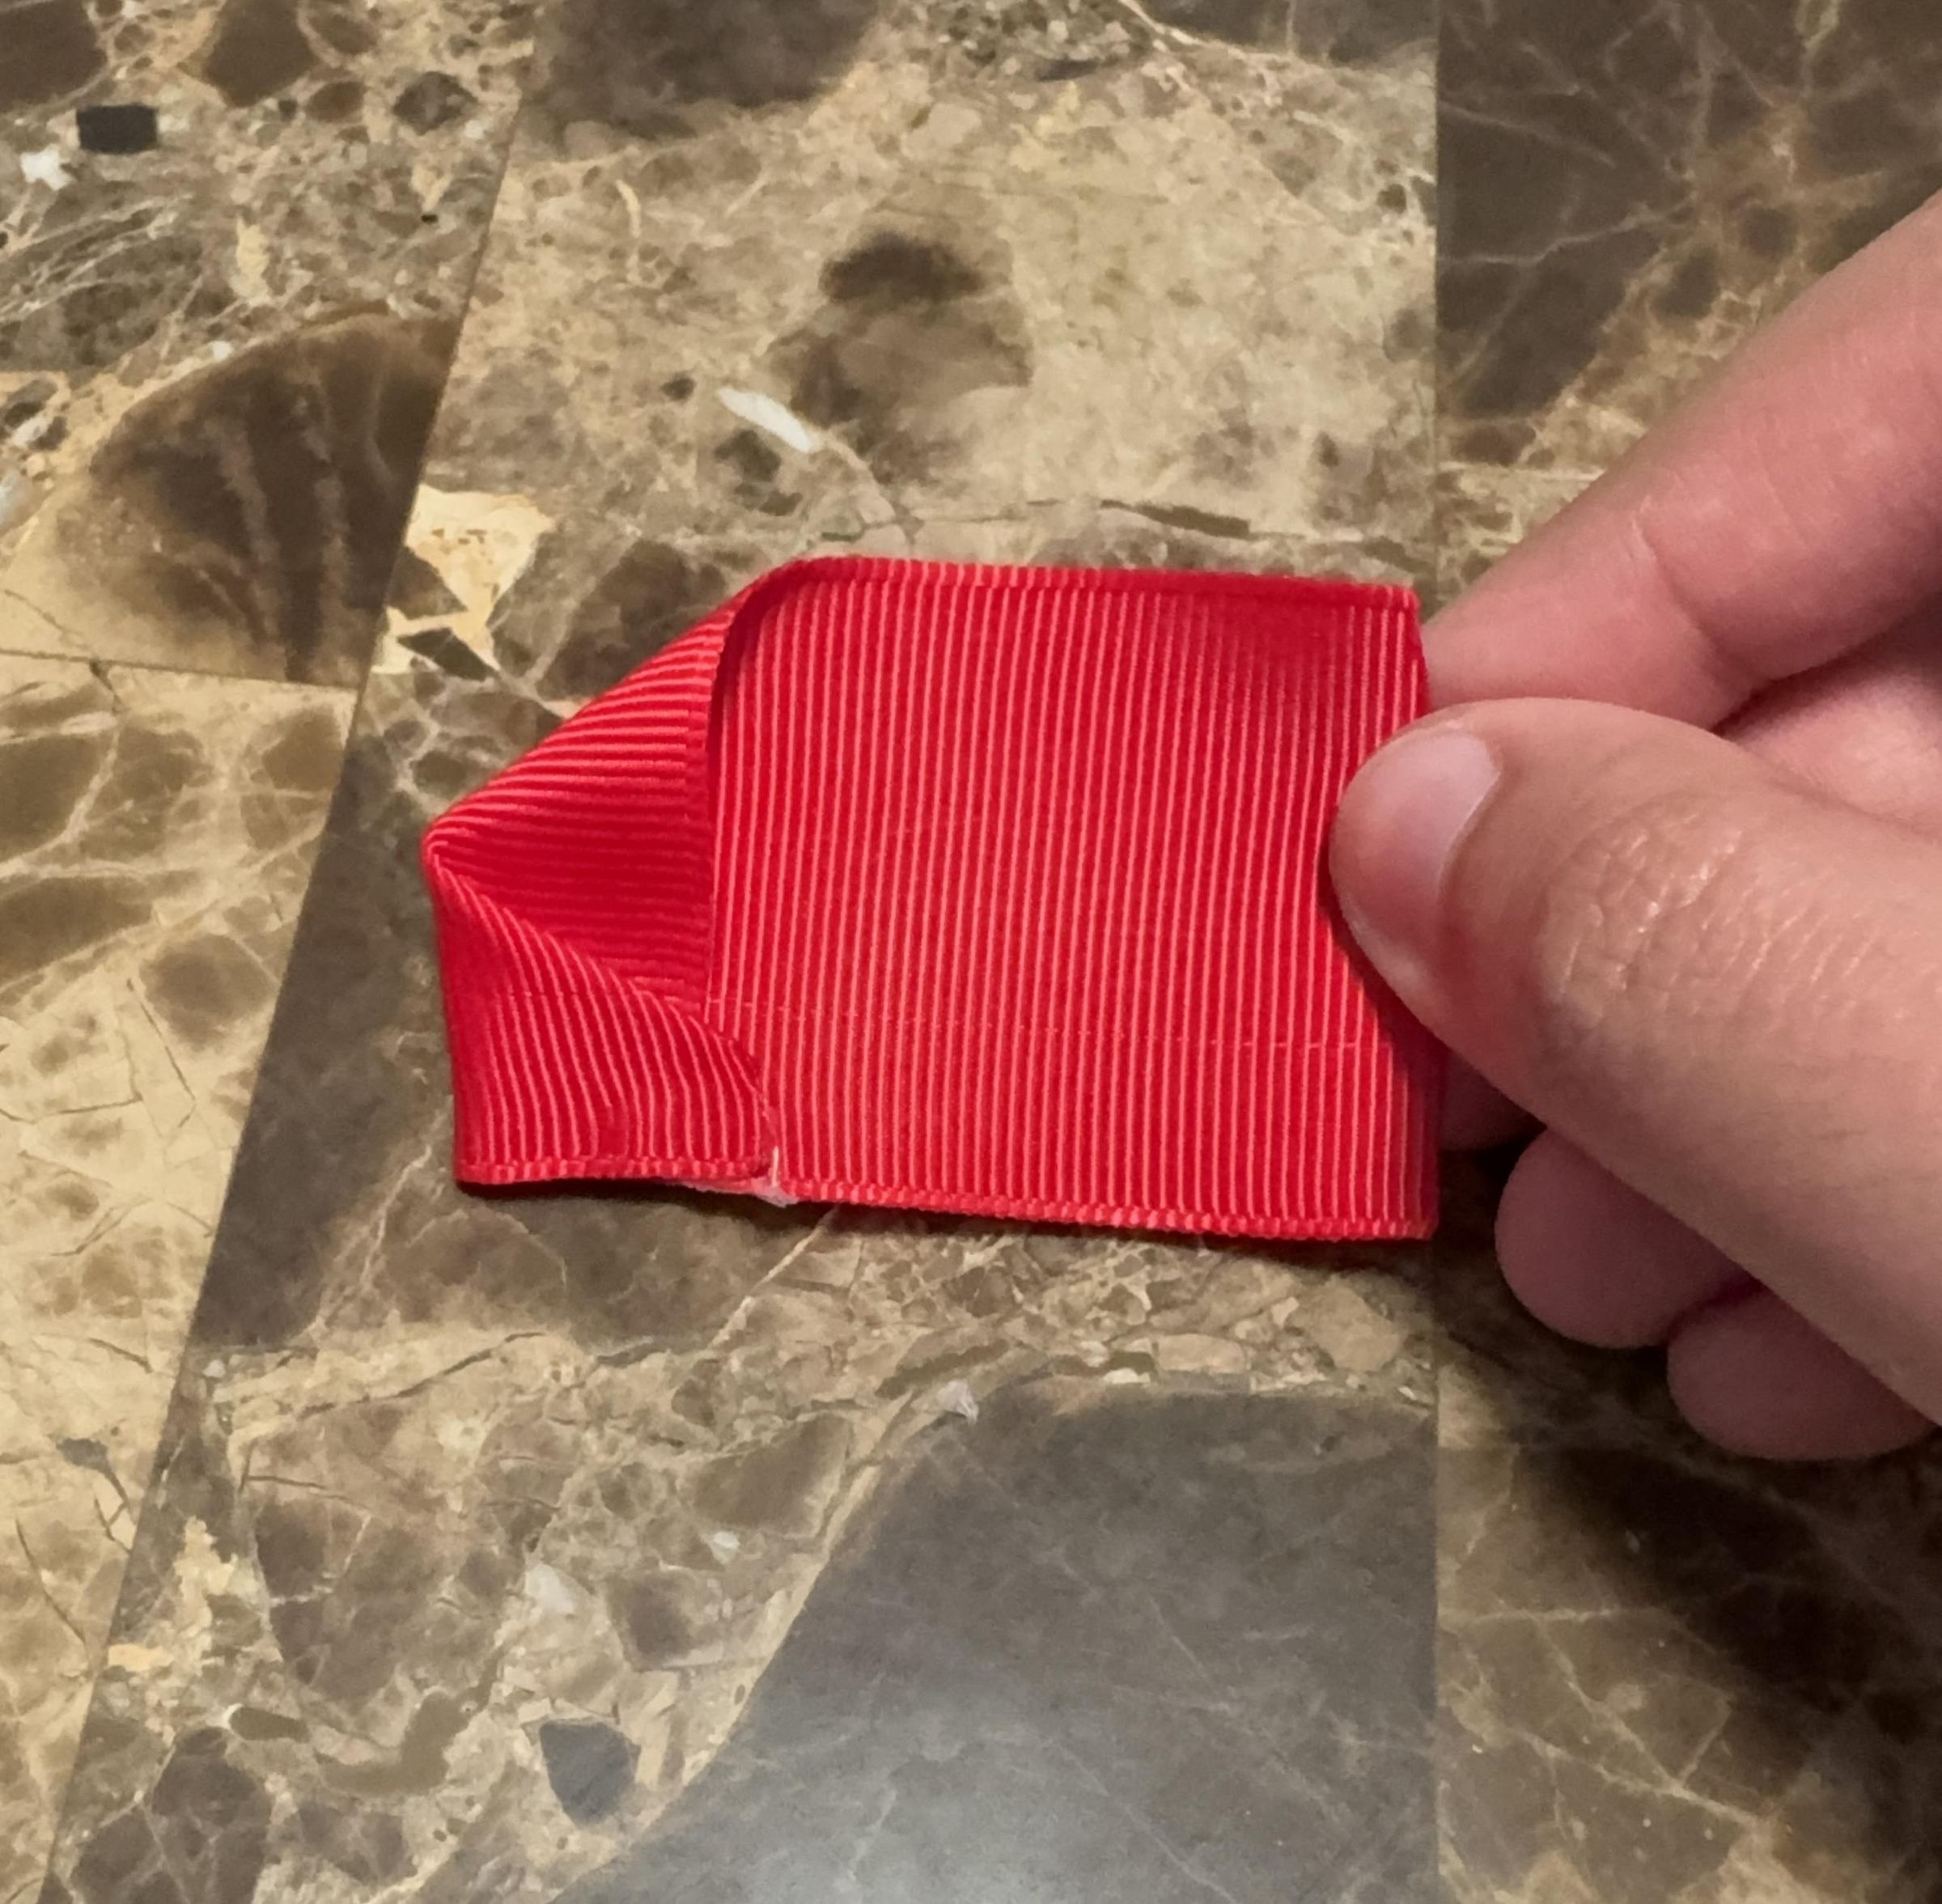
Fold the ribbon from the top left corner towards the bottom center, secure it with a small dot of glue, and fold the remaining bottom left corner.
Warning: Be careful when using the hot glue gun. So handle the tool carefully and keep fingers away from the nozzle. In case of burns, immerse the burned area in cool running water for 10-15 minutes.
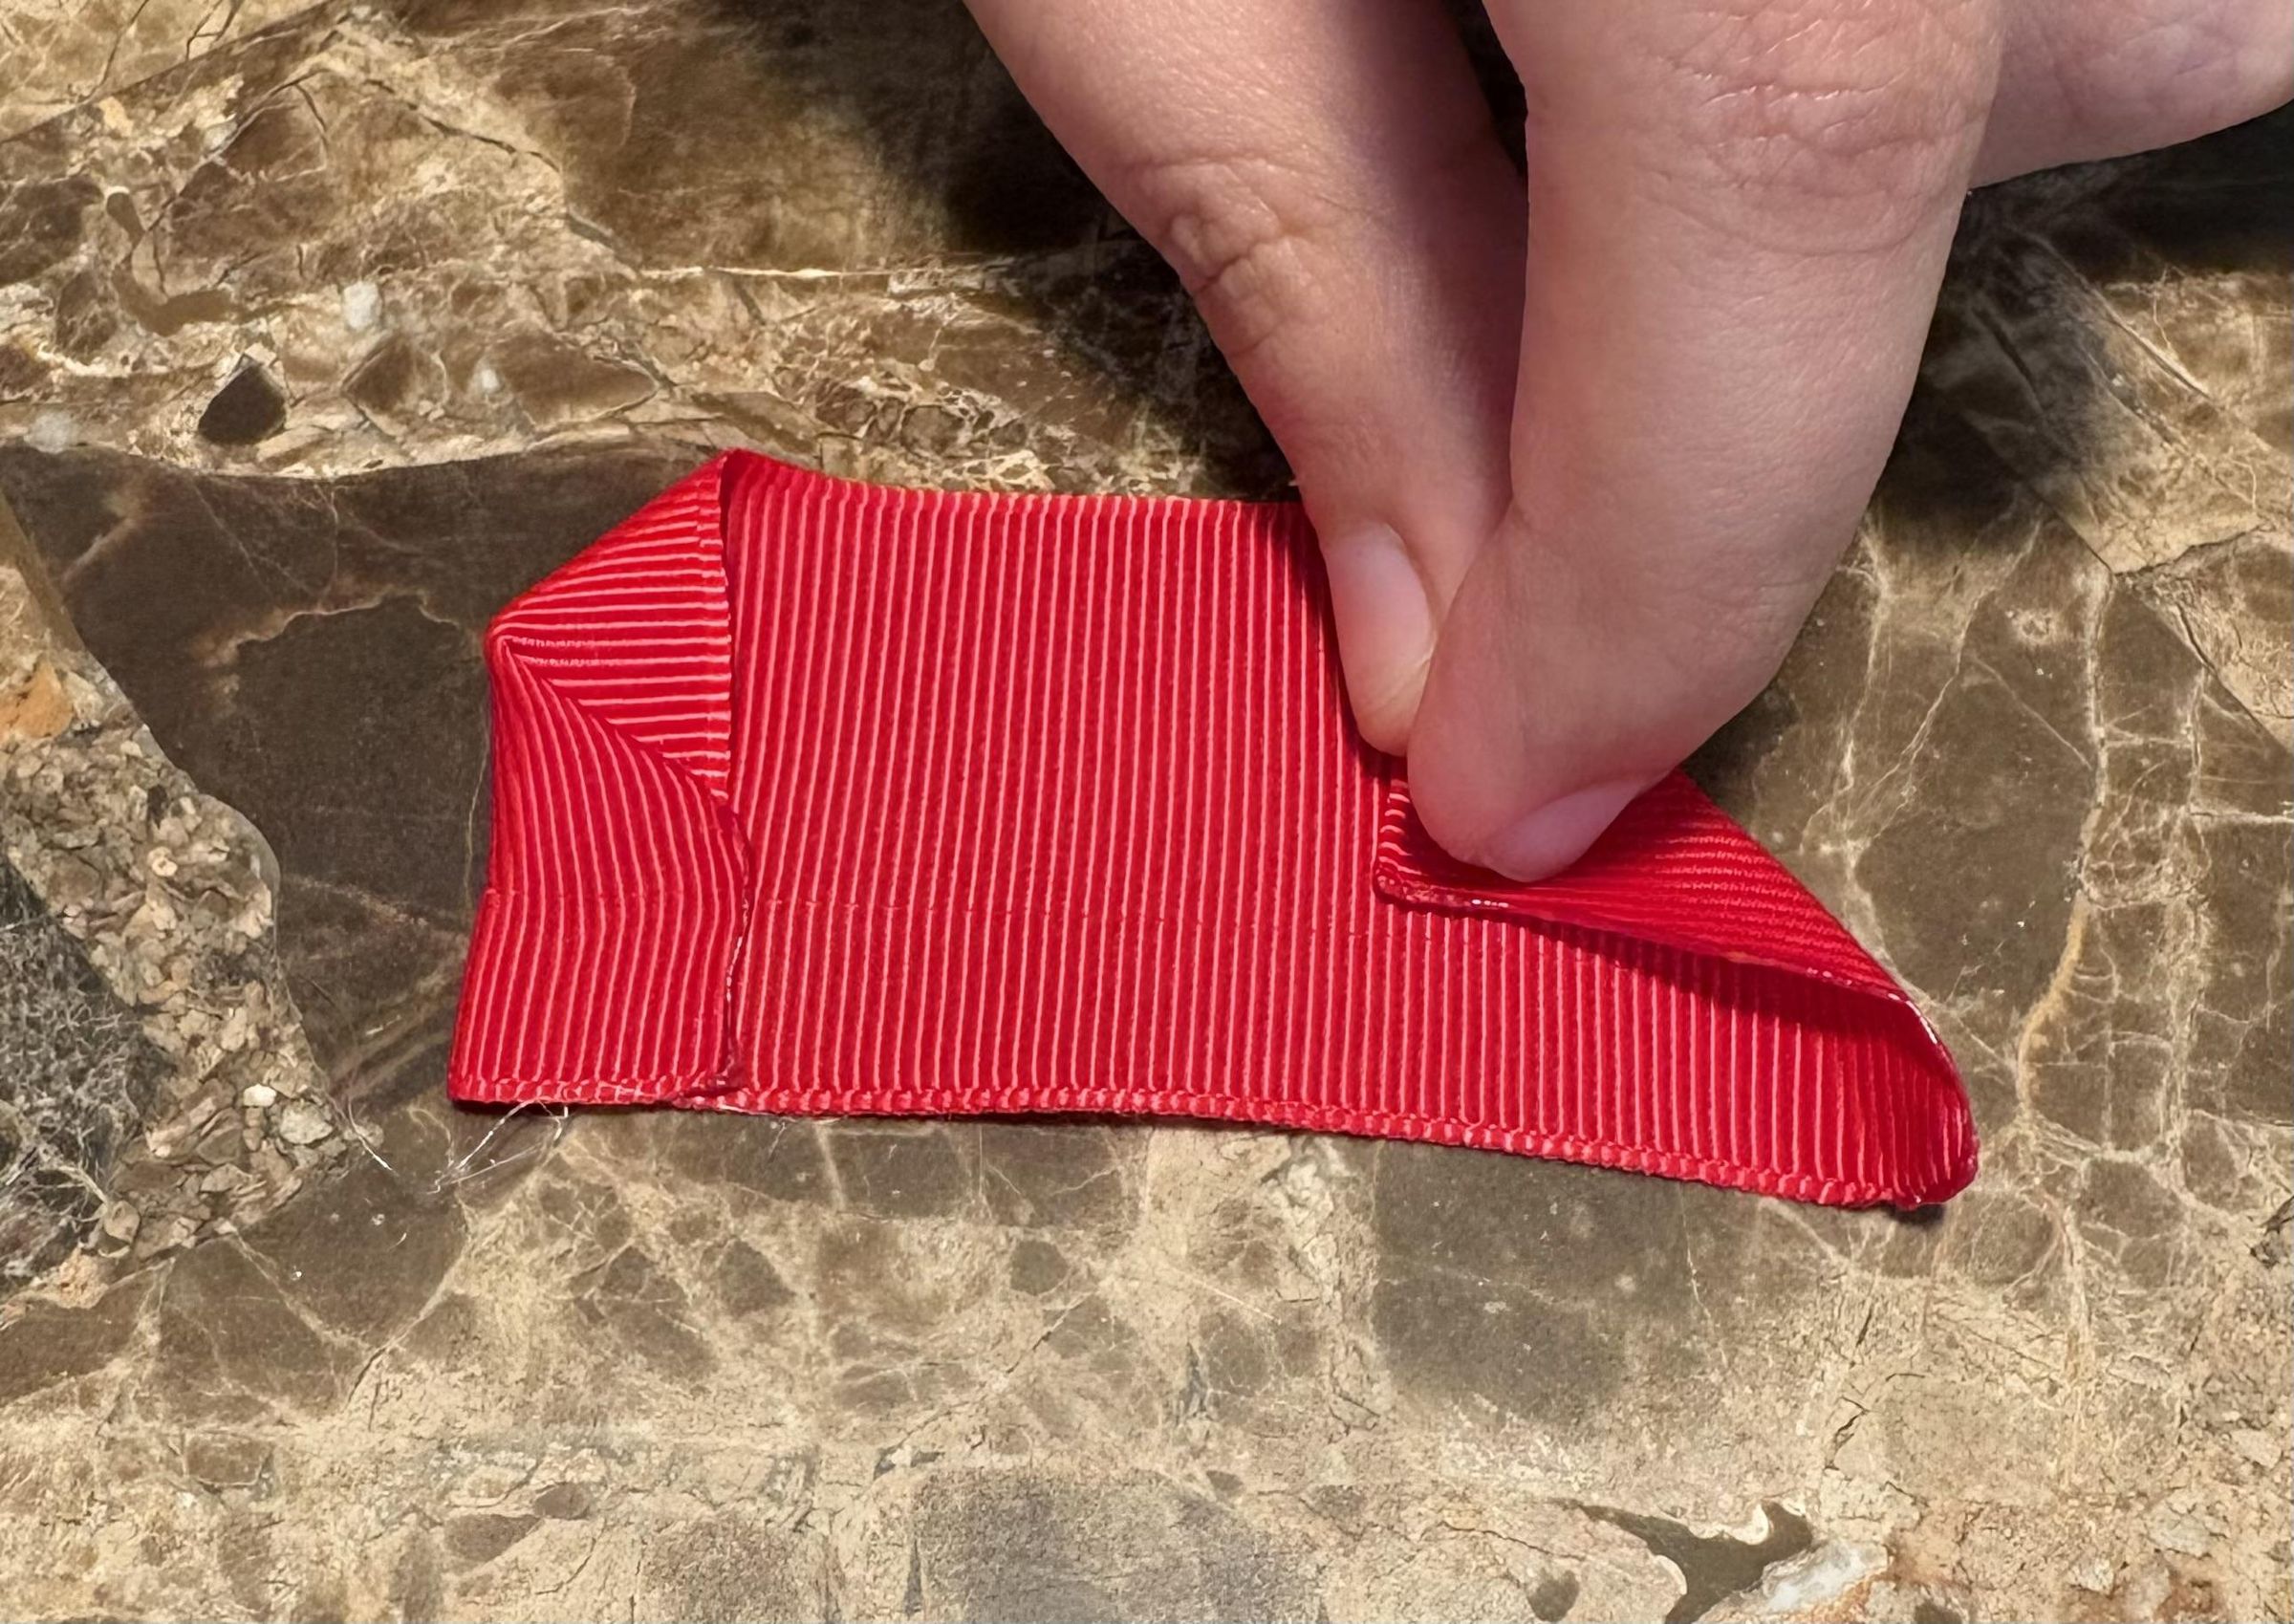
Complete the Petal Shape
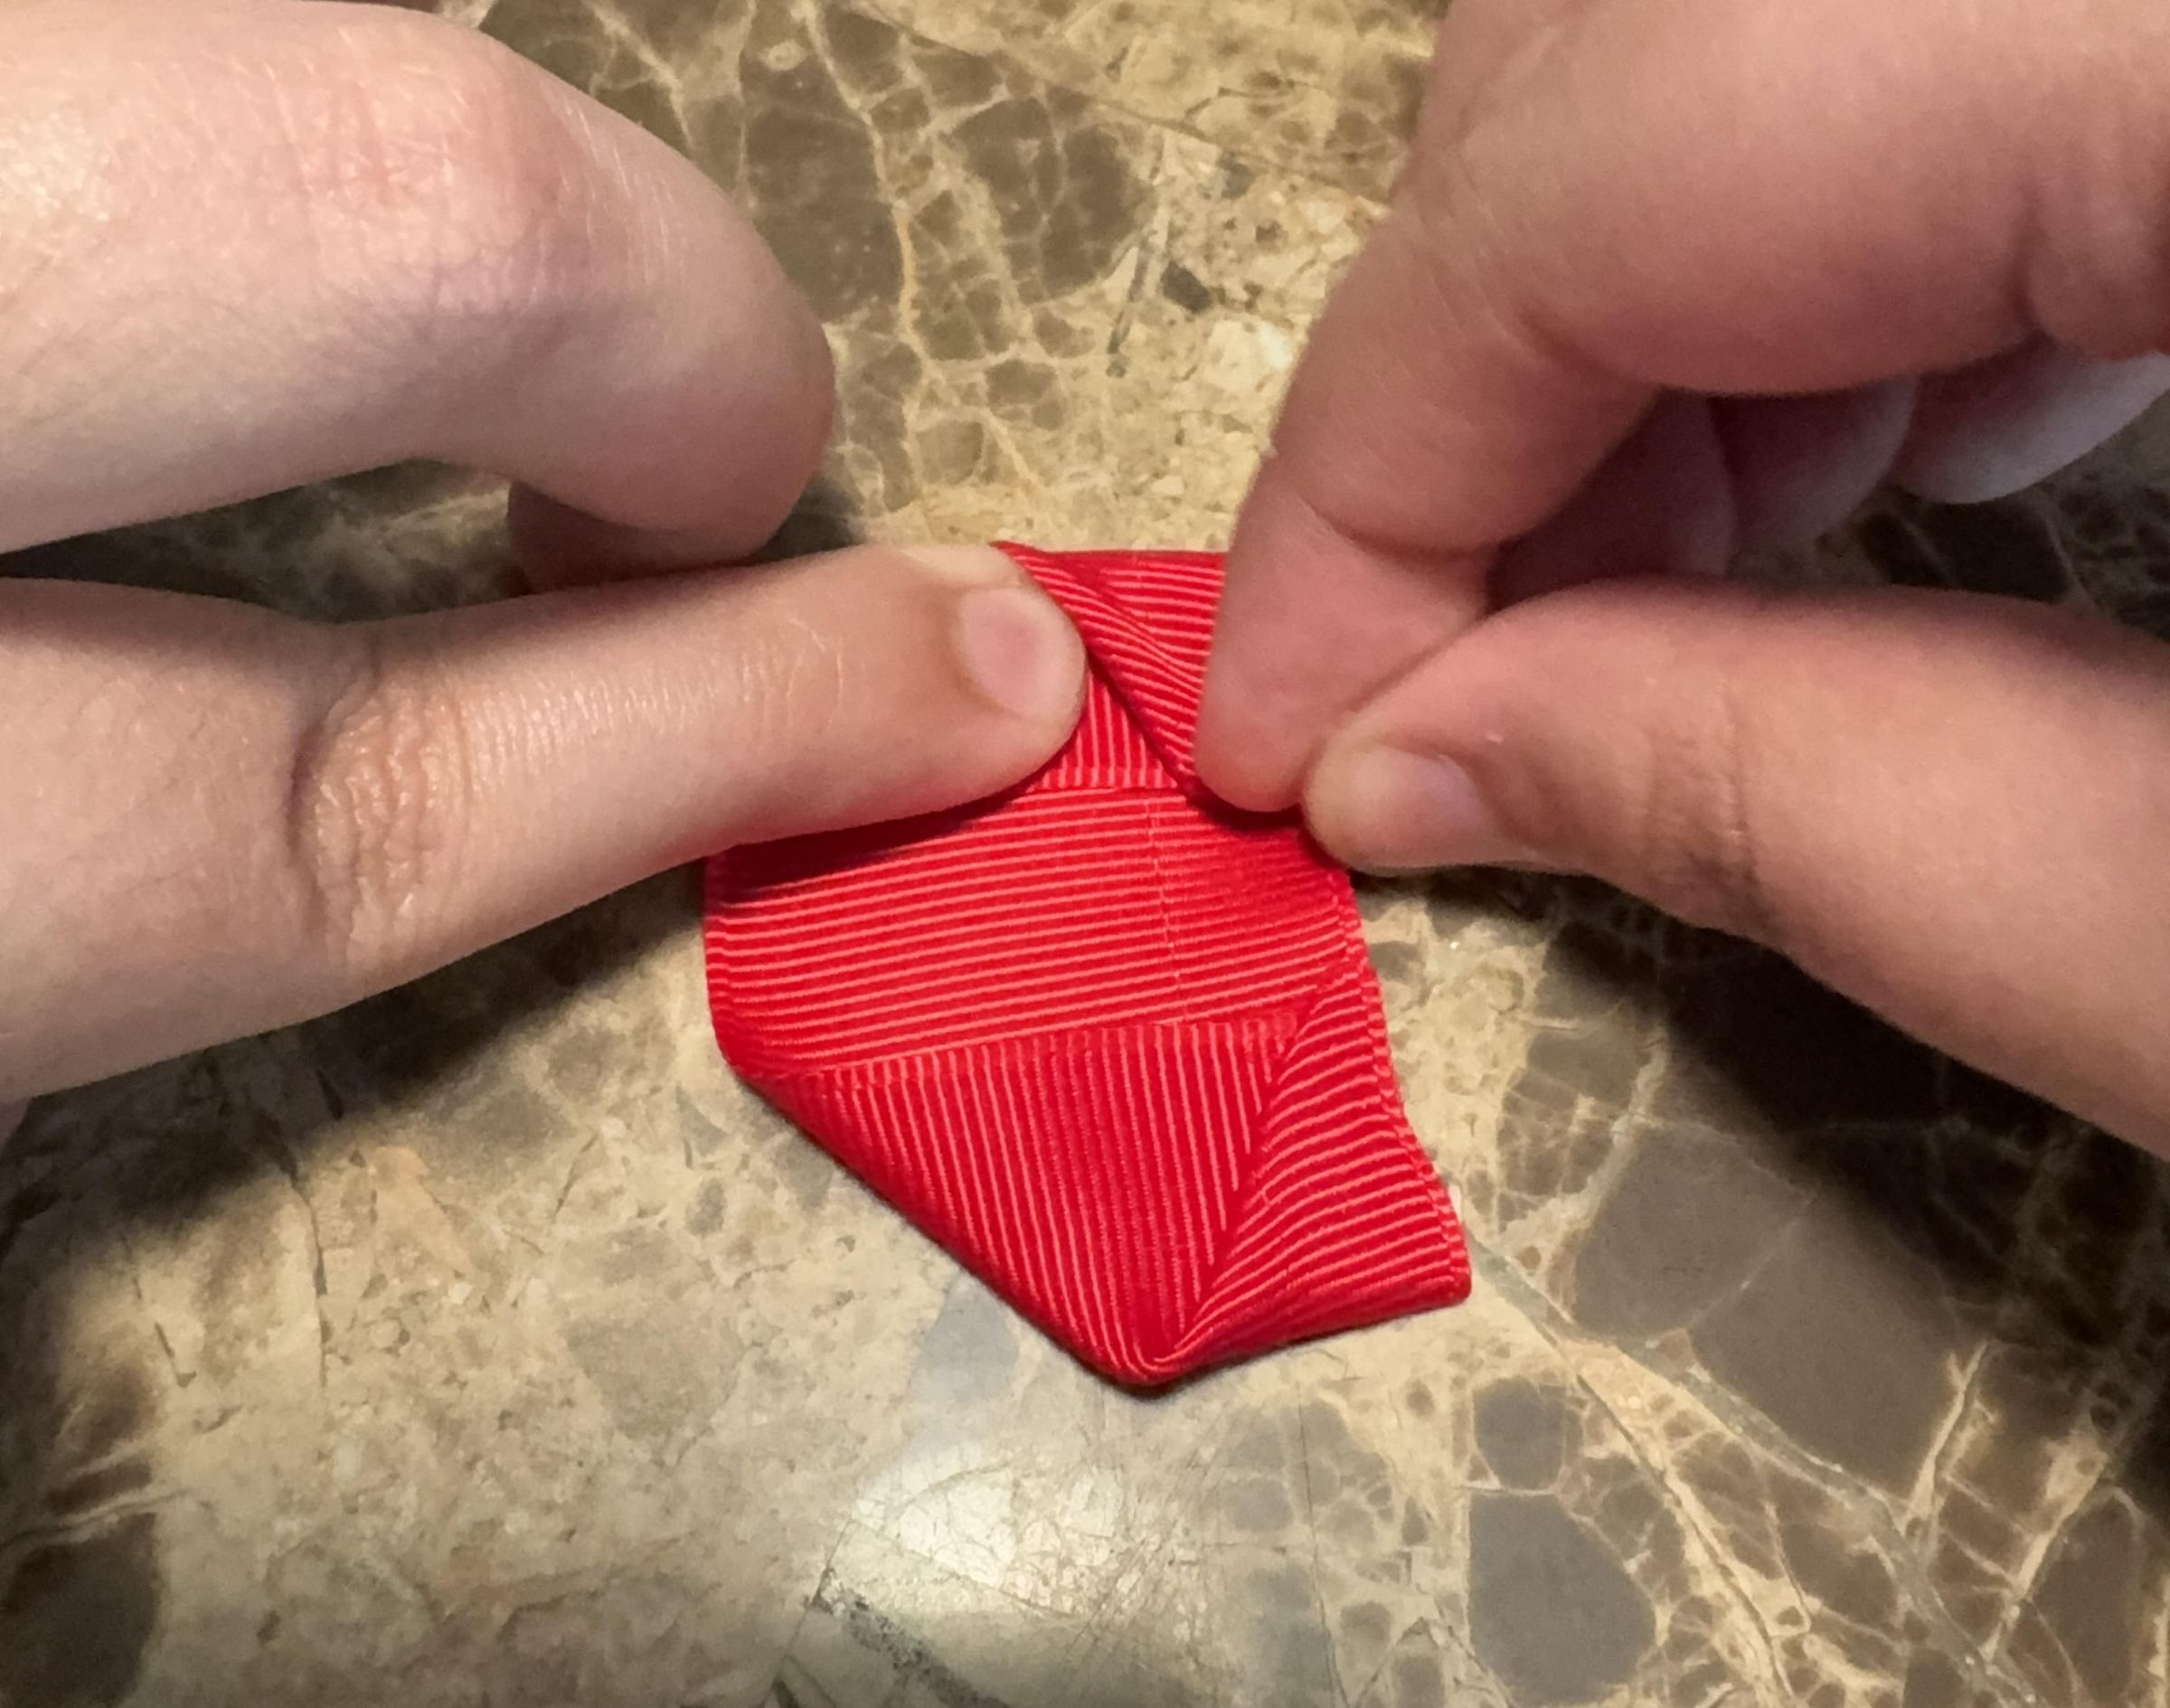
Fold the opposite corner like you did in step 4, to finish forming the petal.
Build the Center Layer
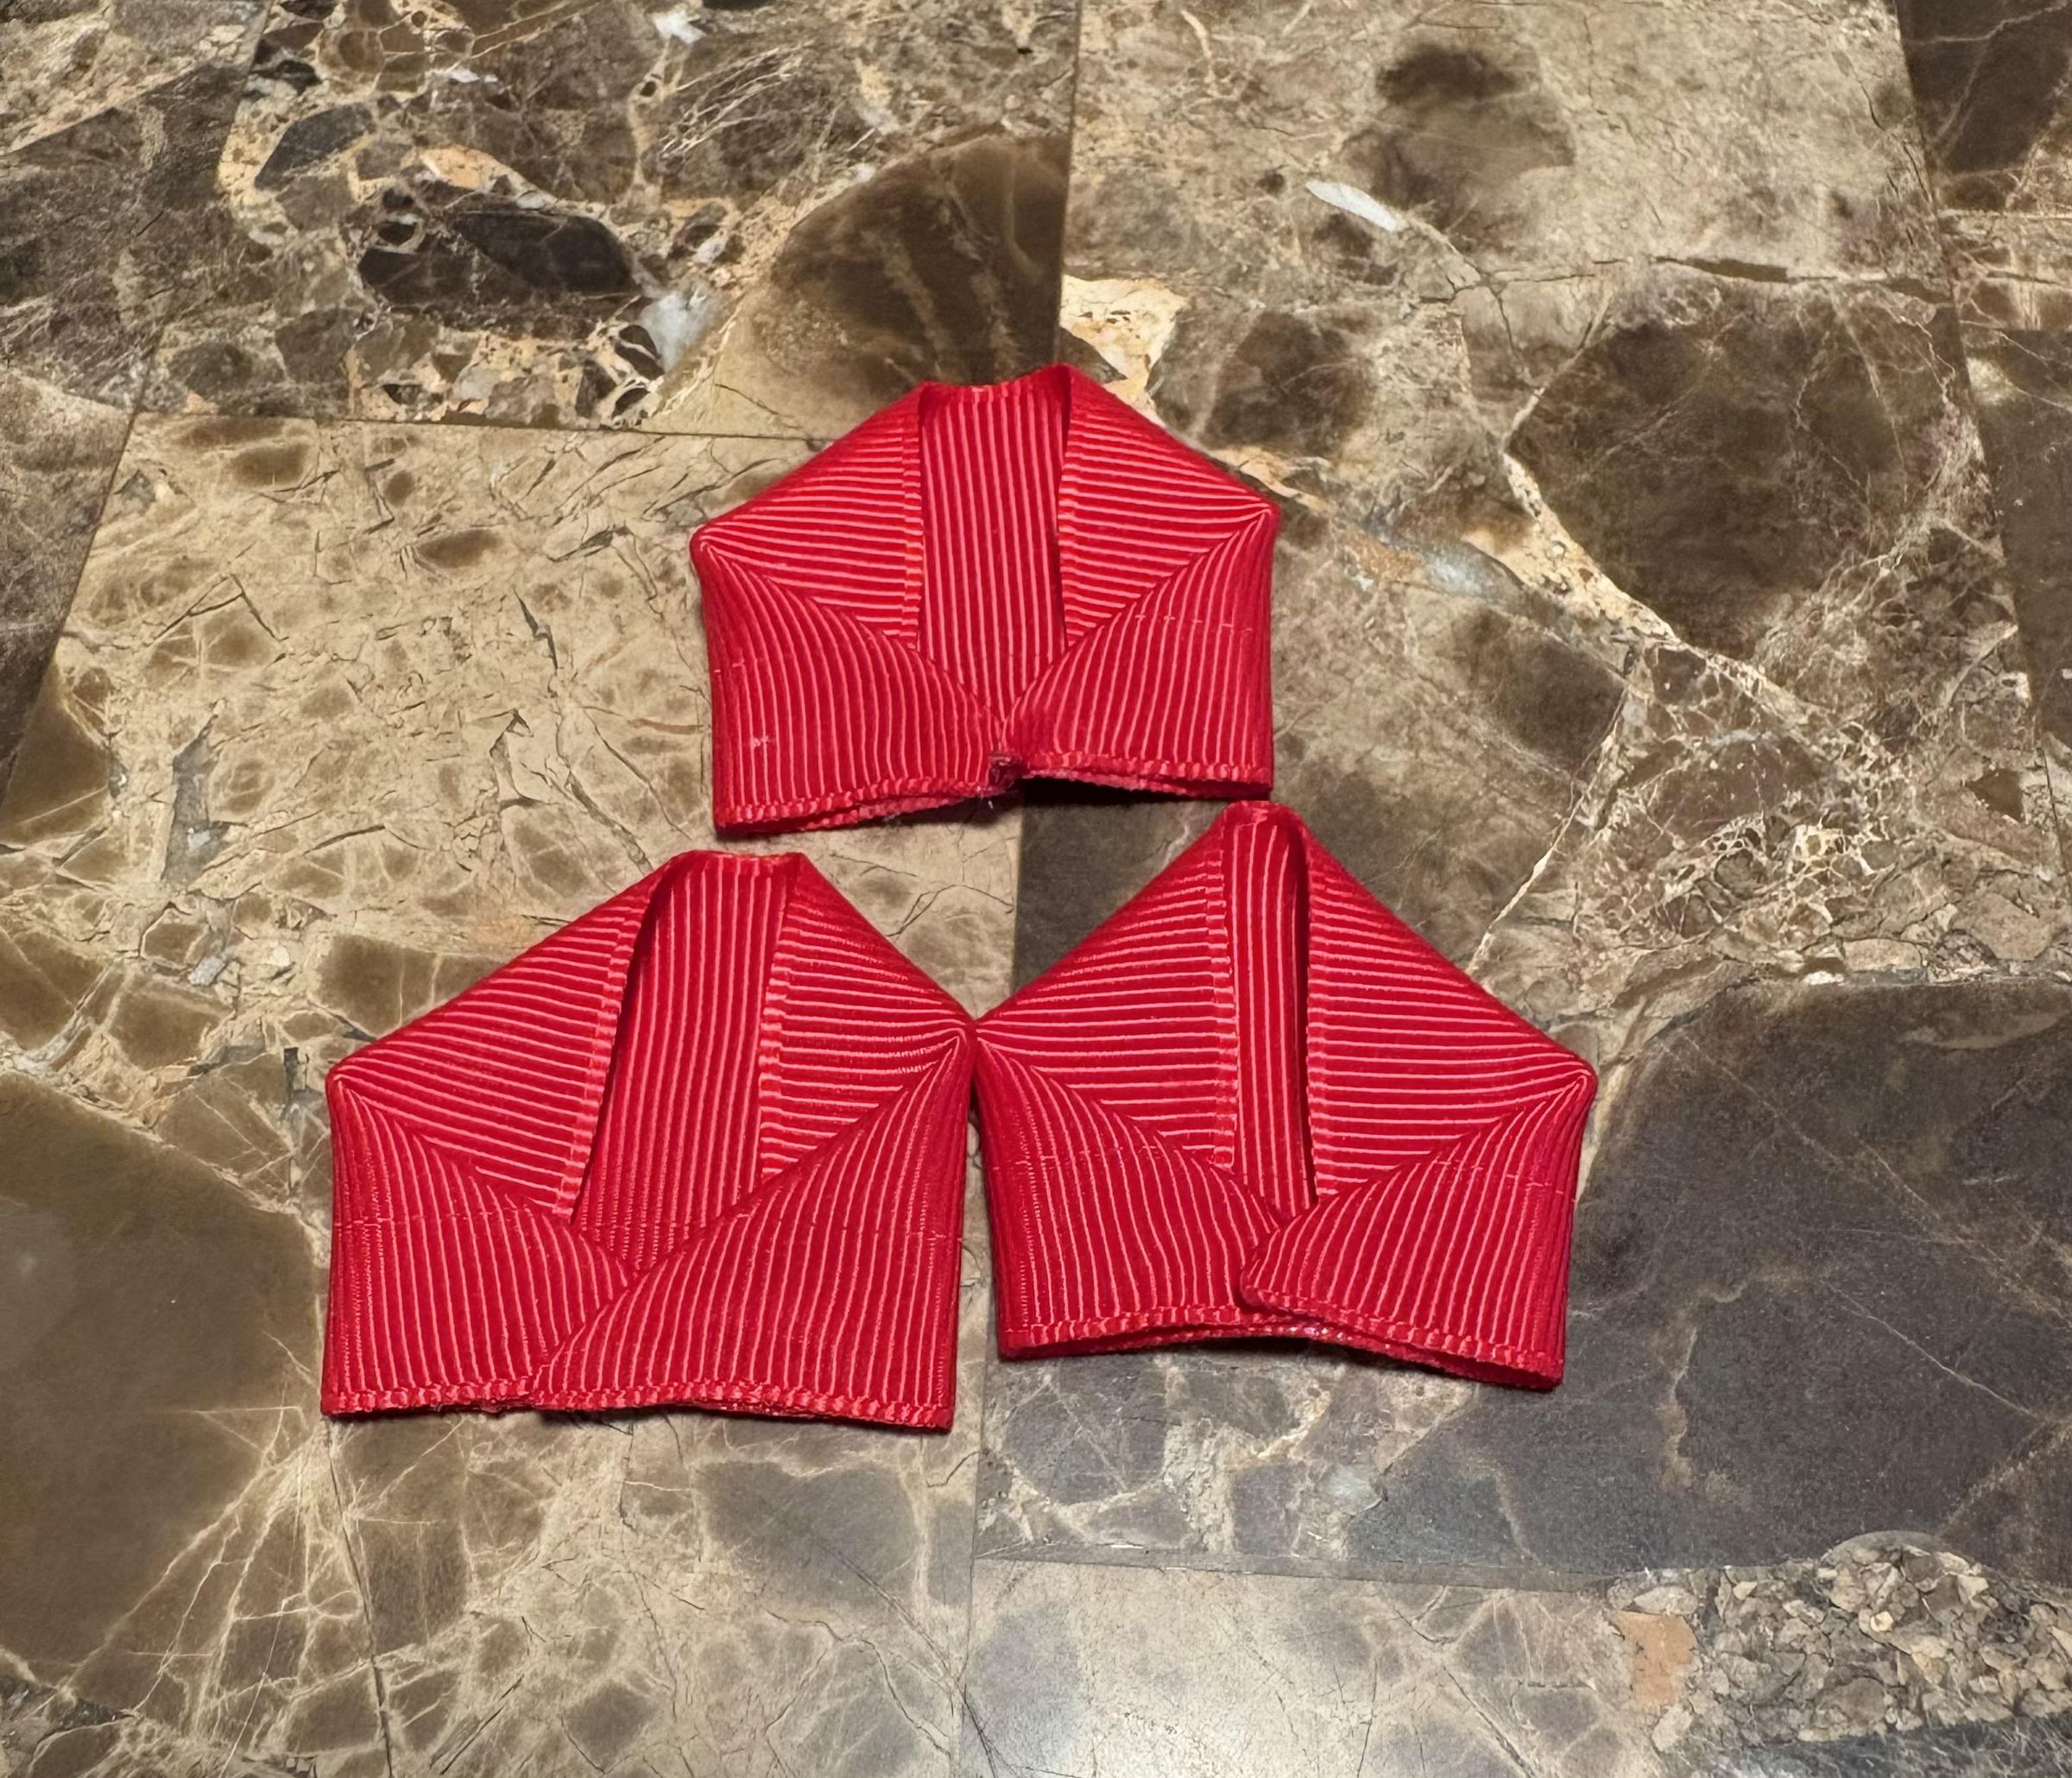
Repeat steps 4–5 with the remaining two center-layer petals to complete the center layer.
Creat the Middle Layer
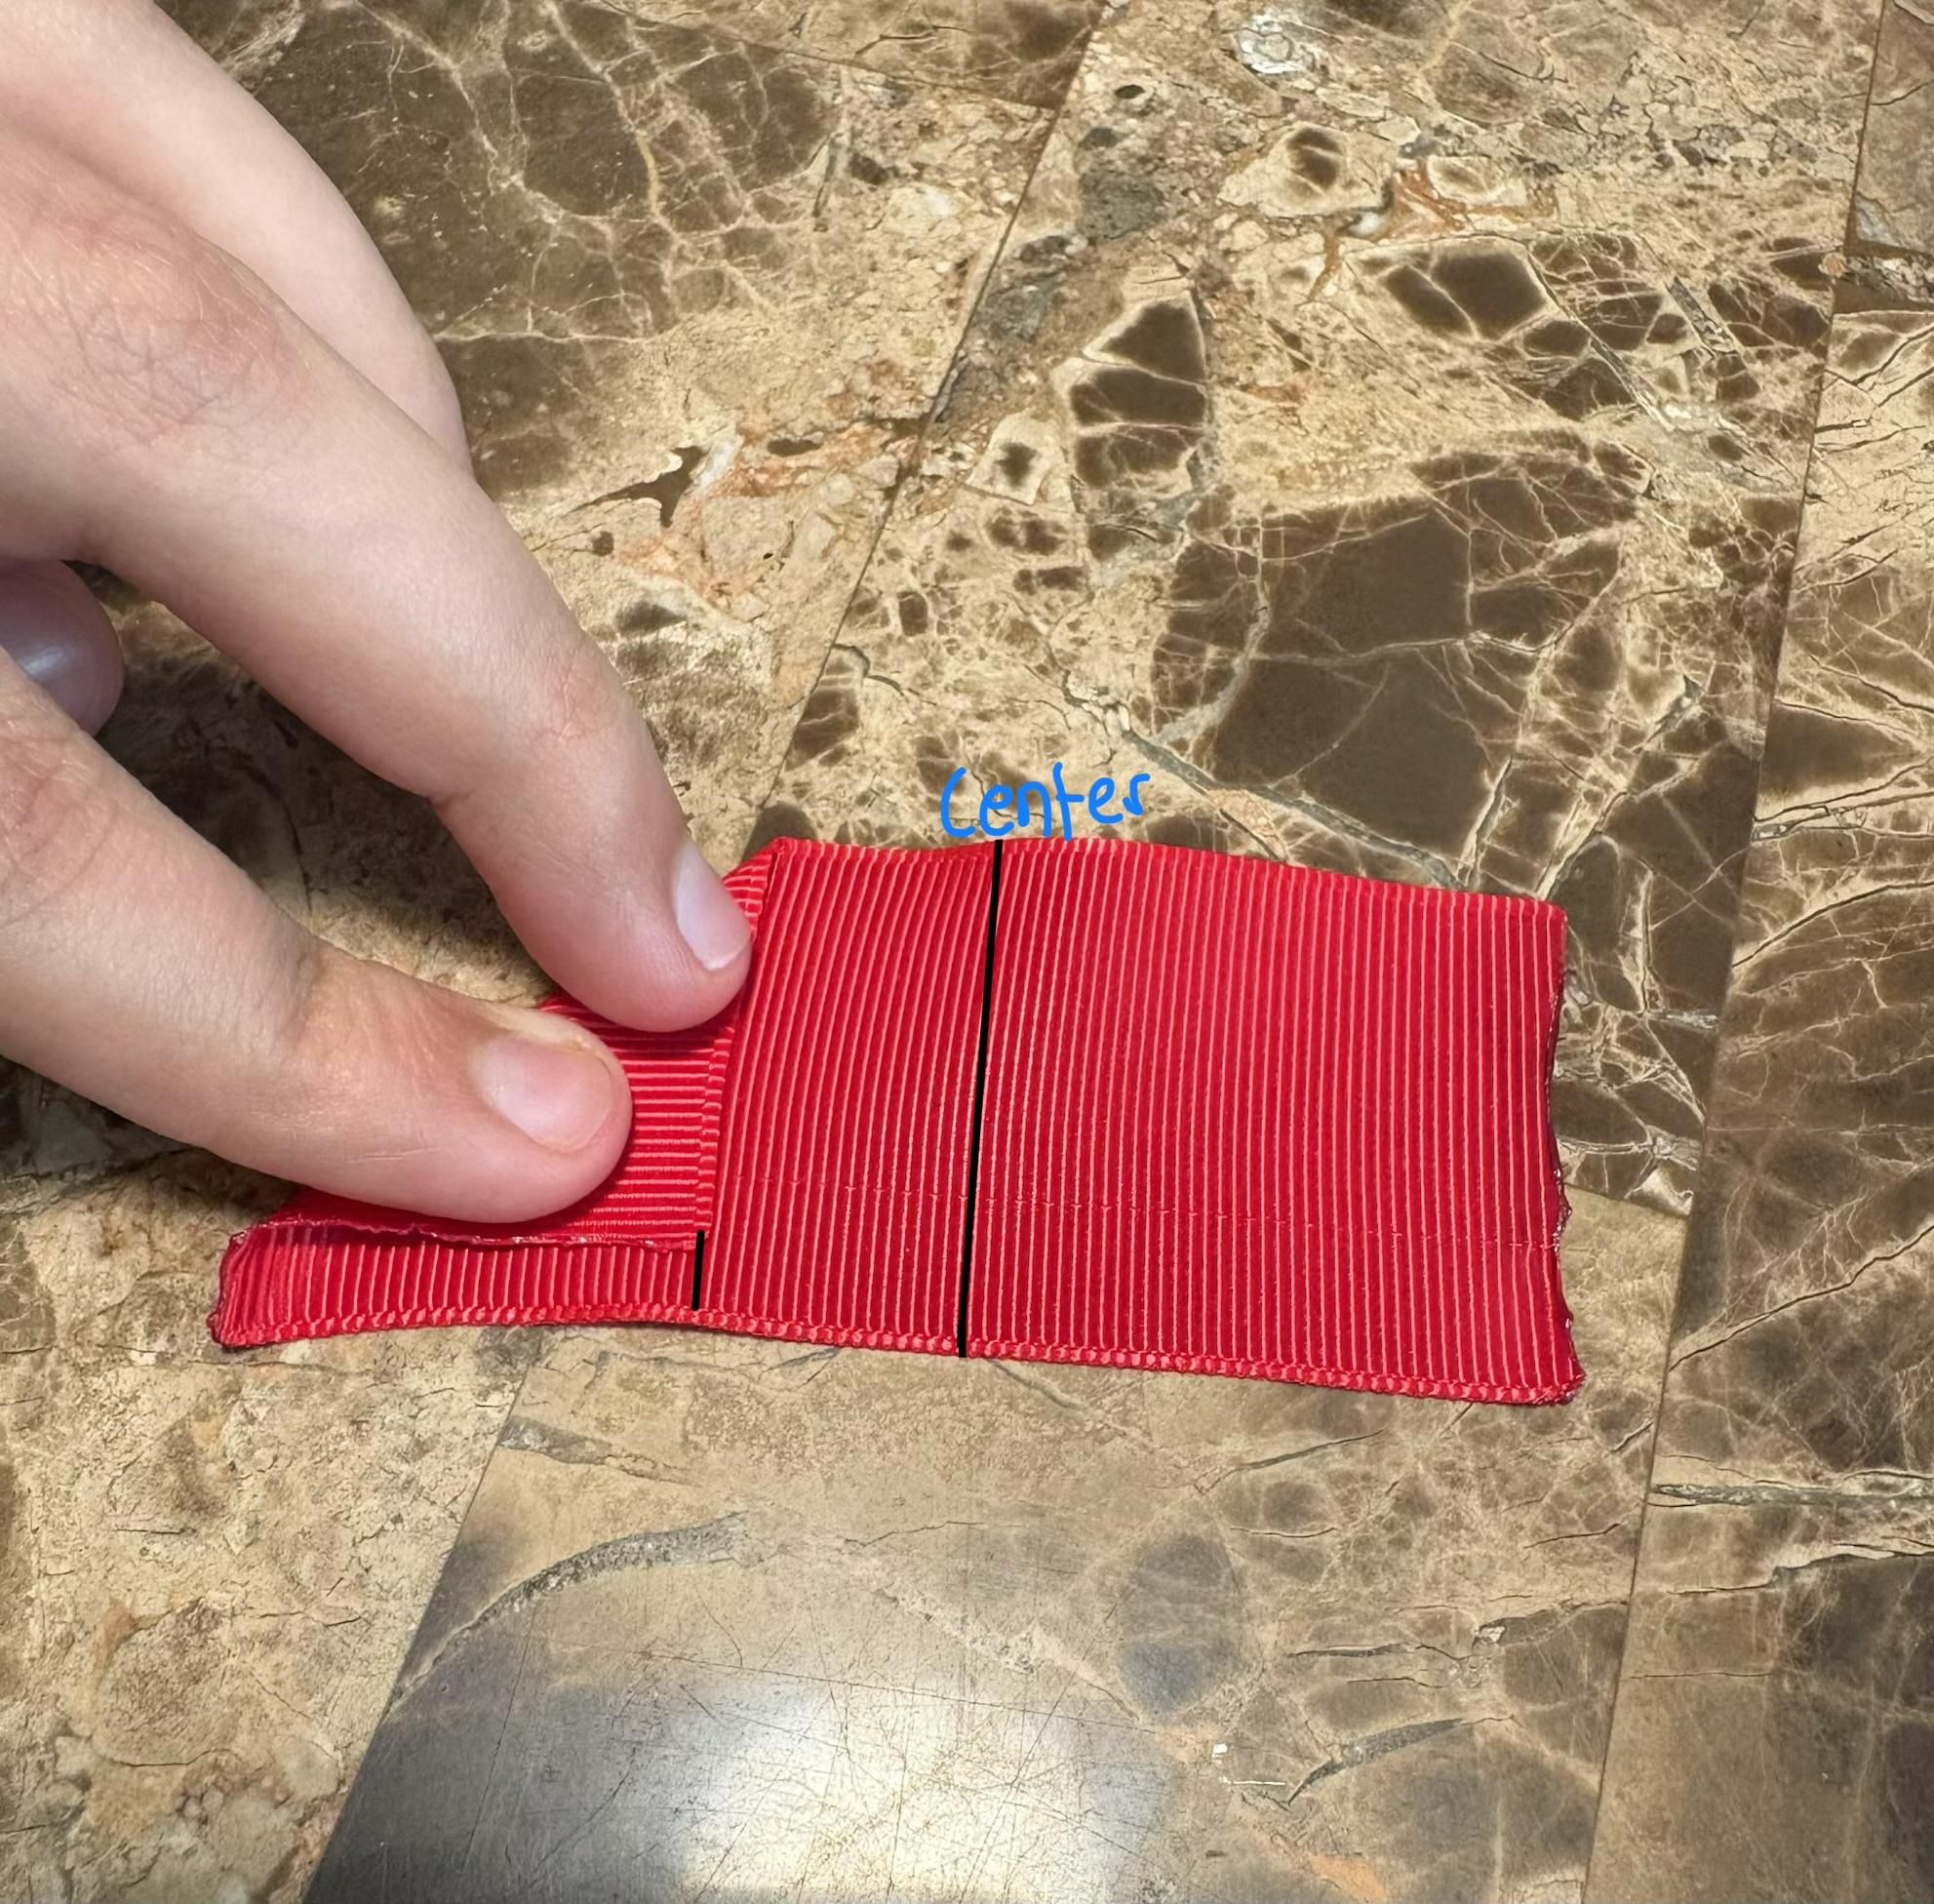
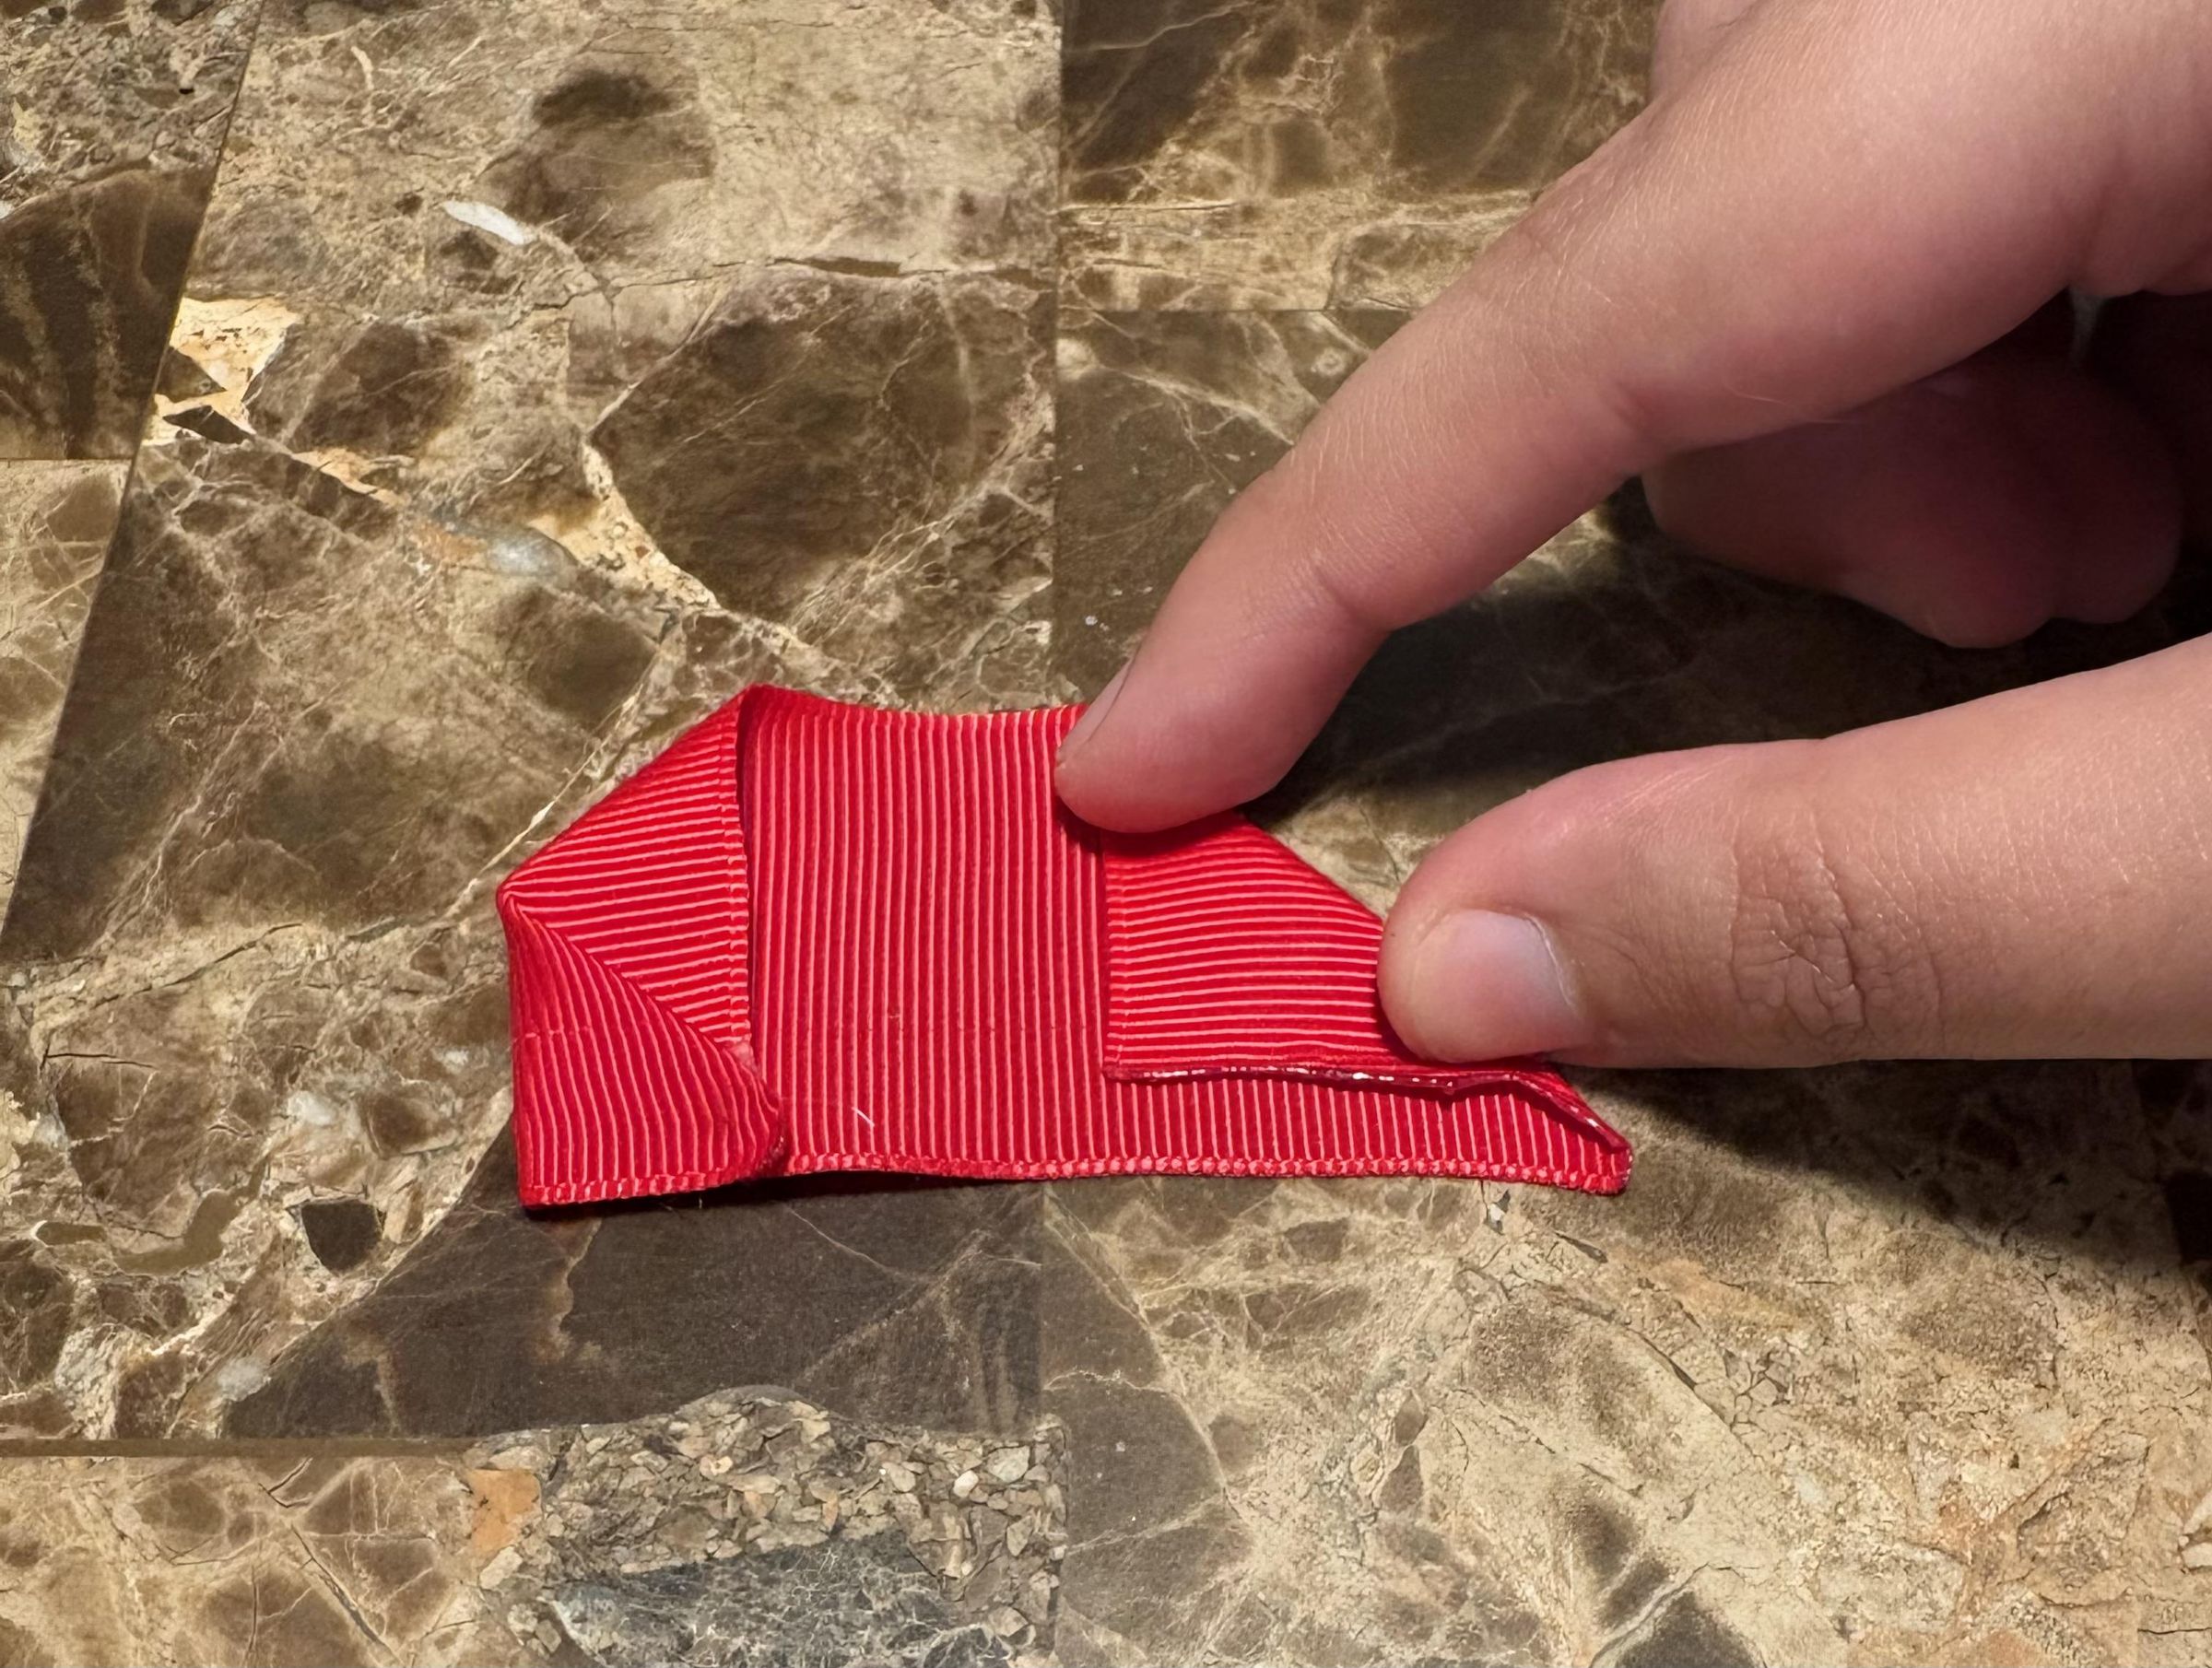
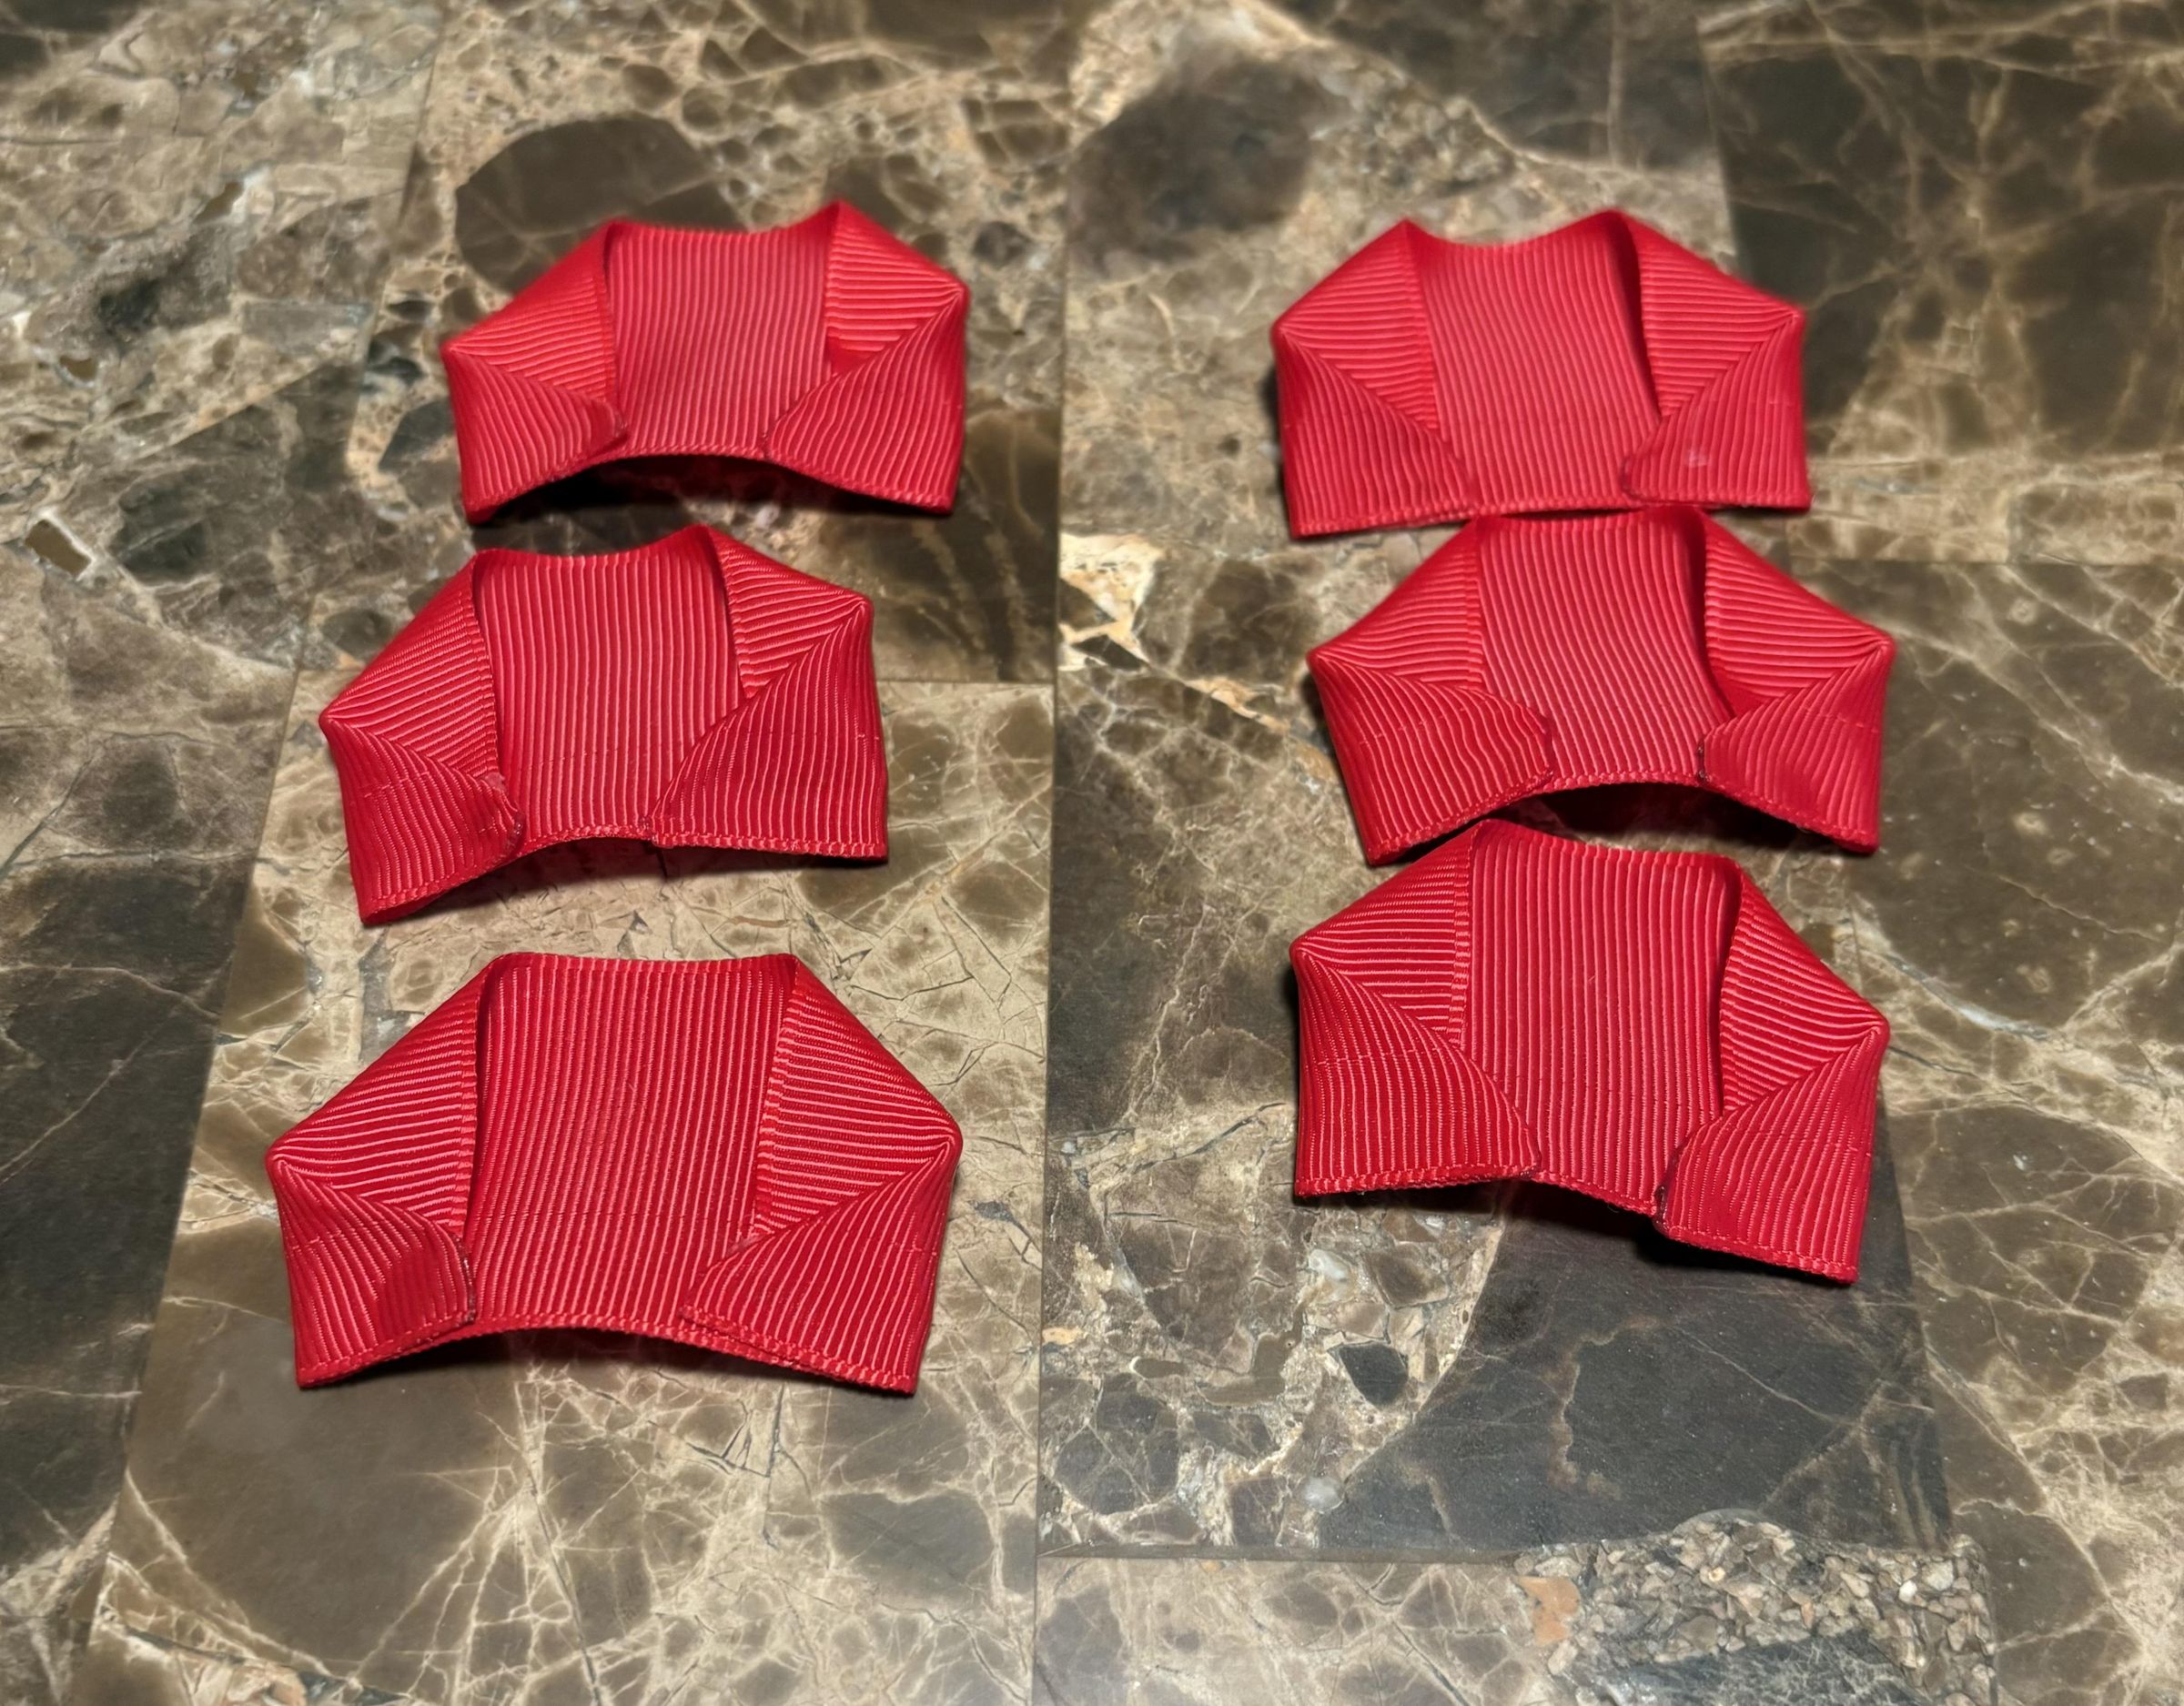
Repeat steps 4–5 with the six middle-layer petals, adjusting the placement away from the center to create the middle layer.
Creat the Outer Layer
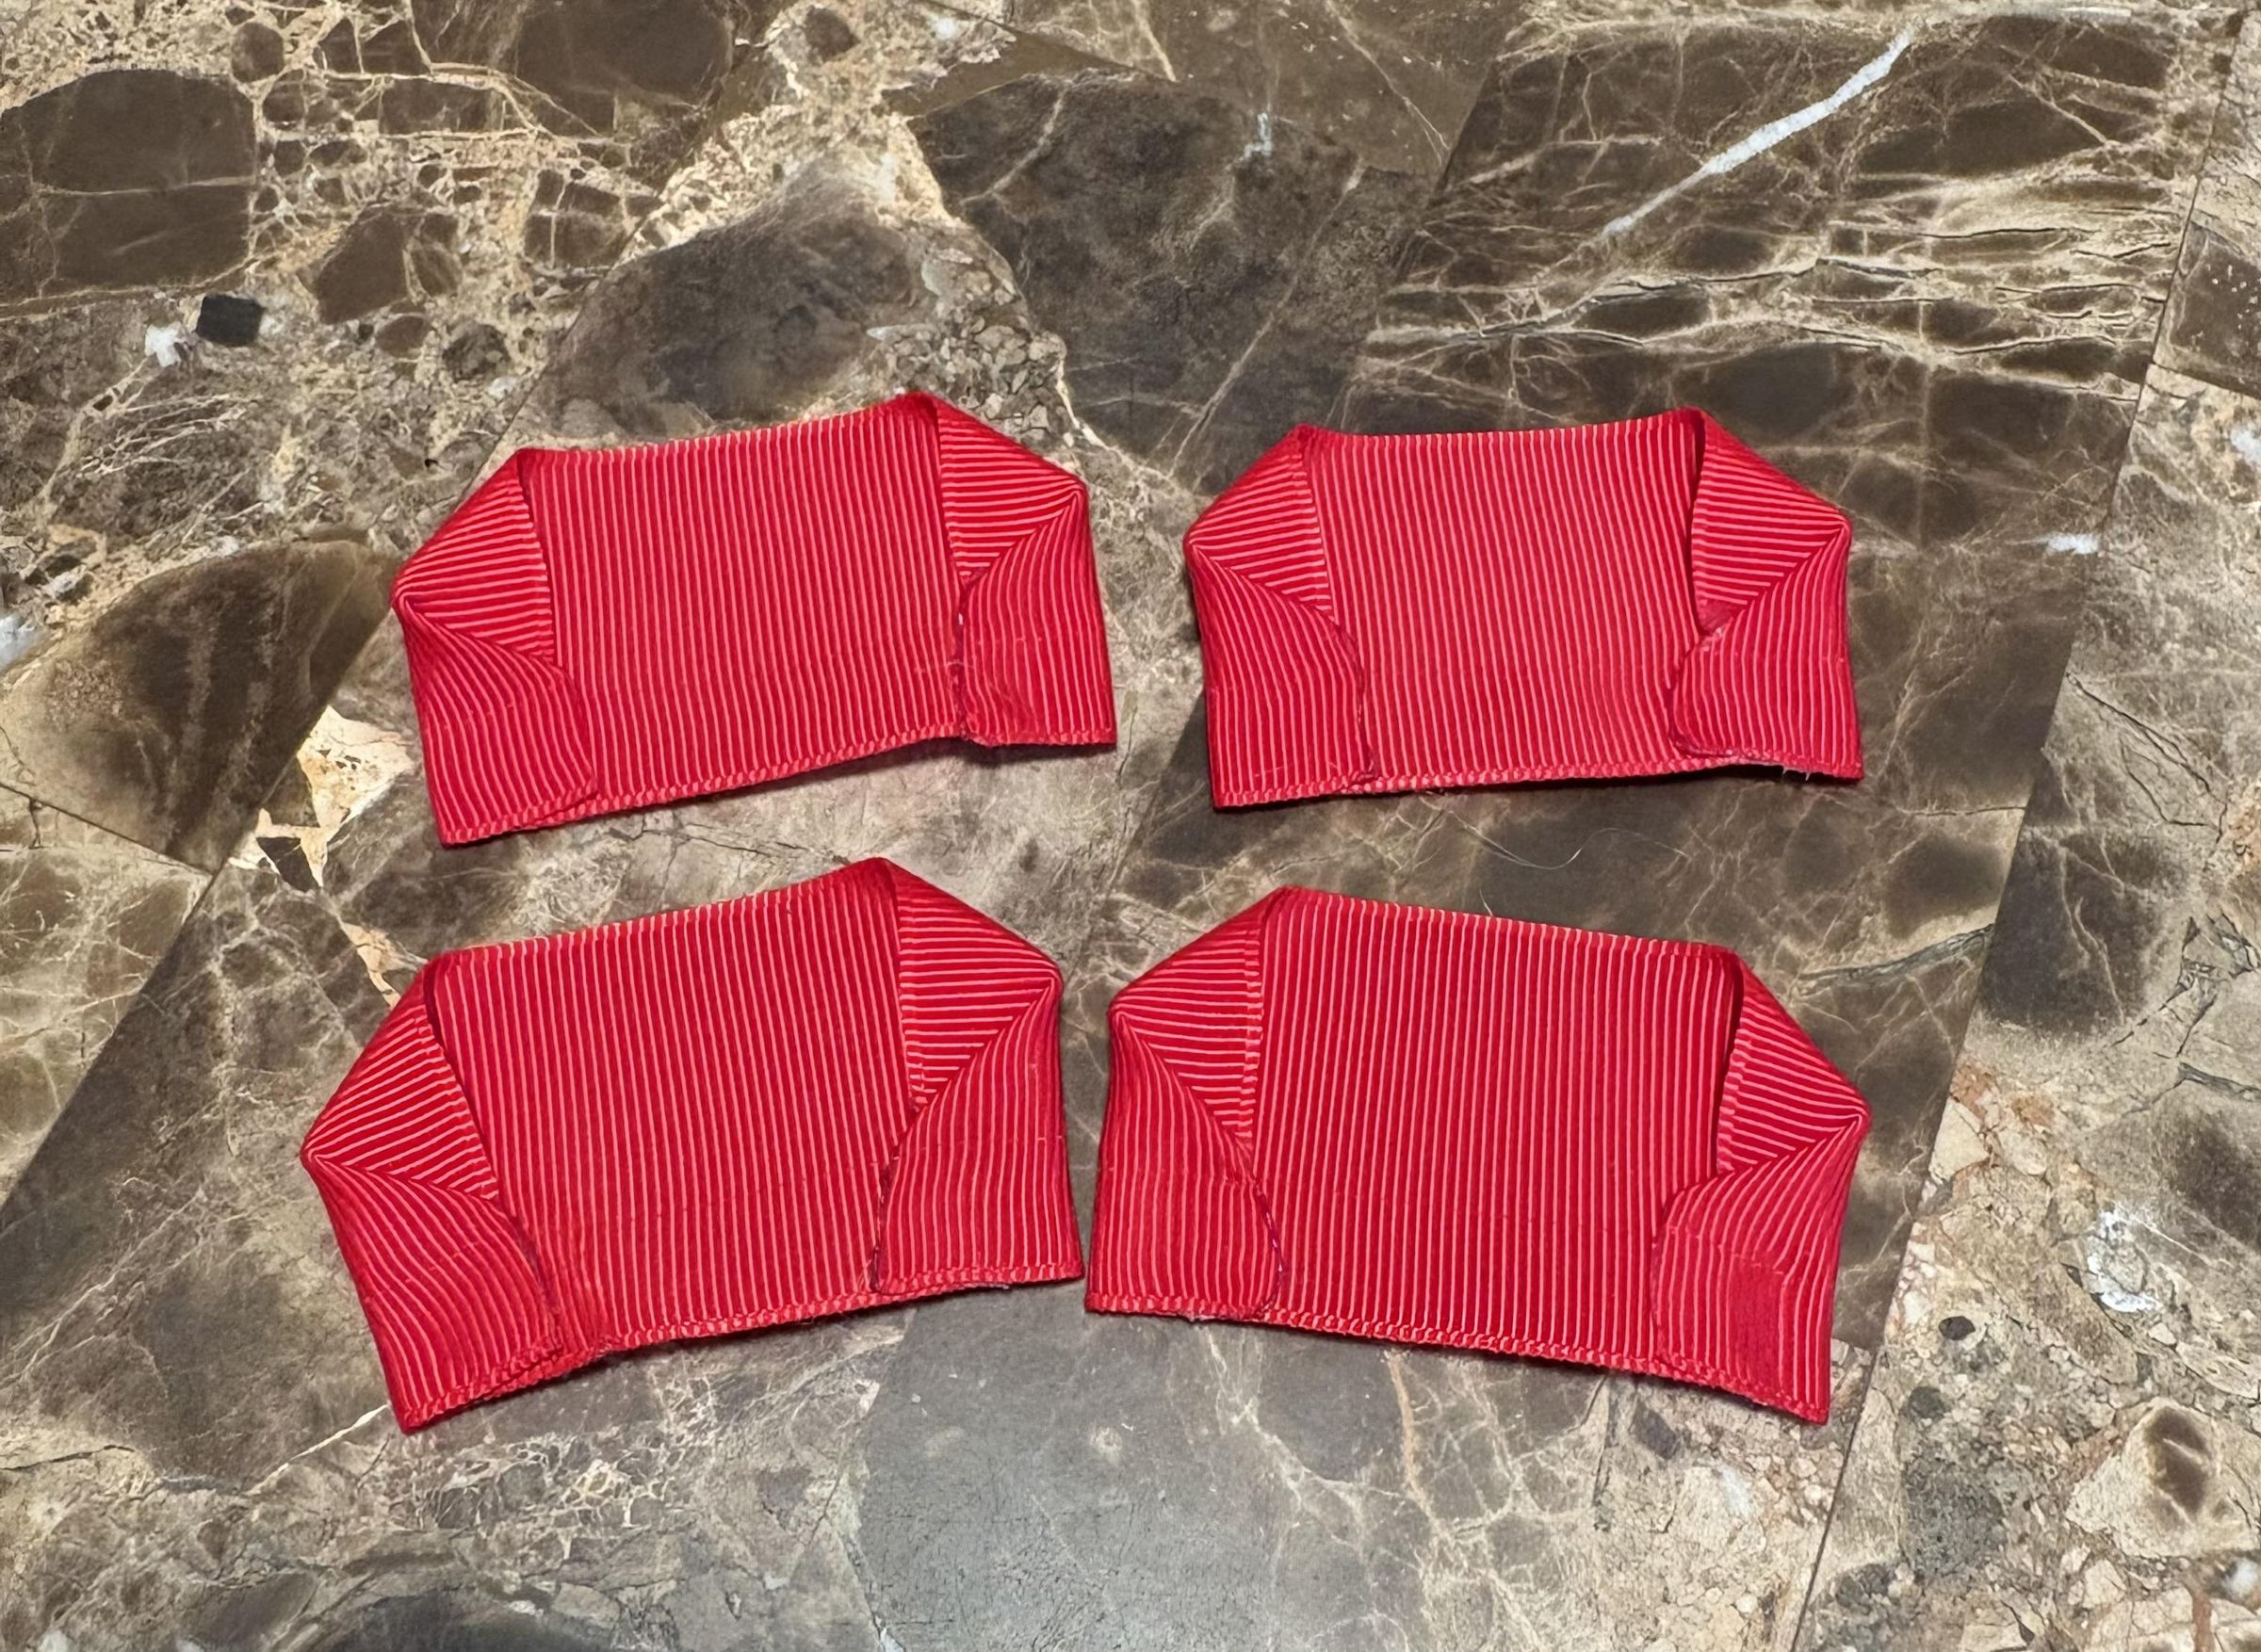
Repeat steps 4–5 with the four outer-layer petals to complete the outside layer of the rose.
Note: Adjust the placement from the center to create a larger petal.
Attach the First Petal
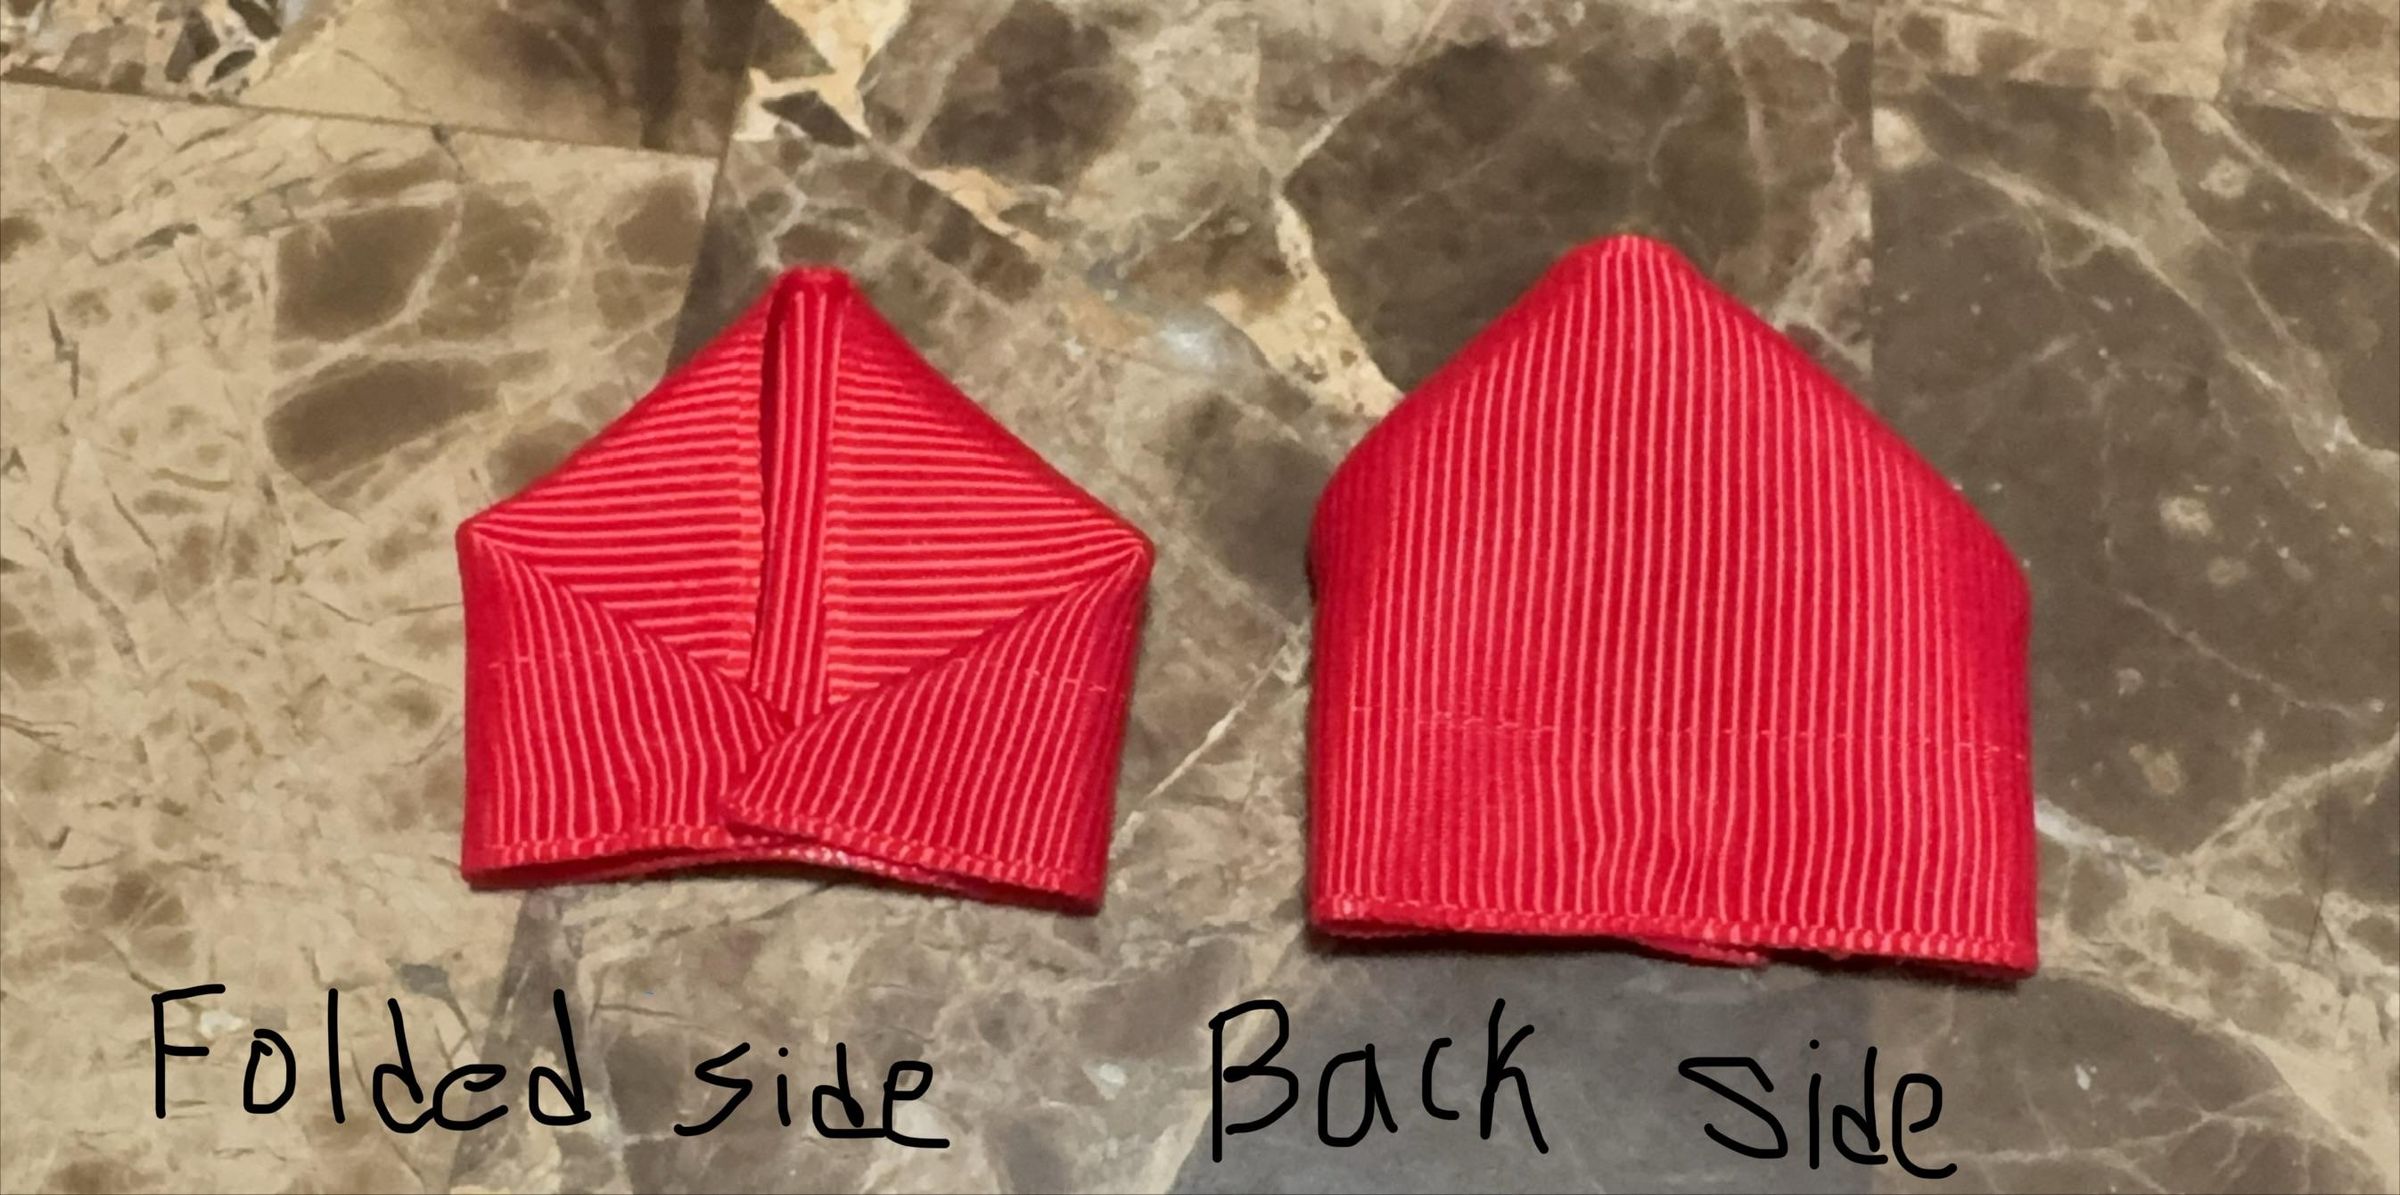
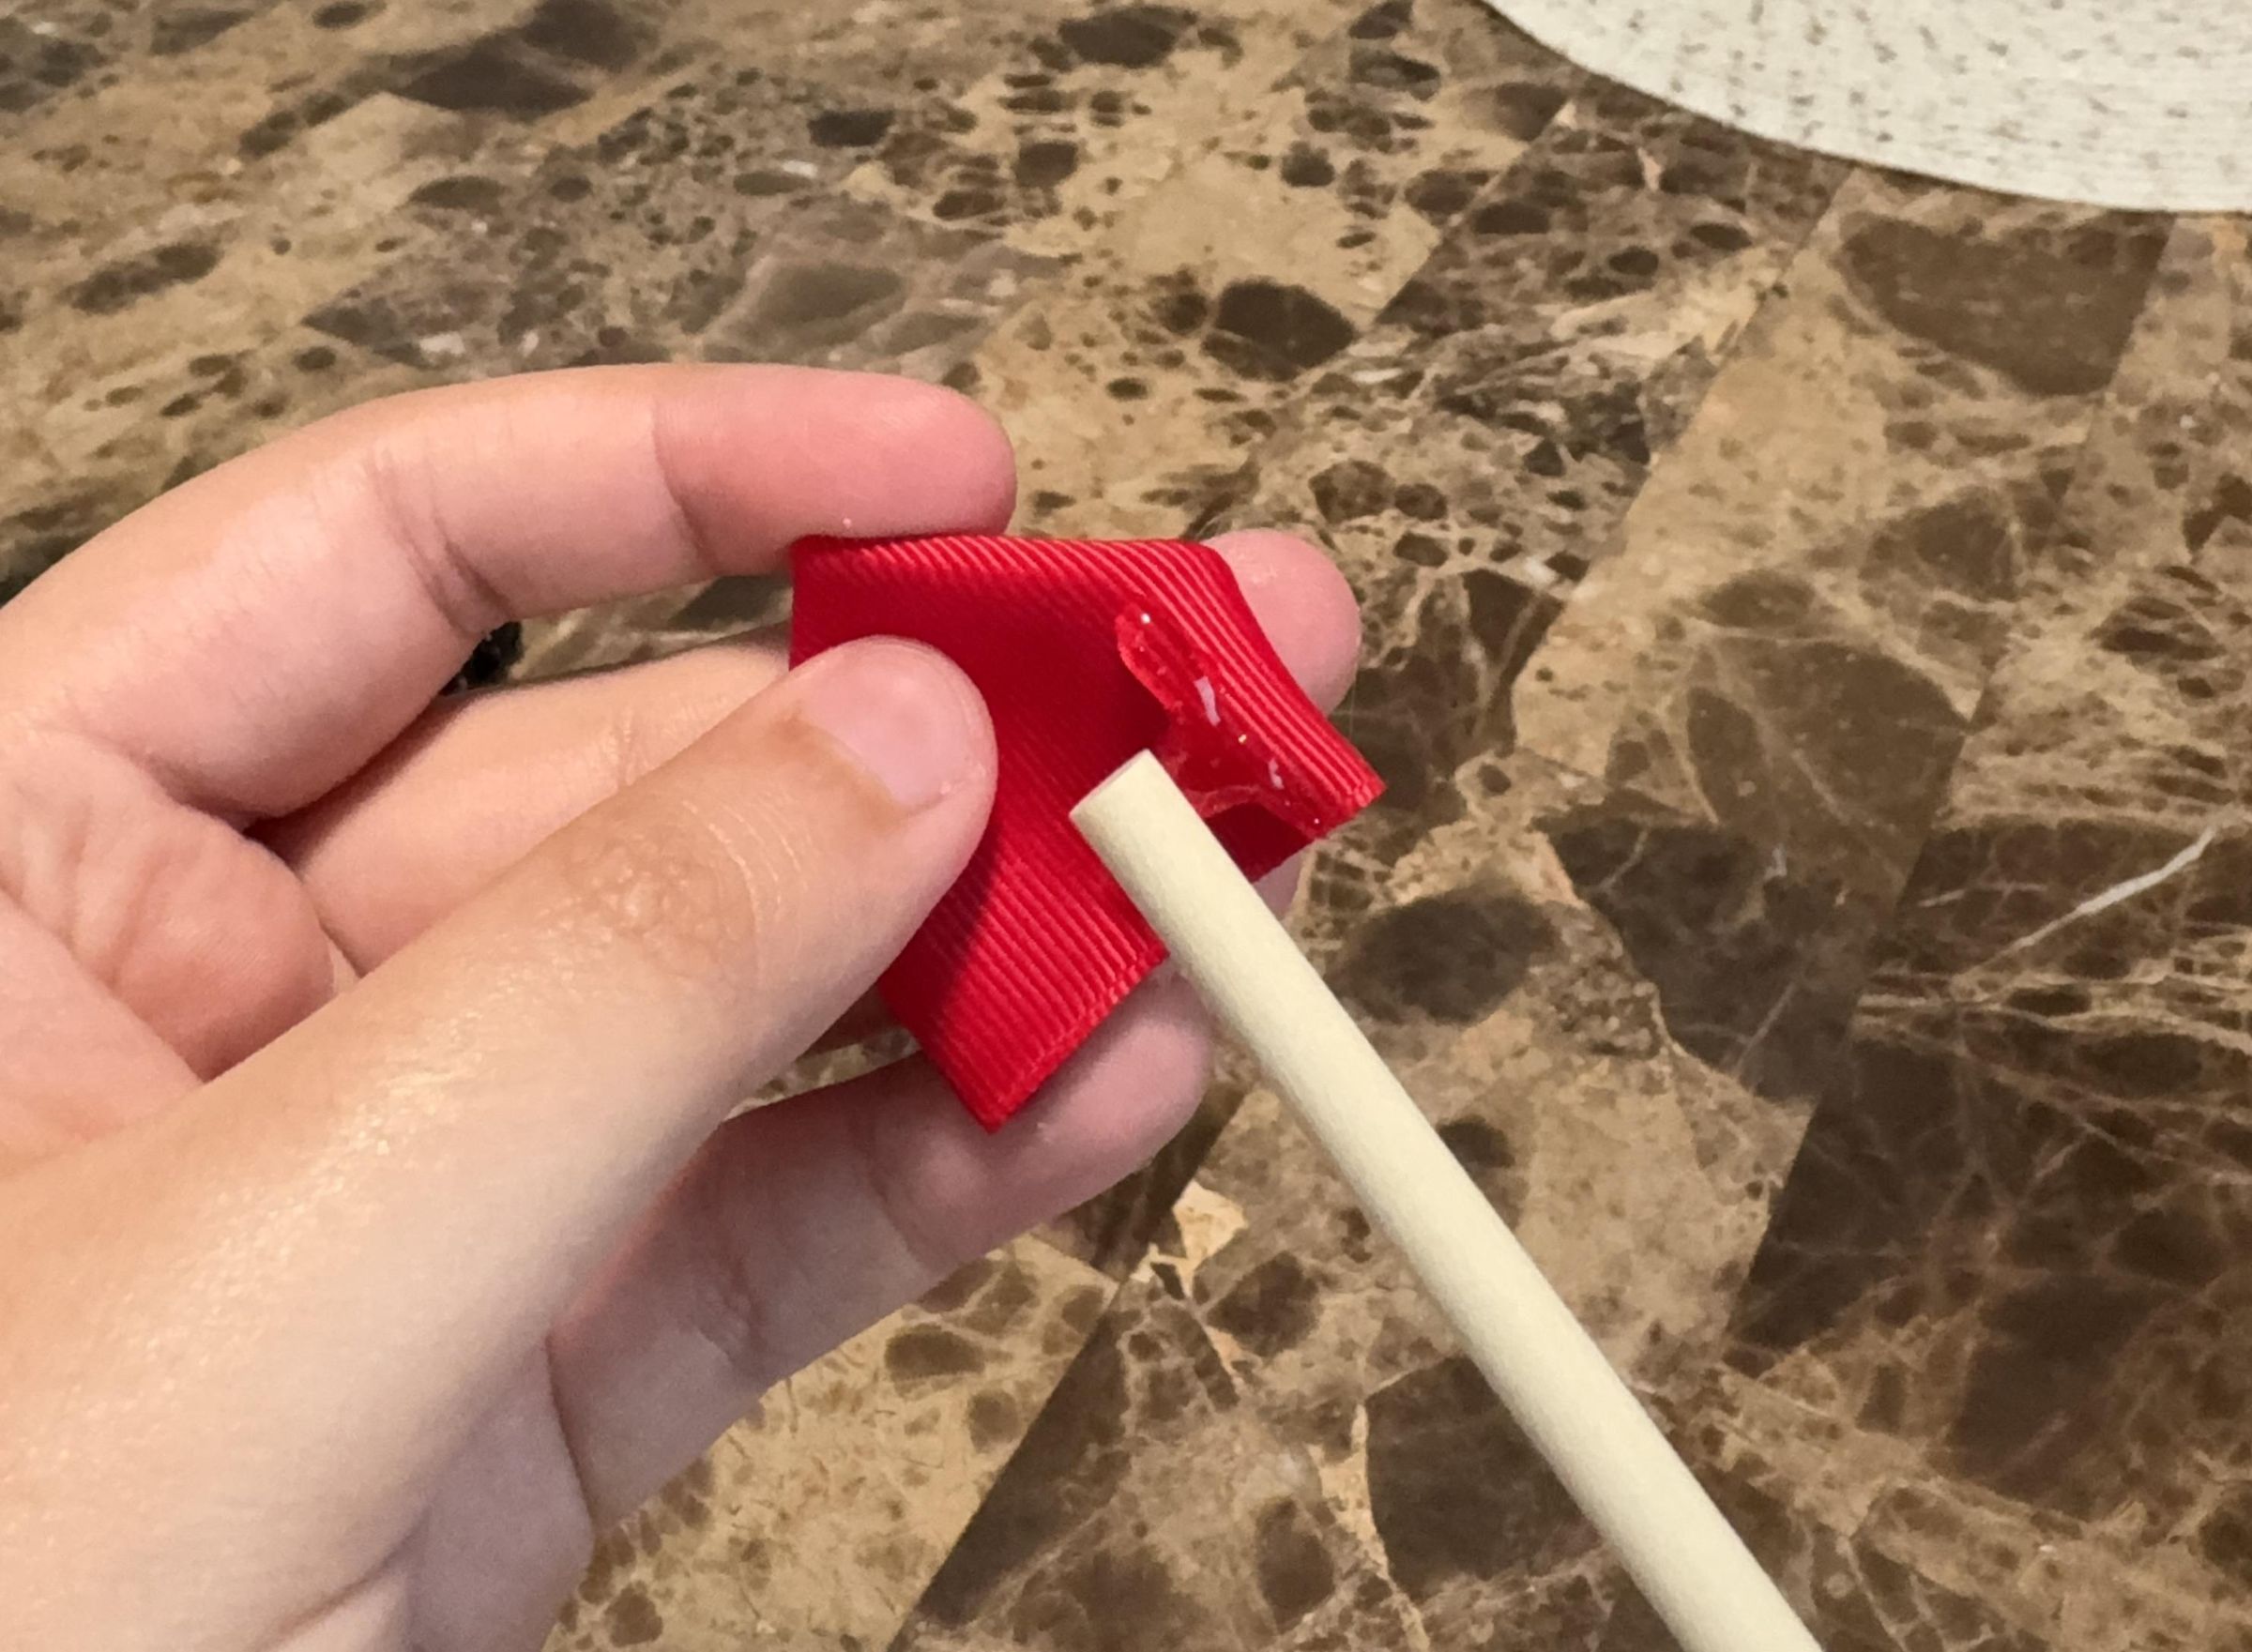
Select one petal from the center layer and position the first center-layer petal so the back side faces the stem and the folded side faces outward.
Attach the first petal to the stick by applying glue along the outer right edge and securing the petal around the stem.
Warp the Petal
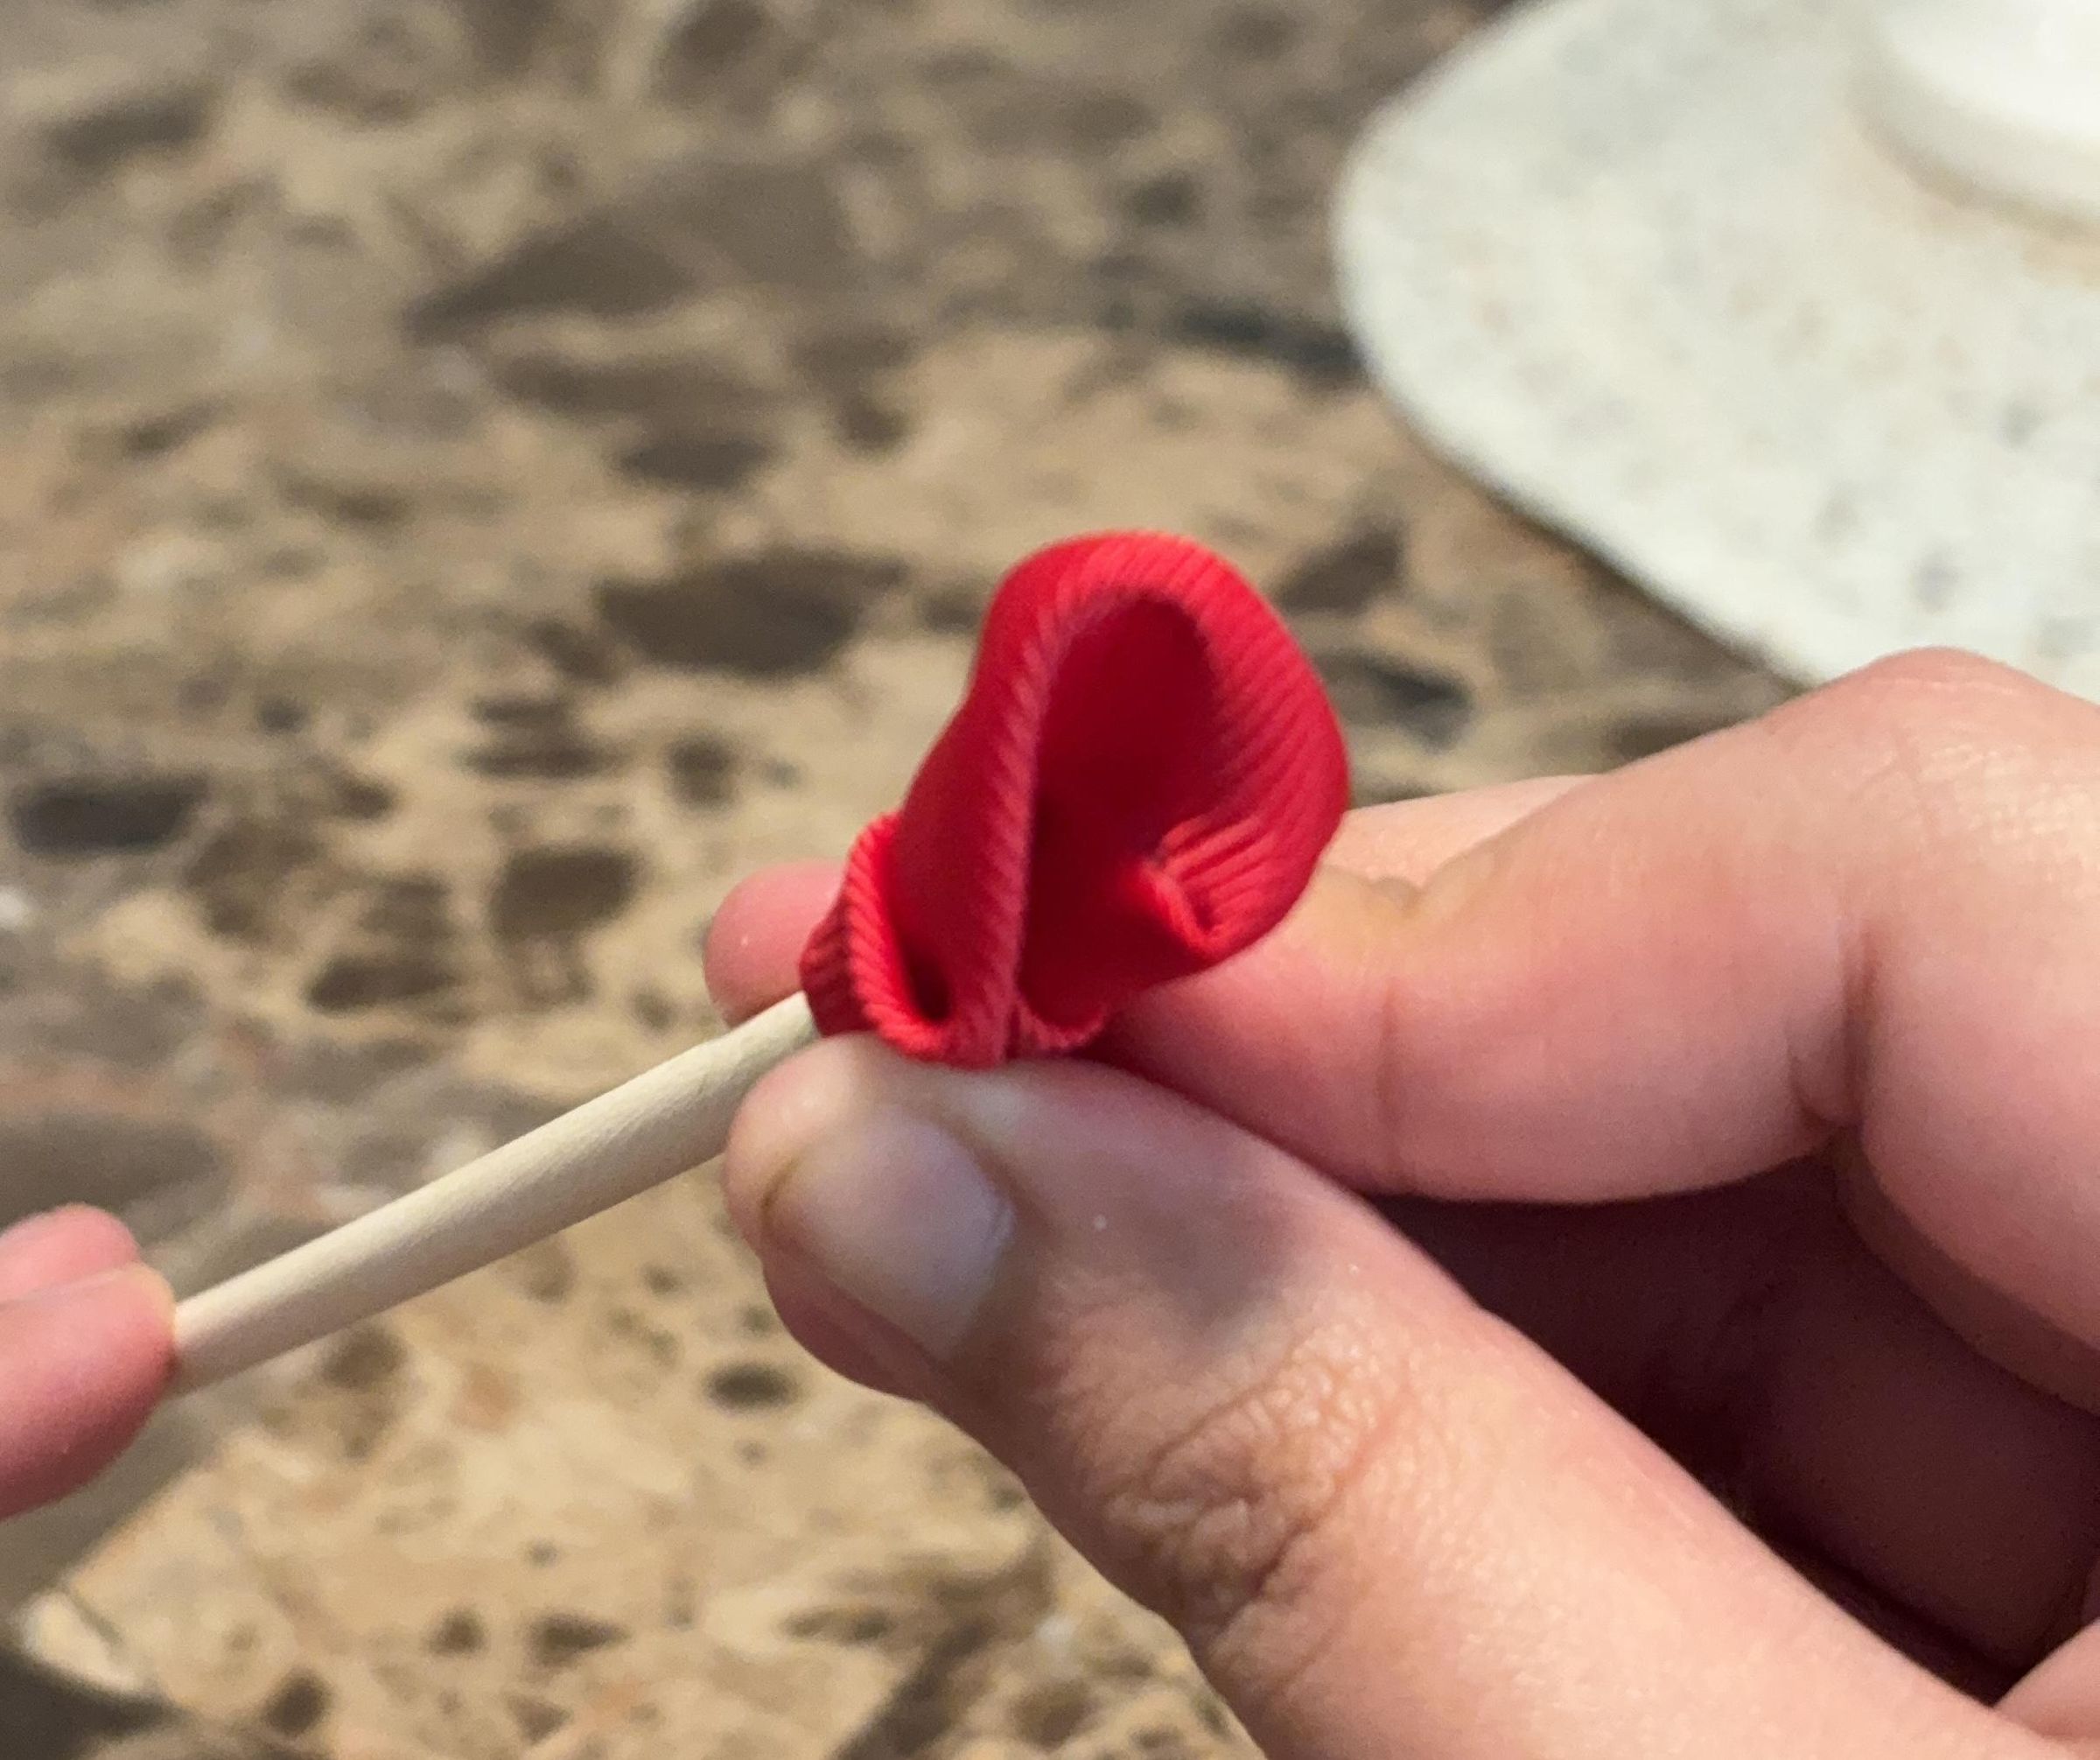
Wrap the first petal around the stem to create the center of the rose.
Add Inner Petals
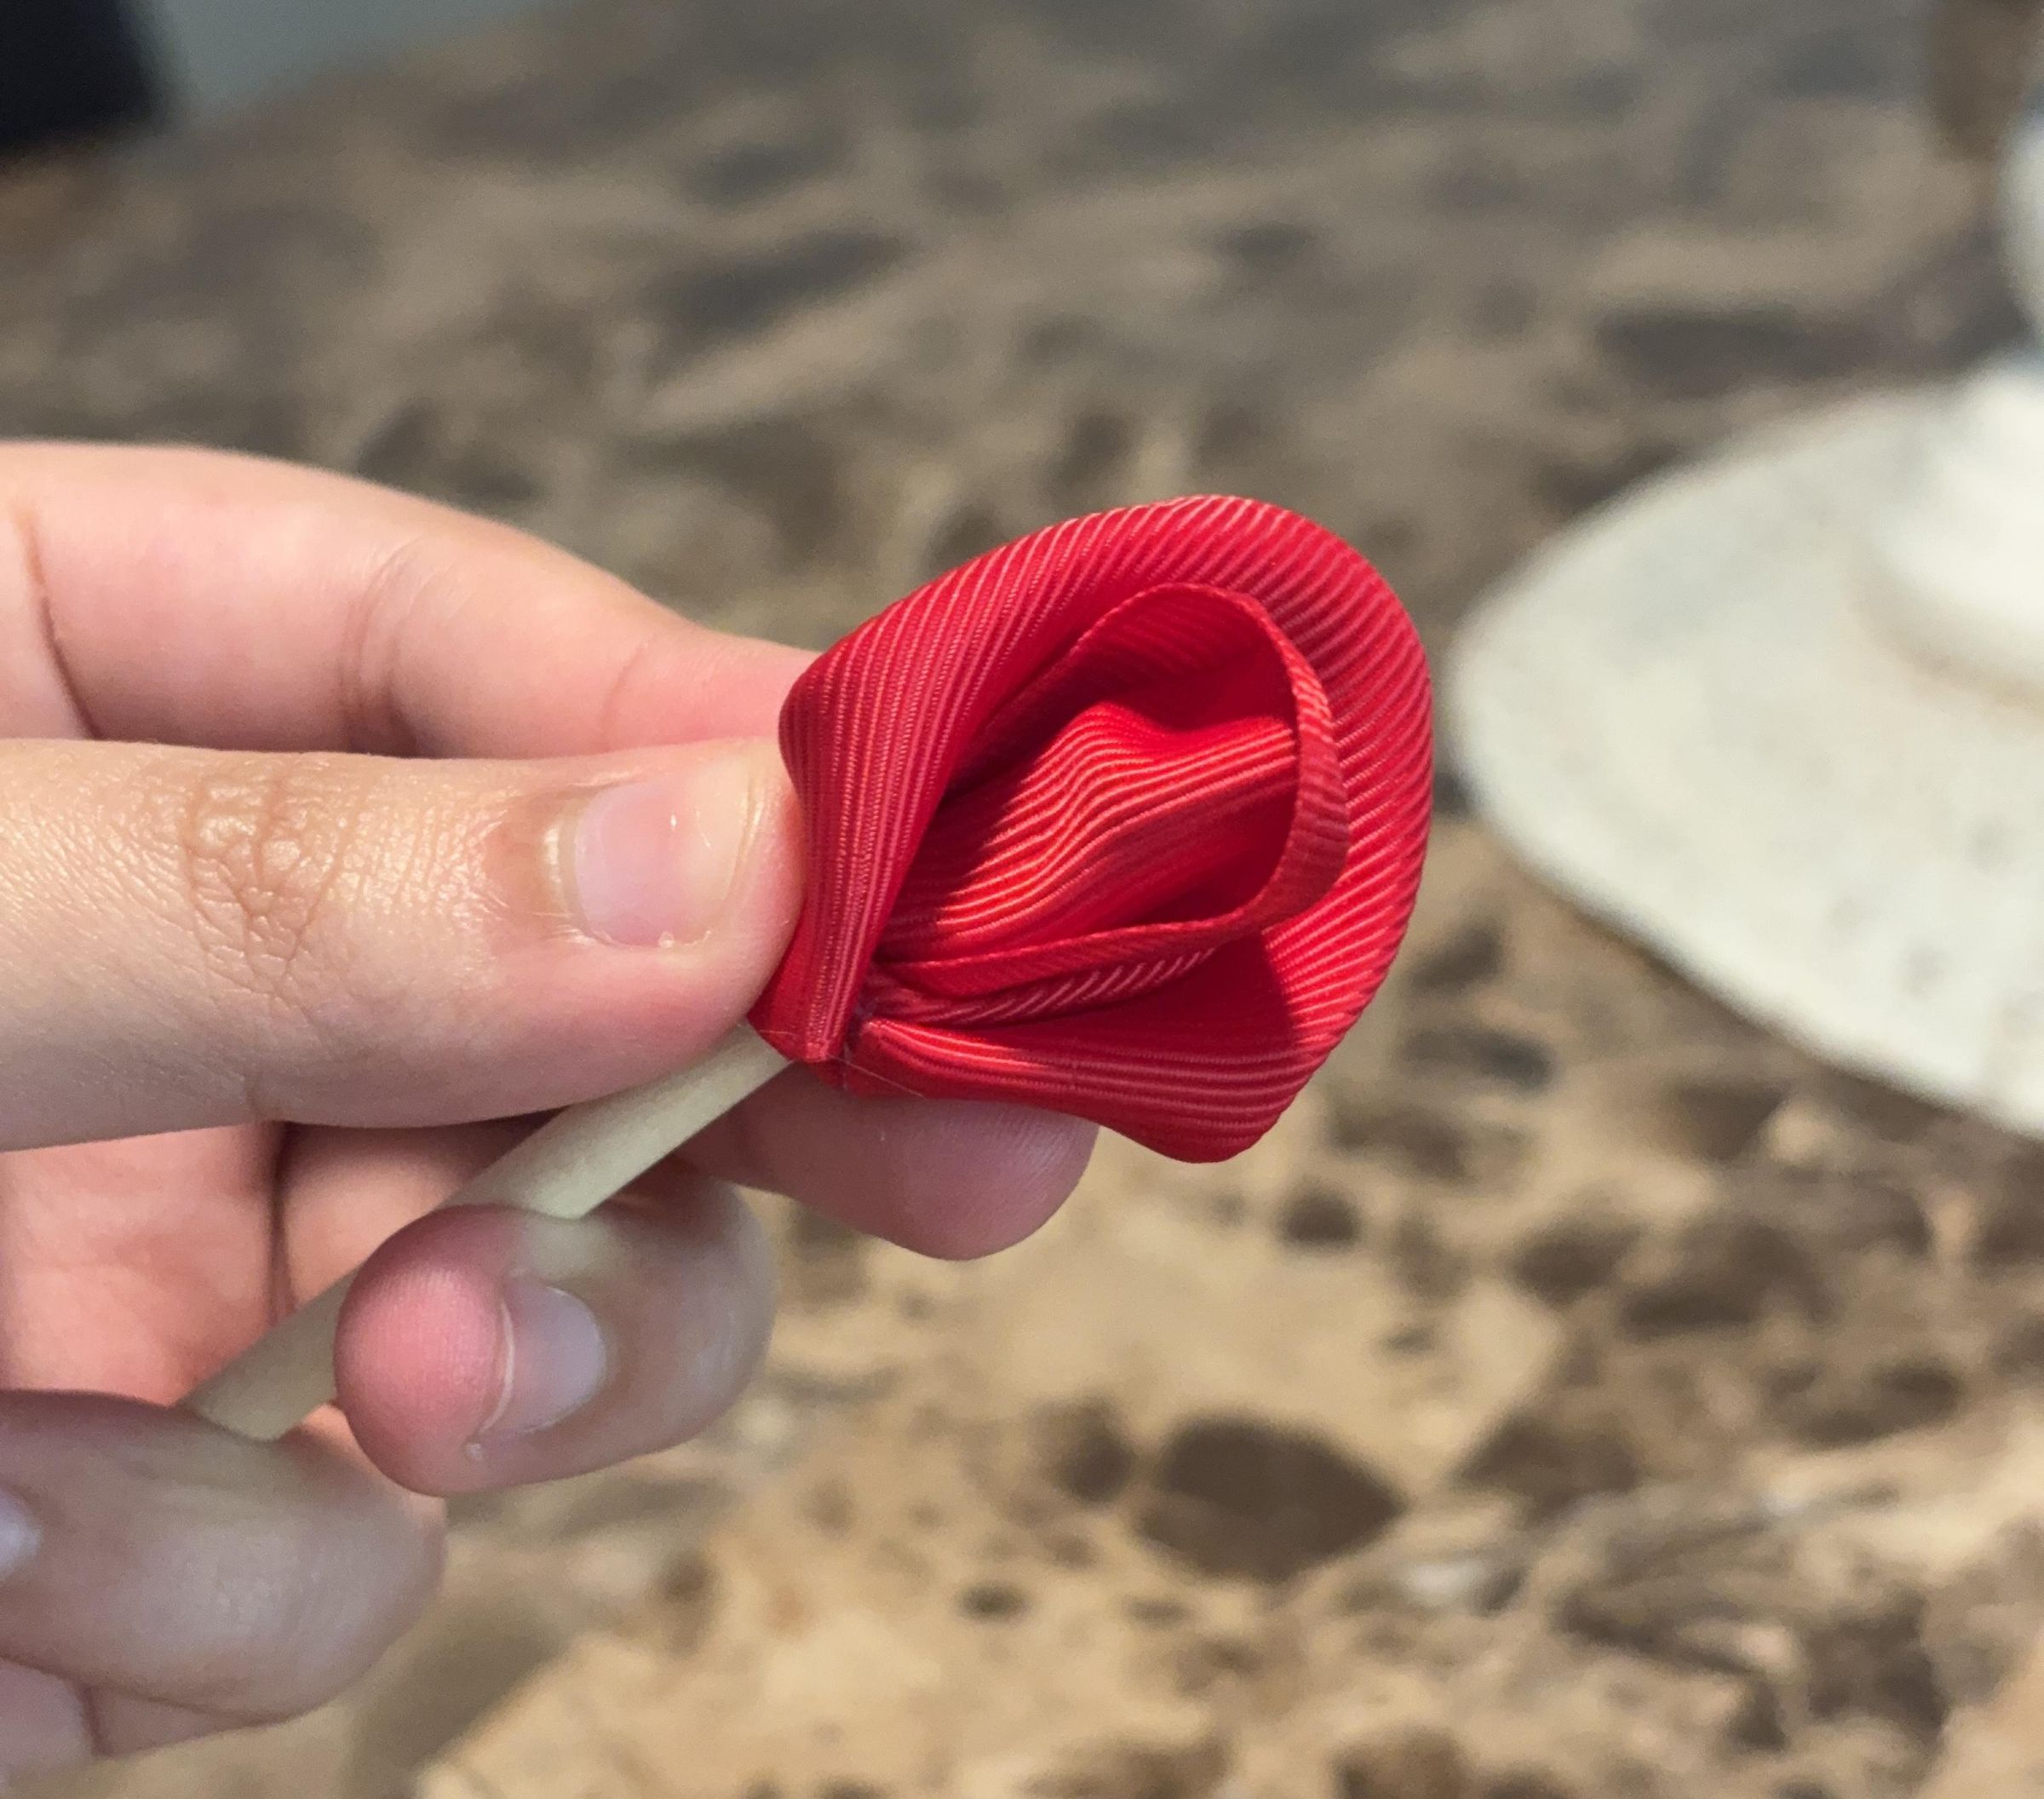
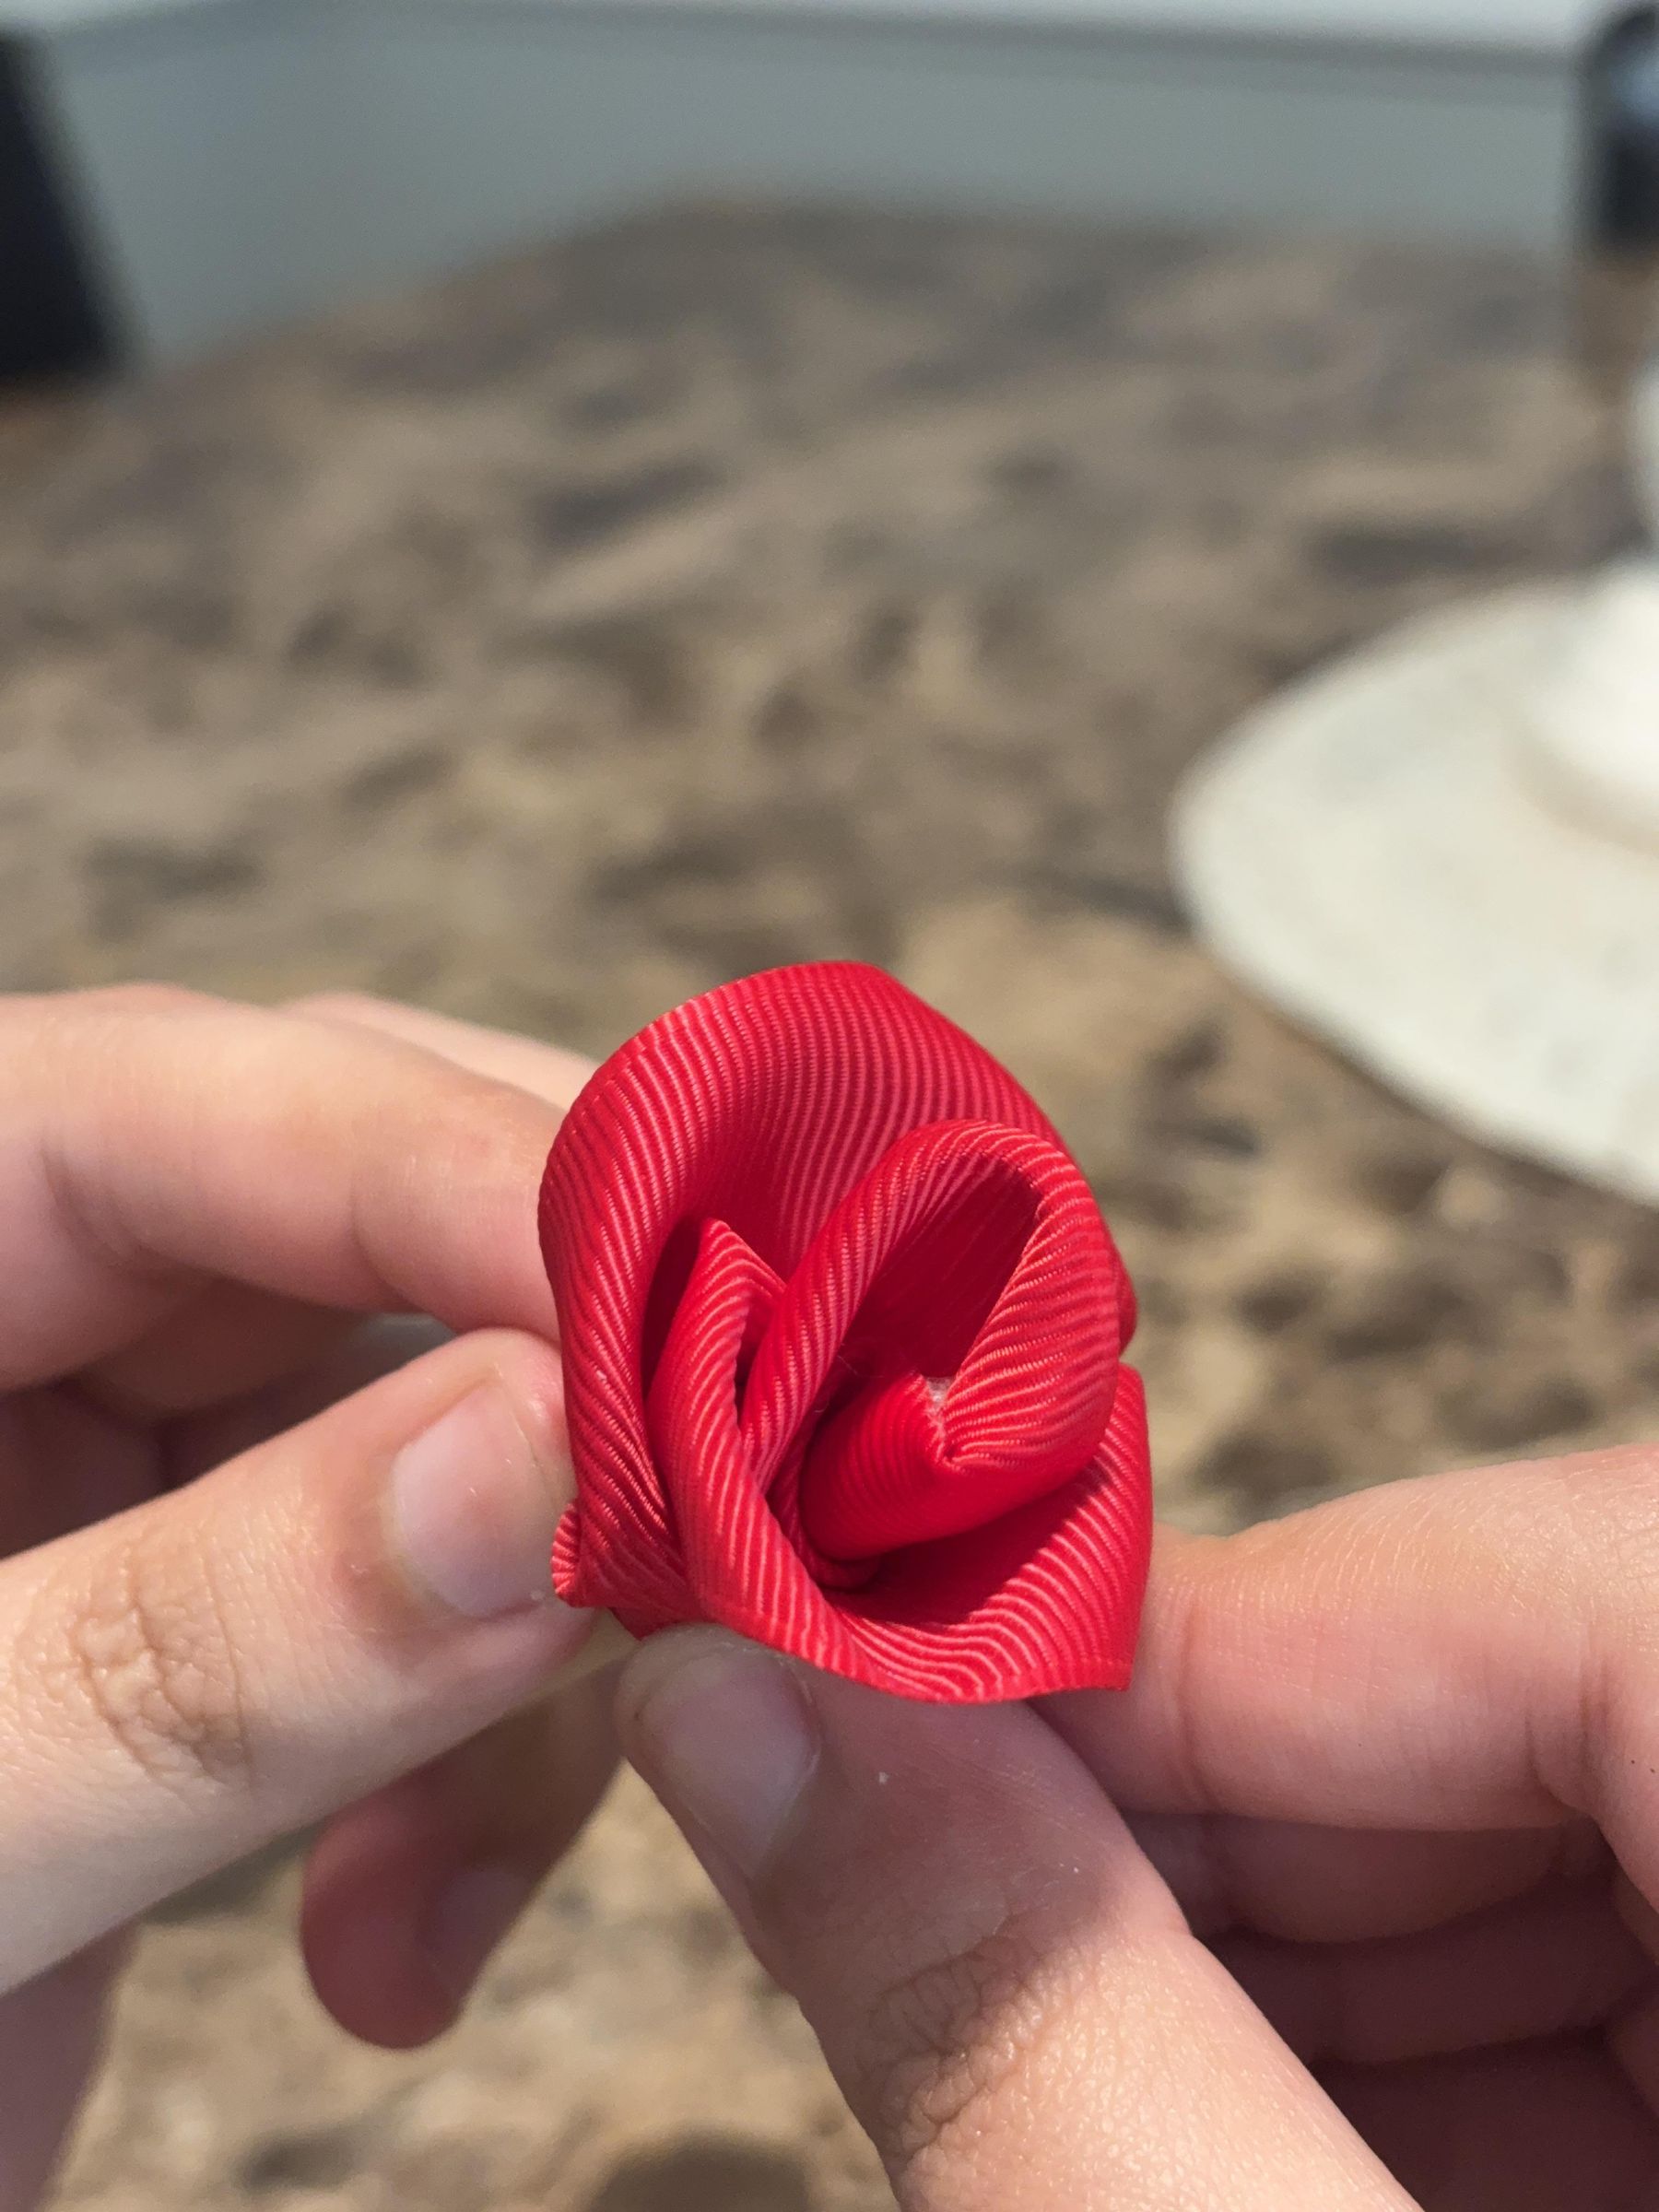
Attach the remaining two center-layer petals by gluing and wrapping them around the existing center.
Build the Middle of the Rose
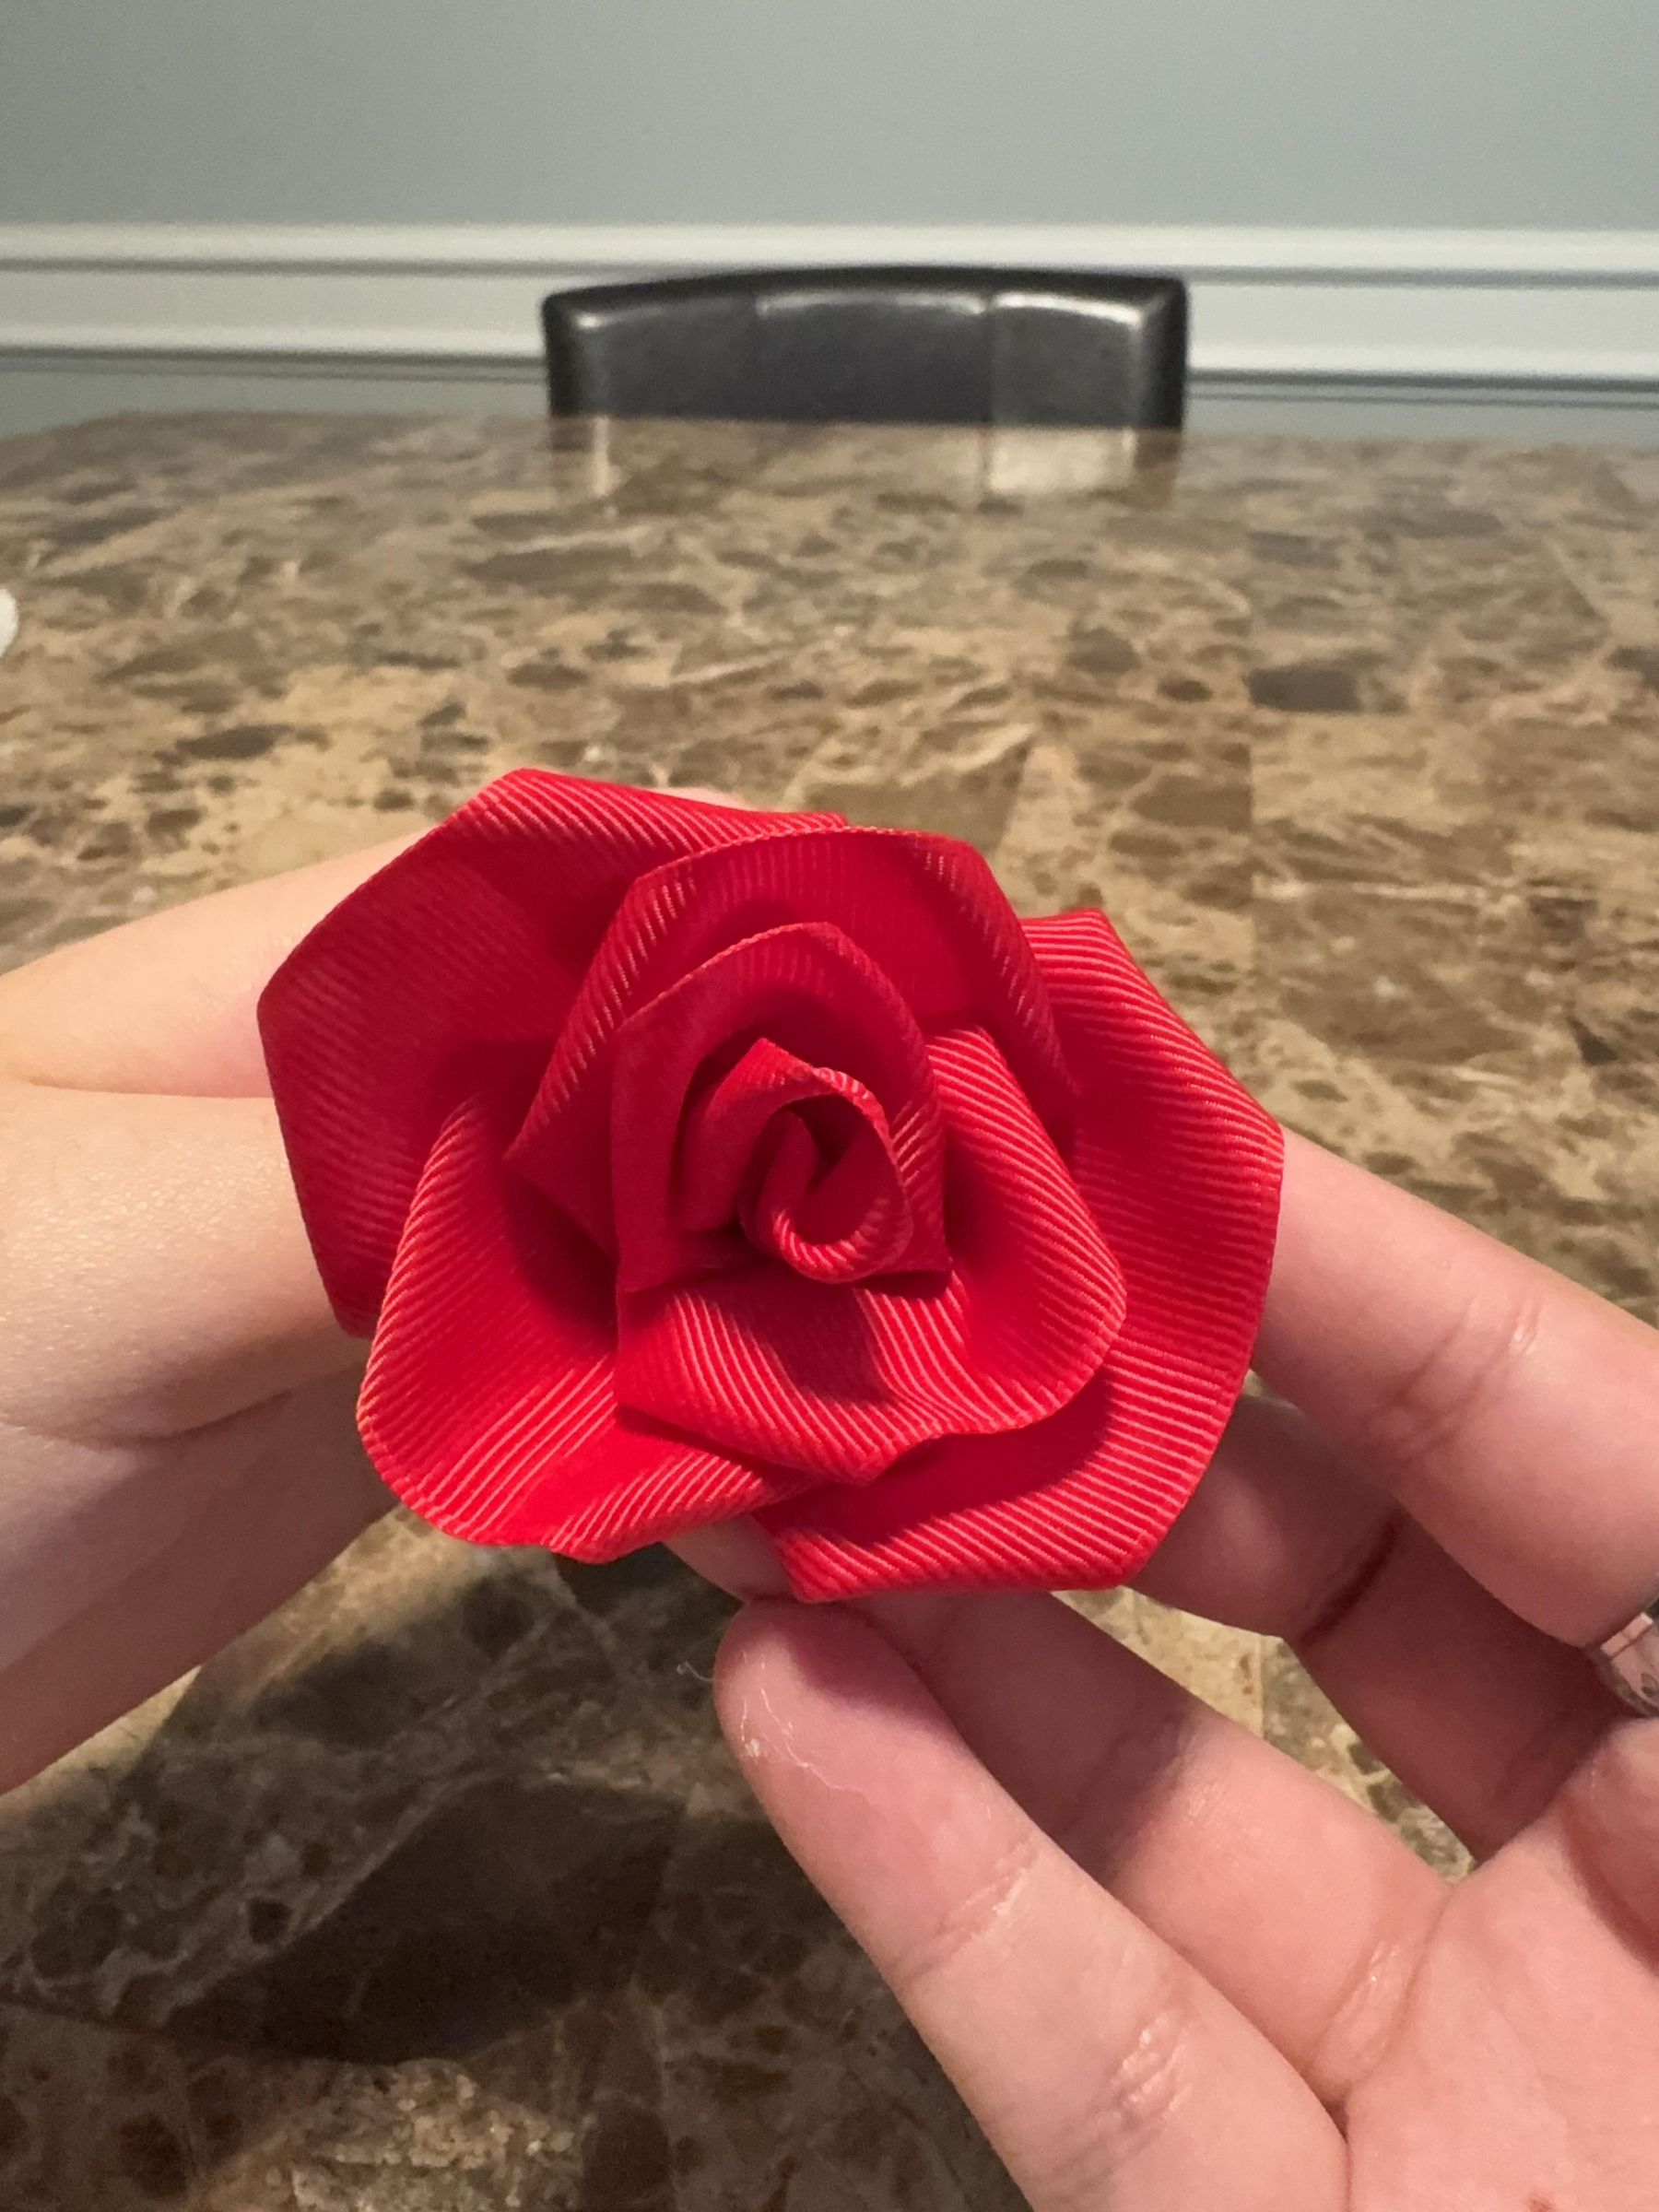
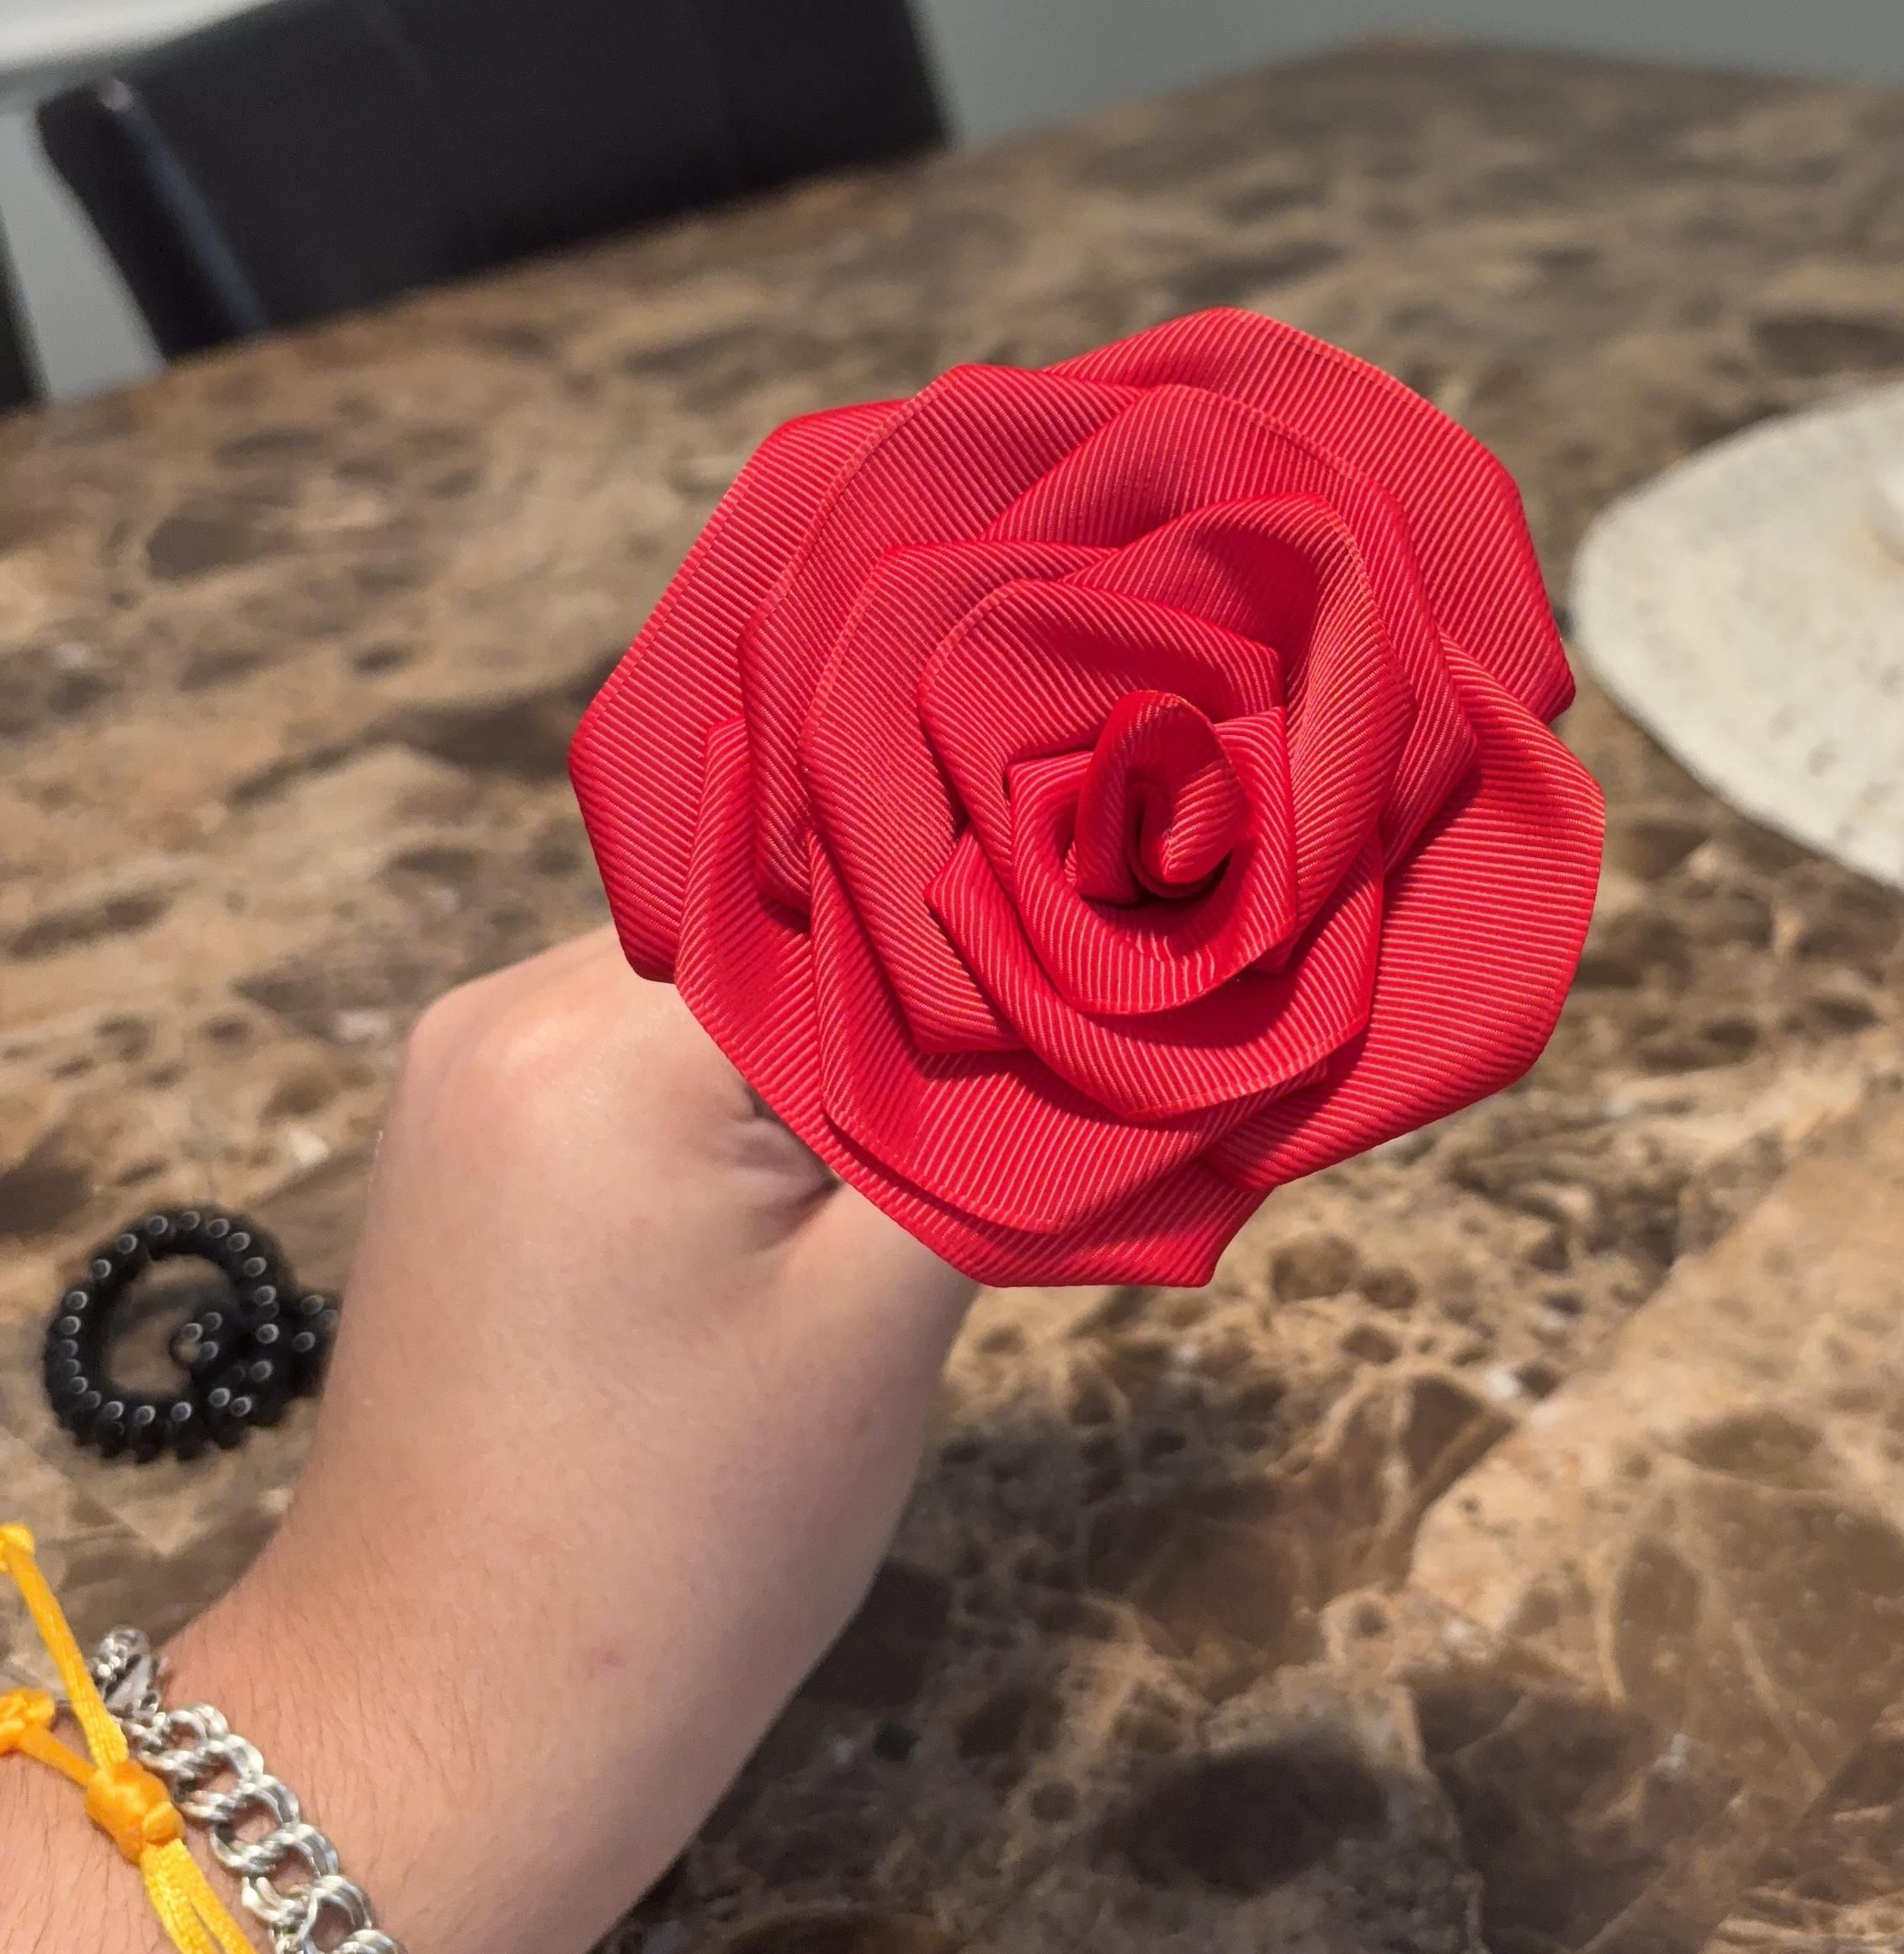
Continue gluing and wrapping the six middle-layer petals around the center to increase the rose size.
Note: Glue each petal around the rose while spacing them evenly. Place each petal where there is an open space to create a fuller flower shape.
Finish the Outer Layer
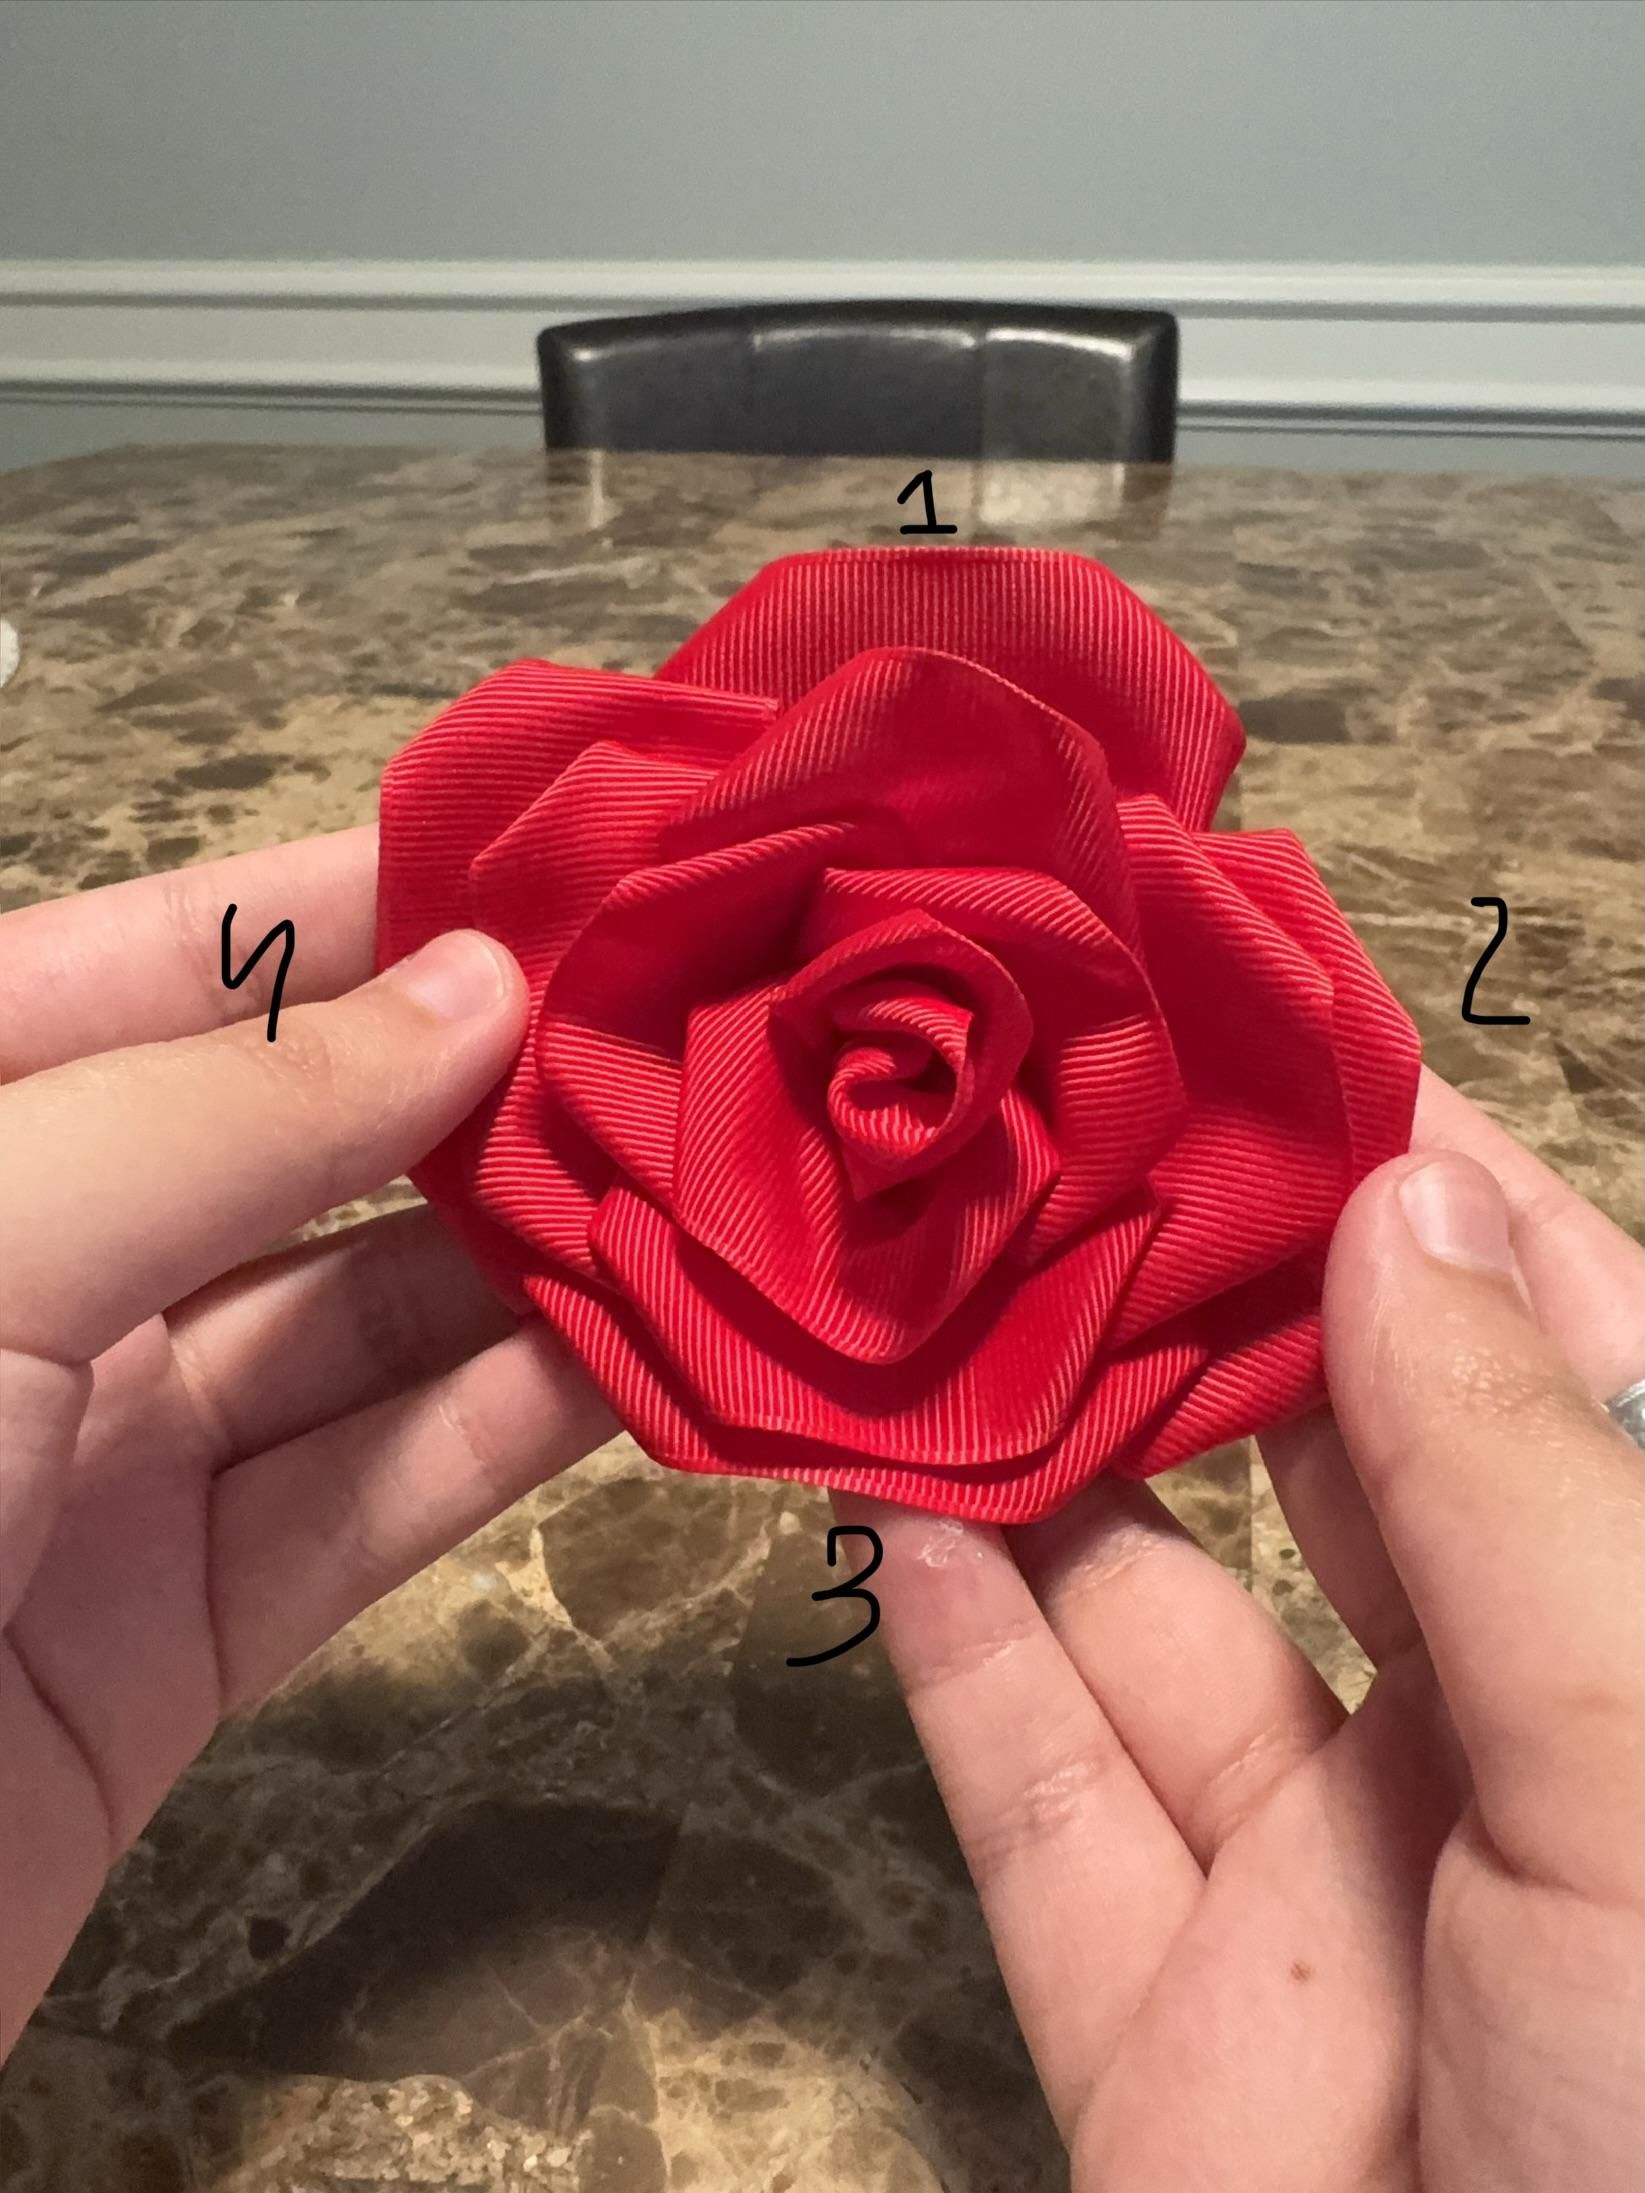
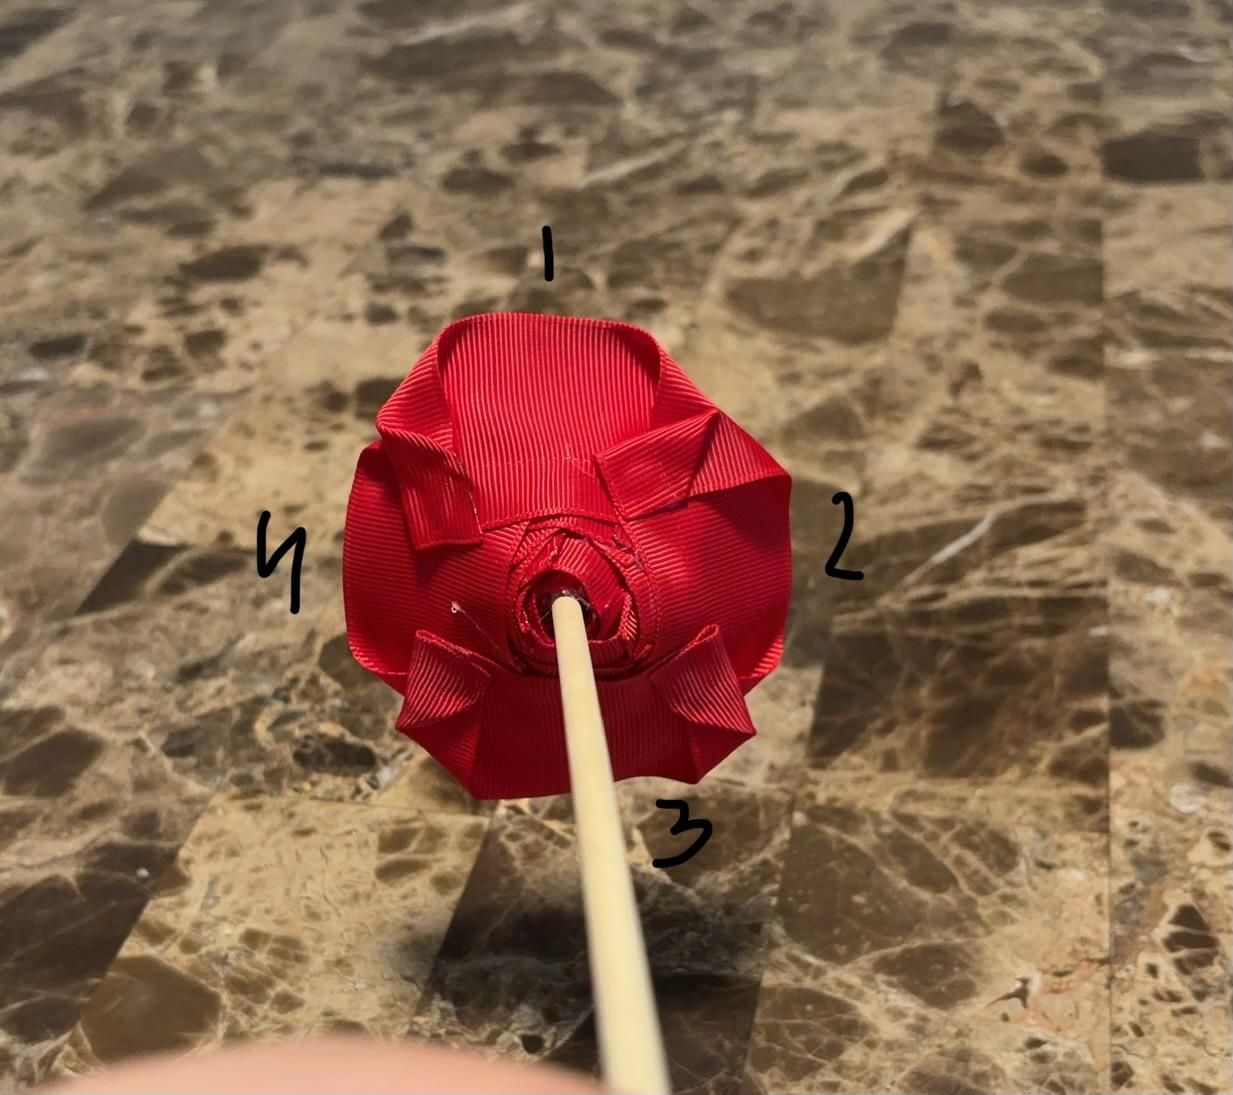
Attach the final four petals around the outside of the flower to complete the rose shape.
Note: The four petals should be placed to fill the gaps around the middle layer, helping create an evenly shaped flower.
Wrap the Stem
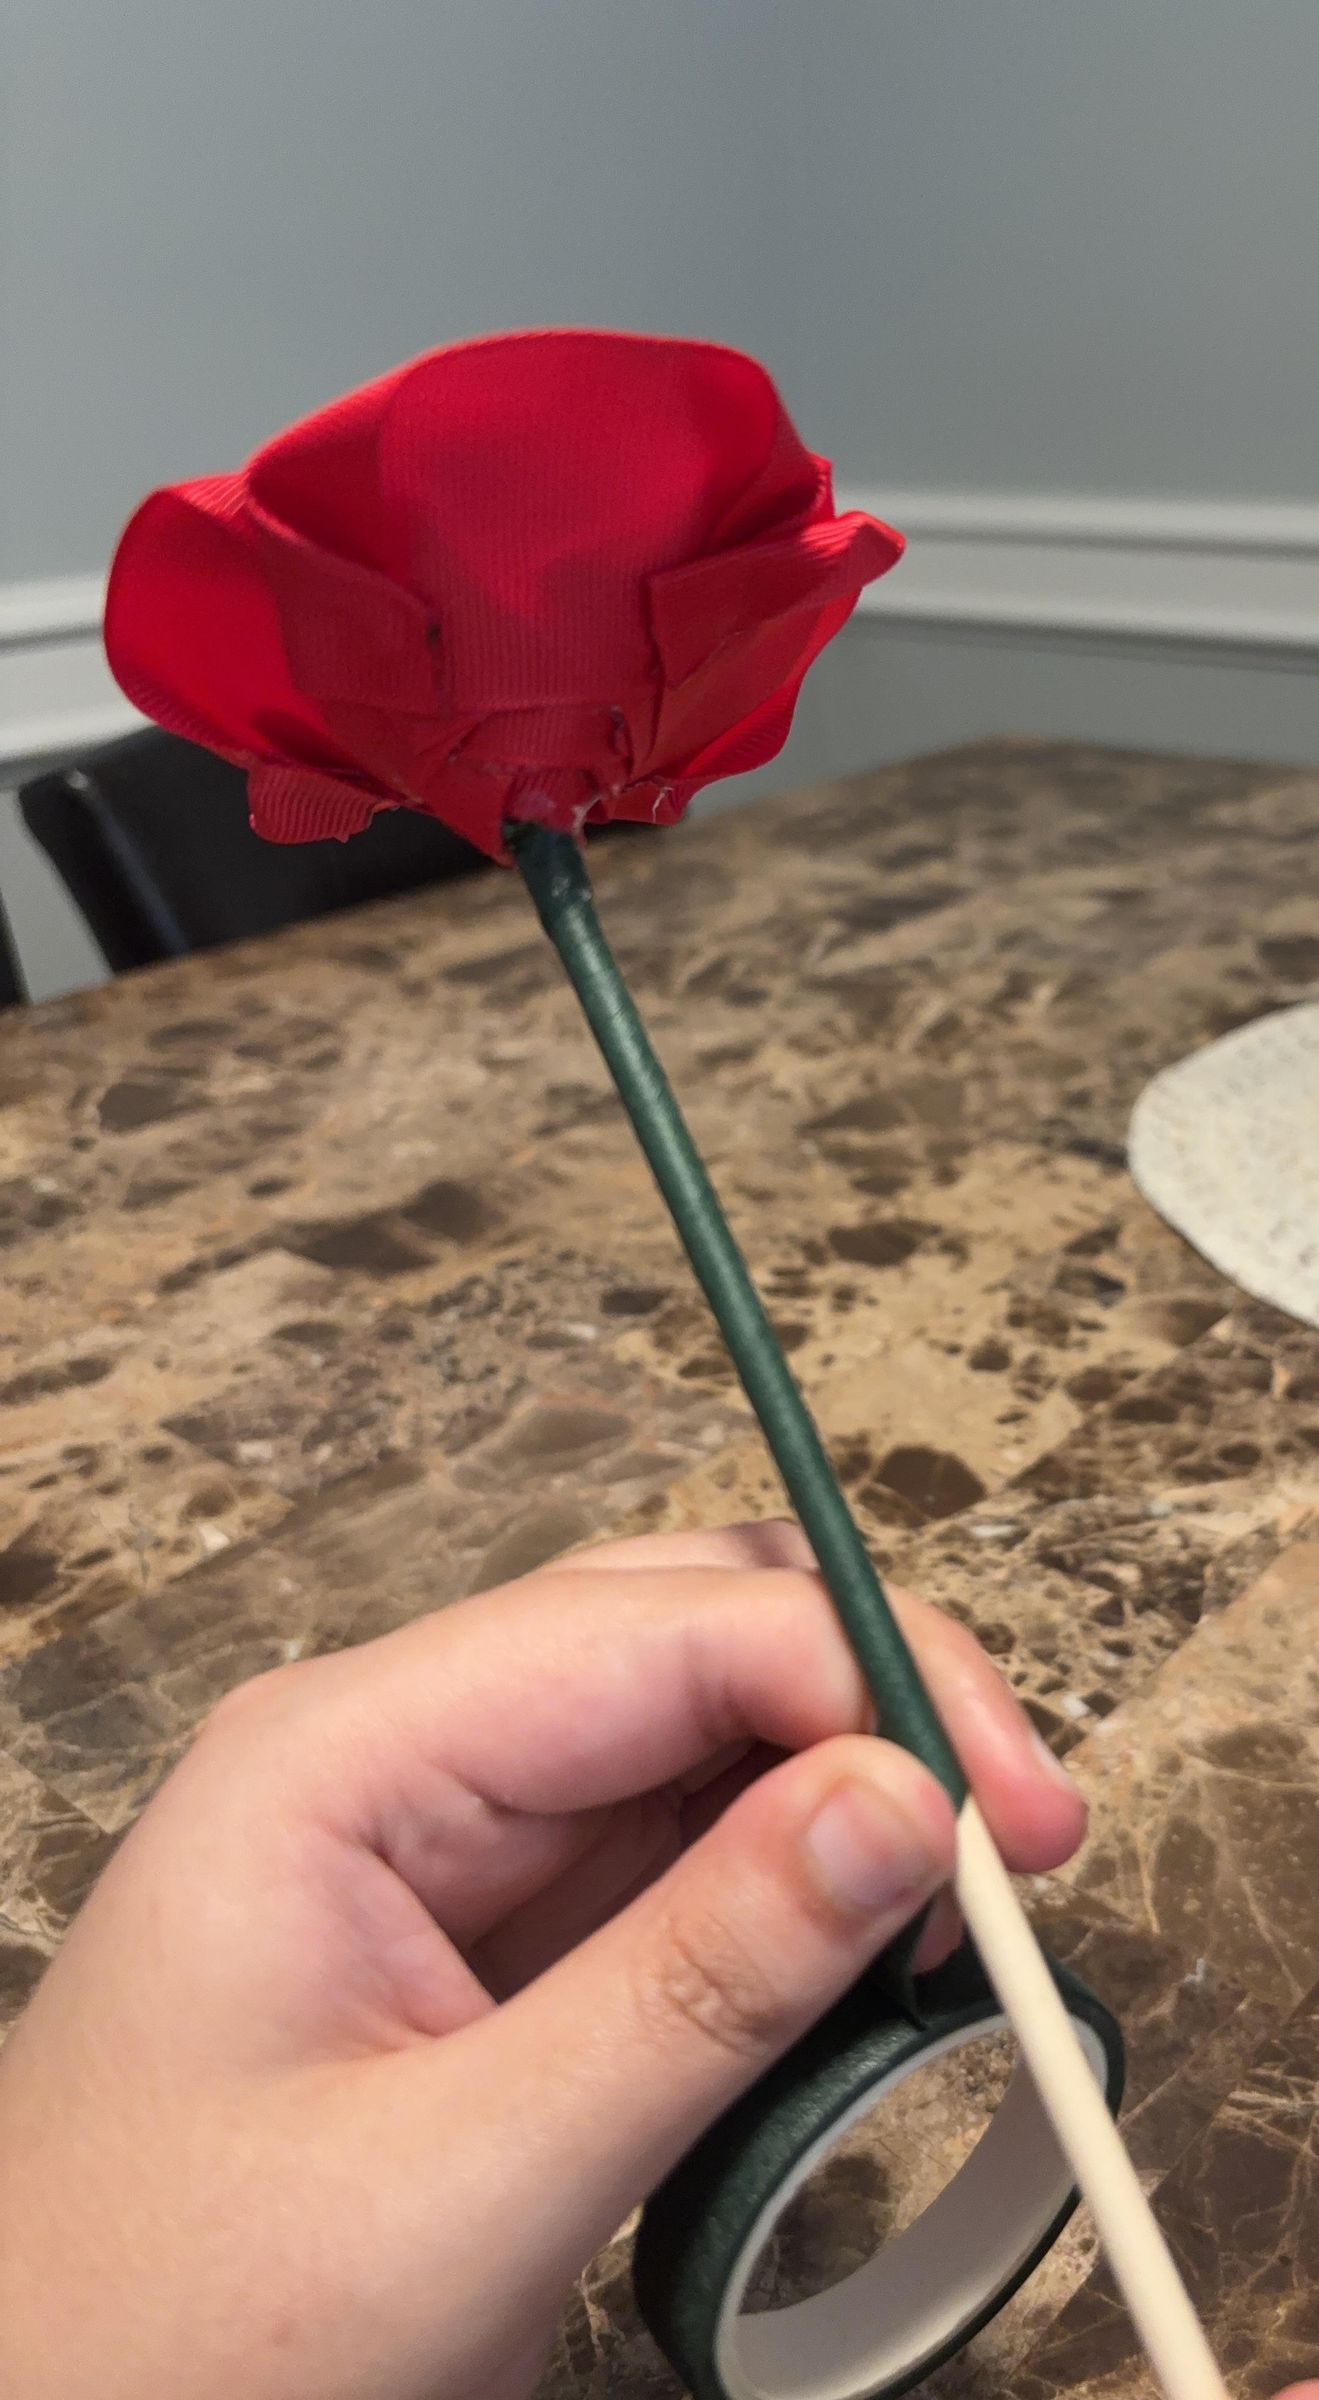
Cover the stick with floral tape to create a finished stem look.
Creat Additional Roses
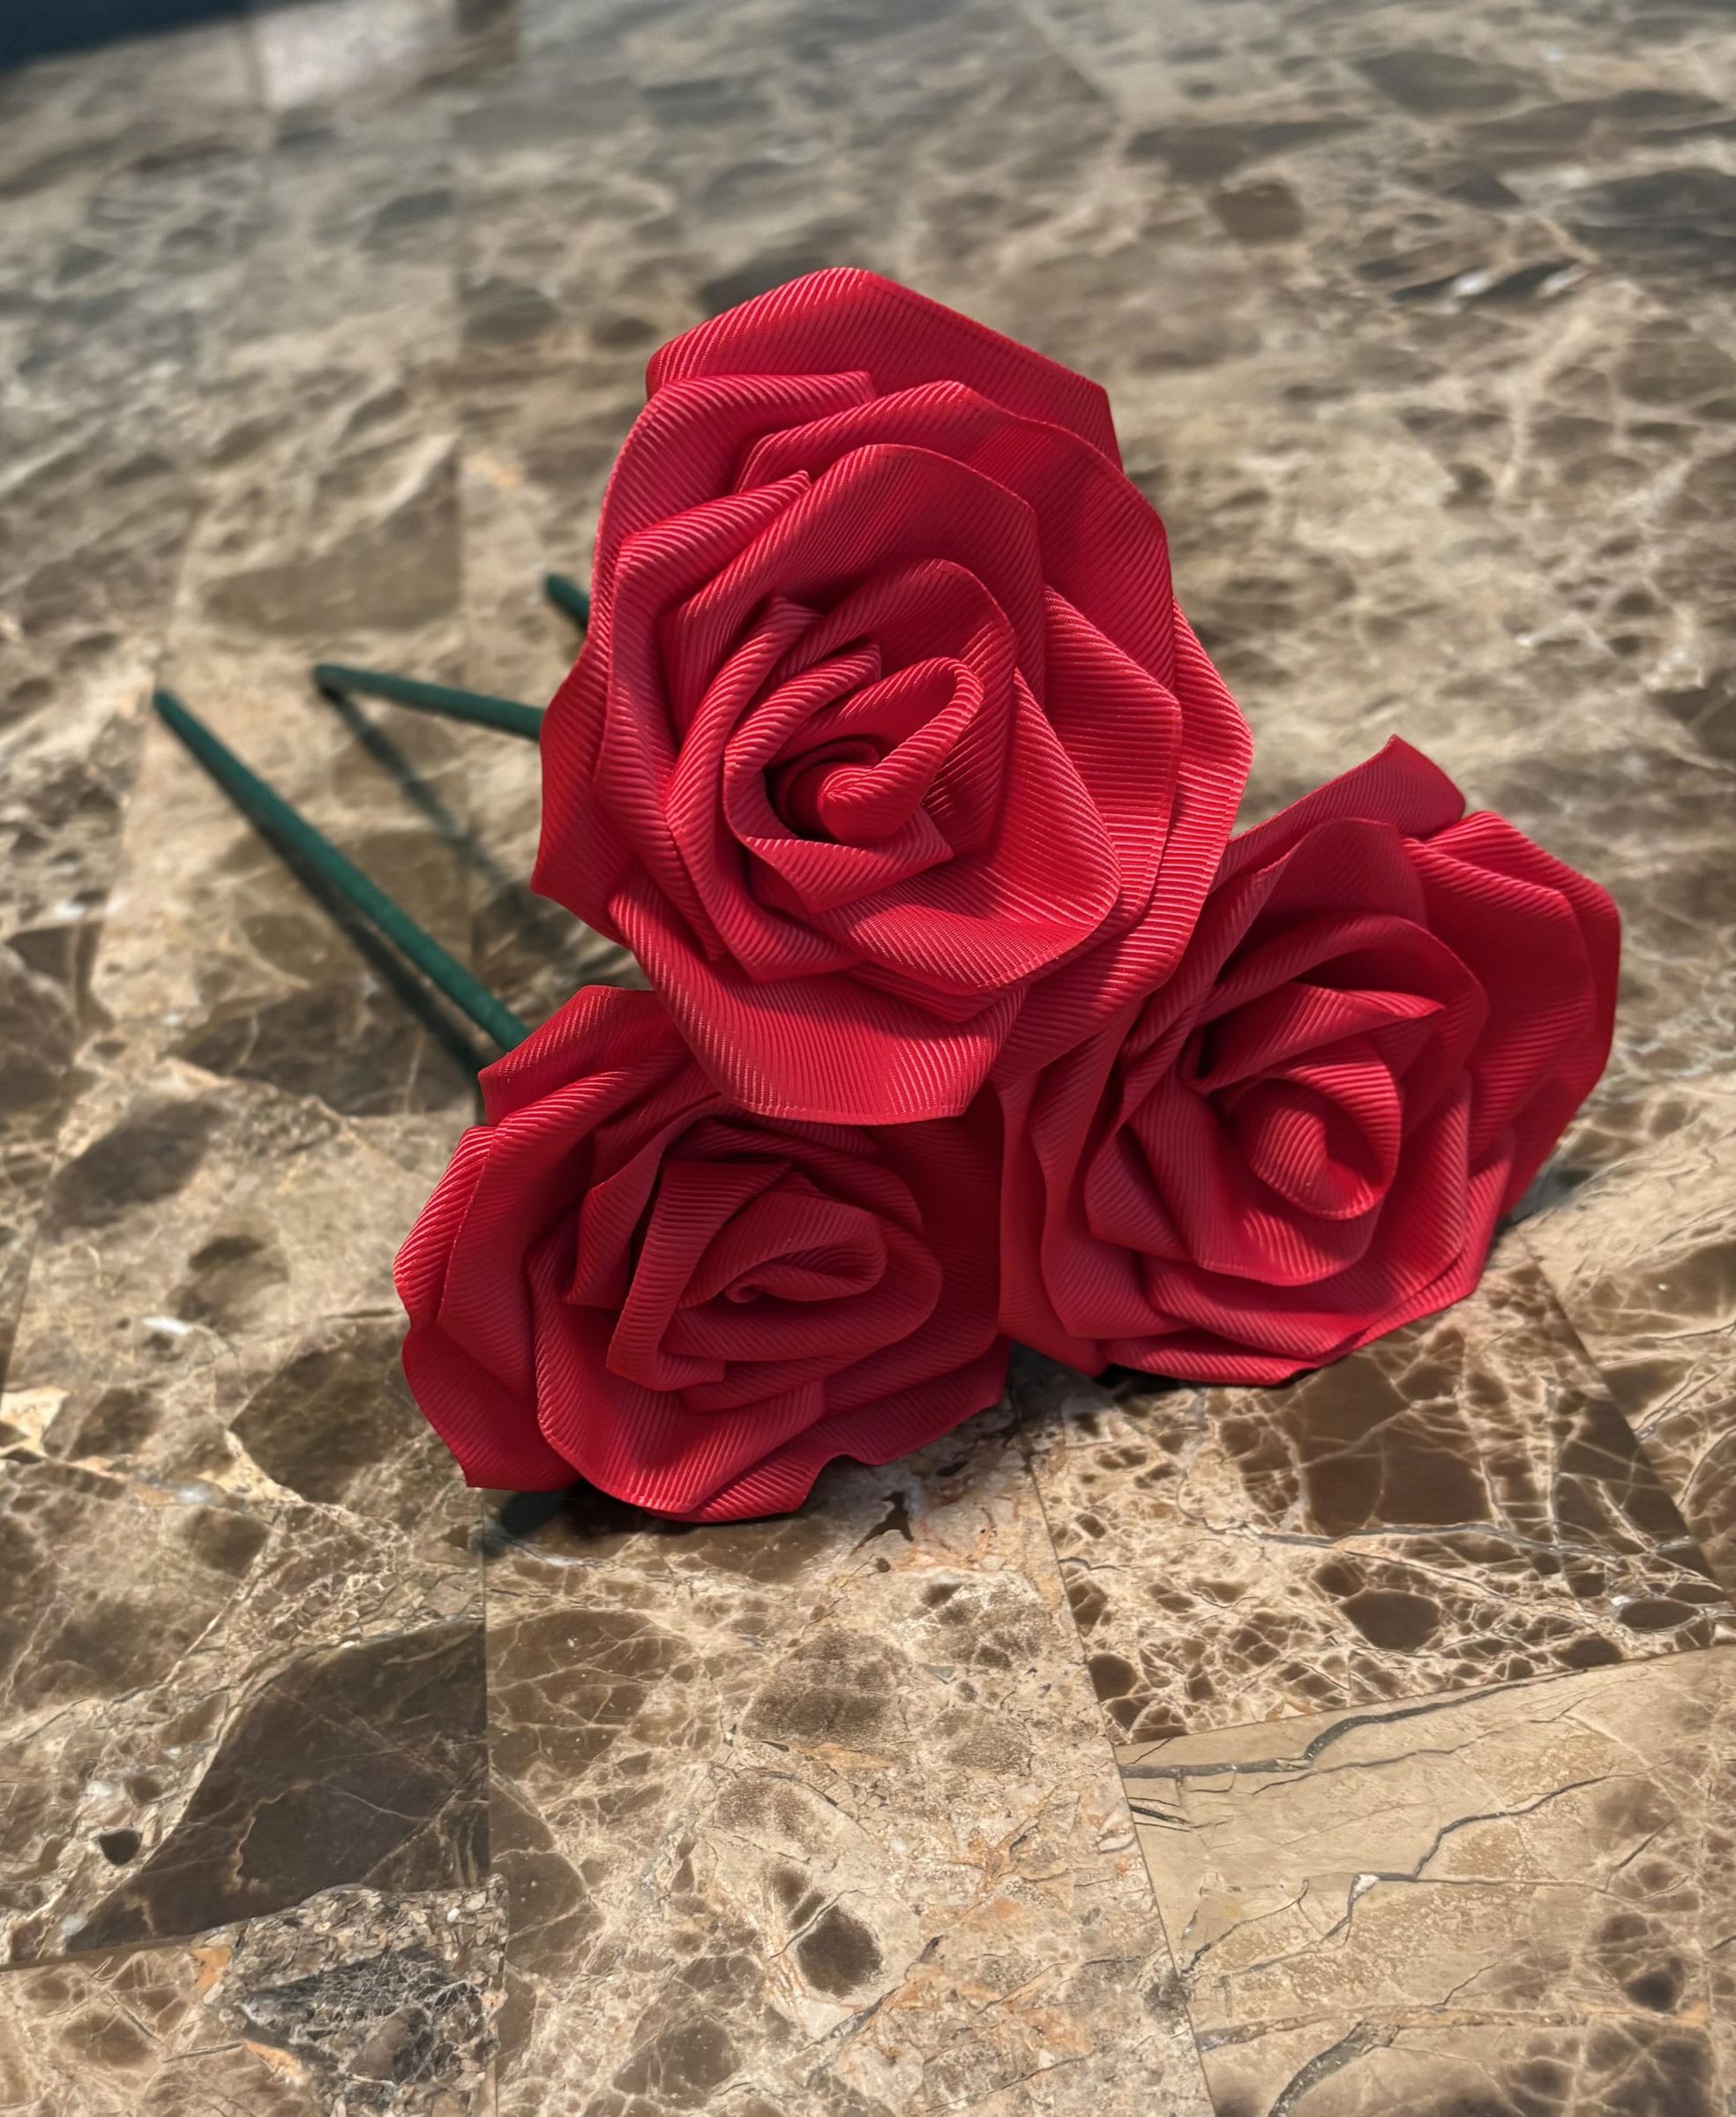
Repeat steps 1-14 to create enough ribbon roses for the bouquet.
Arrange the Bouquet
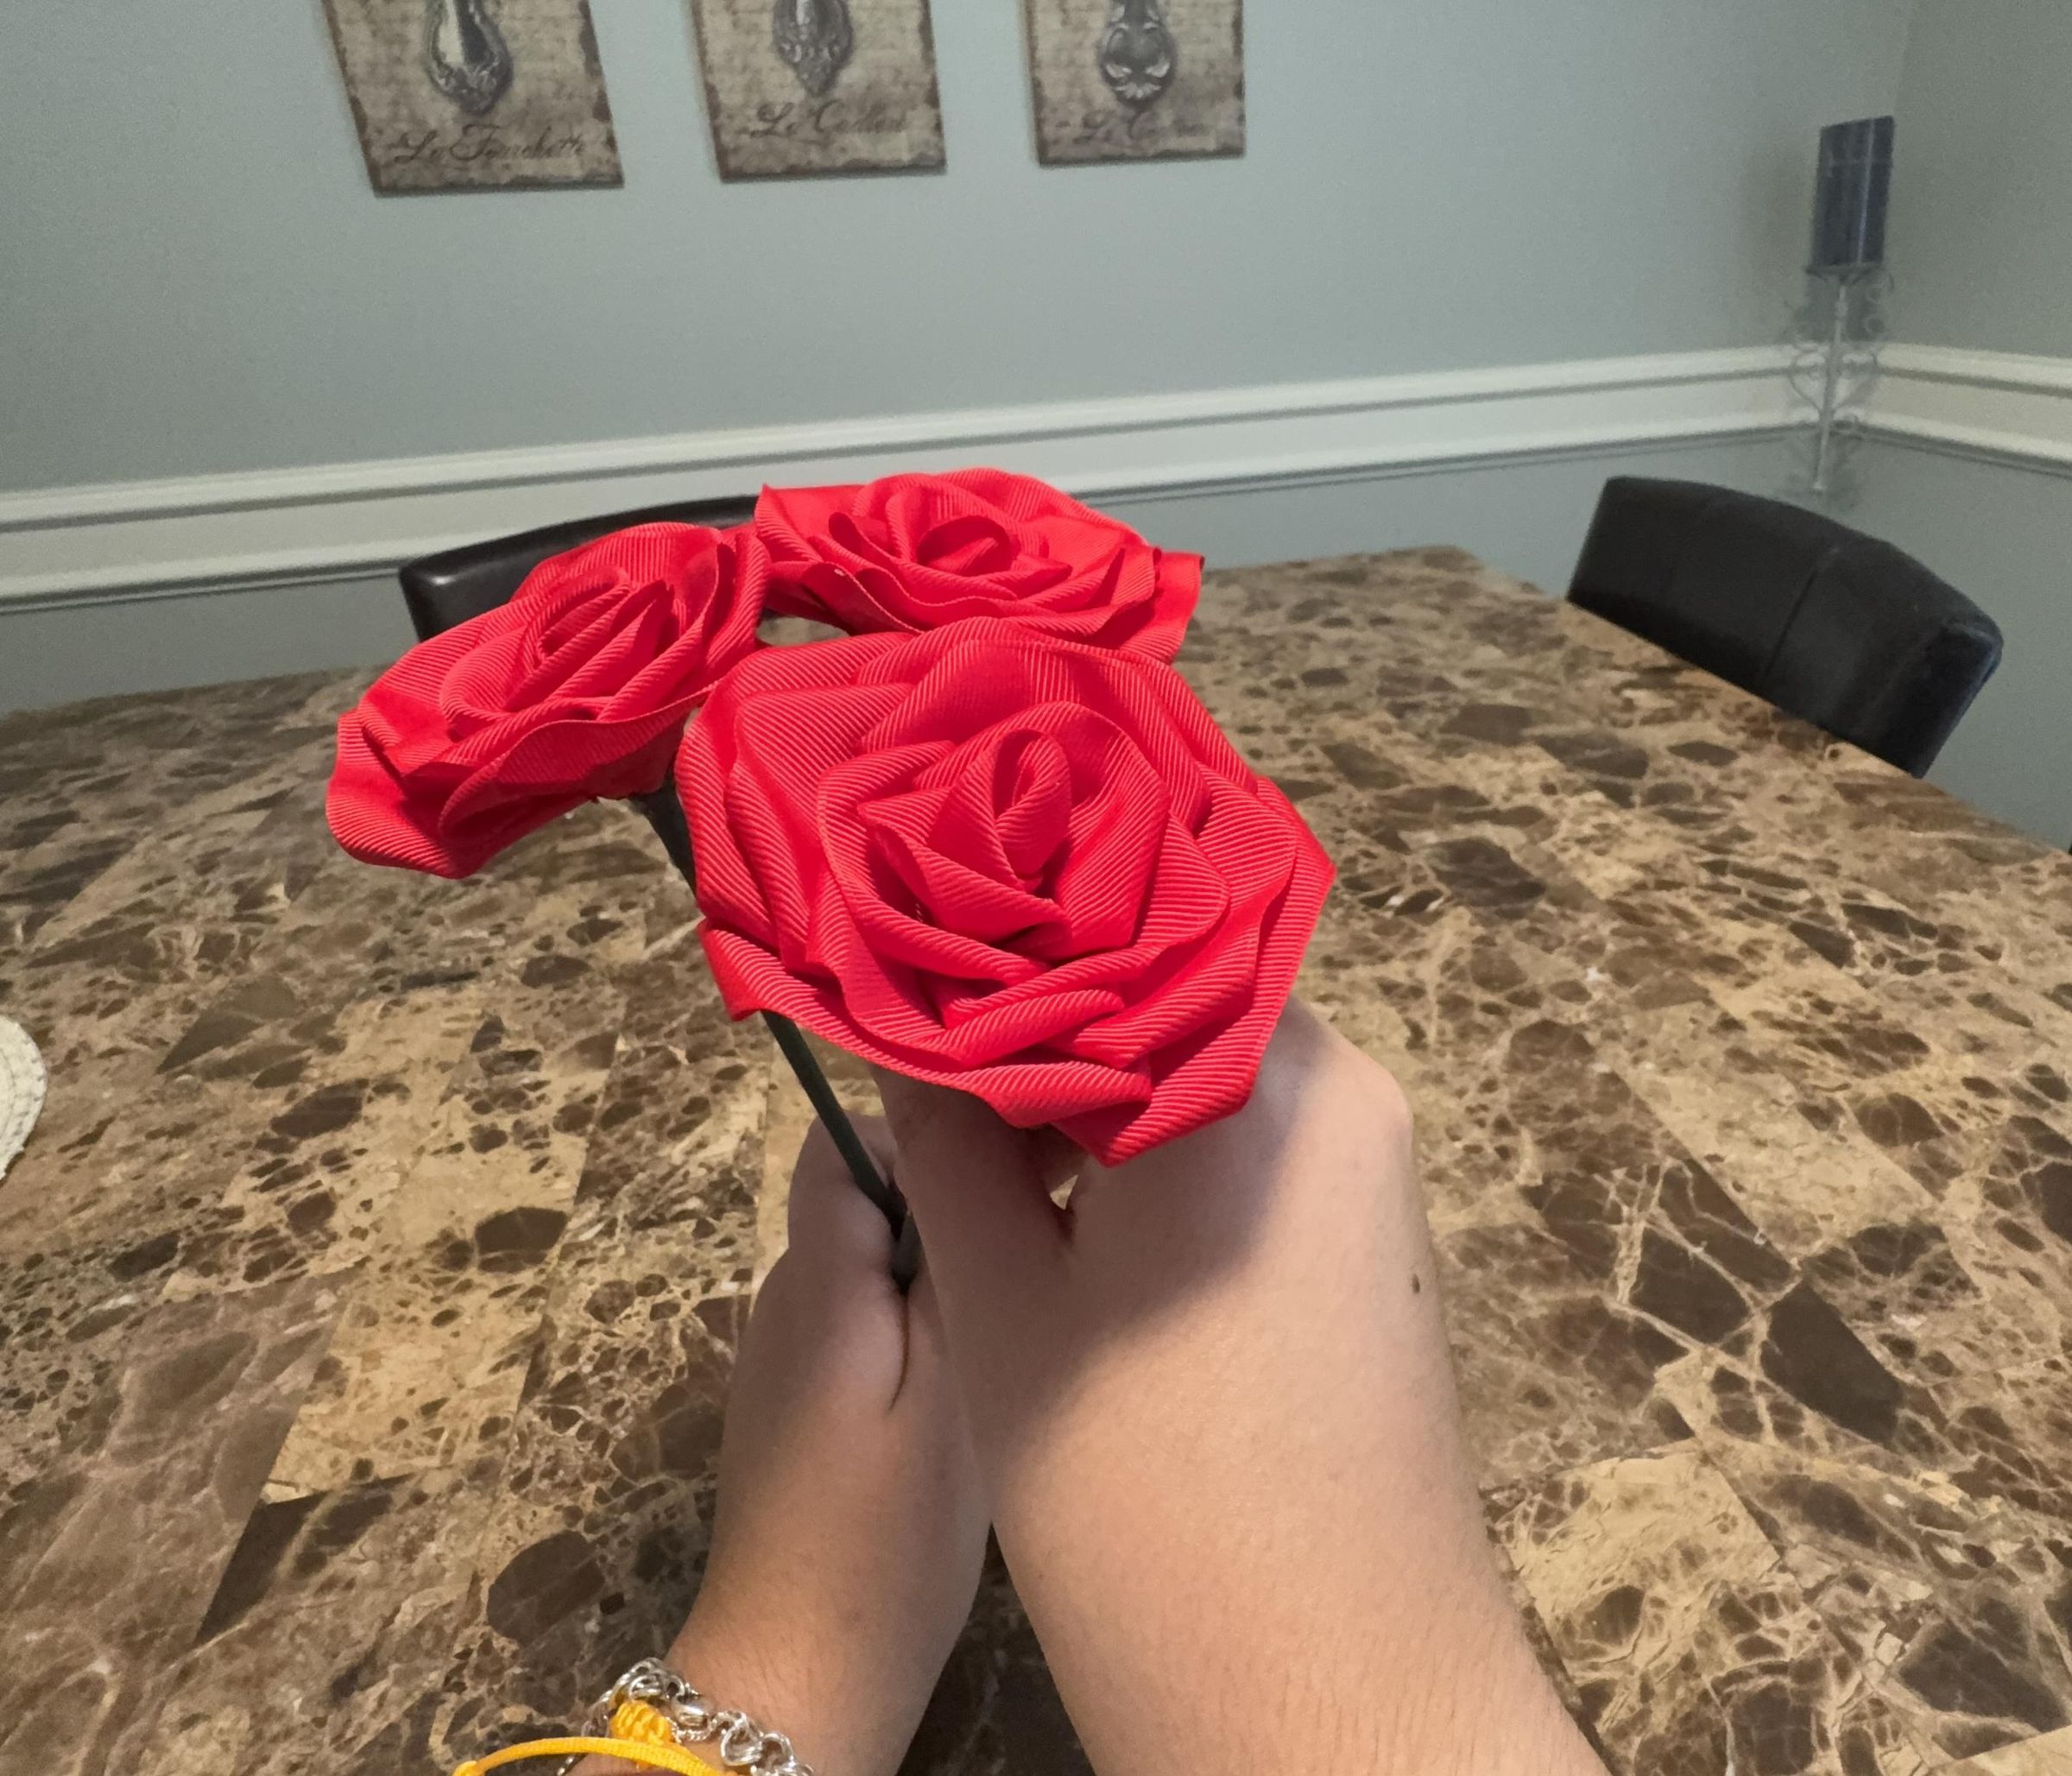
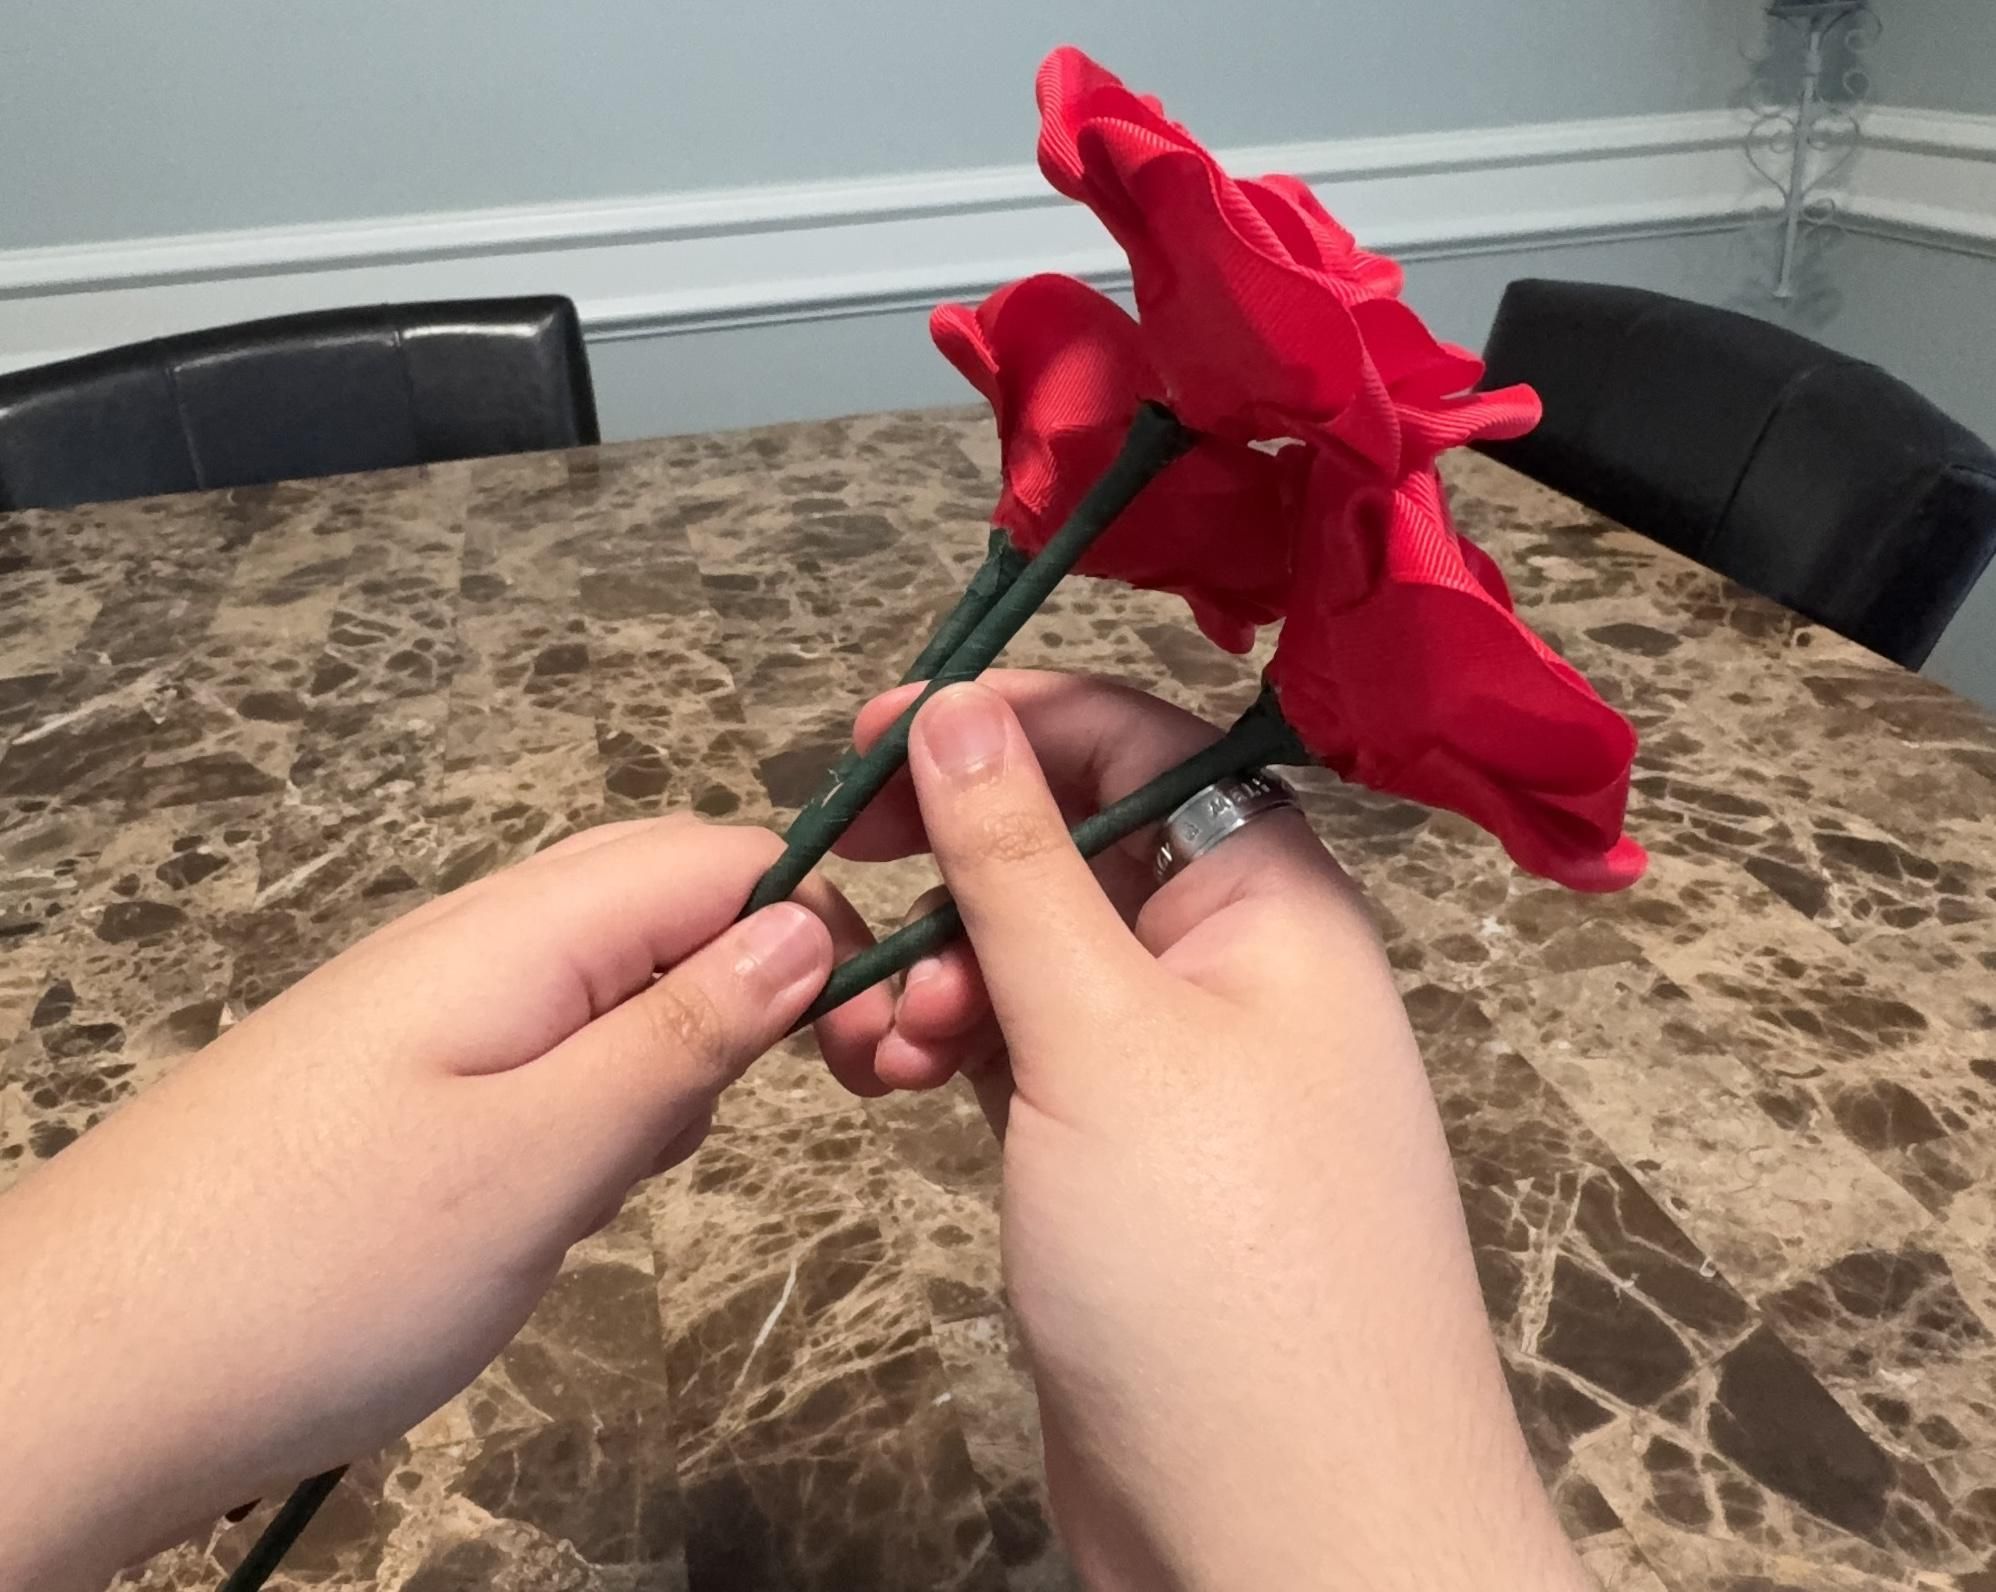
Position the roses together and adjust their height and placement to create a balanced bouquet.
Note: If preferred, the completed roses can also be placed into a vase.
Secure the Bouquet
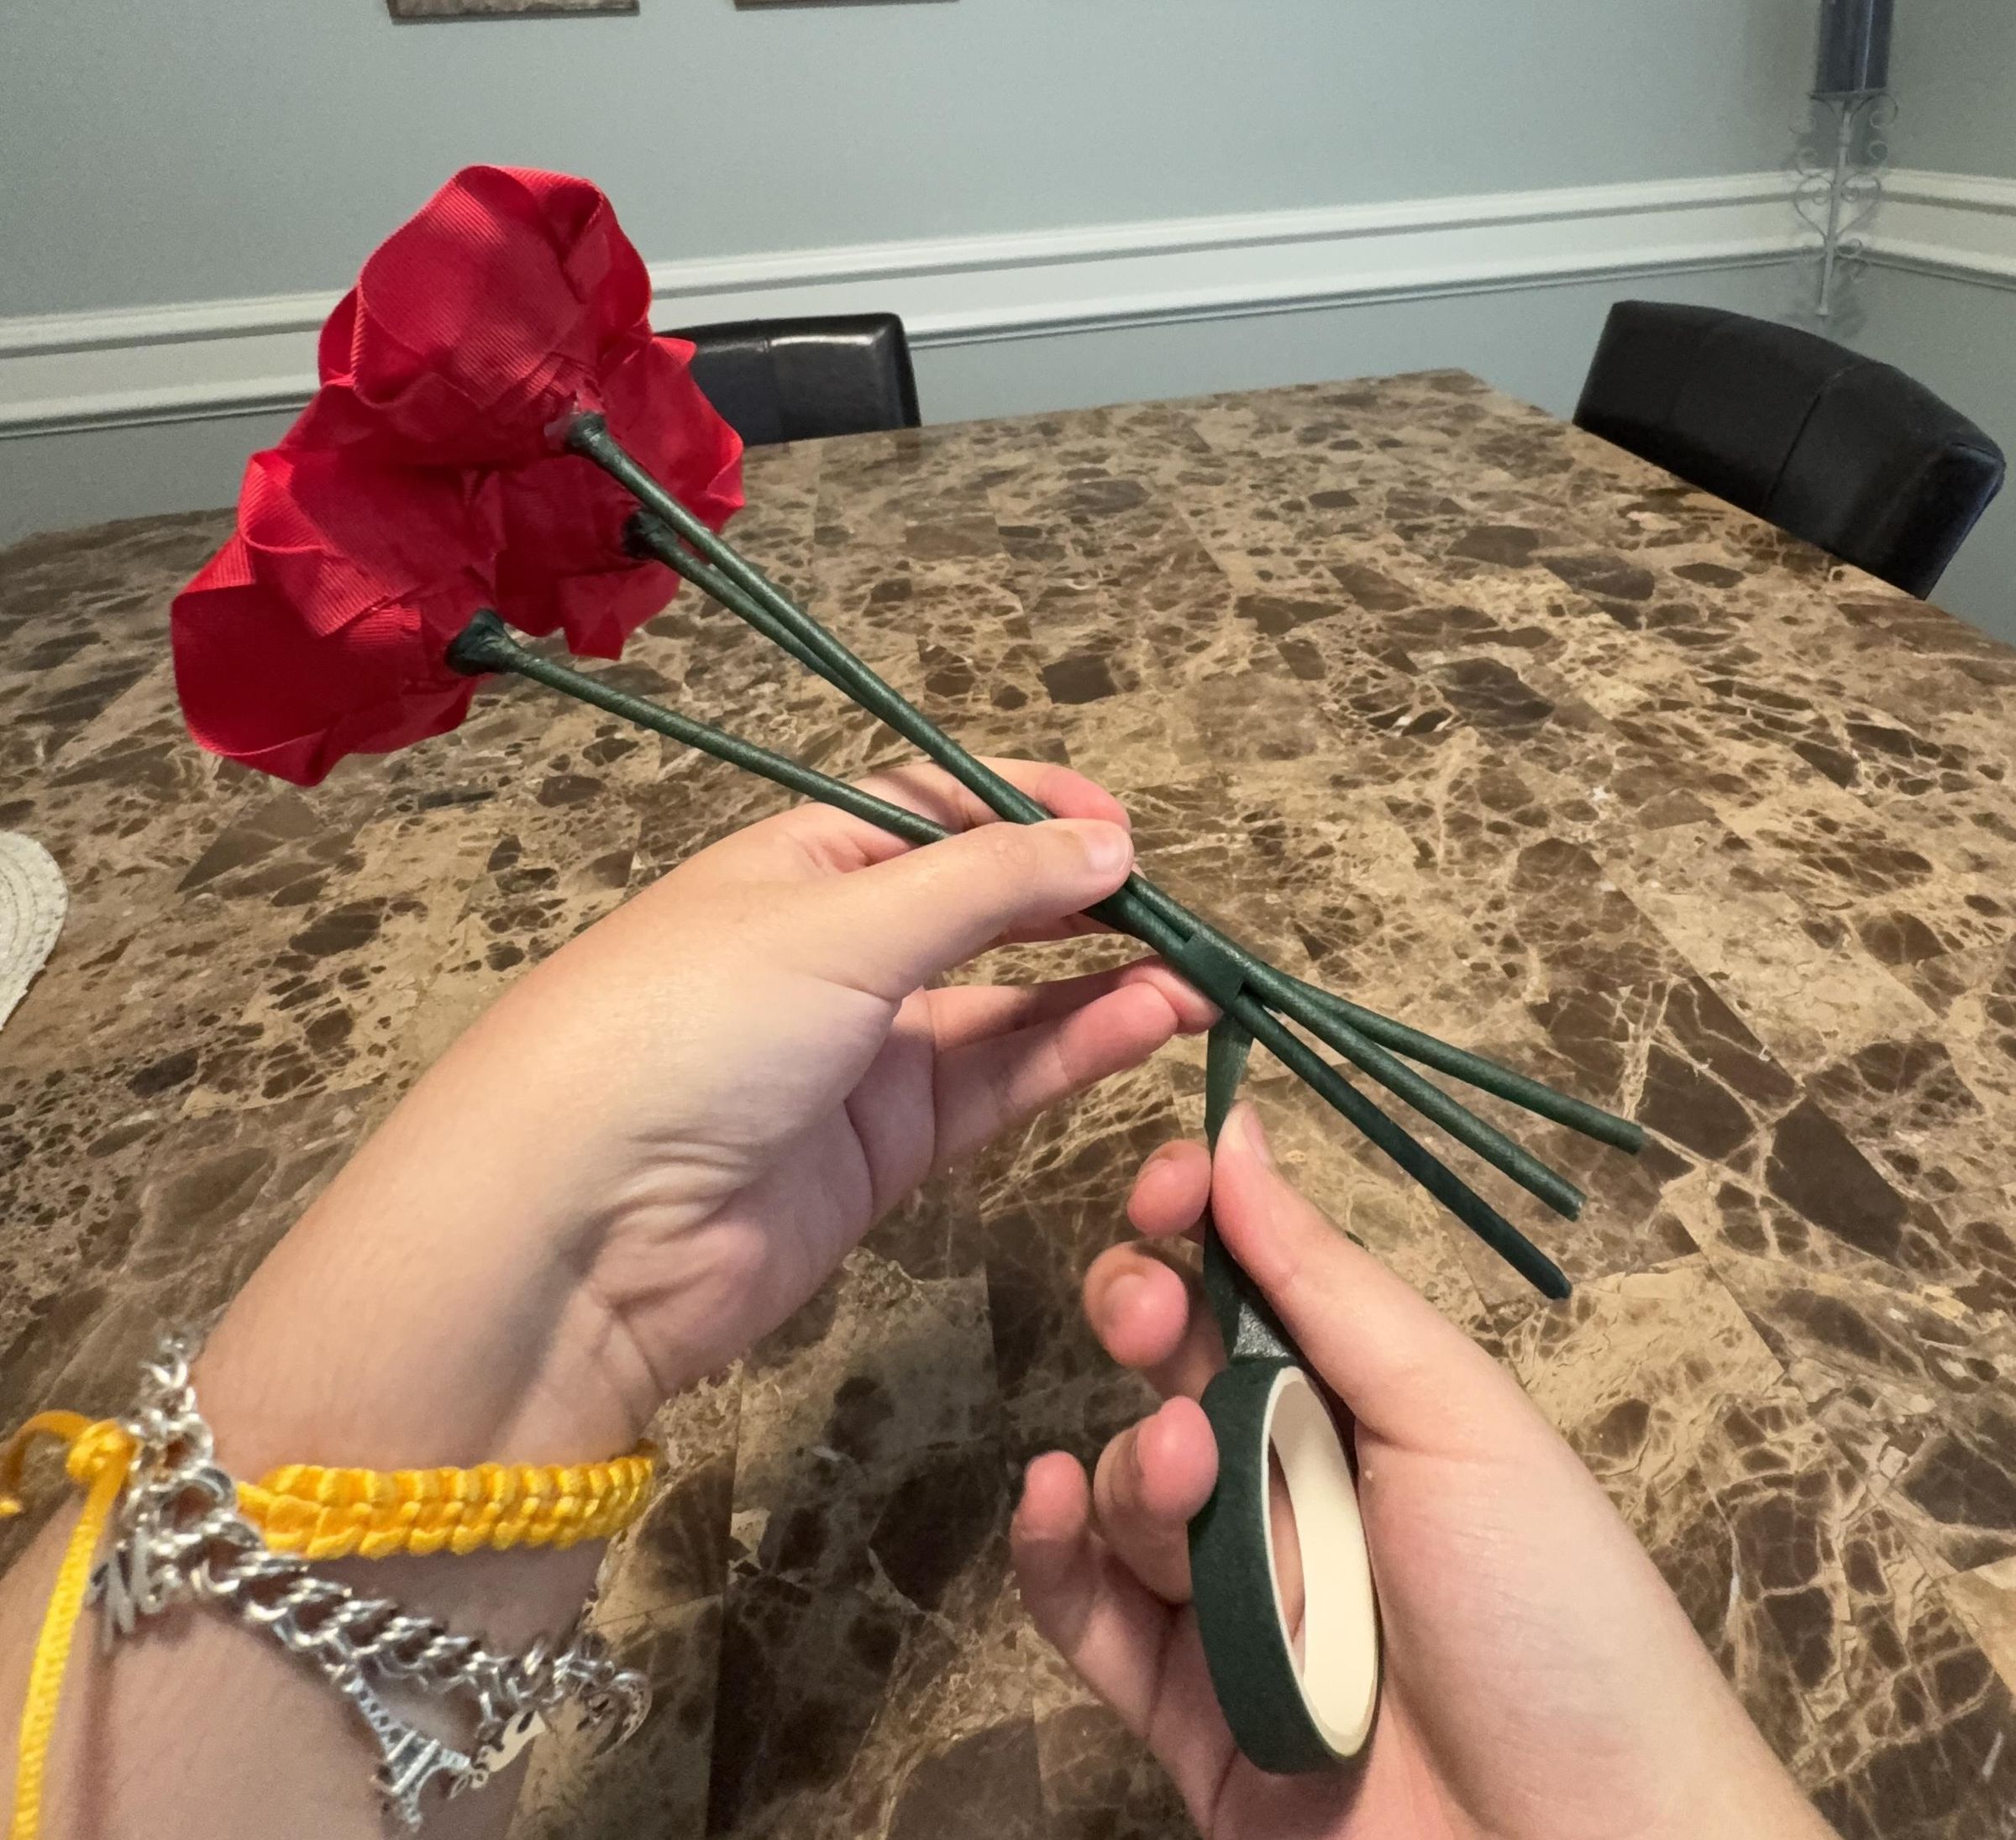
Tie the stems together with floral tape or a rubber band to hold the bouquet in place.
Finish the Bouquet
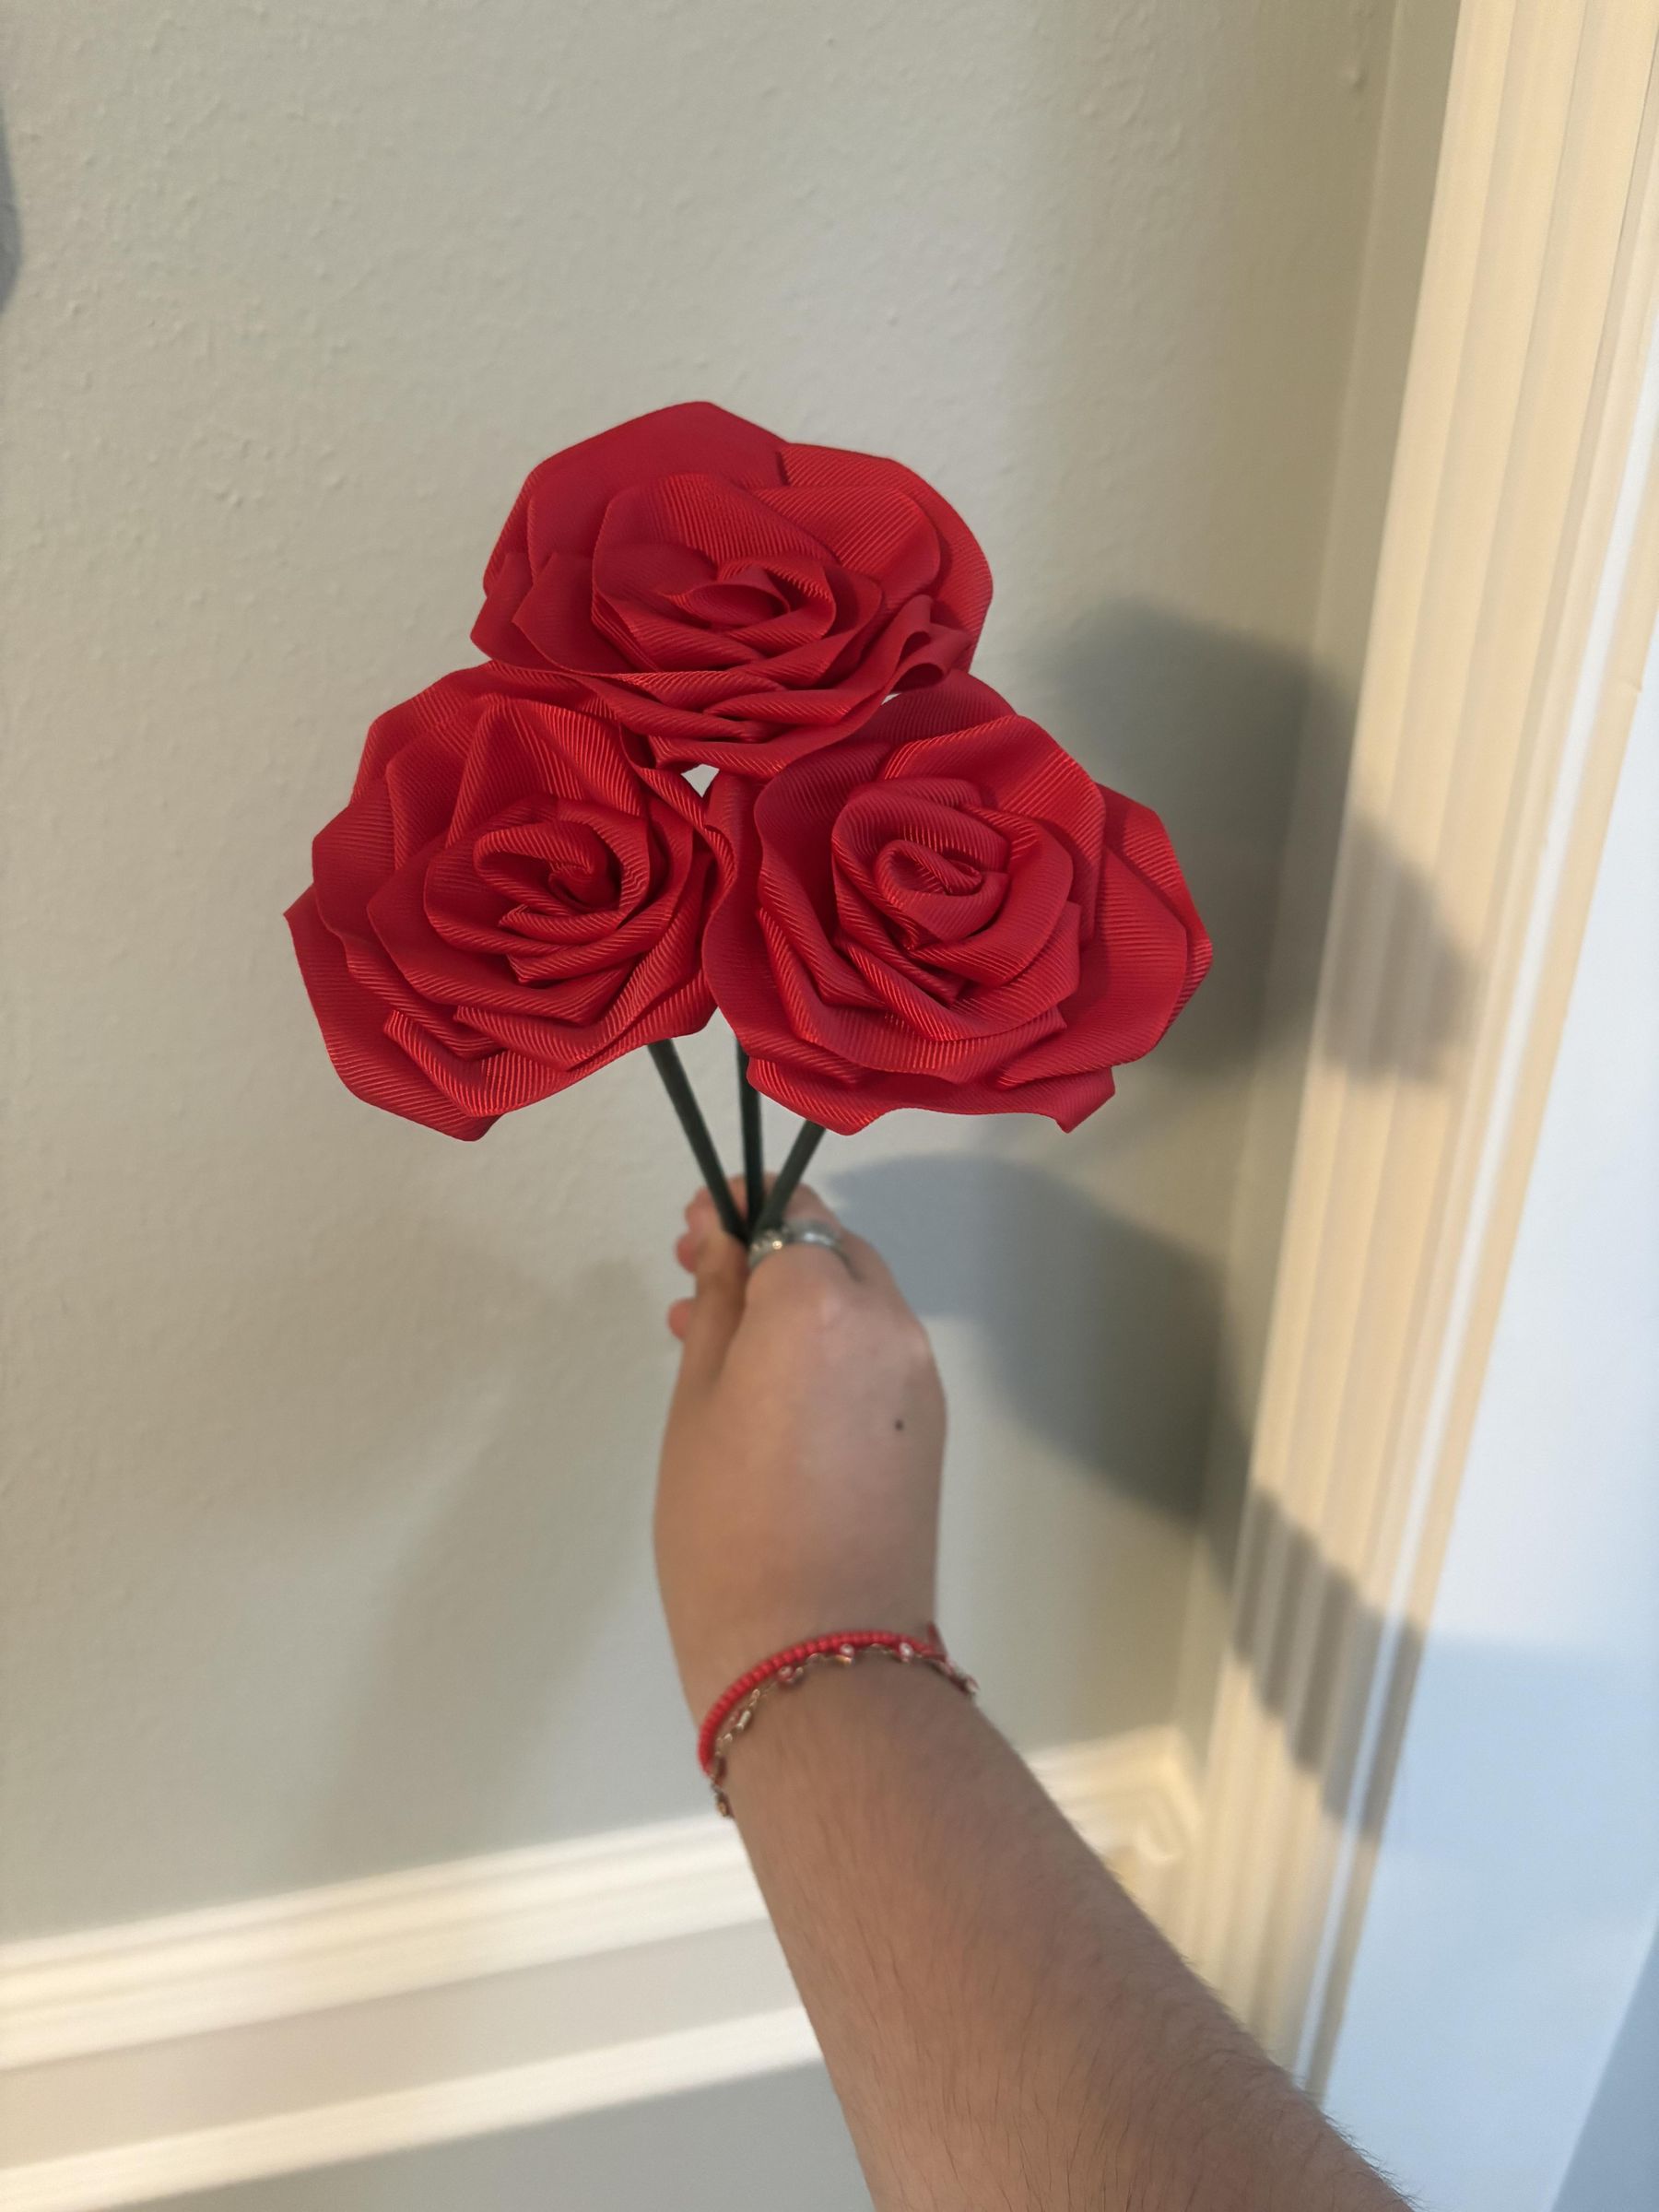
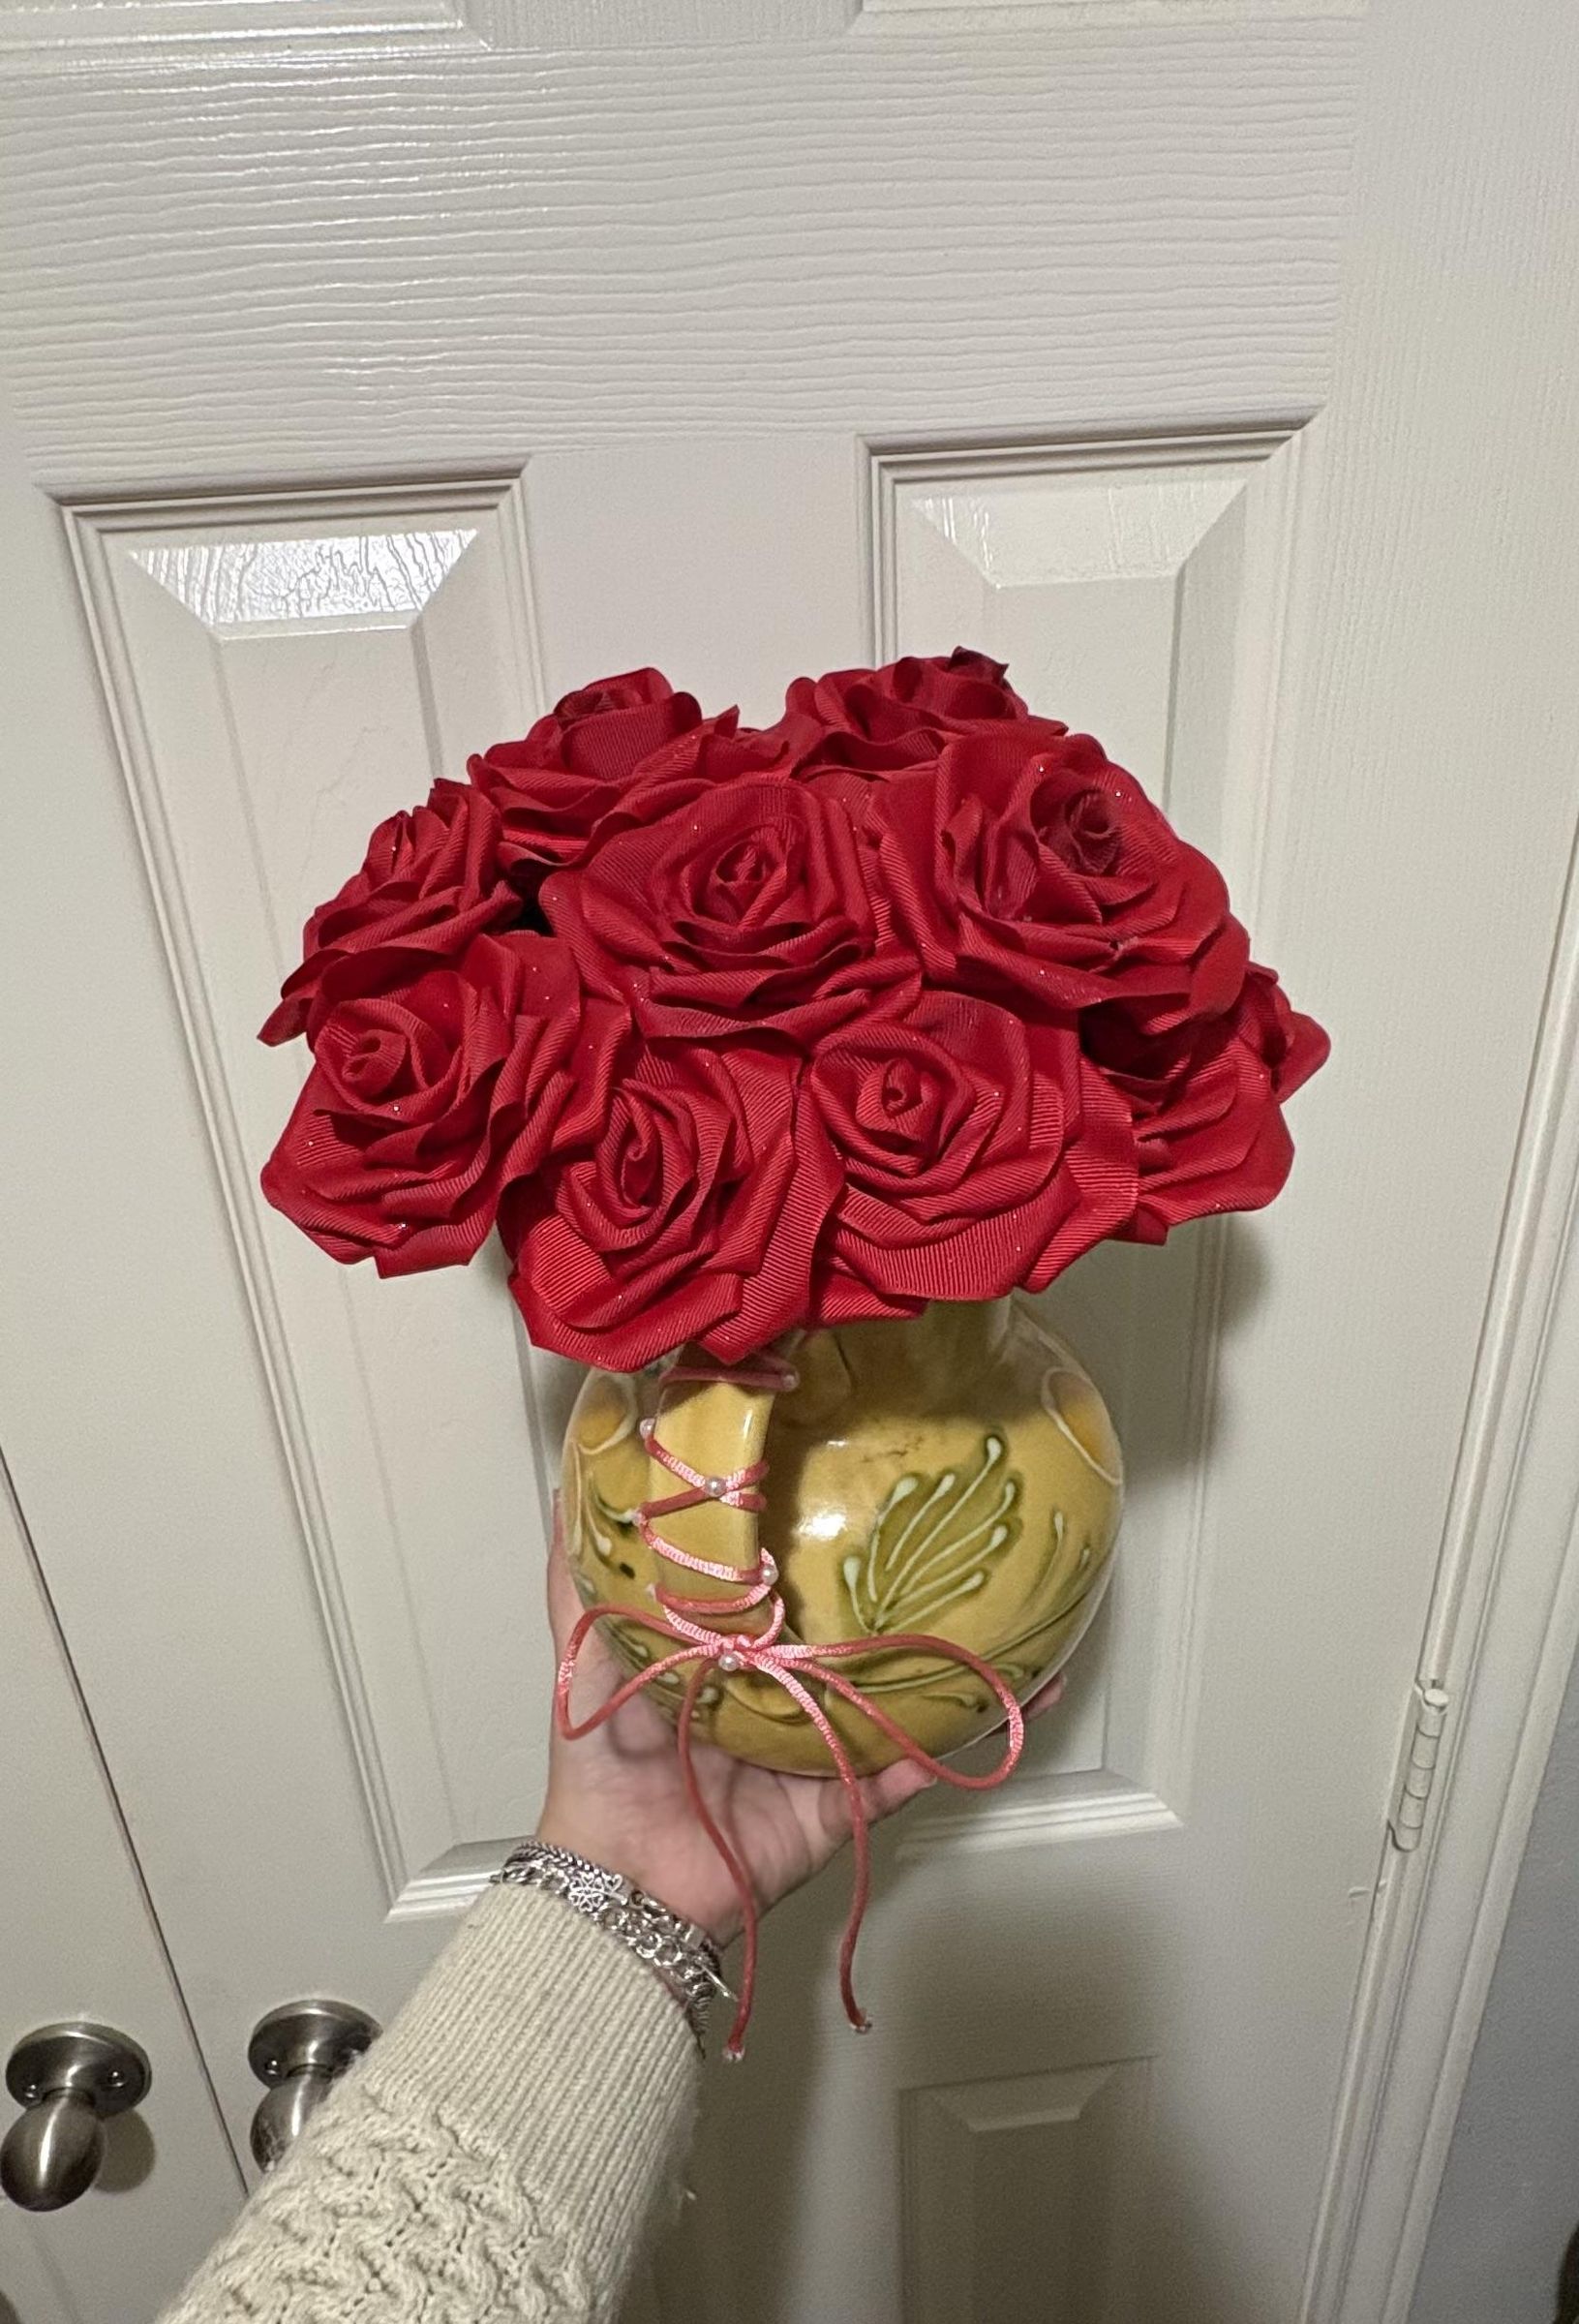
Adjust the flowers and add final decorations to complete the ribbon rose bouquet.