How to Mount a Pedante Digital Miter Saw Fence to a DeWALT DE7023-XJ Miter Saw Stand
by maapermanis in Workshop > Tools
69 Views, 1 Favorites, 0 Comments
How to Mount a Pedante Digital Miter Saw Fence to a DeWALT DE7023-XJ Miter Saw Stand
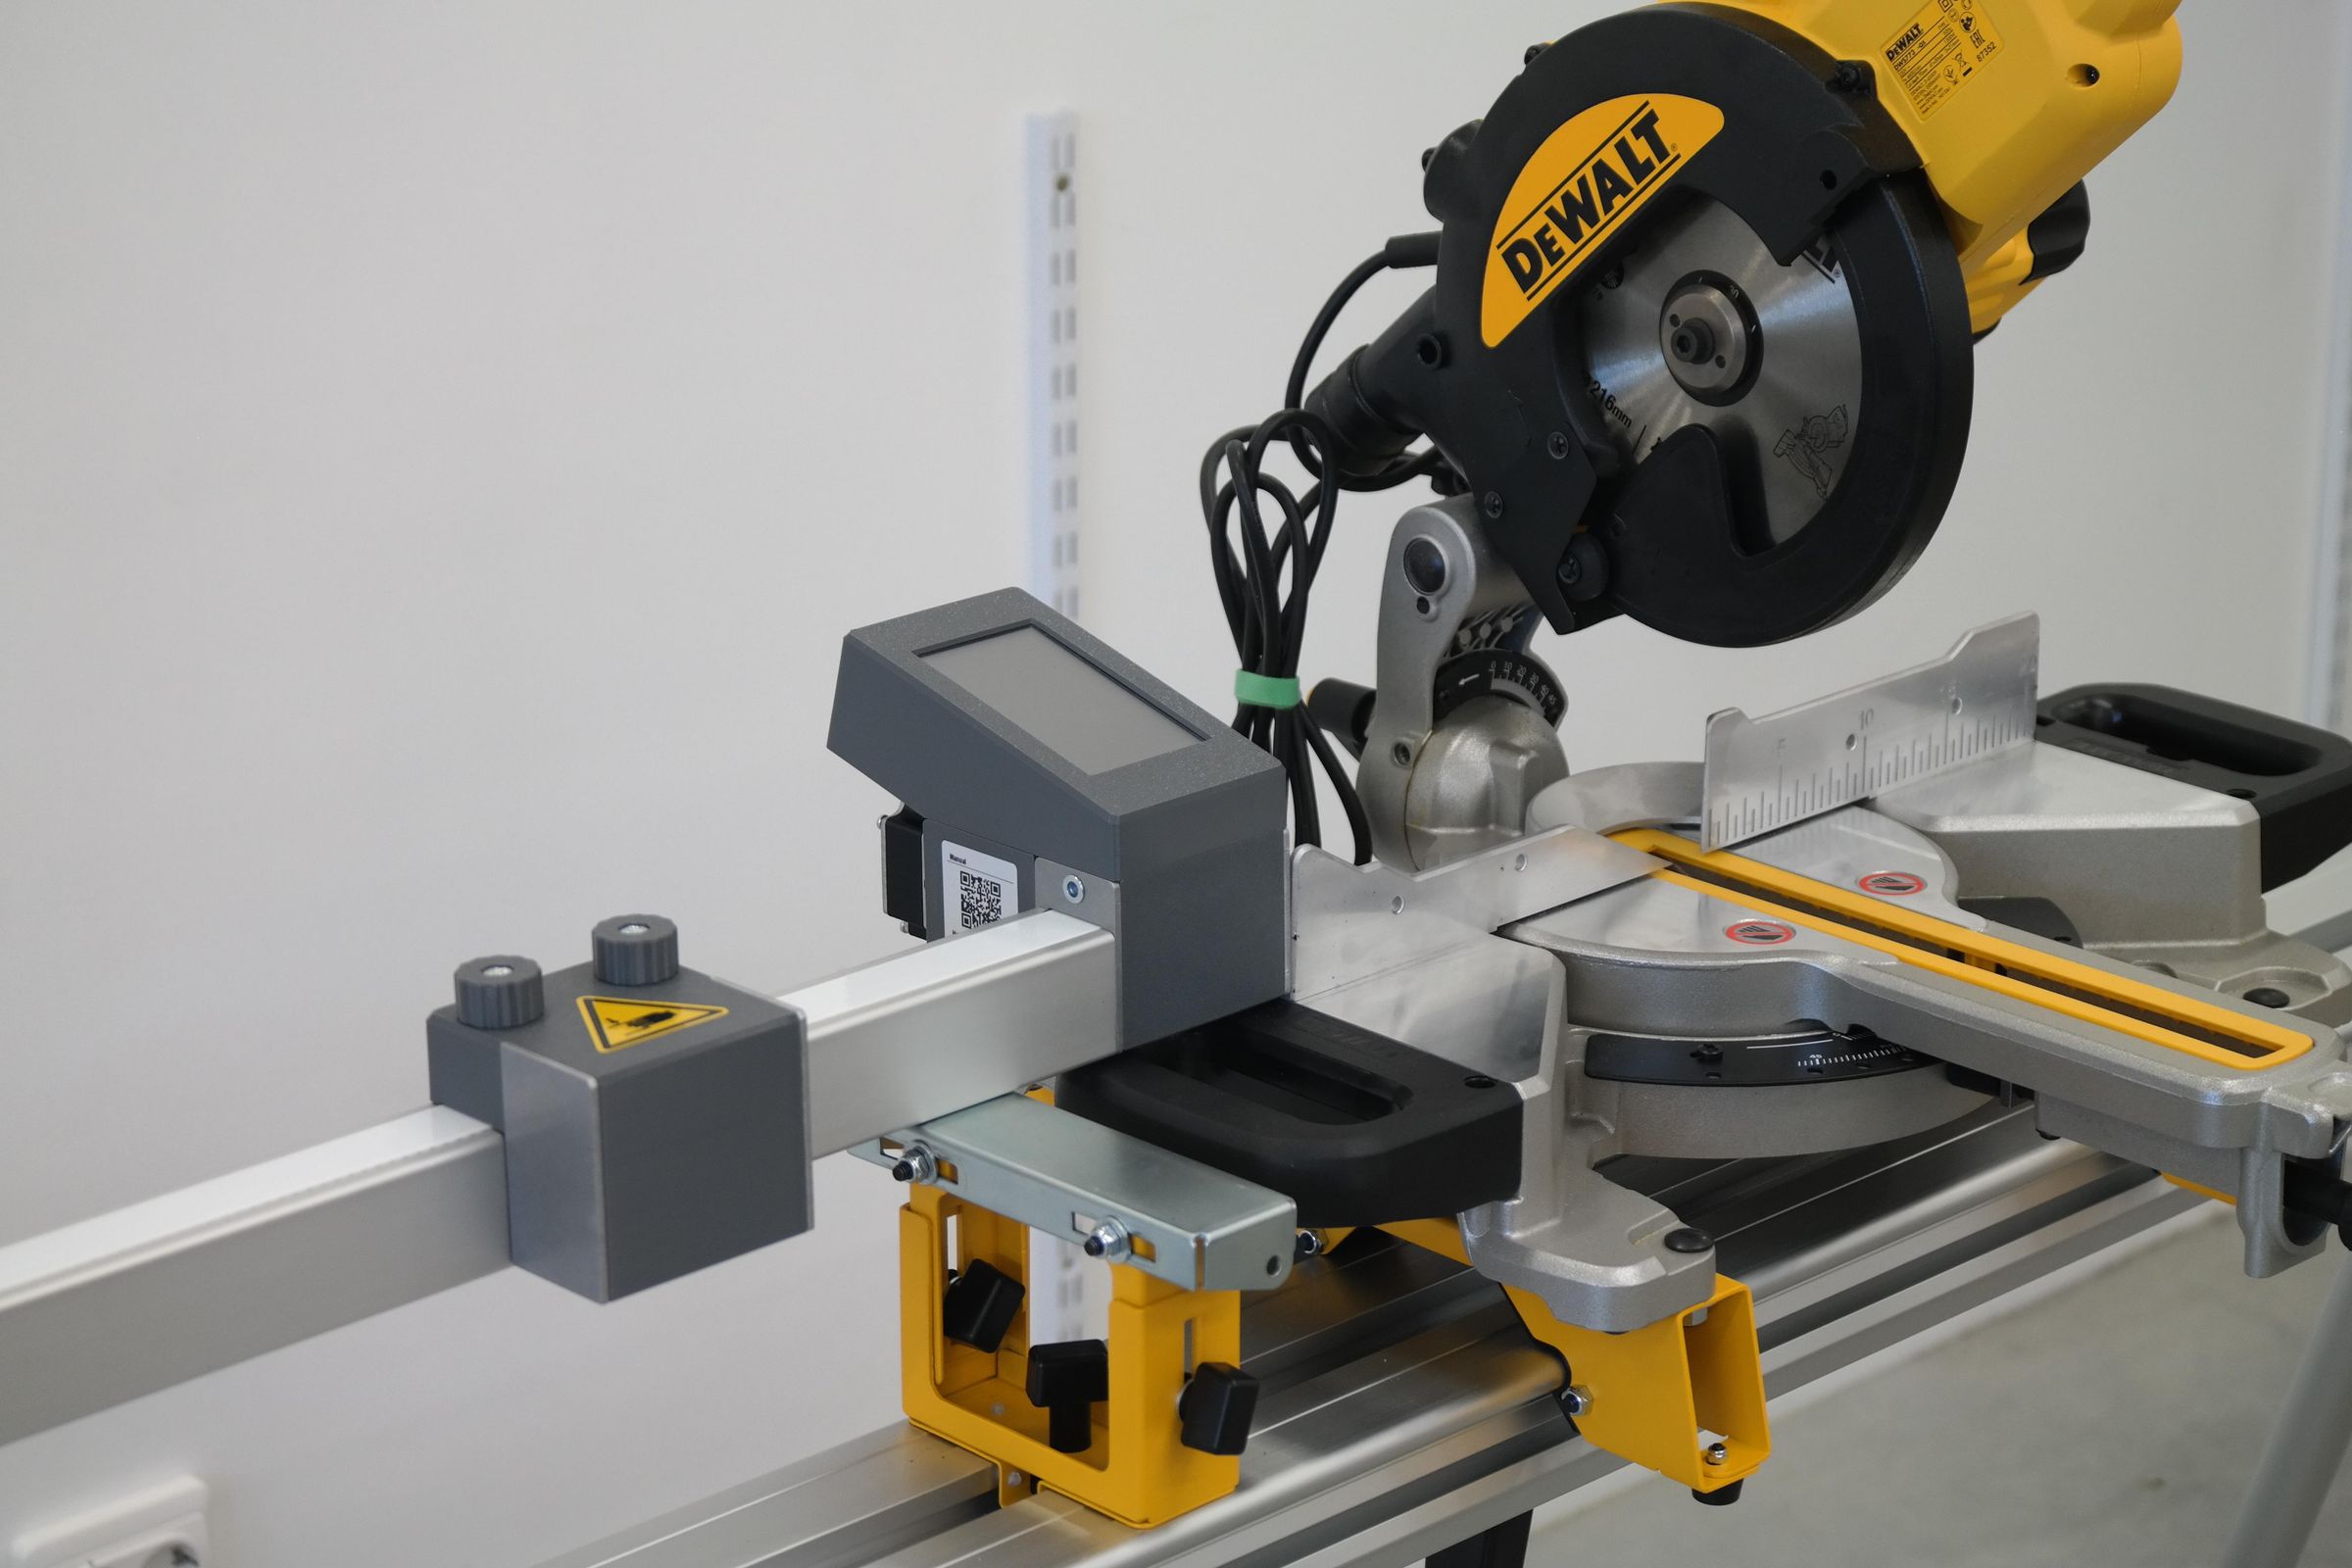
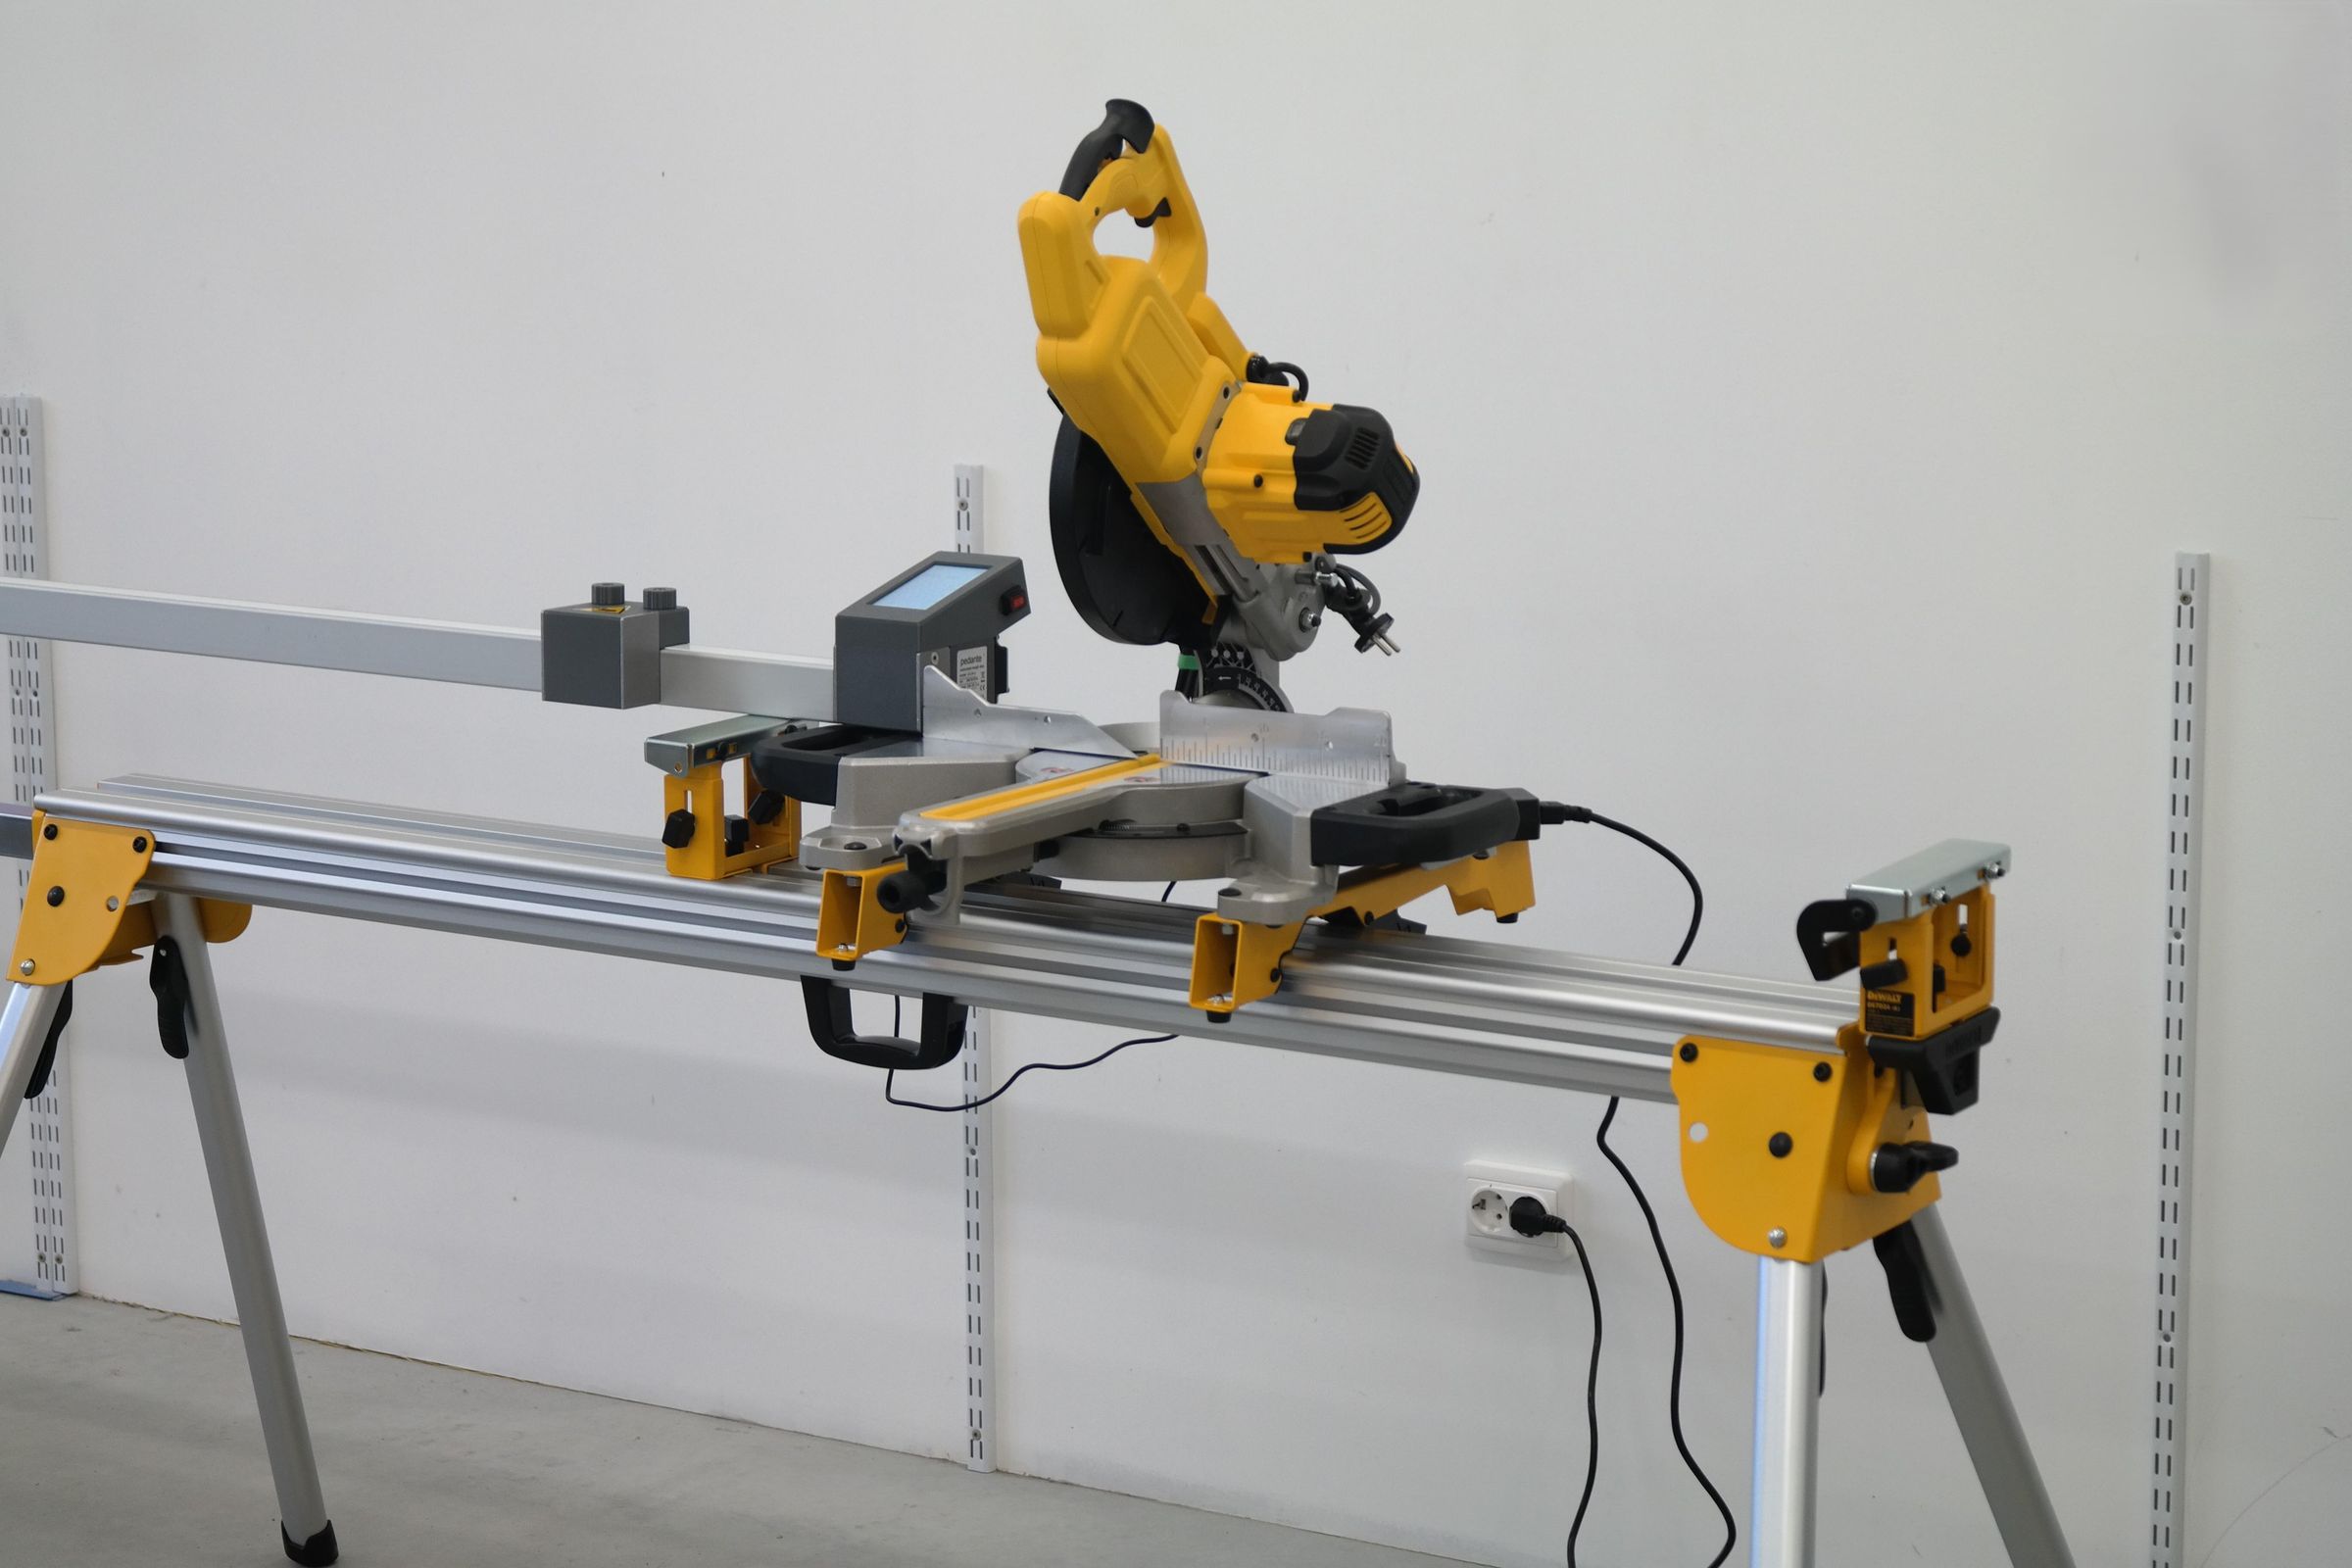
This instructable shows how to attach a Pedante LS-24-U digital miter saw fence to a DeWALT DE7023-XJ miter saw stand using DeWALT work supports. Pedante is an automatic length stop for miter saws. Instead of measuring and setting a manual stop every time, you enter the required cutting length on the touchscreen, and the stop moves to the correct position.
The goal of this setup was simple: a solid, straight, and portable cutting station that I can use both in the workshop or on-site for cutting wood/PVC/aluminum profiles.
This setup uses a DeWALT DE7023-XJ stand, together with a DeWALT DE7024 work supports, but the same basic ideas can be used on other miter saw stands and supports as well.
Keywords, because Instructables removed them: Pedante, DeWALT DE7023-XJ, DeWALT DE7024, Miter Saw Stand, Digital Miter Saw Fence, Automatic Length Stop, Woodworking, Workshop Setup
Supplies
Main:
- 1x Pedante LS-24-U Digital Miter Saw Fence
- 1x DeWALT DE7023-XJ (called DWX723 in USA) miter saw stand (Includes 2 work supports)
- 1x DeWALT DE7024 miter saw stand support
- 1x Miter saw
Attachments:
- 2x T-head bolts (Included with Pedante LS-24-U)
- 2x DIN6334 M8 extended nuts
Tools:
- Wrench
- Screwdriver
- Square
- Marker
- Center punch
- Hammer
- Drill
- Smaller drill bit for pilot hole (I used 5 mm)
- 8 mm drill bit
- Straight piece of wood/metal (I used a level)
- Tape measure (For calibrating Pedante)
Install the Miter Saw on the Stand
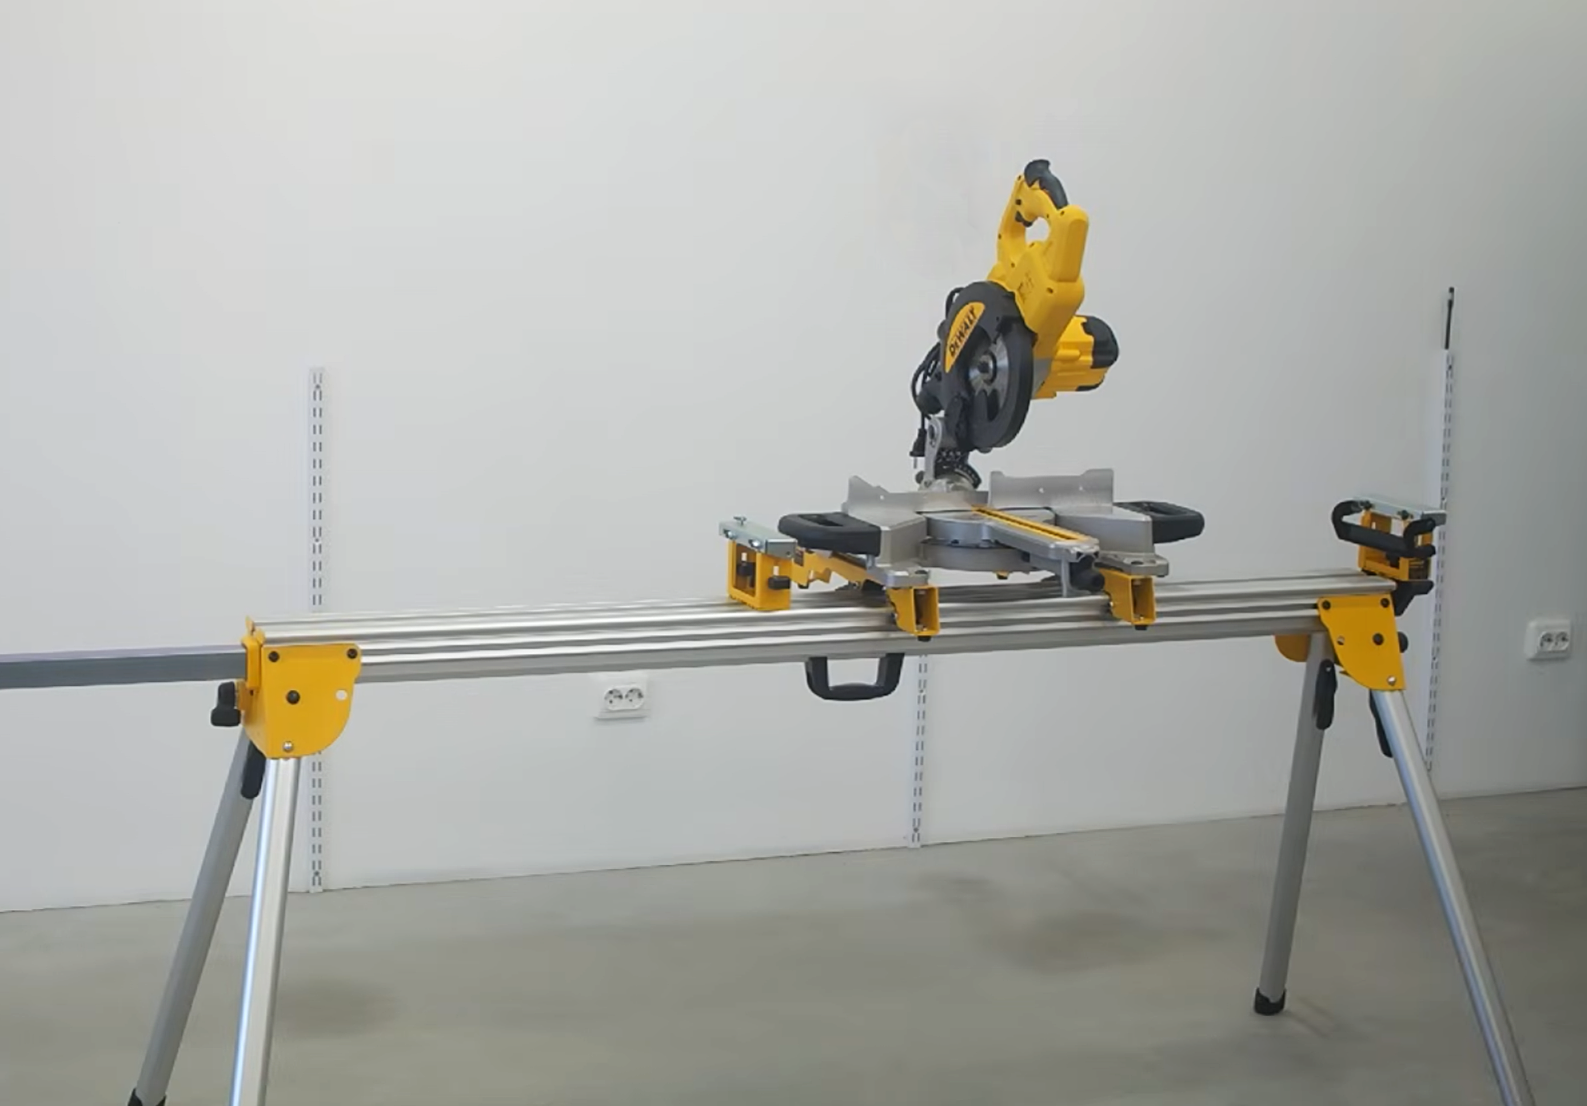
Mount your miter saw on the DeWALT DE7023-XJ miter saw stand. Place the saw where it gives you enough working room on the side where Pedante will be installed. For this setup, the Pedante rail will be mounted using two DeWALT work supports on the left side of the saw.
Before tightening the saw brackets, check if:
- The saw is sitting securely on the stand
- The saw table is not twisted
- The saw fence is accessible
- There is enough space for the Pedante control unit near the saw
- Long pieces of material can pass through the cutting station without hitting anything
- The moving stop block will have enough travel
Once the saw position looks correct, tighten the saw mounting brackets according to the DeWALT stand instructions manual (attached in the Supplies section).
Mount the two work supports that came with the DeWALT stand. Place one on each side of the miter saw.
Prepare the Extra Work Support
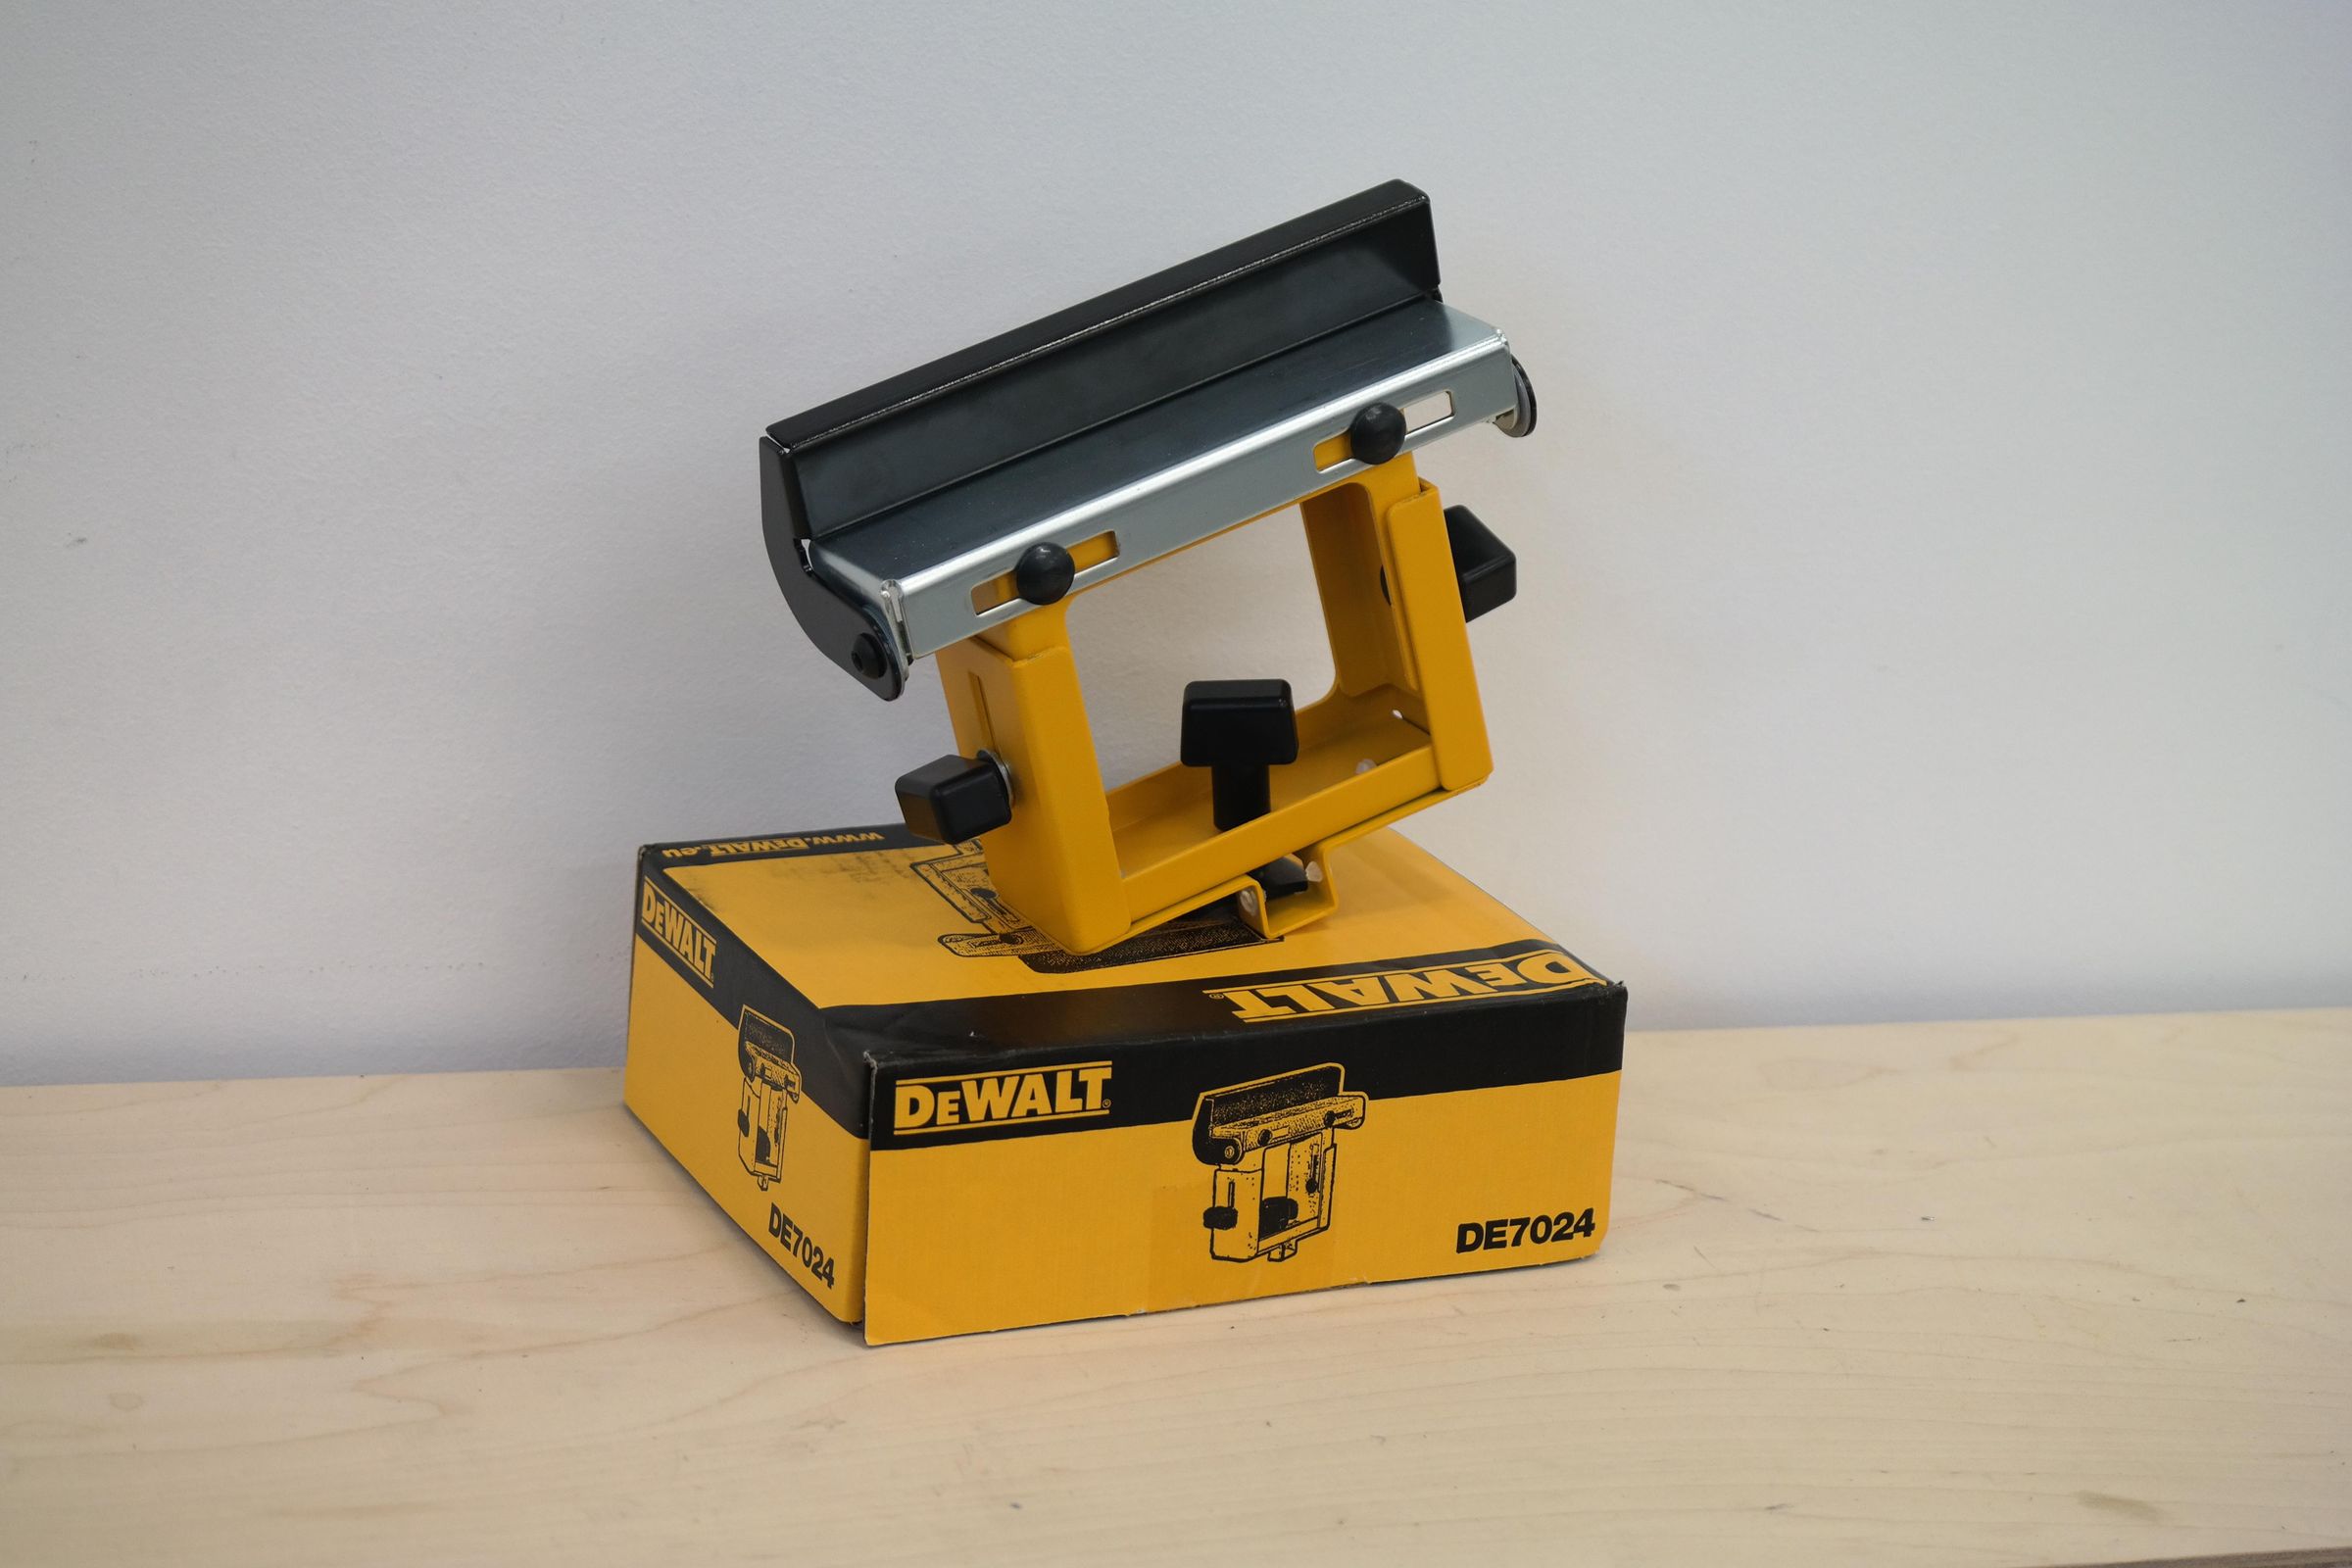
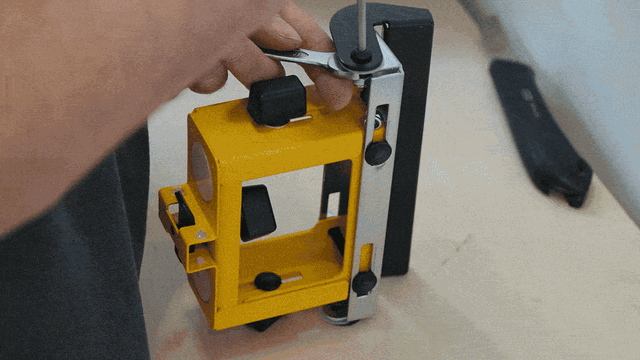
Take the extra DeWALT DE7024 support and remove the length stop (black part) from it using a wrench to unscrew the nuts and a screwdriver to hold the bolts in place. Set the removed length stop and its hardware aside. Keep the parts in case you want to return the support to its orginal use later.
Move Height Adjustment Knob
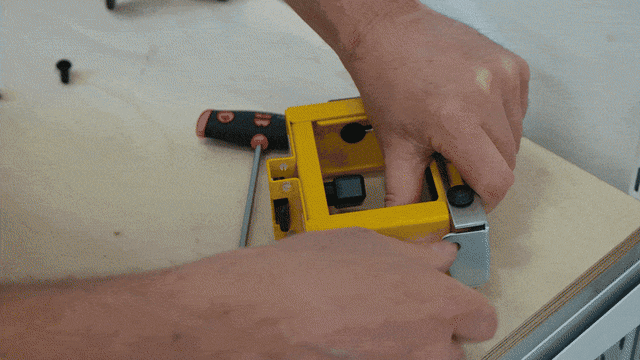
Unscrew one of the height adjustment knobs on the support. Move it from the outside of the support to the inside, then screw it back in. This has to be done to give space for the T-bolts and extended nuts required to mount the Pedante miter saw fence.
Check that the height adjustment still works after moving the knob.
Attach the Extra Support to the Stand
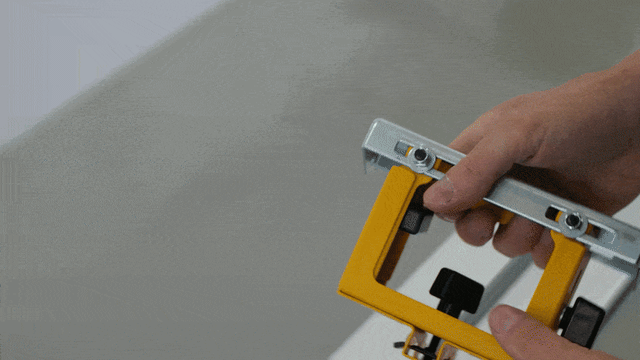
Attach the extra DE7024 support to the miter saw stand. Loosen the tensioning knob until the support can slide into the groove on the stand. Slide it into position on the same side of the saw where Pedante will be mounted.
Do not place it randomly. Think about where the Pedante fence will sit and where the two T-head bolts will need to go. Once the support is in the right position (you can move it later, as needed), tighten the tensioning knob, so it doesn't move.
Move Workpiece Support to the Side
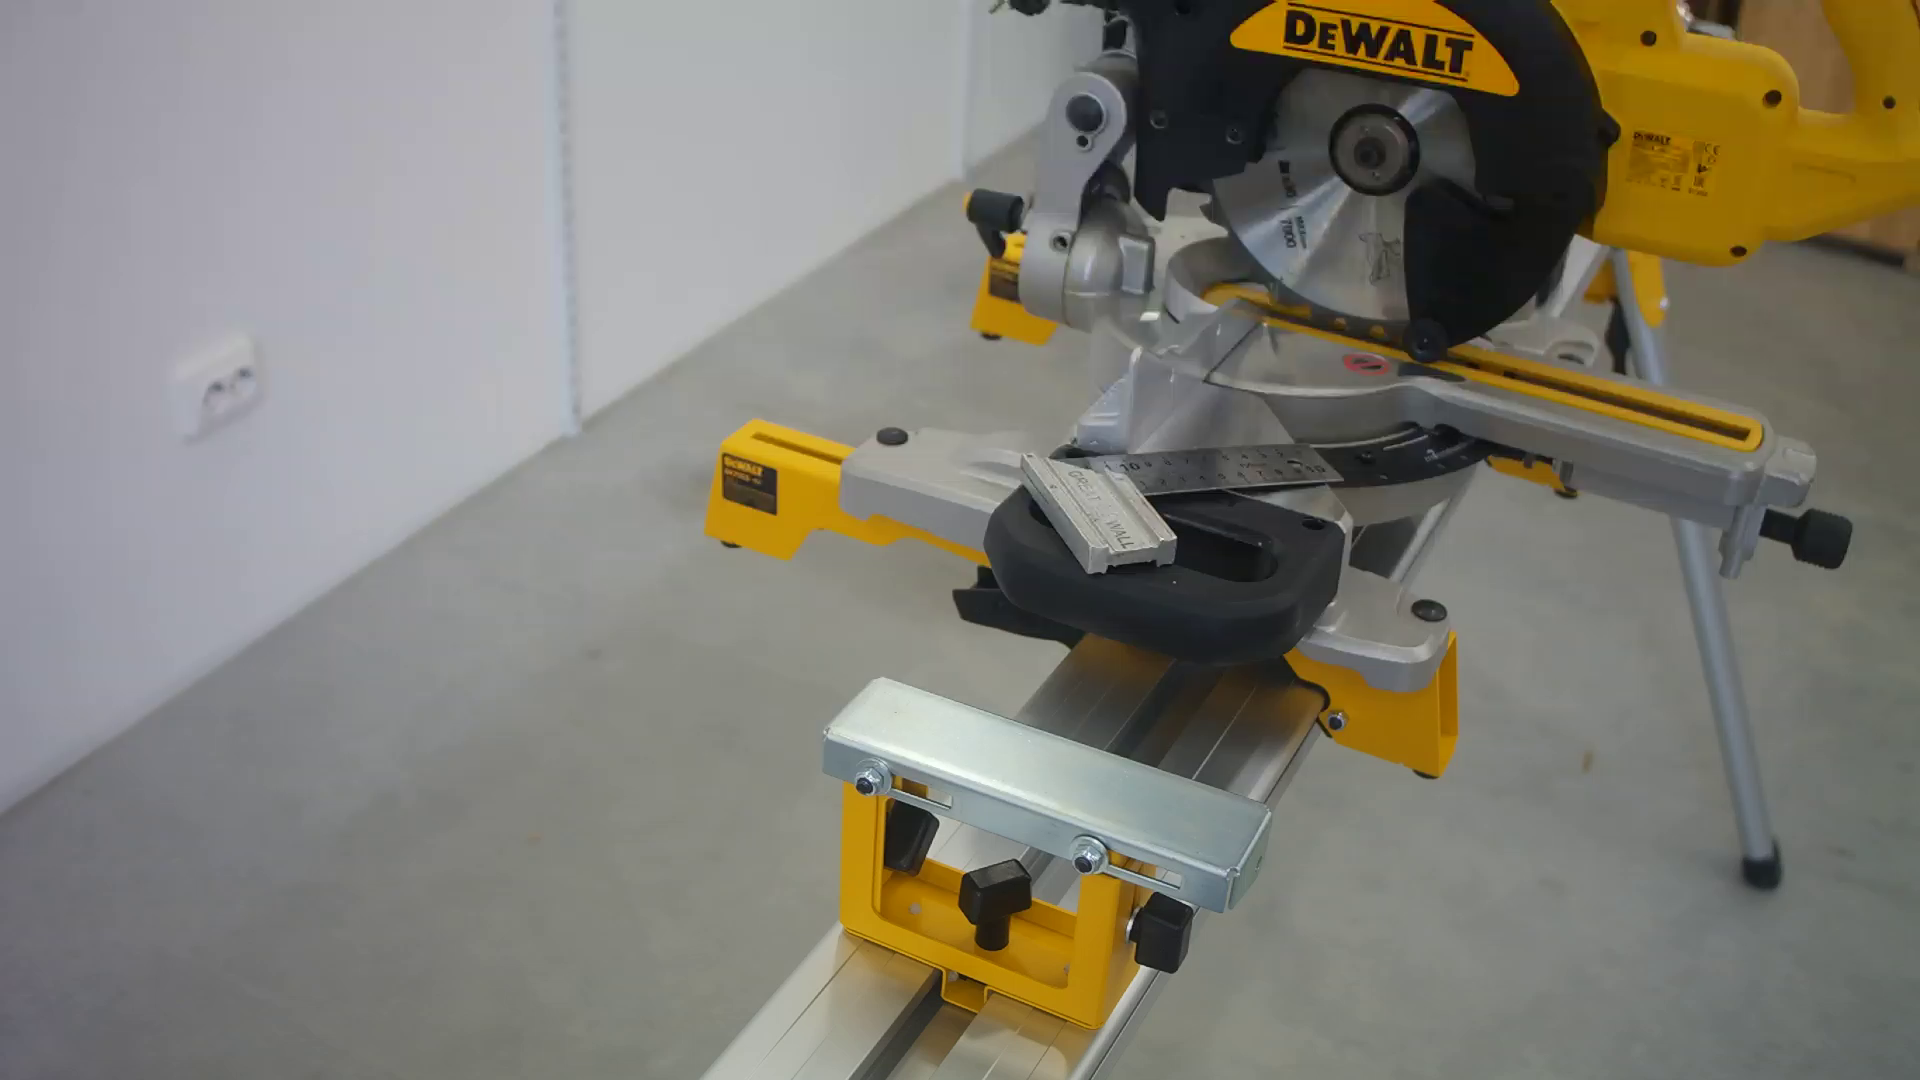
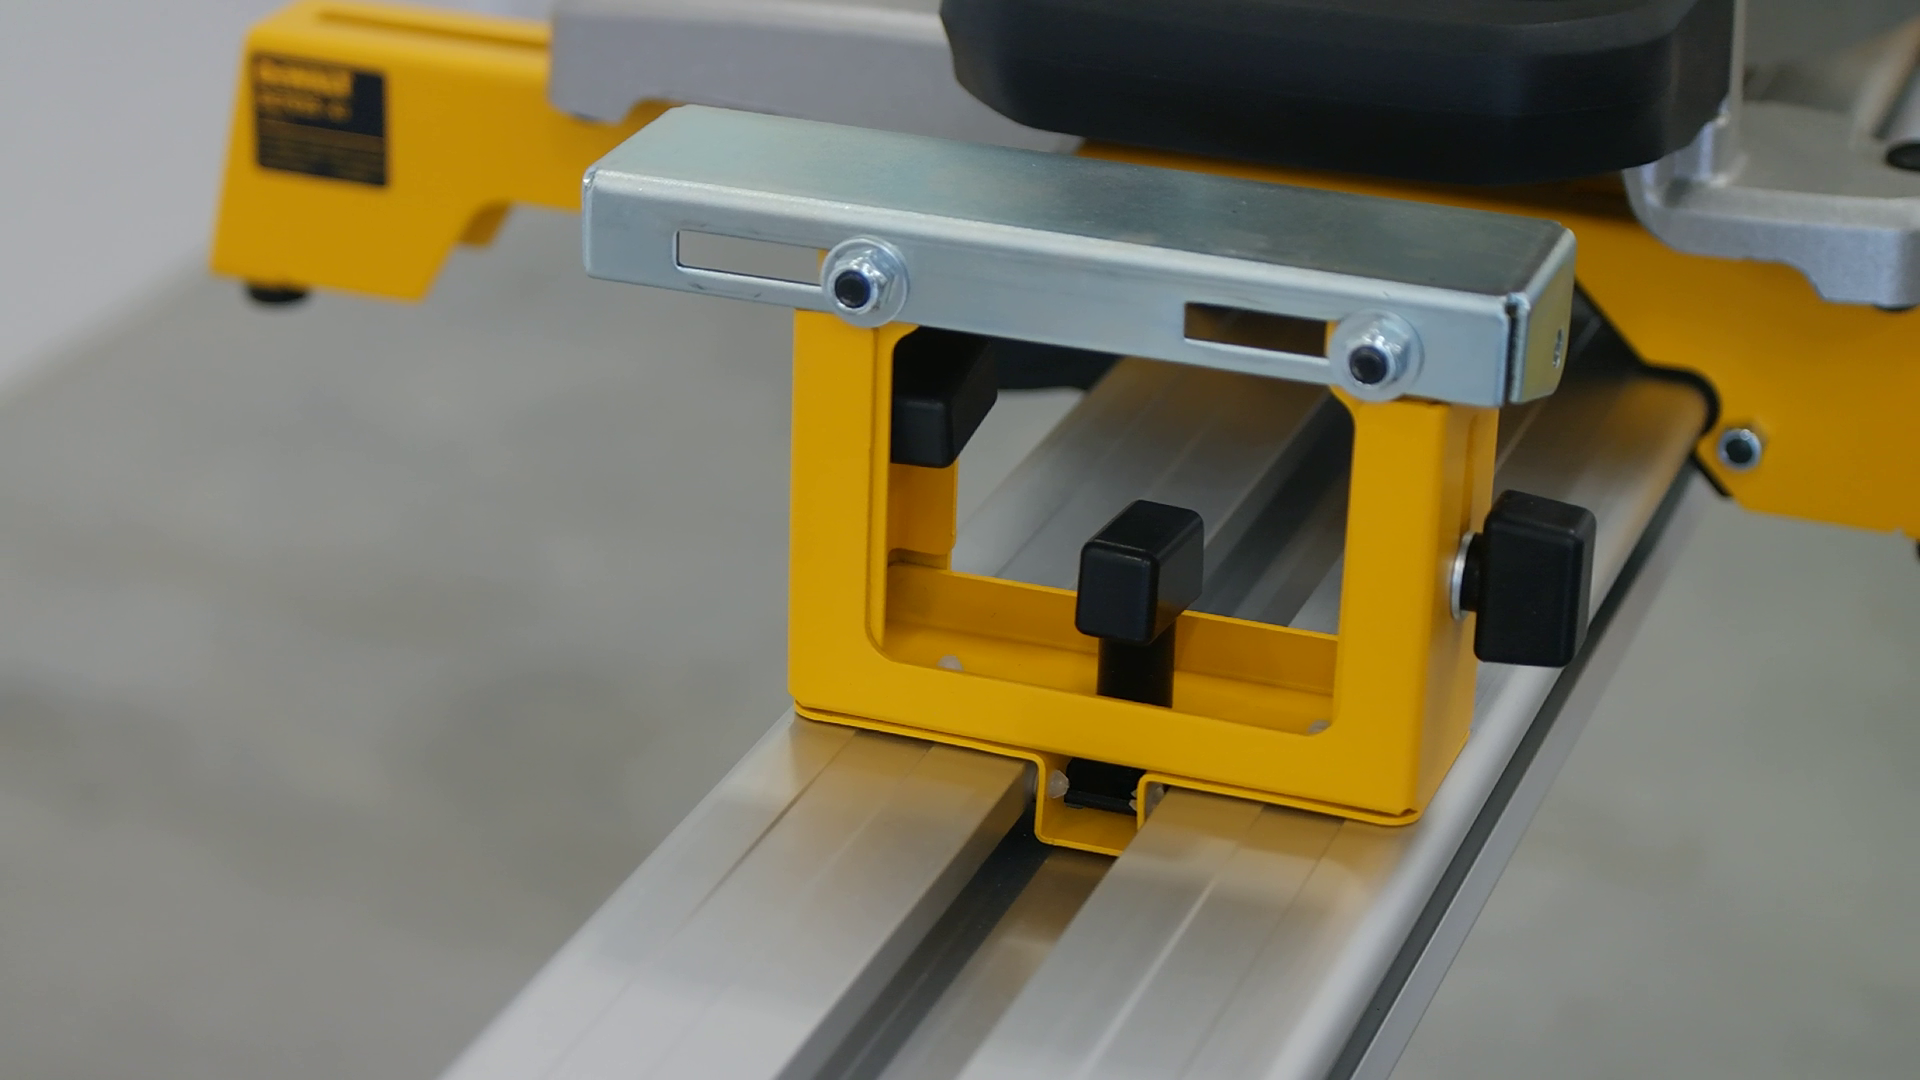
Loosen the nuts that lock the workpiece support in place. Slide the support as far as possible toward the side from which you removed the height adjustment knob (like in the 2nd image).
This will give you the best available surface for drilling the mounting hole for the Pedante T-head bolt.
Mark the Drilling Spot
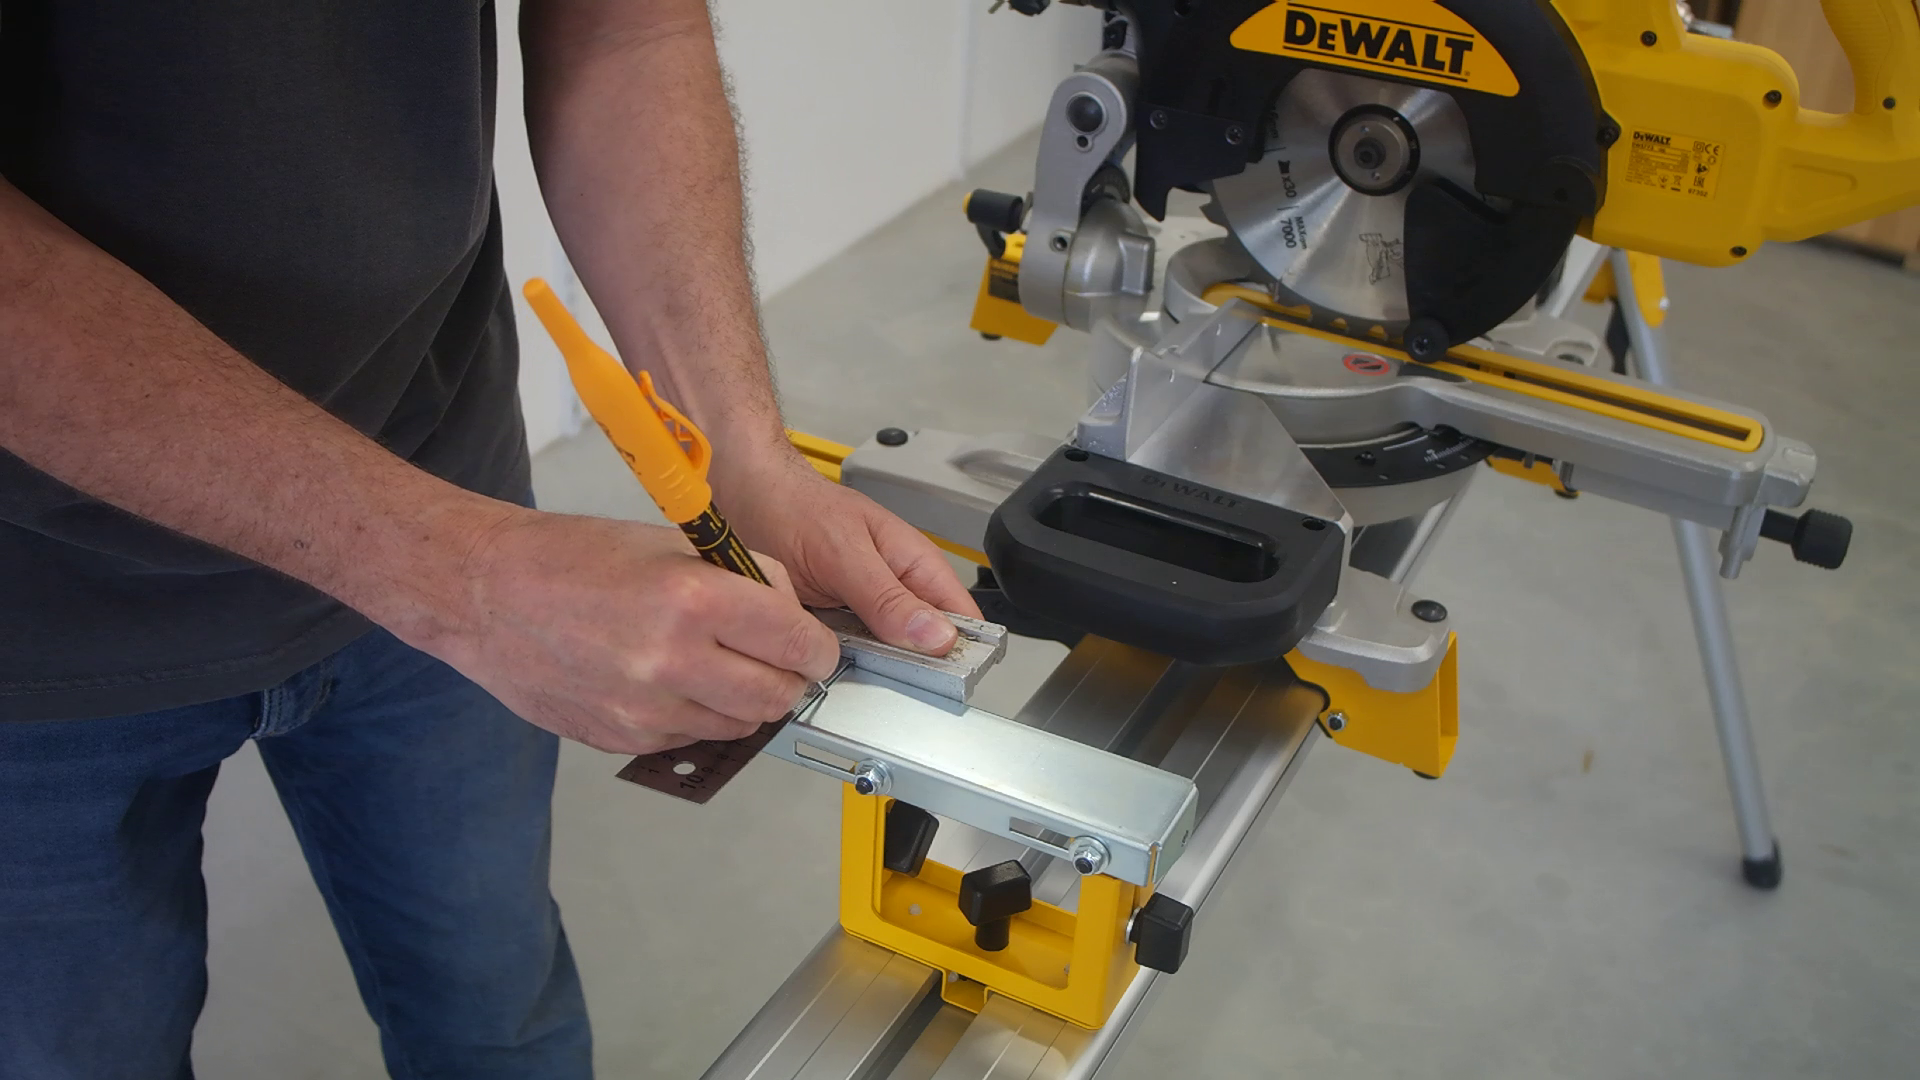
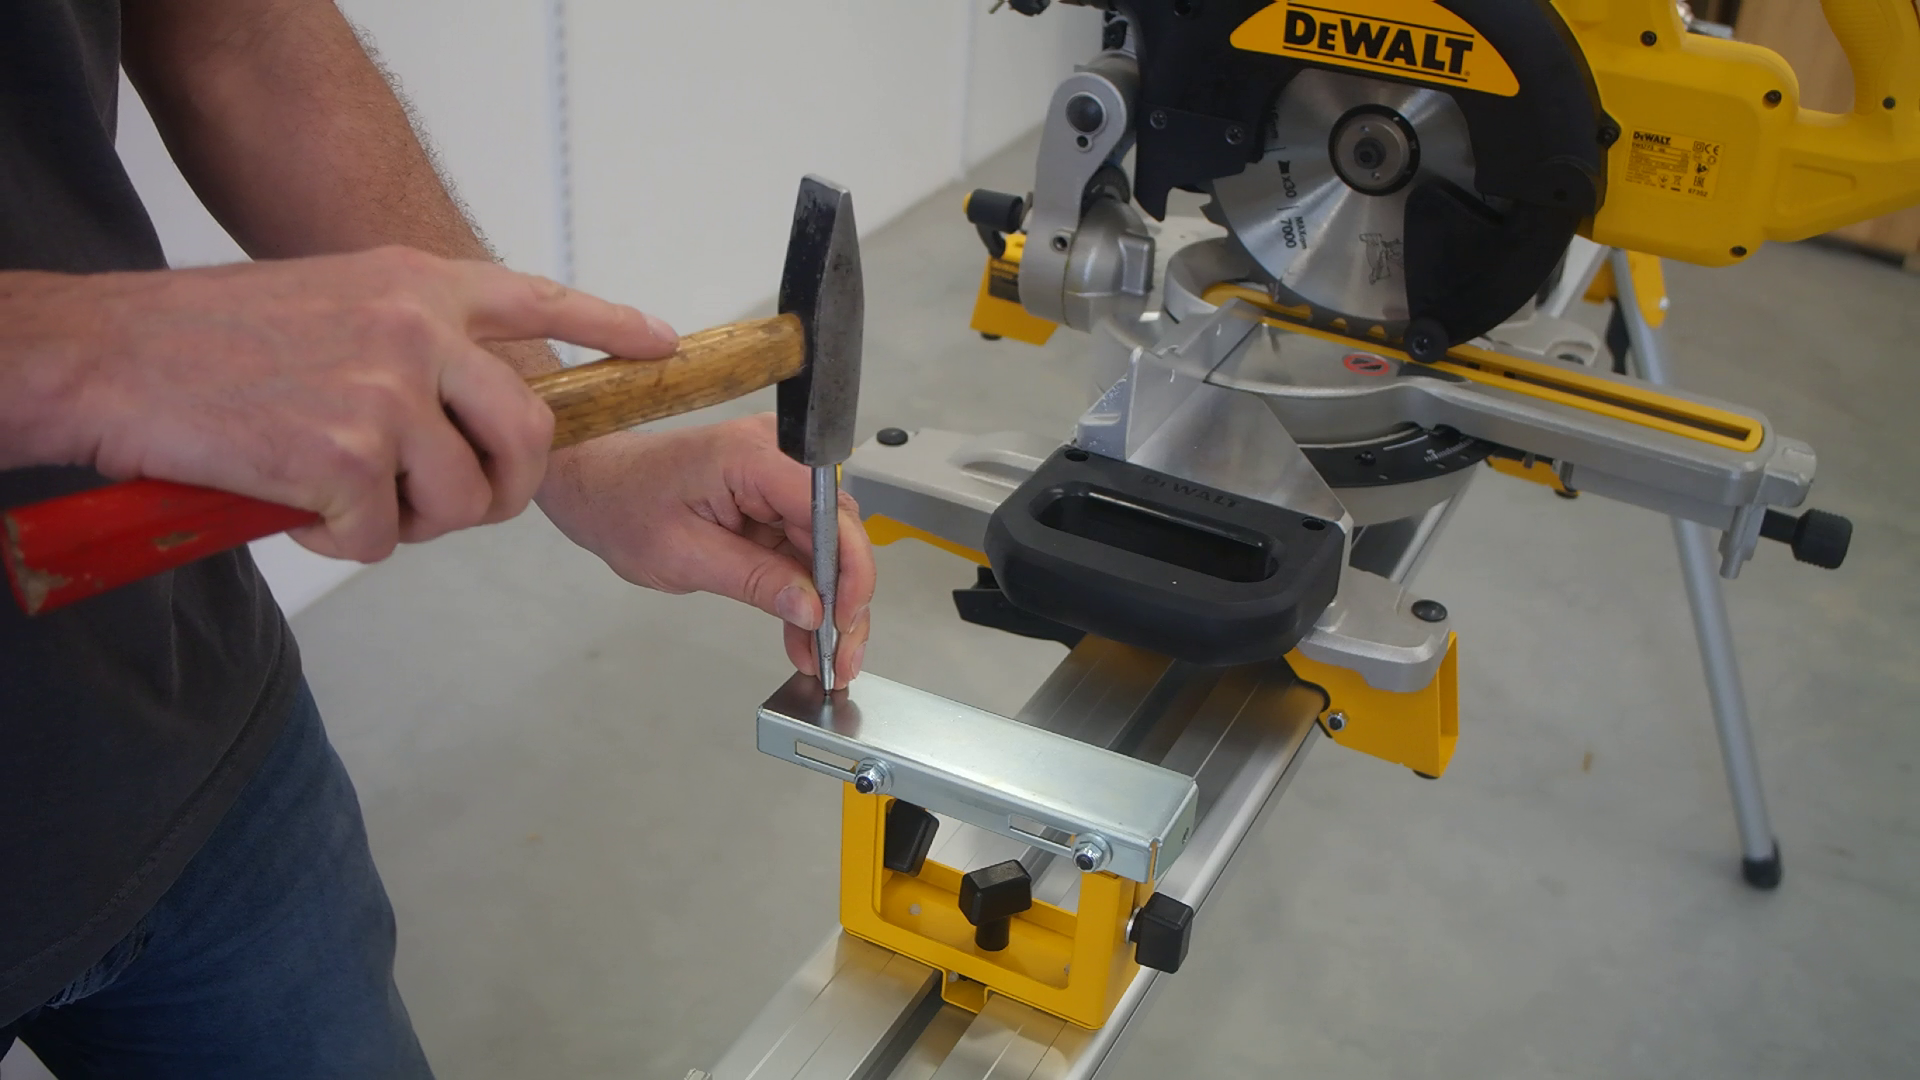
Mark the drilling spot on the workpiece support with a marker. The hole you will drill has to match the groove on the bottom of the Pedante rail, so use a square to precisely mark the position. After that, use a center punch to indent the spot, so the drill doesn't slip when making the mounting hole.
Drill the Hole

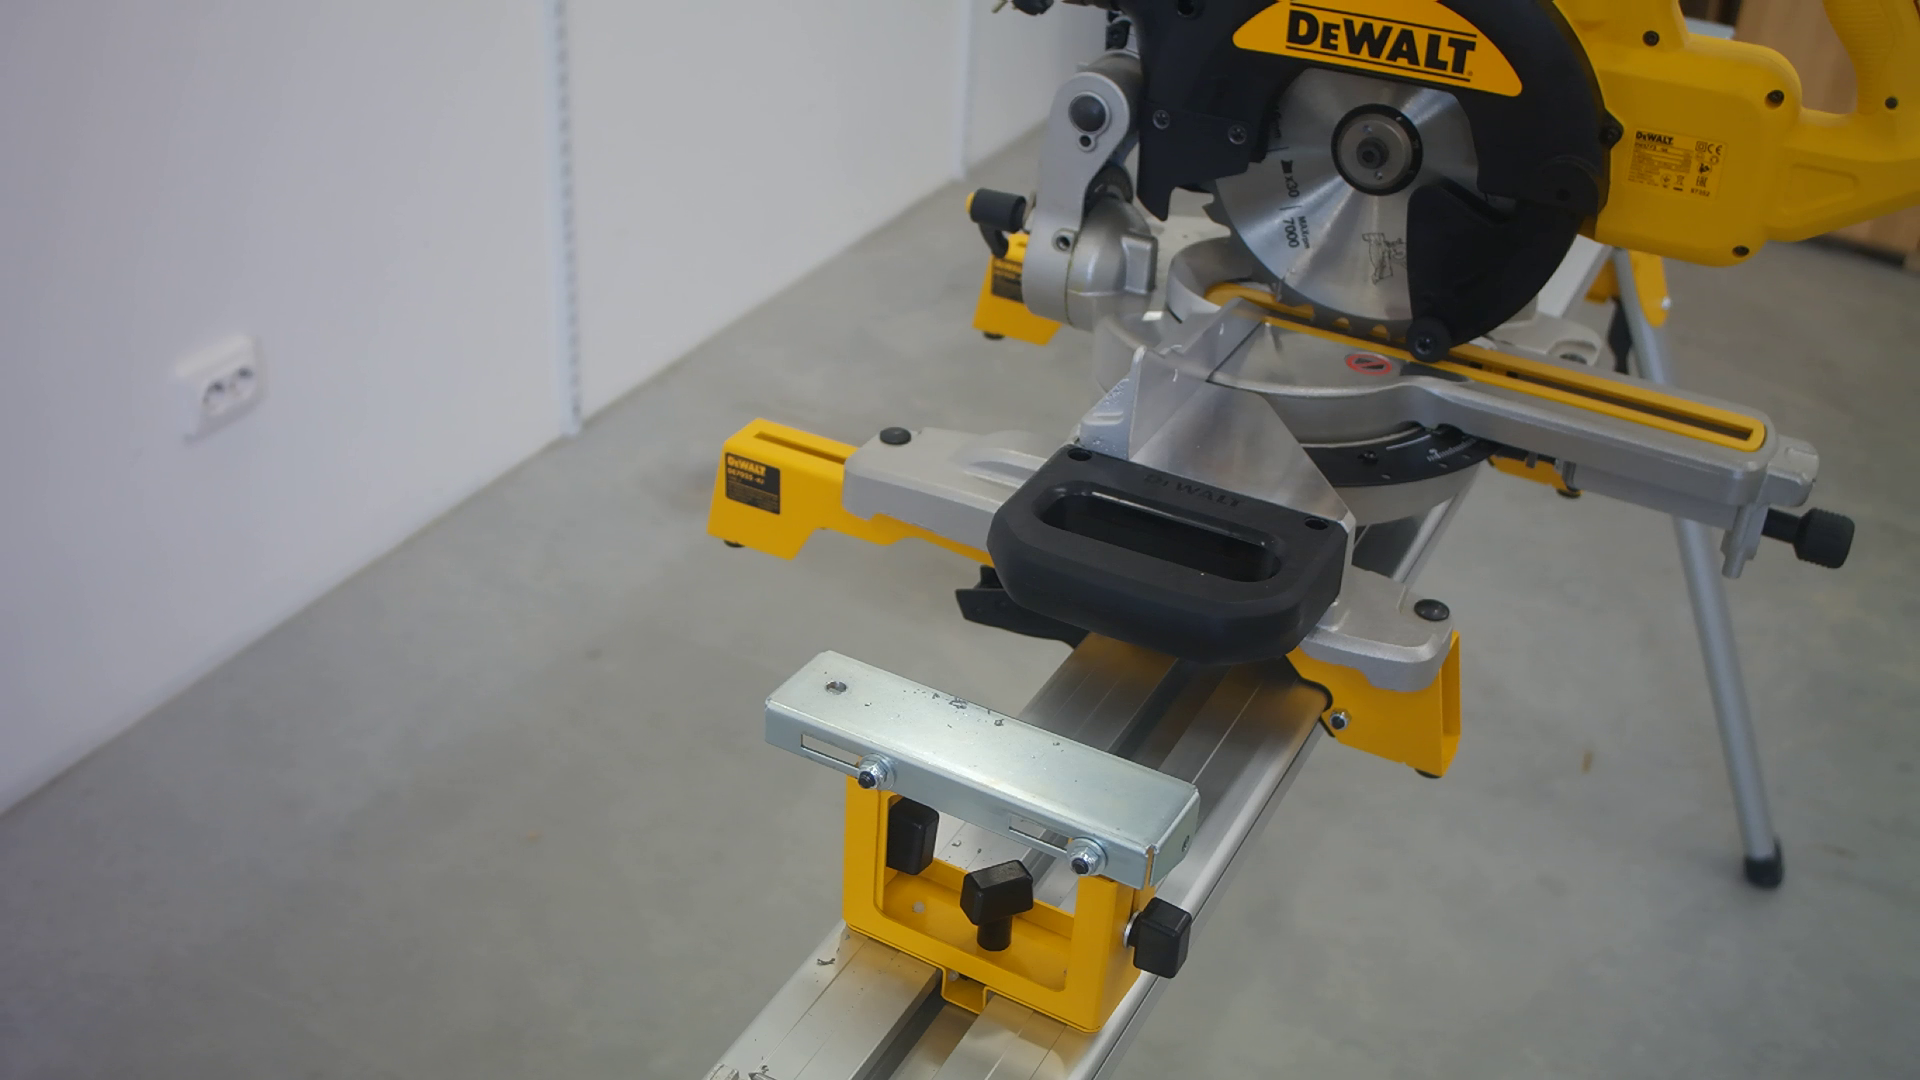
Drill the hole where you made the indent.
The T-head bolts included with the Pedante digital miter saw fence are 8 mm in diameter, so the finished hole needs to be 8 mm. I started with a smaller drill bit first in order to make a pilot hole, then moved up to the 8 mm drill bit. This method reduces the risk of the larger drill bit slipping and making the hole misaligned.
Insert the T-bolt
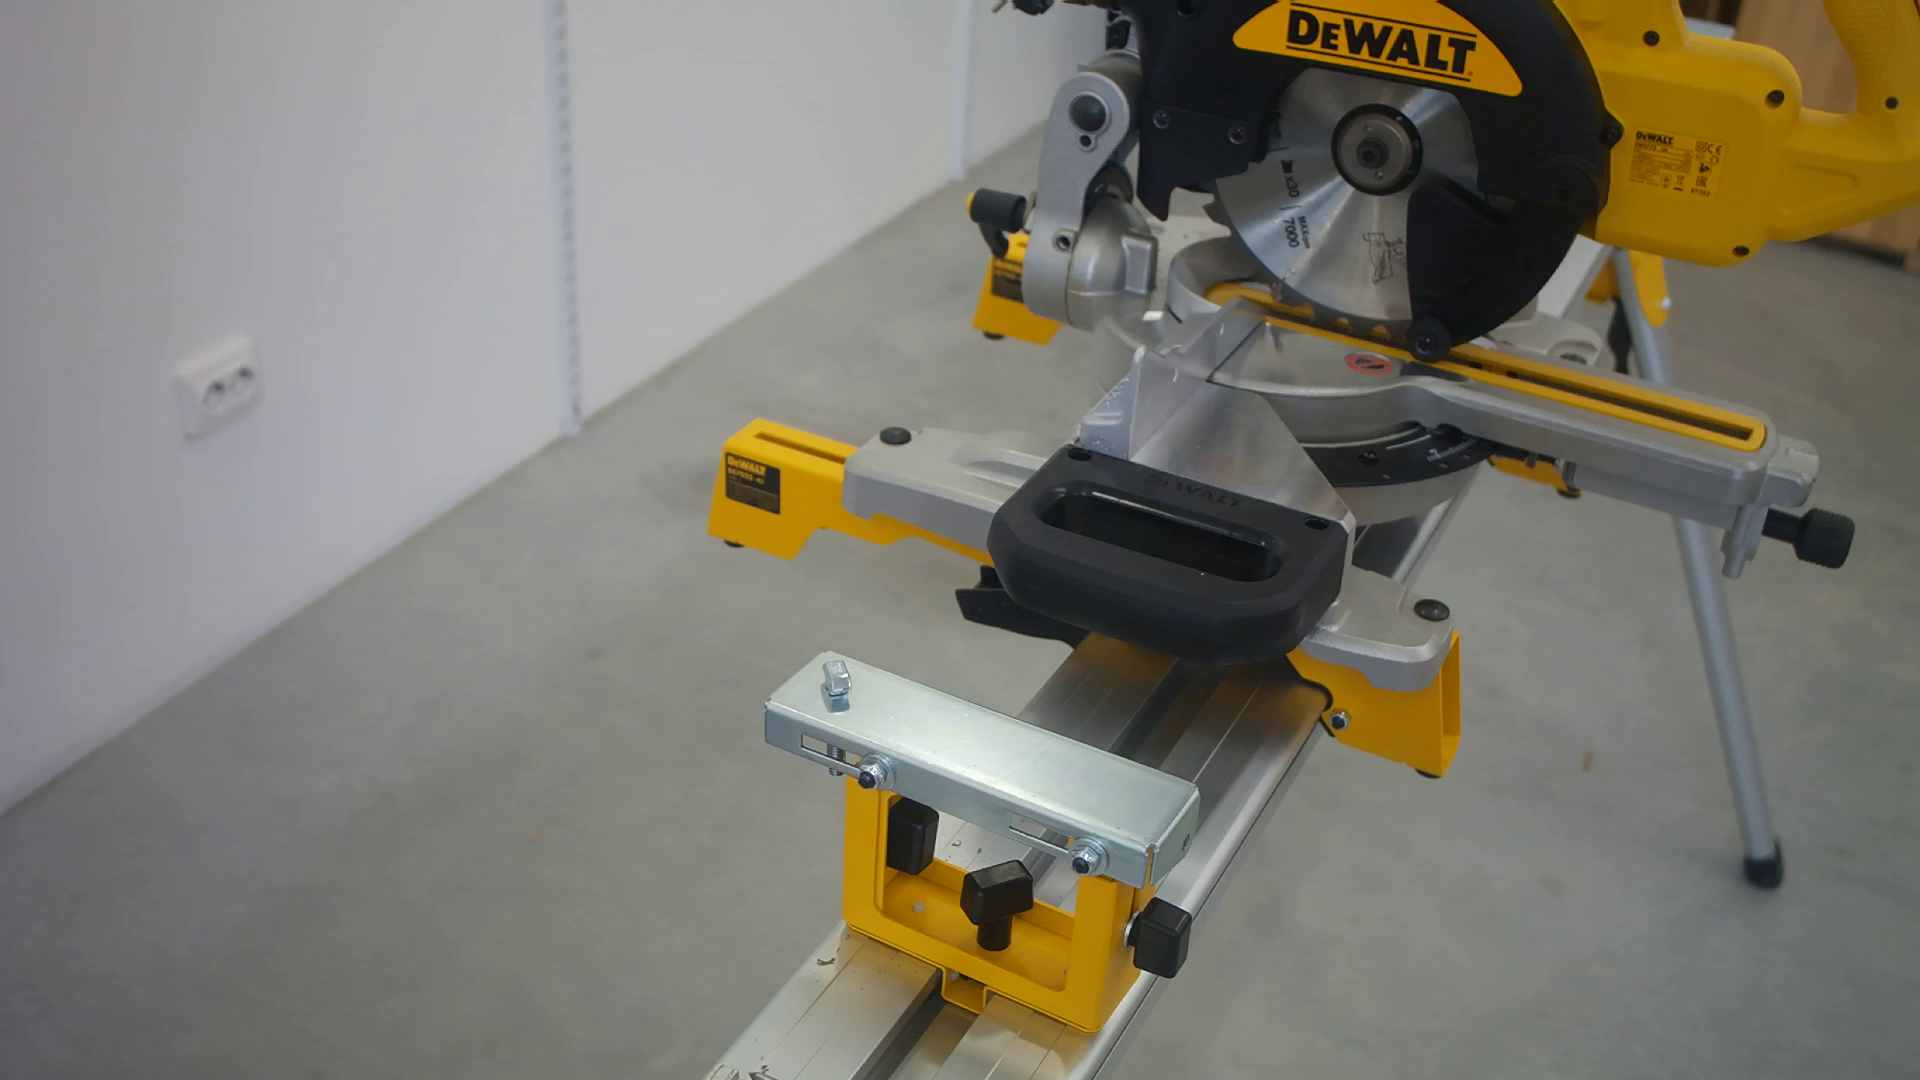
Insert one Pedante T-head bolt into the hole you just drilled. Make sure the head is turned parallel to the length of the stand, so it can fit in the groove on the bottom of the Pedante rail later. Do not tighten anything yet.
Repeat the Same Process on the Second Support
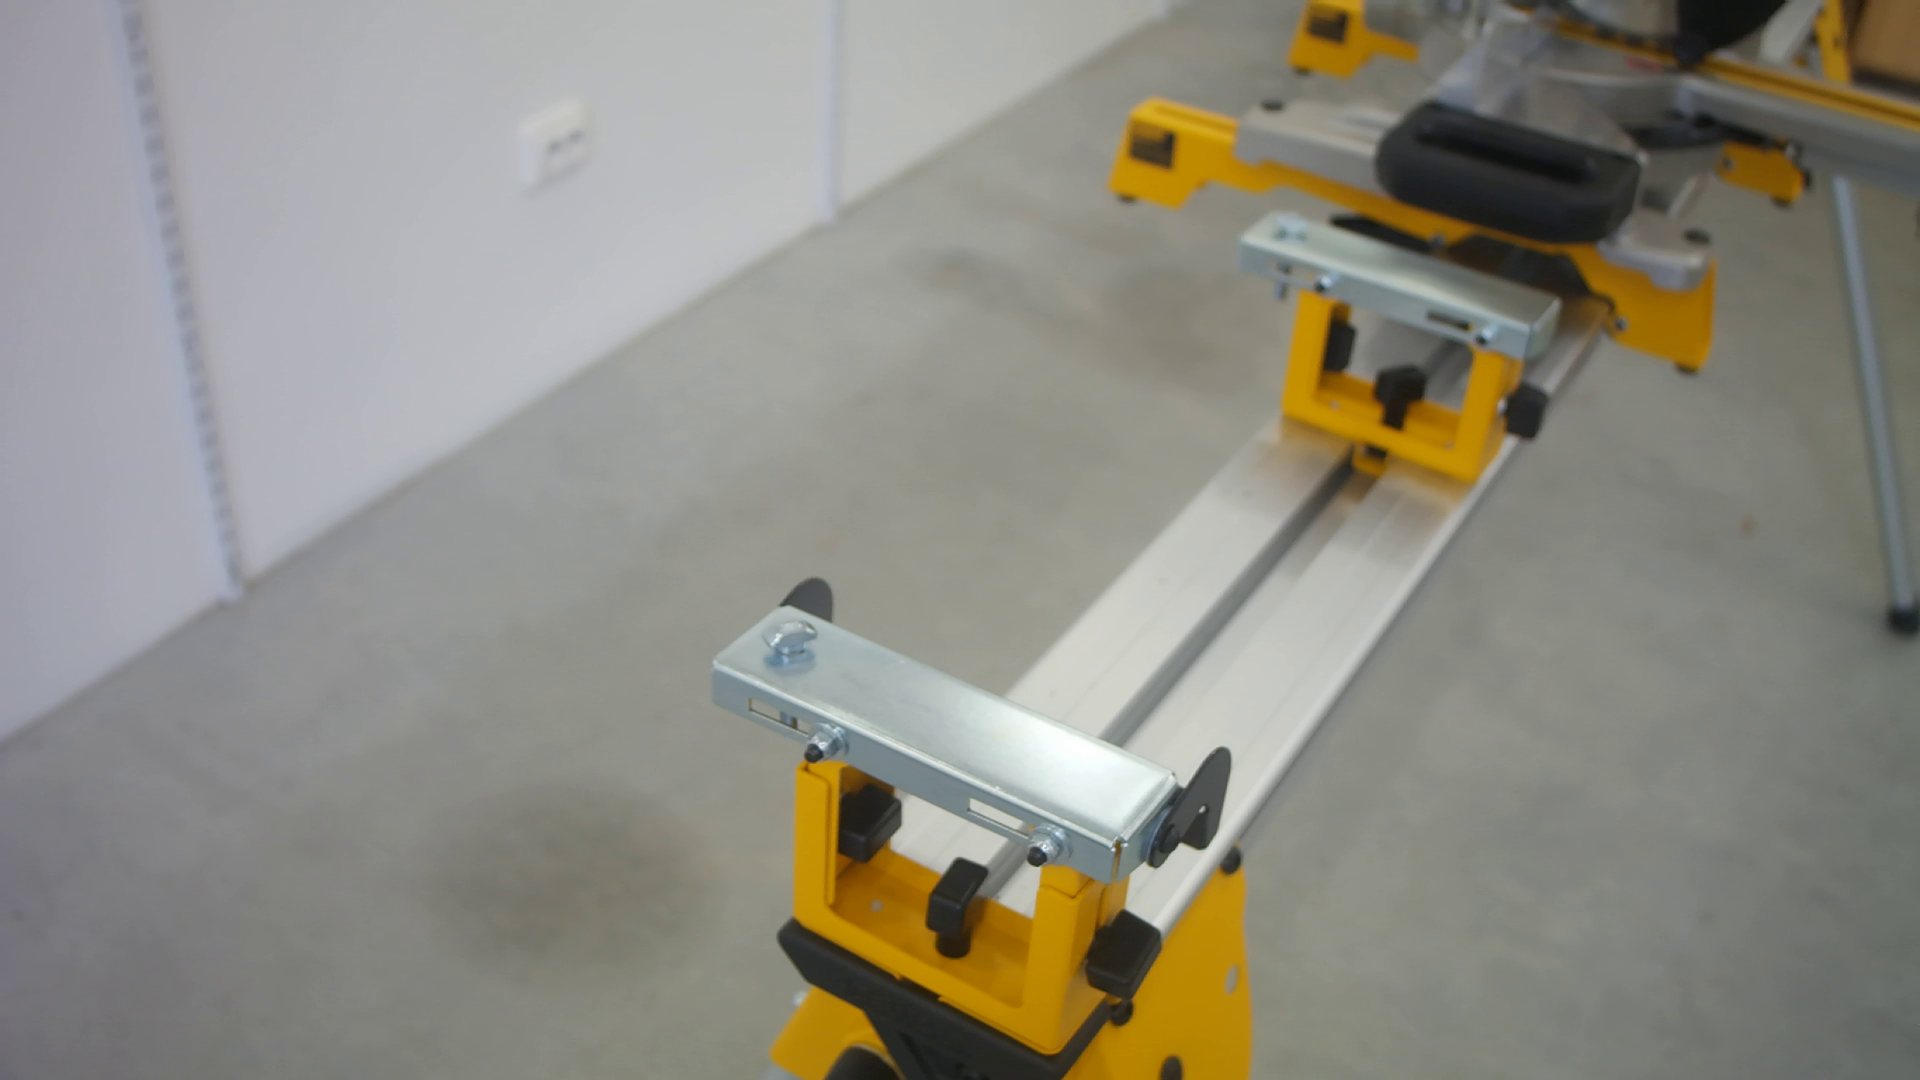
Repeat the same support preparation steps on the other support on the Pedante side of the saw.
- Remove the length stop
- Move height adjustment knob
- Mark the drilling spot
- Drill the hole
- Insert the T-bolt
After this, you should have two supports on the Pedante side of the saw, each with one T-head bolt installed, which will hold the saw fence.
Adjust the Support Heights
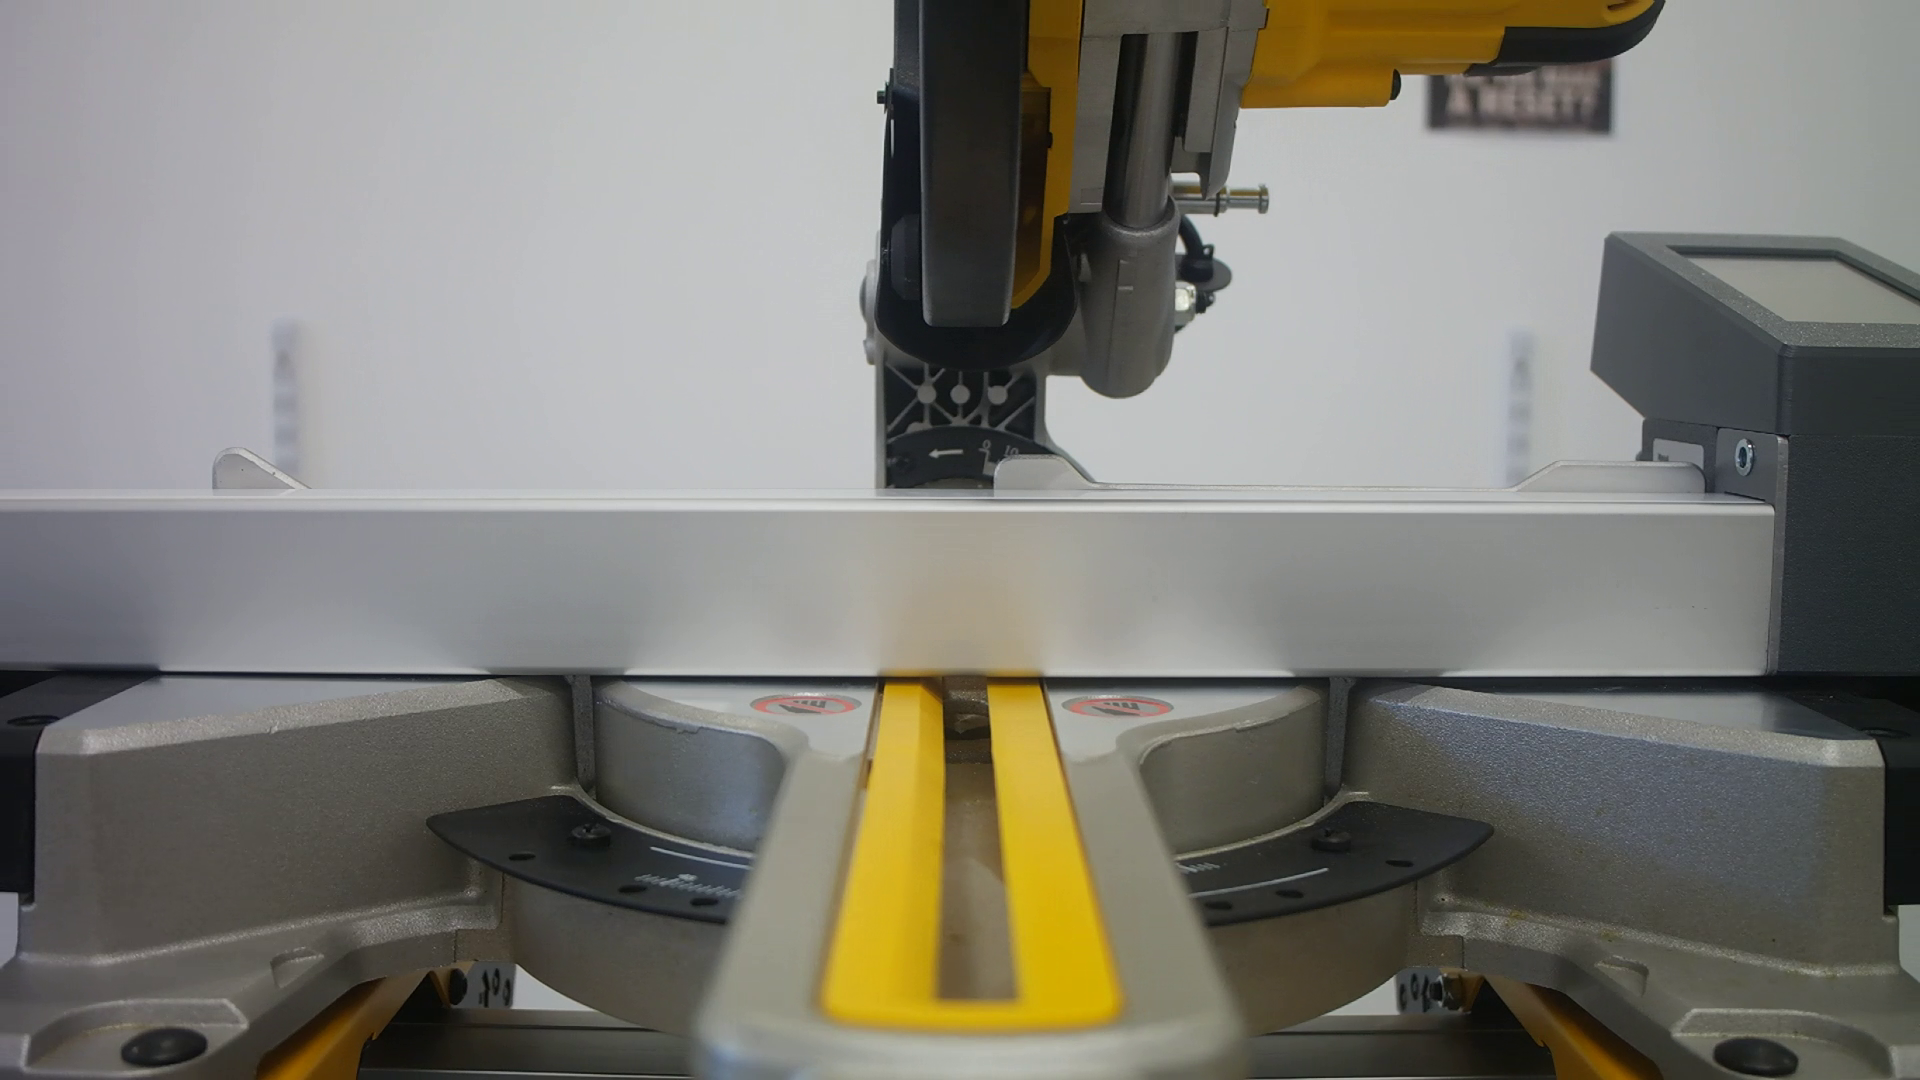
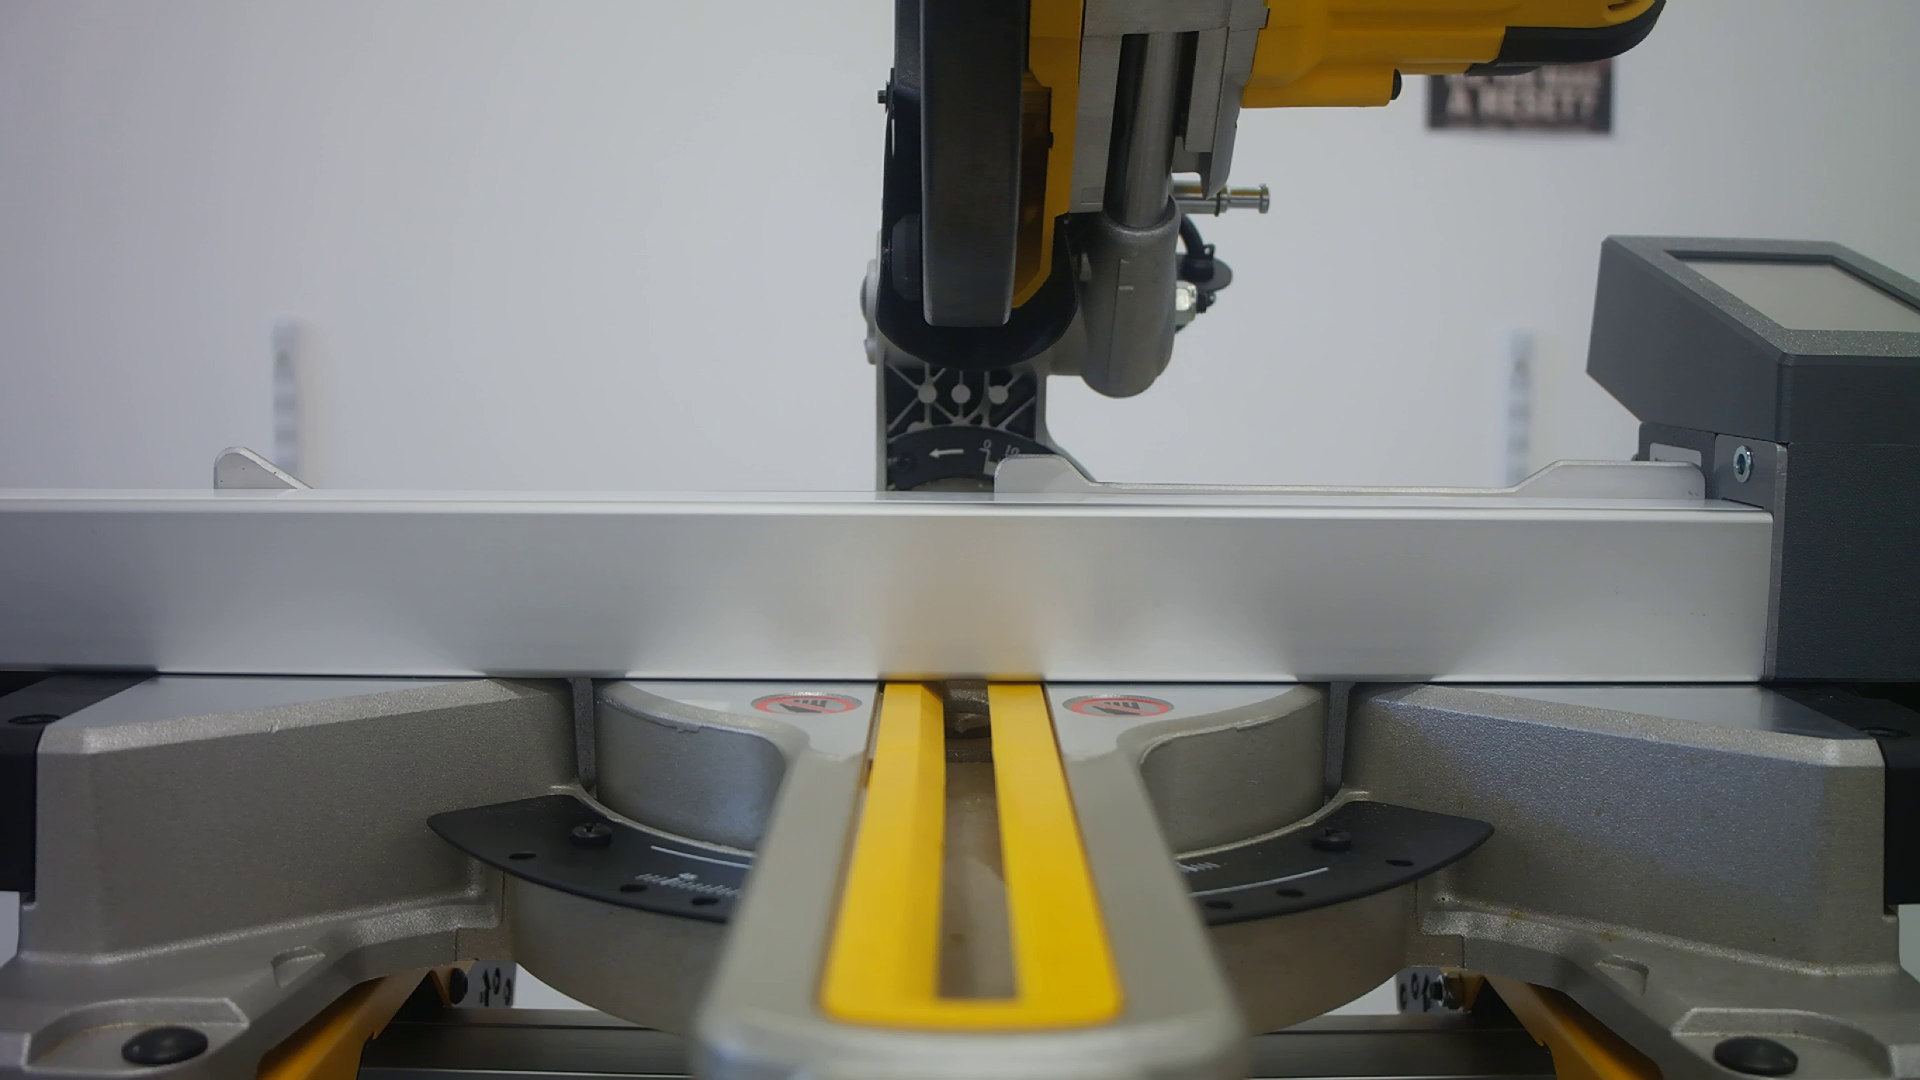
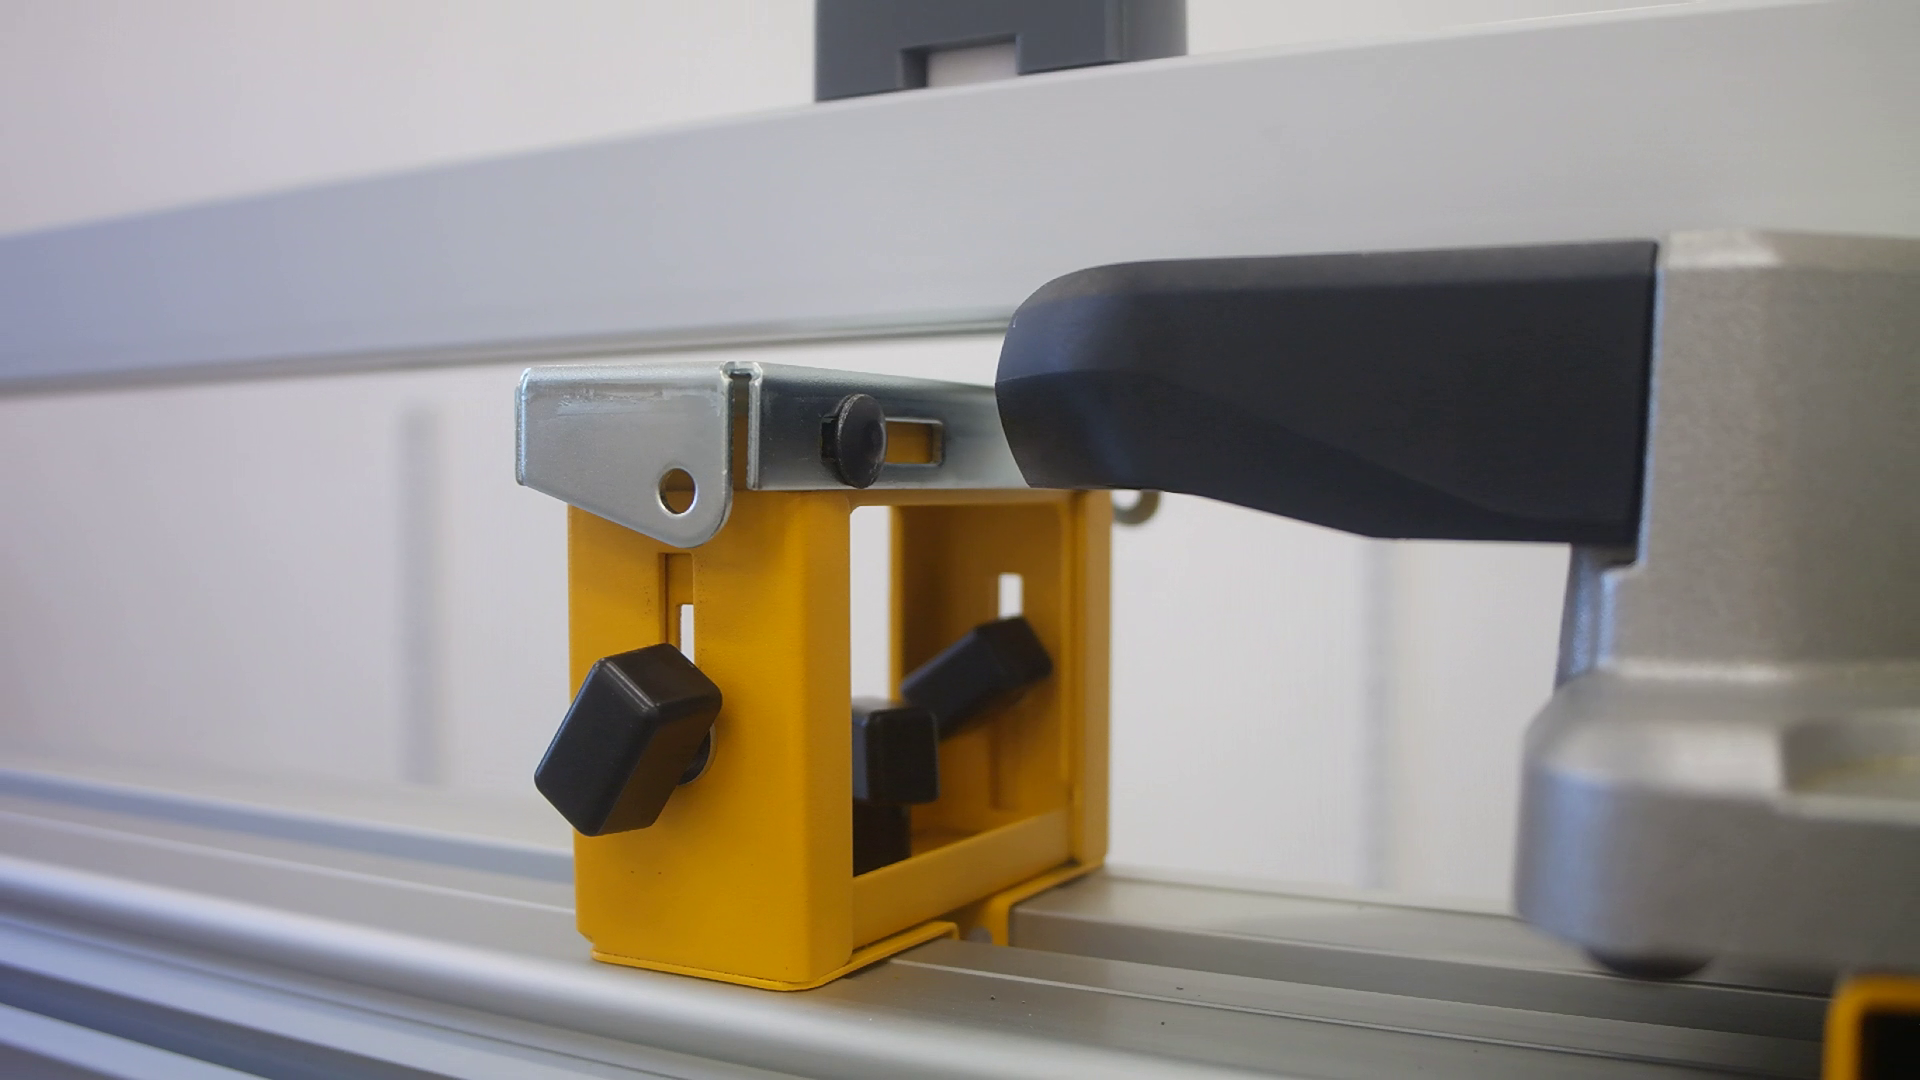
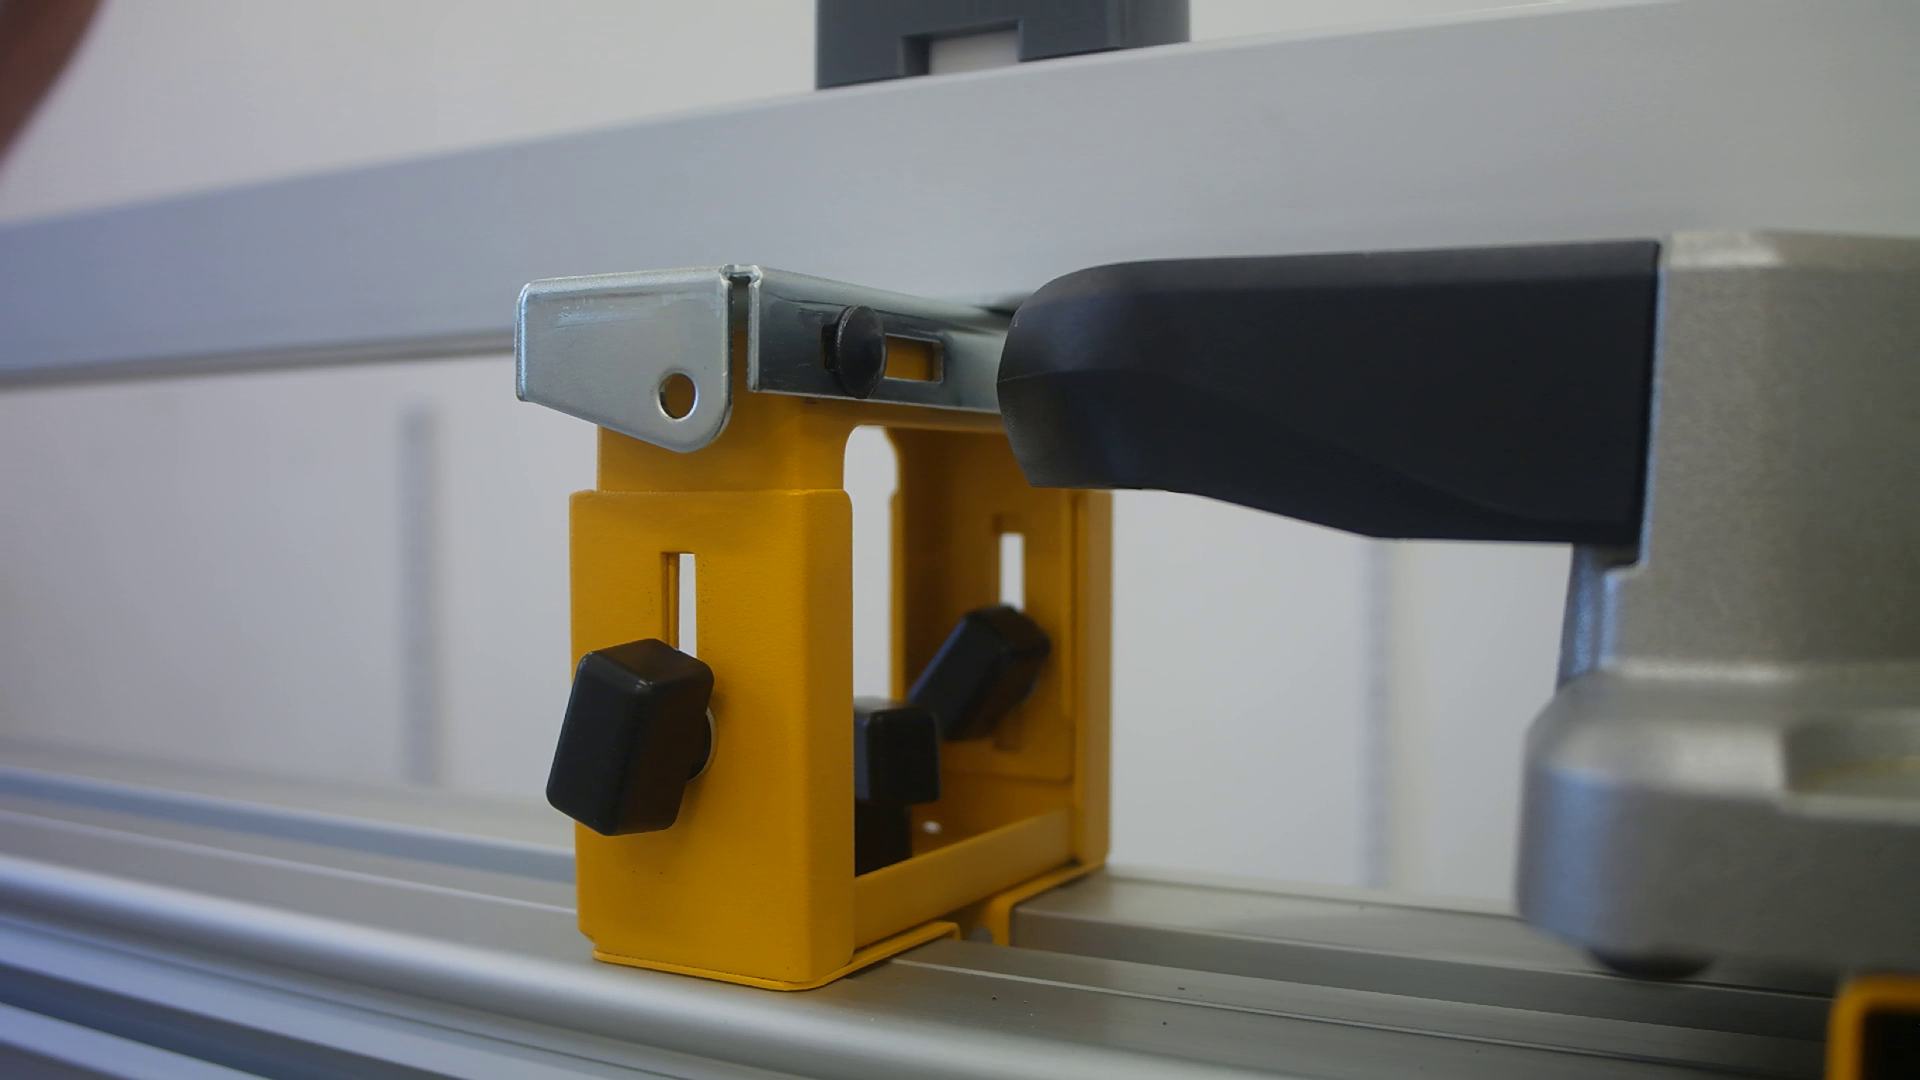
Place the Pedante digital miter saw fence on the miter saw turntable/saw table and use it as a reference to adjust the height of the DeWALT supports. The Pedante fence should be flush with the table area (see 2nd image).
Loosen the height adjustment knobs and lift the supports until Pedante is level (see 4th image). When you have done that, tighten the knobs, so the support stays in place.
Place Pedante on the Mounting Bolts
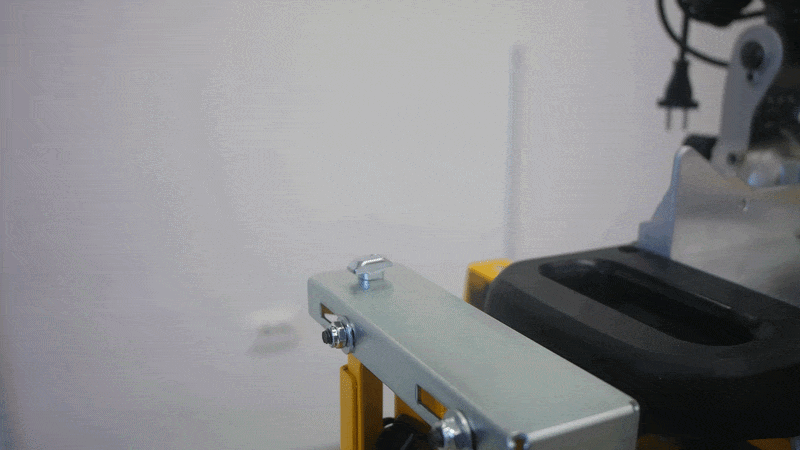
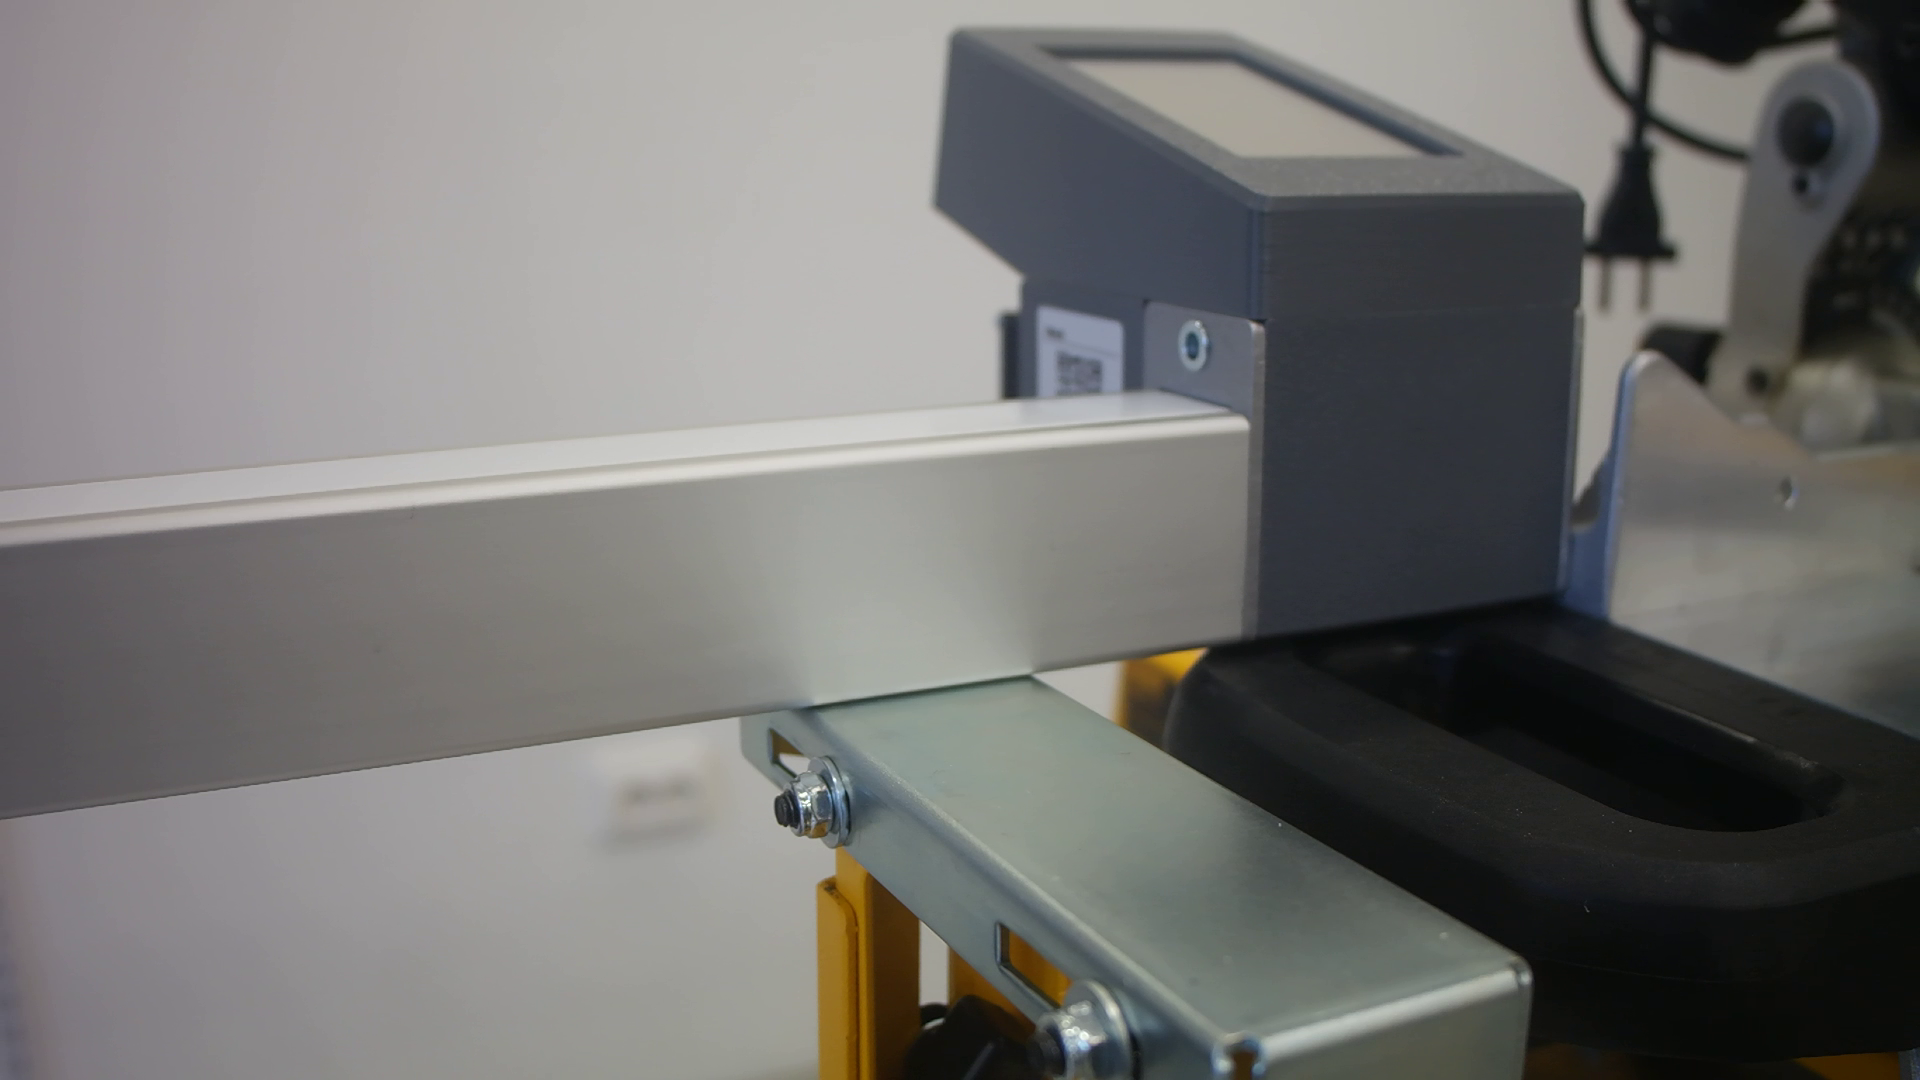
Remove the Pedante fence from the saw table area and move it toward the side where it will be mounted. Position it so the T-bolts heads enter the groove on the bottom of the Pedante rail.
Move the Pedante control unit close to the saw, so it sits against the saw fence/grille area (Check this carefully on your own saw, because the contact point can be different on other saws). The main point is that the rail starts in the correct position relative to the saw, without interfering with the blade, saw head, fence, turntable, etc.
Lock the T-Head Bolts
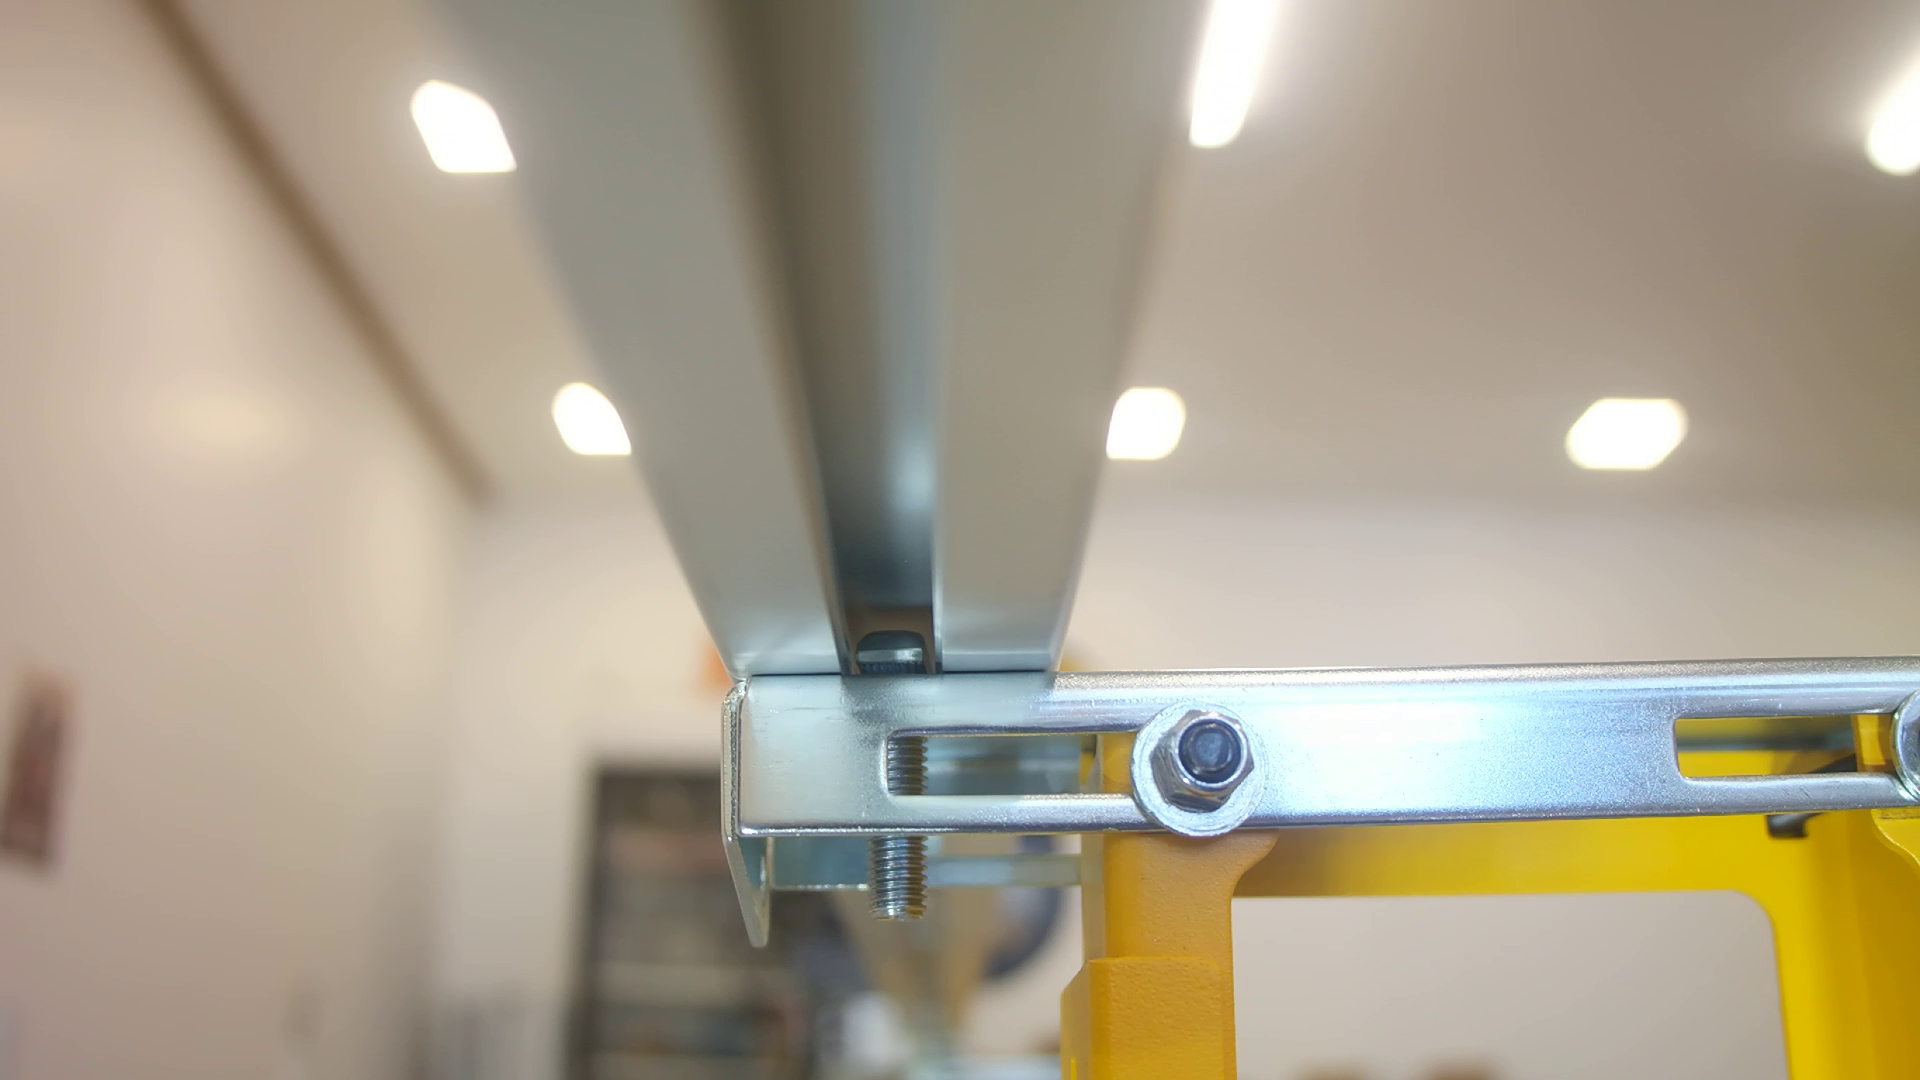
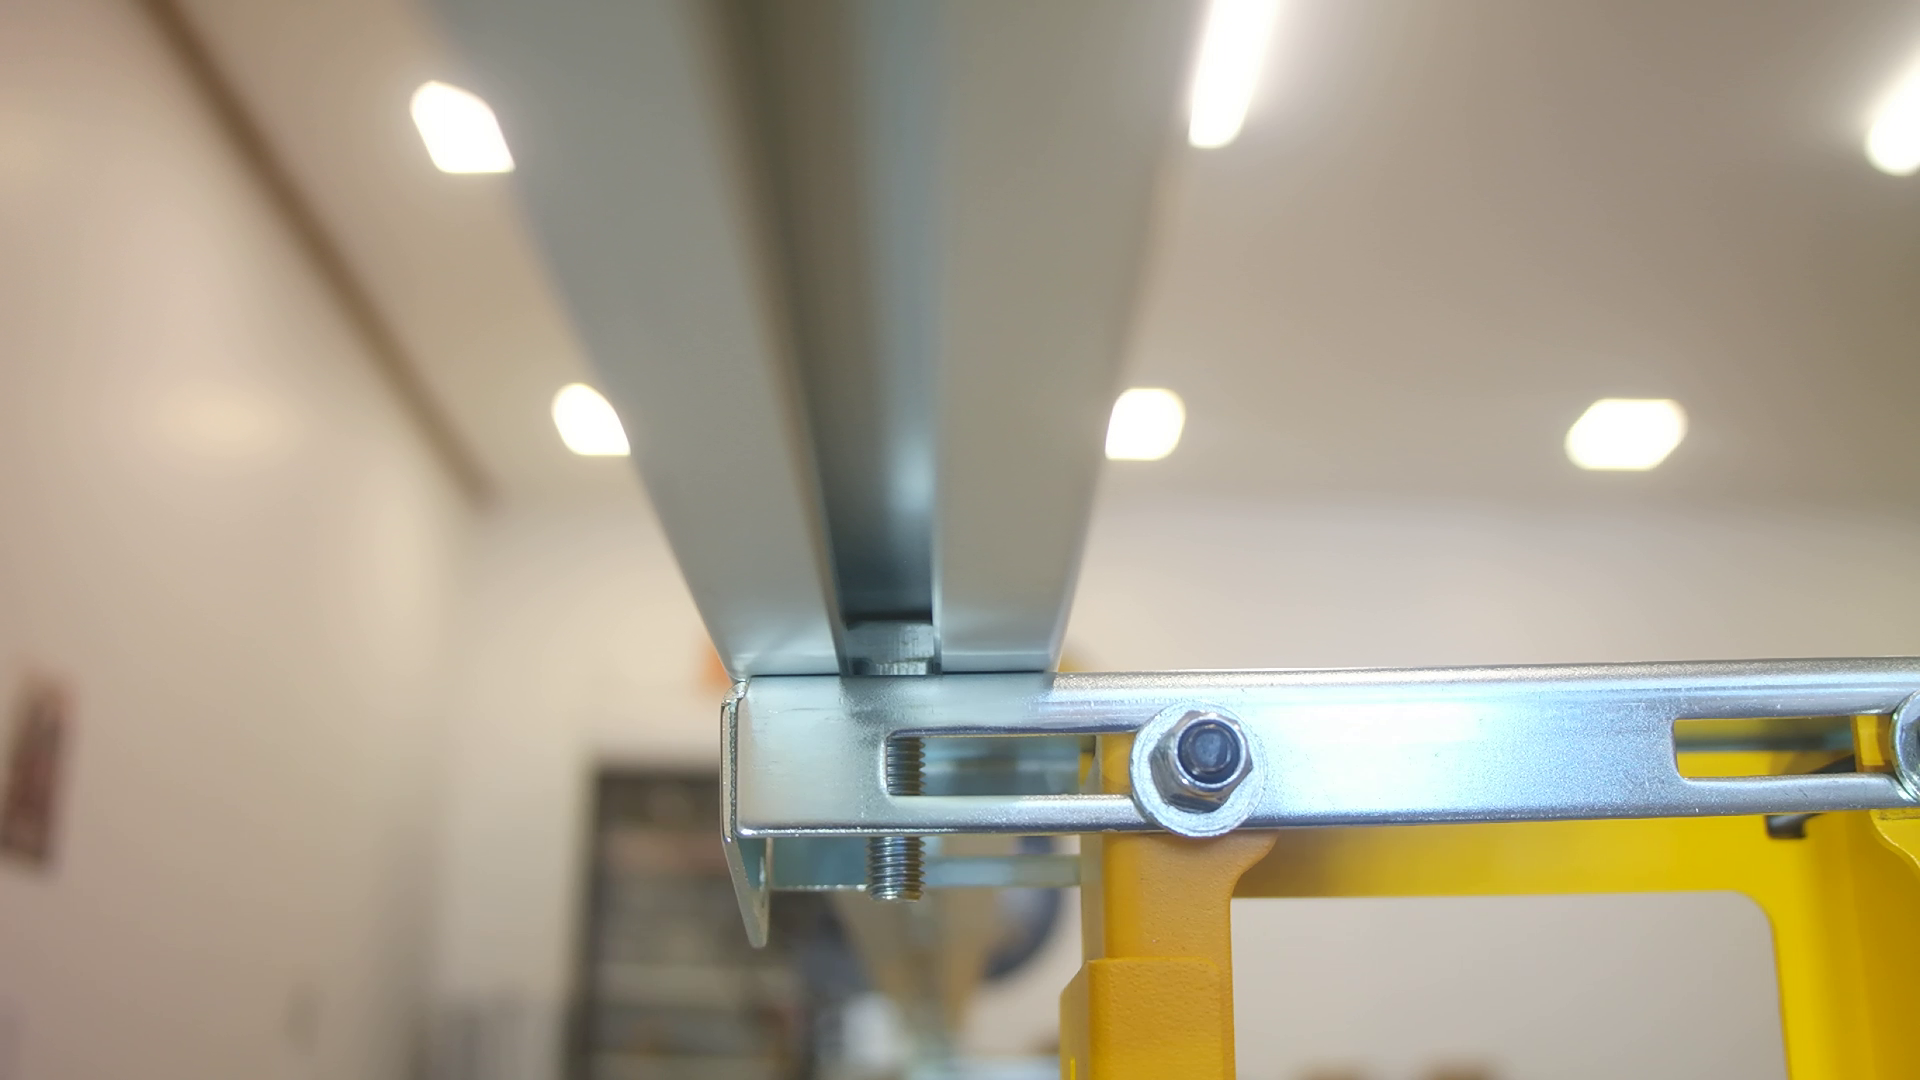
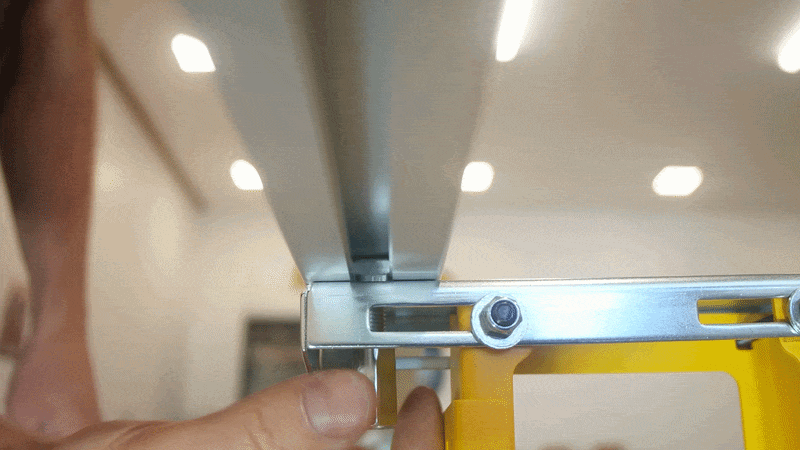
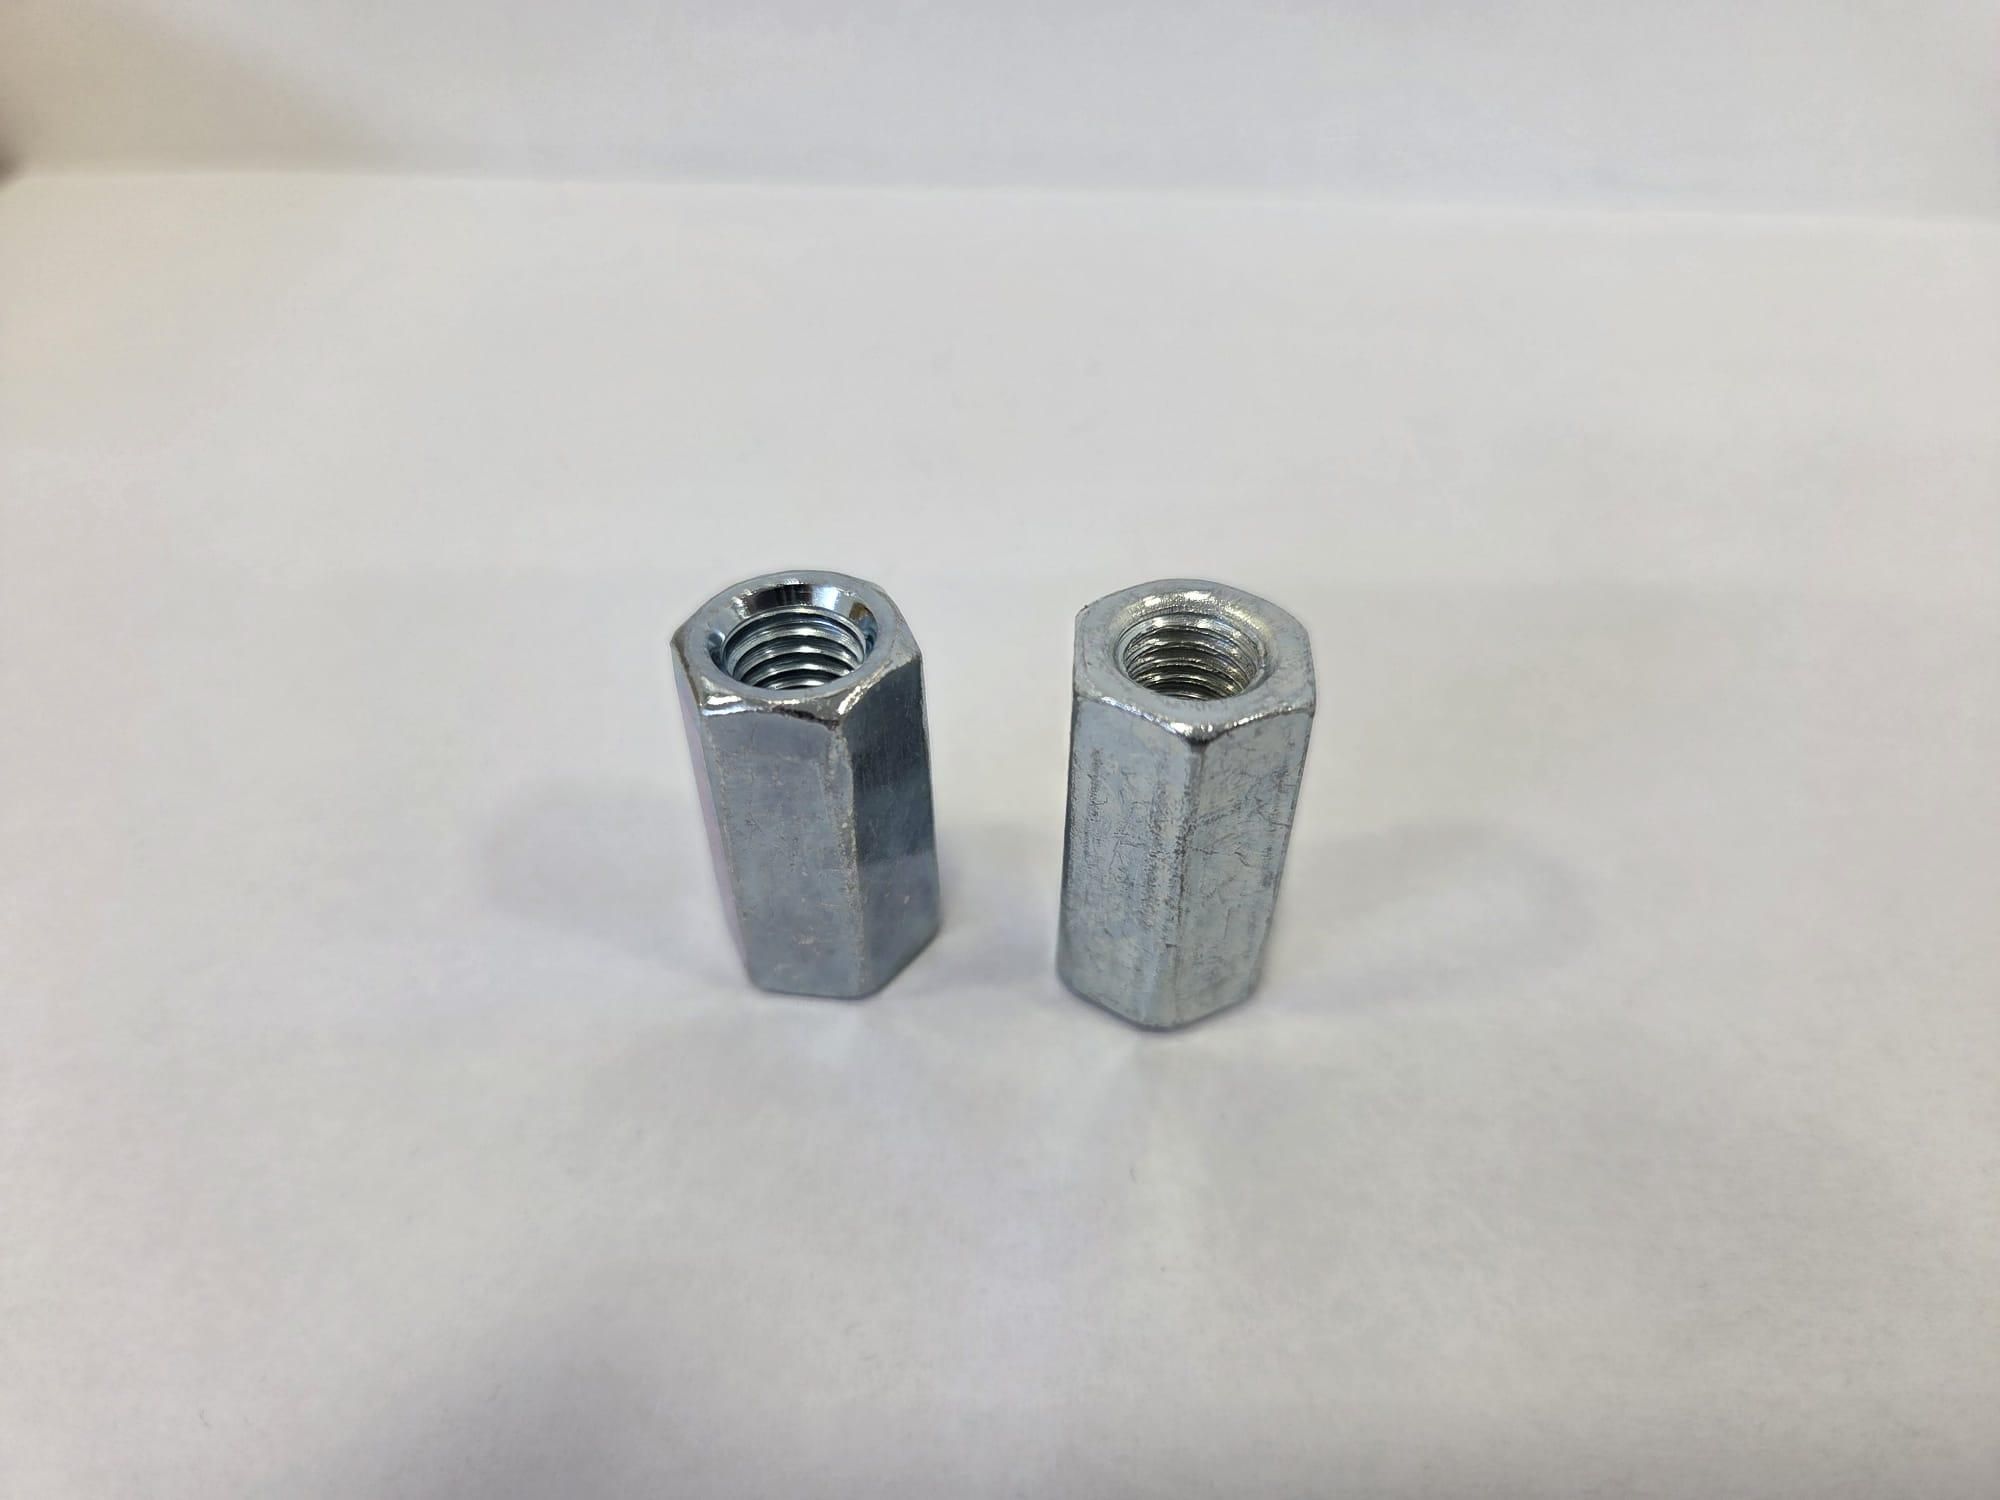
Turn the T-head bolts 90 degrees so they lock inside the groove on the bottom of the Pedante fence (see 2nd image), then screw on the DIN6334 M8 extended nuts. Use a wrench to tighten the nuts.
Align the Pedante Fence With the Saw Fence
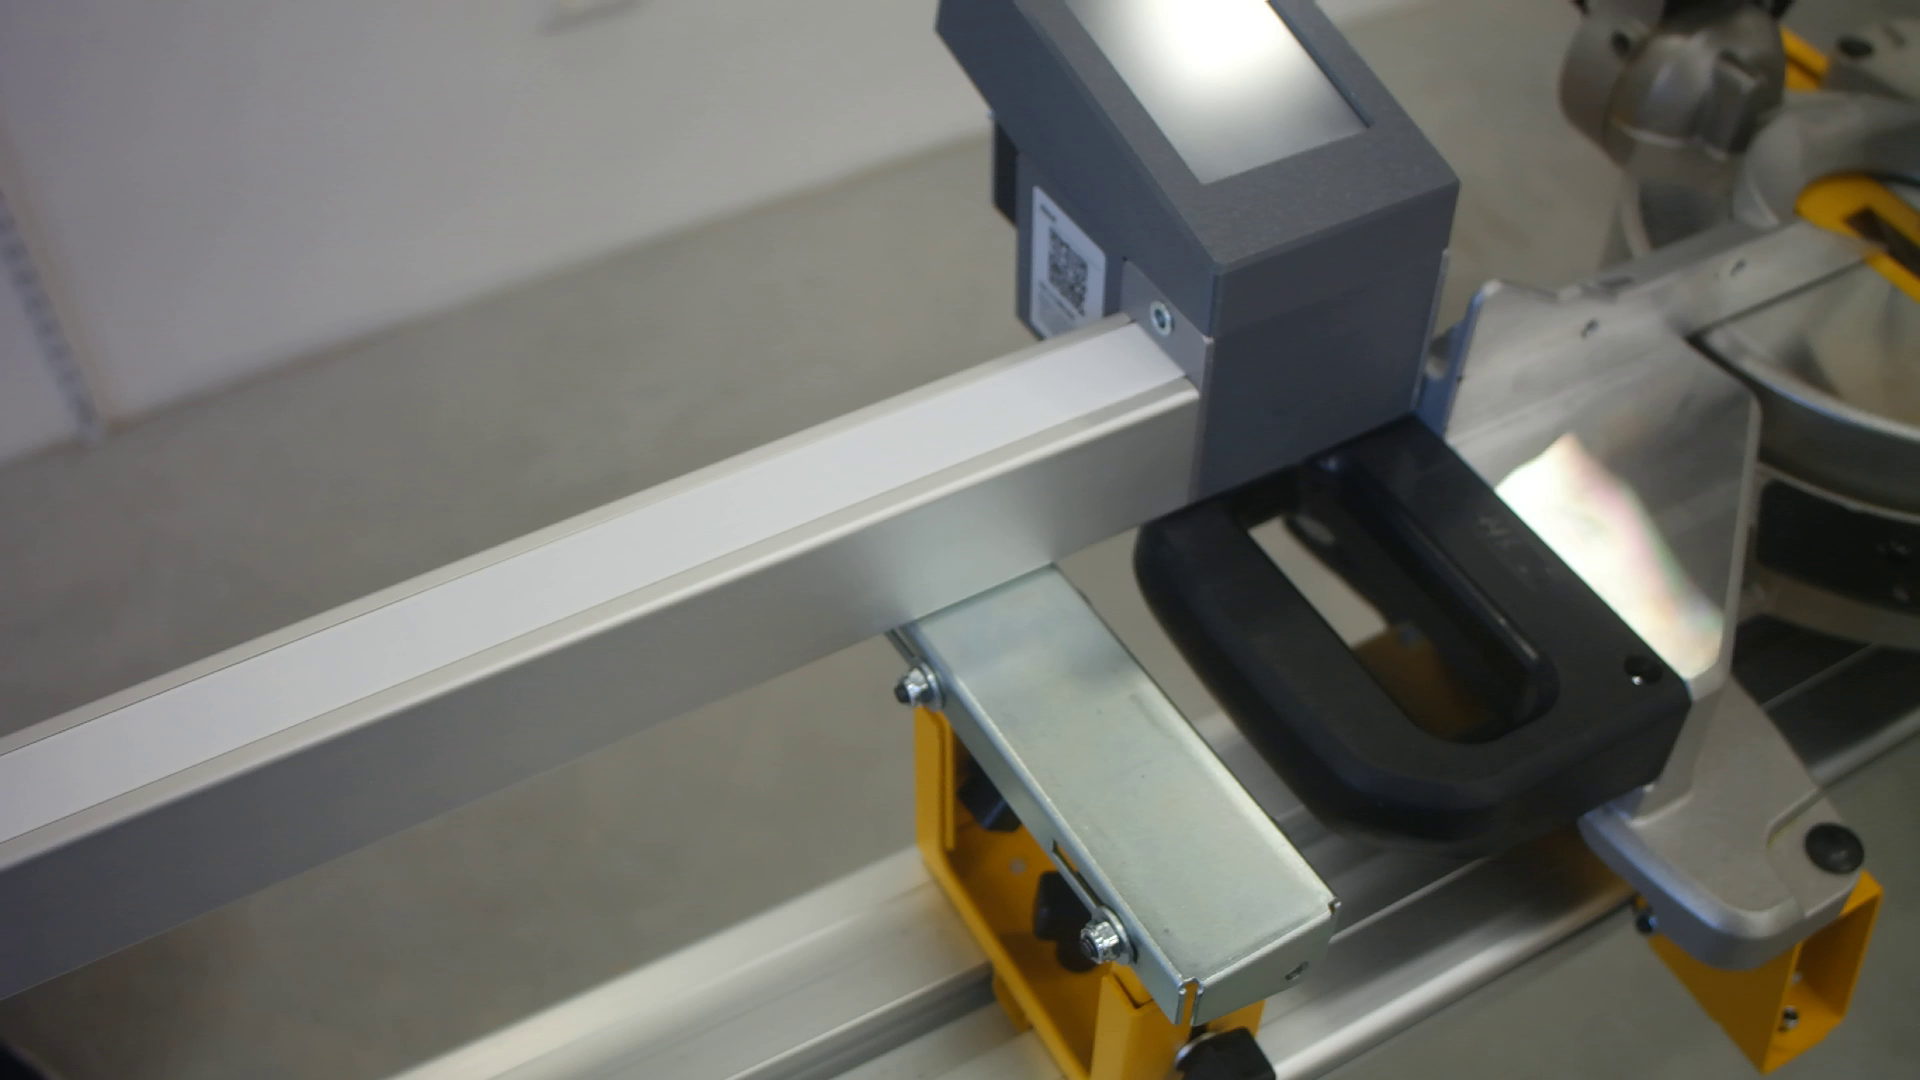
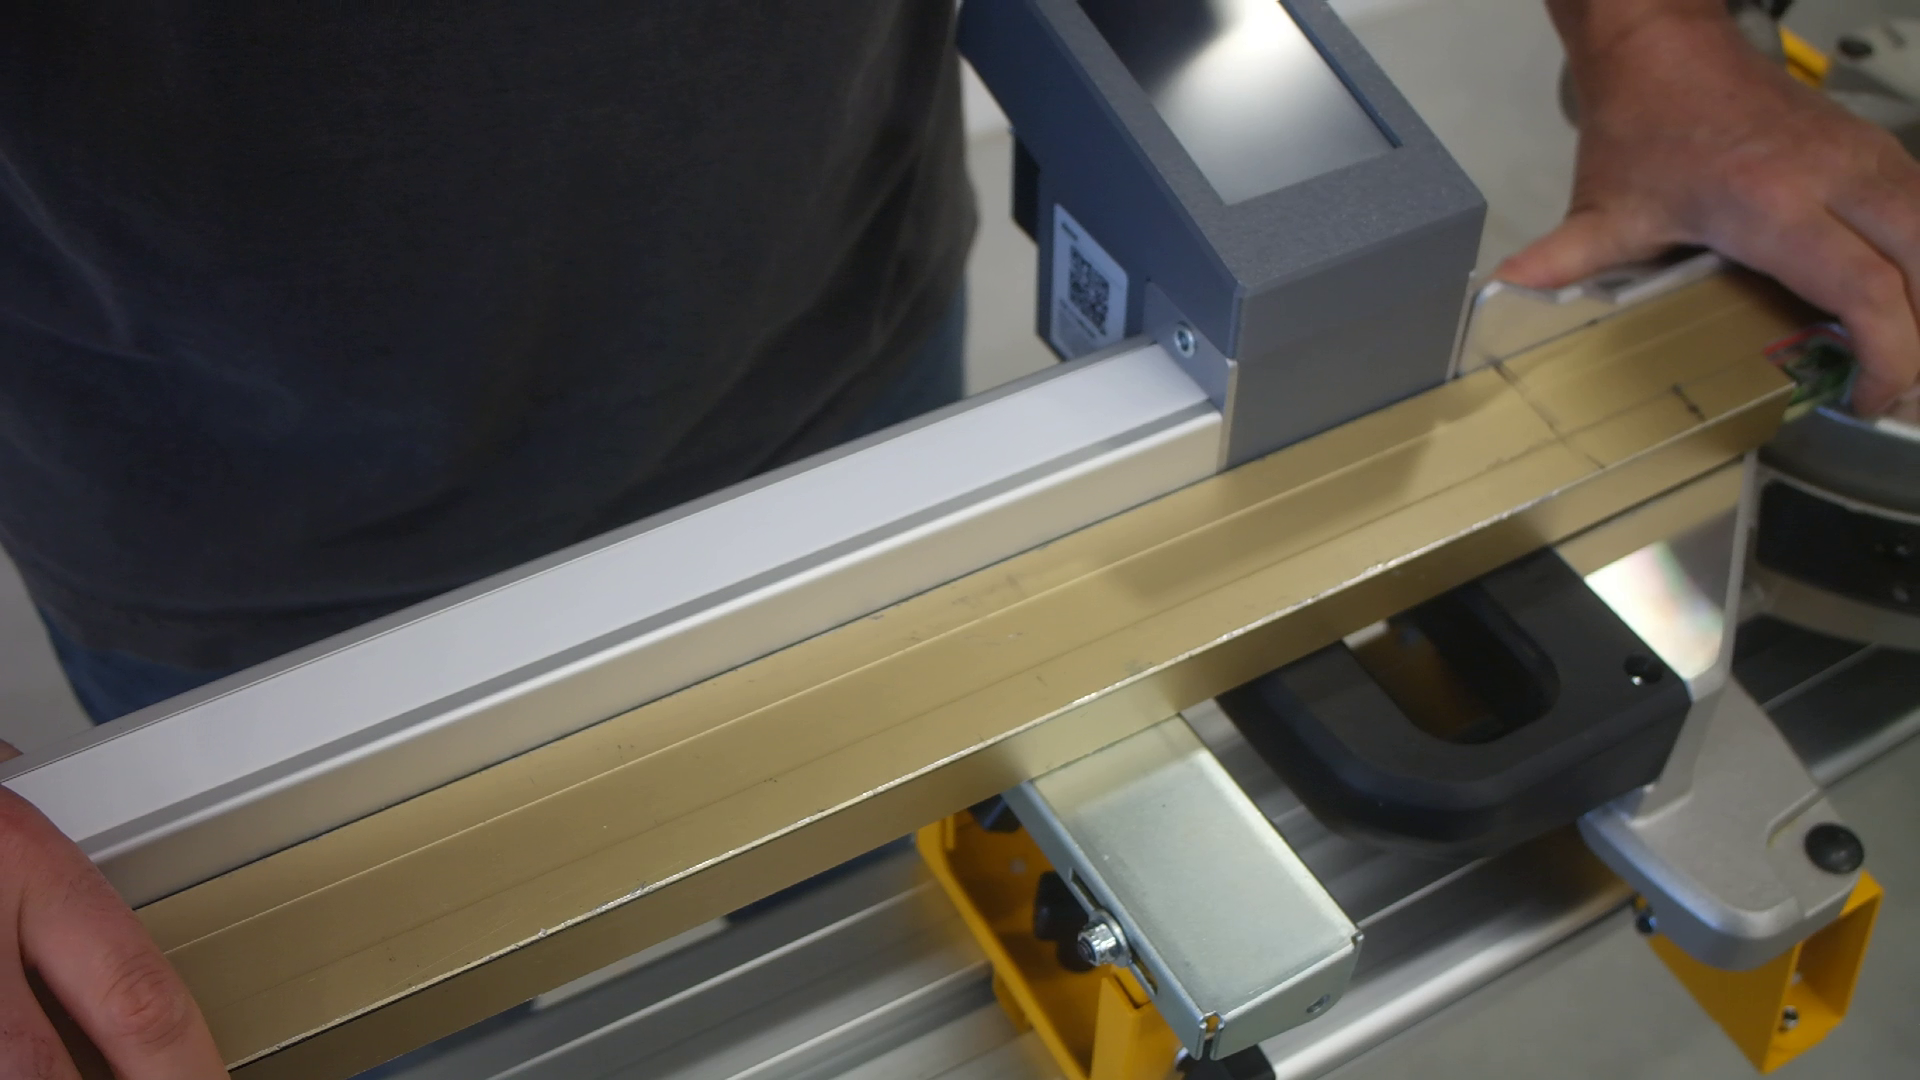
Loosen the nuts that lock the DeWALT work support. Use a straight piece of wood or metal to align the Pedante rail with the saw fence. I used a level for this. Place the straight edge against the saw fence and continue it along the Pedante rail (2nd image). The Pedante rail should follow the same path as the saw fence.
When you have aligned it, use a wrench to tighten the nuts that hold the work support in place, so it doesn't move anymore.
Attach the Pedante Stop Block
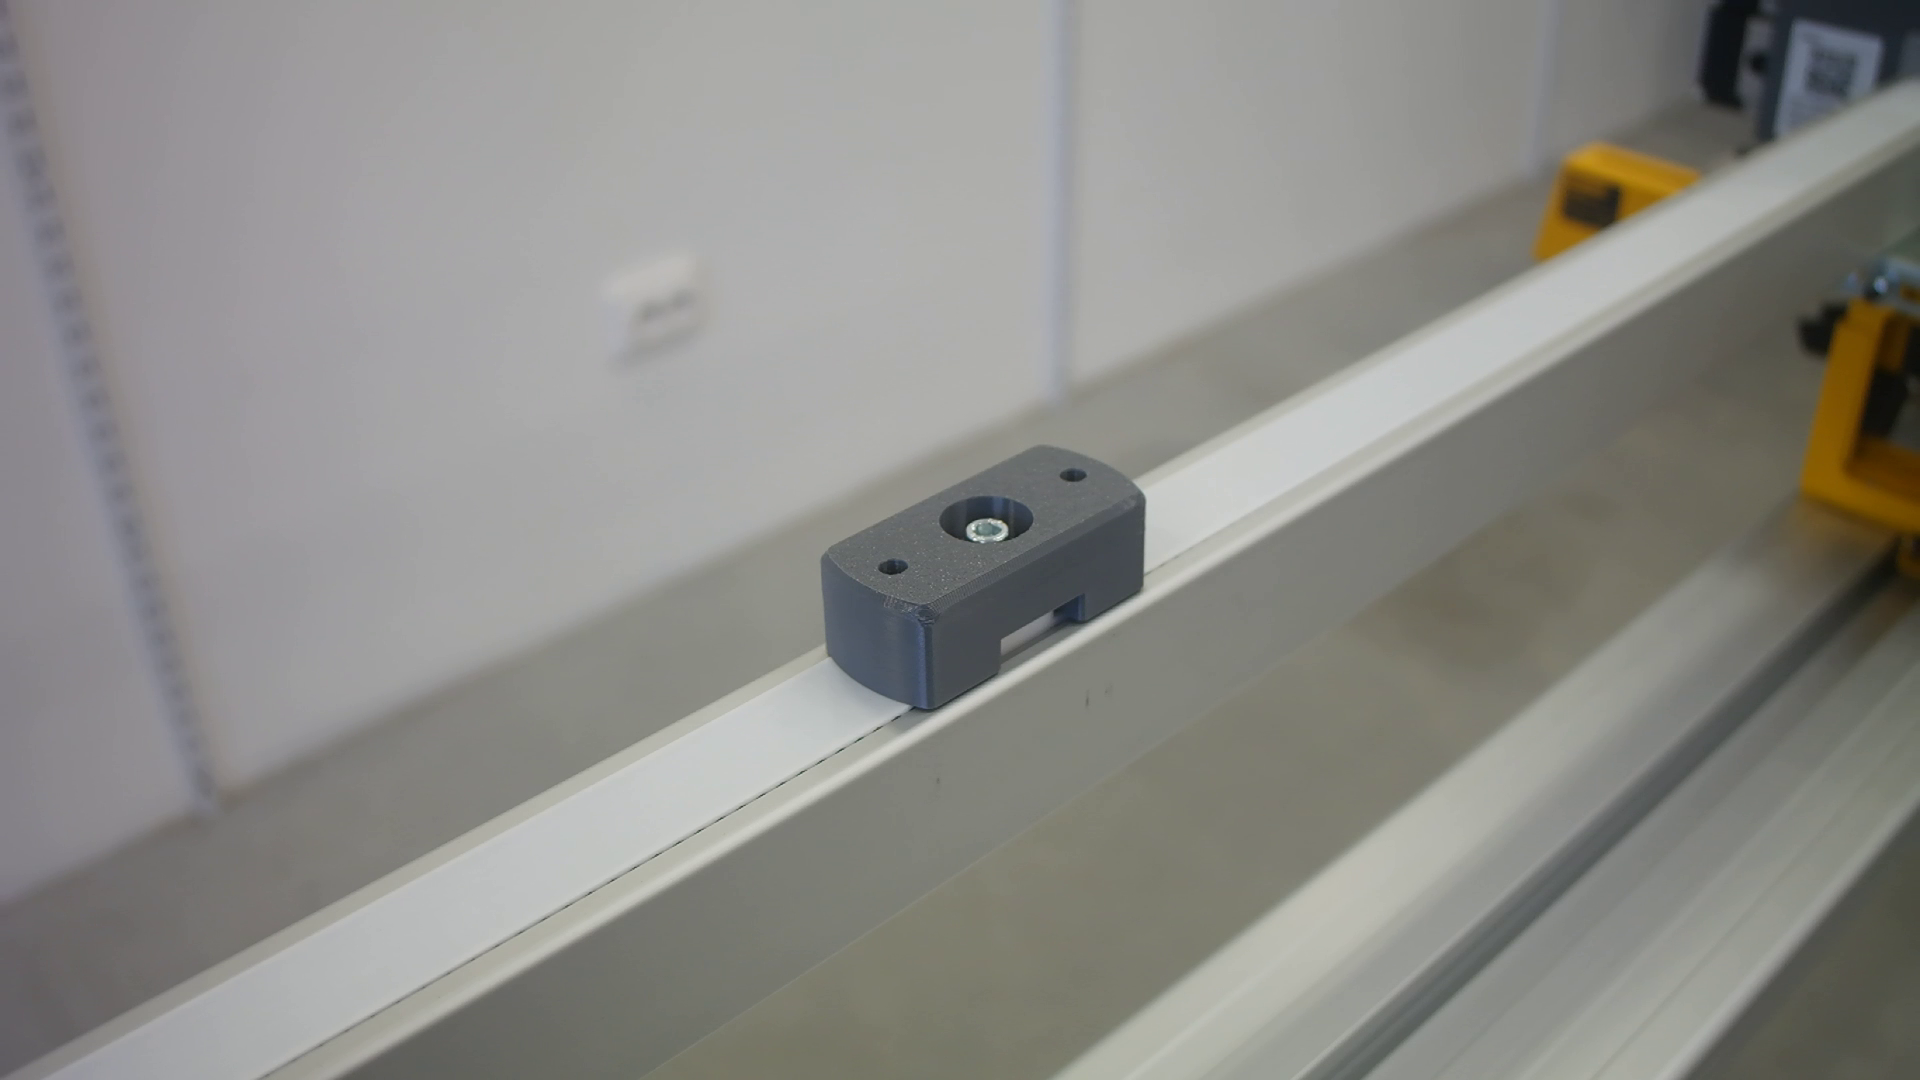
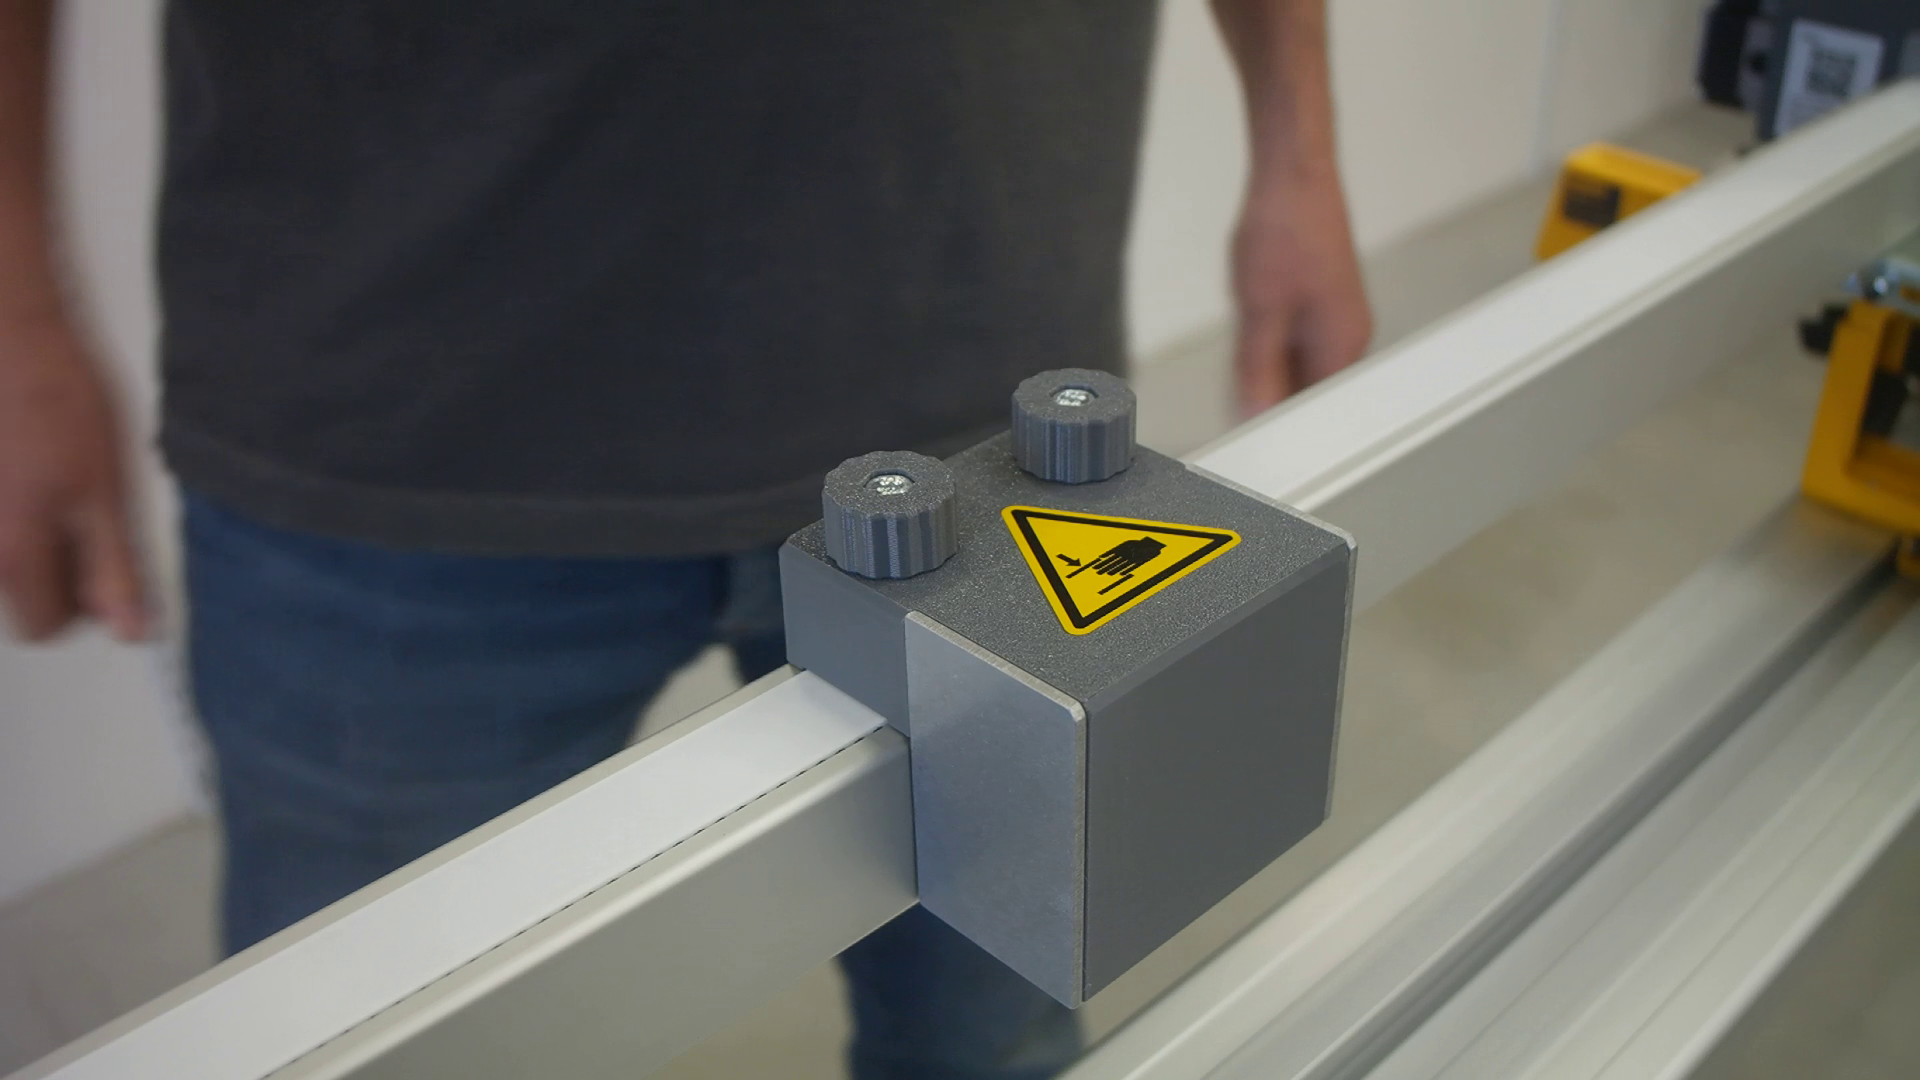
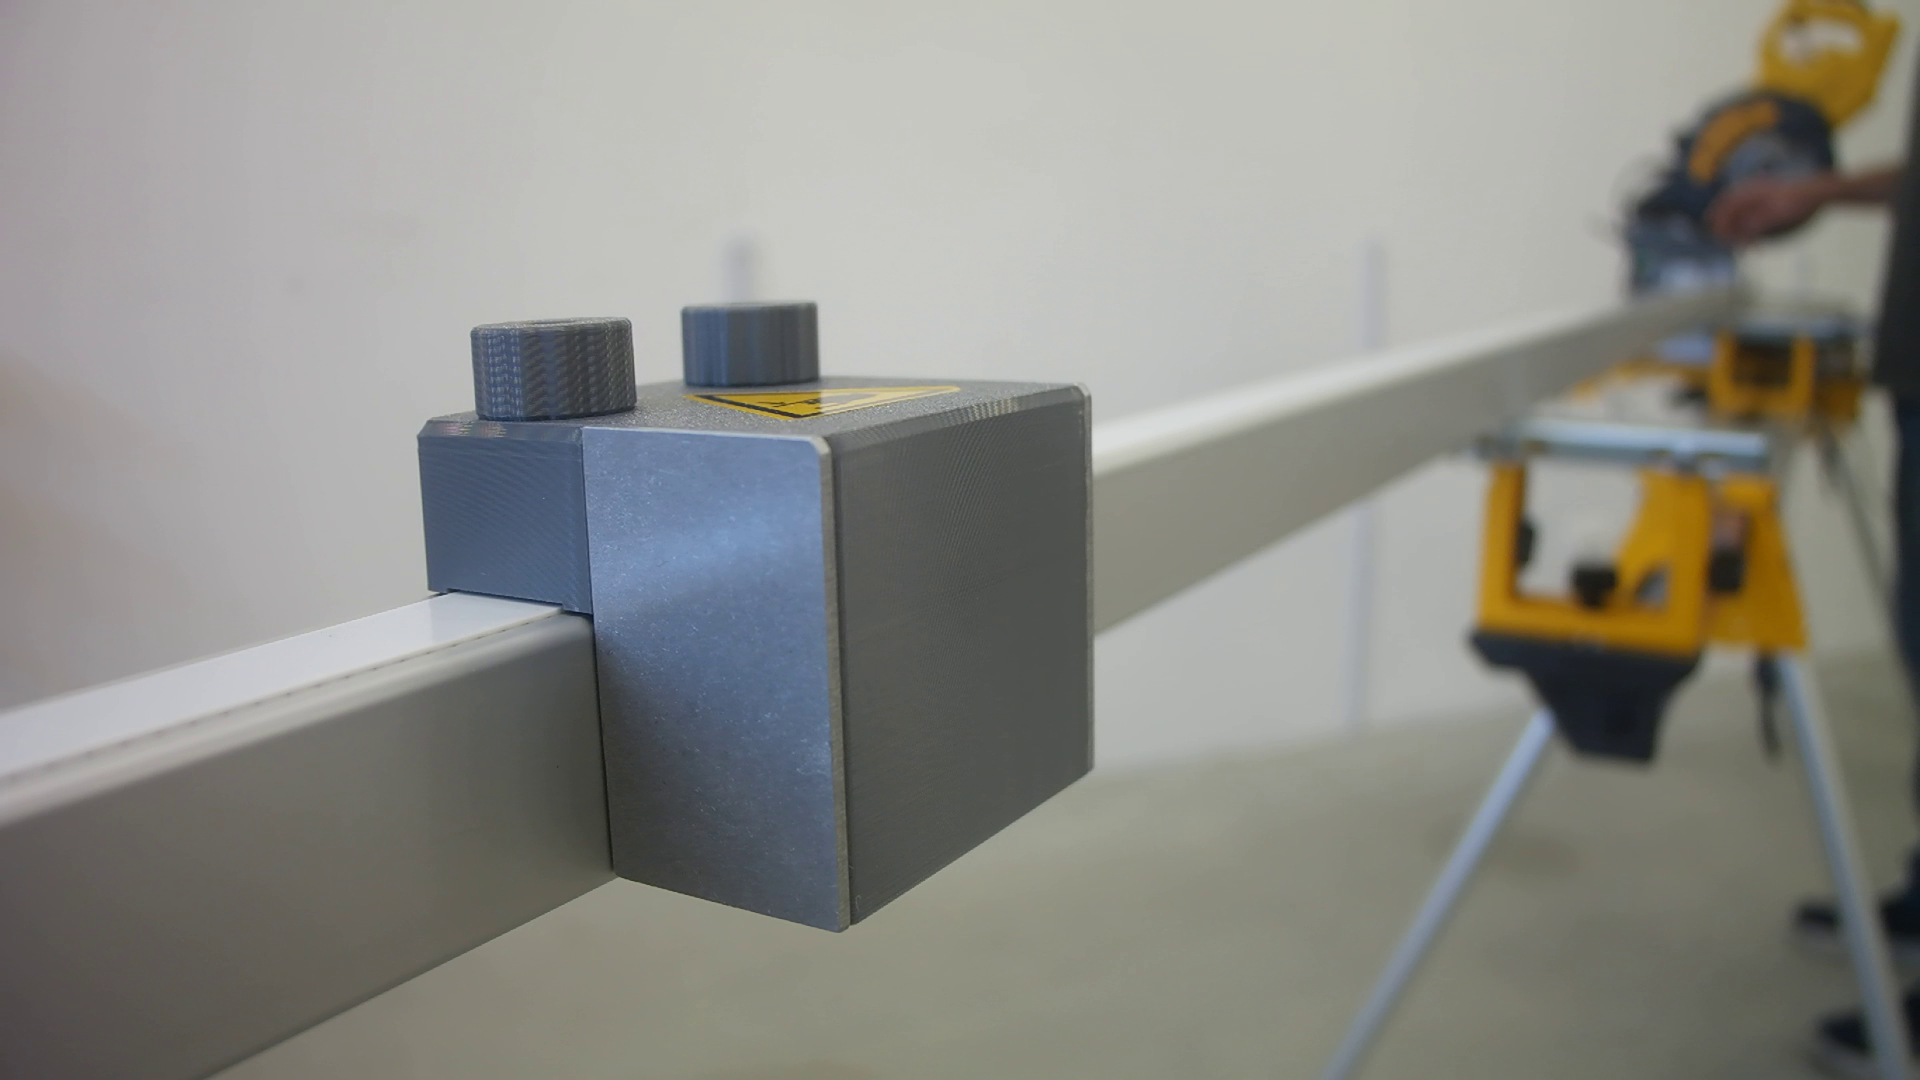
Attach the stop block to the Pedante miter saw fence by placing it on the rail and tightening the knobs. Make sure it moves freely along the rail and doesnt hit the DeWALT supports, miter saw or any knobs.
Connect and Power on Pedante
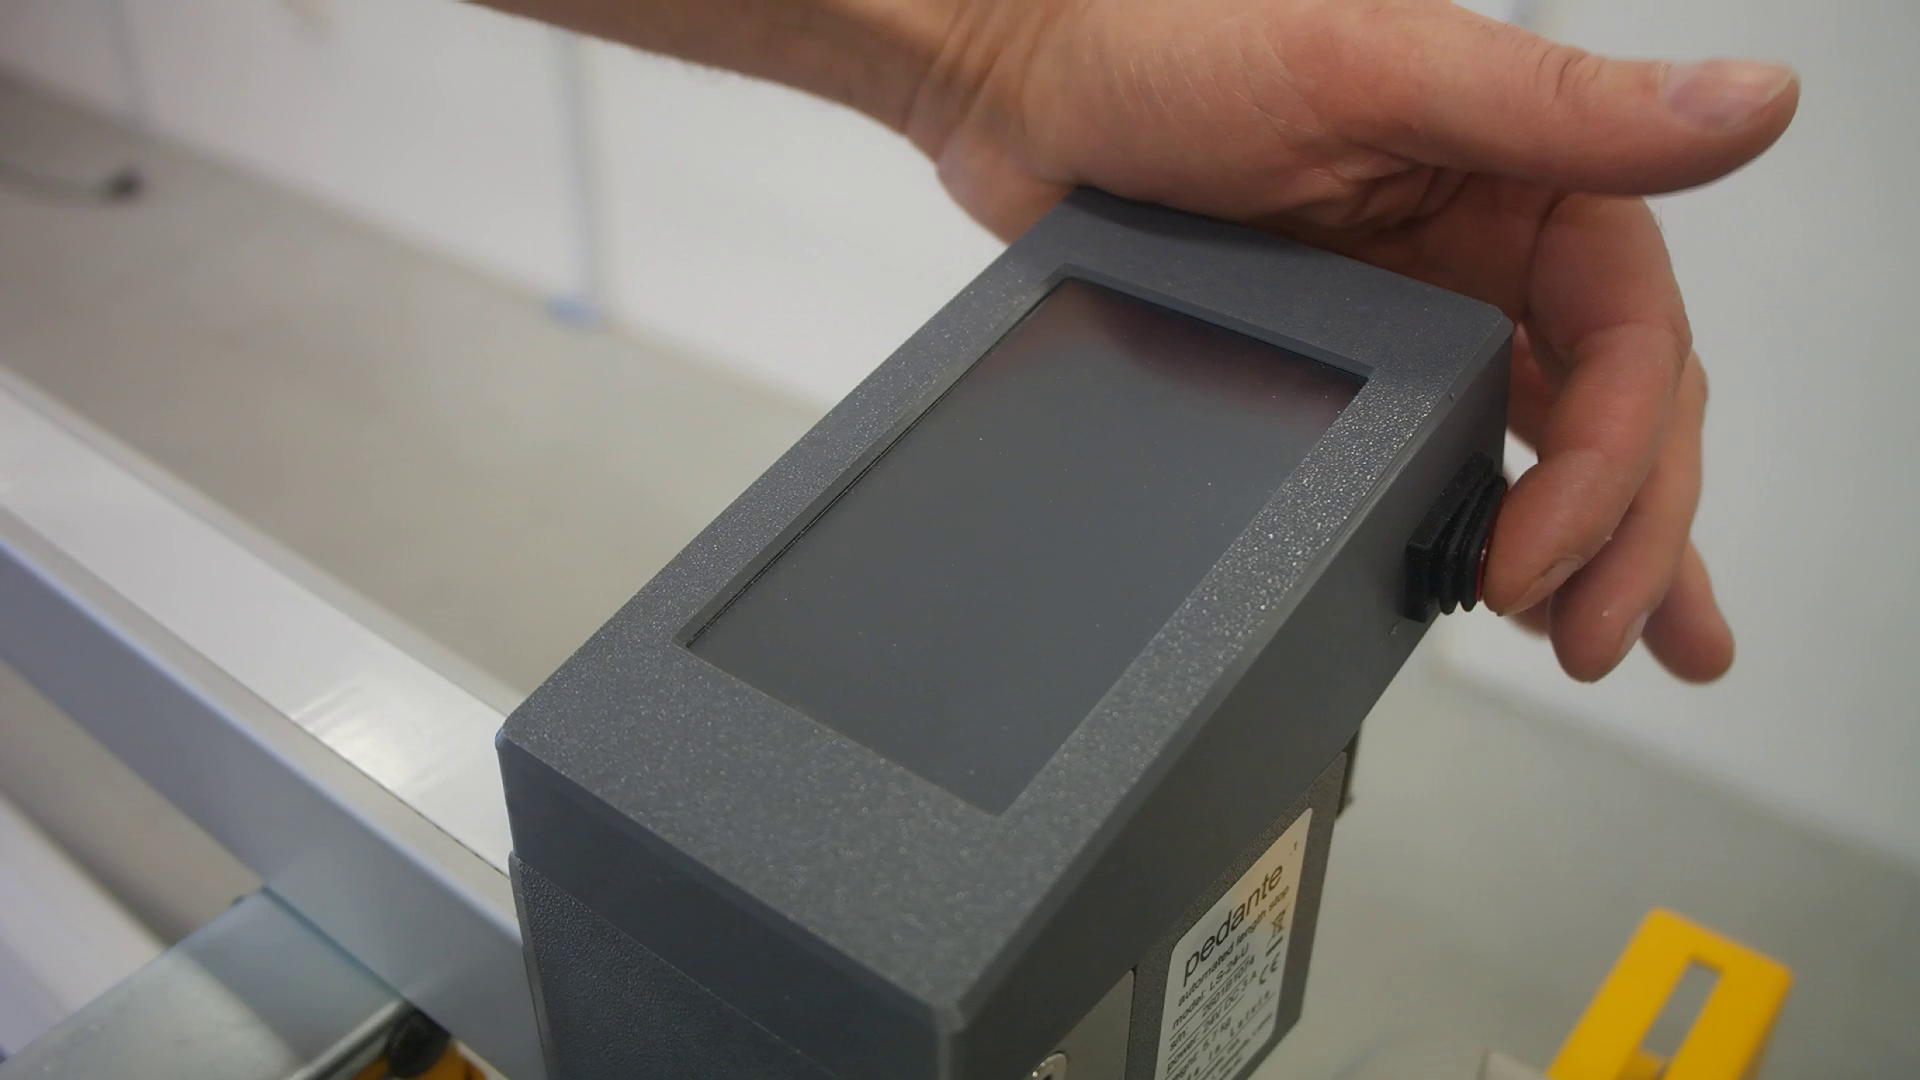
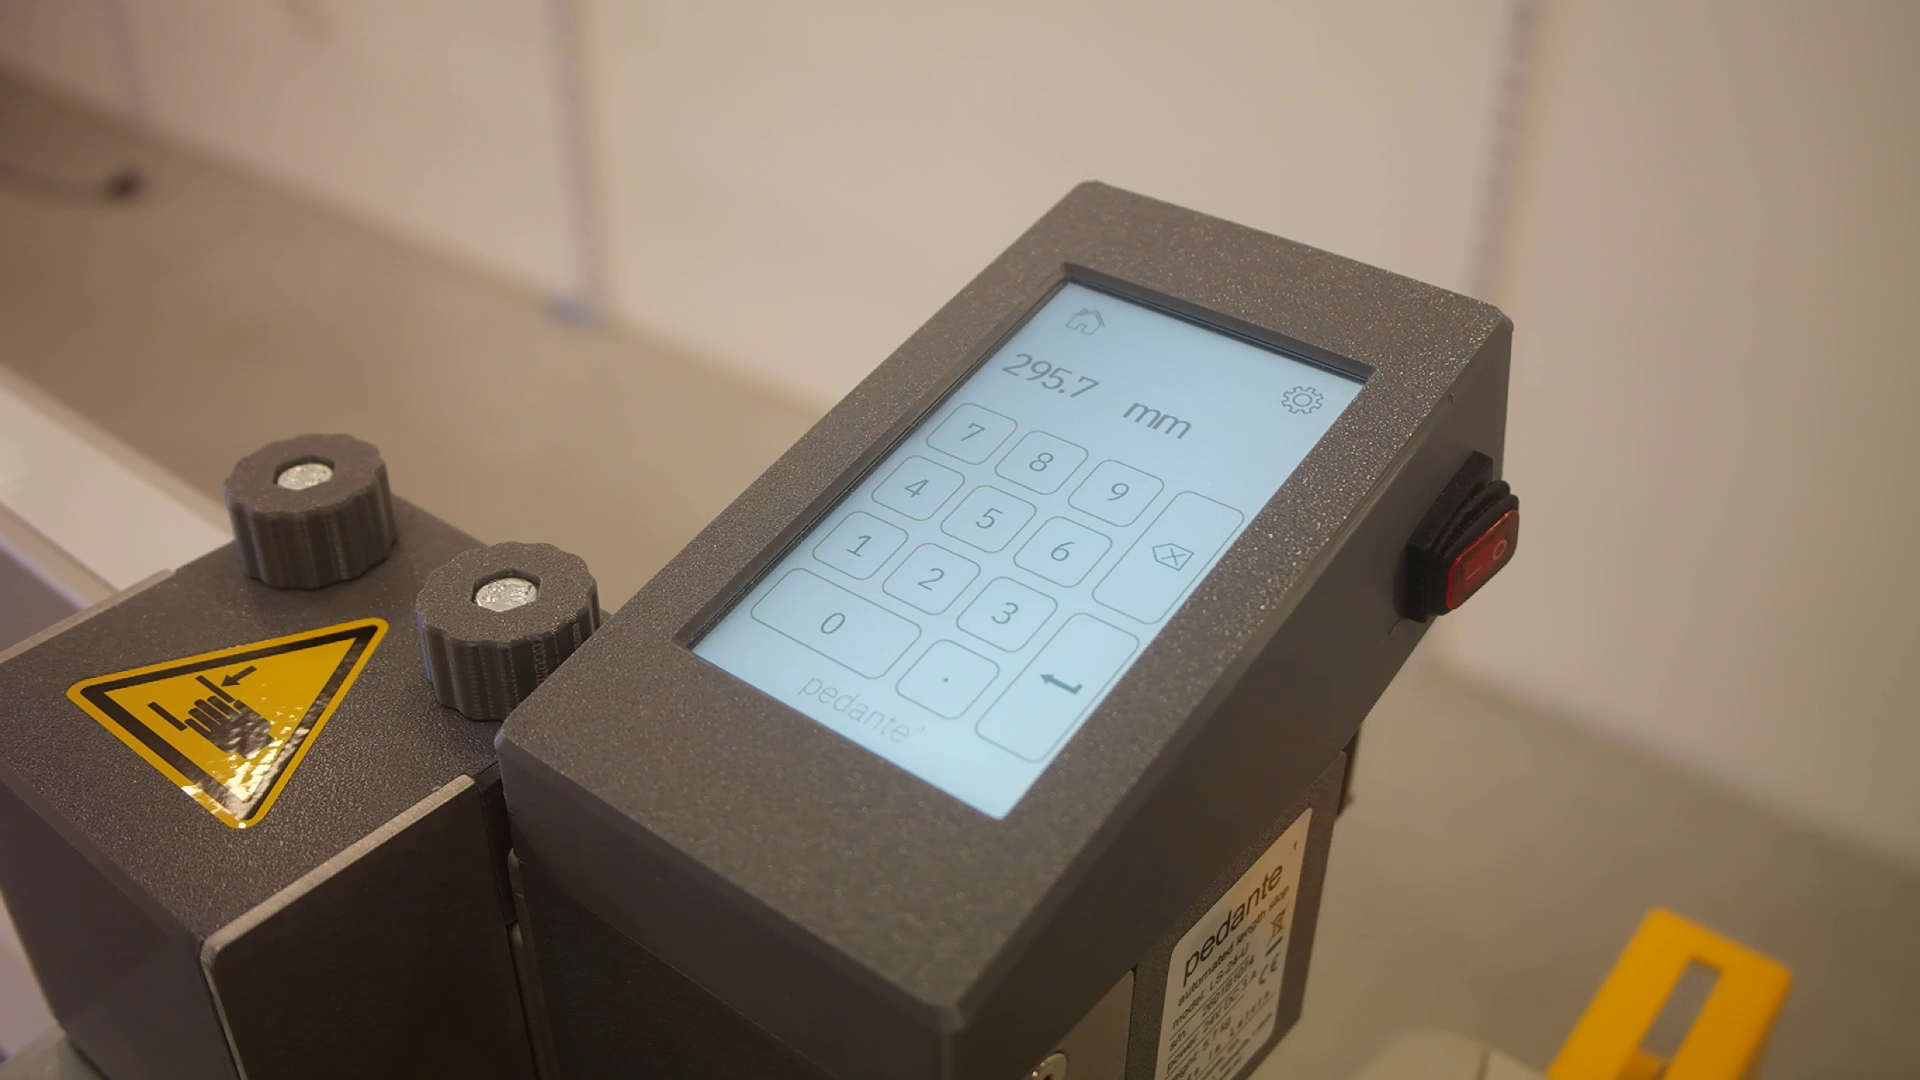
Plug in and turn on the Pedante control unit. Pedante should be installed on the intended side of the saw before the first run. If the system has already been set up on another side, the system will need to be reset.
The physical installation should be complete before turning it on and starting the first run. Make sure you followed all the steps in this Instructable carefully and nothing is loose, crooked, etc.
Done! (almost)
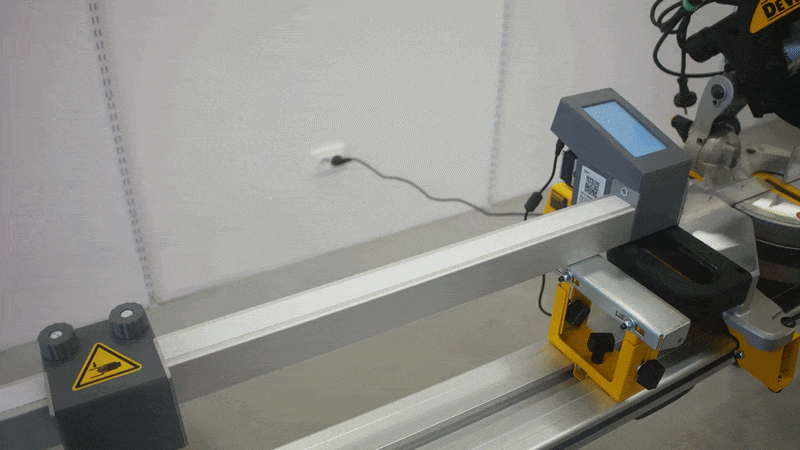
Congratulations! You have finished the installation.
Before starting work, Pedante has to run its self-setup program, during which it will automatically detect the working range and which side of the saw it is mounted on.
After the self-setup, Pedante needs to be calibrated. Do it according to the instructions in the manual (attached in the Supplies section), but the basic steps are this:
- Type in a test length on the touchscreen
- The stop block will move to this position
- Place a piece of scrap material against the saw fence and Pedante stop, then cut
- Measure the cut piece carefully
- Compare the real cut length to the length shown on the screen
- Press the calibration button (Gear icon)
- Enter the length of your cut piece
Now you can use your Pedante both inside and outside of the workshop.
The End