How to Password Protect Flash Drives in Windows 10
1614 Views, 2 Favorites, 0 Comments
How to Password Protect Flash Drives in Windows 10


With the increasing popularity of cloud storage such as google drive, one drive, and Dropbox, the popularity of flash drives is decreasing. However, there are still some advantages of flash drives over cloud storage. Some of these include accessing data in areas with no internet connectivity and are cost-effective. A lot of us store crucial confidential and personal data on these flash drives such as passwords, login information, banking information and so on. Many of us use these to backup important data. Imagine it falling into someone else’s hands. They would have access to everything. So, it’s a good idea to password protect the USB drives to protect the data if the drive ever gets lost or stolen.
There are many software on the internet which help to password protect the flash drives. This instructable makes use of a built-in feature in Windows 10 pro that helps password protect flash drives. BitLocker is a dedicated encryption tool that gets preinstalled with Win10. A list of third-party software can be found at https://www.digitalcitizen.life/5-tools-password-protect-your-folders-windows.
Warning : Back up the data in the flash drive to avoid data loss before proceeding to the following steps:
Supplies
1.
USB Drive
RECOMMENDATION: If possible, use a 3.0 USB drive for faster performance.
2. Windows 10 pro

Insert the flash drive and open ‘This PC’. Under ‘Devices and drivers’, right-click on the flash drive.
Click on ‘Turn on BitLocker’.
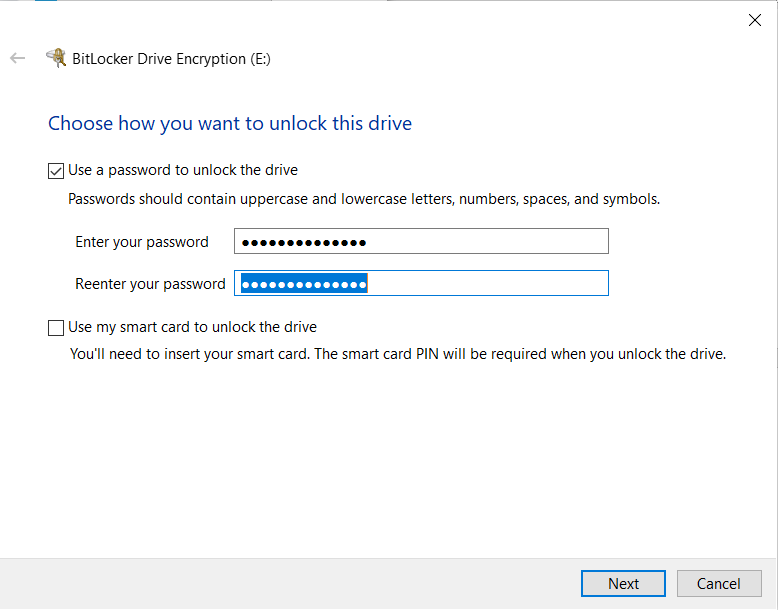
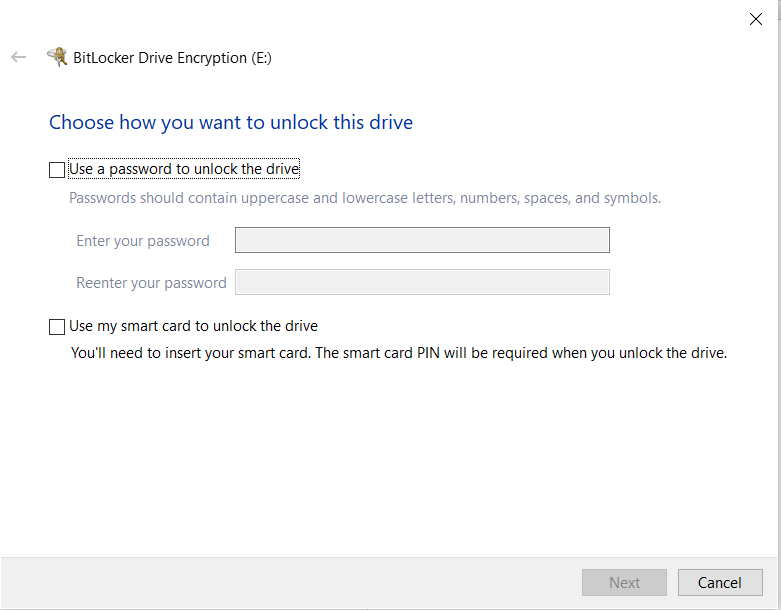
Select ‘Use a password to unlock the drive’ and set a password of a combination of uppercase and lowercase letters, numbers, spaces and symbols and hit next.
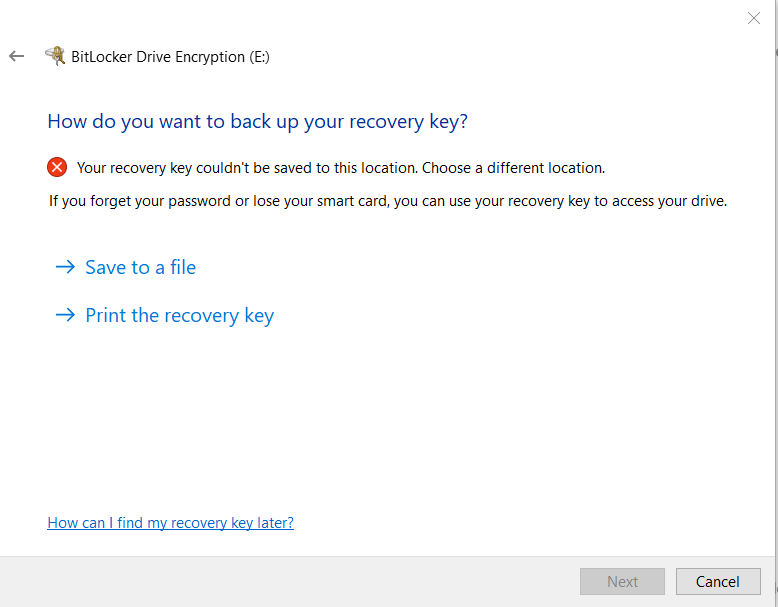
It prompts to back up the recovery key. You can either print the recovery key or save it to a file. For this instructable, I am going to save it. The recovery key is required if the password set is forgotten.

Save it anywhere you can access and keep it safe. For now, I am going to save it as a bit on my desktop.

After saving or printing the recovery file, click Next. Click on ‘Encrypt used disk space only’ and click Next.
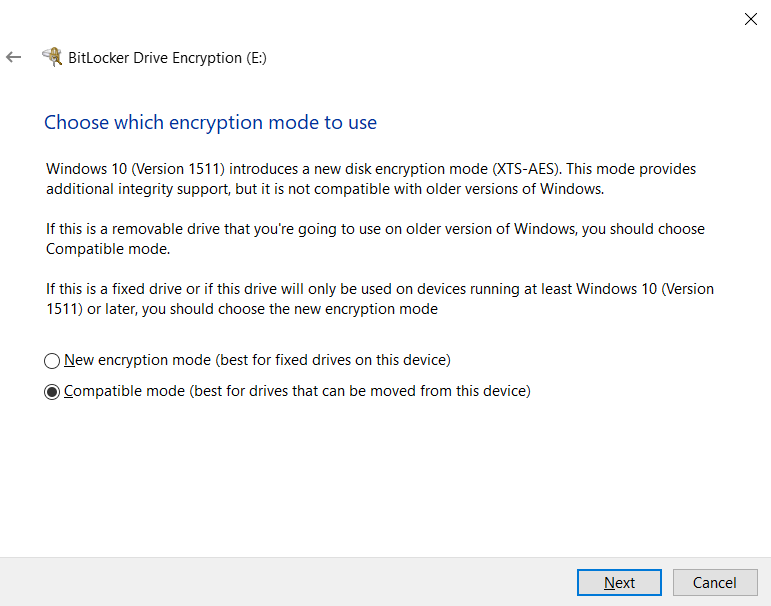
Click on ‘Compatible mode’ and click Next.
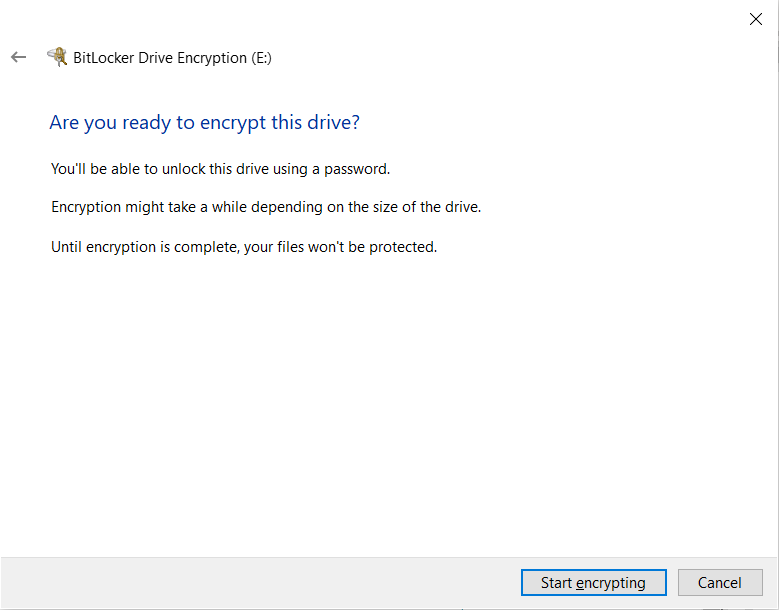
Click on ‘Start encrypting’.
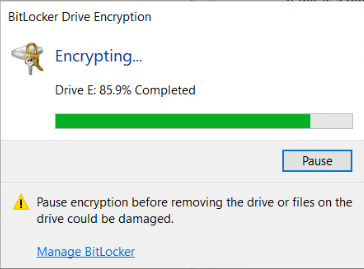
The following pops up. Wait until it completes. The time to completion differs with the file size in the flash drive and the version of the USB drive.
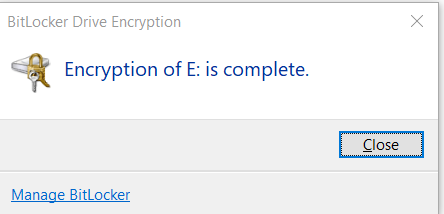
The following message is displayed once the process is complete. Now, the USB drive has been password protected.

To confirm, unplug the flash drive and reinsert it. It should prompt for the password as in the picture.
Now, you don’t have to worry about someone else having unauthorized access to your valuable information stored in your flash drive if it ever gets lost or stolen.
If you no longer wish to password protect your flash drive, see below instructions:
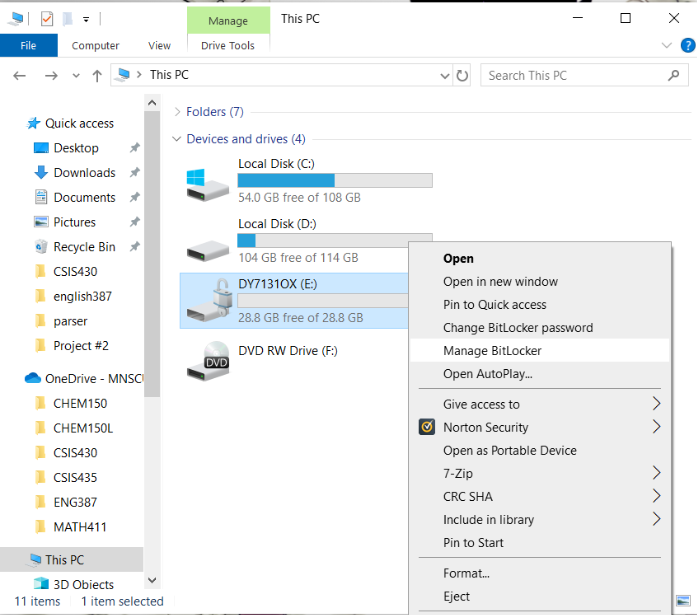
Follow step 2 from above and select ‘Manage Bitlocker’.
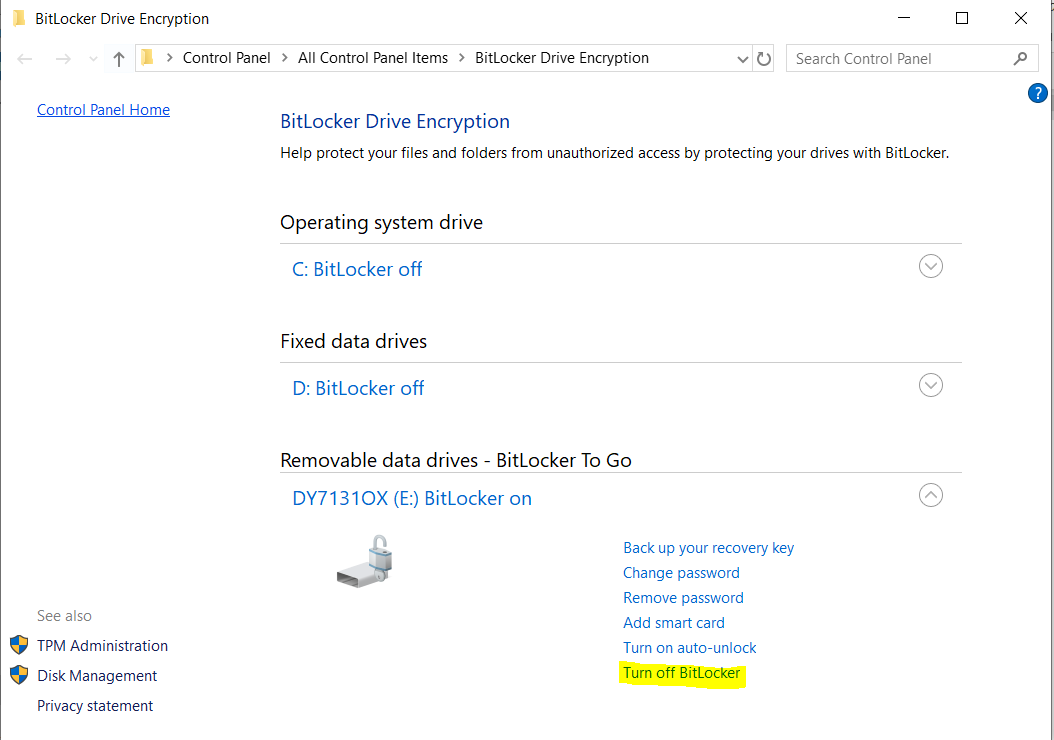
A new windows pops up as below and select ‘Turn off Bitlocker’.

Again, a new window pops up. Click on ‘Turn off Bitlocker’.
A window similar to step 10 pops up. Wait until it completes.
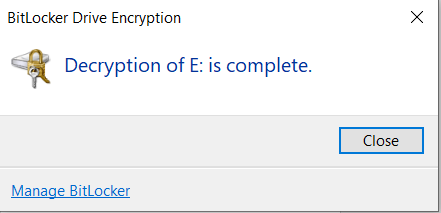
Click on ‘Close’ and now, your USB drive no longer requires a password.
Tip: If you forgot the password and lost the recovery key as well, you may still be able to use the flash drive by formatting it. Formatting it will remove the password. However, you won’t be able to recover the data that was on the drive.