How to Rotate Mounting Holes of PA-QR1 Actuators
by Progressive Automations in Workshop > Repair
28 Views, 0 Favorites, 0 Comments
How to Rotate Mounting Holes of PA-QR1 Actuators
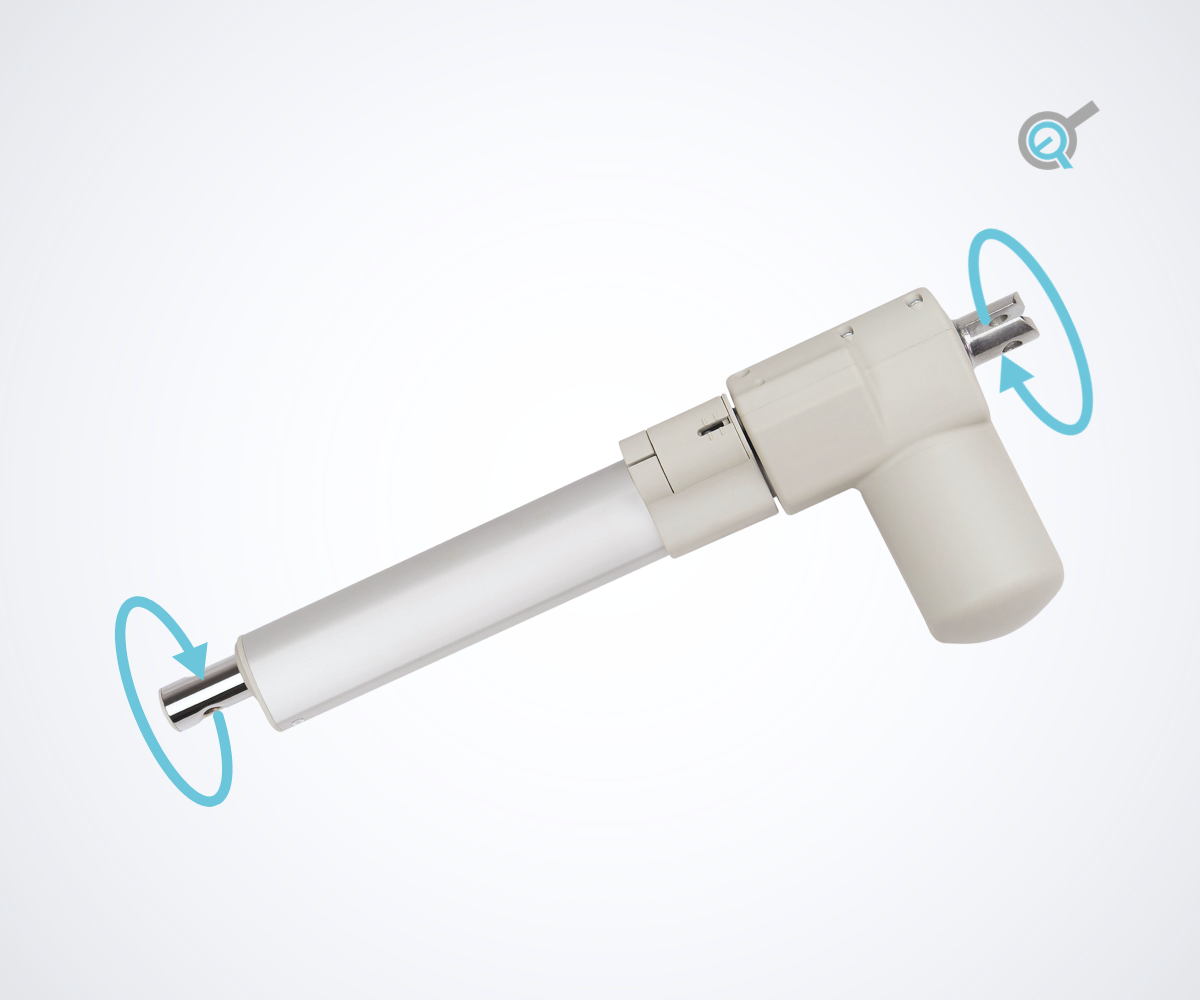
In some electric actuator installations, the position of the motor housing, cable exit, or mounting holes can affect how easily the actuator fits into a project. This is especially common in compact assemblies where side-mounted motors or cables may interfere with surrounding frames, brackets, or enclosure walls. If your project requires a stock PA-QR1 actuator and you are comfortable making this adjustment yourself, this step-by-step guide explains how to rotate the mounting holes on our select models. Please note that rotating the actuator mounting holes may affect its ingress protection rating and should only be done when environmental sealing is not critical to the application.
Supplies
-Actuators
-Vice
-Phillips screwdriver
-Torx screwdriver
Securing Into a Vice
We will begin with the front mounting hole rotation. Using a piece of leather or something similar to protect the shaft housing from the vice plates, clamp the shaft housing with just enough pressure to prevent it from slipping during the following steps.
Screwdriver Insertion
Place a screwdriver into the stroke mounting hole.
Rotational Torque
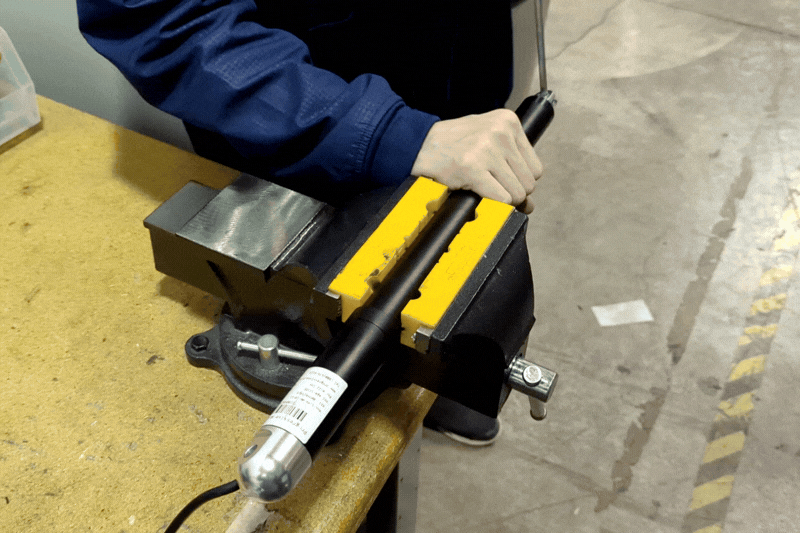
Rotate the screwdriver counterclockwise to the 90° position. If this is the first-time rotating the mounting hole, some extra torque may be required.
Warning: Do not rotate mounting holes counterclockwise more than 1 turn.
Screwdriver Removal
Remove the screwdriver, and your stroke mounting hole rotation is complete.
Removing Actuator Case Screws
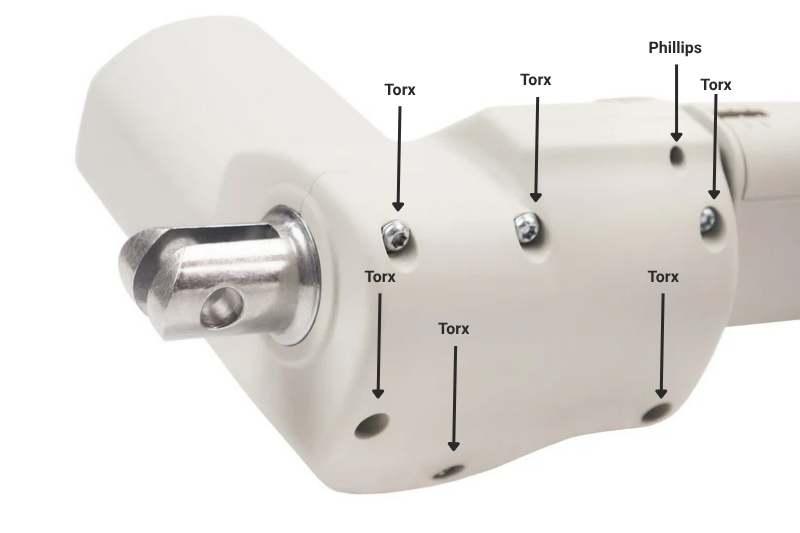
The next phase is rotating the rear mounting hole. Remove the Actuator Case Torx Screws and the Actuator Case Small Phillips Screw with their appropriate screwdrivers.
Opening Actuator Bottom Case
Open Actuator Bottom Case (Part 1) as seen on page 9 of our datasheet linked here.
Mounting Bracket Rotation
Rotate the Mounting Bracket (Part 10) 90° counterclockwise.
Reinserting Actuator Bottom Case
Place the Actuator Bottom Case back into position.
Securing Actuator Case Screws
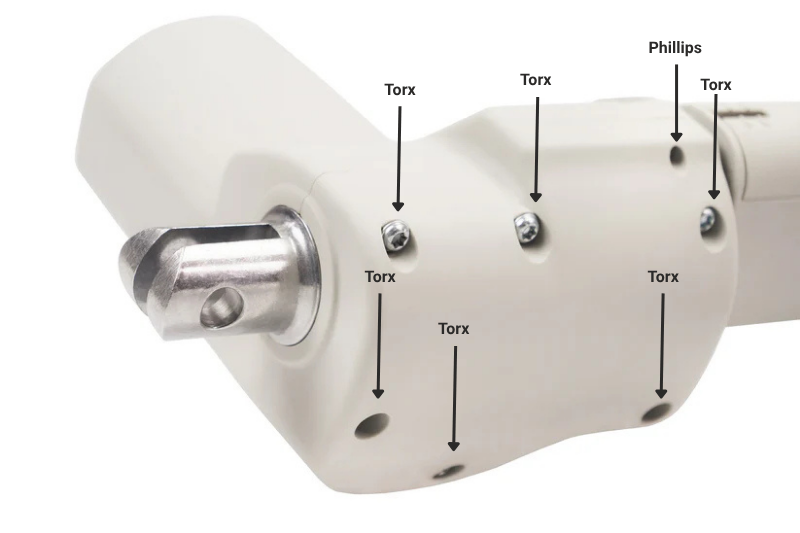
Reinsert and tighten all the Actuator Case Torx Screws and Actuator Case Small Phillips Screws with their appropriate screwdrivers. Rotation complete.
In Summary
To summarize, many actuators may need their mounting holes rotated for certain installation conditions and space requirements. By using a few tools and spending some time to follow our step-by-step guides, you too can rotate the mounting holes of an actuator to the required positions.
If you require further assistance or have more questions on how to rotate actuator mounting holes, you may call us at 1-800-676-6123 or email us at sales@progressiveautomations.com.