How to Sculpt a Wooden Handle Knife
by lesPtitesMainsdeLucile in Workshop > Knives
2812 Views, 31 Favorites, 0 Comments
How to Sculpt a Wooden Handle Knife

An Instructables to personalize the handle of your knife. And thus make this basic object unique, original and personal.
Estimated time: 6-10 hours
This is a nice project if you want to start woodworking or if you are looking for a quick and original project! It can be a very personal gift for someone who loves spending time in nature.
Supplies

- Knife with a wooden handle
- Sandpaper sheets with a medium grit (80 and 120)
- Fine files: at least a flat one and a triangular one
- String
- Pliers
- Paper towels
- Adhesive tape
- Oil for the finish
Regarding the choice of knife, I particularly like working with French Opinel-branded pocket knives. It’s a simple, practical and inexpensive knife with a classic look. For this Instructables, I choose the classic model N°08 (i.e. a handle length of approximately 11 cm). Opinel makes a number of different products that you could use, like a kitchen knife, a mushroom picking knife, or even pruning shears. Alternatively you can use any knife with a wooden handle.
Protect Your Blade


The first step is to prepare your knife. Protect any part that you don’t want to get scratched. And more importantly cover the edge so that you can work safely.
With Opinel in particular, to ensure a clean end result, remove the rotating safety band; this will prevent scratches. To do this, carefully and gently open the ring with pliers and push it up.
It is then essential to protect the blade, this will prevent you from cutting yourself. Wrap paper towels around the edge of the blade and tape them in place.
Remove the Varnish

This step is optional but recommended. Without varnish it will be a little easier to draw on the handle.
Cut out a piece of 80-grit sandpaper and rub it over the entire handle. Try to make movements parallel to the wood fibers and always in the same direction. Also try to apply even pressure to each pass.
Draw the Pattern


For this knife I wanted to imitate the look of rope.
To achieve the visual effect of a rope, I recommend using string to draw consistent curves.
Depending on the size of your knife, the number of loops will change. For this knife, I find that 4 strands, each going around the knife twice, looks the best.
File a small notch with a triangular file as shown in the photos. This will allow you to put the threads on the notch so that they stay in place.
Tape the threads on the side of the blade at equal distances around the knife. Then wrap the string as much as you want. The notch allows you to hold the string in place while you tape this second end of the string.
This step is very important, take the time to get a result that you really like (it’s a “measure twice, cut once” situation). Don't hesitate to redo this step multiple times until it looks right
Once you are convinced by the look, take a pencil and draw lines over the strings. Then remove the strings and the tape that holds them.
File the Notch
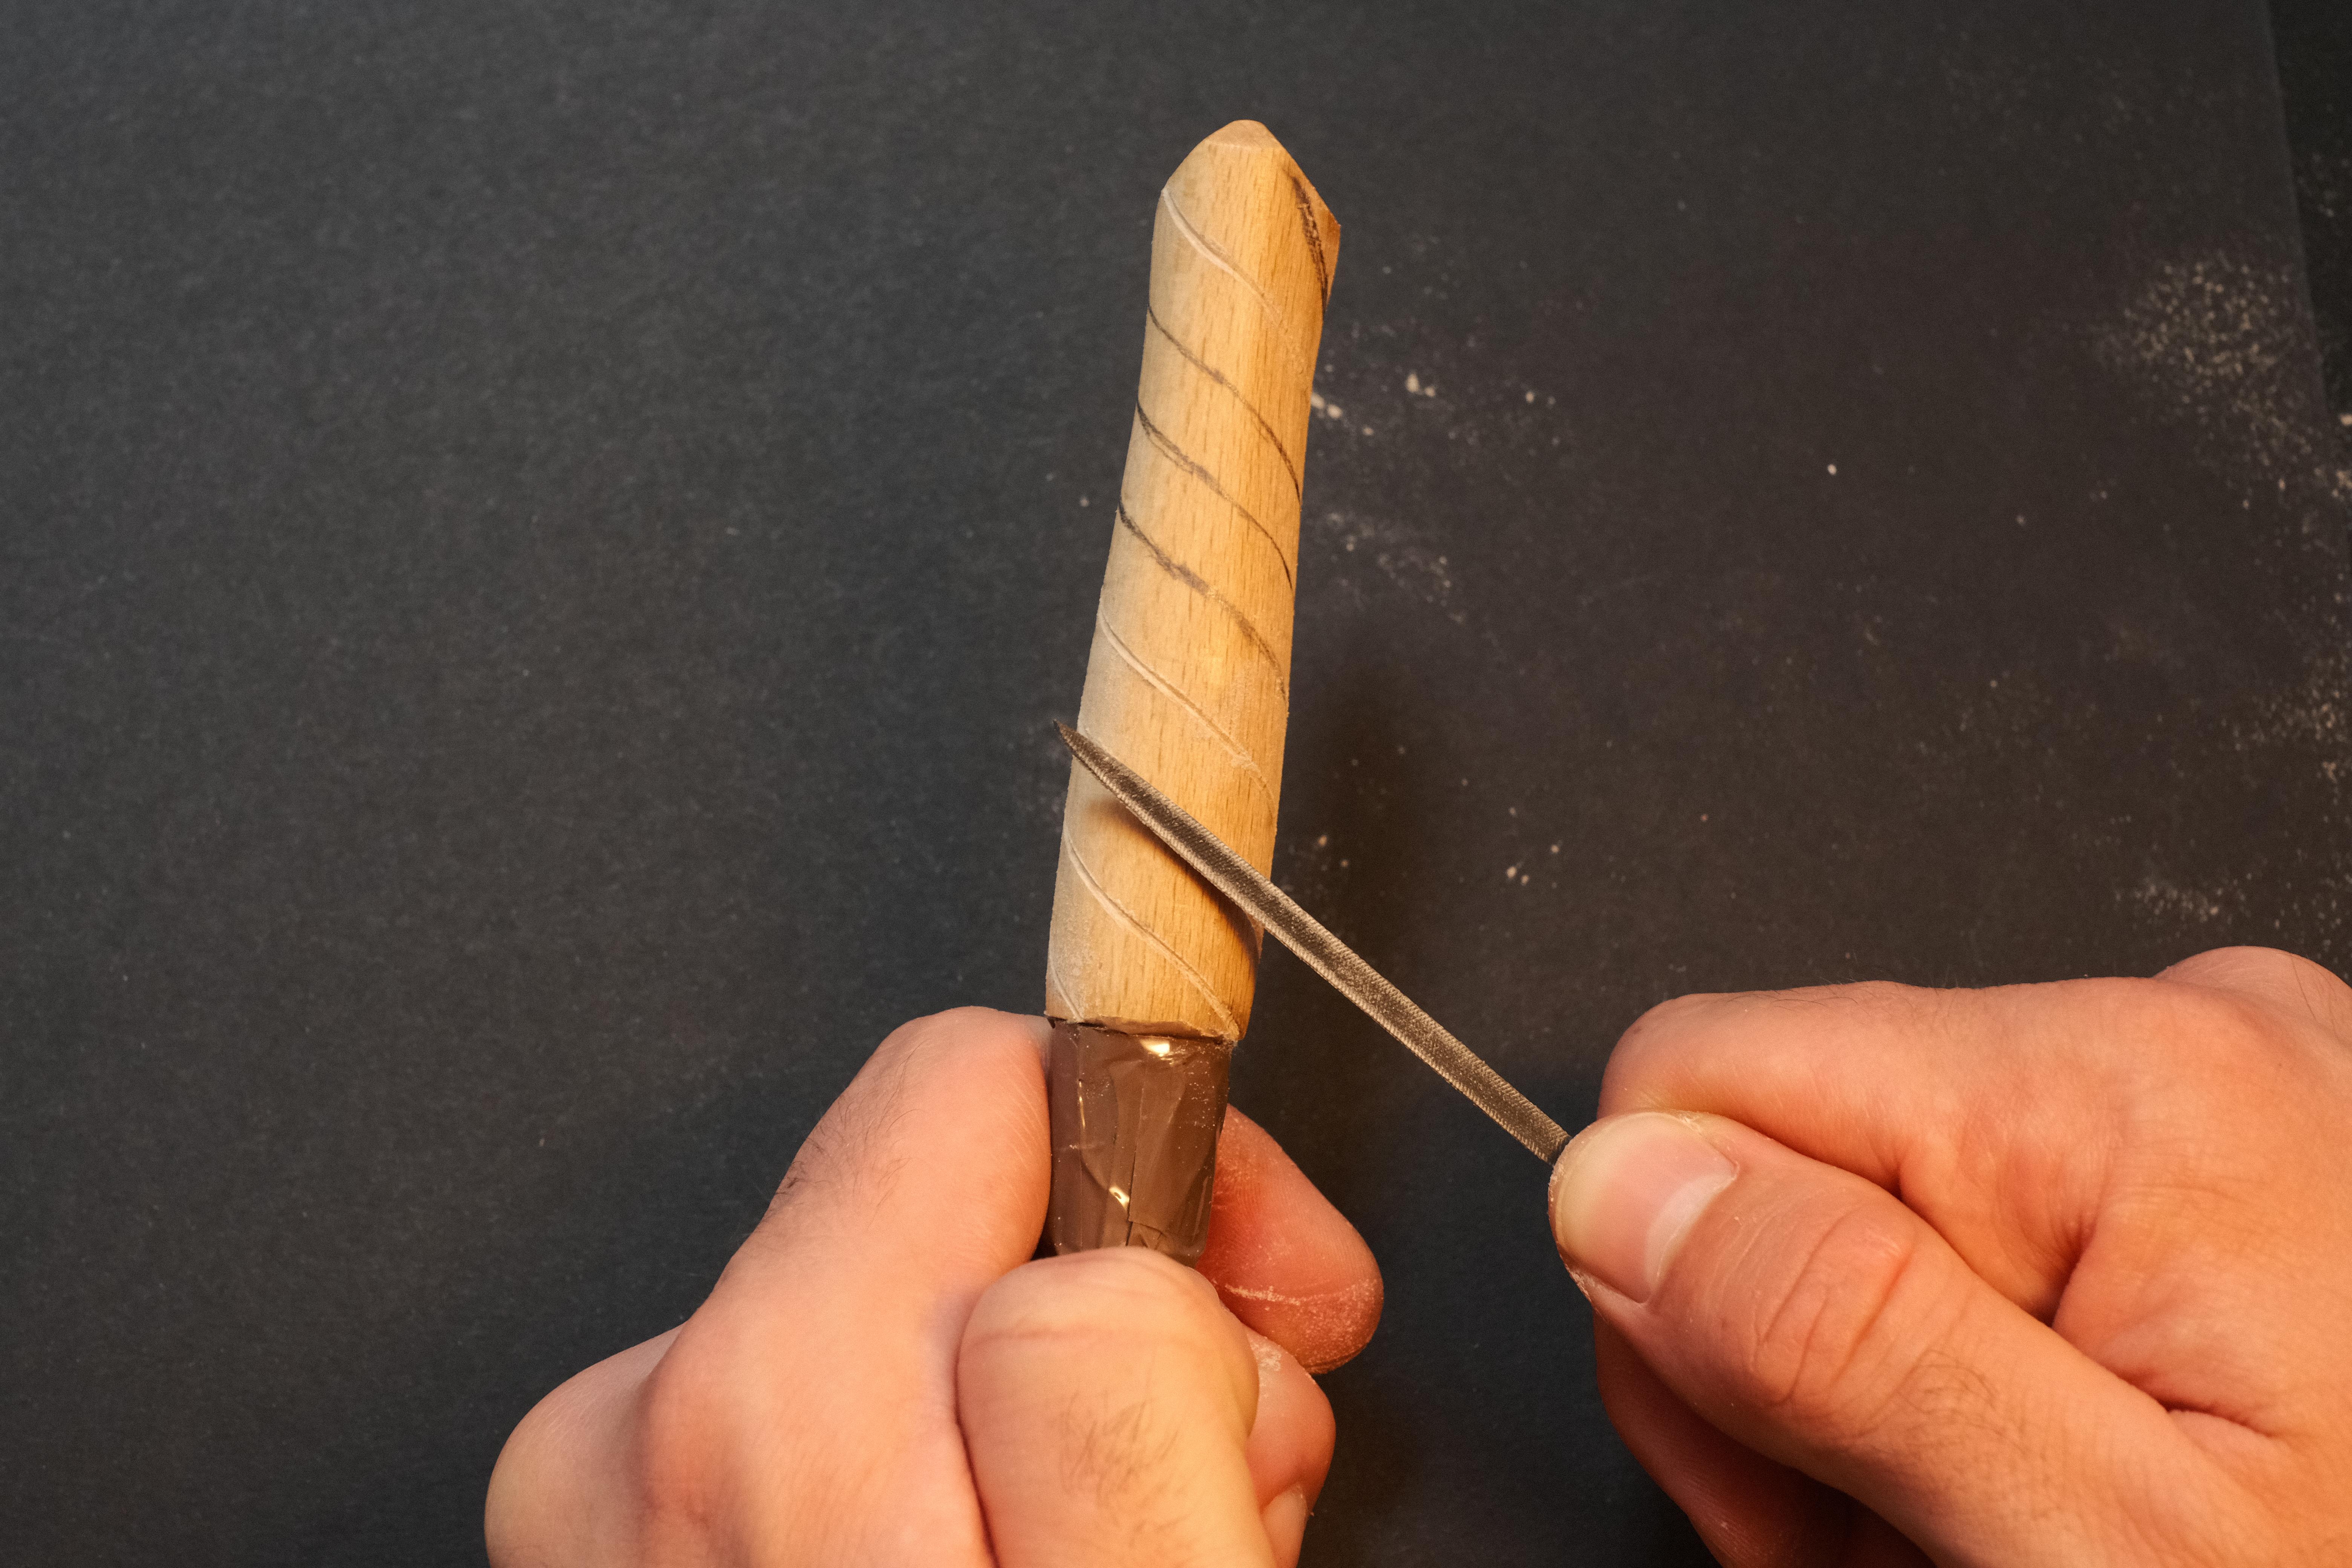


With a triangular file, go over the lines. File until you have made a notch of the size you want. Here I made about 2 mm.
Remove sawdust regularly to see your work clearly.
When your file gets dirty, you can use a metal brush or a needle to clean it. The goal is to remove sawdust from the file grooves. Remember that files only cut on the push stroke. Don’t try to file on the pull, this will only clog your file faster.
Shaping


Once the V grooves are deep enough, you can start rounding them. Use the flat file to chamfer the edges at 45 degrees. Then smooth out the shape, making it almost round.
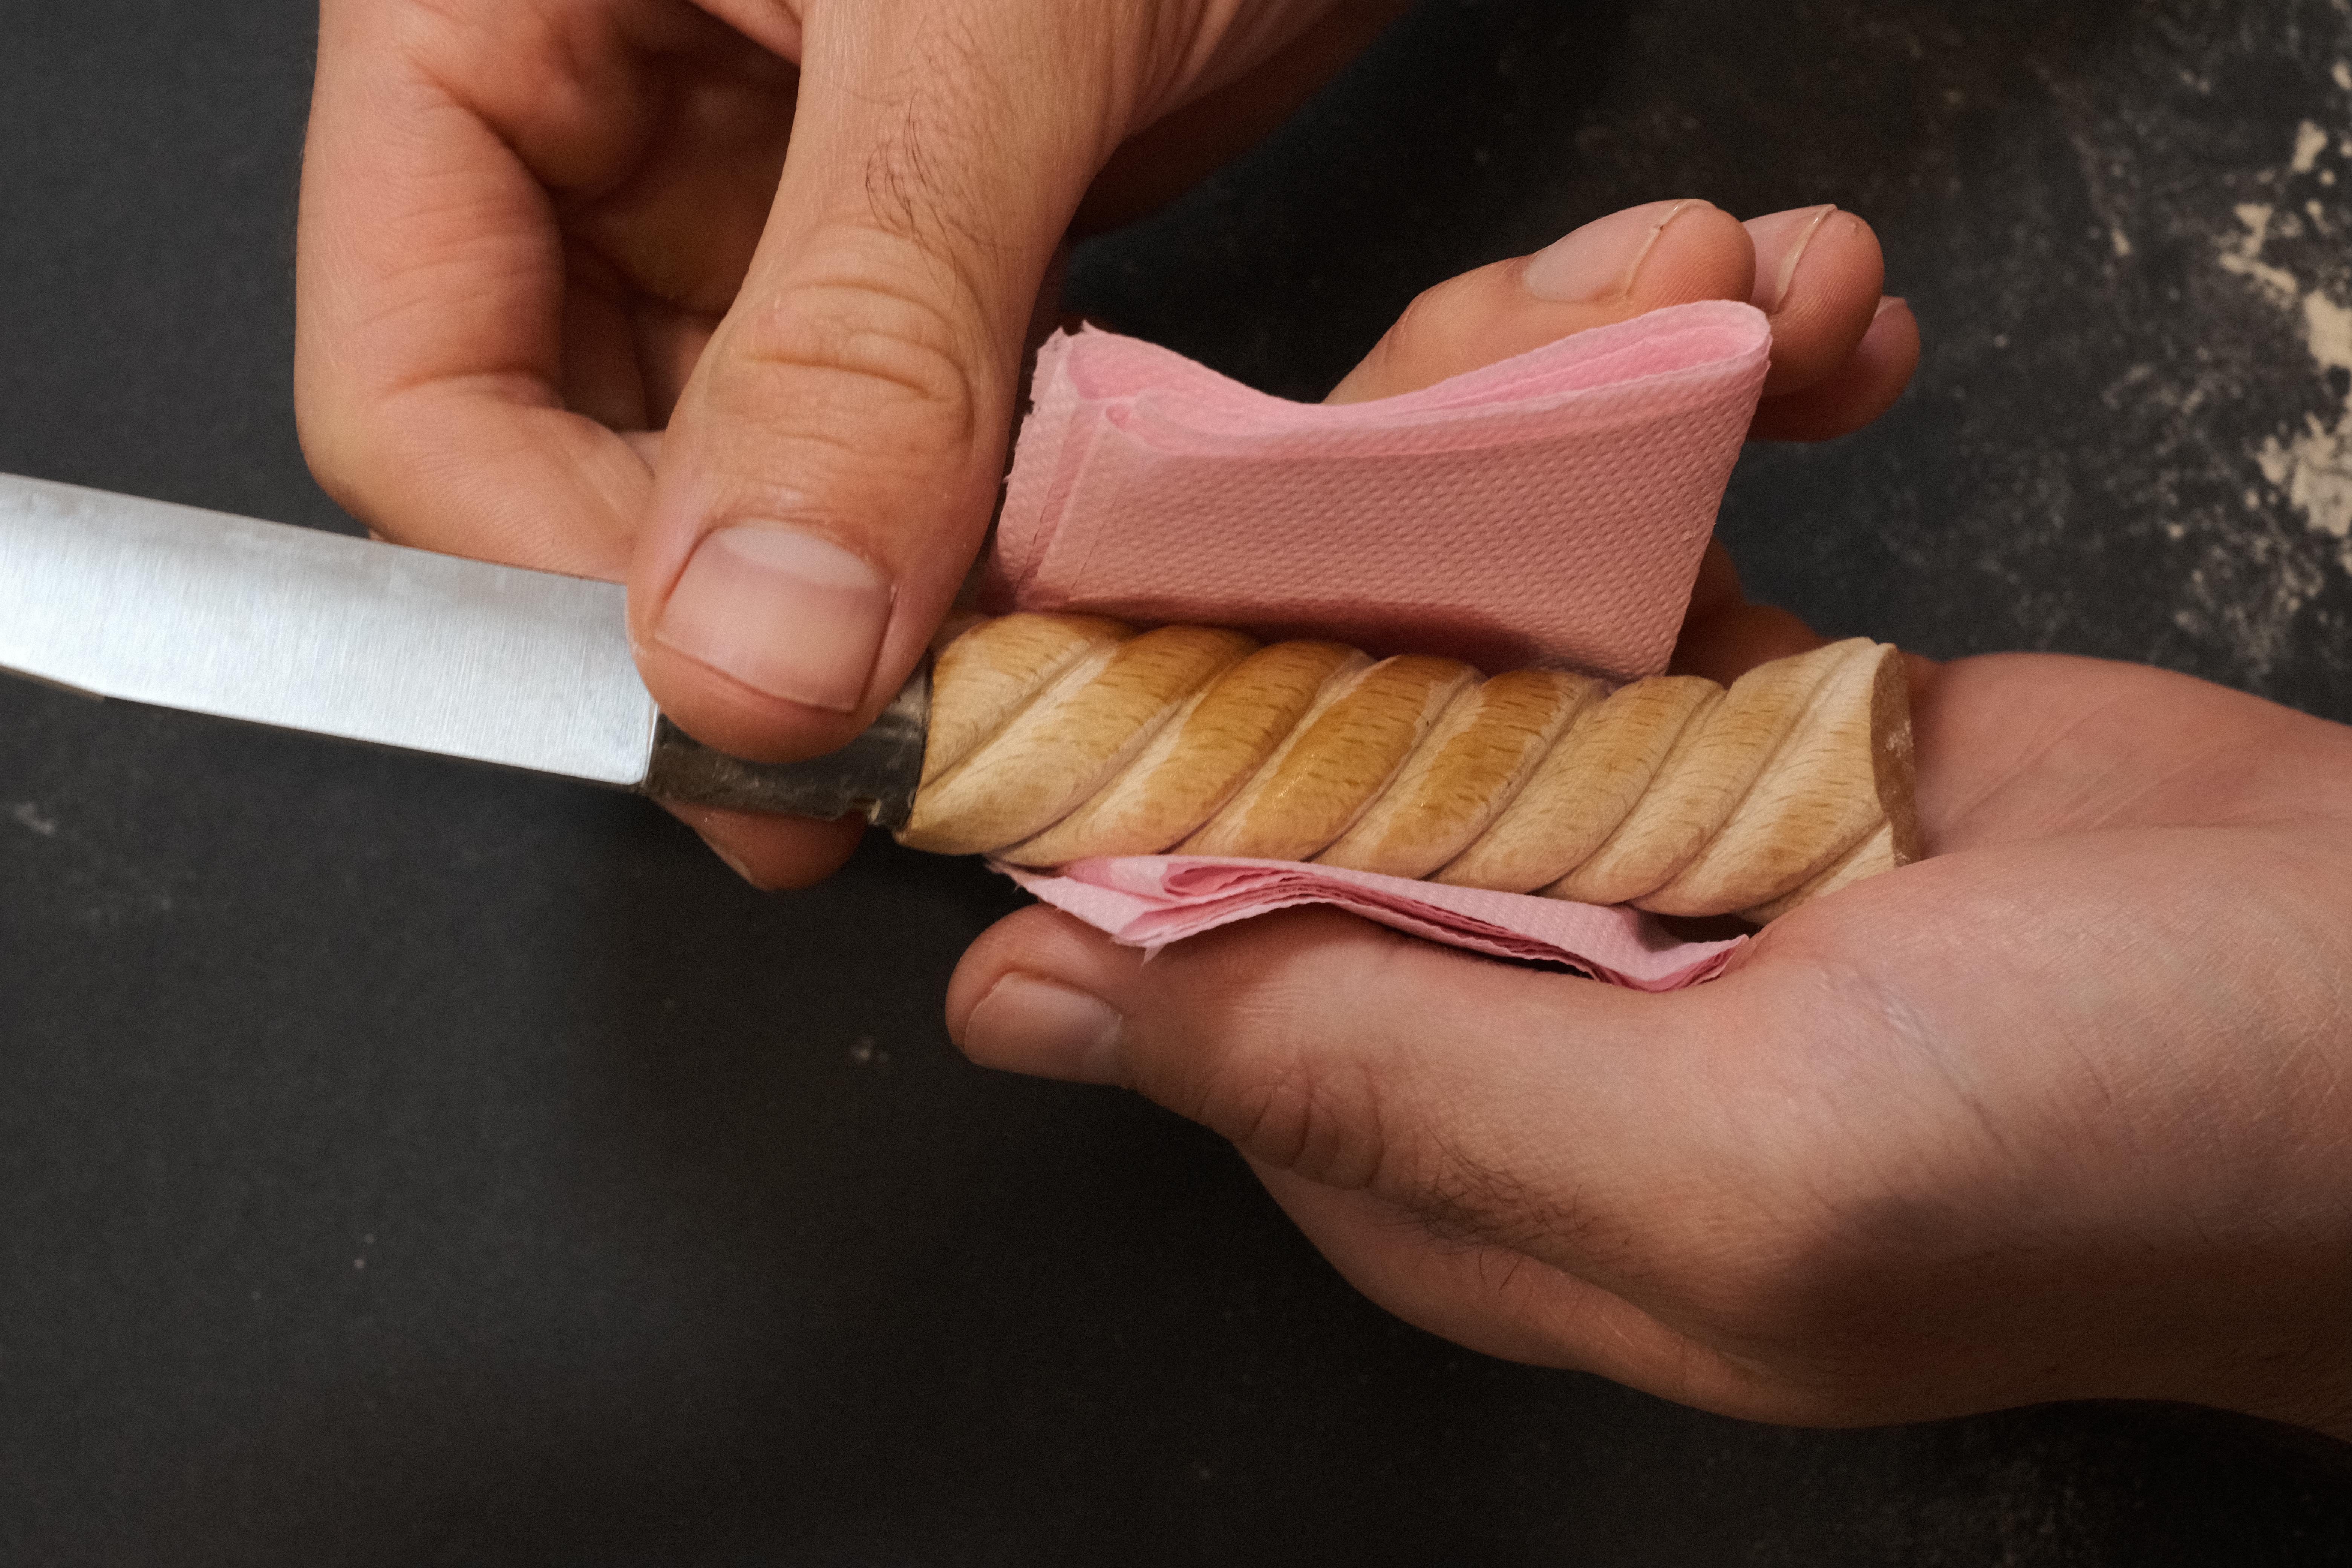
Sand to Remove Defects


Cut out a piece of 120 grit sandpaper. Go over all the curves to smooth out the shape.. After sanding there should be no flat spots or file marks. Take the time to look at your knife carefully and sand what is necessary.
Unlike the file, using sandpaper you can make back and forth movements.
Pro tip to prevent the sandpaper from tearing: put duct tape on the back of the paper.
Finishing Stage

The last step is to remove the tape of the blade and protect the wood.
To protect the wood, apply a few drops of oil to a paper towel and rub the handle with it so that the wood absorbs the oil. Remember to go into all the notches.
If you prefer you can also apply varnish.
Now you can clip the safety band back on and admire the result.
Final Result
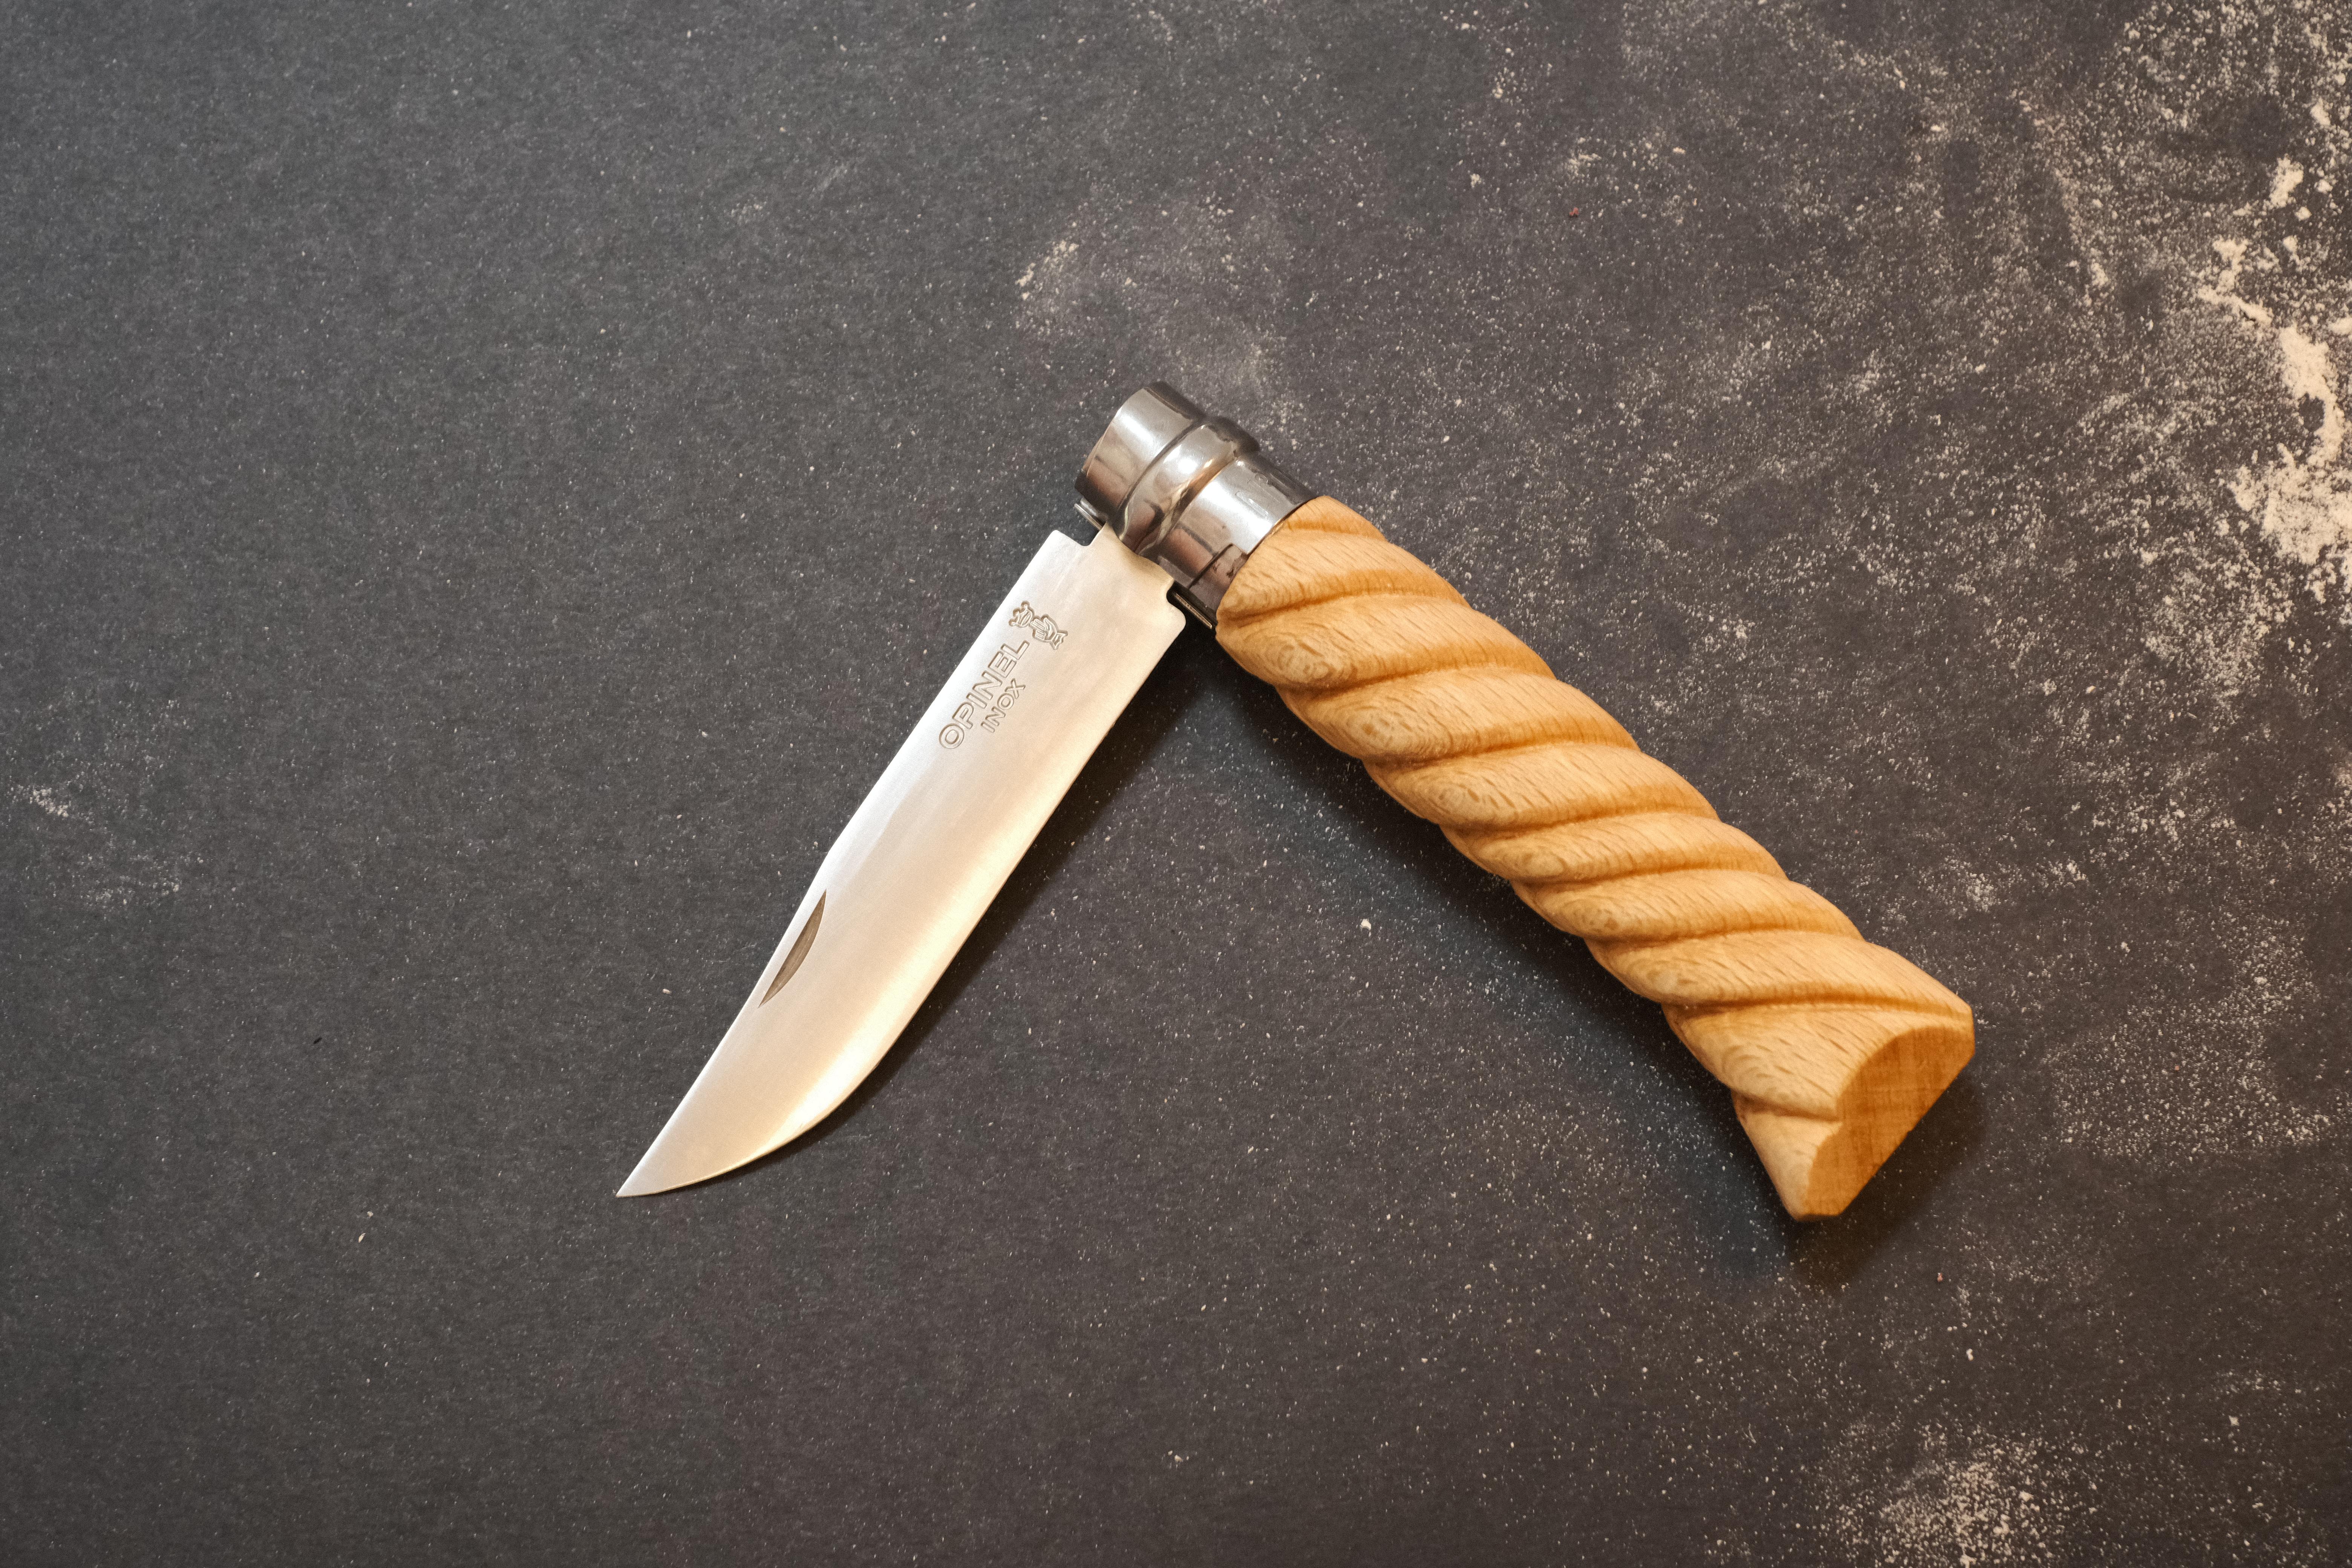
Now you can clip the safety band back on and admire the result.
You have sculpting your wooden handle knife !
Try Other Ways to Customize Your Blade

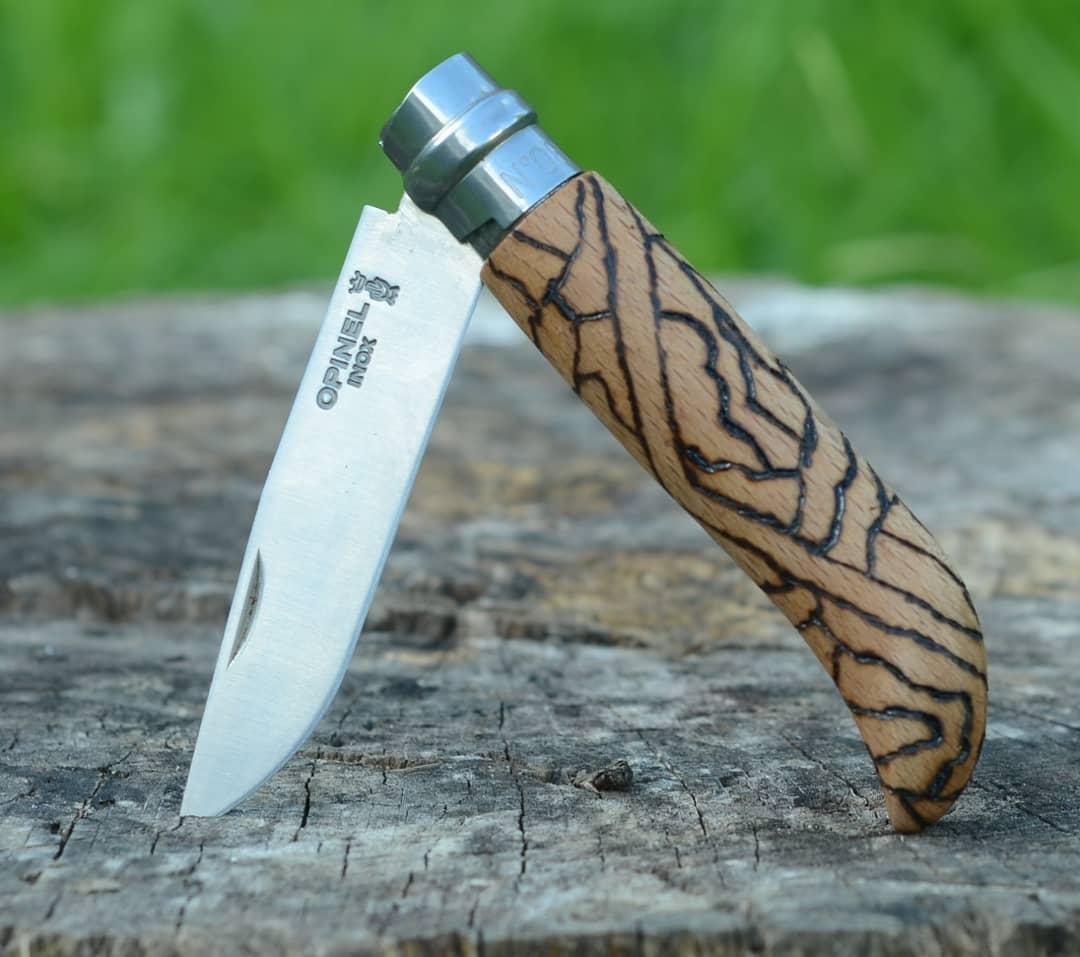
Here is another Opinel I sculpted. In this case, I made three extra customizations: notches on the spine, drawing on the blade and adding a lanyard with a ring.
- Notches on the back of the blade were made with a Dremel.
- Drawings were possible because the blade is carbon steel (not stainless steel). To make marks on carbon steel, just use something acidic like vinegar or mustard. On a clean blade, leave it for a few moments with the desired pattern, clean it thoroughly and apply oil to prevent rust.
- To add the lanyard, make a hole through the knife. Using a drill press makes this easier and more precise. The location of the hole is very important because it must not stop the knife blade from going into the handle.
On this knife I decided to make two and half turns with four strings. That's why the rope looks thinner.
Try Other Pattern


This knife is sculpted into an octopus tentacle. It was made for a friend that works at a fish market. The entire handle has been sanded with a dremel, except for the circles along the slot, to get the octopus suction cup look. The shape of the handle has also been worked on to become increasingly slim.
I sculpted this one out of a N°12 Opinel so the handle is 16cm in length.
Try Other Techniques

To customize the handle of your tools, you don't have to limit yourself to filing and sanding. For these two new customizations, I chose to play with heat.
The first one was done with a soldering iron. A pyrographer can also be used.
The second one was burned. The holes were made first with a Dremel, then the knife was passed under the flame of the blowtorch. The flame does not fit into the small holes, which gives this appearance.