How to Use the Instructables Editor
by instructables in Circuits > Websites
62640 Views, 144 Favorites, 0 Comments
How to Use the Instructables Editor

In the last few years we've made several improvements to the editor we think you’ll like, including a simplified layout and improved text and image editing.
Here is an updated guide for using the editor from start to finish.
Start a New Instructable

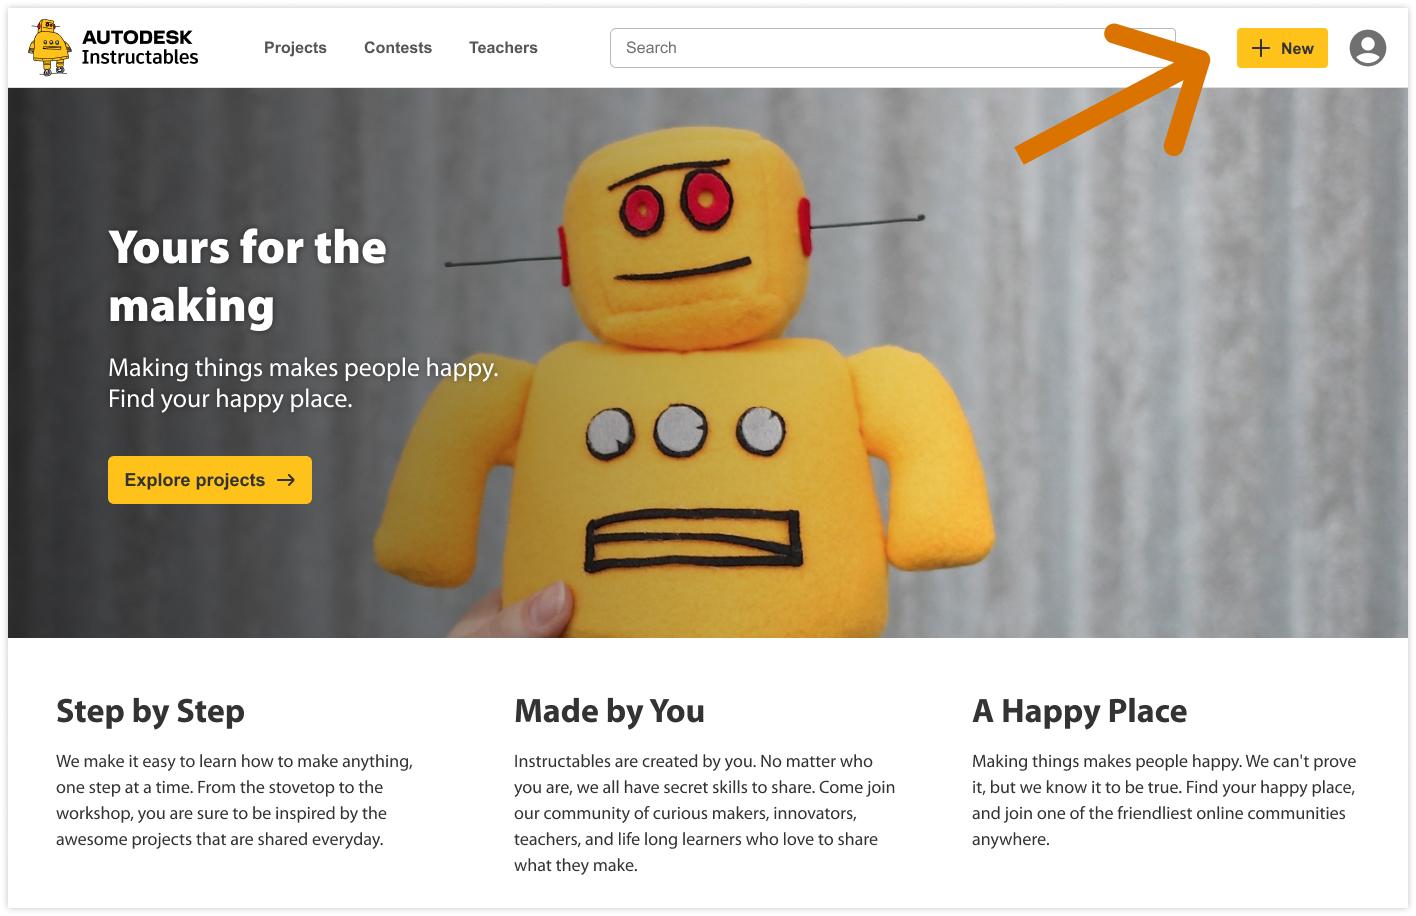
To start a new Instructable, log in and then click on the yellow "New" button in the top navigation menu.
You need to be a member of Instructables to author projects. If you aren't already a member, sign up here! It’s completely free to join our community.
Name & Categorize

Once you begin, the first step is to name your Instructable. Simple, clear, descriptive names are best. If you want to get fancy you can learn more about choosing titles for good SEO.
Next, select a topic category and channel for your project. Categories help people find projects they’re interested in. Each project can only belong to one category so choose whichever category you think is the closest fit.
Finally, you can add a cover image. During the upload process you can reposition your image within the frame by clicking on your image and dragging to reposition.
Add an Introduction and Supplies List

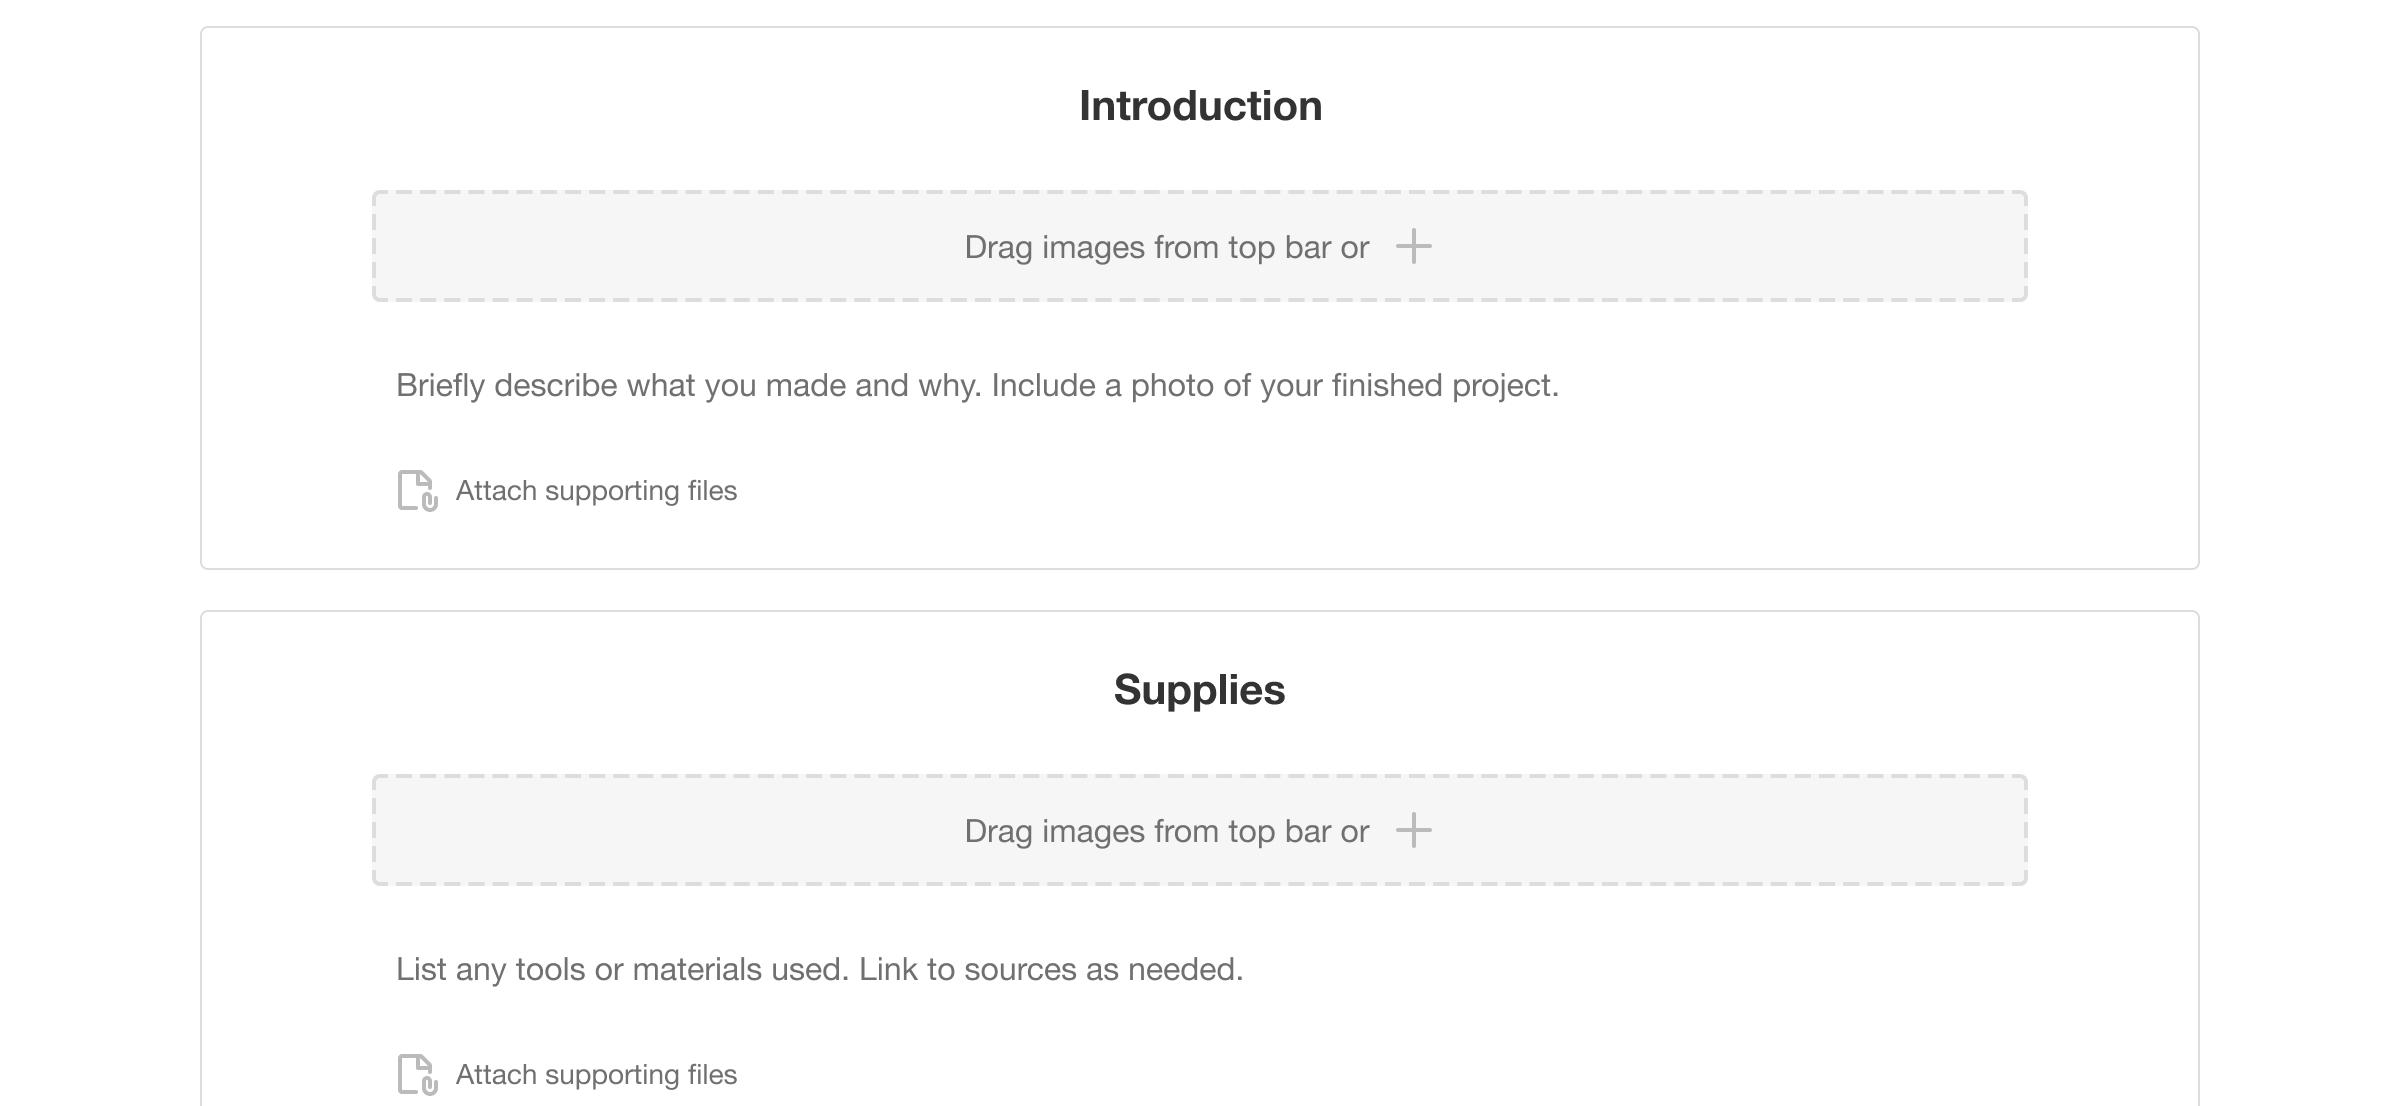
Use the introduction to briefly describe what you made and why. Be sure to add a photo of your finished project here so that others can see the end result and get excited about reading more.
The Supplies section is where you should summarize all of the tools and materials that you used so that others can recreate your project. Include lists of any parts, materials, ingredients, and tools used, with links to sources as needed, as well as links to any useful references.
You aren’t required to add a supplies section but we highly encourage it. Adding a supplies list helps others plan and follow along.
Explain Your Step by Step Process

Now it’s time to explain how you made your project using text, images, videos, and files. Use as many steps as you like to explain your project clearly. To add steps, click on the "Add New Step" button.
Projects should be broken into enough steps to be easy to follow, with sufficient photos and explanatory text to allow the reader to understand the process.
Steps can be reordered by clicking on the step actions (3 dots) icon in the upper right corner and selecting "Reorder steps" or "Move up/down one step". Steps can also be deleted from this menu.
Uploading Images & Files

You can add media in a number of different ways. If you like to add all of your media first and then organize later, click in the top file library tray to upload to your project library.
Or, if you like to add media step by step, you can alternatively upload photos directly to a particular step. Simply click in the grey bar below any step title.
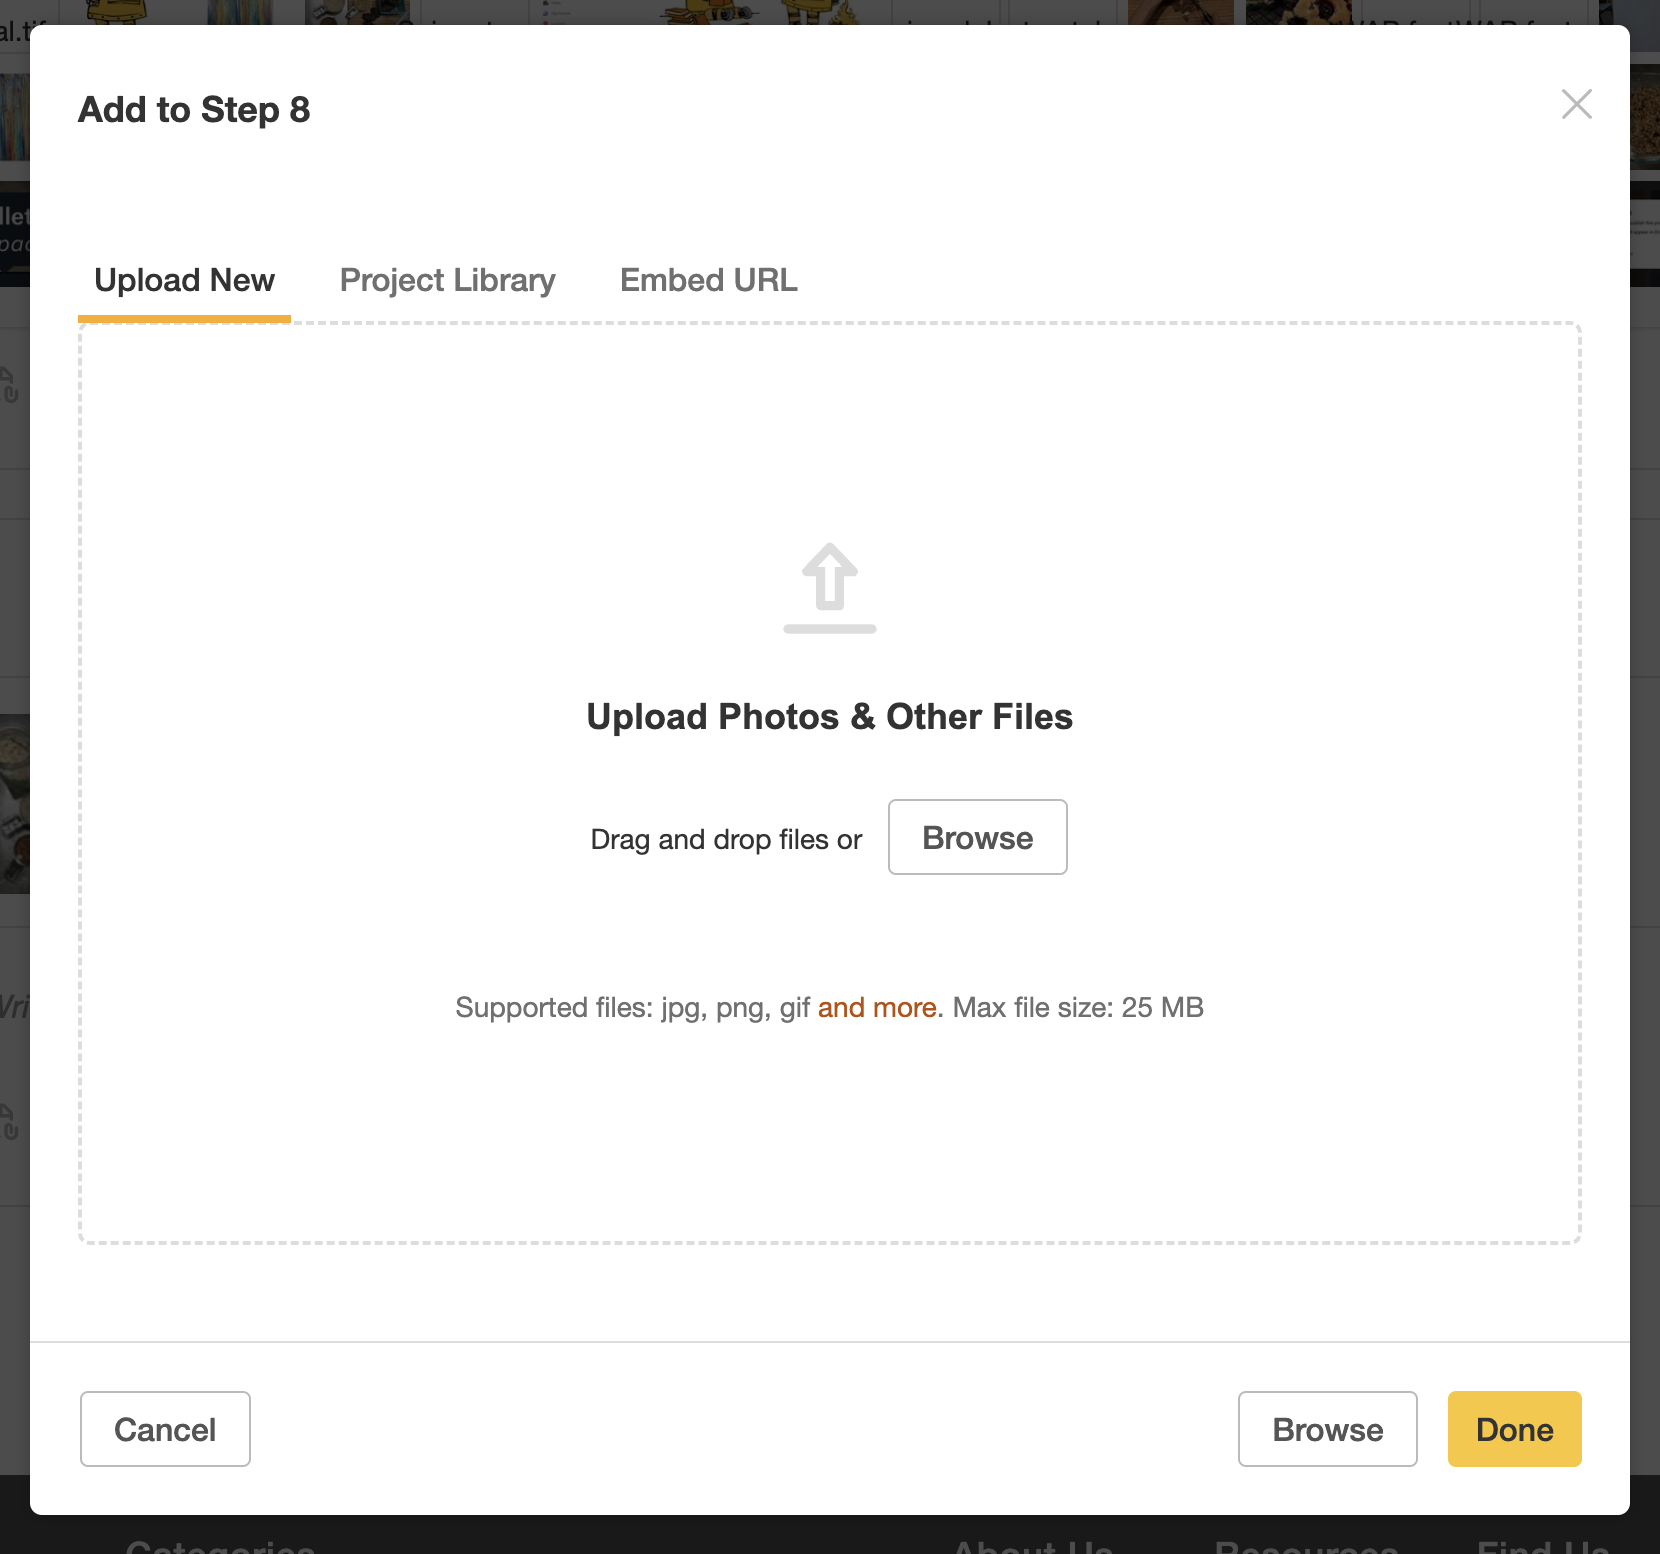
Once in the Upload modal, you’ll see tabs for different methods of adding content.
Use the Upload New tab to upload files directly from your computer.
Use the Project Library tab to select a file that’s already been uploaded (the project library is unique to each project, so it will always start out blank when you begin a new project).
Use the Embed URL tab to add media from another online source like YouTube or Vimeo. This is the best way to add a playable video to your Instructable.
Regardless of media type, remember that all images, files, and videos should be original content created by you.
Arranging Images & Files

If you have files in the top file library tray, you’ll want to eventually drag and drop them into steps or use the Project Library tab in the Upload modal to put them where they belong. Anything in the top file library is not yet part of your actual Instructable.
You can move media between different steps by dragging and dropping. You can also use drag and drop to rearrange the order of media within a step. Dragging something to the area between two steps will insert a new step.
Files that are photos or media embeds will display at the top of your step as square image thumbnails. These images will be displayed in our mosaic grid above your step text. (To see what this looks like, use Preview).
Any other files are considered supporting files and will display below your step text as attachments. See our list of supported file types.
To remove media from a step, drag items back to the top image tray, or click the "x" shown on hover. If you would like to delete the media from your Instructable entirely, click the Delete button on a file in the top tray.
Editing Images

Newsflash: You can rotate your photos! This will save the day if you ever need to quickly rotate a photo. Simply hover over a thumbnail and click on the Edit (pencil) icon to begin. Our tool works in 90-degree increments moving clockwise.
If you would like to add additional information to your photos, or point out something specific on your image, you can add image notes. Click on the desired area of your photo and write your note. Hover over the note outline to move or resize the note area.
When you’re done rotating and adding notes, be sure to save your changes by clicking Done.
Writing Text

Our text editor is really easy– just click in a text area of any step and start typing. Every step is viewable on the main page so you always have the full context of the rest of your Instructable.
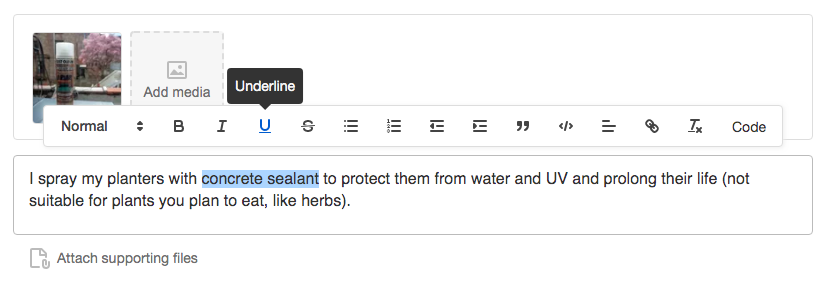
When you’re actively in the text area, you’ll see a floating text edit bar appear above with your formatting controls. Here, you can change the text styles, add bullets or paragraphs, add text links, and even enter code view where you can edit the HTML.
Previewing Your Instructable
The "Preview" button allows you to see your Instructable as it will appear on the site, but without interactivity due to security reasons. Despite not being able to see videos or see additional images, it is useful to see how your media will appear in our mosaic layout and to read through your entire Instructable at once.
Publishing Your Instructable
When you are done authoring your Instructable, click Publish! From there, you will be directed to the publishing details screen to add some final information before your project goes live.
This final screen is an opportunity to review how your cover image and title will look, and to enter some keywords so people can find your awesome new project on the site.
You can also choose to enter one of our contests. If your Instructable is a good fit for one of the open contests, enter it! You can enter each project in one contest.
When you have added all the information for your Instructable, click "Publish Now"!
Published! & More Resources

Once you publish your instructable, you should see a success modal with a link to your published project. Please note, it will take some time for your project to index and show up live on the site.
This guide is solely intended to be a how-to for using the editor. However, now that you are an expert on how to use the tool, you may be interested in some additional resources for writing great Instructables.
1) We have an excellent guide for how to create an all-around great Instructable.
2) Photos are one of the most important aspects of your Instructable. View helpful photography tips and techniques to make your photos look their best.
3) Want to get your Instructable featured? Check out our list of what to keep in mind for the best chance of getting featured.
4) View our full Get Started collection to see additional photography, writing, SEO tips and other resources.