I Built My Own Wi-Fi Nixie Clock (and You Can Too!)
by LaurentP30 in Circuits > Clocks
132 Views, 2 Favorites, 0 Comments
I Built My Own Wi-Fi Nixie Clock (and You Can Too!)
.jpg)
Hi everyone,
I’ve seen a lot of Nixie clocks, and I wanted to make my own (ESP32 + 3D Printing + PCB).
I have some knowledge in Arduino and 3D printing — for the rest, I have to thank GreatScottLab, Cledfo11, Proto G, and jakabo27 for their Instructables.
⚠️ Warning: This project involves high-voltage DC power supply, so please be careful!
Supplies
Most of the supplies can be found on eBay, Amazon, or at your local electronics shop.
What we’ll need:
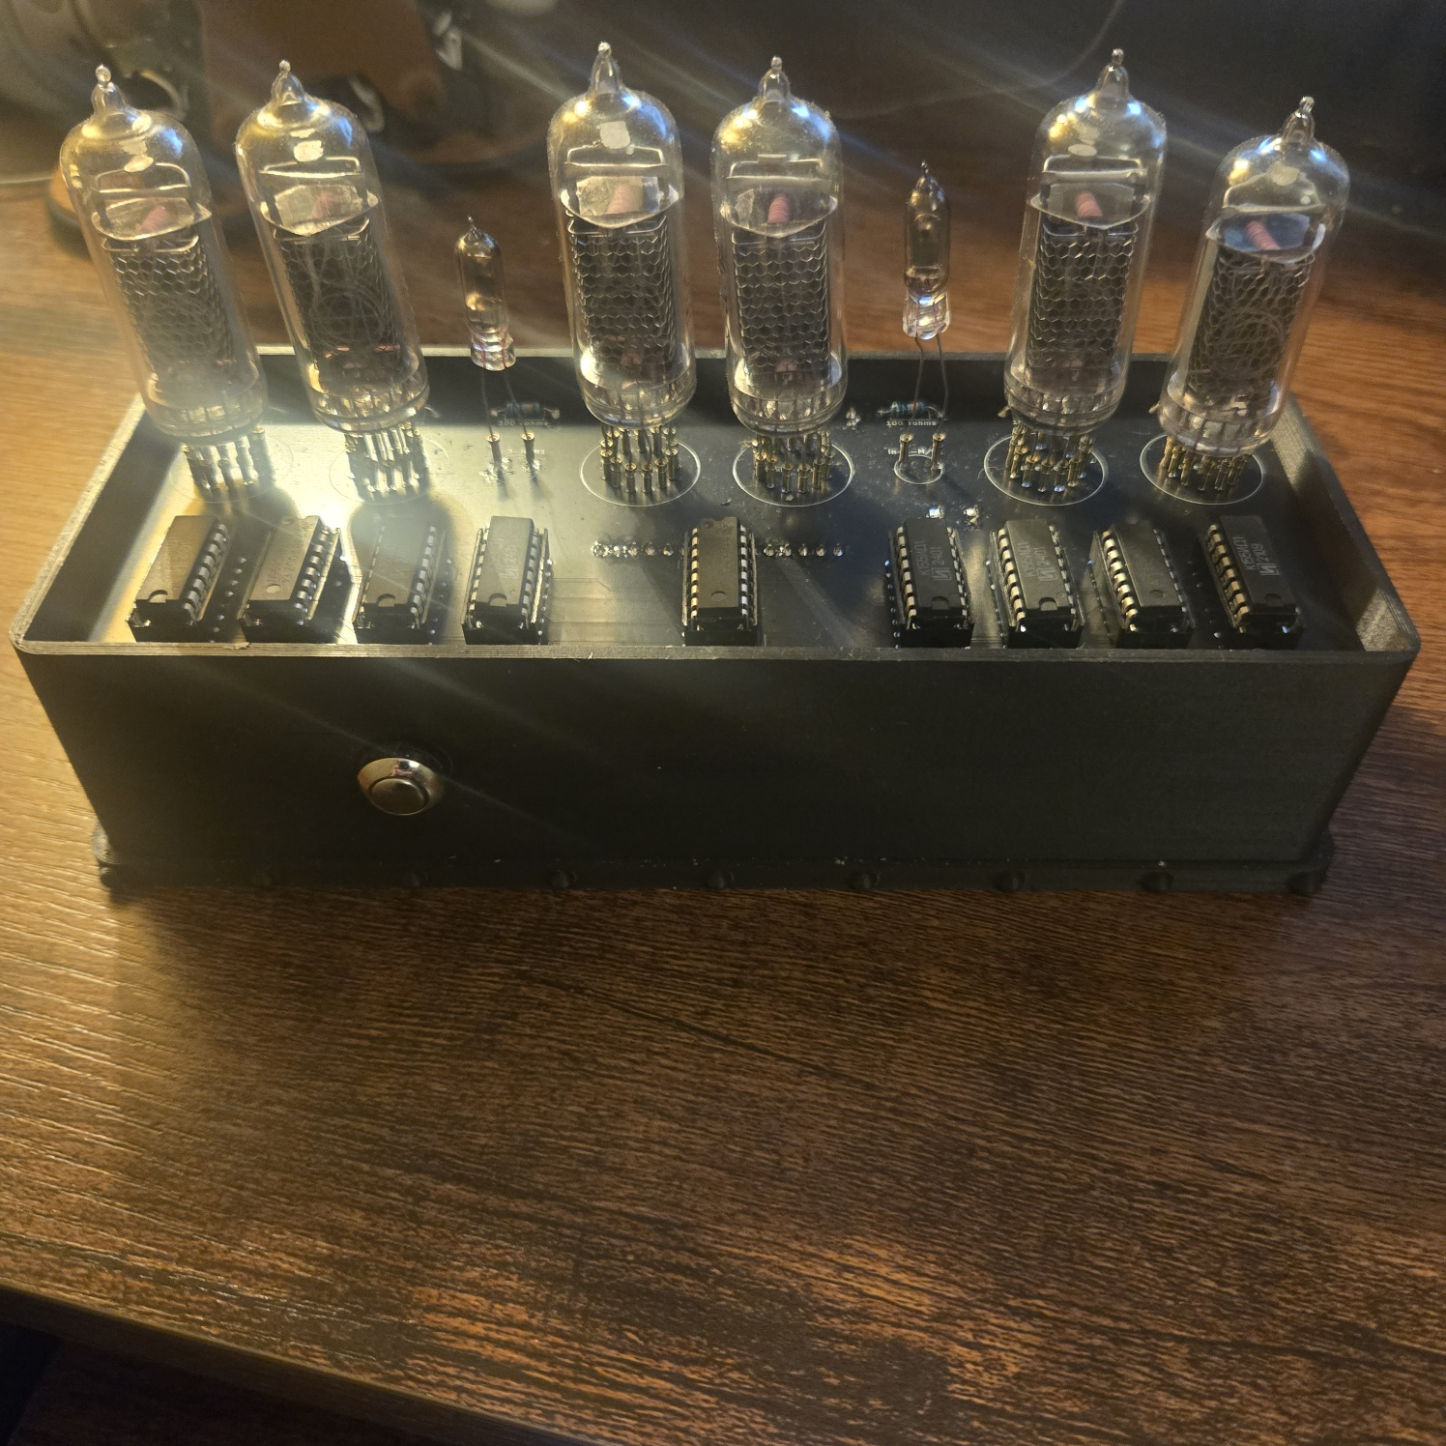
- 6x nixie tube in-14
- 2x nixie tube in-3
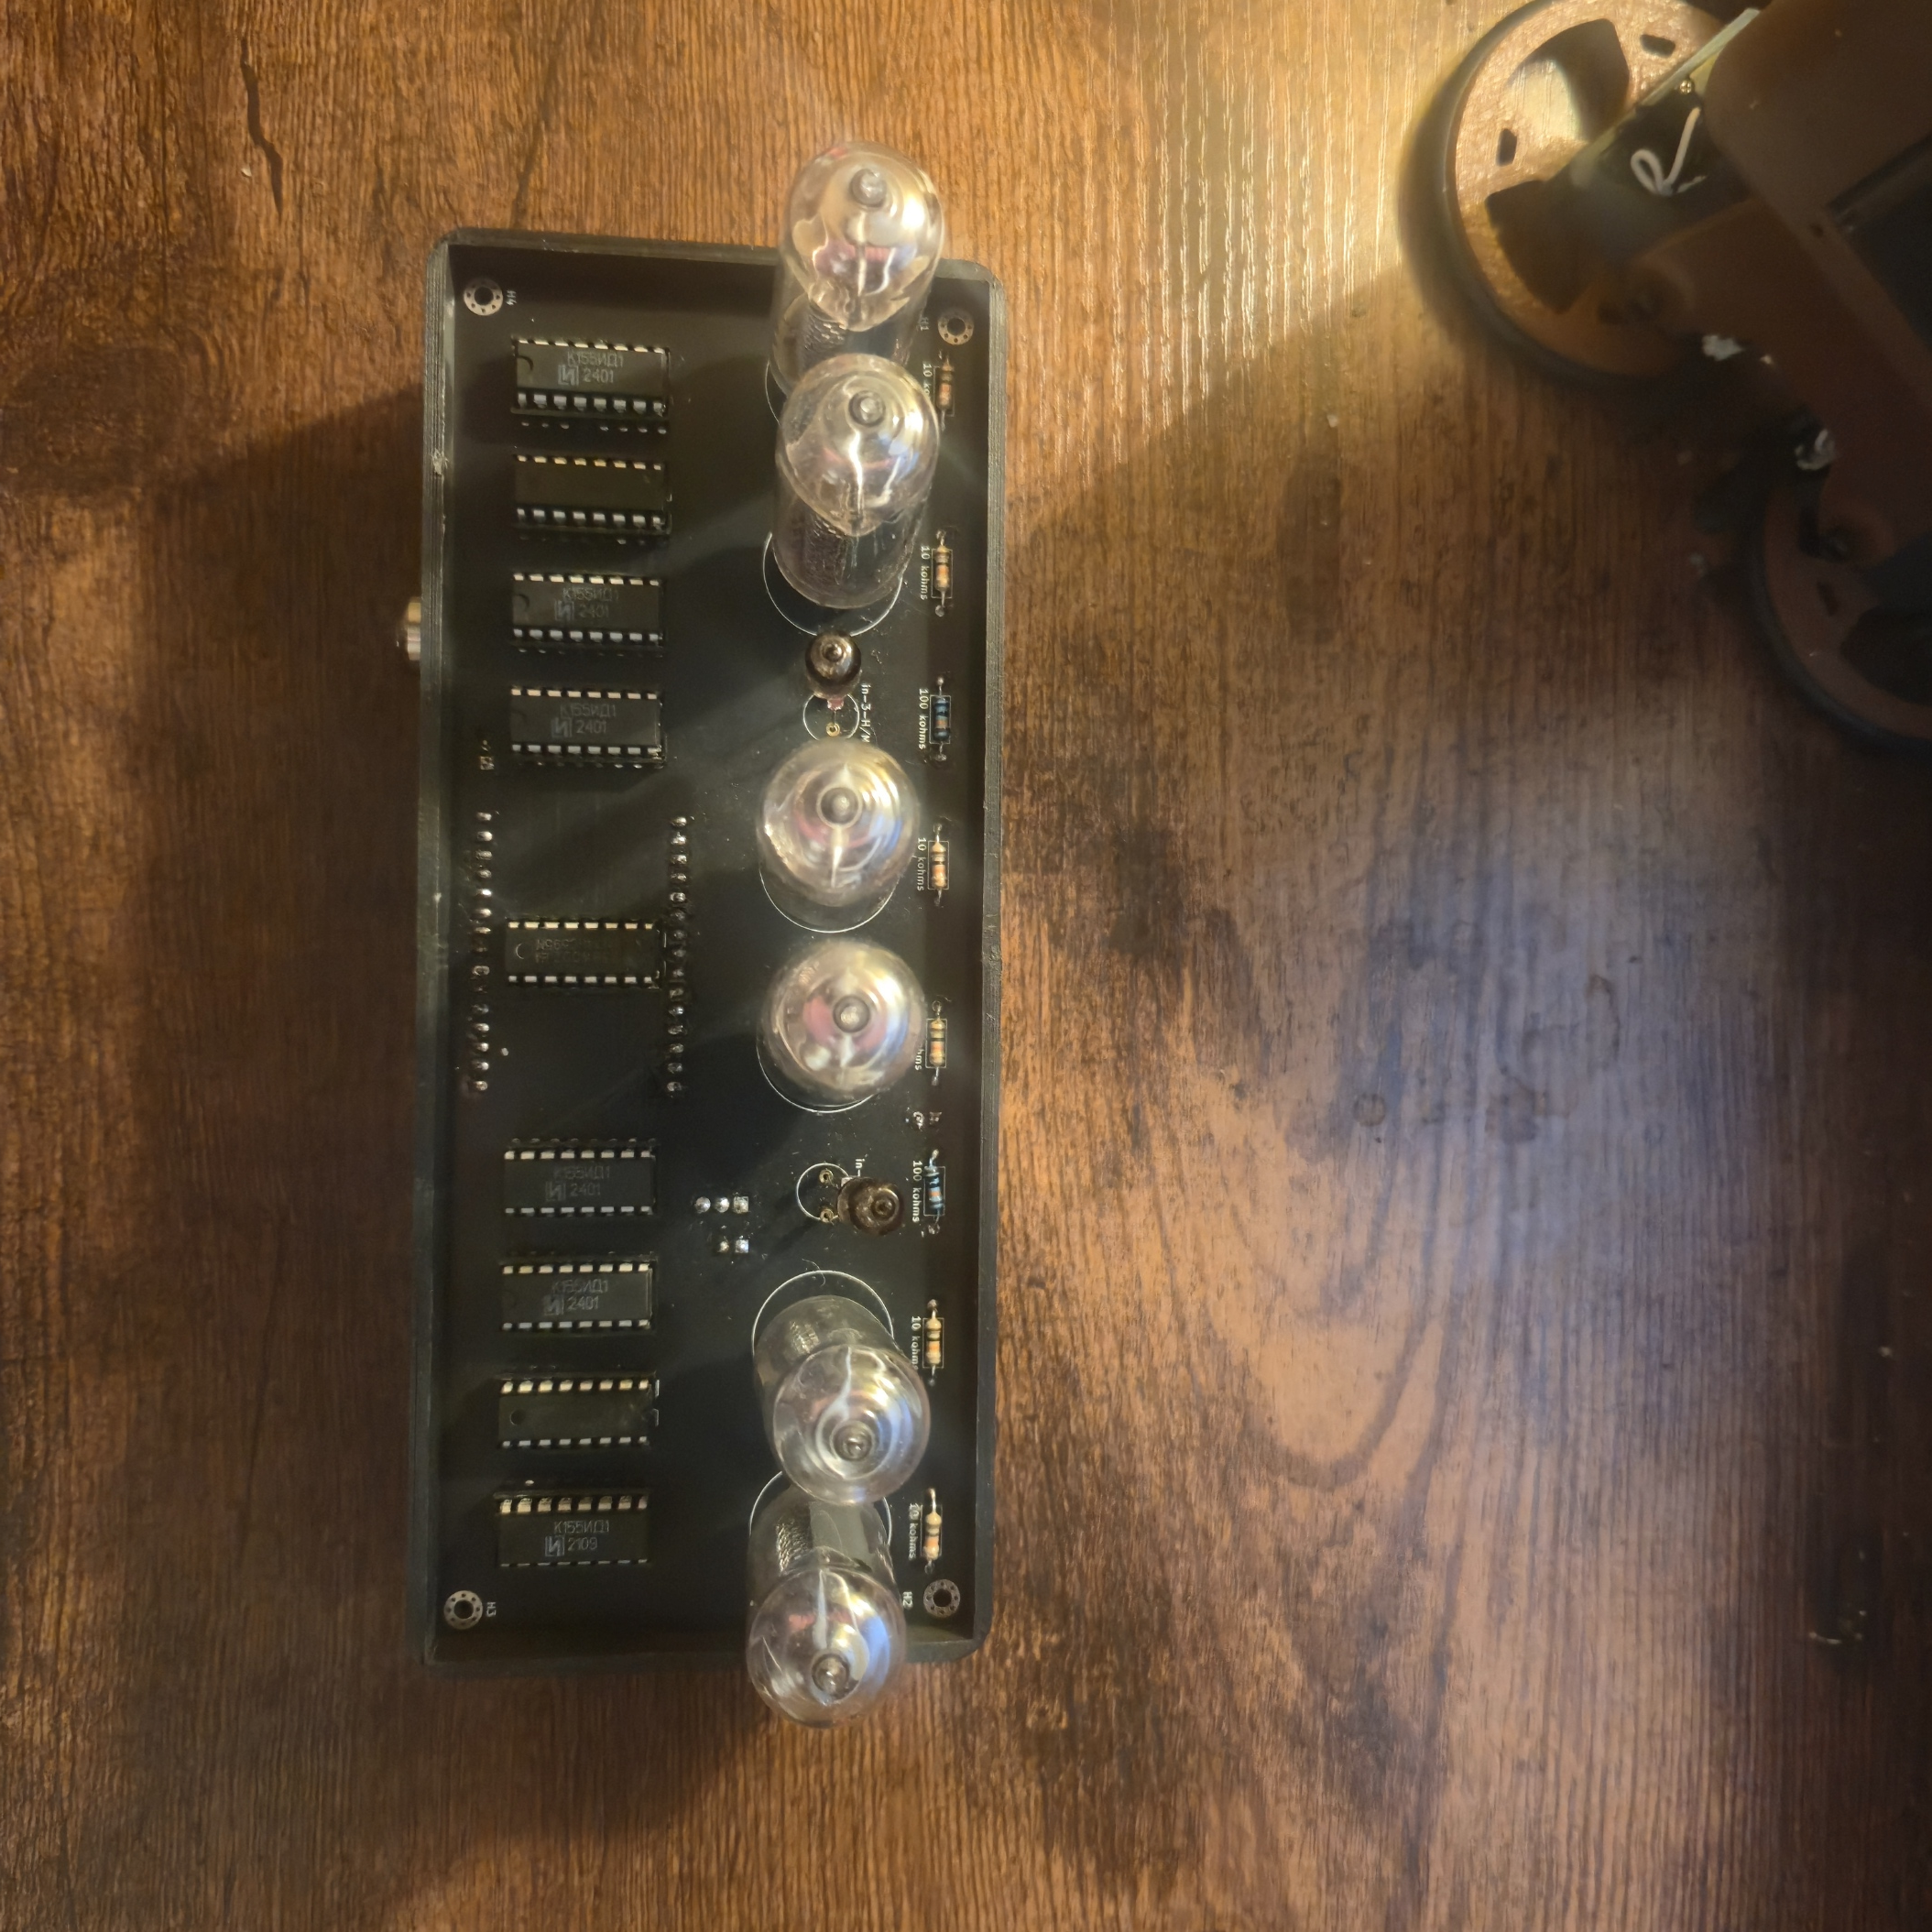
- 6x k155ID1
- 3x 74hc595
- 1x esp32 wroom
- 6x resistor 10khoms
- 2x resistor 100khoms
- 3x capacitor 0,1uf
- 1x 170V DC Supply
- 1x DC Input Jack
- 1x Mini MP1584 DC-DC 3A Adjustable
- 1x push button
- 82x nixie pin socket
- 9x DIP socket 16 pin
- some pin header
- pla filament
Pcb


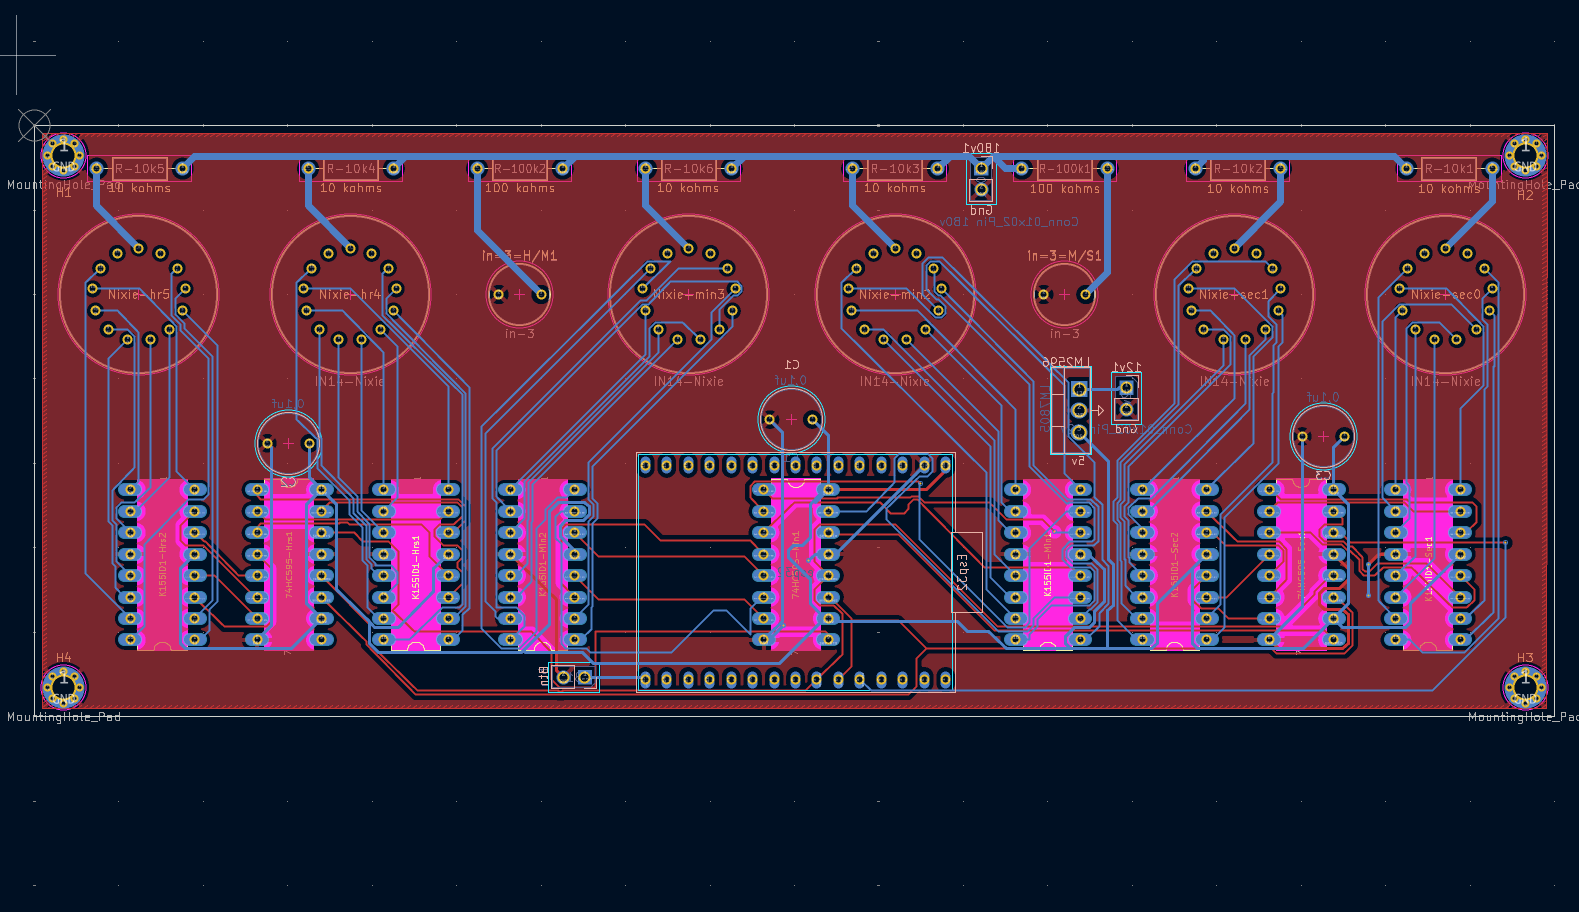
You can make your own PCB — I used KiCad to design mine. It’s free, and there are lots of tutorials on YouTube explaining how to use it.
This folder contains all the Gerber files for the PCB.
I used the JLCPCB service to manufacture it.
At first, I used an LM2596, but I later switched to the Mini MP1584.
The MP1584 pin header:
- Input+ → 12V (top)
- Ground + → both MP1584 Ground
- Output+ → 5V (bottom)
My layout:
On the top:
IN-14 Nixie tubes, IN-3 Nixie tubes, K155ID1, 74HC595 (with sockets), 10kΩ and 100kΩ resistors
On the bottom:
Female pin headers for the ESP32 Wroom, MP1584, 170V/GND, 12V/GND, push button .
and the 0.1µF capacitors
Arduino Code
You can find the Arduino code [here].
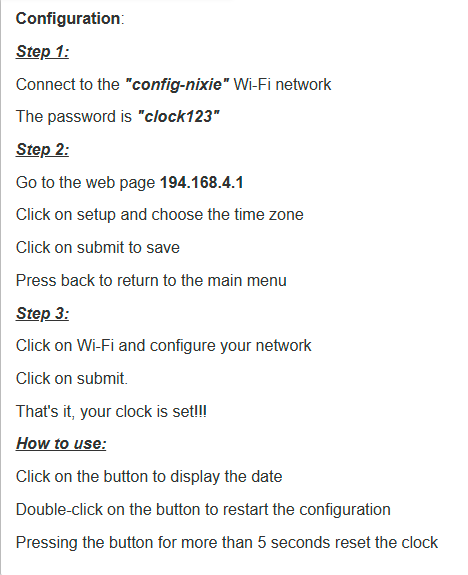
On the first boot, the ESP32 will start in AP mode.
You’ll need to configure your Wi-Fi network and time zone.
The ESP32 will then restart, connect to Wi-Fi, and get the time automatically.
The push button controls:
- Single click: Show the date
- Double click: Open configuration page
- Long press: Reset the clock
If you don’t reset the clock on each boot, it will automatically reconnect to Wi-Fi.
3d Printing
I design it on fusion 360 [here] is the step file. if you want to work on it
There are three files:
- The box
- The cover
- The "mode d emploie"(with QR code)
For the first two files:
Use PLA filament, 20% infill, and standard print settings.
For the QR code:
- Locate the layer where the color change occurs in your slicer preview.
- Install the “Modify G-Code” extension in Cura (found under Extensions → Post Processing).
- Add a Filament Change script, and enter the layer number you found.
- Re-slice the model and send the G-code to your 3D printer.
There are many tutorials online if you need help with this process.