Infrared Through-beam Sensor (pair) for DSLR
by strixaluco in Circuits > Cameras
206 Views, 0 Favorites, 0 Comments
Infrared Through-beam Sensor (pair) for DSLR
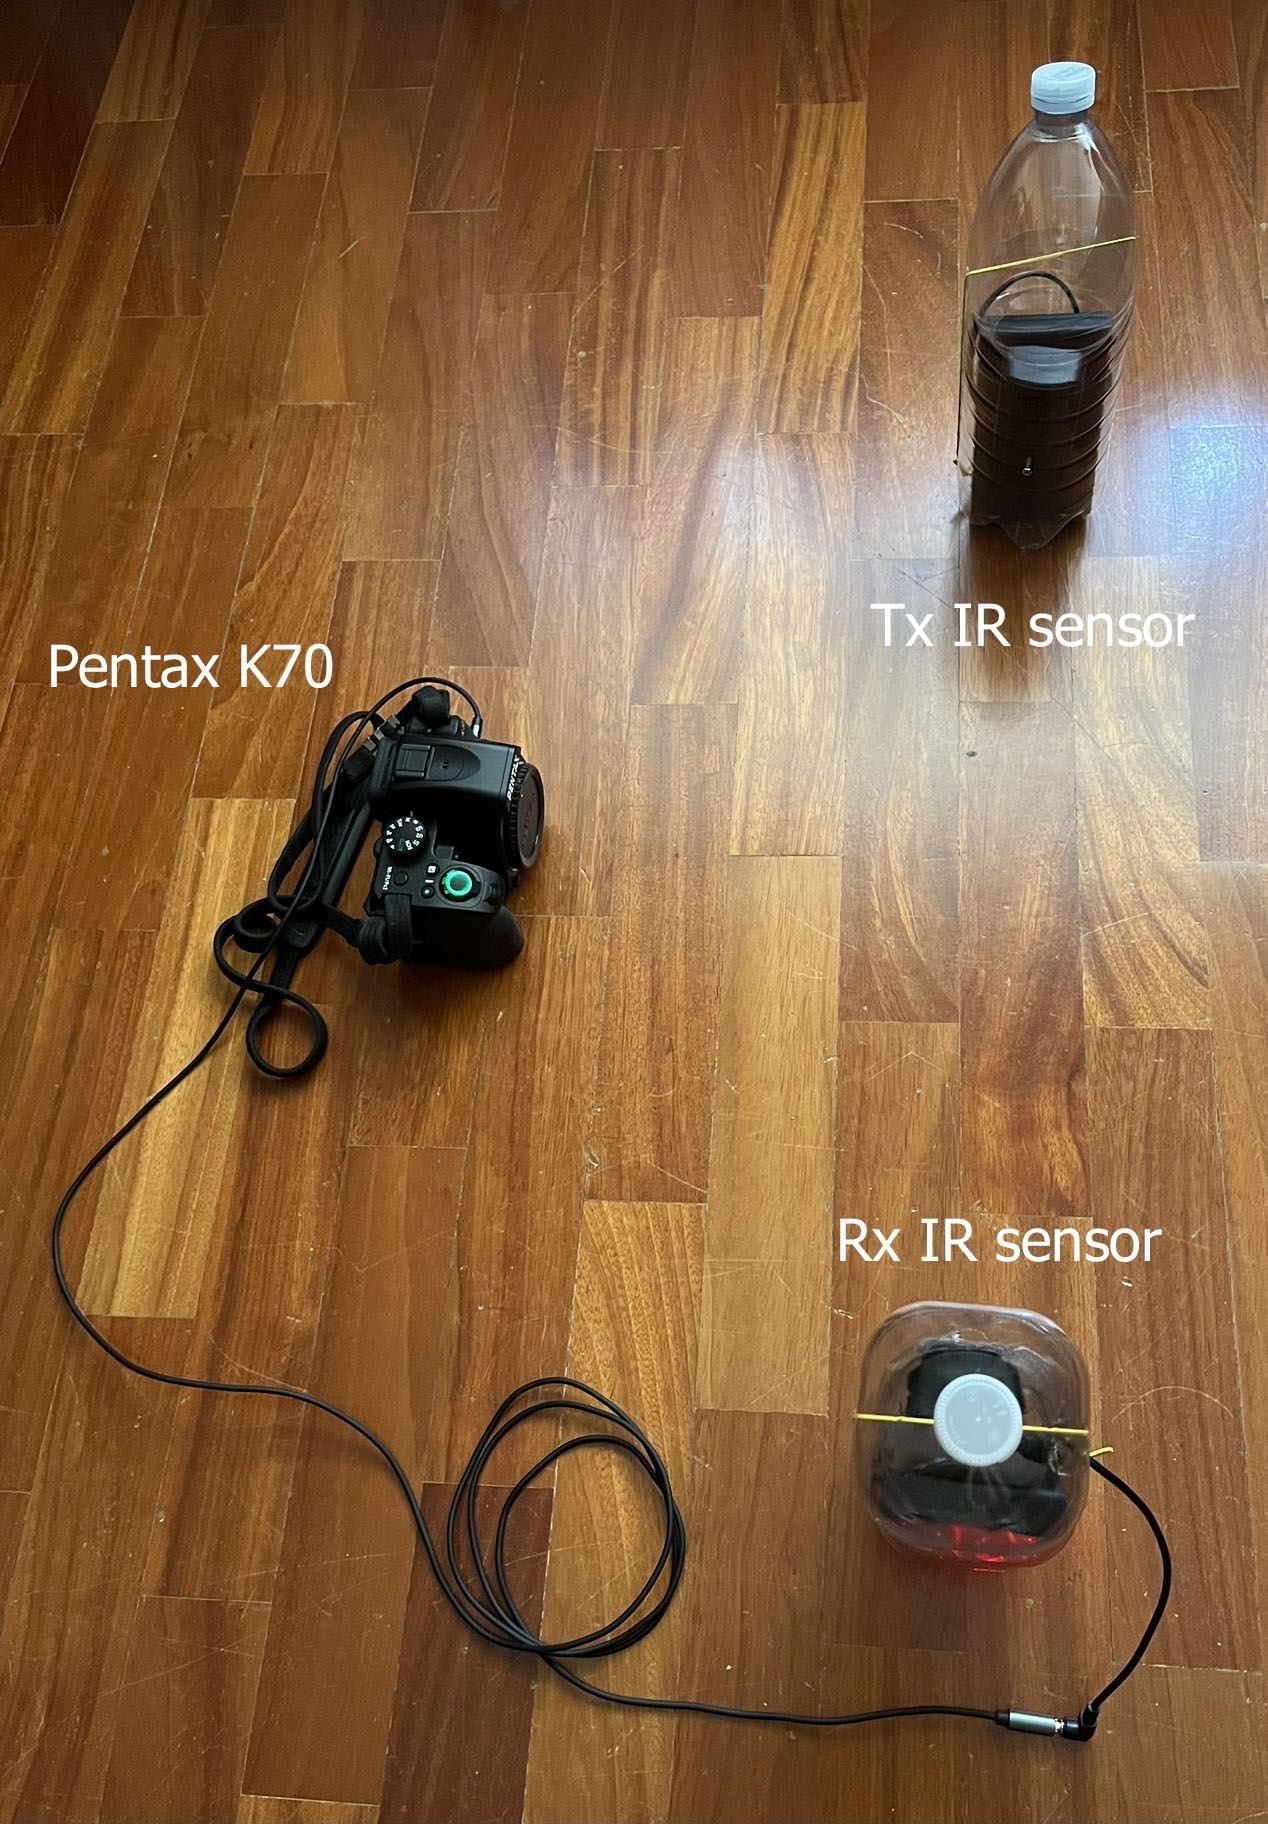
I'm a passionate wildlife photographer and I'm very much into DSLR camera trapping.
Nowadays, the golden standard for this kind of photography is a PIR motion sensor trigger based on a sudden change of temperature, usually an animal like a mammal passing by.
You can more or less have an idea of where the animal will stand when the motion sensor trigges the camera, but if you want to activate it exactly when it crosses a line you have to have IR through-beam photocells.
Moreover, I wanted to build something quickly and cheaply, without resorting to Arduino etc.. which, don't get me wrong, is by all means excellent, but not this time :-))).
Supplies
Therefore I bought:
1) Automatic Gate Safety Infrared Detector 12V-24V AC DC Garage Door Photocell Photoelectric Beam Sensor.1 Transmitter (TX) and 1 Receiver (RX) =€9
2) XL4015 4-38V to 1.25-36V Buck Converter 5A High Power 75W DC-DC Step-Down Voltage Regulator=€6
3) Power source: 16 x 1.2V-1.5V AA rechargeable NiMH or lithium batteries, or even non-rechargeable alkaline (I had them at home. Price is variable, average non-rechargeable 16 x AA 1.5V alkaline batteries = €15)
4) 8 x AA batteries case with switch and 5021 plug + bare wire. You need 2 boxes = €8
5) 3.5mm 4-pole TRRS cable with male jack (for my Pentax K70). = €5.
I happen to have a 3.5mm 4-pole to 2.5mm 3-pole adapter, so I can use the whole kit also for my Pentax K20D (many Canon DSLR cameras have exactly the same socket).
That's it. With less than €50 you can build your own IR through-beam sensor paired device, with 1 TX and 1 RX. With this kit you can gauge both the input and the output voltage by means of the XL4015 before it connects to the RX:
Getting the TX Ready
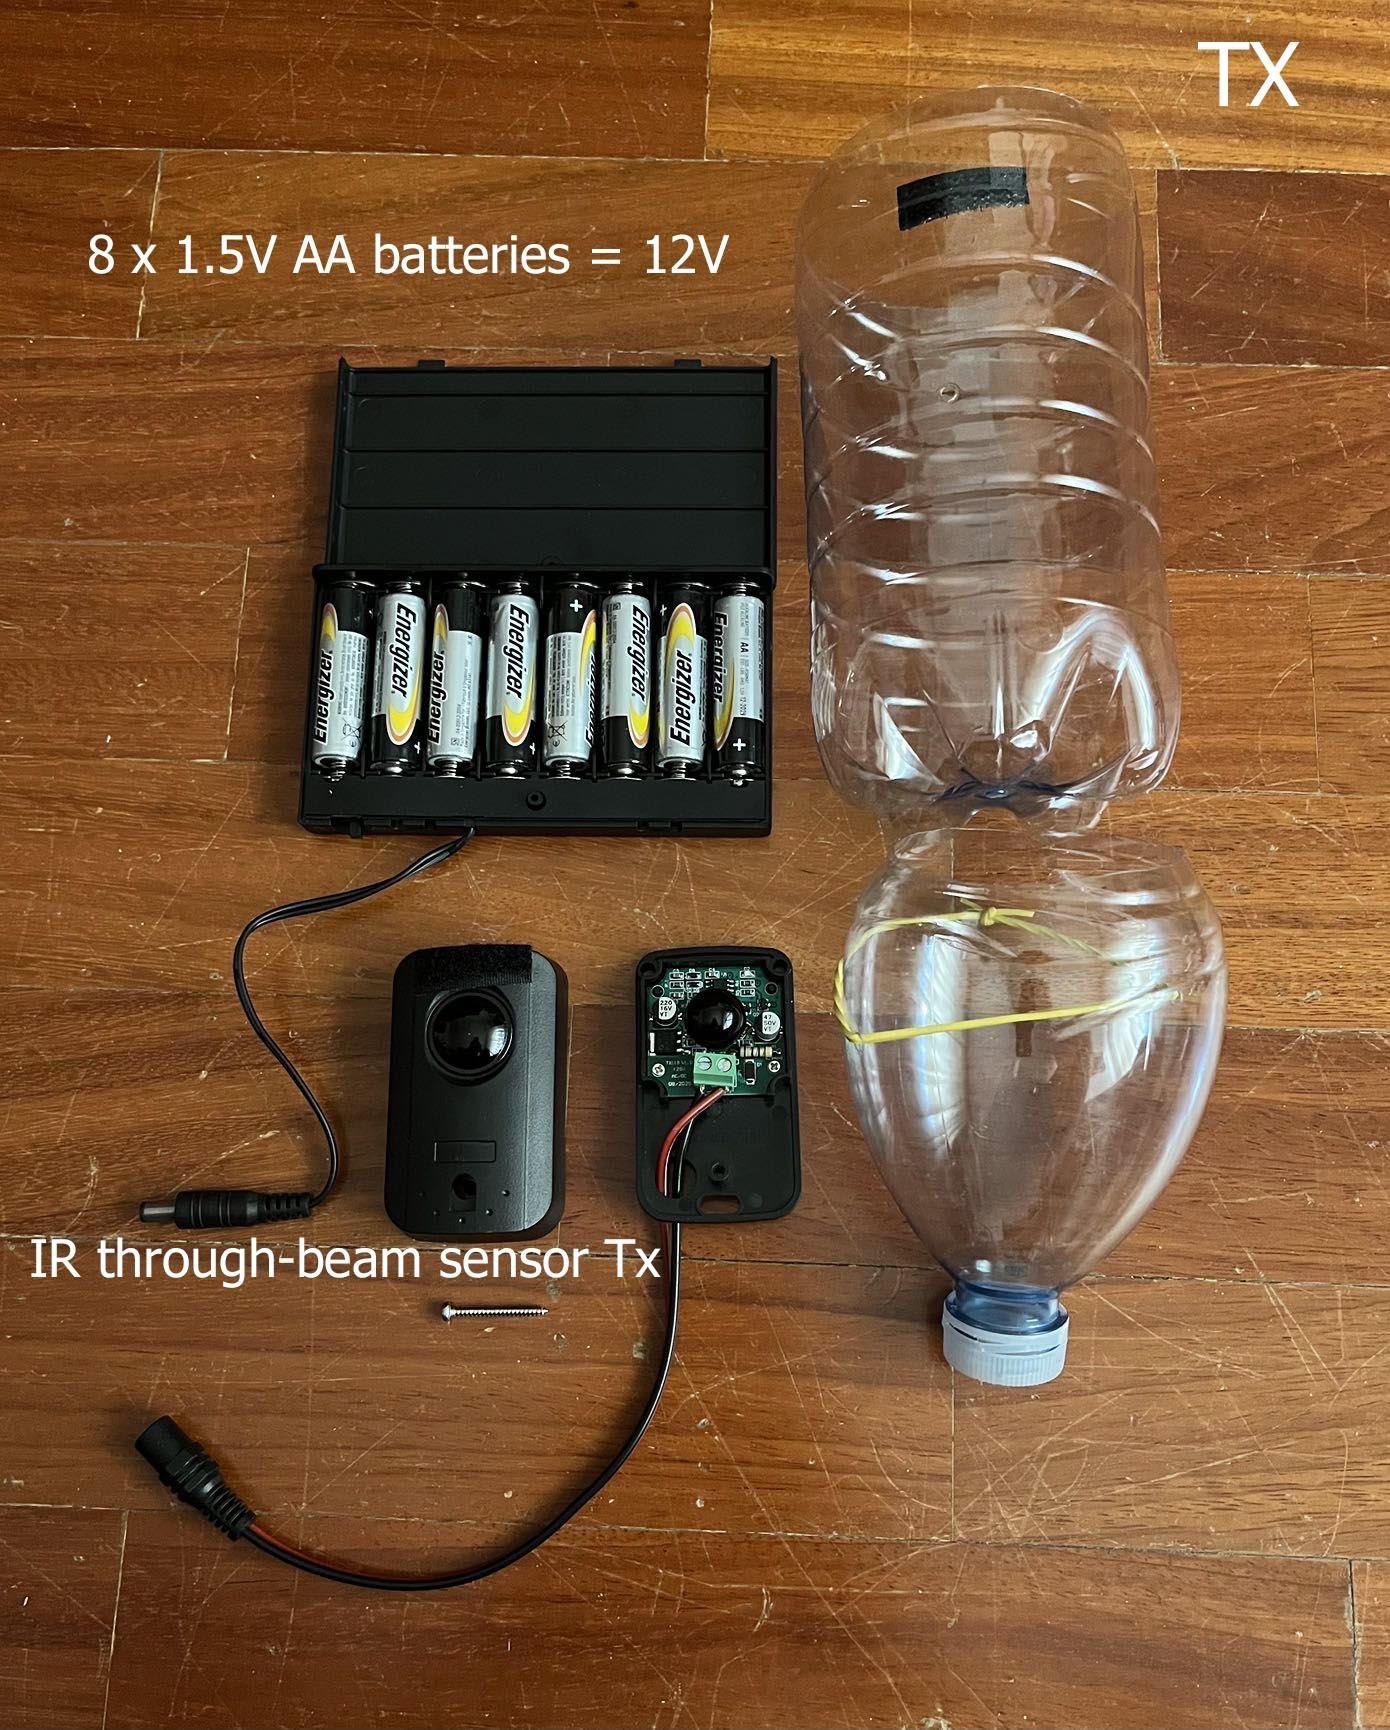
First step: insert the 8 AA 1.2V or 1.5V batteries into the case in series. Keep the switch off. Connect the red wire to the positive terminal of the TX (it has only 2 terminals) and the black wire to the negative one. Now switch on the TX. You will see a red LED on. It means it is releasing the beam. As simple as that.
Now Getting the Buck Converter & RX Ready
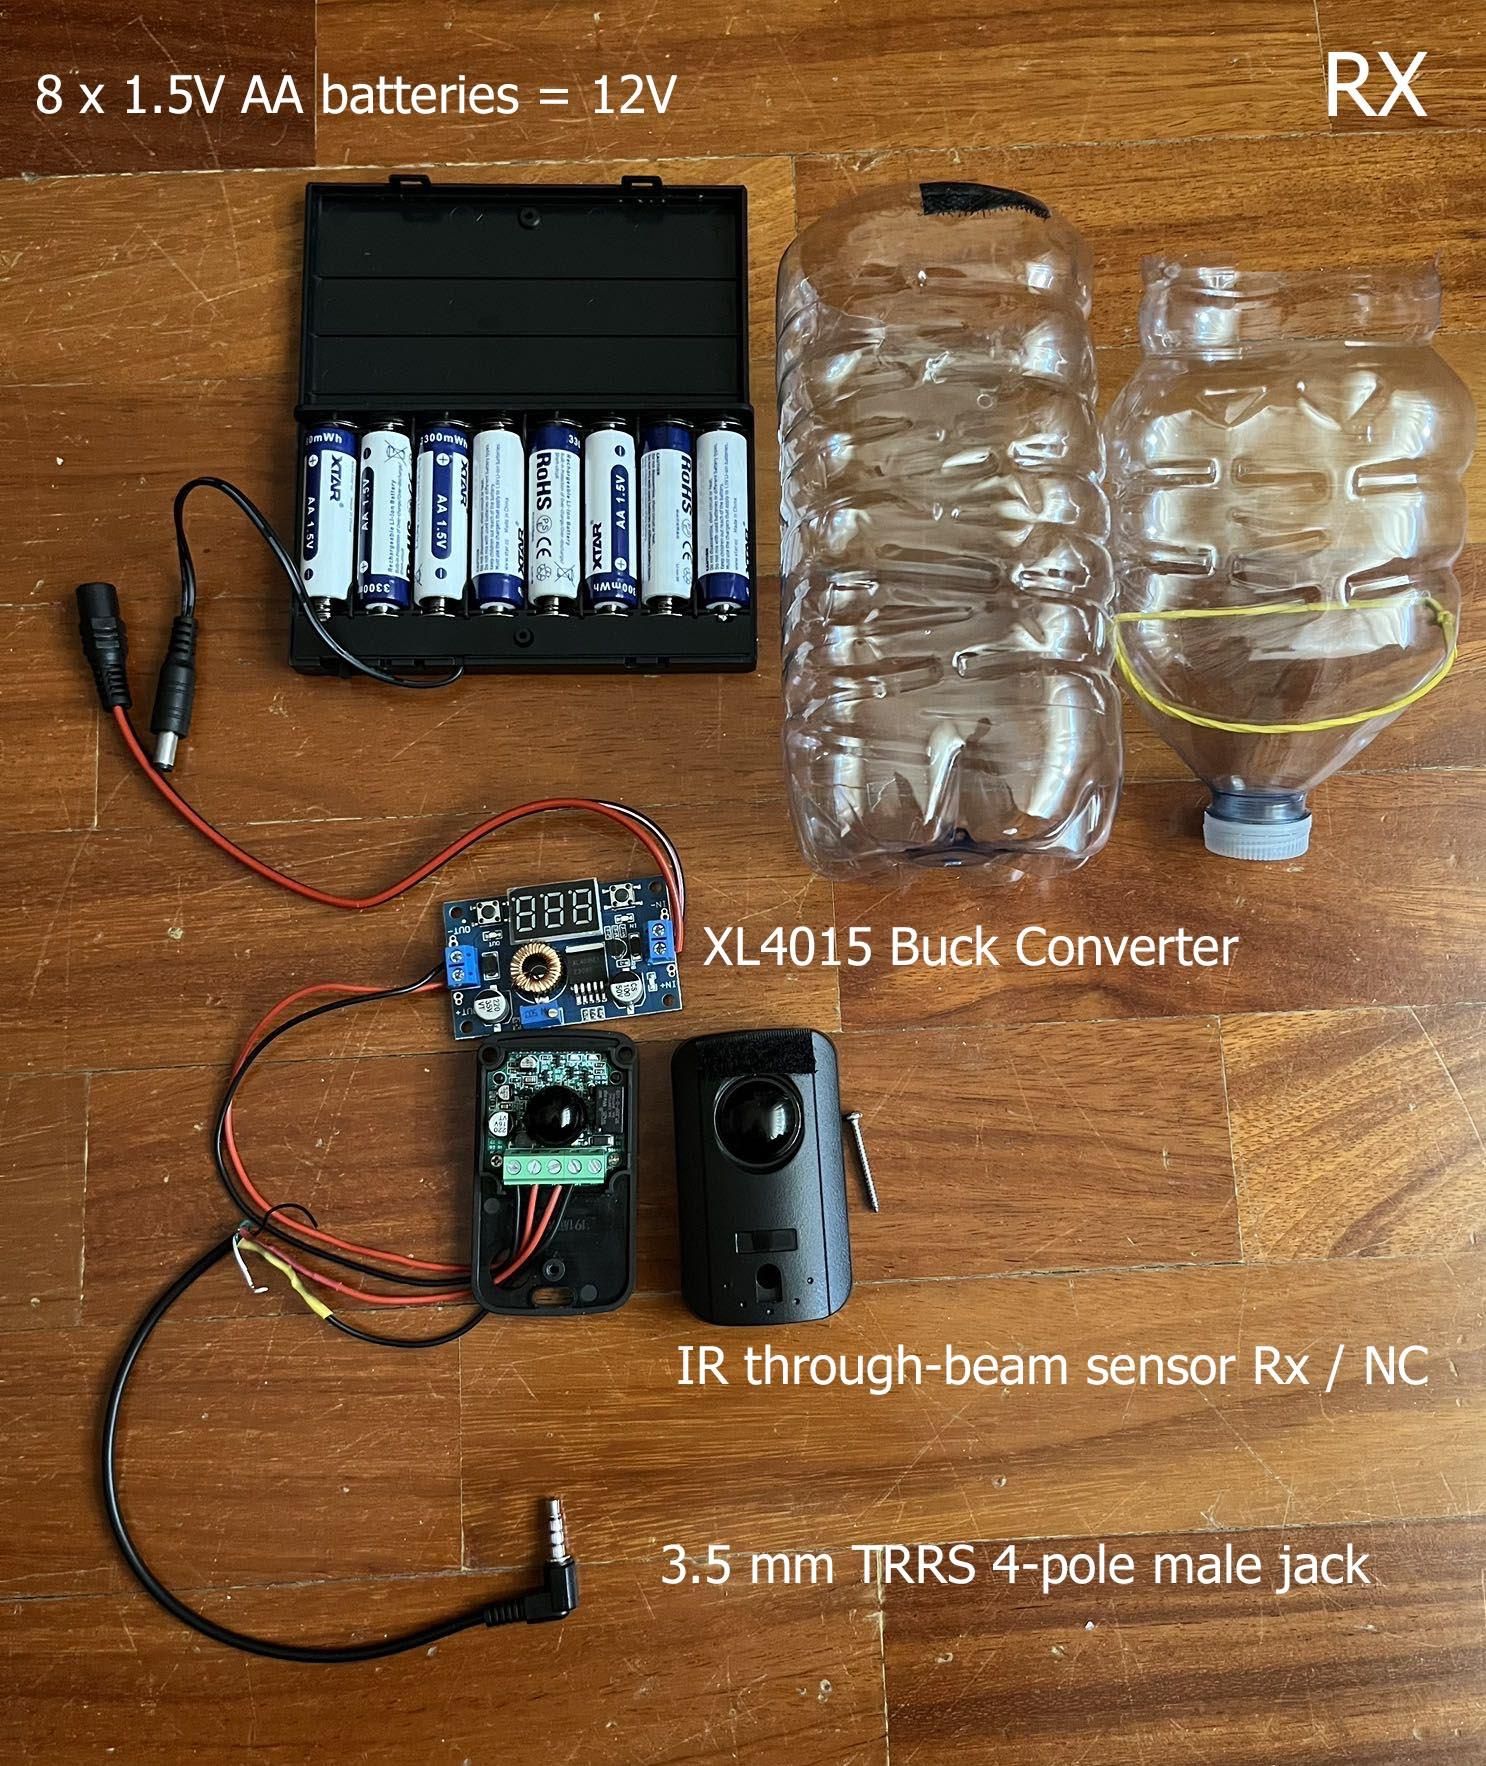
Second step: same as above: insert the 8 AA 1.2V or 1.5V batteries into the case in series keeping the switch off.
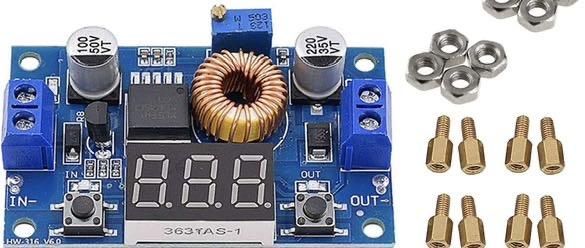
Connect the red wire to the "+IN" terminal of the XL4015 and the black wire to its "-IN" terminal. Then connect a cable from the "+OUT" terminal of the XL4015 to the "+IN" terminal" of the RX, and another cable from "-OUT" terminal of the XL4015 to the "-IN" terminal of the RX. If you turn the little golden screw clockwise the output voltage is going down, anti-clockwise it will go up but no higher than the input voltage, which is 12V.
XL4015 suits me because I can check at all times the voltage coming from the batteries by pushing the IN or OUT button: I use the lowest voltage possible to trigger the relay of the photocells (you hear a click and the green light goes off when the beam is interrupted). Below, the circuit does not open when the beam is broken.
RX Output
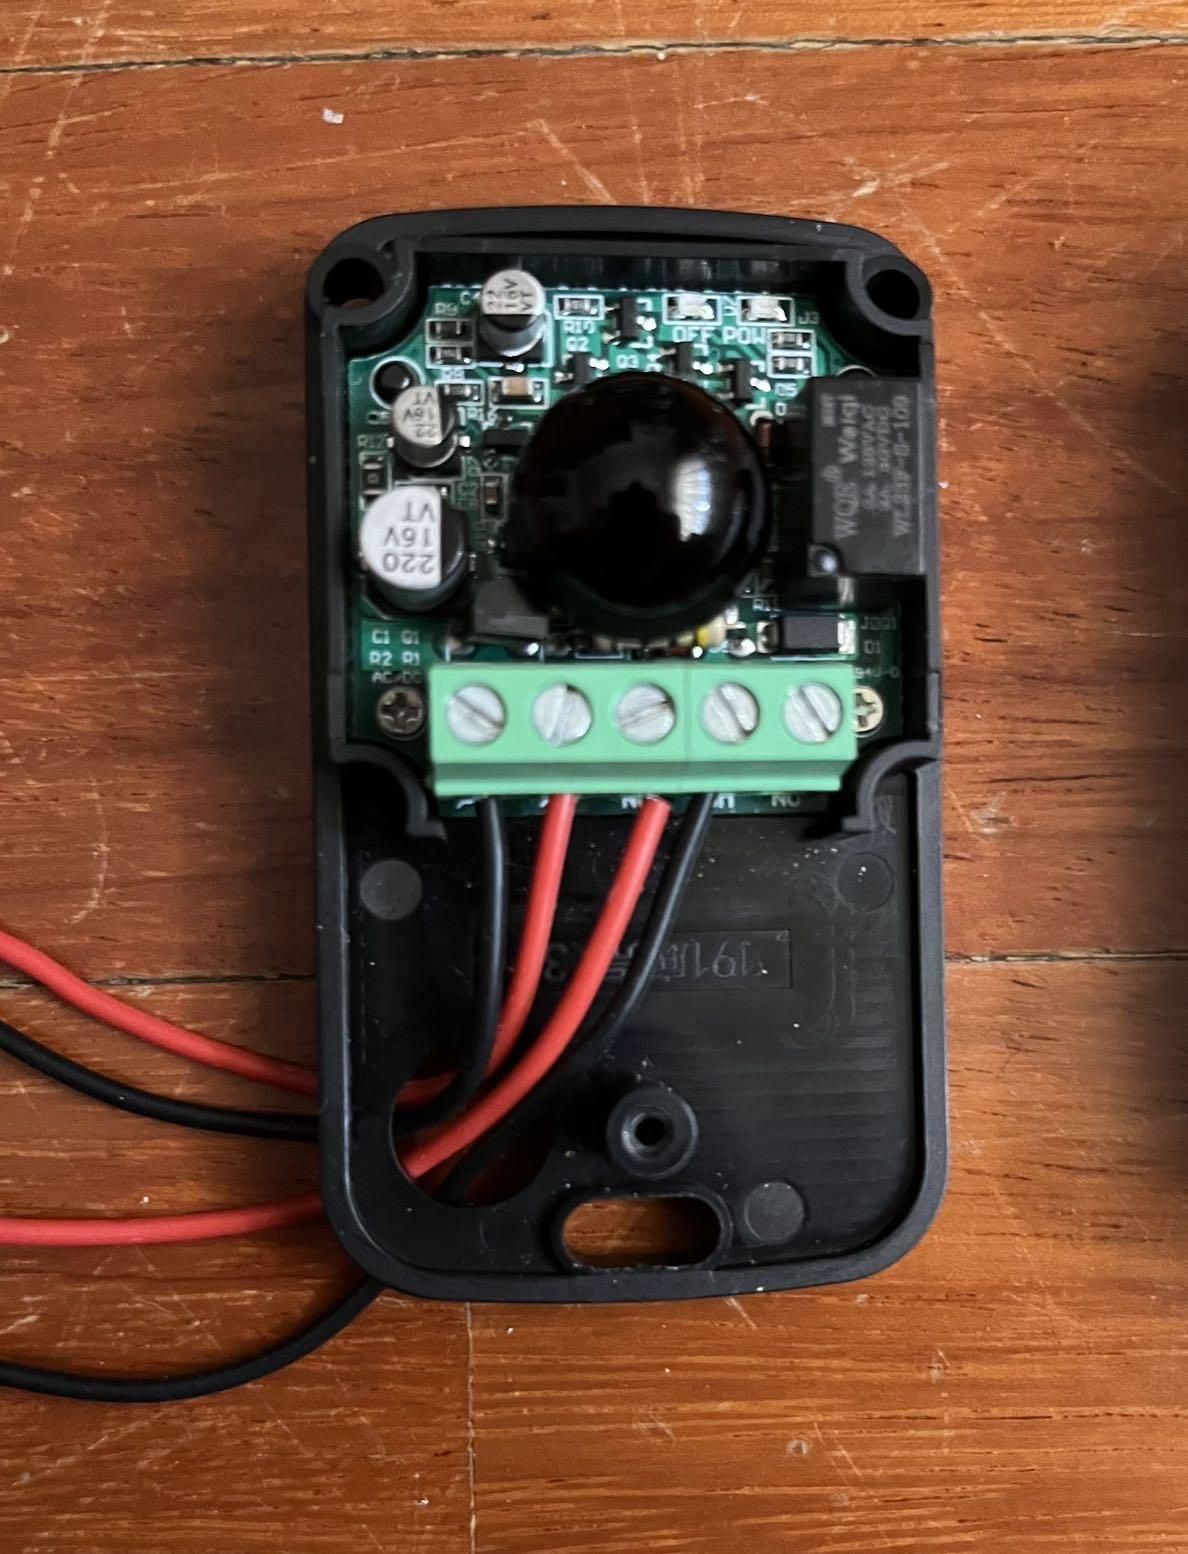
Third step: in the RX output end you have the option NO (Normally Open) or NC (Normally Closed).
I selected the latter: I connected the NC on the Rx to the tip of the 3.5mm plug (shutter) and RX COM to ground (3rd ring from the top of the 3.5mm jack). Just ignore the other 2 wires on the 3.5mm jack (2nd ring from top = autofocus and sleeve).
In my model, the input voltage in the XL4015 is 12V and output is 8.15V. Then the current goes through the RX motherboard which dampens down the voltage even further: when it leaves the RX and goes into the cable ending with a 4-pole 3.5mm male jack, the voltage is 3-4V, which is safe for my Pentax K70.
Pentax K70 has an in-built pull-up resistor in the shutter release circuit, but Pentax K20D hasn't. Both work well on this kit: it means it is the RX motherboard doing the job of lowering the voltage further.
I checked with my tester (btw, this is an essential tool to have) and when the beam is broken the voltage on RX output is never higher than 4V.
Don't Chuck Away Empty Bottles!
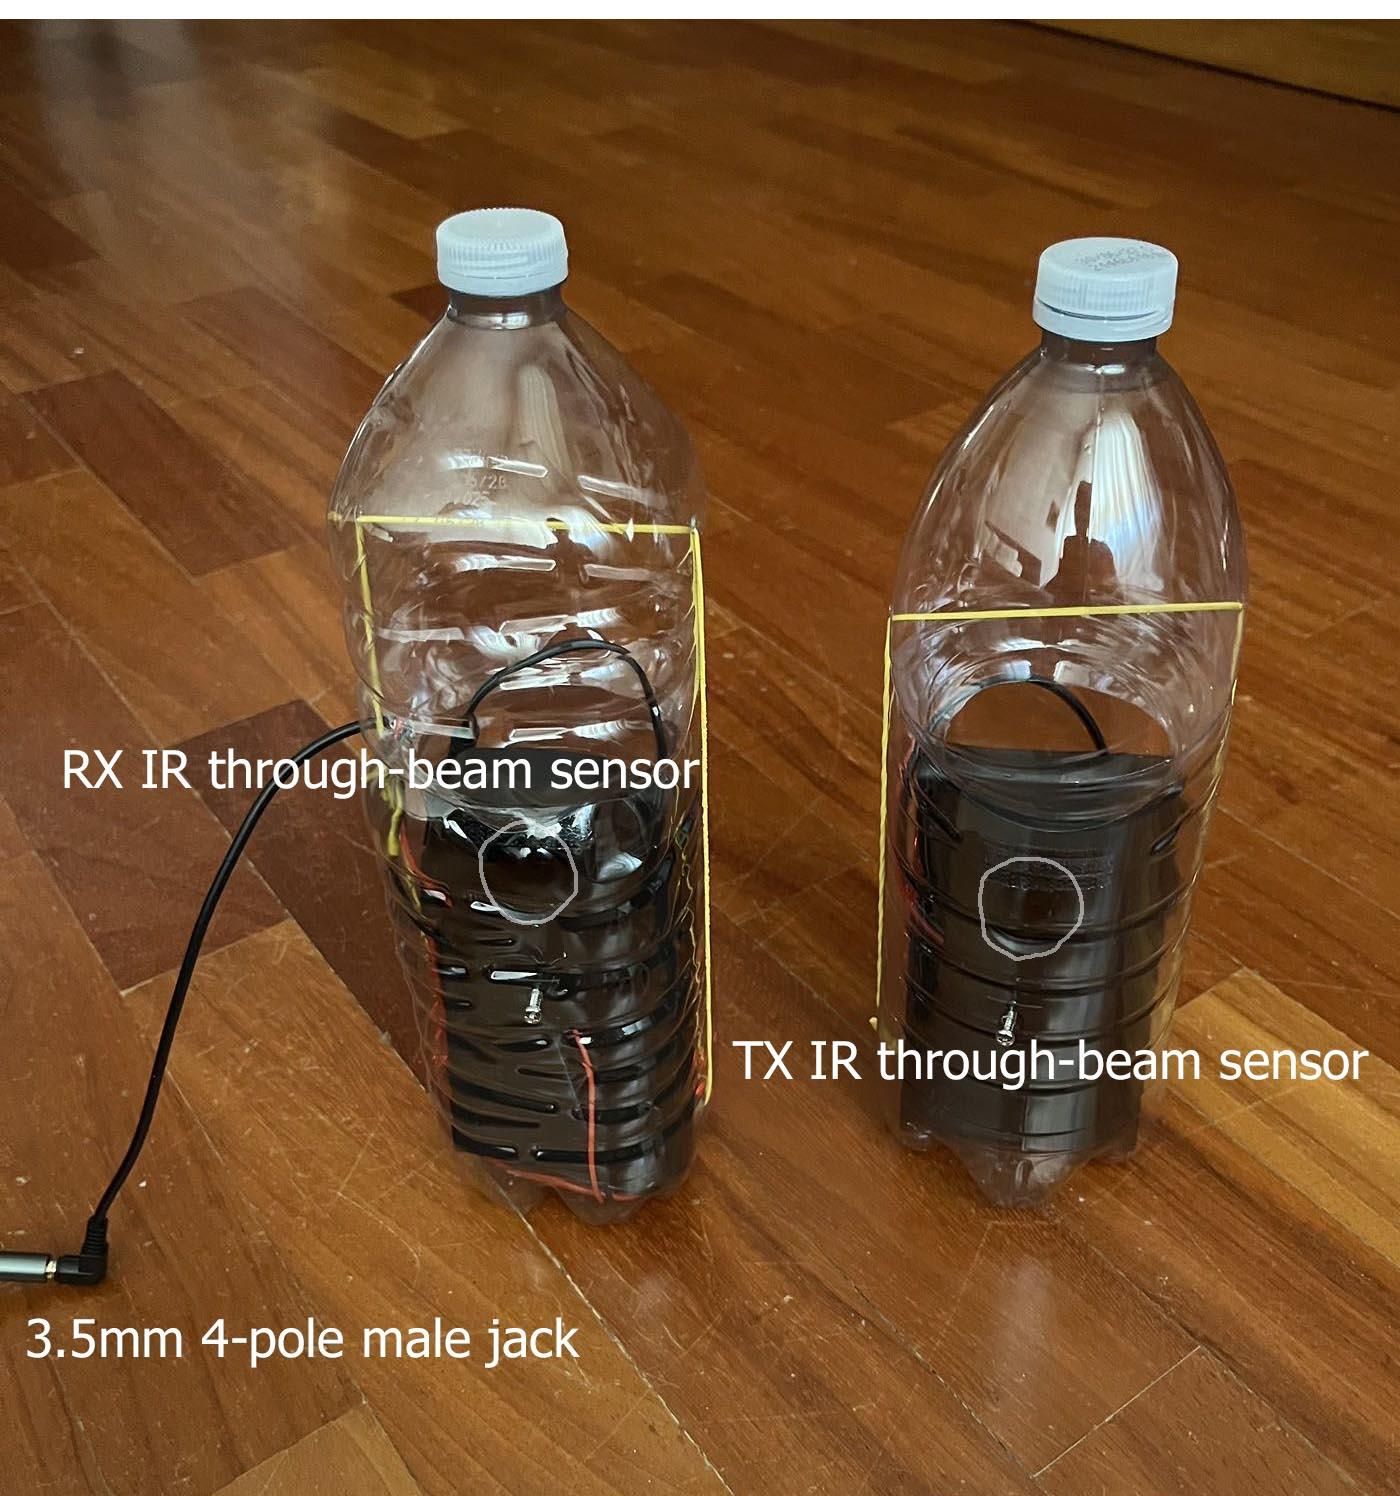
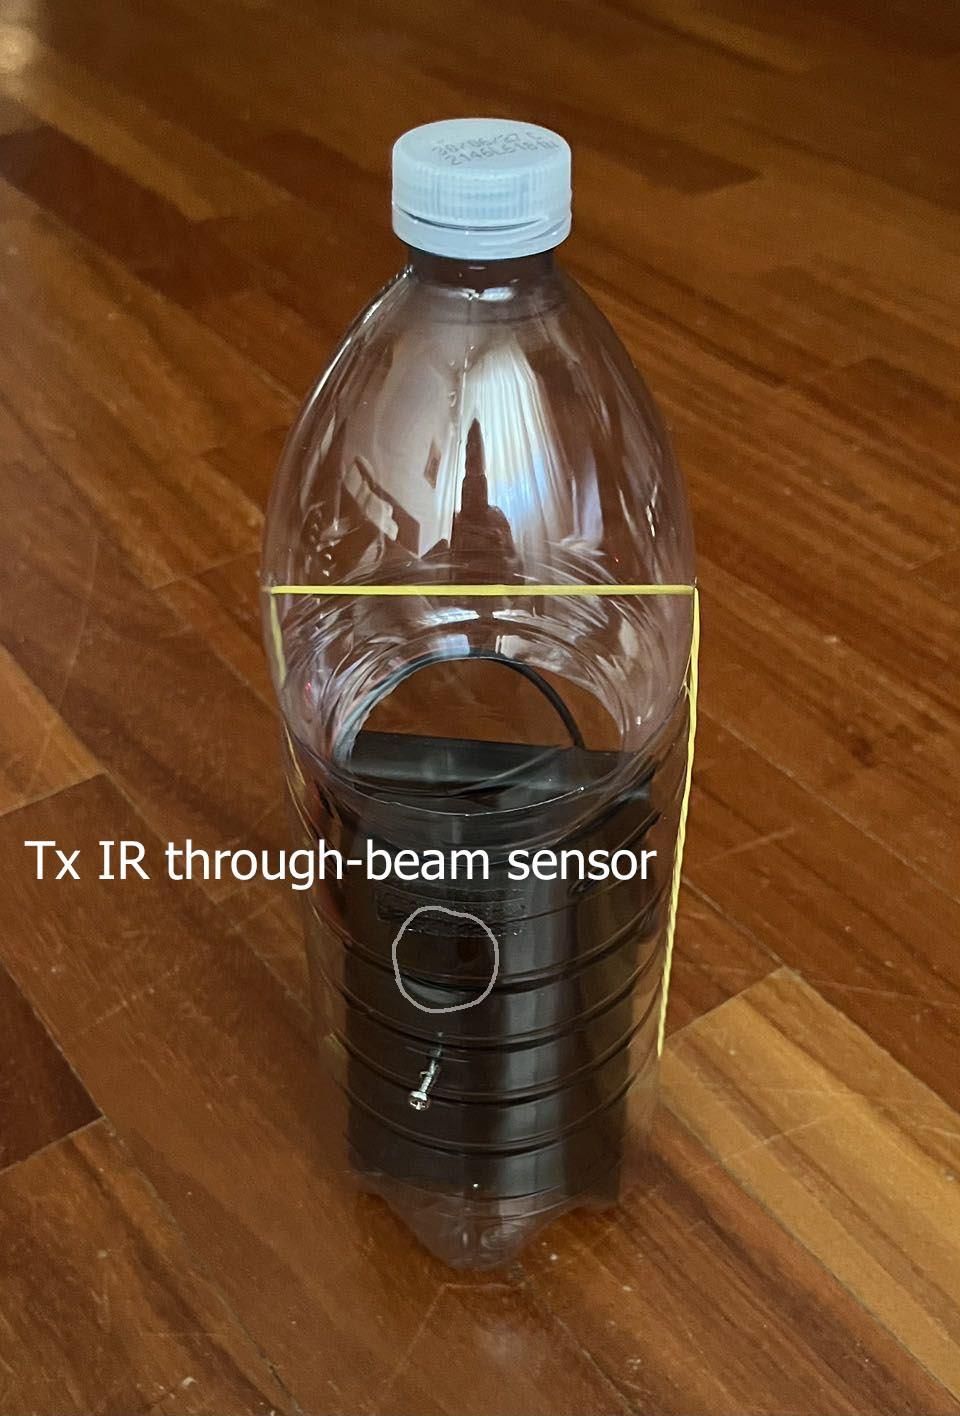
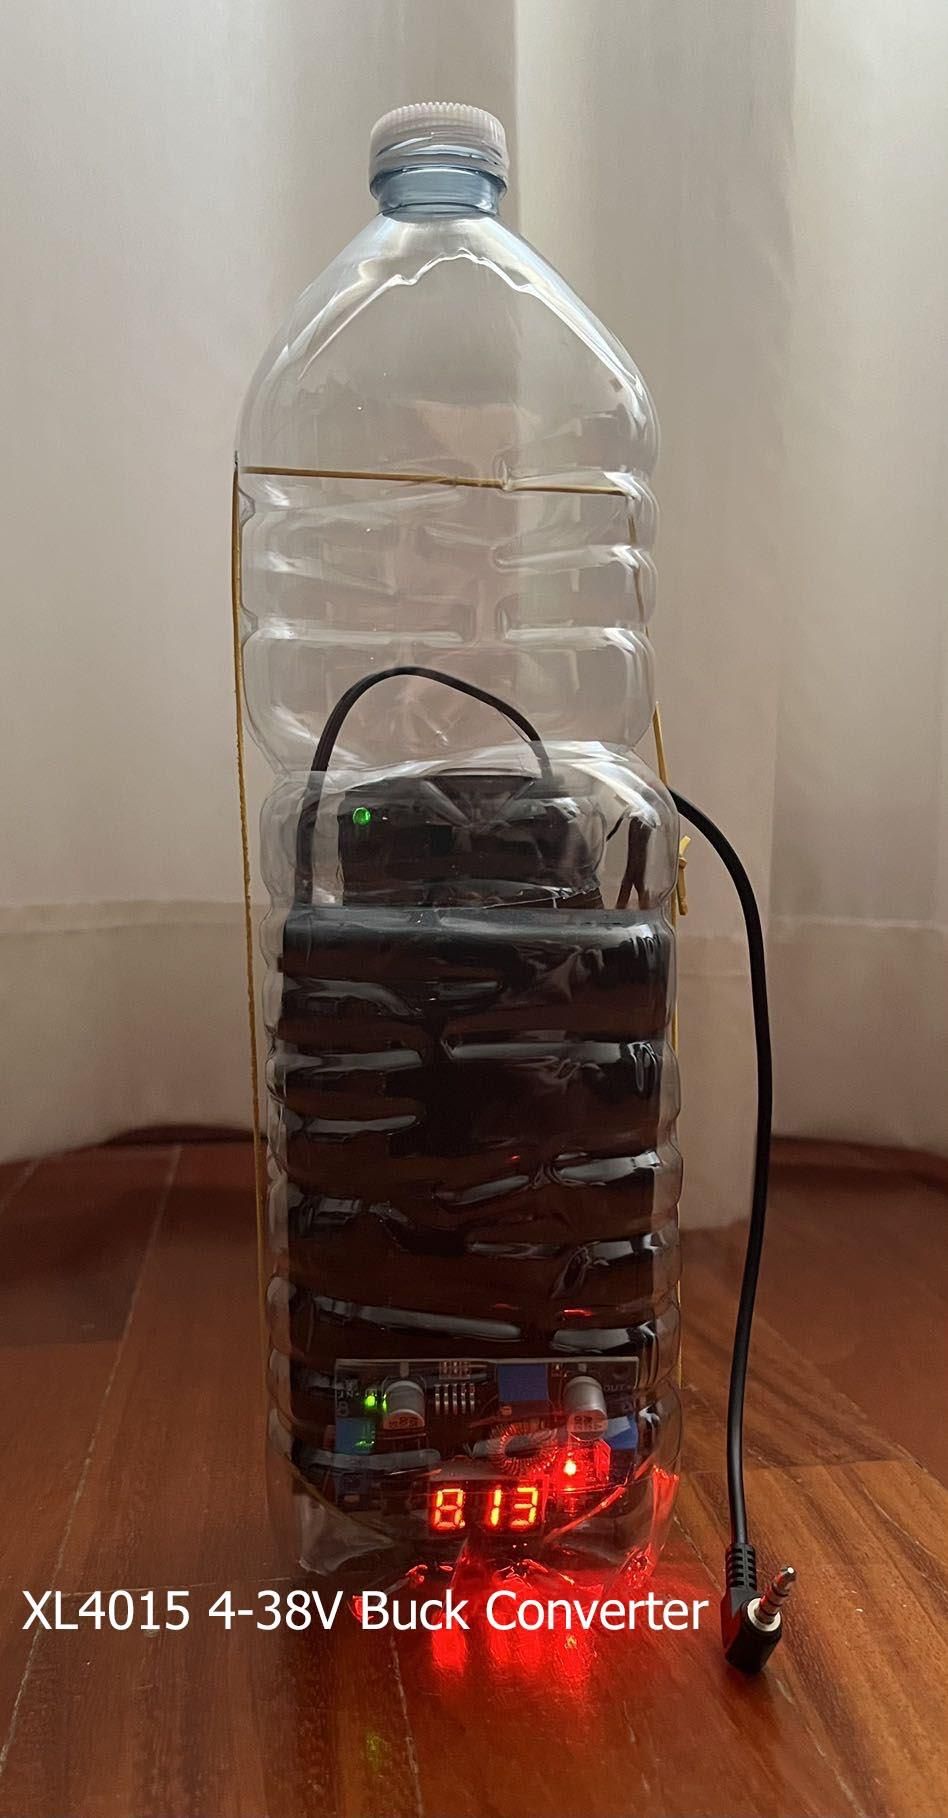
Fourth step: now I had to work out a way to keep the kit waterproof, home and dry. I looked into the kitchen and...what about 2 empty mineral water bottles? I cut them in half, made a hole with a solderer and used one of the long screws to keep the sensors steady, then put a stripe of velcro both on the top of each sensor and inside the bottles. Then I made 2 holes into the top part of each bottle, and slithered through an elastic band, then down to the bottom half of the bottle to keep the top well stuck to the bottom. The sensor is perfectly active through the transparent thin plastic layer of the bottles, and all works fine.
Now Shoot (only Photos Please!)
Fifth step: you may want to use self-amalgamating tape to seal the 2 halves of the bottle to be sure no water and no insects go through. Then put some camouflage tape around the bottle except the sensor area.
Now you're ready to bring the kit outdoors and take pictures.
I suggest to place the pair of IR sensors on a known pathway in the woods, after carefully monitoring the area by means of an IR trail camera.
I'd place the DSLR 3-4m away from the pathway, perpendicular to it. The wired (to the DSLR) RX should be 1m away from the DSLR, 45 degrees to the pathway, facing the unwired TX across in a diagonal line: in this way, should the animal like a badger or a fox etc. walk along the pathway from either direction, it will break the IR beam and trigger the DSLR shutter and you have taken its photo from the side.
Remember, this type of TX-RX through-beam sensors can work at a maximum distance of 15m, but I wouldn't go beyond 4-5m.. The beam is invisible, you won't notice anything like the red dot of a laser beam which you'll immediately see in photos too.
Now, go out and about to take wildlife photos!