Install System 7.0 Software on a Classic Mac Using a Pc (and a Lot of Other Junk)
26691 Views, 25 Favorites, 0 Comments
Install System 7.0 Software on a Classic Mac Using a Pc (and a Lot of Other Junk)


So here is the scenario, I have an idea for a project, that project needs a classic Macintosh computer, so I picked a couple 68k compact macs from the local recyclers for a dollar each (ones really dead, atm) the one that functions is a Macintosh SE, with a dead hard disk and a funky 800k floppy disk
With no other working Mac's in the house how do I get this thing to boot??
In the following instructable I will show you how to do it using a apple formatted and apple firmware installed hard disk, a pc running ubuntu, a pc SCSI card, and a emulator so you can transfer the hard drive to a Macintosh SE and have it boot
This is a narrowly focused instructable that should apply to any classic Macintosh with a SCSI hard disk and that can run system 7.0 but I have no way to test it so run wild with it
Also you can use this information to take a hard disk out of a failed computer and retrieve information off of that disk (as long as the hard disk is still ok)
This instructable also gets sorta complicated, it requires specific things and software, but it is much better than the alternative in this case, which is 800k floppy disk drive (dont have another mac) apple firmware SCSI cd rom (dont have), or have "someone" snail mail me a floppy disk (bah!)
So if you are still with me ... shall we?
Requirements


Hardware:
one working HFS or HFS+ formatted SCSI hard disk with apple firmware
one Macintosh computer with a SCSI interface (target) capable of running system 7
one pc with linux installed and SCSI interface (host)
What I used:
80MB hard disk out of my dead performa, it would boot but was just a minimal install to only work on the performa 200 / classic 2, so my SE would halt
Macintosh SE, 800k floppy so I could not just make a boot disk, if your computer has a "super disk" you can just download image files on your pc and make floppy boot disks, 800k disks require a different drive mechinism that IBM heritage pc's do not support
A amd X64 running ubuntu 9.10, and a compaq scsi card, yes you probably can use other flavours of nix, but that is out of the scope of this article
Software:
Ubuntu linux www.ubuntu.com/
Basilisk II (apt - get)
Sytem7.0.smi.bin download.info.apple.com/Apple_Support_Area/Apple_Software_Updates/English-North_American/Macintosh/System/Older_System/System_7.0.x/
Basilisk II starter disk www.emaculation.com/articles/starterdisk.zip
Basilisk II compatible rom, these rom images can only come from a mac you own, course if you can not boot how can you get them?? I googled some shady looking sites and finally found a rom image for a "performa" which works fine with the emulator
I am going to link it here unless instructables says something, only with the understanding that you are only going to use it to bootstrap your real physical classic Macintosh computer, and not just leech it for emulator usage, if you do its your own butt, I claim no responsibility for the use of this outside of booting your machine
Downloads
Setting Up


first I need to install Basilisk II, open a terminal window and bang in
sudo apt-get intstall basilisk2
once that is done, I keep the terminal window open we will need it a bunch more
next I need to deal with the hard disk first mounting
my drive pops up as "hard disk" so I will be using that to refer to the macintosh drive under linux menus ...
Boot into ubuntu with the mac drive and scsi card installed in the system, linux should pick it up no problems as a HFS drive (provided it is formatted that way), first thing you need to do is mount the hard disk, you can do this by clicking places > hard disk, which should bring up a new file explorer window, which you can promptly close as it does no good
Now I need to see what our hard drive is assigned to, this may be different depending on the configuration of your machine, you can easily see this by clicking system > administration > disk utility
find your Macintosh Hard drive, and click on its HFS partition, the last line in the summary should tell you where the linux mount point is located at, make a note of that as we will need to know later
Go ahead and close "disk utility"
now I am ready to access the Macintosh disk, both to archive whatever is on it, but install system software that will work on my SE
Moving Software on and Off of the Disk
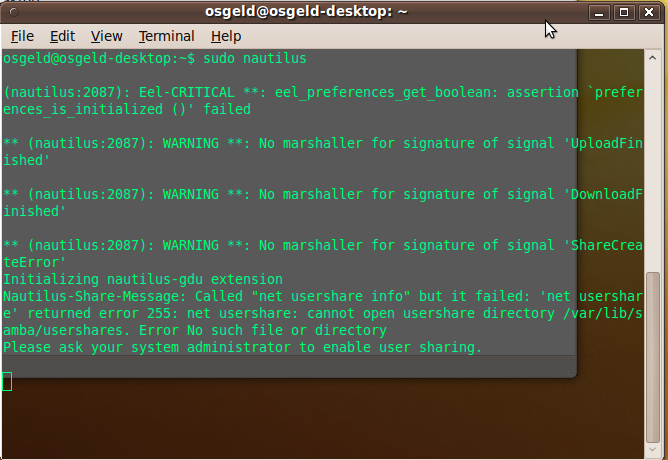


In the terminal window bang in sudo nautilus to open up a new file explorer window, this explorer is in root mode so please do not go poking around too much as you can kill your linux OS, choose "hard disk" and it should open up the mac hfs as any other type of filesystem
now is the chance to archive what is on the drive, and clean it up for system reinstall. Once I am done with that, I copied System7.0.smi.bin to the Macintosh hard disk and close the file explorer window
now we must unmount the Mac disk, just right click the Icon that appears on your desktop and choose unmount
Starting the Emulator


Go back to your terminal window and bang in sudo BasiliskII this should bring up a basic configuration window
First click on the last tab that is marked "Memory / Misc", leave the memory at 8M and select your rom from where ever you downloaded it to
Now go to the "Volumes" tab and click add, you want to add Starterdisk.hfv first, so point the browser to where ever you downloaded that to and select it
Next click add again, this time you want to point to your mac hard disk mounting point, in my case its at dev/sdb1, so I click ..// a couple times until I can see the dev directory, then I enter it and find the file marked sdb1
Now the emulator will boot from the starter disk, and have access to the real Macintosh hard disk at the same time
Once everything is set, hit start and the emulator will boot up to the starter disk, and on the desktop you will see the starter disk and the Macintosh hard disk
Install Stuffit


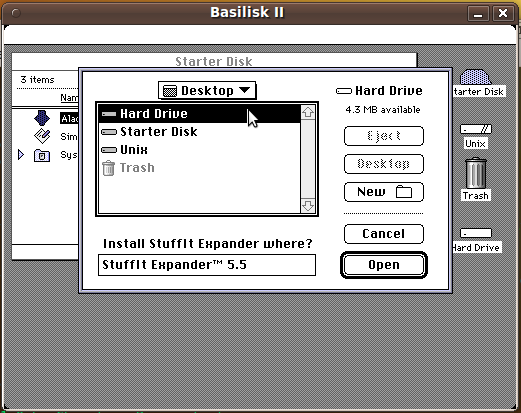
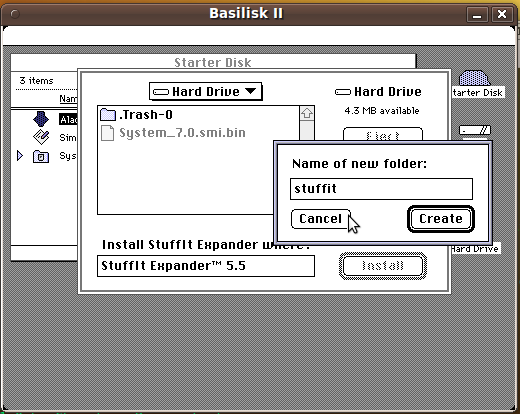
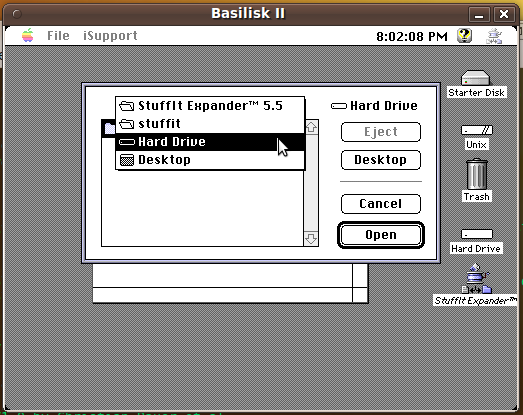
Open up the starter disk in the emulator and you will see an old stuffit expander installer, double click on the installer to run it
It will ask you where you want to install the program to, click on the drop down box and change "starter disk" to "desktop" then choose the mac hard disk
Once the mac hard disk is selected I made a new folder for stuffit to live in and installed the program
It will ask you where you want to install the program to, click on the drop down box and change "starter disk" to "desktop" then choose the mac hard disk
Once the mac hard disk is selected I made a new folder for stuffit to live in and installed the program
Decompress System Software
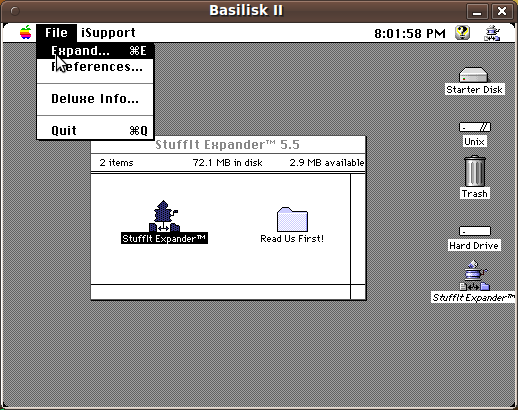
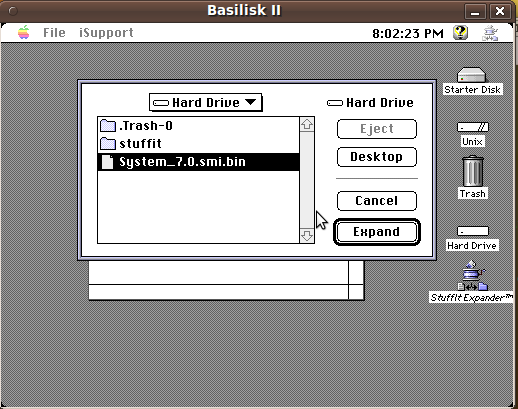
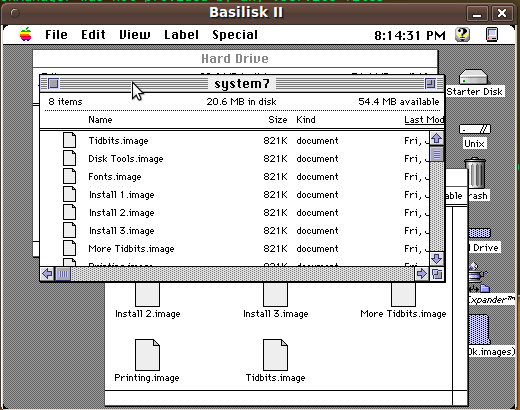
Now that I have stuffit installed, open it up and run it, once the program loads, goto the top menubar and choose file > expand, point the file browser to the mac hard disk and select System7.0.smi.bin
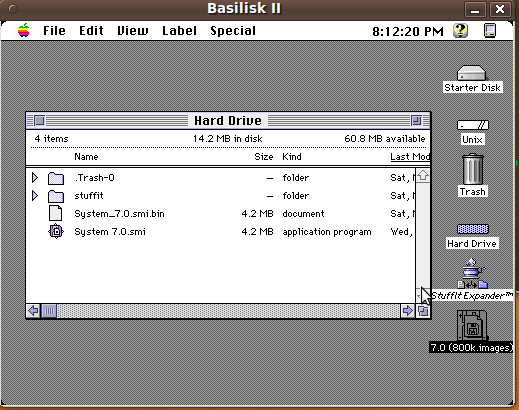
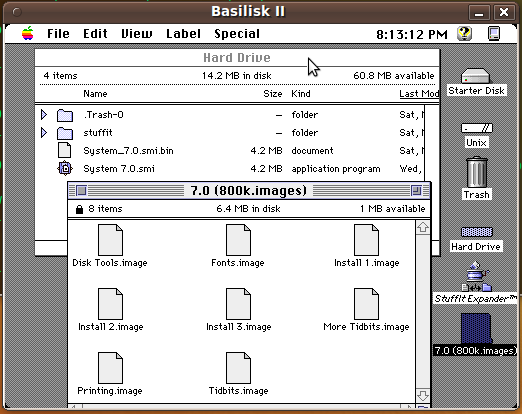
Click expand, and there will be a new file on the mac hard disk, and there should be a new icon on the desk top (if not double click the icon on the hard disk)
The last action will open up another finder window with *.image files in it, copy these files to a folder on your macintosh hard disk
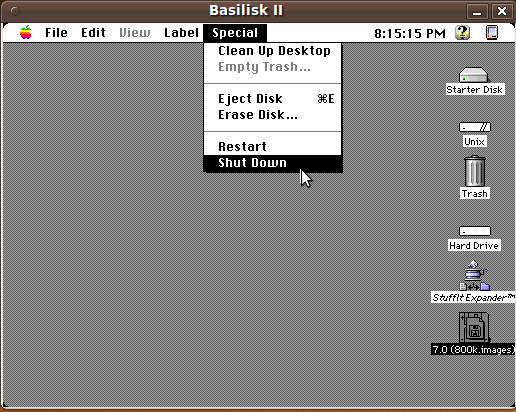
once you have all the image files extracted to the hard disk, shut down the emulator
Back to the Start (sort Of)
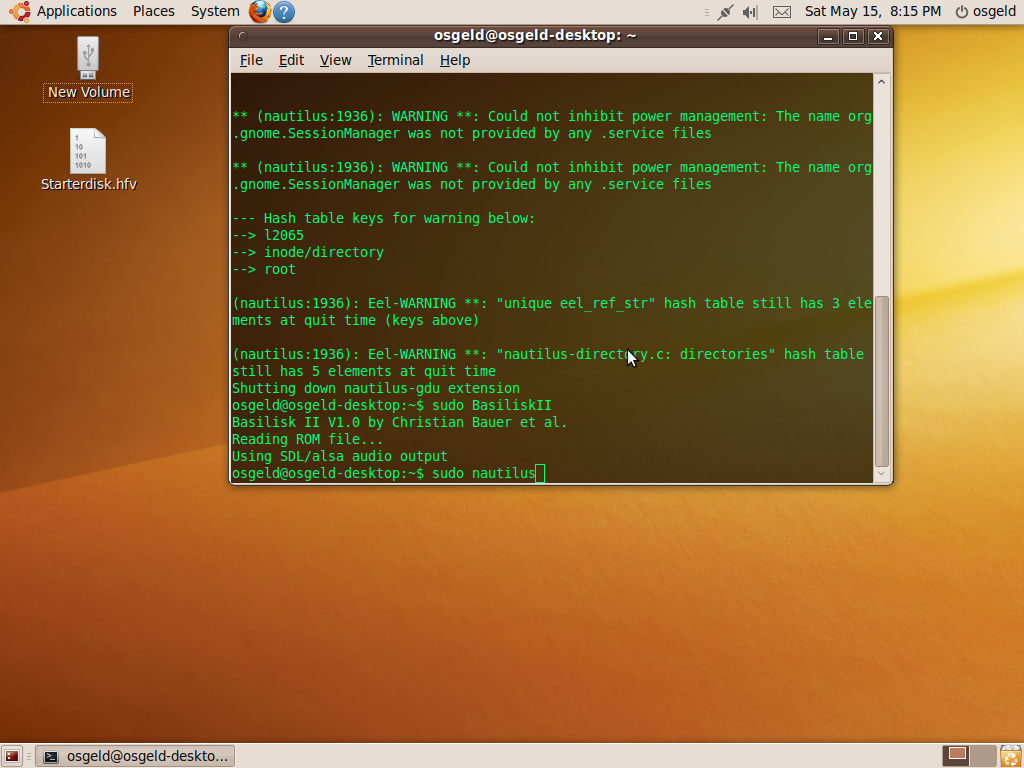


Once the emulator is shut down you need to goto places > hard disk again and remount the mac drive, and again shut the file explorer window that pops open
goto your terminal enter sudo nautilus again and point at the hard drive, copy all the image files you extracted off of the drive to somewhere you can find them
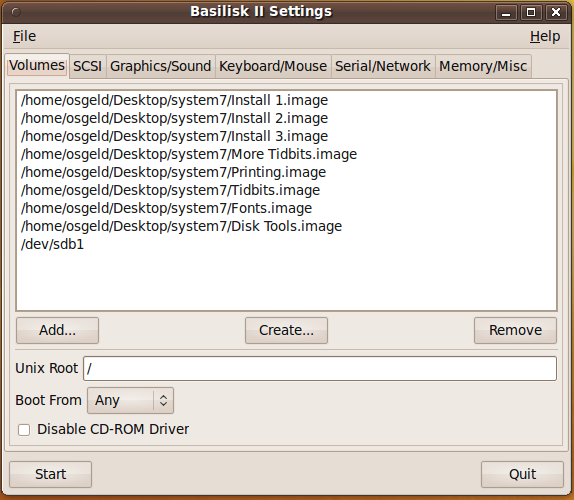
once you get the image files over to the linux filesystem you can close the explorer window, unmount the drive and go back to the terminal window and restart basilisk II (sudo BasiliskII). The same setup window will appear, under volumes remove all listings
Once clear add you must add Install 1.img first, THEN add all the other disk images, finally add the mac hard disk mouting point
Then you can hit start
Install System 7
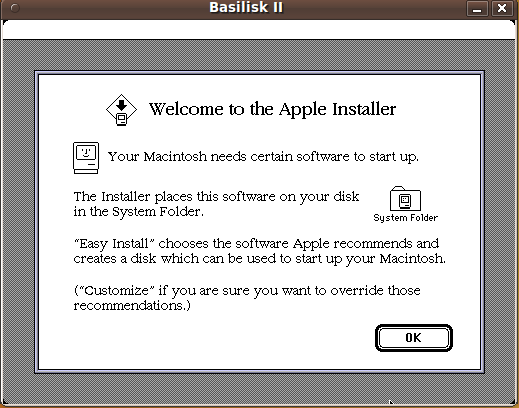


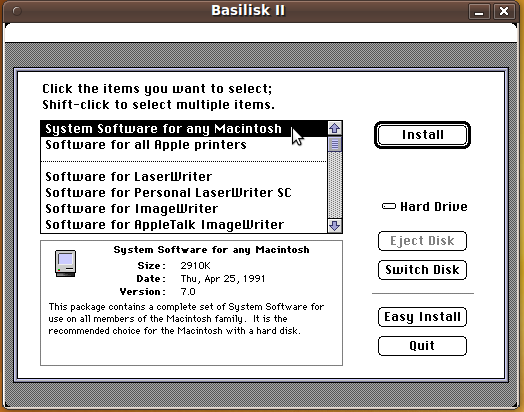
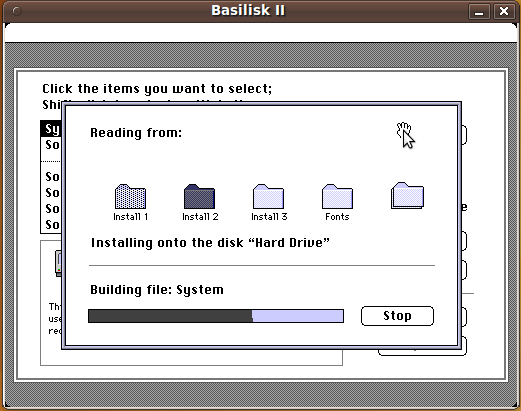

It is pretty easy to install Mac OS, when you start the emulator you will be greeted with the installer, and it will by default try to install on the disk image, which we do not want, even if it could
So click the switch disk button until you cycle to the mac hard disk, do not click install, but instead click customize
In the customize window you can select which mac and features you want, playing it safe with the emulator I choose "System Software for any Macintosh", one can always clean it up later
Now click install
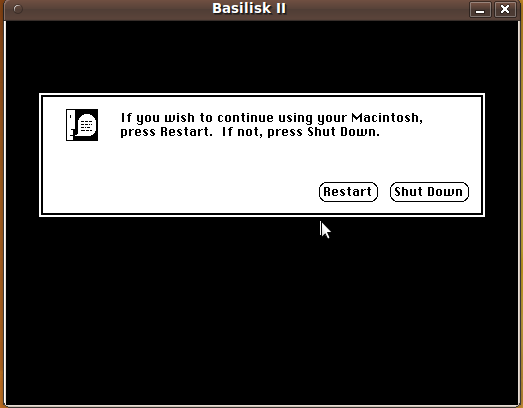
Once it is done choose quit, and then shut down
Transplant and Happy Mac


You can now shut down the pc and remove the SCSI drive, and attach it to the Mac SE
If you are attaching the drive to the internal connection as shown be extra careful due to fragile glass, mains current, and extreme high voltage driving the screen
so if you choose this route do so at your own risk, otherwise there is a external SCSI port for a reason!!
Once the hard drive is hooked back up to the Macintosh computer it quickly boots up into system 7.0
Good Luck! and happy (and safe) retro computing!